


Man: 100, Seatpost: 0
 11-03-22, 09:39 PM
#1
Senior Member
Thread Starter
Man: 100, Seatpost: 0
So last week I bought a 2010 Kona Smoke in the form of a "Kit", i.e., frame and fork disassembled into parts in boxes. It was a great deal and all appeared to be there. There was just one problem: The seatpost was seized up in the frame. But the seller included a bunch of upgrades (drivetrain, mostly) and knocked $20 off the listed price because of the seatpost issue. I figured at worst I could sell the parts off to recoup my money, and at the best, I'd show that seatpost a thing or two and salvage the frame:

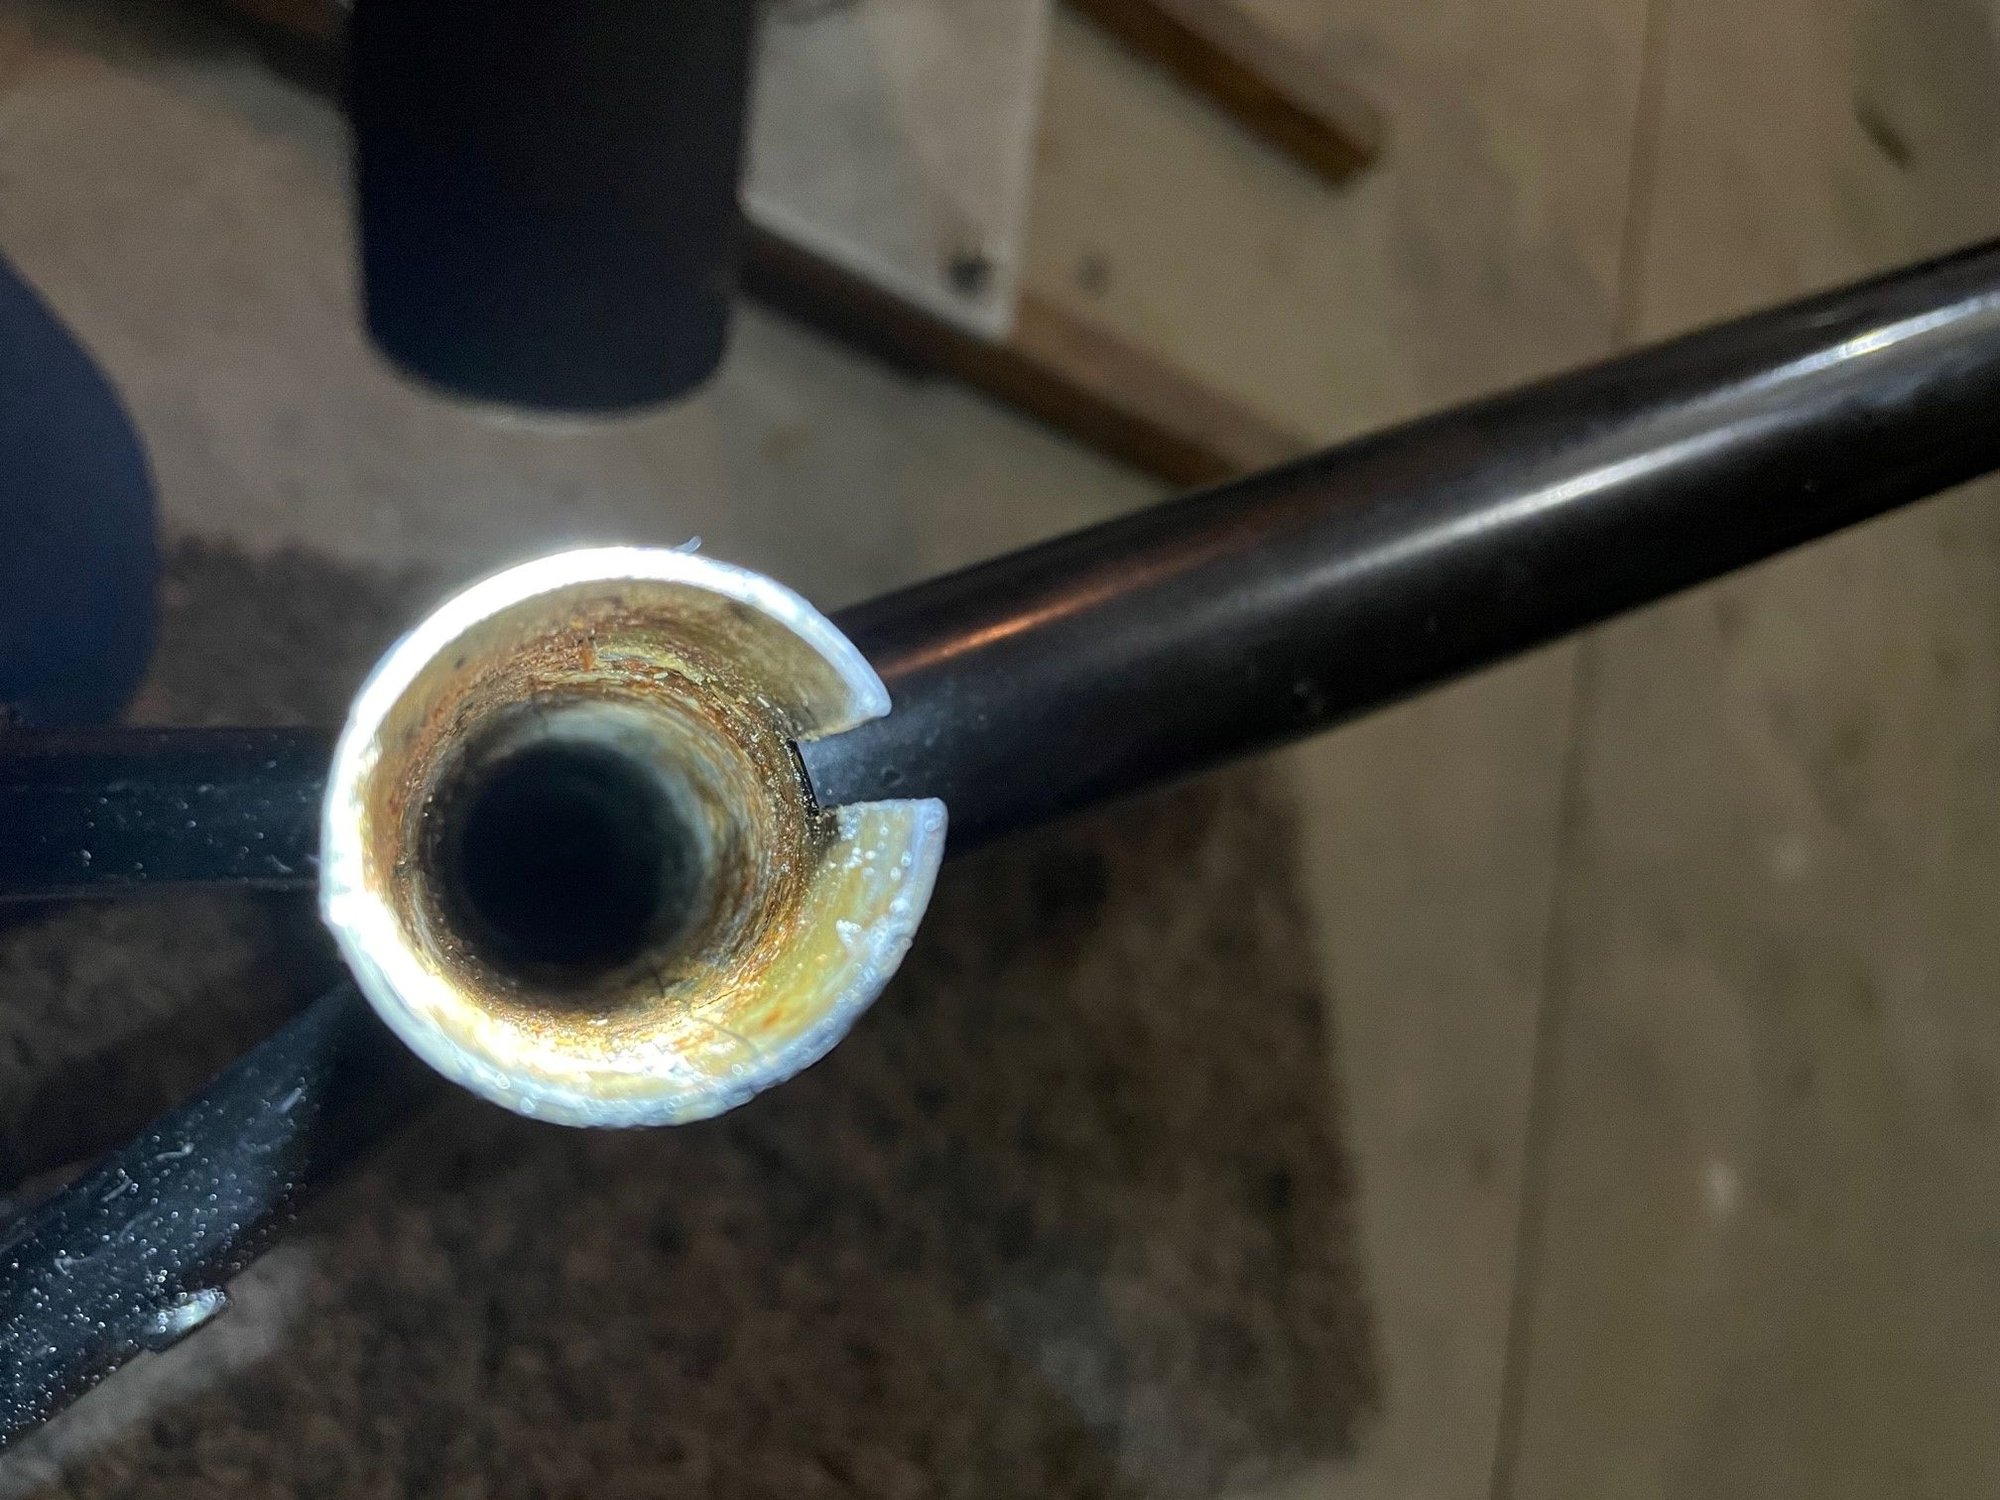
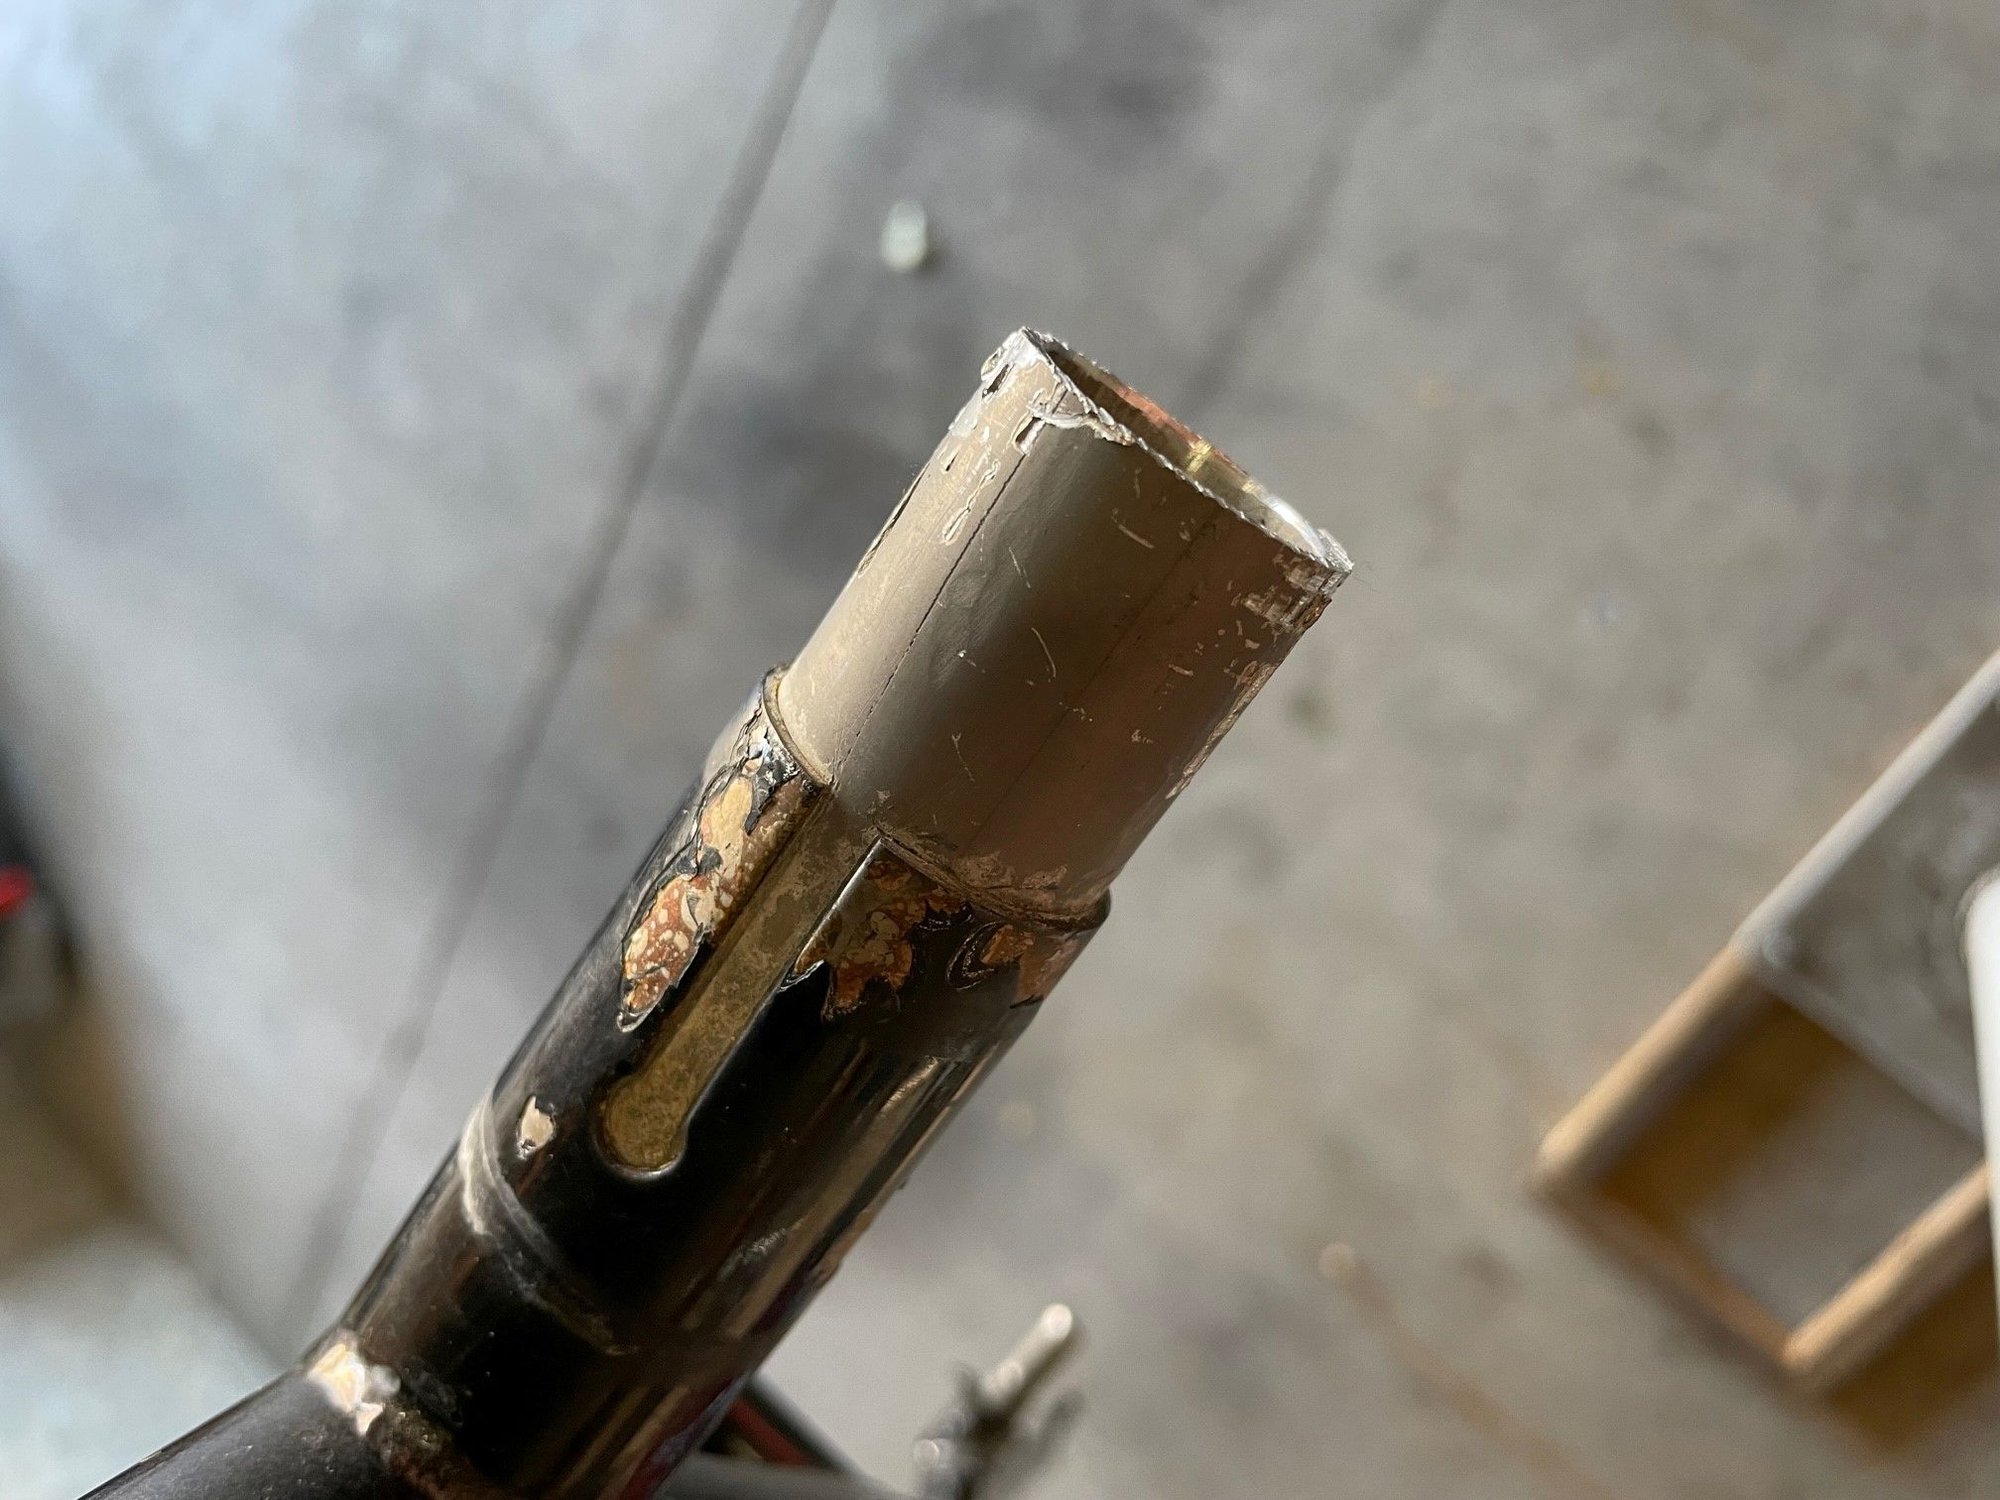
So after thinking about it a bit, and doing some research on the internets, I initially decided I was going to go the lye route and dissolve that mutha outta the frame. Yeah, its toxic, it emits flammable gas, and it ruins the paint. But it looked so easy and besides, science in action is pretty cool. But then I thought about it some more and decided against that route. Mostly because I didn't want to have to probably repaint the frame. So instead I made a tool to cut the seatpost into sections and peel it away from the ID of the seat tube:

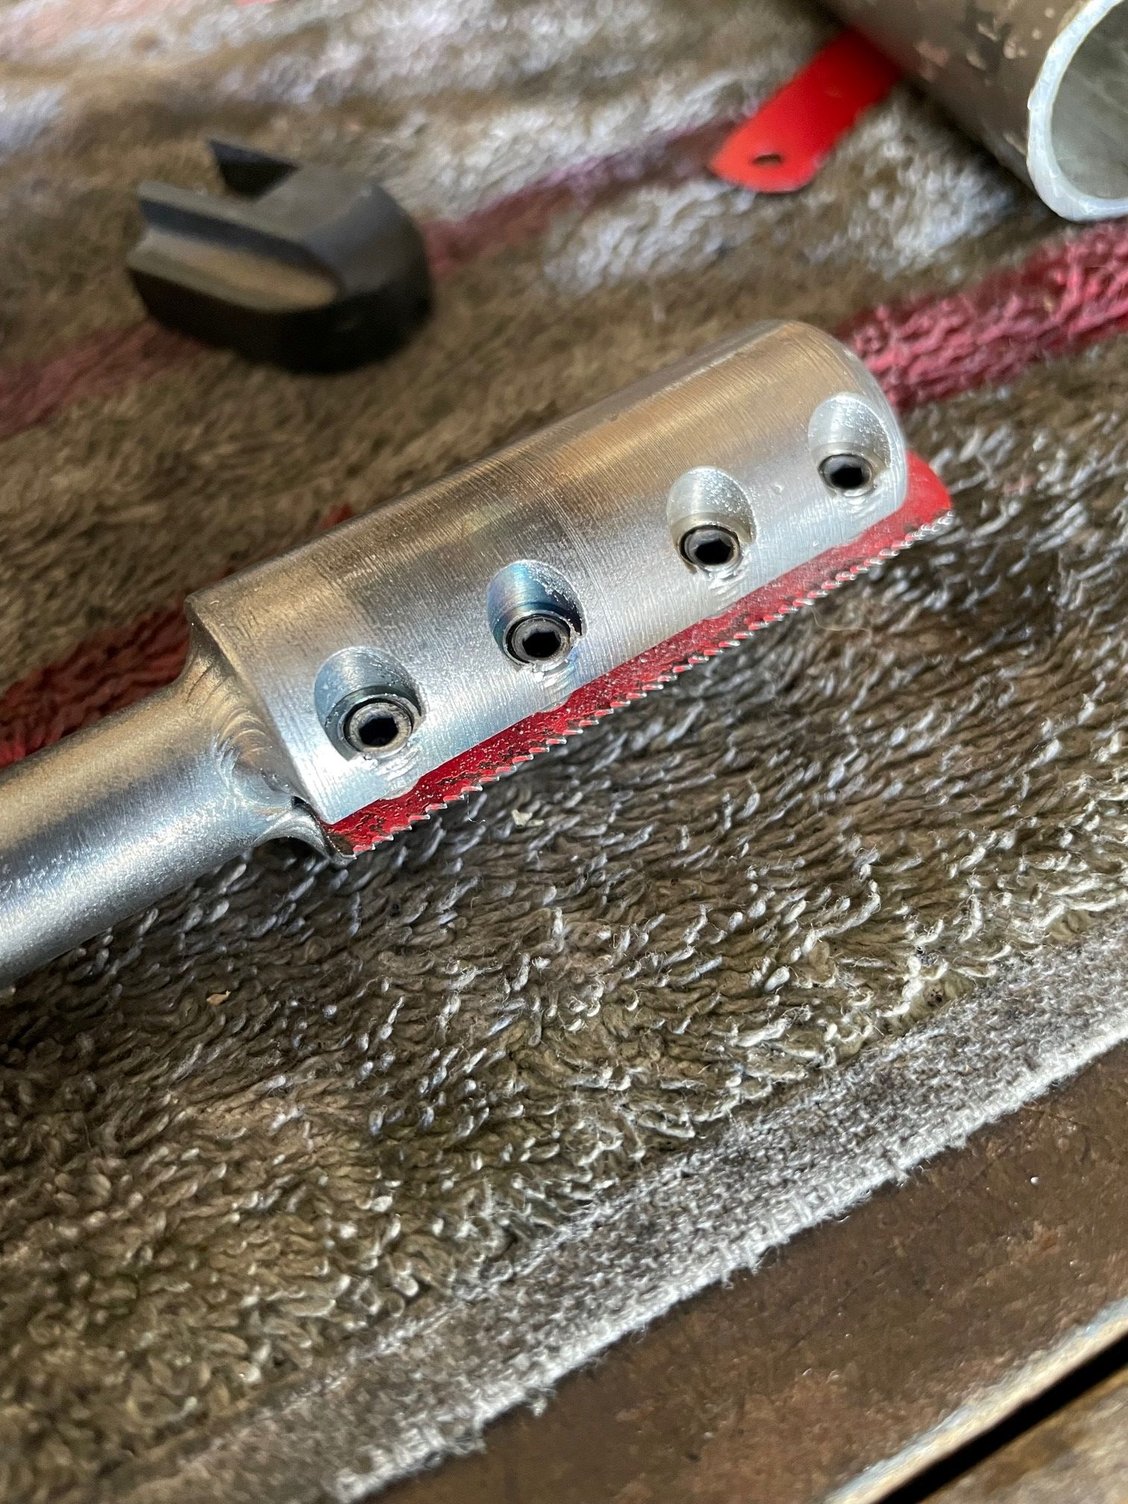

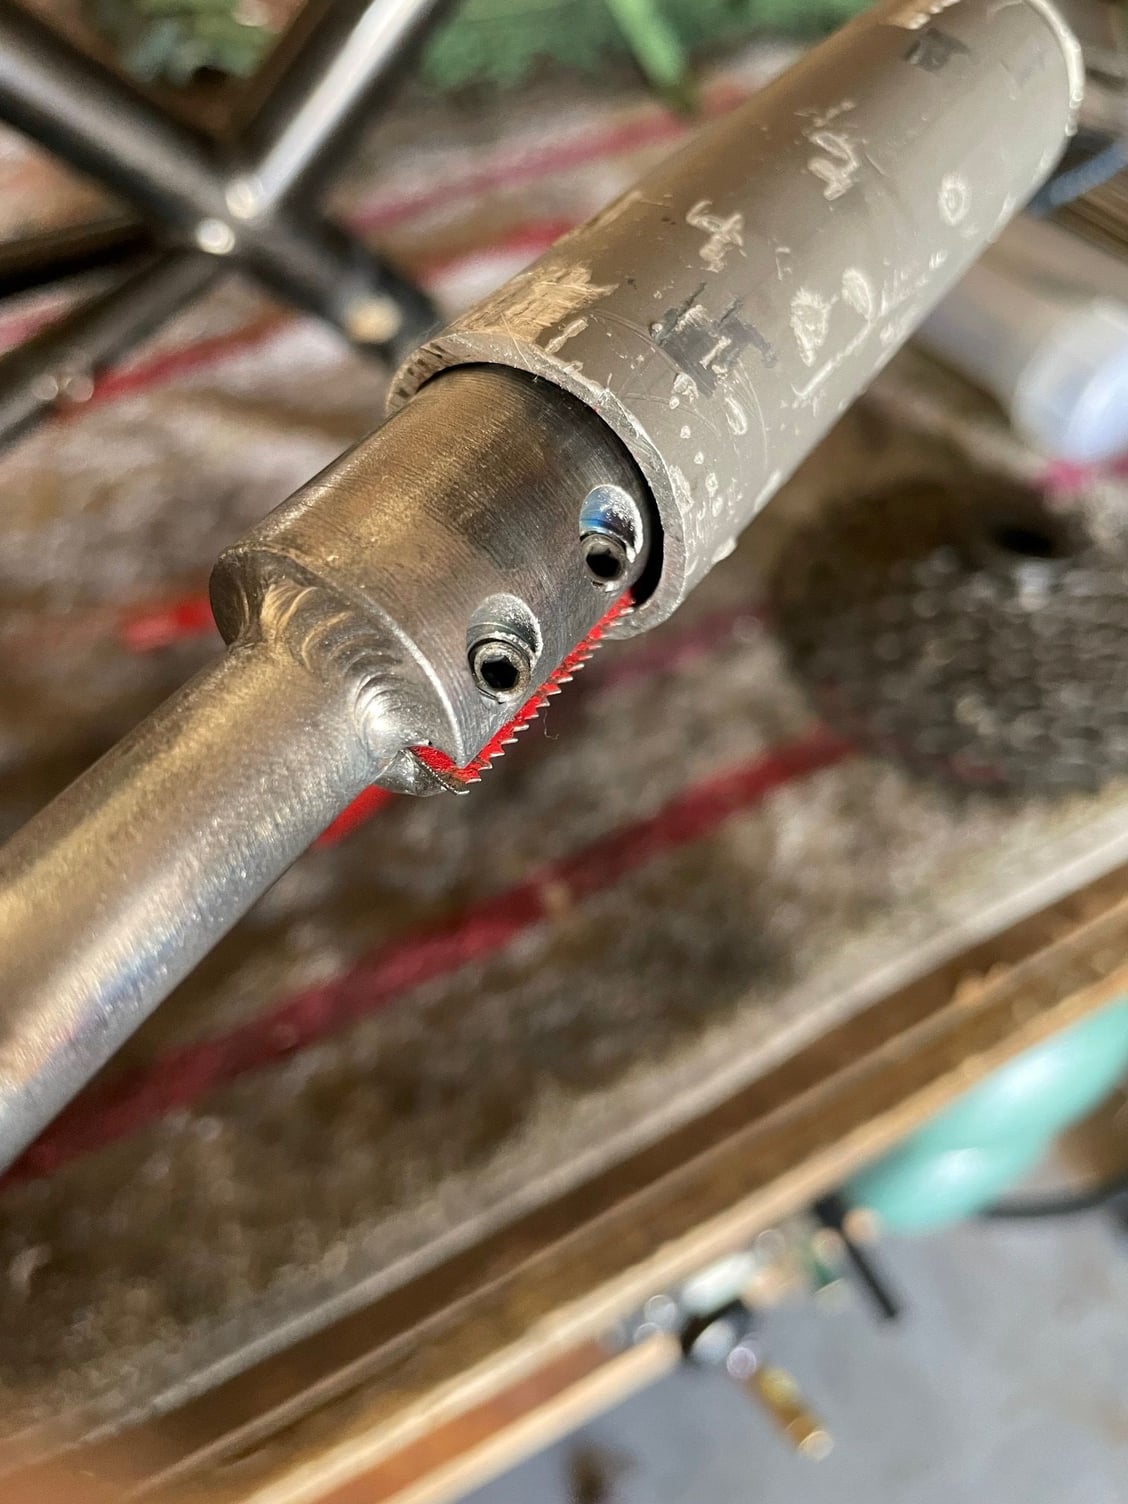
Inside a section of the seatpost that I cut off, checking for fit.
Now why would I jump to the extreme of cutting the post without even trying any of the other, less involved methods? Firstly, the PO informed me he already tried them to no avail. Secondly, based on the amount of rust inside the head tube and bottom bracket, I doubted very highly that any of those less destructive methods would work. And, I had a new tool to try out, silly!
Unfortunately, the tool was manufactures to too close of tolerances, and would therefore bind up inside the seatpost. Not impossibly so, just enough to make it frustrating. But I'm bull-headed if nothing else, and forged ahead with great determination. The first cut probably took 2 hours of alternating between the homemade tool and another silly handheld hacksaw I found in the bottom of my toolbox. At about the 1 hour mark I had to remind myself why I thought it was a good idea to cut the post out rather than just find another frame (1 - its a Kona. 2 - its my size. 3 - with the Project 2 Fork in 700c/29" size, it could make a good "One Bike To Rule Them All". Plus, it was here in my garage. Bird in the hand, you know). At about 1:30 I was seriously questioning my sanity. But then the sun broke free of the clouds, the angels sang, and the 1st cut was done. Time to go in for some dinner.
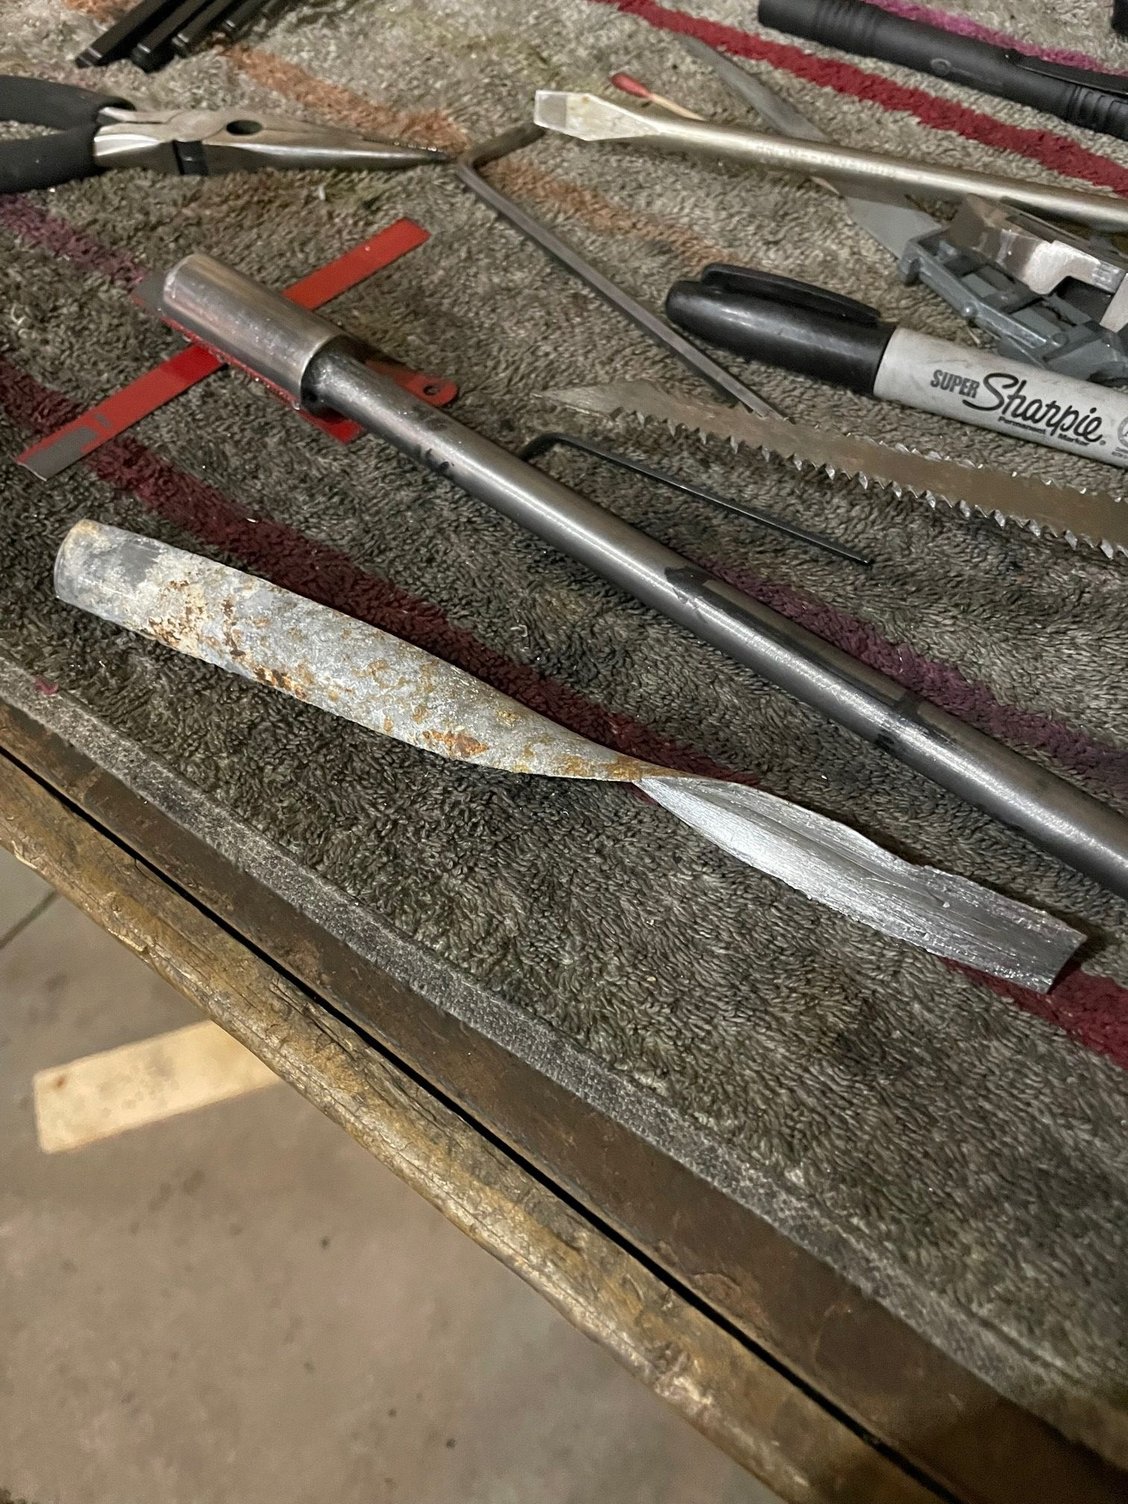
With that major milestone, it was time to start on the second cut. I initially planned to make 4 cuts, but after the pain and suffering of the 1st, I decided 3 cuts would suffice. So after about another hour and a half, the second cut was done. And I could not resist the opportunity to extract some revenge on this stupid seatpost and its idiotic first owner who let it fall to this condition in the first place. With a big ole pair of lineman's pliers, I gave it a twist and a jerk and out came the 1st piece:
To be continued.....
So after thinking about it a bit, and doing some research on the internets, I initially decided I was going to go the lye route and dissolve that mutha outta the frame. Yeah, its toxic, it emits flammable gas, and it ruins the paint. But it looked so easy and besides, science in action is pretty cool. But then I thought about it some more and decided against that route. Mostly because I didn't want to have to probably repaint the frame. So instead I made a tool to cut the seatpost into sections and peel it away from the ID of the seat tube:
Inside a section of the seatpost that I cut off, checking for fit.
Now why would I jump to the extreme of cutting the post without even trying any of the other, less involved methods? Firstly, the PO informed me he already tried them to no avail. Secondly, based on the amount of rust inside the head tube and bottom bracket, I doubted very highly that any of those less destructive methods would work. And, I had a new tool to try out, silly!
Unfortunately, the tool was manufactures to too close of tolerances, and would therefore bind up inside the seatpost. Not impossibly so, just enough to make it frustrating. But I'm bull-headed if nothing else, and forged ahead with great determination. The first cut probably took 2 hours of alternating between the homemade tool and another silly handheld hacksaw I found in the bottom of my toolbox. At about the 1 hour mark I had to remind myself why I thought it was a good idea to cut the post out rather than just find another frame (1 - its a Kona. 2 - its my size. 3 - with the Project 2 Fork in 700c/29" size, it could make a good "One Bike To Rule Them All". Plus, it was here in my garage. Bird in the hand, you know). At about 1:30 I was seriously questioning my sanity. But then the sun broke free of the clouds, the angels sang, and the 1st cut was done. Time to go in for some dinner.
With that major milestone, it was time to start on the second cut. I initially planned to make 4 cuts, but after the pain and suffering of the 1st, I decided 3 cuts would suffice. So after about another hour and a half, the second cut was done. And I could not resist the opportunity to extract some revenge on this stupid seatpost and its idiotic first owner who let it fall to this condition in the first place. With a big ole pair of lineman's pliers, I gave it a twist and a jerk and out came the 1st piece:
To be continued.....
 11-03-22, 09:53 PM
#2
Senior Member
Thread Starter
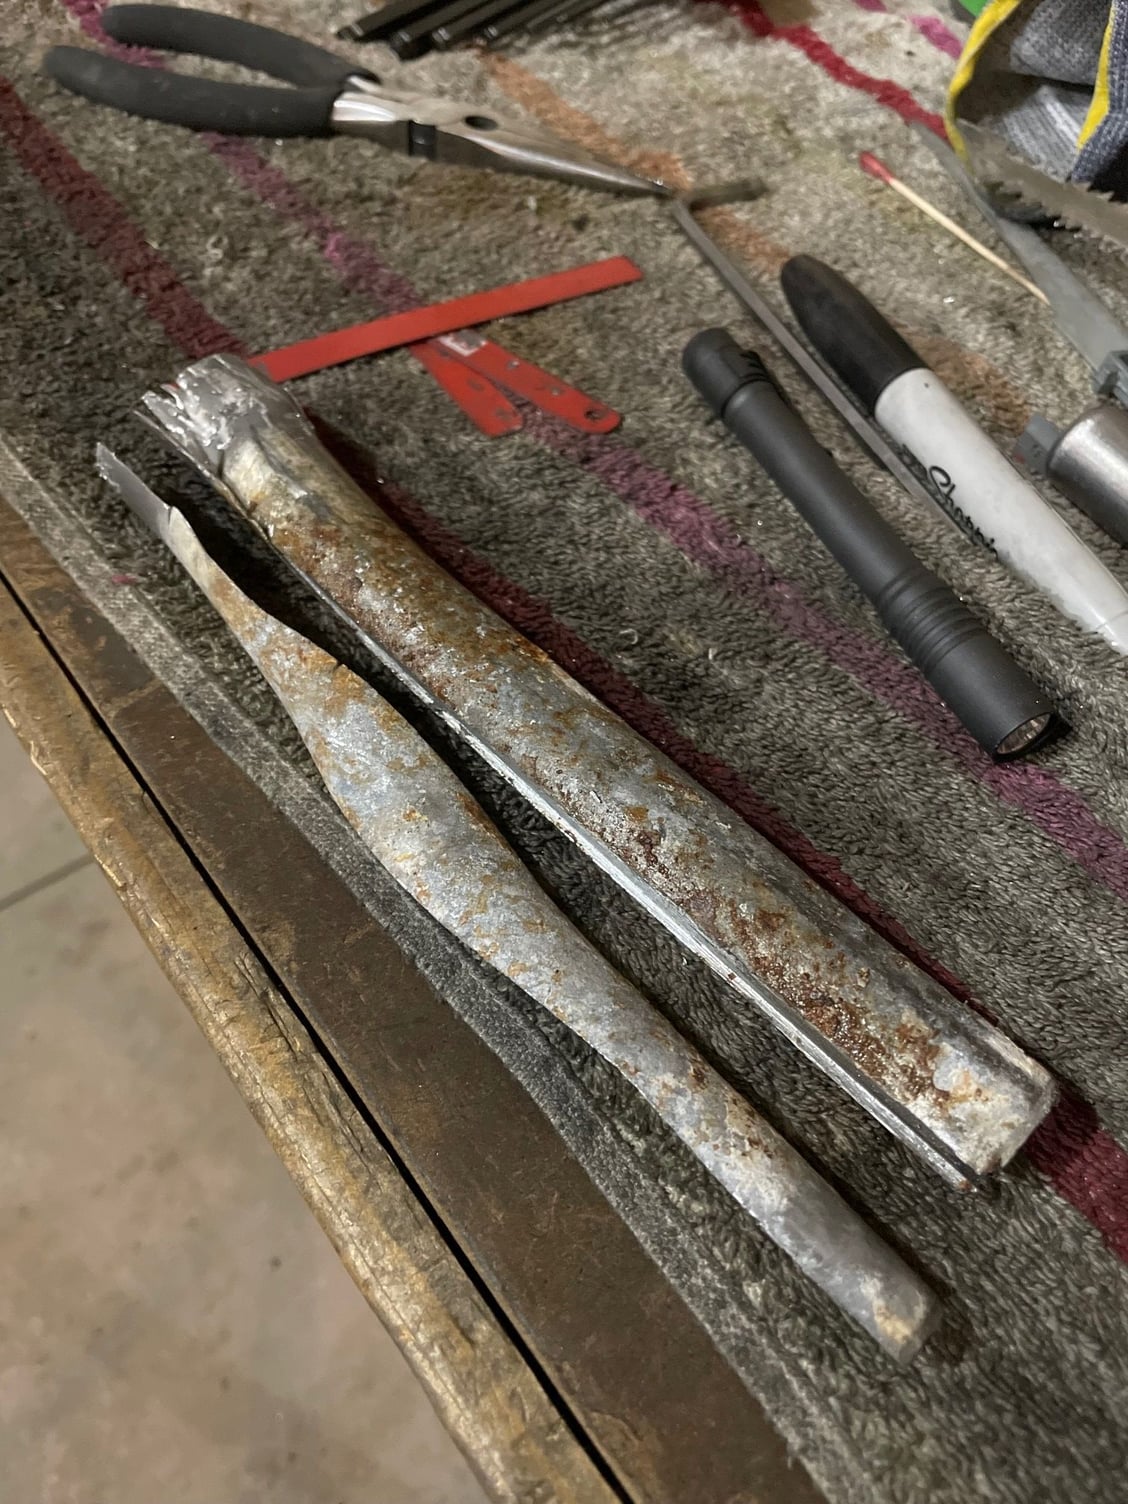
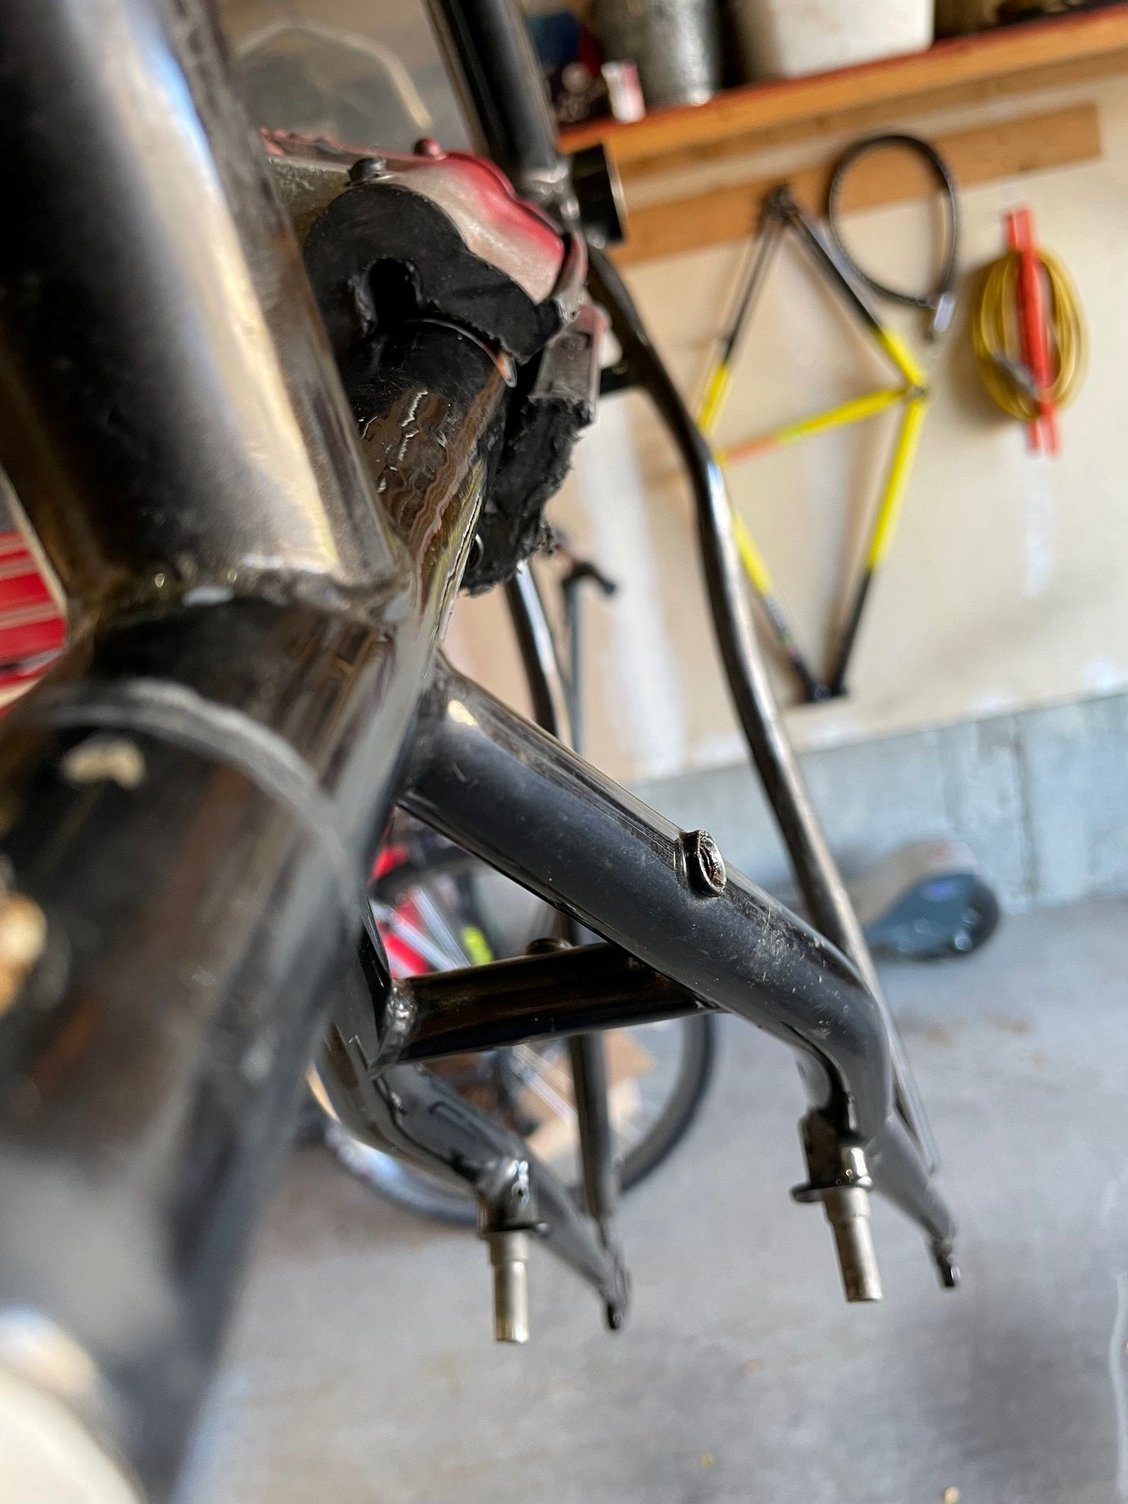
With that 1st pesky piece out of the way, there was more clearance to aggressively slide the tool in and out, thereby effecting a much quicker cut. So, with nothing to lose but a finger or two and a mangled seatpost, I set in in earnest to winning. About 45 minutes later I still hadn't conquered the cut all the way, but I heard some pinging and popping noise emanate from the general vicinity of the seatpost. I figured now or never (it was time for the Simpsons to come on) and grabbed my trusty linemans' pliers and again gave it a good twist and a jerk. This piece wasn't cut far enough to break off, but it was scored well enough to allow it to fold over, thus releasing its deathgrip on the frame. A few more twists and a few more tugs and and a few less curses, and that post finally admitted defeat:
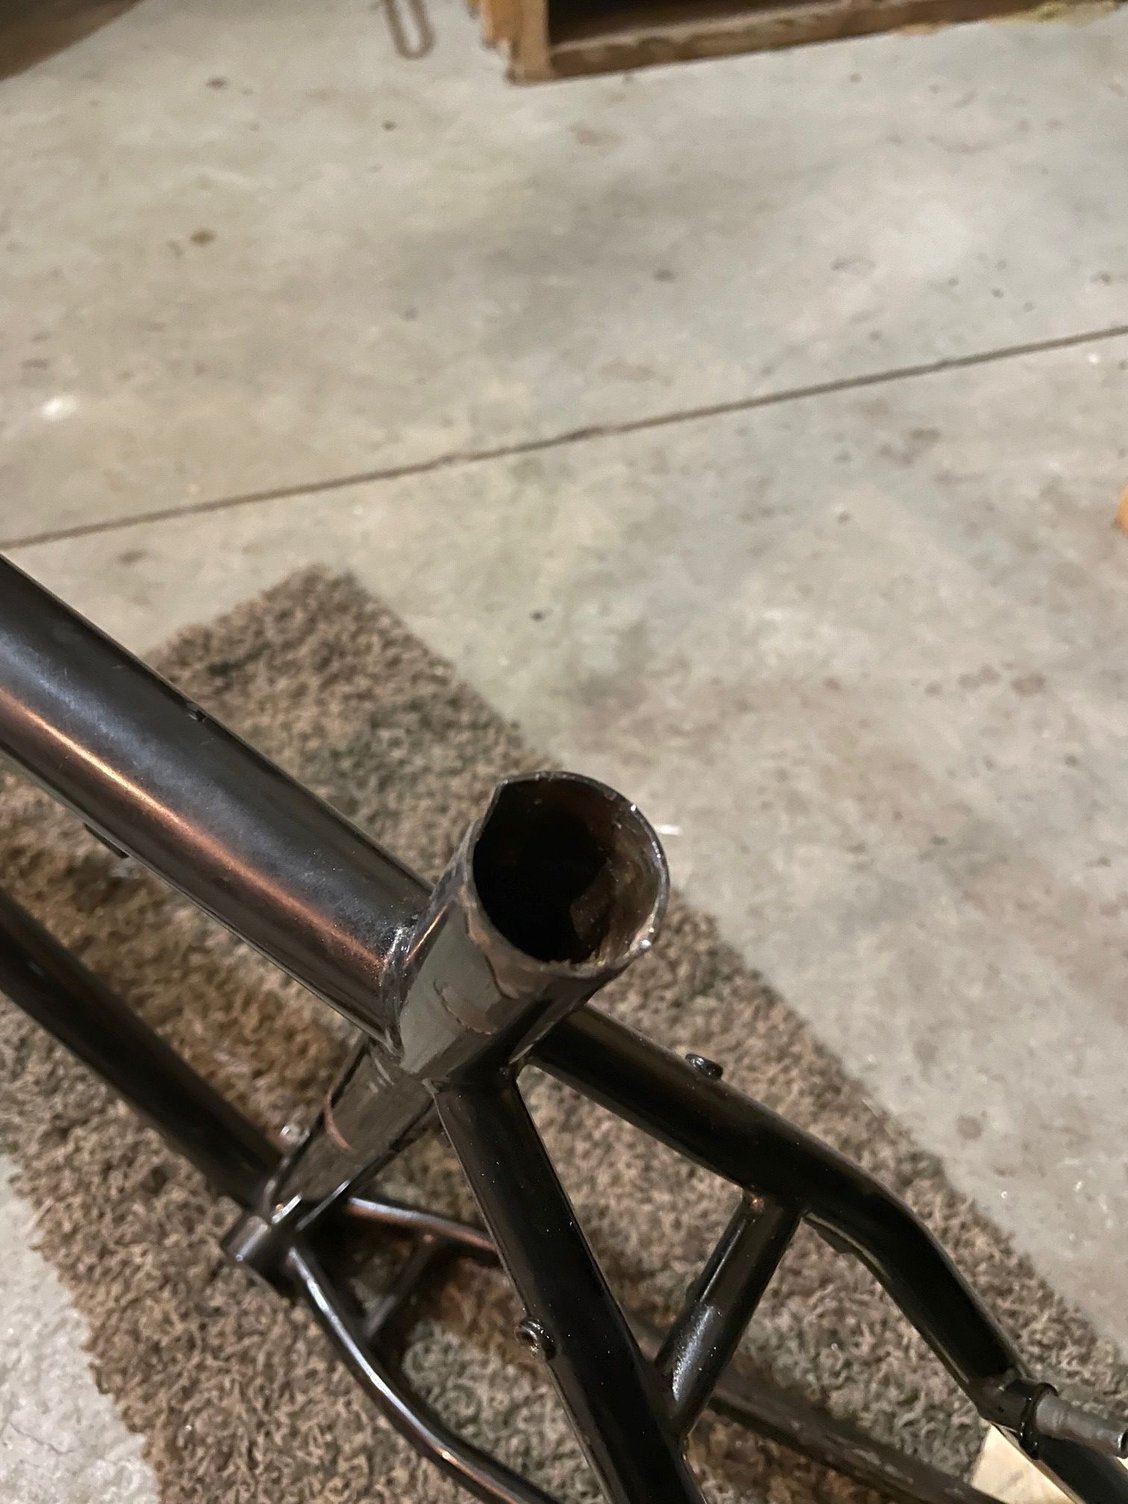
A shot down the seat tube:
Lots of corrosion!
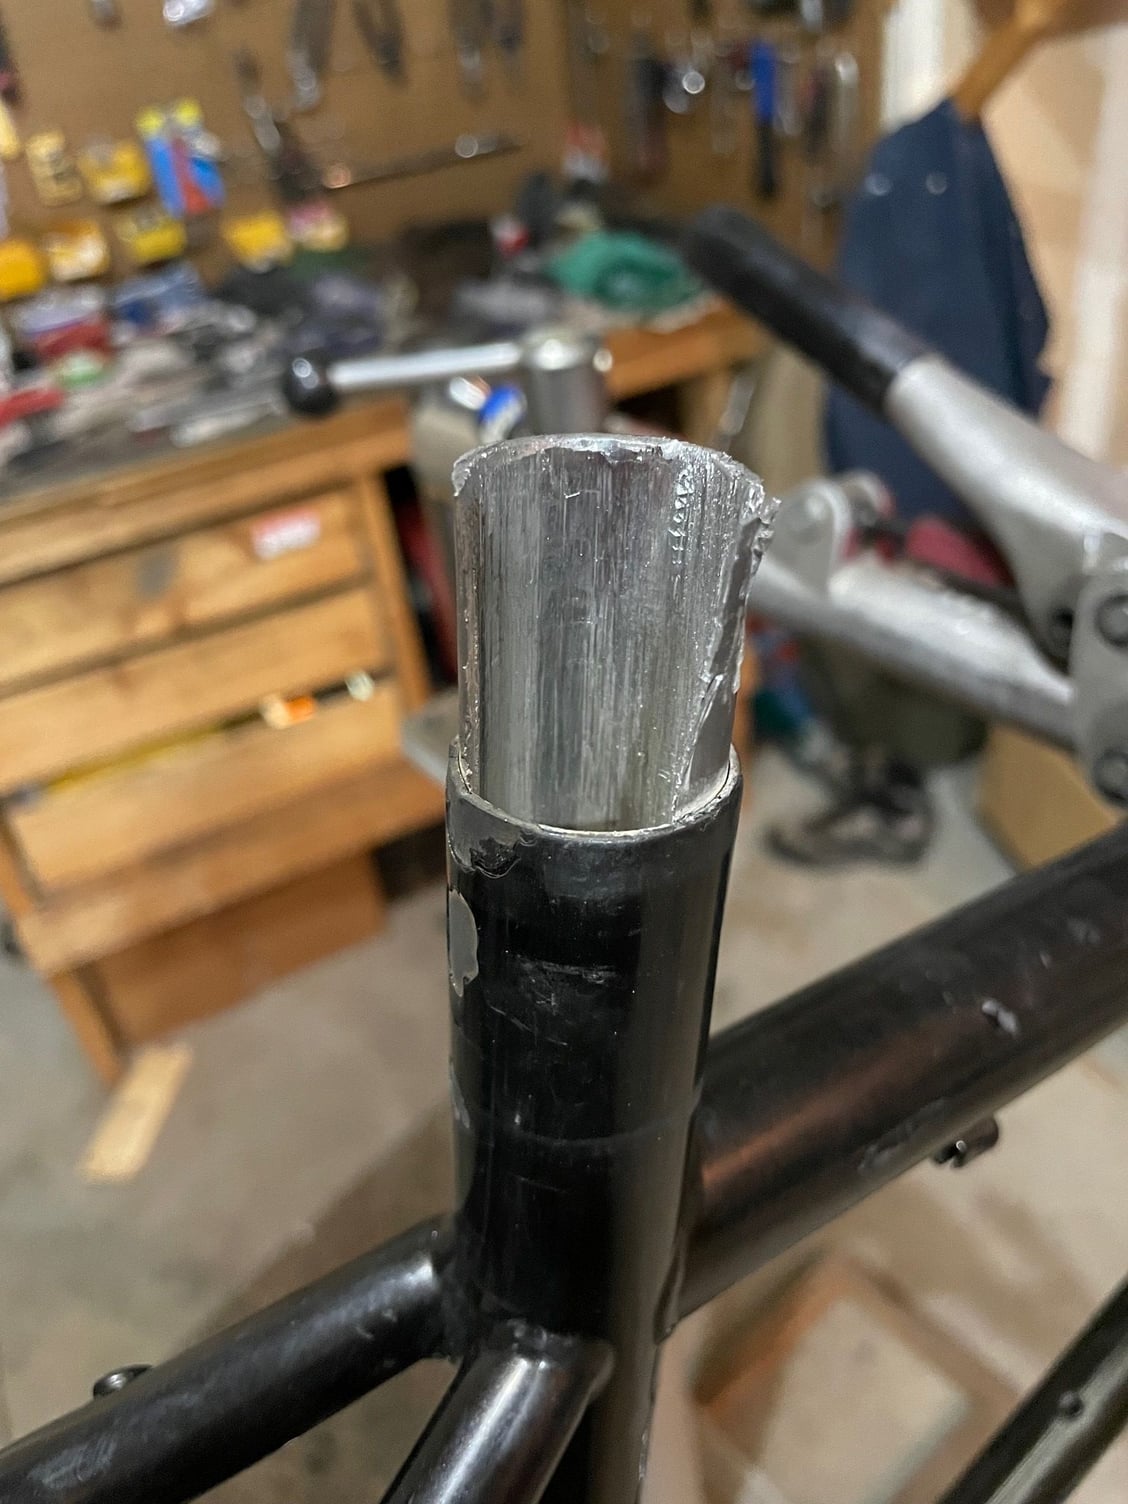
I gave the seat tube a good hone with a 3 stone flex hone, but my replacement seatpost won't go in but maybe 3 inches. I think this may be why:
If ya look at the seat tube just below the top tube junction, you can see some ripples. I think this may be from the PO pounding on it with a hammer, trying to break the post free. I'll take it to my LBS and have them ream the seat tube to 27.0, see if that helps. If nothing else, it should remove some of the left over corrosion that my hone couldn't remove....
So, 100 points for me (because it was so doggone difficult), and 0 for the seatpost. Man wins again!
A few random pics for fun:
I'm excited to put this silly thing together!
A shot down the seat tube:
Lots of corrosion!
I gave the seat tube a good hone with a 3 stone flex hone, but my replacement seatpost won't go in but maybe 3 inches. I think this may be why:
If ya look at the seat tube just below the top tube junction, you can see some ripples. I think this may be from the PO pounding on it with a hammer, trying to break the post free. I'll take it to my LBS and have them ream the seat tube to 27.0, see if that helps. If nothing else, it should remove some of the left over corrosion that my hone couldn't remove....
So, 100 points for me (because it was so doggone difficult), and 0 for the seatpost. Man wins again!
A few random pics for fun:
I'm excited to put this silly thing together!
Likes For Smokinapankake:
11-04-22, 07:16 AM
#3
Senior Member
Join Date: Dec 2016
Location: Long Island, NY
Posts: 2,109
Bikes: Trek 800 x 2, Schwinn Heavy Duti, Schwinn Traveler, Schwinn Le Tour Luxe, Schwinn Continental, Cannondale M400 and Lambert, Schwinn Super Sport
Mentioned: 14 Post(s)
Tagged: 0 Thread(s)
Quoted: 809 Post(s)
Liked 1,022 Times
in
665 Posts
That is an impressive tool that looks just right for the job of slicing a seat tube @Smokinapankake . Did you make it or buy it. It looks like you had to take the diameter down a little. Good job. My hat is off to you for your diligence and patience.
Will this turn into a build thread now that the seat post is out?
Will this turn into a build thread now that the seat post is out?
11-04-22, 07:49 AM
#4
Senior Member
Join Date: Aug 2005
Location: Pittsburgh, PA
Posts: 33,656
Bikes: '96 Litespeed Catalyst, '05 Litespeed Firenze, '06 Litespeed Tuscany, '20 Surly Midnight Special, All are 3x10. It is hilly around here!
Mentioned: 39 Post(s)
Tagged: 0 Thread(s)
Quoted: 2026 Post(s)
Likes: 0
Liked 1,096 Times
in
742 Posts
I've often seen the recommendation to vertically hacksaw a terminally stuck seatpost into pieces but never knew anyone who had actually done it. Congratulations.
Now, once you get a new seatpost to fit, I recommend treating the frame tubes, stays and fork blades internally with Weigel's Frame Saver or Amsoil HDMP. That frame shows significant rust and should be protected from additional deterioration.
Now, once you get a new seatpost to fit, I recommend treating the frame tubes, stays and fork blades internally with Weigel's Frame Saver or Amsoil HDMP. That frame shows significant rust and should be protected from additional deterioration.
11-04-22, 08:11 AM
#5
Senior Member
Thread Starter
Thank you all for the comments. The tool was not manufactured by me, but the idea was mine. Execution was thanks to a very accomodating maintenance guy I know. The Kona will be built, but I don't know if I'll do a thread.... if I do, I'd probably put it in the hybrid section? My plan going forward is to have the LBS ream the seat tube, chase and face the bottom bracket, and maybe face the head tube. I've never treated a frame internally so I'll have to look up some information about it. I hear boiled linseed oil works pretty well also.
As far as cutting slots vertically in the seat tube, I hope I never have to do it again. I can't describe well enough how much pain and suffering is involved! A curse and a pox on anyone who doesn't lube their seatpost!
As far as cutting slots vertically in the seat tube, I hope I never have to do it again. I can't describe well enough how much pain and suffering is involved! A curse and a pox on anyone who doesn't lube their seatpost!
11-04-22, 08:13 AM
#6

LR�P=HR
Join Date: Sep 2019
Location: SF Bay Area
Posts: 2,167
Bikes: 1981 Holdsworth Special, 1993 C-dale MT3000 & 1996 F700CAD3, 2018 Cervelo R3 & 2022 R5, JustGo Runt, Ridley Oval, Kickr Bike 8-)
Mentioned: 1 Post(s)
Tagged: 0 Thread(s)
Quoted: 864 Post(s)
Liked 1,198 Times
in
690 Posts
Awesome tool.
But suspect you actually loosened the post using high levels of Radiation!
Barry
But suspect you actually loosened the post using high levels of Radiation!
Barry
Likes For Barry2:
11-04-22, 08:20 AM
#7
Senior Member
Join Date: Mar 2022
Location: Missoula MT
Posts: 1,765
Bikes: Handsome xoxo, Serotta atx, Canyon Endurace CF8
Mentioned: 1 Post(s)
Tagged: 0 Thread(s)
Quoted: 904 Post(s)
Liked 1,887 Times
in
844 Posts
hey whats that green rigid fork propped up by your bench? I am in search of a rigid fork 
11-04-22, 08:27 AM
#8
Senior Member
Thread Starter
It came off my daughters' '96 Nishiki Cascade. Suspension length, for a 26" wheel, 1-1/8" steer tube. Holding on to it, "just in case"...
Likes For Smokinapankake:
11-04-22, 09:06 AM
#10
Senior Member
Join Date: Oct 2014
Location: Portland, OR
Posts: 12,902
Bikes: (2) ti TiCycles, 2007 w/ triple and 2011 fixed, 1979 Peter Mooney, ~1983 Trek 420 now fixed and ~1973 Raleigh Carlton Competition gravel grinder
Mentioned: 129 Post(s)
Tagged: 0 Thread(s)
Quoted: 4802 Post(s)
Liked 3,922 Times
in
2,551 Posts
I've often seen the recommendation to vertically hacksaw a terminally stuck seatpost into pieces but never knew anyone who had actually done it. Congratulations.
Now, once you get a new seatpost to fit, I recommend treating the frame tubes, stays and fork blades internally with Weigel's Frame Saver or Amsoil HDMP. That frame shows significant rust and should be protected from additional deterioration.
Now, once you get a new seatpost to fit, I recommend treating the frame tubes, stays and fork blades internally with Weigel's Frame Saver or Amsoil HDMP. That frame shows significant rust and should be protected from additional deterioration.
 11-04-22, 09:44 AM
#11
Senior Member
Thread Starter
Yup. I've got a 1991 Fat City Wicked Fat Chance that needs a new fork. I'm in the process of having legs made to fit a new old stock Tange Switchblade crown I picked up about 15 years ago. Because I could never find legs, and because I could never find a decent 1" threaded steerer fork to fit it. Good luck with your search.
11-04-22, 10:42 AM
#12
Senior Member
Join Date: Aug 2005
Location: Pittsburgh, PA
Posts: 33,656
Bikes: '96 Litespeed Catalyst, '05 Litespeed Firenze, '06 Litespeed Tuscany, '20 Surly Midnight Special, All are 3x10. It is hilly around here!
Mentioned: 39 Post(s)
Tagged: 0 Thread(s)
Quoted: 2026 Post(s)
Likes: 0
Liked 1,096 Times
in
742 Posts
It can work but not nearly as well as the products specifically made as undercoating/rust inhibitors, particularly on a frame already a bit rusty. Frame Saver and HDMP are inhibitor containing waxes in a thin solvent. You spray them into the tubes and stays, rotate the frame and fork several times to evenly distribute the liquid and they then dry in place. There are several threads here describing how to use and apply them.
11-04-22, 12:09 PM
#13
SE Wis
Join Date: Apr 2005
Location: Milwaukee, WI
Posts: 10,507
Bikes: '68 Raleigh Sprite, '02 Raleigh C500, '84 Raleigh Gran Prix, '91 Trek 400, 2013 Novara Randonee, 1990 Trek 970
Mentioned: 40 Post(s)
Tagged: 0 Thread(s)
Quoted: 2743 Post(s)
Liked 3,390 Times
in
2,053 Posts
I have one of these that make it much easier.
11-04-22, 02:15 PM
#14
Senior Member
Thread Starter
That looks far superior to my tool! I'll have to be on the lookout for something like that.
Likes For Smokinapankake:
11-07-22, 02:12 PM
#17
Senior Member
Join Date: Jun 2012
Location: Stillwater, OK
Posts: 7,827
Mentioned: 33 Post(s)
Tagged: 0 Thread(s)
Quoted: 1872 Post(s)
Liked 692 Times
in
468 Posts
I just went through this. I used a sawzall! Took three nights of several hours each and only got about 4 inches of post out but that's enough for a short seatpost to go far enough past the seattube/top tube junction to be safe. I just wish I hadn't put a one inch cut into the seat tube with the blade...oh well, JB Weld to the rescue!
__________________
2014 Cannondale SuperSix EVO 2
2019 Salsa Warbird
2014 Cannondale SuperSix EVO 2
2019 Salsa Warbird
11-07-22, 02:19 PM
#18

Senior Member

Join Date: Jul 2006
Location: San Jose (Willow Glen) Ca
Posts: 9,840
Bikes: Kirk Custom JK Special, '84 Team Miyata,(dura ace old school) 80?? SR Semi-Pro 600 Arabesque
Mentioned: 106 Post(s)
Tagged: 0 Thread(s)
Quoted: 2337 Post(s)
Liked 2,818 Times
in
1,539 Posts
i like the tool there could be a market for it
__________________
Life is too short not to ride the best bike you have, as much as you can
(looking for Torpado Super light frame/fork or for Raleigh International frame fork 58cm)
Life is too short not to ride the best bike you have, as much as you can
(looking for Torpado Super light frame/fork or for Raleigh International frame fork 58cm)
11-08-22, 07:54 AM
#19
Senior Member

Join Date: Jan 2005
Location: Baltimore, MD
Posts: 5,371
Mentioned: 15 Post(s)
Tagged: 0 Thread(s)
Quoted: 2482 Post(s)
Liked 2,952 Times
in
1,677 Posts
Back when I worked in a bike shop, whenever we encountered a badly stuck seat post, we'd take the bike to the car repair place next door and ask a mechanic to drive the post out with a heavy-duty pneumatic hammer. Took about 10 seconds. (Only works if the seat clamp is intact at the top of the post. If you saw that off, you're on your own.)
Just remembered one other technique I once saw someone use on a straight steel seat post, although it should also work with an aluminum post that has had the clamp at the top sawn off.
He began by inserting a long threaded rod into the open end of the post and placing a bunch of screws in the gap between the rod and the post.
Once there were enough screws in place to fill the gap all the way around the rod, he added another that he screwed into the tight space between two of the screws that he'd inserted earlier. All those screws bit into the inside surface of the seat post, making the post and rod effectively one unit.
He then added a number of nuts and wide washers to the exposed end of the threaded rod and beat on the pile of washers with a heavy hammer until the seat post started to move.
If I were to try this, I'd clamp the frame into an old-school heavyweight Park bike repair stand with the frame upside down and with plenty of cloth on the clamp jaws to protect the frame. (Also with cardboard taped to the frame to protect against wild hammer swings.) Maybe with the clamp jaws positioned all the way at the bottom of the seat post so the bottom bracket took most of the impact.
Edit: almost needless to say, this technique would work only if the seat post has not been sawn off flush with the top of the frame's seat tube.
11-10-22, 05:52 PM
#20
Senior Member
Thread Starter
Just updating to the correct year. I initially thought it was a 2010, but some simple internets research revealed it to be a 2009. I believe they called it the Smoke 2-9, then in 2010 it got renamed to just Smoke. What keyed me off was the 2010 catalog described the color as a "cool, flat black finish". And the Kona downtube and top tube logos were silver, not yellow like mine are. Not that it really matters, but I like to strive for accuracy. With that said, I deduced the seatpost diameter to be 27.2, not 27.0 as initially thought. A quick flex hone polish of the ID of the seat tube removed the majority of the remaining stubborn corrosion, but a 27.0 seatpost would not clamp securely. So I greased up a 27.2, slipped it down into the seat tube and realized my initial assessment was wrong. Bike is built now but just as I finished it up the weather turned really cold and really wet. So.... pics for posterity!
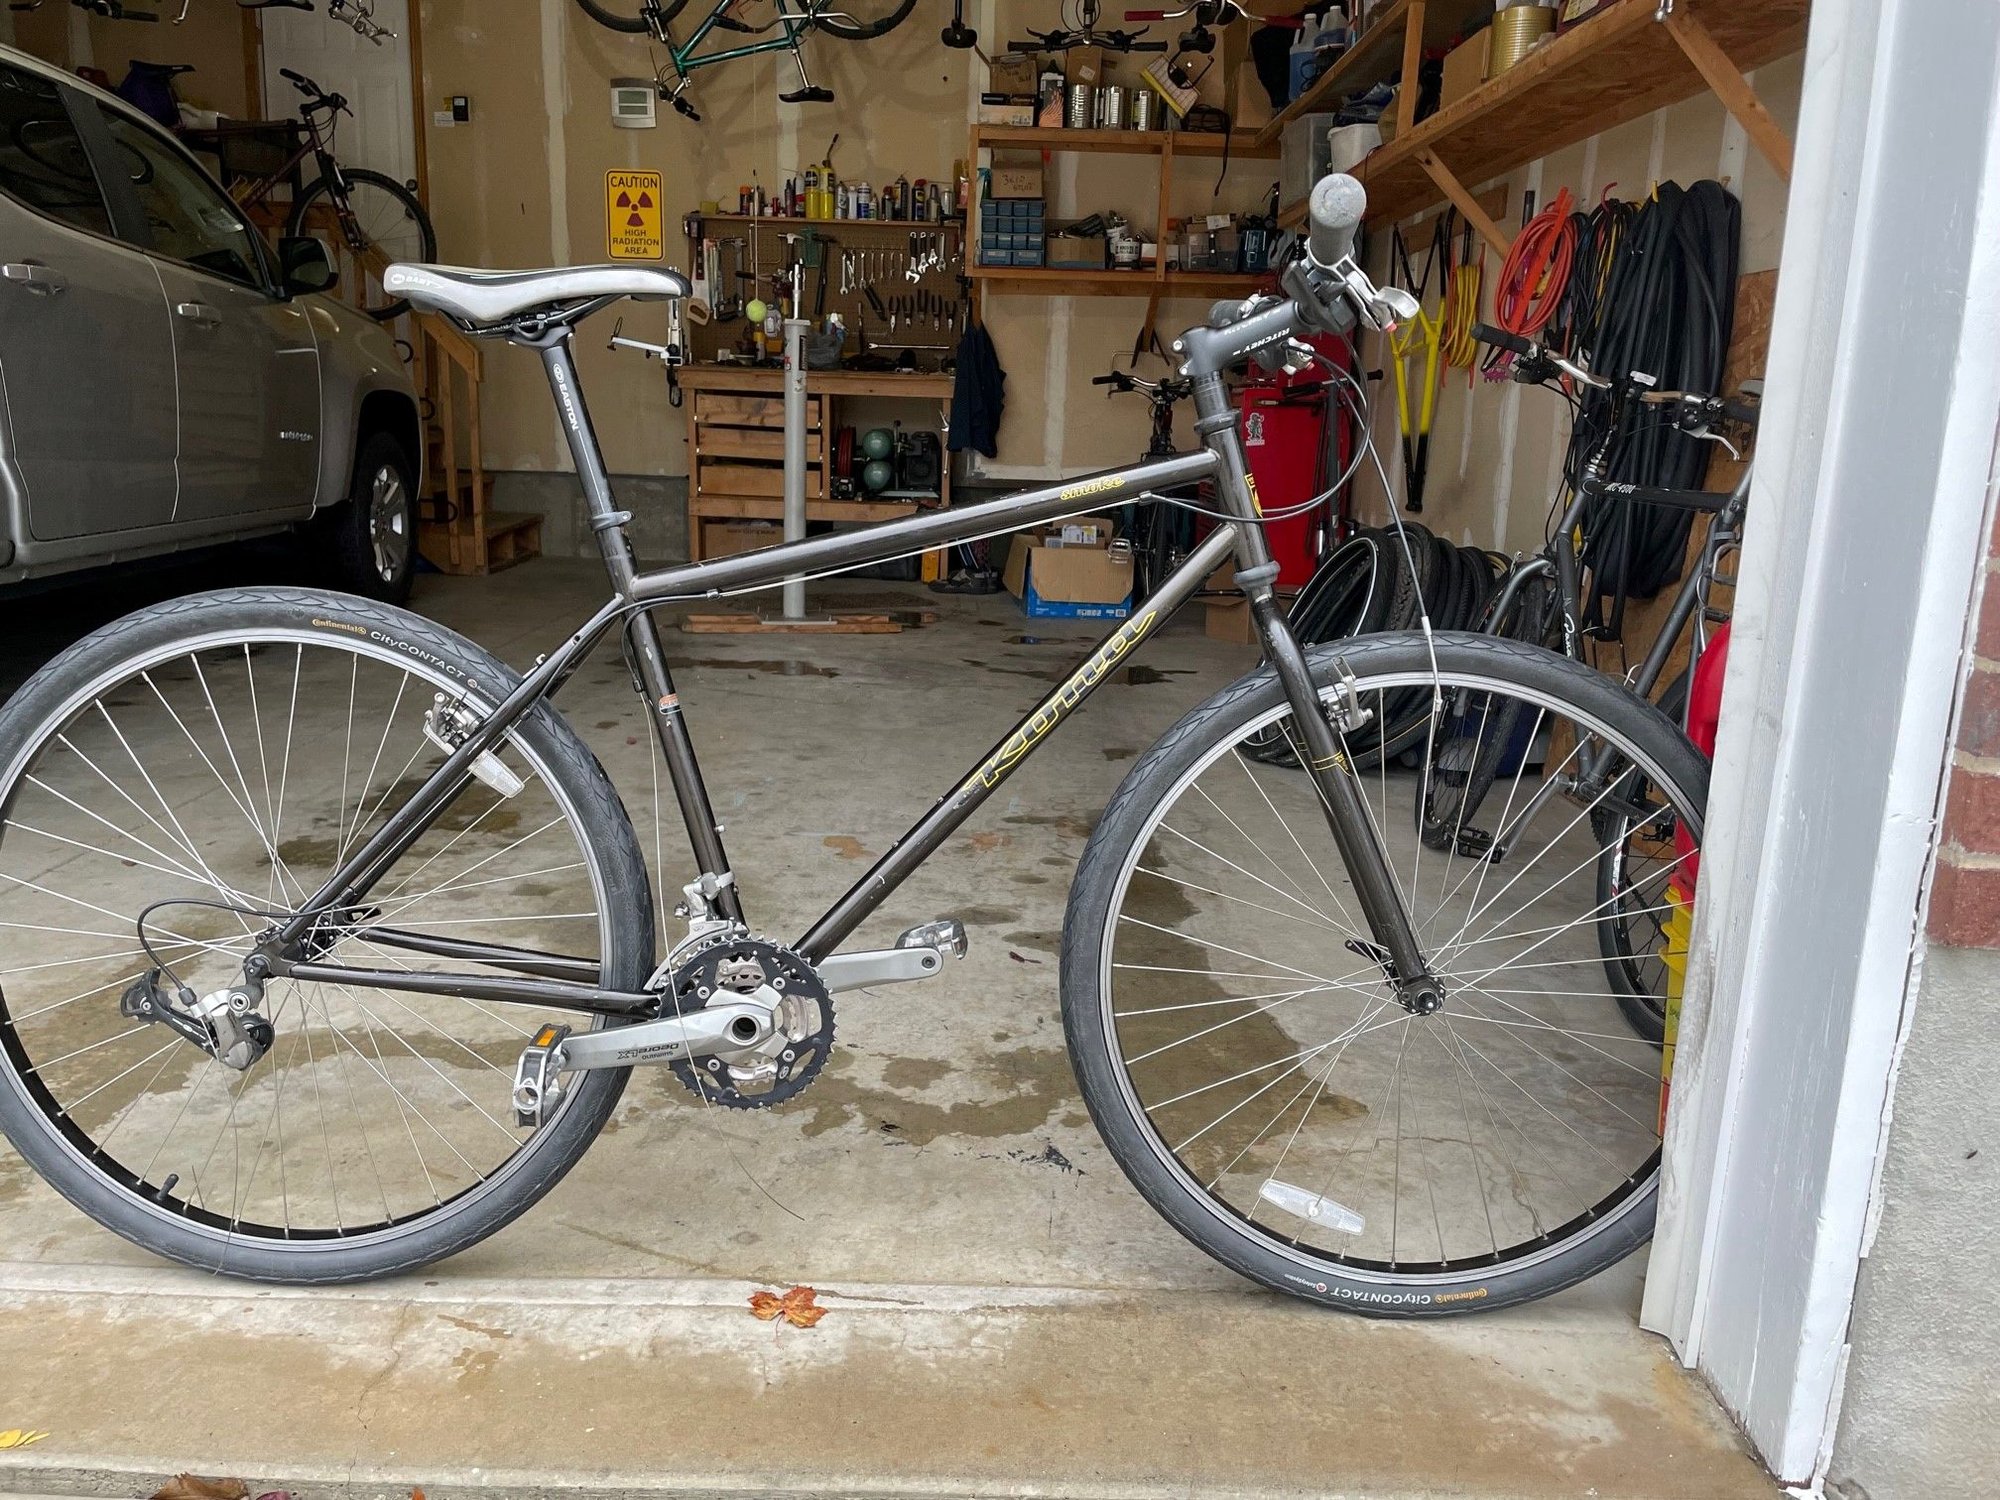
Just need to chain and cable it....
I think the stem is a bit too long, and I don't really like flat bars as a rule, so I think I'll put a Ritchey Kyote bar on and ride the crap out of it! Initial impressions around the block are favorable - it feels fast and nimble. Much more so than the original MSRP (approx. $450) would make you think! I'm kind of excited to give the whole 29er MTB thing a try, pending some more off-roady tires, that is....
Thanks for looking!
