


Rethread internal cable
 09-07-22, 06:48 AM
#1
Newbie
Thread Starter
Join Date: Oct 2014
Posts: 38
Mentioned: 0 Post(s)
Tagged: 0 Thread(s)
Quoted: 10 Post(s)
Likes: 0
Liked 2 Times
in
2 Posts
Rethread internal cable
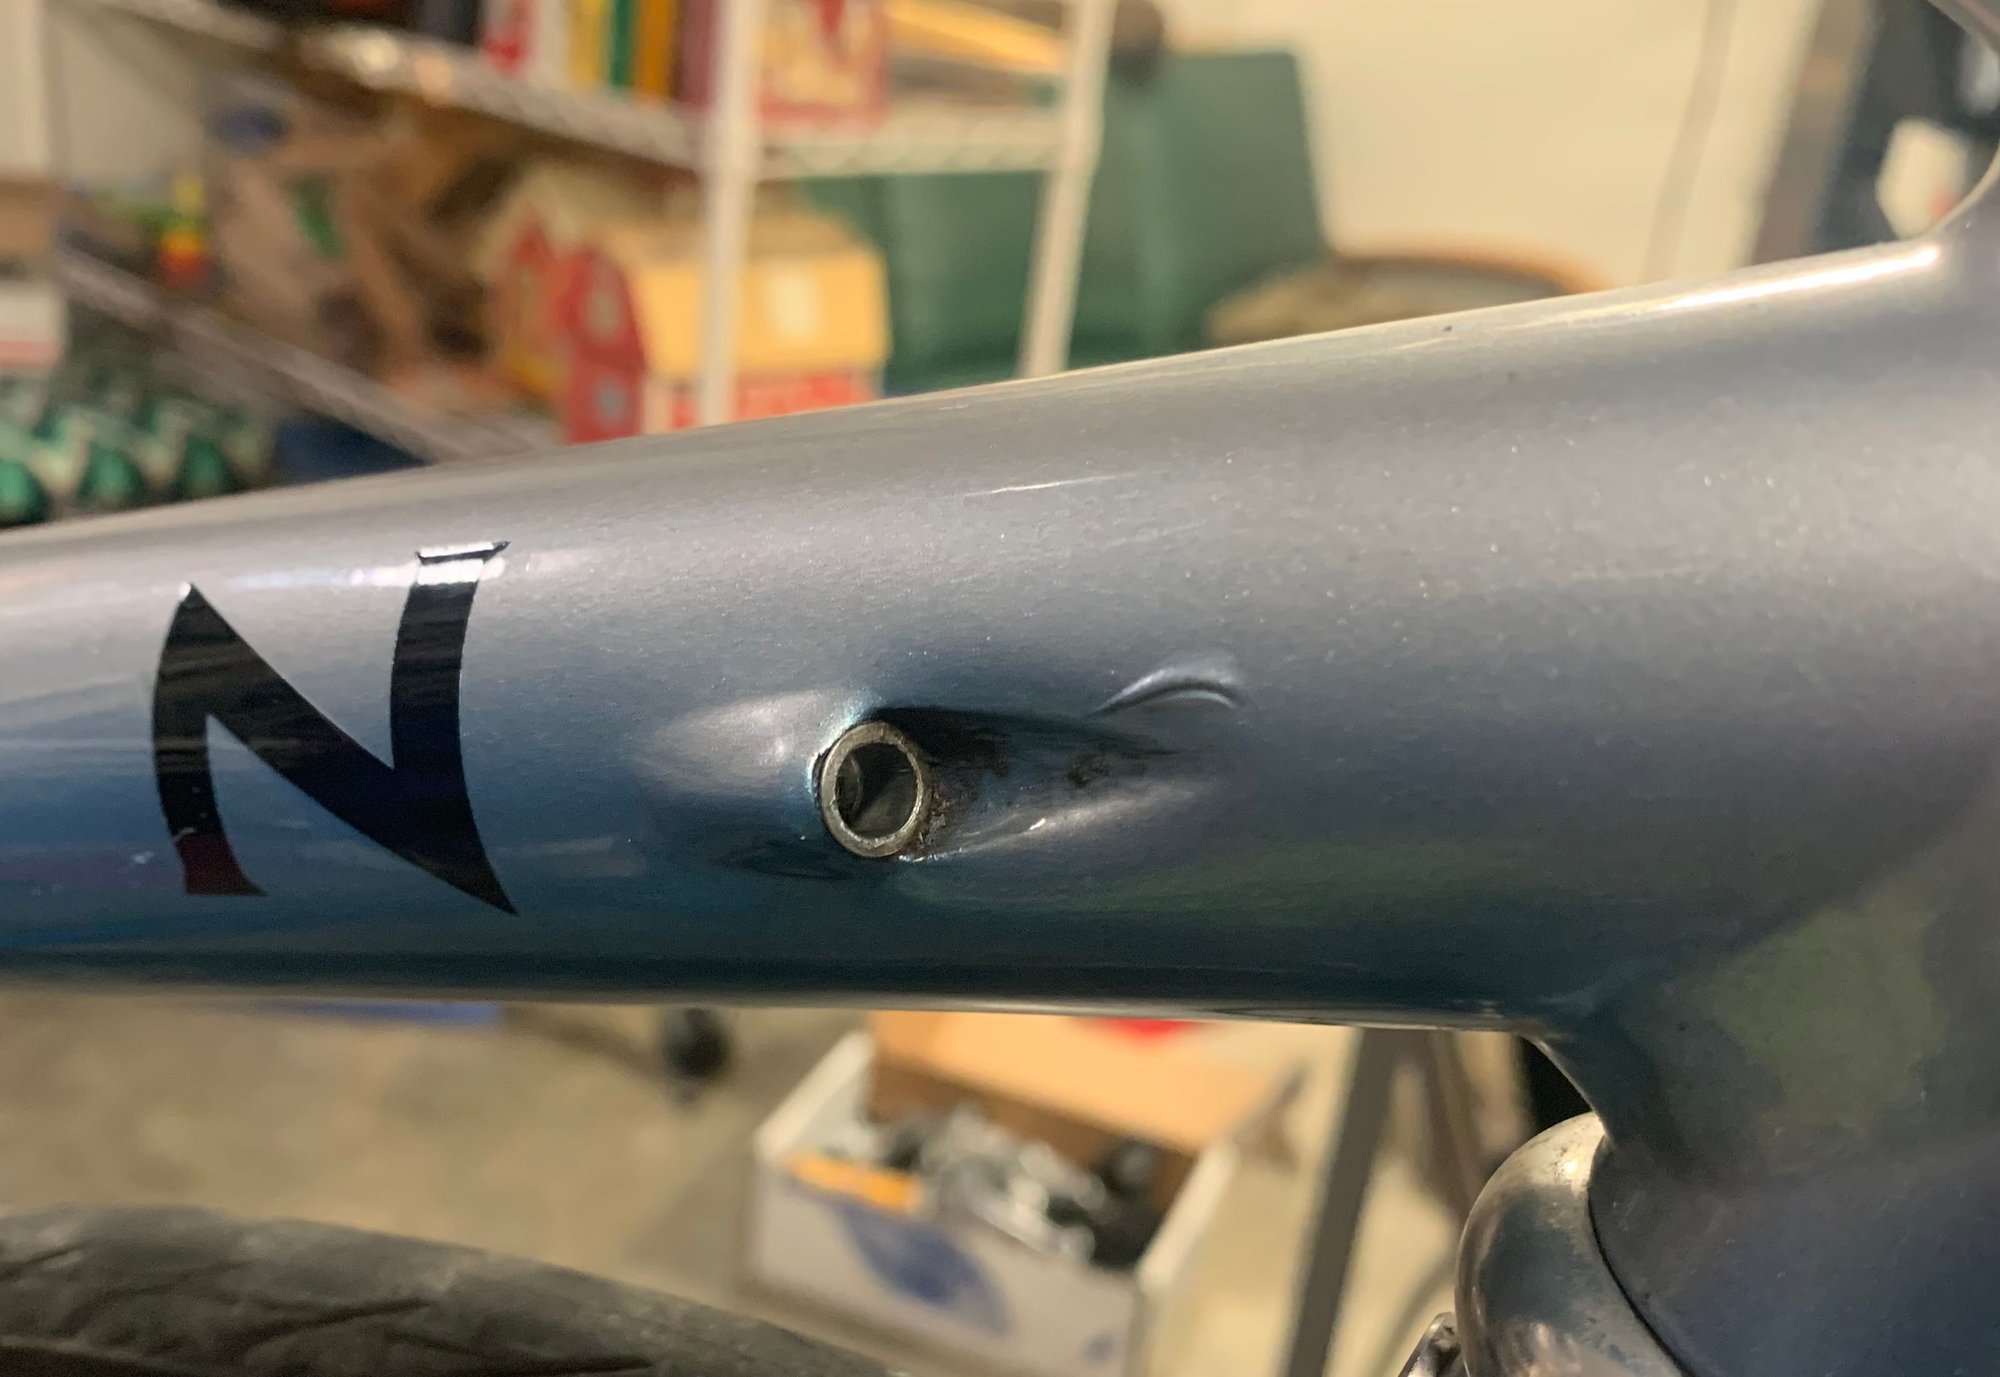

The ferule on the internal shifter cable on my Klein disintegrated and the only way I could think of to remove it required that I give up the cable position. I now seek advice on rethreading the cable. The tubing that exits near the BB does not connect to the other port.
Thanks
Jim
 09-07-22, 09:03 AM
#2

Senior Member
Join Date: Feb 2012
Location: Rochester, NY
Posts: 18,052
Bikes: Stewart S&S coupled sport tourer, Stewart Sunday light, Stewart Commuting, Stewart Touring, Co Motion Tandem, Stewart 3-Spd, Stewart Track, Fuji Finest, Mongoose Tomac ATB, GT Bravado ATB, JCP Folder, Stewart 650B ATB
Mentioned: 0 Post(s)
Tagged: 0 Thread(s)
Quoted: 4193 Post(s)
Liked 3,837 Times
in
2,295 Posts
These older Kleins were known for their poor cable routing WRT replacing cables. Thankfully the industry has learned a lot about how to make this easier.
The usual first way to thread a cable through an internal path is by sliding cable liner tubing over the in place inner cable. But I see the inner cable has been pulled already . Next is the frustrating attempts to get a cable to find the exit port by giving the cable a slight bend an inch from its end and pushing/twisting and praying the end will find that tiny exit. Some will run a thread first using a vacuum to pull the thread to that exit port and once through attaching the cable to that thread. Some use magnets to do this (the cable should be galvanized steel, not SS. Once through the liner slid over it trick can allow for the SS cable to be installed). Park Tools offers an internal cable threading kit that you might check out.
We would ditch the translucent cable tubing once we got an inner cable through as when the tube would get removed from the entry port it was basically impossible to get the inner to rethread through that tubing. A few times we just ran external cable and housing when the rider wasn't going to be happy with the cost of the time it took for us to go fishing with their poorly conceived cable path. Andy
The usual first way to thread a cable through an internal path is by sliding cable liner tubing over the in place inner cable. But I see the inner cable has been pulled already
. Next is the frustrating attempts to get a cable to find the exit port by giving the cable a slight bend an inch from its end and pushing/twisting and praying the end will find that tiny exit. Some will run a thread first using a vacuum to pull the thread to that exit port and once through attaching the cable to that thread. Some use magnets to do this (the cable should be galvanized steel, not SS. Once through the liner slid over it trick can allow for the SS cable to be installed). Park Tools offers an internal cable threading kit that you might check out. We would ditch the translucent cable tubing once we got an inner cable through as when the tube would get removed from the entry port it was basically impossible to get the inner to rethread through that tubing. A few times we just ran external cable and housing when the rider wasn't going to be happy with the cost of the time it took for us to go fishing with their poorly conceived cable path. Andy
__________________
AndrewRStewart
AndrewRStewart
Likes For Andrew R Stewart:
09-07-22, 08:03 PM
#3
Go Ride!
Join Date: May 2019
Location: Minnesota�55346
Posts: 268
Bikes: Klein Quantum Pro, Klein Attitude, Azuki SS, Merckx AXM, Klein Quantum Race, Klein Quantum
Mentioned: 2 Post(s)
Tagged: 0 Thread(s)
Quoted: 109 Post(s)
Liked 155 Times
in
87 Posts
No problem!�.Klein downtubes are the easier ones (vs seat tube brake line). You�ll just need an old wire coat hangar and a 12� piece of that clear cable liner. Straighten out the hangar (wirecutter off the twisted ends so you have a nice long straight rod) and then on one end slightly kink/bend one end 10-15 degrees (about 1-2� back). Poke that end first down thru top cable inlet and keep working back and forth till it manages to poke out thru the cable outlet�takes about 5 min. Once you have that in place slide one end of the old clear cable liner over the top end of the hangar so it is good and secure. You FIRST hook your cable all up on top and THEN slide that into the clear cable guide and apply a little forward pressure as you pull the hangar thru�the clear cable guide will take the cable thru as the hangar is pulled out.
I�ve tried the other methods (vacuum a string, magnets) but for the Klein (anyway) I�ve found this method to work best. I�ve done it this way maybe 20-30 times. All the best!
I�ve tried the other methods (vacuum a string, magnets) but for the Klein (anyway) I�ve found this method to work best. I�ve done it this way maybe 20-30 times. All the best!
Likes For Sonofamechanic:
09-07-22, 08:06 PM
#4
Senior Member
Join Date: Feb 2012
Location: Rochester, NY
Posts: 18,052
Bikes: Stewart S&S coupled sport tourer, Stewart Sunday light, Stewart Commuting, Stewart Touring, Co Motion Tandem, Stewart 3-Spd, Stewart Track, Fuji Finest, Mongoose Tomac ATB, GT Bravado ATB, JCP Folder, Stewart 650B ATB
Mentioned: 0 Post(s)
Tagged: 0 Thread(s)
Quoted: 4193 Post(s)
Liked 3,837 Times
in
2,295 Posts
I tip my helmet to you. Andy
__________________
AndrewRStewart
AndrewRStewart
09-08-22, 11:41 AM
#5
Newbie
Thread Starter
Join Date: Oct 2014
Posts: 38
Mentioned: 0 Post(s)
Tagged: 0 Thread(s)
Quoted: 10 Post(s)
Likes: 0
Liked 2 Times
in
2 Posts
These older Kleins were known for their poor cable routing WRT replacing cables. Thankfully the industry has learned a lot about how to make this easier.
The usual first way to thread a cable through an internal path is by sliding cable liner tubing over the in place inner cable. But I see the inner cable has been pulled already. Next is the frustrating attempts to get a cable to find the exit port by giving the cable a slight bend an inch from its end and pushing/twisting and praying the end will find that tiny exit. Some will run a thread first using a vacuum to pull the thread to that exit port and once through attaching the cable to that thread. Some use magnets to do this (the cable should be galvanized steel, not SS. Once through the liner slid over it trick can allow for the SS cable to be installed). Park Tools offers an internal cable threading kit that you might check out.
We would ditch the translucent cable tubing once we got an inner cable through as when the tube would get removed from the entry port it was basically impossible to get the inner to rethread through that tubing. A few times we just ran external cable and housing when the rider wasn't going to be happy with the cost of the time it took for us to go fishing with their poorly conceived cable path. Andy
The usual first way to thread a cable through an internal path is by sliding cable liner tubing over the in place inner cable. But I see the inner cable has been pulled already
. Next is the frustrating attempts to get a cable to find the exit port by giving the cable a slight bend an inch from its end and pushing/twisting and praying the end will find that tiny exit. Some will run a thread first using a vacuum to pull the thread to that exit port and once through attaching the cable to that thread. Some use magnets to do this (the cable should be galvanized steel, not SS. Once through the liner slid over it trick can allow for the SS cable to be installed). Park Tools offers an internal cable threading kit that you might check out.We would ditch the translucent cable tubing once we got an inner cable through as when the tube would get removed from the entry port it was basically impossible to get the inner to rethread through that tubing. A few times we just ran external cable and housing when the rider wasn't going to be happy with the cost of the time it took for us to go fishing with their poorly conceived cable path. Andy
09-08-22, 11:50 AM
#6
Newbie
Thread Starter
Join Date: Oct 2014
Posts: 38
Mentioned: 0 Post(s)
Tagged: 0 Thread(s)
Quoted: 10 Post(s)
Likes: 0
Liked 2 Times
in
2 Posts
No problem!�.Klein downtubes are the easier ones (vs seat tube brake line). You�ll just need an old wire coat hangar and a 12� piece of that clear cable liner. Straighten out the hangar (wirecutter off the twisted ends so you have a nice long straight rod) and then on one end slightly kink/bend one end 10-15 degrees (about 1-2� back). Poke that end first down thru top cable inlet and keep working back and forth till it manages to poke out thru the cable outlet�takes about 5 min. Once you have that in place slide one end of the old clear cable liner over the top end of the hangar so it is good and secure. You FIRST hook your cable all up on top and THEN slide that into the clear cable guide and apply a little forward pressure as you pull the hangar thru�the clear cable guide will take the cable thru as the hangar is pulled out.
I�ve tried the other methods (vacuum a string, magnets) but for the Klein (anyway) I�ve found this method to work best. I�ve done it this way maybe 20-30 times. All the best!
I�ve tried the other methods (vacuum a string, magnets) but for the Klein (anyway) I�ve found this method to work best. I�ve done it this way maybe 20-30 times. All the best!
Jim
09-08-22, 02:42 PM
#7
Go Ride!
Join Date: May 2019
Location: Minnesota�55346
Posts: 268
Bikes: Klein Quantum Pro, Klein Attitude, Azuki SS, Merckx AXM, Klein Quantum Race, Klein Quantum
Mentioned: 2 Post(s)
Tagged: 0 Thread(s)
Quoted: 109 Post(s)
Liked 155 Times
in
87 Posts
A bit different for the brake line in the top tube. The top tube has cable stop �plugs� (actually a form of rivet) and so the exit hole is not as easy to �slide� the hangar into. IF you can wiggle out one of the cable stops and use that as your initial �exit� for the hangar then its as just easy. If not, you�ll need more patience but it still works. 3 follow ups i neglected to mention earlier:
1) if you do want to replace the clear interior cable liner, (you don�t really need it at all) just pull that thru first with the hangar, and then use a heated Philips head screwdriver to �cone out� (mushroom, flange, whatever) the end where the cable will start�that stops the cable liner from slipping past the cable stop. Then cut the other end to length and slide the cable thru.
2) when �fishing� for the exit hole with the hangar, pre-mark how far in the hangar will have to go to reach the exit hole�that helps guide you in not going past the exit hole and spending time trying to find something you are already 3� past�.(from experience).
3) a slight overall bend in the hangar can help insure the end is pushed up against the side of the tube it needs to exit (this ONLY works for the downtube where the exits are directly out the side.)
09-08-22, 02:55 PM
#8
Go Ride!
Join Date: May 2019
Location: Minnesota�55346
Posts: 268
Bikes: Klein Quantum Pro, Klein Attitude, Azuki SS, Merckx AXM, Klein Quantum Race, Klein Quantum
Mentioned: 2 Post(s)
Tagged: 0 Thread(s)
Quoted: 109 Post(s)
Liked 155 Times
in
87 Posts
BTW�Race or Pro? Ice blue?


