


Is there a wrench for this?
 07-26-22, 08:51 AM
#26

Senior Member
Thread Starter
Join Date: Aug 2007
Location: Evanston, IL
Posts: 5,093
Bikes: many
Mentioned: 63 Post(s)
Tagged: 0 Thread(s)
Quoted: 1444 Post(s)
Liked 1,392 Times
in
760 Posts
As I mentioned in my original post, I've tried a chainring wrench. It didn't work at all. I imagine with some filing it could be made too work. I'll have to see what I have in the parts bin.

 07-26-22, 09:01 AM
#27
Senior Member
Thread Starter
Join Date: Aug 2007
Location: Evanston, IL
Posts: 5,093
Bikes: many
Mentioned: 63 Post(s)
Tagged: 0 Thread(s)
Quoted: 1444 Post(s)
Liked 1,392 Times
in
760 Posts
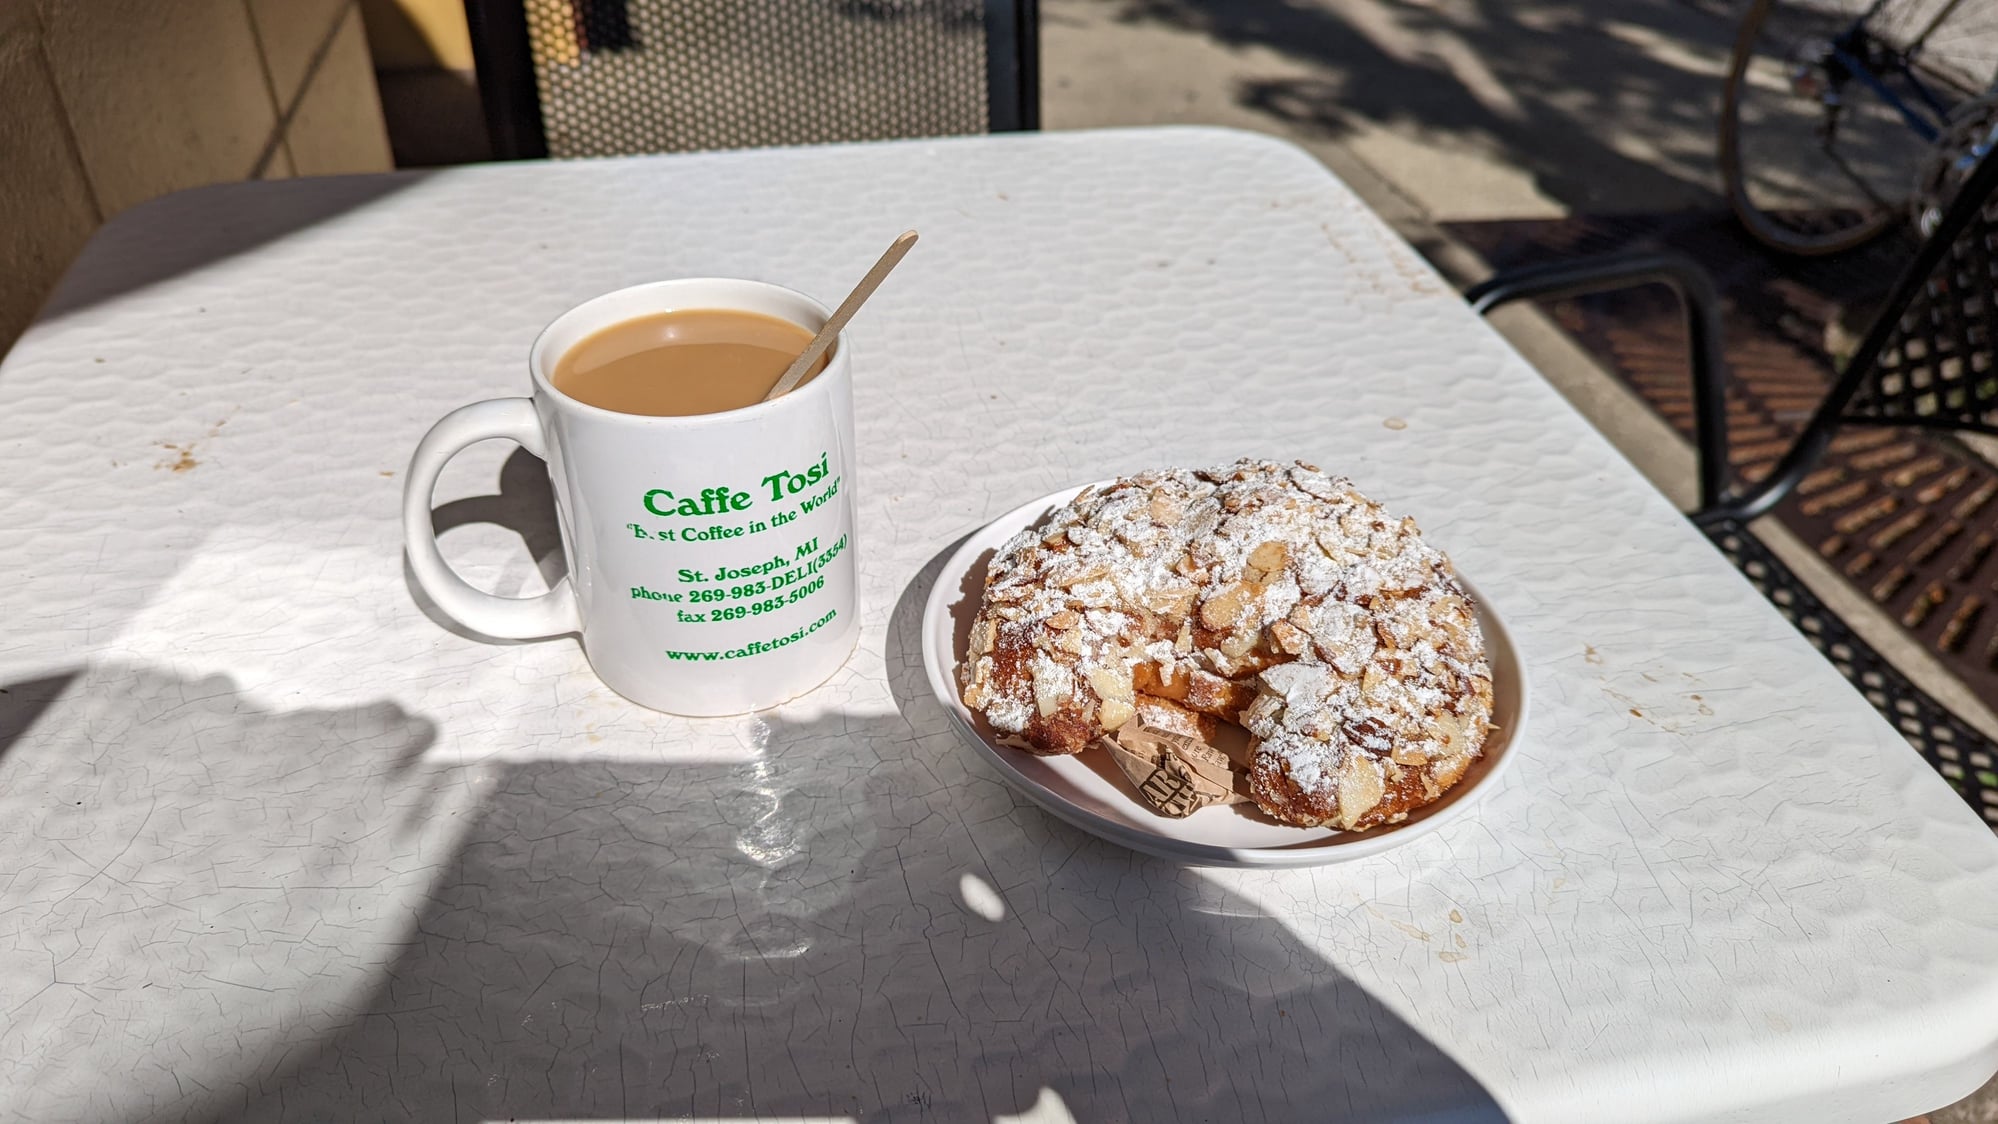
I'm still out of town (coffeeneuring at Tosi's in St Joe, MI this morning). I will disassemble things when I'm back home (on the weekend) and take pix. My guess is this was how Miyata did their seatpost binders, so it was probably a stick part of some framebuilding supply place inn the early 80s. My understanding is the Univega Super Speciale frame was in reality a Miyata something-or-other. This thought is reinforced by the comment by SurferRosa about using JB Weld to solve the same issue on a Miyata 812.
Likes For smontanaro:
07-26-22, 10:17 AM
#28
Senior Member
I have a SR Maxima that has the same binder bolt, it can be tightened with using only a allen wrench. Mine was mounted with the slotted side of the nut facing inside the seat lug. The slotted side is slightly beveled on the edge, I'm thinking that's what holds it in place while it's being tightened. Try flipping the nut, maybe it'll tighten up.
Likes For brian3069:
07-26-22, 10:19 AM
#29
Senior Member
Join Date: Mar 2013
Location: Maryland
Posts: 3,800
Bikes: Lots of English 3-speeds, a couple of old road bikes, 3 mountain bikes, 1 hybrid, and a couple of mash-ups
Mentioned: 53 Post(s)
Tagged: 0 Thread(s)
Quoted: 887 Post(s)
Liked 335 Times
in
225 Posts
I have a Miyata 1000 with that same seat post bolt. There is no slot in the frame or tab on the bolt/nut. The nut will not take an allen wrench either; so I put mine in a little plastic bag marked 'original Miyata seat post bolt" and used a quick release clamp that I had in the bin o'parts.
Likes For dweenk:
07-26-22, 11:46 AM
#30
se�or miembro

Join Date: Dec 2018
Location: Pac NW
Posts: 6,623
Bikes: '70s - '80s Campagnolo
Mentioned: 92 Post(s)
Tagged: 0 Thread(s)
Quoted: 3886 Post(s)
Liked 6,480 Times
in
3,206 Posts
... reinforced by the comment by SurferRosa about using JB Weld to solve the same issue on a Miyata 812.


Likes For SurferRosa:

Likes For smontanaro:
07-29-22, 05:48 PM
#33
se�or miembro
Join Date: Dec 2018
Location: Pac NW
Posts: 6,623
Bikes: '70s - '80s Campagnolo
Mentioned: 92 Post(s)
Tagged: 0 Thread(s)
Quoted: 3886 Post(s)
Liked 6,480 Times
in
3,206 Posts
07-29-22, 06:10 PM
#34
Partially Sane.
Join Date: Jan 2016
Location: Sunny Sacramento.
Posts: 3,559
Bikes: Soma Saga, pre-disc
Mentioned: 22 Post(s)
Tagged: 0 Thread(s)
Quoted: 972 Post(s)
Likes: 0
Liked 643 Times
in
468 Posts
Well nevermind then, if you're gonna use that newfangled math, like algebra or trigonometry or whatever ya got there. 🤔 I got my mind fried on that math stuff, just switching to "new math", in the '60s. 🙄😉 You couldn't even get help from your parents, cause they were confused too. Maybe even more than us kids. 😟
07-29-22, 06:16 PM
#35
se�or miembro
Join Date: Dec 2018
Location: Pac NW
Posts: 6,623
Bikes: '70s - '80s Campagnolo
Mentioned: 92 Post(s)
Tagged: 0 Thread(s)
Quoted: 3886 Post(s)
Liked 6,480 Times
in
3,206 Posts
07-29-22, 07:09 PM
#36
Senior Member
Join Date: Jan 2004
Location: Madison, WI USA
Posts: 6,154
Mentioned: 50 Post(s)
Tagged: 0 Thread(s)
Quoted: 2363 Post(s)
Liked 1,749 Times
in
1,191 Posts

Likes For madpogue:
07-29-22, 10:18 PM
#37
Partially Sane.
Join Date: Jan 2016
Location: Sunny Sacramento.
Posts: 3,559
Bikes: Soma Saga, pre-disc
Mentioned: 22 Post(s)
Tagged: 0 Thread(s)
Quoted: 972 Post(s)
Likes: 0
Liked 643 Times
in
468 Posts
Thank you. ✌️ I dunno, I can spell and punctuate properly just fine, but my math circuitry is definitely faulty. 😟
And it doesn't help anything, when I reply to threads, as if it were a competition, sometimes. 🙄 I know I should use some restraint, but apparently I don't have enough sense to actually do so.
I'm gonna work on that. 🤐
And it doesn't help anything, when I reply to threads, as if it were a competition, sometimes. 🙄 I know I should use some restraint, but apparently I don't have enough sense to actually do so.
I'm gonna work on that. 🤐
07-30-22, 12:12 AM
#38
Junior Member
Join Date: Jul 2017
Posts: 139
Bikes: '85 Le tour Luxe, Puch Mixtie, Raleigh Gran Sport, Mystery Machine
Mentioned: 1 Post(s)
Tagged: 0 Thread(s)
Quoted: 34 Post(s)
Likes: 0
Liked 12 Times
in
9 Posts
Just make your own tool from some flat stock steel. But first clean that nut-slot up with a file. Put a handle on it, or hold it with pliers. Never use a tapered blade screwdriver on a straight walled screw slot. Use a hollow ground blade. Good Luck.
07-30-22, 01:03 AM
#39
verktyg

Join Date: Jul 2006
Location: SF Bay Area
Posts: 4,030
Bikes: Current favorites: 1988 Peugeot Birraritz, 1984 Gitane Super Corsa, 1980s DeRosa, 1981 Bianchi Campione Del Mondo, 1992 Paramount OS, 1988 Colnago Technos, 1985 RalieghUSA SBDU Team Pro
Mentioned: 207 Post(s)
Tagged: 0 Thread(s)
Quoted: 1036 Post(s)
Liked 1,238 Times
in
654 Posts
Everyone is guessing about all of this c**p and how to make a bad idea work.... 
My first question is what does the other side look like? Please post a picture of the NDS and the rear of the lug.
A photo is worth more than a thousand guesses!!!
verktyg retro grouch!!! ;50;
Sorry for being so nasty...
My first question is what does the other side look like? Please post a picture of the NDS and the rear of the lug.
A photo is worth more than a thousand guesses!!!
verktyg retro grouch!!! ;50;
Sorry for being so nasty...
__________________
Don't believe everything you think! History is written by those who weren't there....
Chas. ;-)
Don't believe everything you think! History is written by those who weren't there....
Chas. ;-)
Likes For verktyg:
07-30-22, 11:14 AM
#40
Senior Member
Join Date: Mar 2013
Location: Maryland
Posts: 3,800
Bikes: Lots of English 3-speeds, a couple of old road bikes, 3 mountain bikes, 1 hybrid, and a couple of mash-ups
Mentioned: 53 Post(s)
Tagged: 0 Thread(s)
Quoted: 887 Post(s)
Liked 335 Times
in
225 Posts
I have a SR Maxima that has the same binder bolt, it can be tightened with using only a allen wrench. Mine was mounted with the slotted side of the nut facing inside the seat lug. The slotted side is slightly beveled on the edge, I'm thinking that's what holds it in place while it's being tightened. Try flipping the nut, maybe it'll tighten up.
Last edited by dweenk; 07-30-22 at 12:14 PM.
07-30-22, 07:41 PM
#41
Ride, Wrench, Swap, Race

Join Date: Jan 2010
Location: Northern California
Posts: 9,193
Bikes: Cheltenham-Pedersen racer, Boulder F/S Paris-Roubaix, Varsity racer, '52 Christophe, '62 Continental, '92 Merckx, '75 Limongi, '76 Presto, '72 Gitane SC, '71 Schwinn SS, etc.
Mentioned: 132 Post(s)
Tagged: 0 Thread(s)
Quoted: 1565 Post(s)
Liked 1,295 Times
in
865 Posts
These kind of binder arrangements are actually the best imo, mainly because the ordinary kind of 8.8- or 12.9-grade "socket head cap screw" tends to be a lot stronger than the typical, shouldered and headed "Cr-MO" binder bolt. I've never broken one!
The nut should be on the left side. And the nut (if it doesn't press-fit into the lug socket on the left side) should be fixed in place with Loctite or other adhesive.
Lastly, the seatpost slippage may be remedied by simply lubricating the bolt/nut threads, which will better convert bolt torque into clamping force, while lessening the unwanted turning force on the nut in the lug socket (so the bolt can draw up tight instead of the nut just spinning in it's bore).
07-31-22, 02:36 PM
#42
Senior Member
Thread Starter
Join Date: Aug 2007
Location: Evanston, IL
Posts: 5,093
Bikes: many
Mentioned: 63 Post(s)
Tagged: 0 Thread(s)
Quoted: 1444 Post(s)
Liked 1,392 Times
in
760 Posts
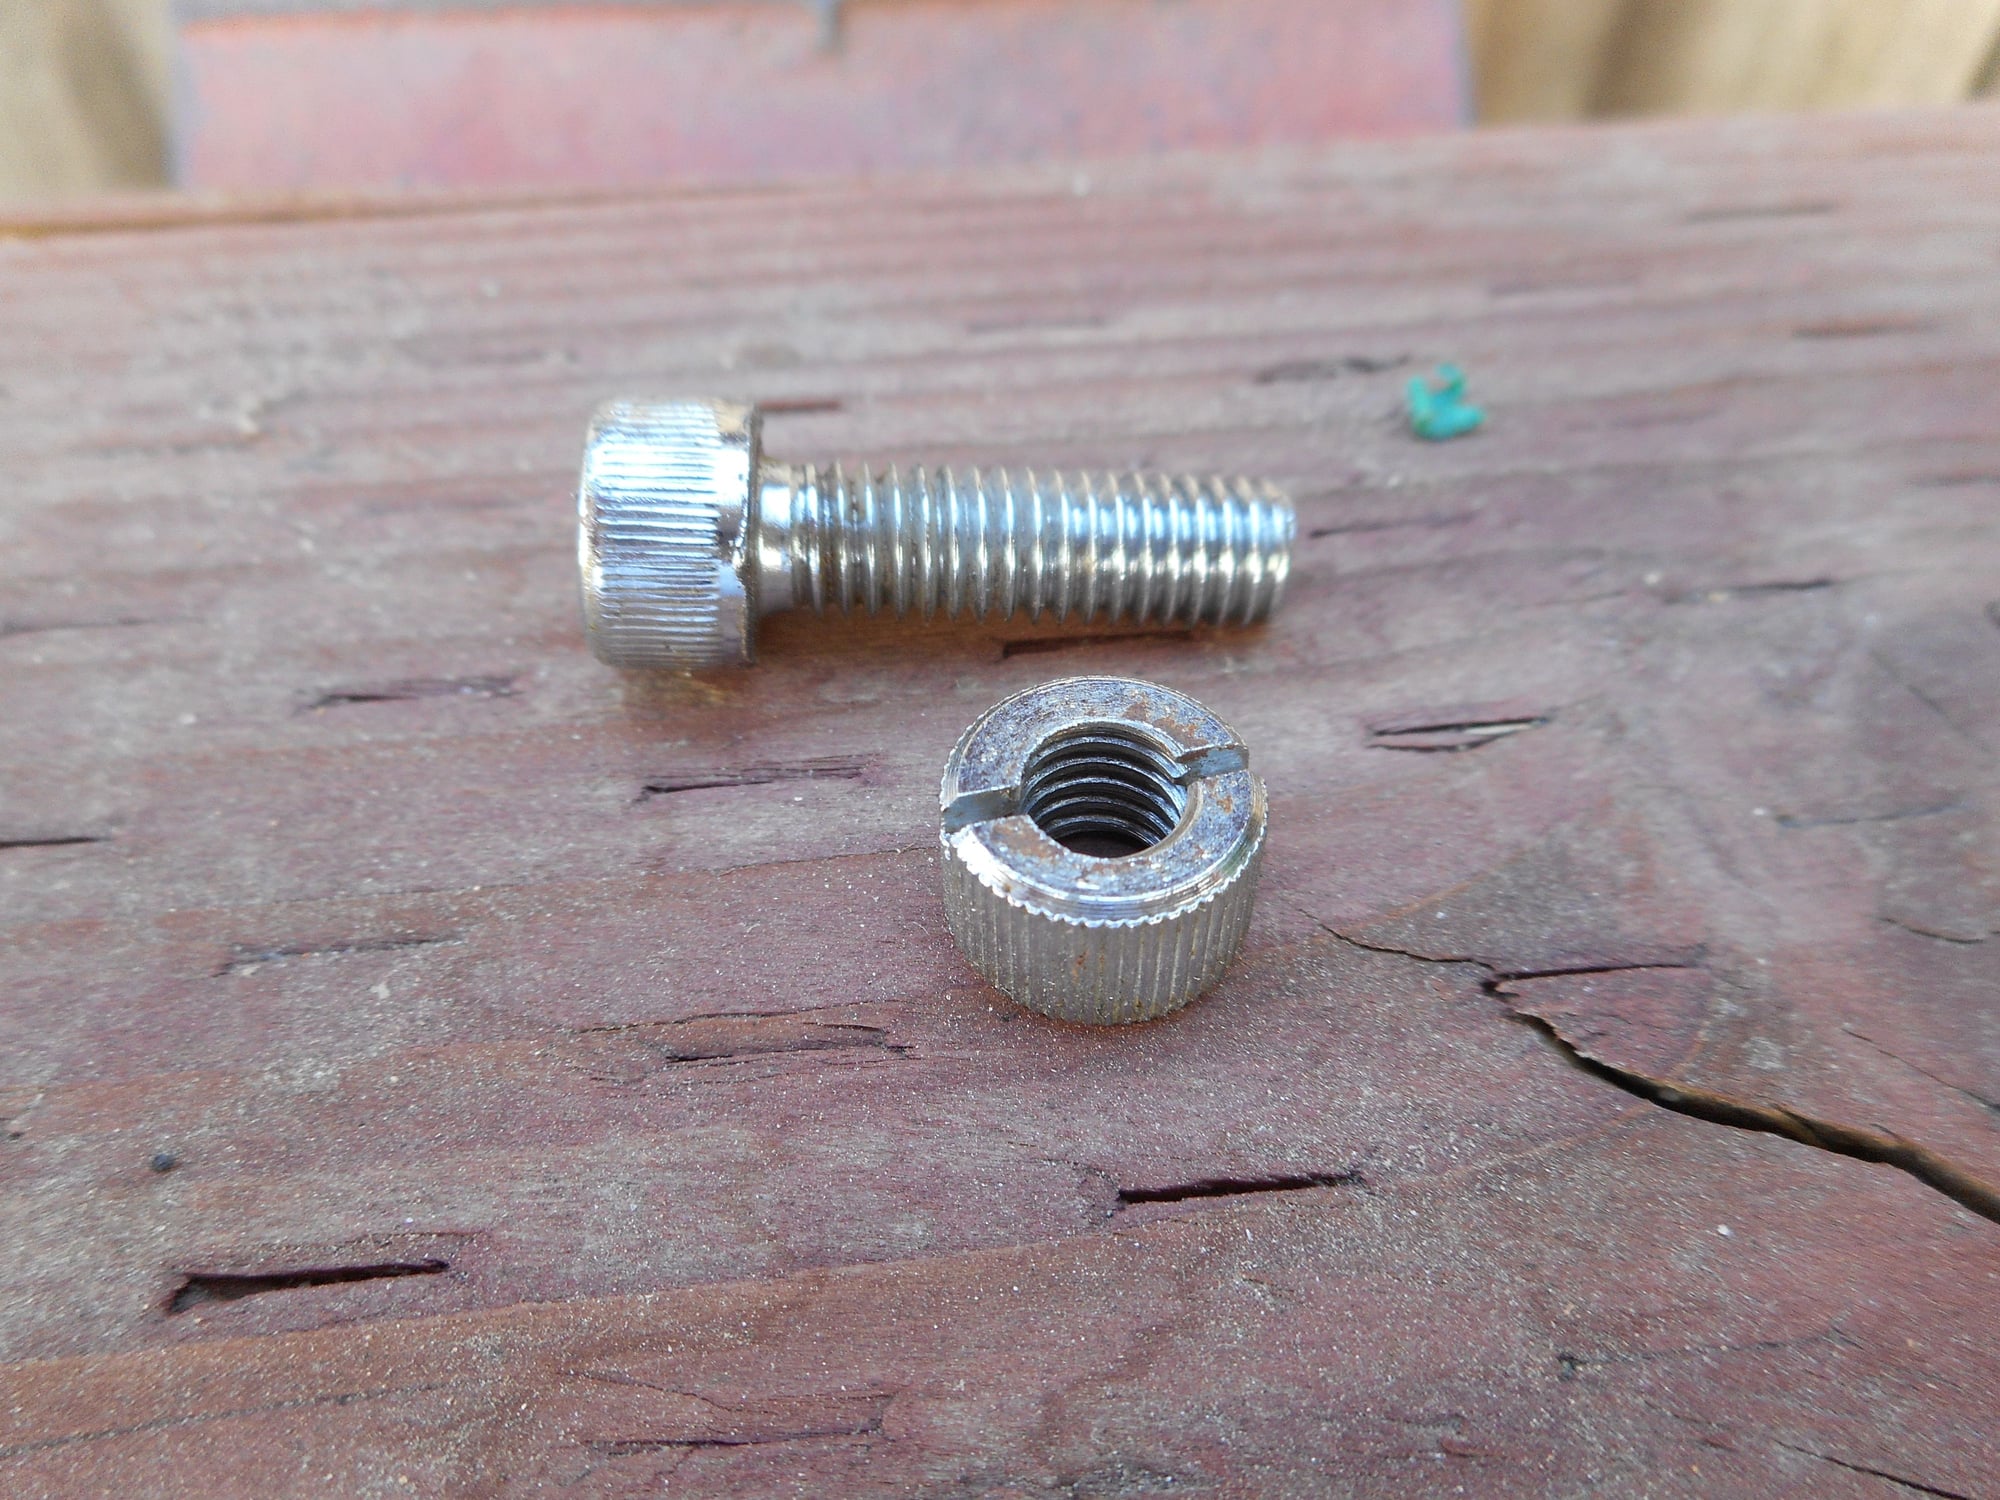
I'm back from Michigan and starting to catch up on email. I spent a bit of time with the Univega this afternoon. As far as I can tell, the "ports" on the left and right side of the binder assembly are identical. Switching left-to-right won't improve things by itself. The 26.8 seatpost is a perfect fit (nice parallel slot). It doesn't slip when I can get the bolt & nut snugged up. I searched through my box of odd small wrenches and found one to modify. Aside from too much underbiking which wrecked a nice tubular, I've solved the problems with the Univega
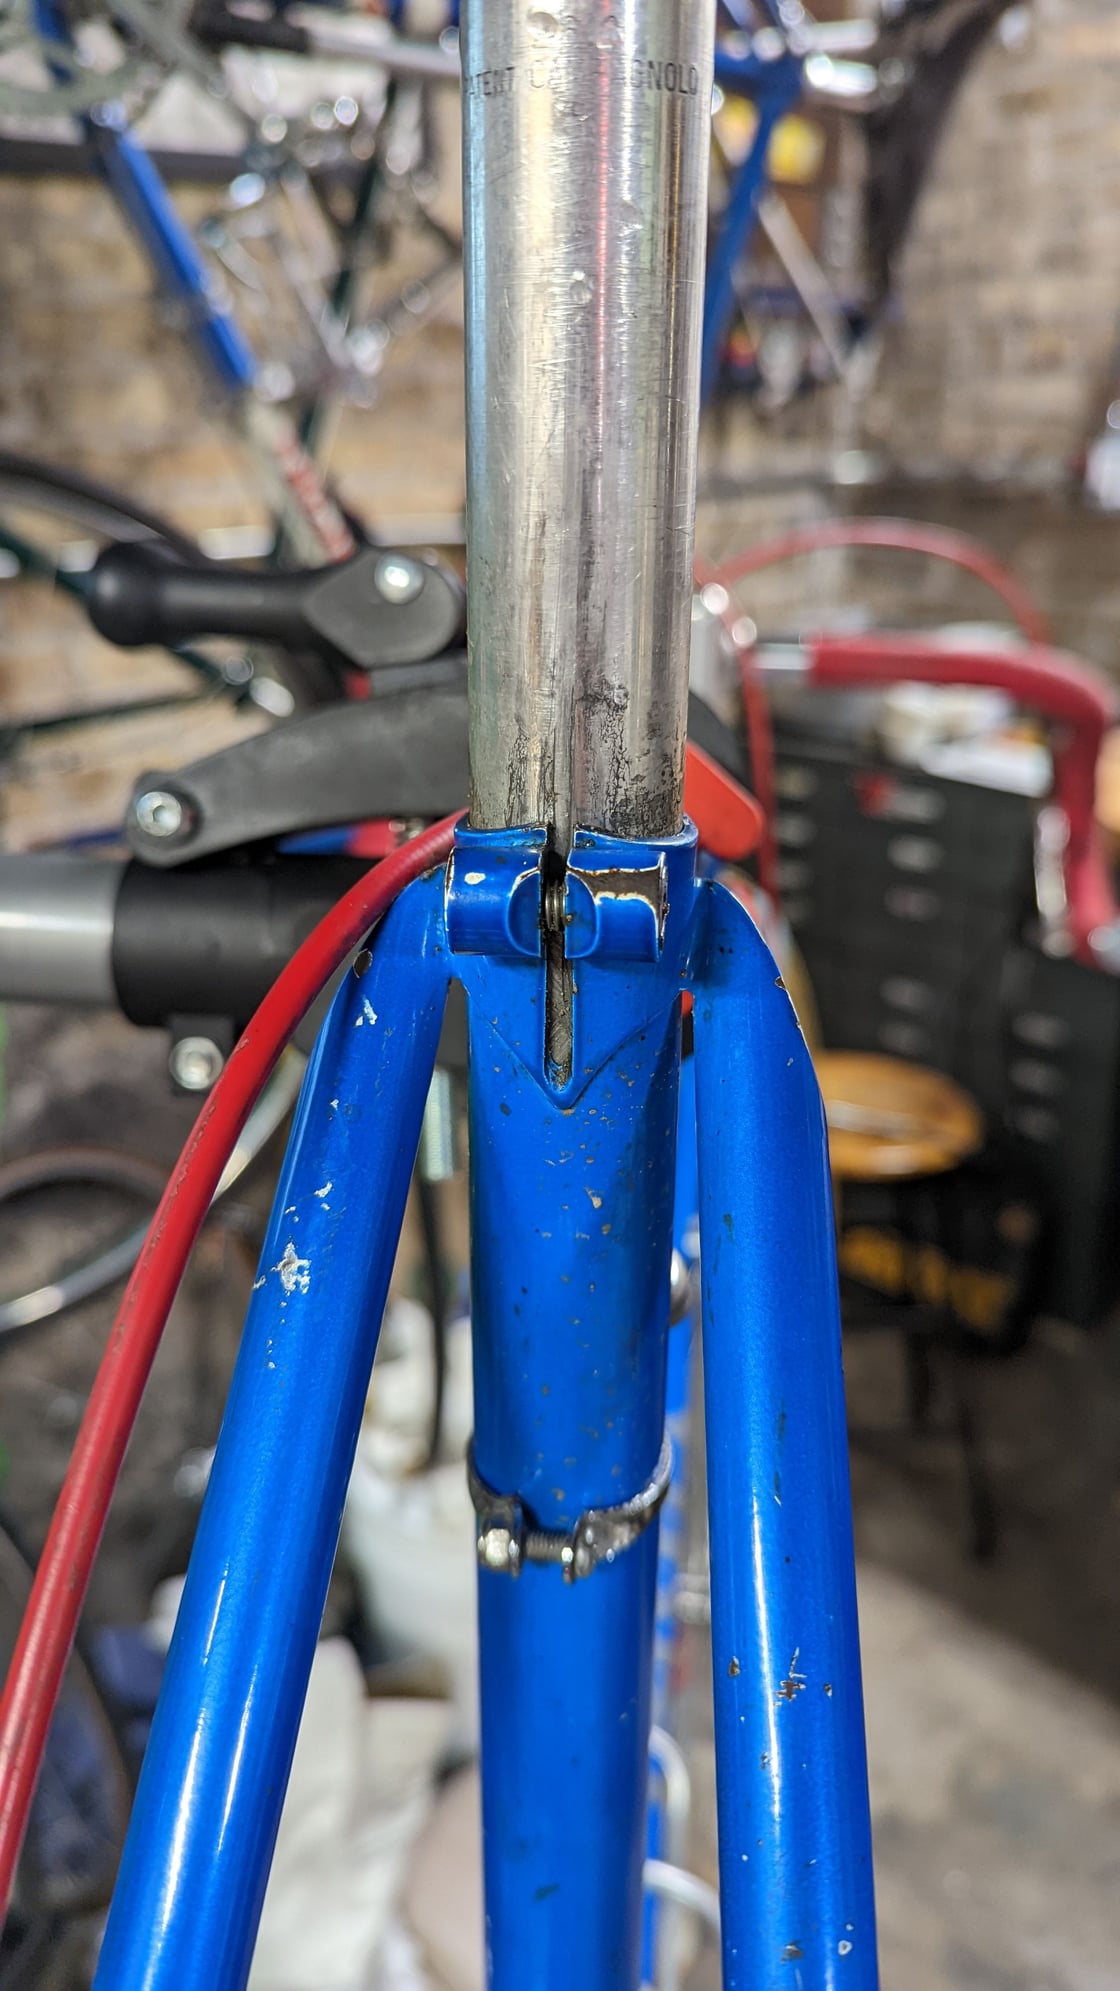
Seatpost slot detail
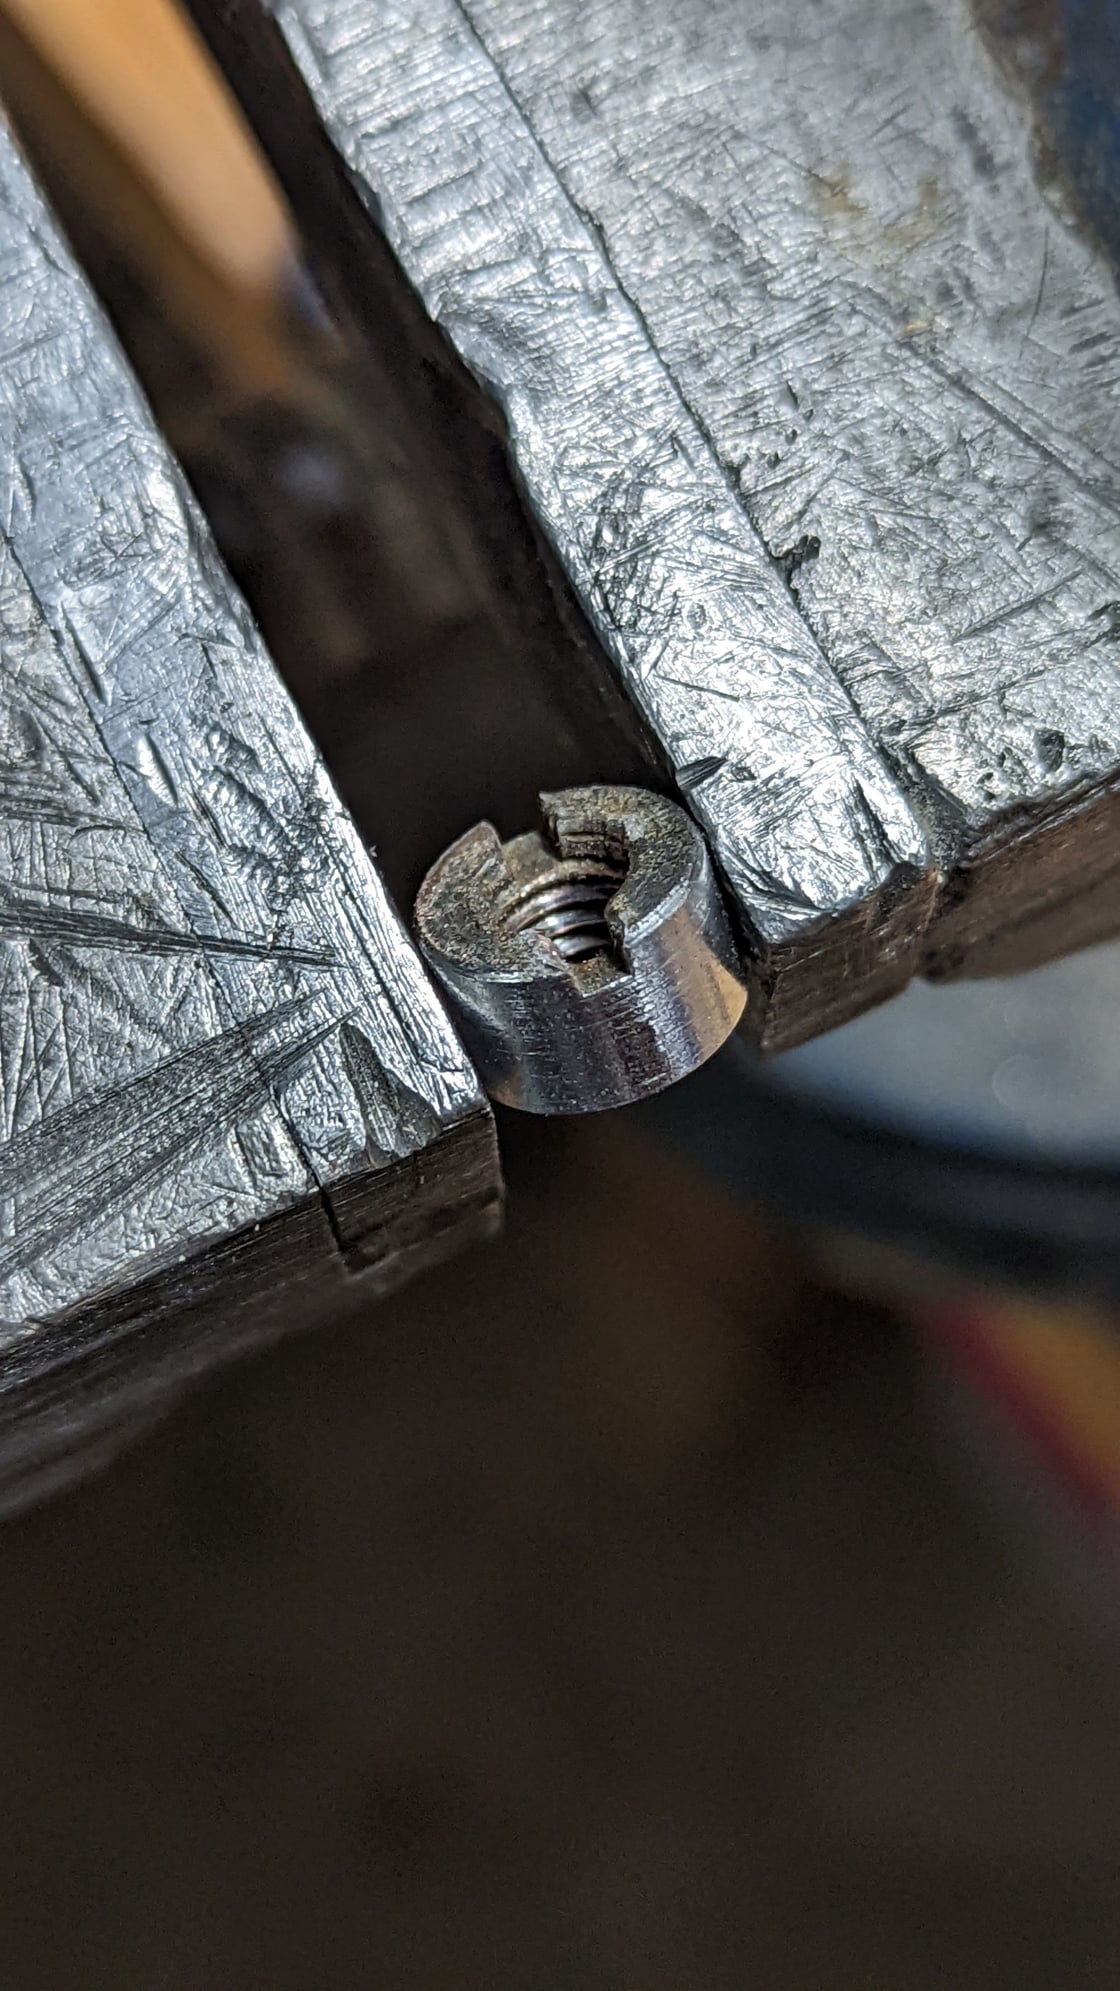
Nut detail
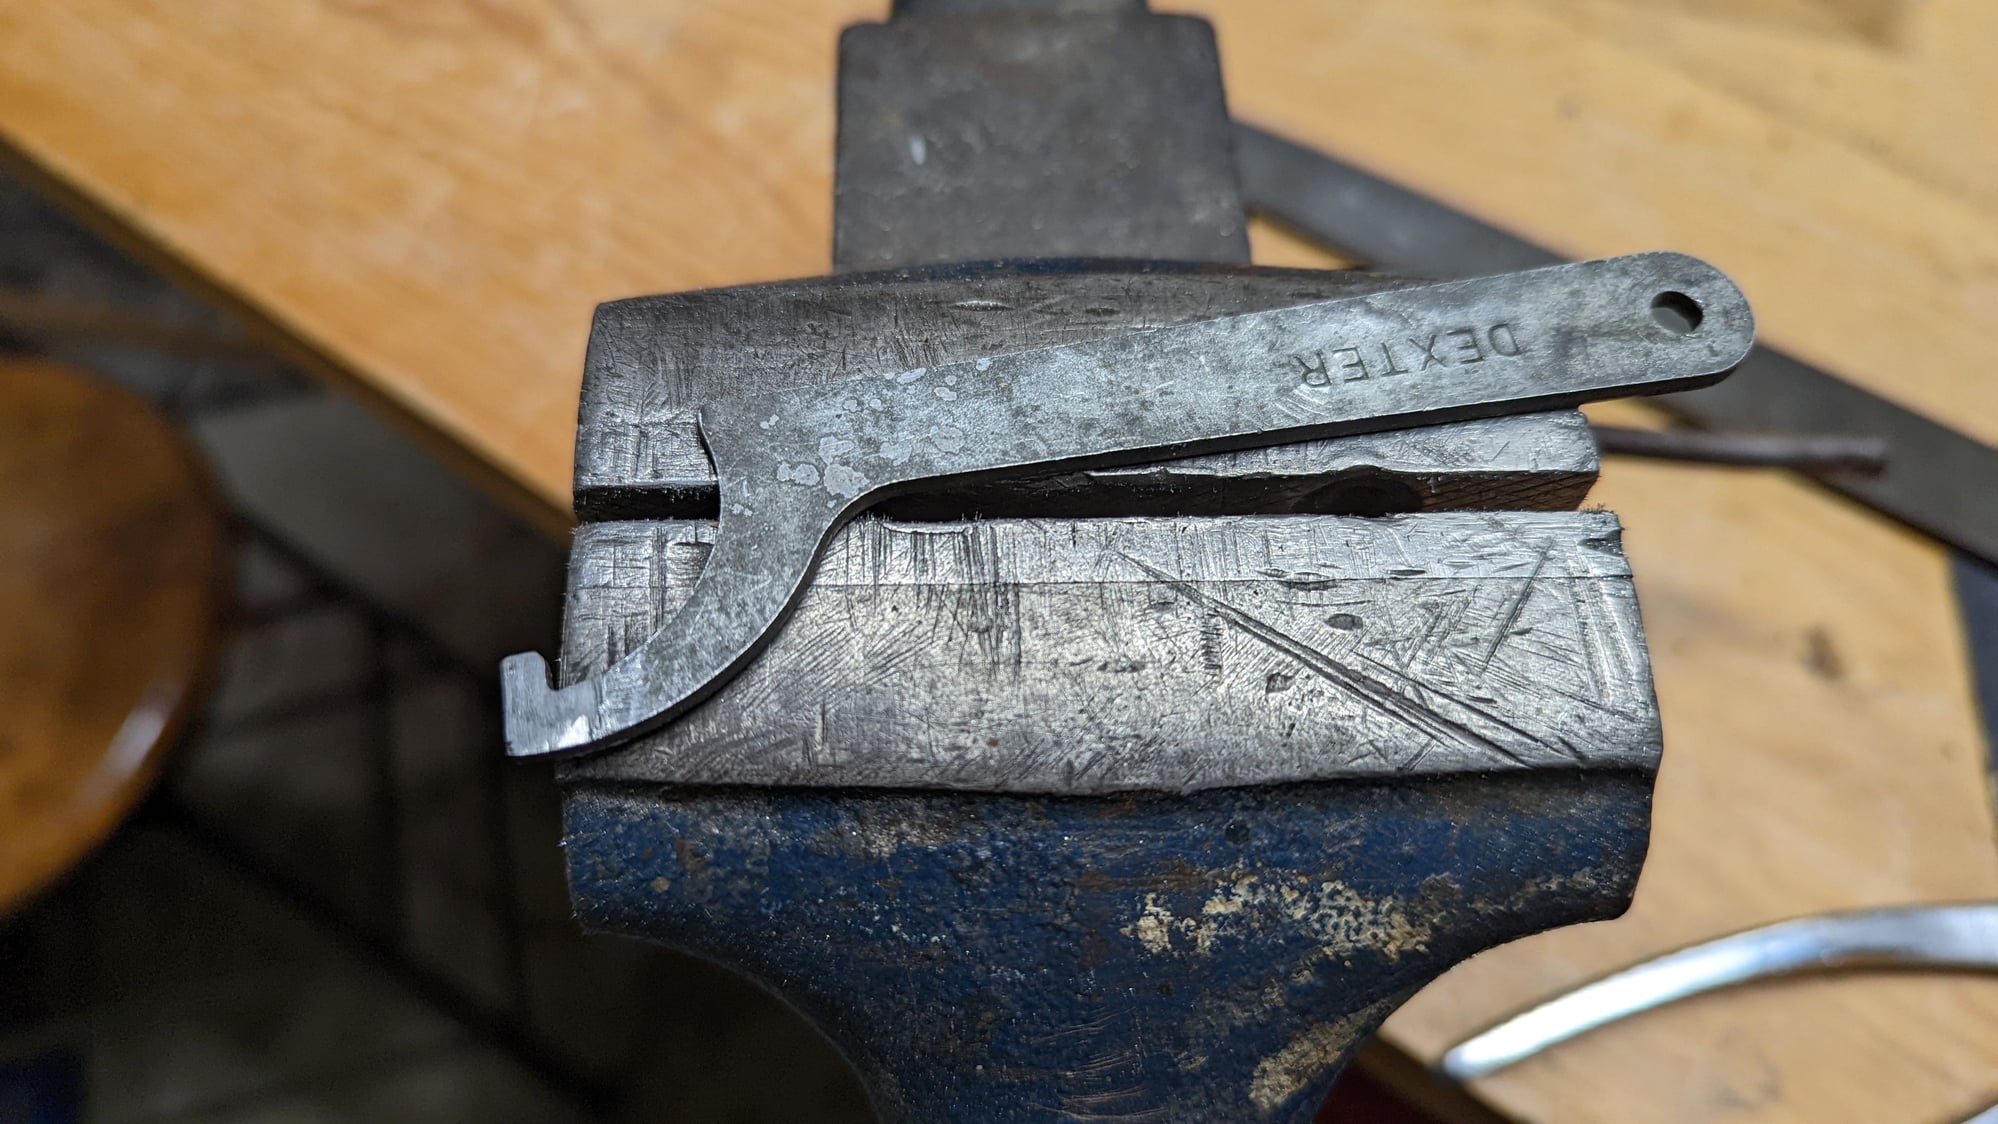
Modified "wrench"
Seatpost slot detail
Nut detail
Modified "wrench"
Likes For smontanaro:
07-31-22, 02:57 PM
#43
Partially Sane.
Join Date: Jan 2016
Location: Sunny Sacramento.
Posts: 3,559
Bikes: Soma Saga, pre-disc
Mentioned: 22 Post(s)
Tagged: 0 Thread(s)
Quoted: 972 Post(s)
Likes: 0
Liked 643 Times
in
468 Posts
You went all the ways to Michigan just for coffee, but refused to buy a new binder bolt? 🤔😁😉
07-31-22, 03:11 PM
#44
Junior Member
The same type of nut was used on handsaws in the 19th century and various other old machinery. Generally known as "Split nuts" Thinking about it, most binder bolts also resemble the type of saw nut that replaced split nuts starting around 1870ish. The usual answer for old tool retrogrouch equivlents is to get a wide blade screwdriver and fie or hack saw a slot for the bolt. Alternatively, spend years digging through old tool boxes at flea markers and tag sales until you find a century old one. I've done both, but the former is much quicker.
Split nut saw nuts: https://www.amazon.com/Taytools-1157.../dp/B07CJ8SGJV
saw nuts: https://www.amazon.com/Chicago-Screw...79480386&psc=1
Split nut saw nuts: https://www.amazon.com/Taytools-1157.../dp/B07CJ8SGJV
saw nuts: https://www.amazon.com/Chicago-Screw...79480386&psc=1
08-02-22, 12:47 PM
#45
Senior Member
Join Date: Mar 2013
Location: Maryland
Posts: 3,800
Bikes: Lots of English 3-speeds, a couple of old road bikes, 3 mountain bikes, 1 hybrid, and a couple of mash-ups
Mentioned: 53 Post(s)
Tagged: 0 Thread(s)
Quoted: 887 Post(s)
Liked 335 Times
in
225 Posts
I have a SR Maxima that has the same binder bolt, it can be tightened with using only a allen wrench. Mine was mounted with the slotted side of the nut facing inside the seat lug. The slotted side is slightly beveled on the edge, I'm thinking that's what holds it in place while it's being tightened. Try flipping the nut, maybe it'll tighten up.
08-02-22, 03:04 PM
#46
Senior Member
08-02-22, 08:55 PM
#47
Full Member
I've got one like that too. I don't have a tool for it, I hold a small screwdriver in one of the notches while I tighten the screw.
08-03-22, 09:37 AM
#48

Senior Member
Join Date: Jun 2006
Posts: 20,305
Mentioned: 130 Post(s)
Tagged: 0 Thread(s)
Quoted: 3464 Post(s)
Liked 2,829 Times
in
1,995 Posts
I would flip the bolt just for grins
originally the bolt faced the drive side
lube the bolt not the slotted nut.
with the bolt away from the bike thread the bolt and nut together and check for fair threading and bolt straightness.
I am not fond of this design.
I would consider a longer bolt, bushing and a nylock nut that you can get some purchase on.

 08-16-22, 06:07 AM
#50
Senior Member
Thread Starter
Join Date: Aug 2007
Location: Evanston, IL
Posts: 5,093
Bikes: many
Mentioned: 63 Post(s)
Tagged: 0 Thread(s)
Quoted: 1444 Post(s)
Liked 1,392 Times
in
760 Posts
Ah, we did not. Thanks for the reminder.
I don't have a decent picture of the setup. I meant to take one before we left the beach house, but forgot until we were home after dark. So, imagine the bike on the rack with a bungie cord through the wheels to keep the front end from flopping around. The two ends of the cord connect right over the front derailleur. My theory is the road vibration over the 2+ hour drive coupled with the slight pressure from the bungie cord served to push the not-quite-tightly-enough secured derailleur down just a skosh, enough that it scraped the large ring on each rotation (demonstrating that the Ofmega-manufactured crank or chainring wasn't perfectly round).
The fix was trivial. Push the shift lever to its limit to slacken the cables a bit, then raise the derailleur slightly, less than a millimeter.