


Super Course Saga
 12-23-21, 09:41 PM
#1
Junior Member
Thread Starter
Super Course Saga
This was to be a story of a thrifty triumph. Alas, not yet.
Having perused the ‘Show us your Super Course’ thread a bit, I was feeling quite pleased with myself (first mistake) for picking up a local ’73 Raleigh Super Course with Capella lugs for a mere $30. From the single photo in the ad, it was clear that there was quite a bit that wasn’t original, but it seemed like it could be a fun project and I have a few era appropriate missing bits lying around in a bin from my ’67 Carlton build, so I jumped. Drove over, and on my way to another appointment did a quick check to make sure the seatpost wasn’t seized and that the nut on the top of the stem turned (my second mistake) and handed over my $30.
This morning I headed out to the shed to start disassembly. Things started off less than smoothly when, removing the back wheel, I found the NDS dropout to be rather wonky, whether awkwardly pulled in to make up for a too narrow rear hub or something more dramatic was unclear. No worries I thought, as I can bend it back in the vise, and things picked up as I pulled the remaining components, separating out the odd side-pull in the rear (to be swapped for a matching Weinmann CP), the Shimano Tourney RD (to be swapped for a Suntour), the Shimano BL-7400 front brake lever (anyone have a single Weinmann with a white Carlton hood to match the rear?), and the mismatched wheelset (to be swapped for a set of wheels with Normandy high-flange hubs/Weinmann rims/Maillard skewers). Cotters popped out in the bench vise/socket with a bit of effort, bottom bracket slid out like a greased hog and I thought I was home free.
Things took a darker turn, however, when I noticed a small crack (see pics) at the top of the DS seat stay (lesson learned, don’t rush the inspection when you buy). A moment of despair and then a quick check of the forums led me to a discussion on cracked seat stay caps that seems to indicate (per gugie in 2018) this was not unknown on Raleighs and so long as the crack is between the cap and the stay and not between the stay and the seat lug, then it is essentially aesthetic. I’d welcome opinions on this, but am less concerned than I was initially. Perhaps some cleaning up and brazing will sort it.
Persevering, I then prepared to disassemble the front end and, having further loosened the expander bolt, freed the wedge with a quick tap with a rubber mallet. However, when I went to pull the stem, it was, shall we say, rock solid. Thus was lost the rest of my afternoon:
- Step 1, firm twisting and whacking with a mallet: failed.
- Step 2, penetrating oil, then more of the above: failed.
- Step 3, heat and cool, then more of the above: failed.
- Step 4, increase leverage with a bench vise and breaker bar: mega-fail (snapped the face right off that lovely little GB stem).
Severe despair.
- Step 5, hacksaw off above the headset, remove headset over quill stump and remove frame from the equation; then, use hacksaw blade to cut remaining quill stump into sections to remove: failed.
I’m currently on Step 6, make a drink, consult the internet, purchase lye and plan for melting the remaining stem out. My $30 triumph has turned into a $30 learning experience, which seems about right. I’m quite new to C&V, but it seems like modesty, a sense of humor and perseverance are at least as important as a cotter press, pin spanner or the dexterity to manage loose bearings.
Live and learn.

The beast as purchased.

Before it's untimely demise, with the odd BL-7400 in the background.
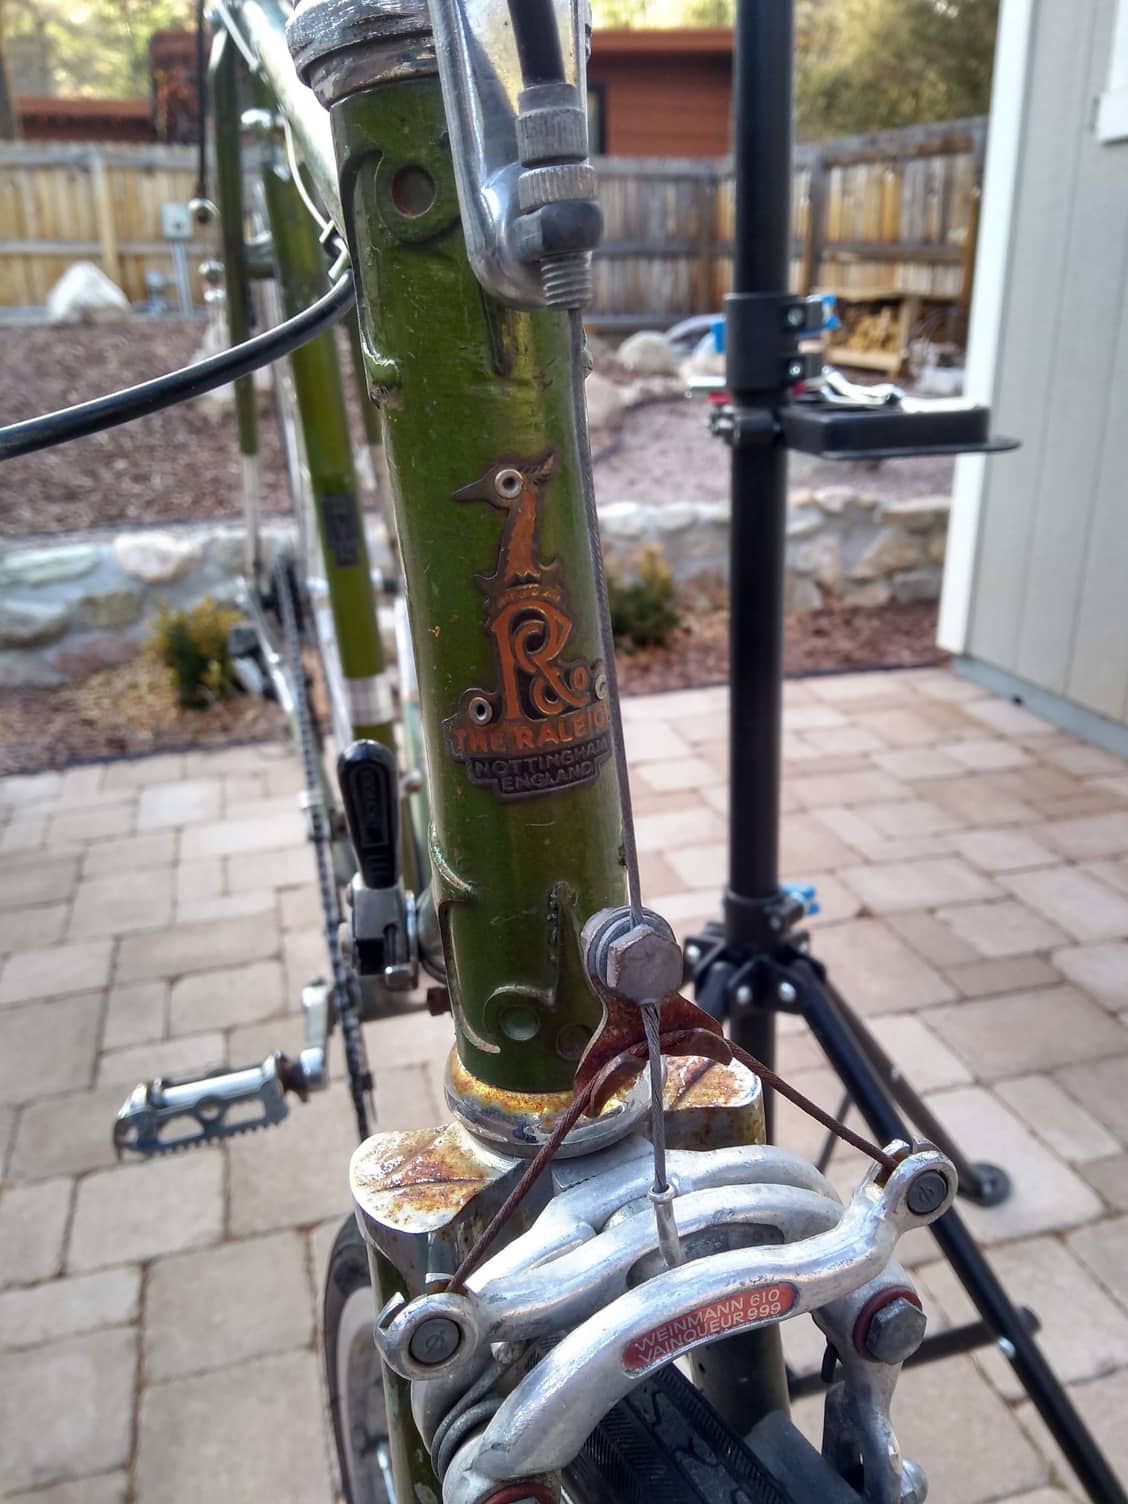
Lugs prompted the purchase.
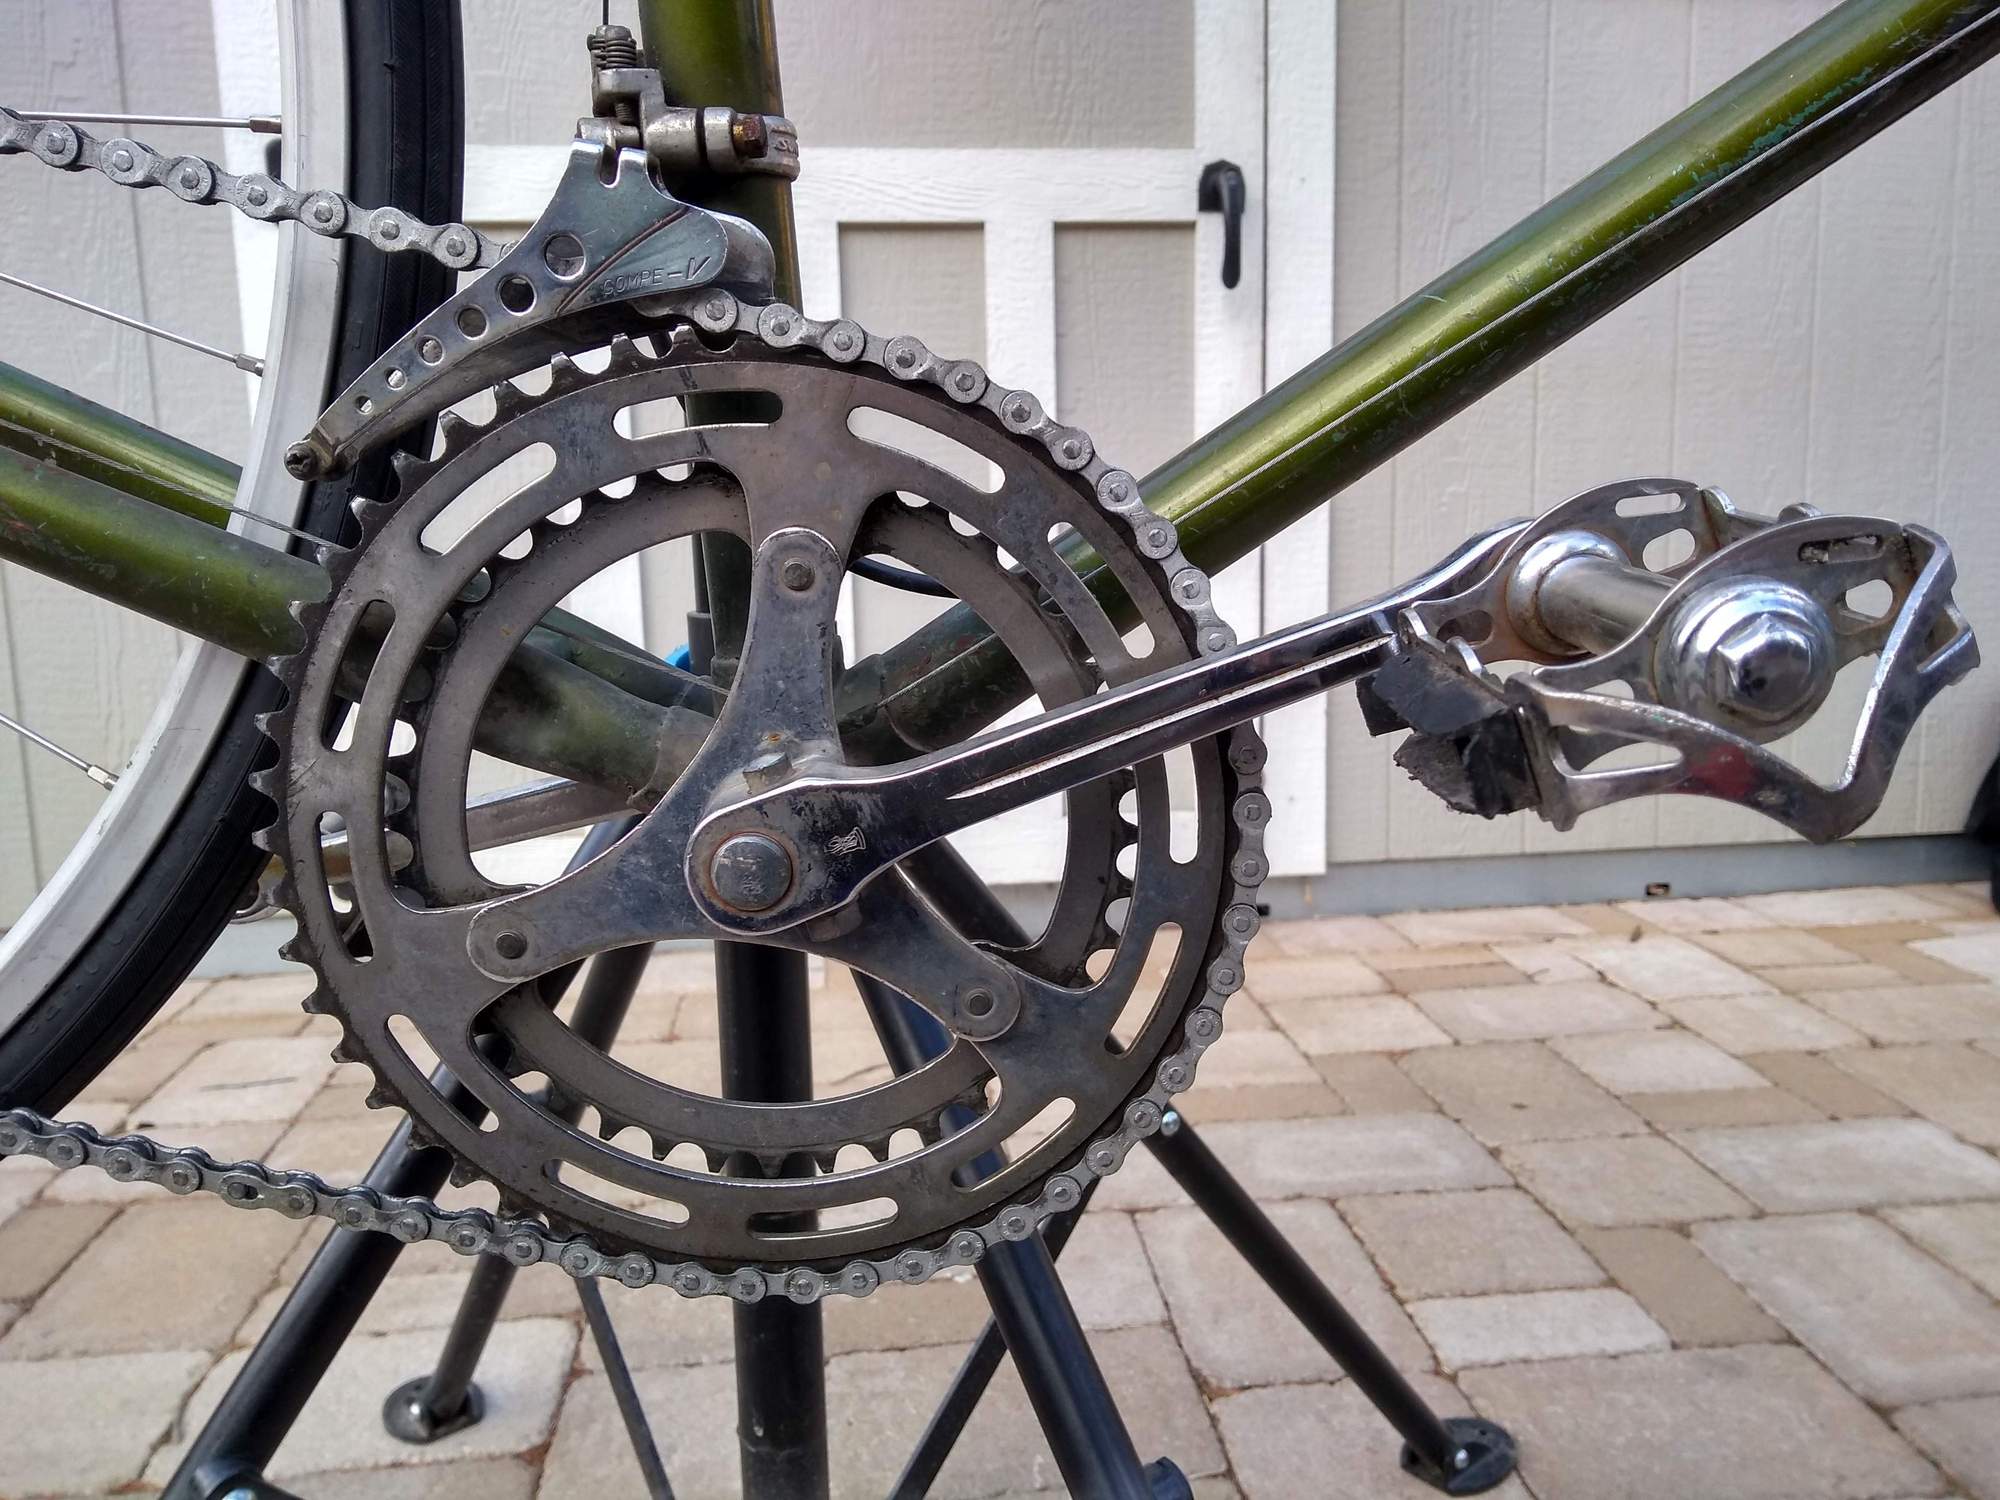
My first cottered experience.
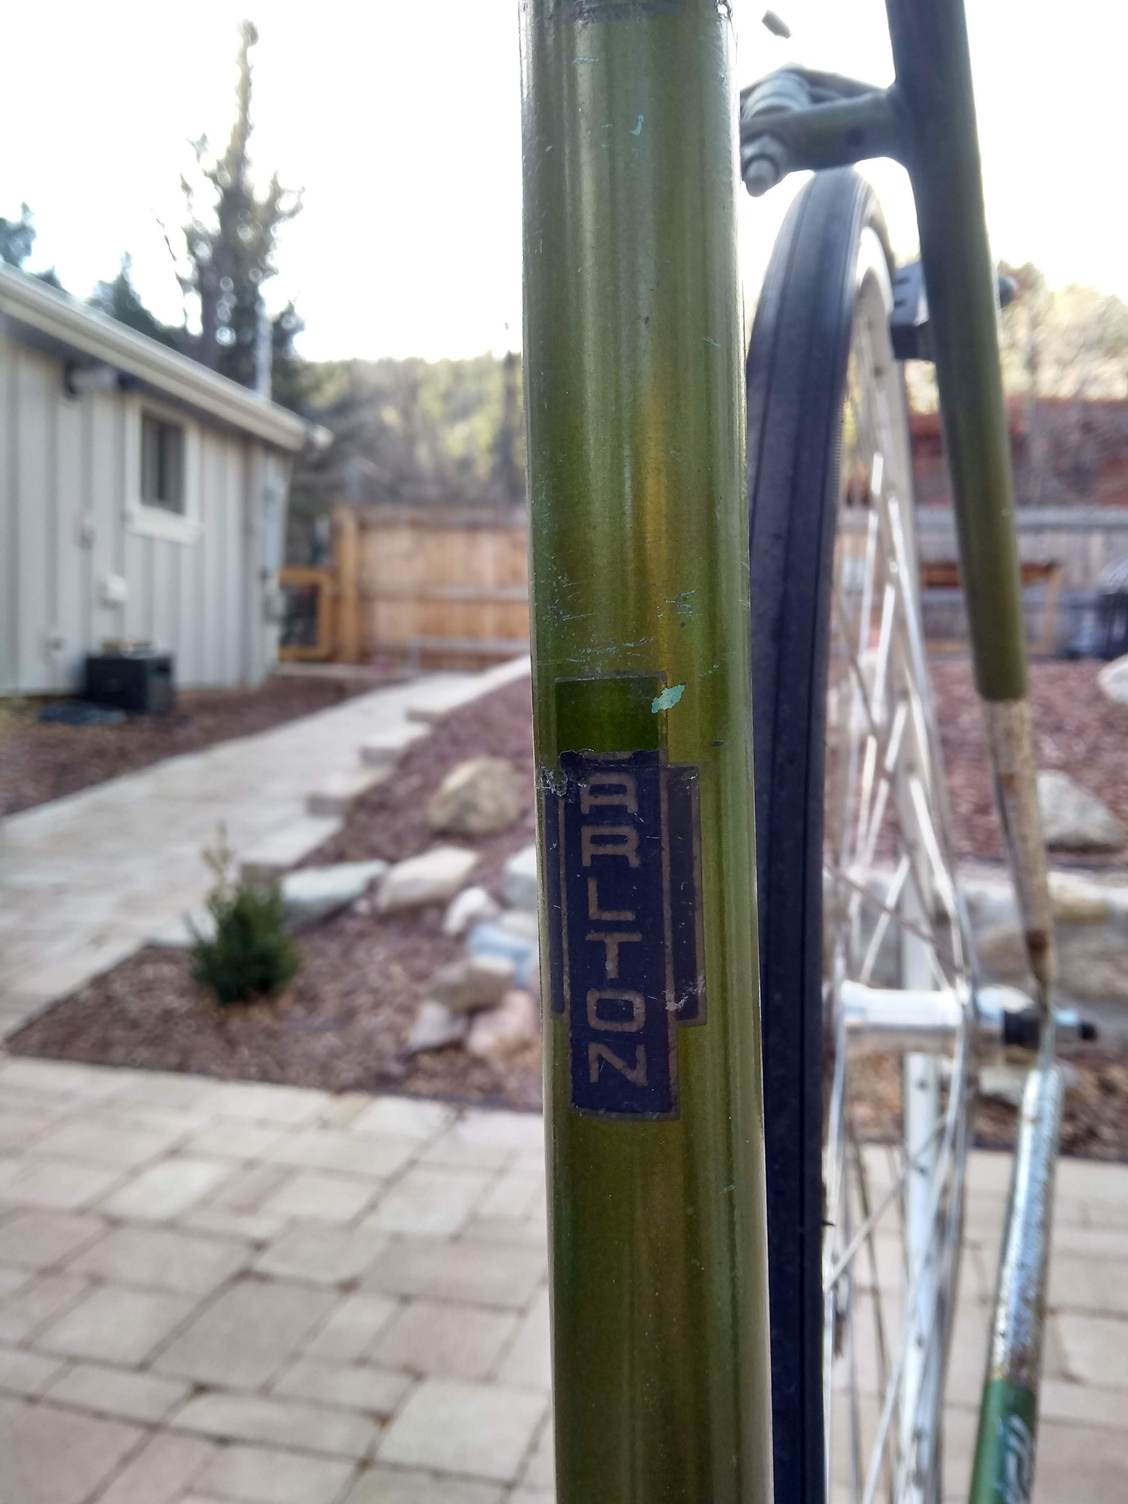
Cause for optimism regarding 24tpi, plus, I do love a Carlton.

"The Crack"
Having perused the ‘Show us your Super Course’ thread a bit, I was feeling quite pleased with myself (first mistake) for picking up a local ’73 Raleigh Super Course with Capella lugs for a mere $30. From the single photo in the ad, it was clear that there was quite a bit that wasn’t original, but it seemed like it could be a fun project and I have a few era appropriate missing bits lying around in a bin from my ’67 Carlton build, so I jumped. Drove over, and on my way to another appointment did a quick check to make sure the seatpost wasn’t seized and that the nut on the top of the stem turned (my second mistake) and handed over my $30.
This morning I headed out to the shed to start disassembly. Things started off less than smoothly when, removing the back wheel, I found the NDS dropout to be rather wonky, whether awkwardly pulled in to make up for a too narrow rear hub or something more dramatic was unclear. No worries I thought, as I can bend it back in the vise, and things picked up as I pulled the remaining components, separating out the odd side-pull in the rear (to be swapped for a matching Weinmann CP), the Shimano Tourney RD (to be swapped for a Suntour), the Shimano BL-7400 front brake lever (anyone have a single Weinmann with a white Carlton hood to match the rear?), and the mismatched wheelset (to be swapped for a set of wheels with Normandy high-flange hubs/Weinmann rims/Maillard skewers). Cotters popped out in the bench vise/socket with a bit of effort, bottom bracket slid out like a greased hog and I thought I was home free.
Things took a darker turn, however, when I noticed a small crack (see pics) at the top of the DS seat stay (lesson learned, don’t rush the inspection when you buy). A moment of despair and then a quick check of the forums led me to a discussion on cracked seat stay caps that seems to indicate (per gugie in 2018) this was not unknown on Raleighs and so long as the crack is between the cap and the stay and not between the stay and the seat lug, then it is essentially aesthetic. I’d welcome opinions on this, but am less concerned than I was initially. Perhaps some cleaning up and brazing will sort it.
Persevering, I then prepared to disassemble the front end and, having further loosened the expander bolt, freed the wedge with a quick tap with a rubber mallet. However, when I went to pull the stem, it was, shall we say, rock solid. Thus was lost the rest of my afternoon:
- Step 1, firm twisting and whacking with a mallet: failed.
- Step 2, penetrating oil, then more of the above: failed.
- Step 3, heat and cool, then more of the above: failed.
- Step 4, increase leverage with a bench vise and breaker bar: mega-fail (snapped the face right off that lovely little GB stem).
Severe despair.
- Step 5, hacksaw off above the headset, remove headset over quill stump and remove frame from the equation; then, use hacksaw blade to cut remaining quill stump into sections to remove: failed.
I’m currently on Step 6, make a drink, consult the internet, purchase lye and plan for melting the remaining stem out. My $30 triumph has turned into a $30 learning experience, which seems about right. I’m quite new to C&V, but it seems like modesty, a sense of humor and perseverance are at least as important as a cotter press, pin spanner or the dexterity to manage loose bearings.
Live and learn.
The beast as purchased.
Before it's untimely demise, with the odd BL-7400 in the background.
Lugs prompted the purchase.
My first cottered experience.
Cause for optimism regarding 24tpi, plus, I do love a Carlton.
"The Crack"
 12-23-21, 10:23 PM
#2


Senior Member
Join Date: Dec 2005
Posts: 17,156
Mentioned: 481 Post(s)
Tagged: 0 Thread(s)
Quoted: 3810 Post(s)
Liked 6,690 Times
in
2,610 Posts
Yeah, that seat stay cap is a common occurrence. Shouldn’t be a problem. On the stuck stem, I usually apply penetrant and wait 24 hours. If still stuck, apply more and wait another day. Sometimes another round after that. Then I’ll put the stem in my bench vise and try and turn the frame (but not with too much force so as to accidentally bending the frame). If you’ve already cut it short, you likely don’t have enough stump to squeeze in the vise, so lye might be your only recourse.
Likes For nlerner:
12-23-21, 11:33 PM
#3
Senior Member
Join Date: Dec 2015
Location: Menomonee Falls, WI
Posts: 1,833
Bikes: 1984 Schwinn Supersport, 1988 Trek 400T, 1977 Trek TX900, 1982 Bianchi Champione del Mondo, 1978 Raleigh Supercourse, 1986 Trek 400 Elance, 1991 Waterford PDG OS Paramount, 1971 Schwinn Sports Tourer, 1985 Trek 670
Mentioned: 7 Post(s)
Tagged: 0 Thread(s)
Quoted: 604 Post(s)
Liked 1,063 Times
in
535 Posts
You only payed 30 bucks, so what’s the problem? From the pics you easily got your money’s worth.
Tim
Tim
Likes For tkamd73:
12-24-21, 09:17 AM
#4
Junior Member
Thread Starter
Thanks! I appreciate the second opinion on the seat stay cap, and well taken on the stem. I should have added 'patience' to the list of required virtues for C&V, and I fear I have indeed cut it too short at this point. I'm optimistic lye will get me there in the end.
Yeah, that seat stay cap is a common occurrence. Shouldn’t be a problem. On the stuck stem, I usually apply penetrant and wait 24 hours. If still stuck, apply more and wait another day. Sometimes another round after that. Then I’ll put the stem in my bench vise and try and turn the frame (but not with too much force so as to accidentally bending the frame). If you’ve already cut it short, you likely don’t have enough stump to squeeze in the vise, so lye might be your only recourse.
12-24-21, 09:22 AM
#5
Junior Member
Thread Starter
No real problem at all in that sense. I certainly do feel like I got my money's worth and more. I was just sharing my experience with the bike so far; sharing a few lessons I've learned as a C&V newbie about the process, my mistakes and potential pitfalls along the way; and getting some input on the current challenges with seat stay cap. Apologies if it didn't come across this way.
12-24-21, 09:24 AM
#6
Senior Member
Join Date: Jan 2016
Posts: 3,448
Mentioned: 33 Post(s)
Tagged: 0 Thread(s)
Quoted: 874 Post(s)
Liked 2,287 Times
in
1,278 Posts
I paid $20 for a 1980 Motobecane Grand Sprint minus the wheels. It took three days to remove the seat post, about the same for the stem , both still intact. Multiple tap, tap , tap with a brass hammer and squirt, squirt , squirt with penetrating oil, then wait …..repeat. Then sanding and polishing badly oxidized alloy previously stuck hardware .Sent the frame to a powder coat place that matched the beautiful color ( sort of a fiery red-orange pearl). I have put the project aside due to work and other projects but I have all the components to put it together including the decals and a nice set of Rigida 27” wheels laced to Campy high flange Record hubs(going mostly Campy on this one).. By the time it hits the road I will have too many hours and a lot of $ but it will be fine. My humble advice is NEVER be in a hurry to remove stuck things or getting a bike on the road. I learned how to get stuck things loose from living on a sailboat for more than a dozen years and dealing with electrolysis and stuck hardware, it can be brutal. Your only friend is GOOD penetrating oil and vibratory taps with a bunch of time. Sometimes light tapping(picture Woody Woodpecker) and a good oil or hydraulic fluid like automatic trans oil which is very similar to Marvel Mystery Oil, good stuff. Good luck , it can test your patience .
12-24-21, 09:33 AM
#7
www.theheadbadge.com

Join Date: Sep 2005
Location: Southern Florida
Posts: 28,513
Bikes: https://www.theheadbadge.com
Mentioned: 124 Post(s)
Tagged: 0 Thread(s)
Quoted: 2422 Post(s)
Liked 4,393 Times
in
2,092 Posts
You did great. There are people out there asking $75 and $125 for Super Courses with the same exact flaws. What you describe are simply the normal things one has to deal with when tinkering with a garage-fresh find.
The Reynolds 531 fork blades on these are a bit fragile when a stuck stem is involved. If you can't support the fork crown itself while trying to twist it off, just go the easy route of cutting it on the neck, and inverting the fork in lye to eat the rest of the stem out. Least destructive procedure to the important bits.
-Kurt
__________________


12-24-21, 10:07 AM
#8
Senior Member
Join Date: Dec 2015
Location: Menomonee Falls, WI
Posts: 1,833
Bikes: 1984 Schwinn Supersport, 1988 Trek 400T, 1977 Trek TX900, 1982 Bianchi Champione del Mondo, 1978 Raleigh Supercourse, 1986 Trek 400 Elance, 1991 Waterford PDG OS Paramount, 1971 Schwinn Sports Tourer, 1985 Trek 670
Mentioned: 7 Post(s)
Tagged: 0 Thread(s)
Quoted: 604 Post(s)
Liked 1,063 Times
in
535 Posts
No real problem at all in that sense. I certainly do feel like I got my money's worth and more. I was just sharing my experience with the bike so far; sharing a few lessons I've learned as a C&V newbie about the process, my mistakes and potential pitfalls along the way; and getting some input on the current challenges with seat stay cap. Apologies if it didn't come across this way.
Happy Holidays, Tim
Likes For tkamd73:
12-24-21, 10:12 AM
#9
Senior Member
Join Date: Dec 2005
Posts: 17,156
Mentioned: 481 Post(s)
Tagged: 0 Thread(s)
Quoted: 3810 Post(s)
Liked 6,690 Times
in
2,610 Posts
Some years back, I won a SuperCourse fork on eBay and used it likely in a similar situation in which the original fork had a stuck stem. What was a bit of a surprise is that the fork came with this attached:

Likes For nlerner:
12-24-21, 06:47 PM
#10
Junior Member
Thread Starter
Sorry, re-reading my post, it does come off a bit snarky. What I should have posted was, awesome bike for 30 bucks, no insurmountable issues that I see, and that will be a great ride when your done going through it. Guess I was a bit jealous, most of my builds started with a lot less, that I paid a lot more for.
Happy Holidays, Tim
Happy Holidays, Tim
You did great. There are people out there asking $75 and $125 for Super Courses with the same exact flaws. What you describe are simply the normal things one has to deal with when tinkering with a garage-fresh find.
The Reynolds 531 fork blades on these are a bit fragile when a stuck stem is involved. If you can't support the fork crown itself while trying to twist it off, just go the easy route of cutting it on the neck, and inverting the fork in lye to eat the rest of the stem out. Least destructive procedure to the important bits.
-Kurt
The Reynolds 531 fork blades on these are a bit fragile when a stuck stem is involved. If you can't support the fork crown itself while trying to twist it off, just go the easy route of cutting it on the neck, and inverting the fork in lye to eat the rest of the stem out. Least destructive procedure to the important bits.
-Kurt
I paid $20 for a 1980 Motobecane Grand Sprint minus the wheels. It took three days to remove the seat post, about the same for the stem , both still intact. Multiple tap, tap , tap with a brass hammer and squirt, squirt , squirt with penetrating oil, then wait …..repeat. Then sanding and polishing badly oxidized alloy previously stuck hardware .Sent the frame to a powder coat place that matched the beautiful color ( sort of a fiery red-orange pearl). I have put the project aside due to work and other projects but I have all the components to put it together including the decals and a nice set of Rigida 27” wheels laced to Campy high flange Record hubs(going mostly Campy on this one).. By the time it hits the road I will have too many hours and a lot of $ but it will be fine. My humble advice is NEVER be in a hurry to remove stuck things or getting a bike on the road. I learned how to get stuck things loose from living on a sailboat for more than a dozen years and dealing with electrolysis and stuck hardware, it can be brutal. Your only friend is GOOD penetrating oil and vibratory taps with a bunch of time. Sometimes light tapping(picture Woody Woodpecker) and a good oil or hydraulic fluid like automatic trans oil which is very similar to Marvel Mystery Oil, good stuff. Good luck , it can test your patience .
Ha! At first glance I thought it was a lugged mug. It's beautiful though, but I can't believe they thought to cut the frame before the stem! I just love the lugs that English companies were doing in those days.
Last edited by 67Carlton; 12-24-21 at 06:48 PM. Reason: Mistakenly put my reply inside the quote
Likes For 67Carlton:
12-24-21, 07:43 PM
#11
www.theheadbadge.com
Join Date: Sep 2005
Location: Southern Florida
Posts: 28,513
Bikes: https://www.theheadbadge.com
Mentioned: 124 Post(s)
Tagged: 0 Thread(s)
Quoted: 2422 Post(s)
Liked 4,393 Times
in
2,092 Posts
Thanks, I did have it clamped on the crown, but fear I might have put a twist in it nevertheless. I feel pretty badly about messing this fork up and wish I would have just gone for the lye earlier, or certainly avoided using force. I my experience force is very, very rarely the answer. I forgot that here and might end up searching for a replacement as a result.
-Kurt
__________________
12-24-21, 08:15 PM
#12
Happy With My Bikes

Join Date: Sep 2020
Location: Oklahoma
Posts: 2,186
Bikes: Hi-Ten bike boomers, a Trek Domane and some projects
Mentioned: 2 Post(s)
Tagged: 0 Thread(s)
Quoted: 884 Post(s)
Liked 2,307 Times
in
1,117 Posts
The OP couldn't do wrong with $30.
__________________
"It is the unknown around the corner that turns my wheels." -- Heinz Stücke
"It is the unknown around the corner that turns my wheels." -- Heinz Stücke
12-25-21, 06:29 PM
#13

Senior Member
Join Date: Jun 2006
Posts: 20,305
Mentioned: 130 Post(s)
Tagged: 0 Thread(s)
Quoted: 3464 Post(s)
Liked 2,829 Times
in
1,995 Posts
I won an auction for a Gran Jubile frame and fork, cheap as the seller cut the stuck stem off to harvest the headset…
Drilled a cross through hole about 3/8” diameter and mounted the fork in a vise at the crown with wood blocks.
Kroil and overnight then “ freeze off “
sprayed into and on the stem, avoiding the steel steerer.
less than 5 minutes of twisting - out.
not all are the same.
with little to grab the options are reduced.
12-26-21, 03:16 PM
#14
Ride, Wrench, Swap, Race

Join Date: Jan 2010
Location: Northern California
Posts: 9,193
Bikes: Cheltenham-Pedersen racer, Boulder F/S Paris-Roubaix, Varsity racer, '52 Christophe, '62 Continental, '92 Merckx, '75 Limongi, '76 Presto, '72 Gitane SC, '71 Schwinn SS, etc.
Mentioned: 132 Post(s)
Tagged: 0 Thread(s)
Quoted: 1565 Post(s)
Liked 1,295 Times
in
865 Posts
With the stem now a write-off, removing the quill is as easy as heating up the steerer tyube to around 700F and waiting for it to cool.
Apply a good penetrant as the assembly cools below 140F and the quill should twist right out as it becomes fully cooled to outside winter temperature.
There should be a lot of smoke coming out as the thing heats above 350F, but the steel can take twice that without any loss of strength.
Note that quite a bit of heat can be applied to a stem, as installed, without damaging ANYTHING.
500F is going to seem very hot.
01-03-22, 03:27 PM
#15
Junior Member
Thread Starter
A quick update: After holidays, high winds, fires and snowstorms, I was finally able to get things set up outside and melt the remainder of the stem. Pleased to report that it appears to have gone well. I used a taller glass vase placed in a wider, shallow plastic tub to catch any overflow, and secured the fork upside down through a piece of plywood with a 1" hole before placing into the vase. Rubber gloves, safety goggles and a mask, 220g lye and 550ml of water to bring the waterline up to a level that would submerge the stem remnants. Bubbled away, including a bit more than expected up and out of the bottom of the inverted steerer and onto the plywood, but is now clean as a whistle. Thanks everyone for the suggestions and support along the way.
One issue sorted, and now onto the next puzzle. The fork has a flat filed off the threading to prevent the hanger rotating; however, the filing of the threaded on the steerer is a bit off center. Headset cup screws on without any problem and there does not appear to be significant bending of the steerer, but I can only assume I likely torqued it in my earlier missteps as the cable hanger would not be centered as it currently stands. I don't think the steerer twisted in the crown as there is still clear line of sight through the brake mount. Is it possible there is a twist in the tube itself? Could I just file a new aligned flat, or perhaps notch it with a dremel? Thanks in advance for any input.
Best wishes and happy new year!
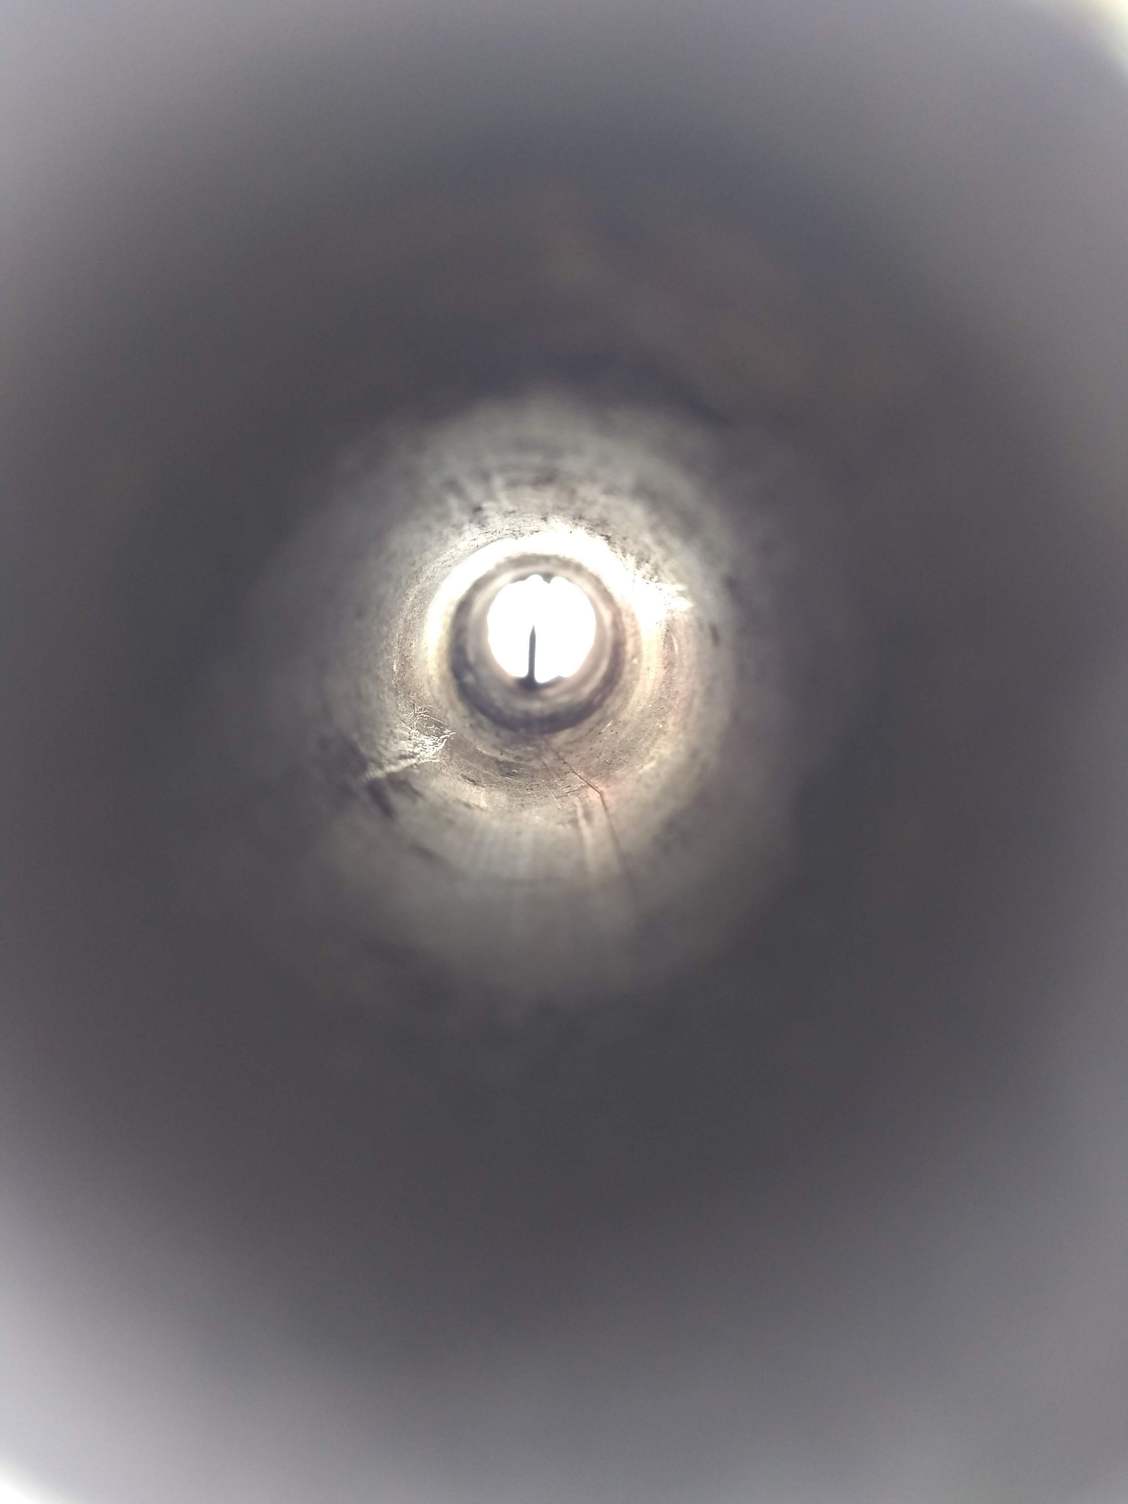
Clean and smooth steerer interior viewed from the top.
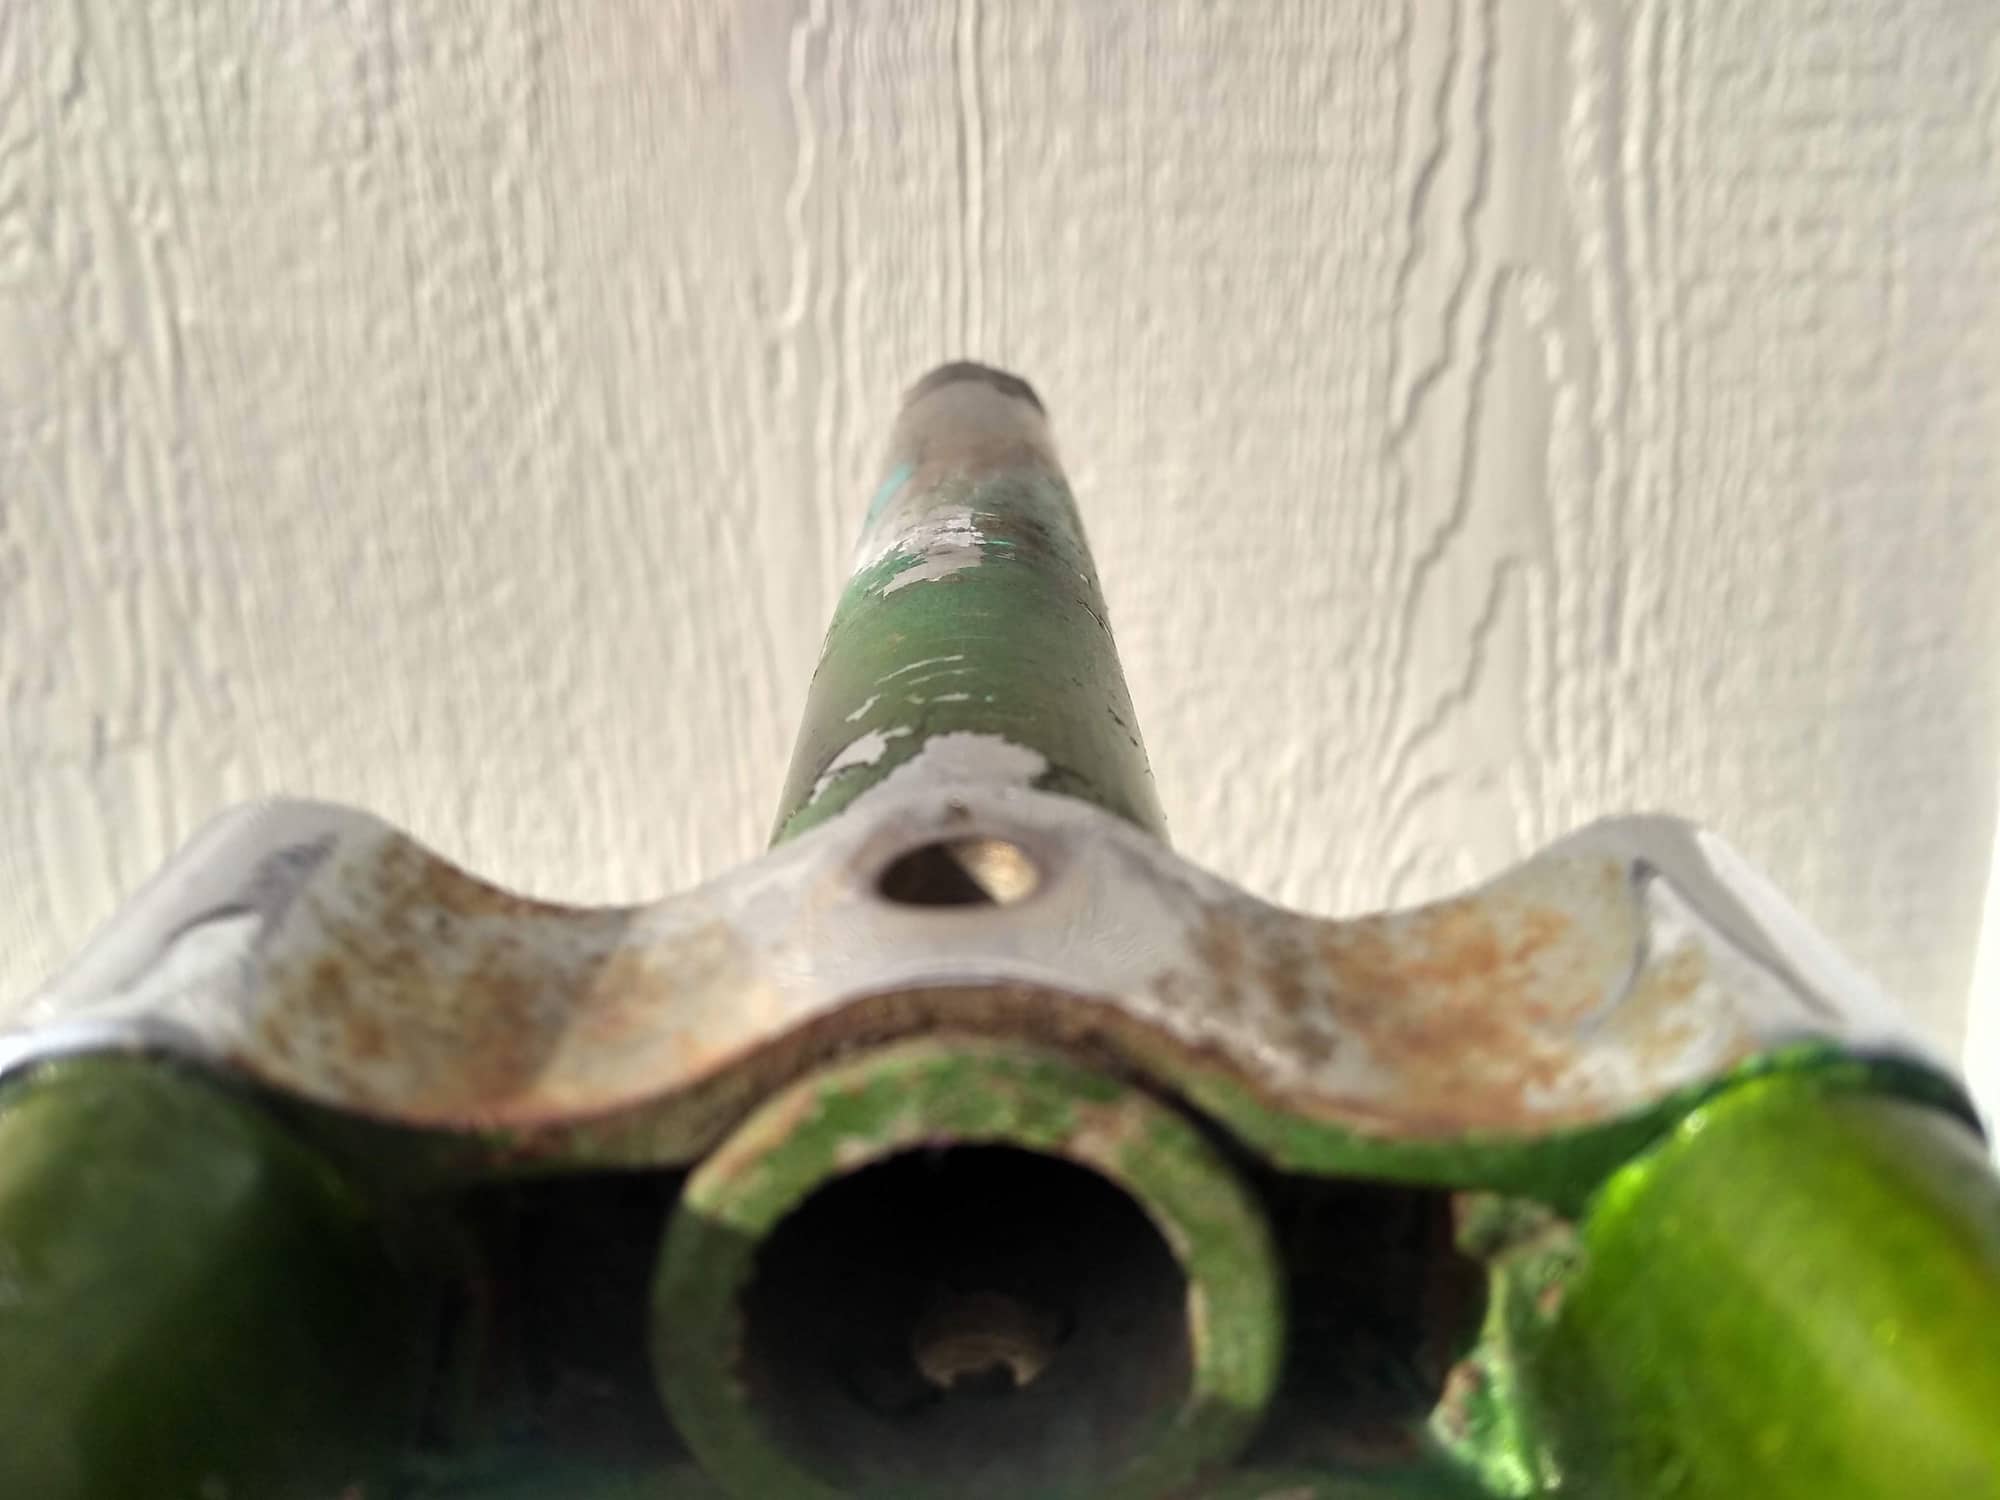
No significant alignment, but at the very end you may be able to see the filing off to the right of center.
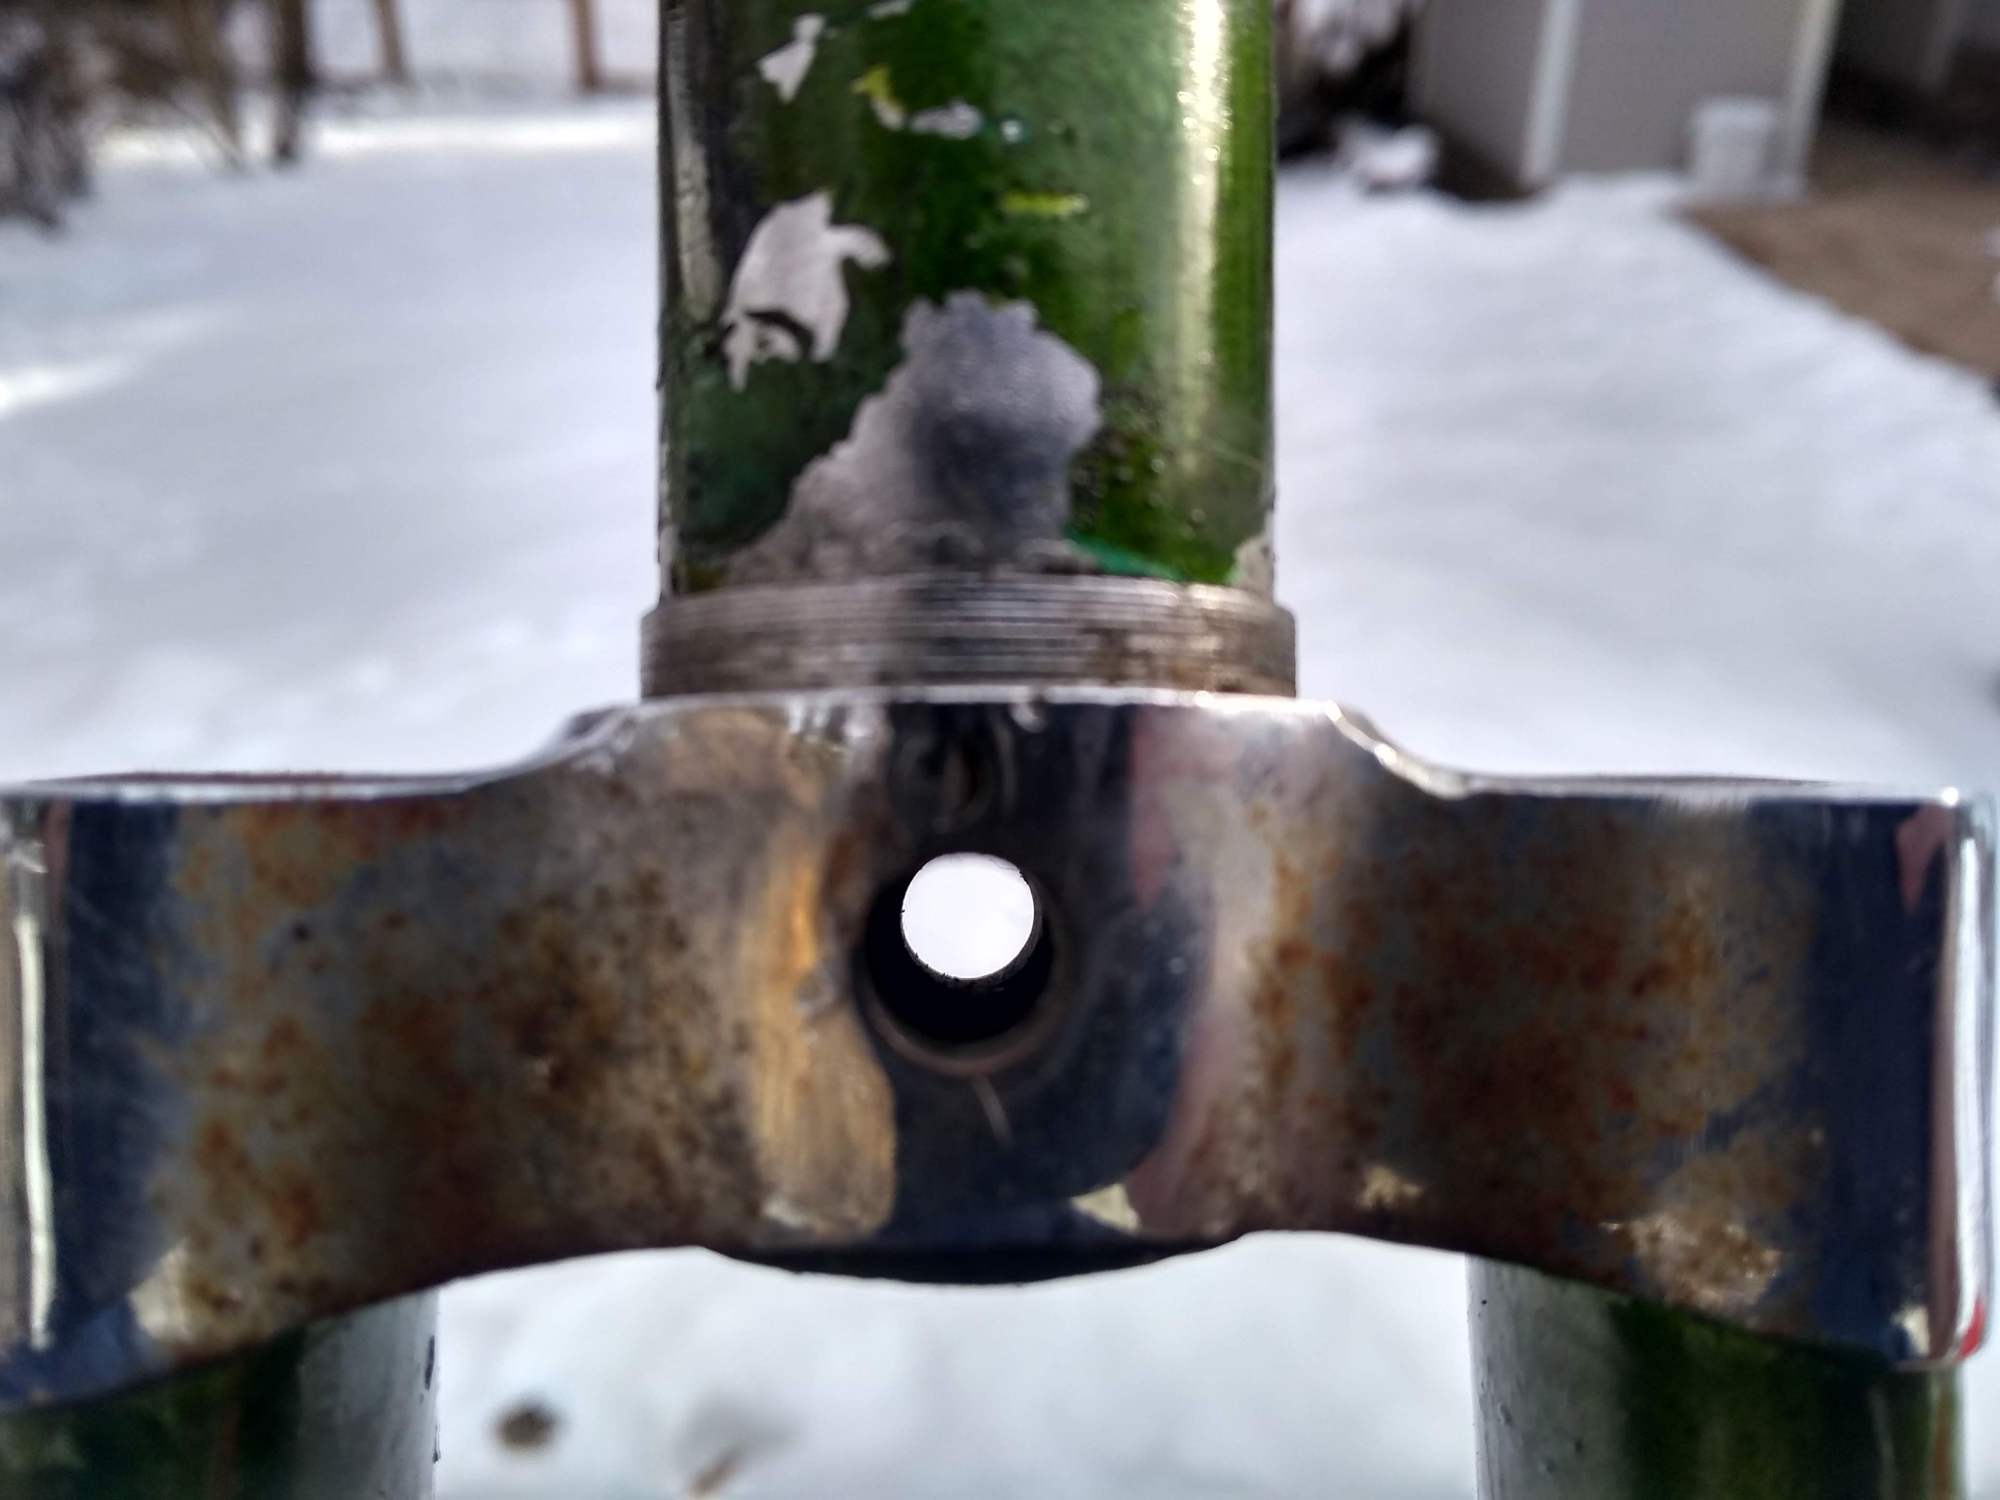
No apparent issues at the crown.
One issue sorted, and now onto the next puzzle. The fork has a flat filed off the threading to prevent the hanger rotating; however, the filing of the threaded on the steerer is a bit off center. Headset cup screws on without any problem and there does not appear to be significant bending of the steerer, but I can only assume I likely torqued it in my earlier missteps as the cable hanger would not be centered as it currently stands. I don't think the steerer twisted in the crown as there is still clear line of sight through the brake mount. Is it possible there is a twist in the tube itself? Could I just file a new aligned flat, or perhaps notch it with a dremel? Thanks in advance for any input.
Best wishes and happy new year!
Clean and smooth steerer interior viewed from the top.
No significant alignment, but at the very end you may be able to see the filing off to the right of center.
No apparent issues at the crown.
Likes For 67Carlton:
01-03-22, 04:53 PM
#16
Full Member

Join Date: Jul 2018
Location: WNY
Posts: 444
Mentioned: 12 Post(s)
Tagged: 0 Thread(s)
Quoted: 177 Post(s)
Liked 313 Times
in
162 Posts
If you’re staying with center pull brakes, grind the brake cable hanger, not the fork. Hold it centered while you tighten the headset locknut. Once that is tight, you’ll be good.
__________________
72+76 Super Course, 74 P-10+ 79 Tandem Paramounts, 84 Raleigh Alyeska, 84 Voyageur SP, 85 Miyata Sport 10 mixte and a queue
72+76 Super Course, 74 P-10+ 79 Tandem Paramounts, 84 Raleigh Alyeska, 84 Voyageur SP, 85 Miyata Sport 10 mixte and a queue
Likes For Schreck83:
01-03-22, 05:19 PM
#17
WGB
Join Date: Jul 2017
Location: Niagara Region
Posts: 2,917
Bikes: Panasonic PT-4500
Mentioned: 46 Post(s)
Tagged: 0 Thread(s)
Quoted: 1800 Post(s)
Liked 2,334 Times
in
1,378 Posts
For anyone else considering lye:
If you pour water onto the lye it can, and probably will, splatter. Lye splatter can blind you or burn your skin. It will also destroy paint on the fork.
Wear eye protection. Goggles best, glasses as a second choice. No exposed skin.
To prevent splatter either add lye to water first or fill container to desired level with cold water then add lye.
Have an extra pail of cold water ready.
Cold water is good as the reaction will rapidly heat up the water anyway.
Wrap a rag around fork to prevent any bubbling getting out and on the paint or you.
Insert wrapped fork into lye/water solution. Leave inserted until bubbling stops. I found it took at least 10 minutes time for each soak and that was in sub zero weather. I did about 4/5 soaks each fork I did.
Remove fork and rinse in the clean water bucket before inspection because you don't want to flick any solution around when you turn the fork for inspection.
Have a safe place to dump the used solution.
Repeat until sliver of stem either falls free/hammers free or it fully melts out. If hammering out, be careful of threads! Same when cutting stem before melting. I damaged threads on a Super GP and had to take fork to a frame builder who had to order a Raleigh threaded die to rethread.
Fyi the local frame builder simply cuts off the stem just above the threads on the fork and then he heats up the first few inches of the tube which is steel, using a welding torch. The aluminum stem begins to melt long before the fork is in any danger and out it twists with no strain on anything. Since the fork tube is often not painted (and even if it is painted it's concealed within the head tube) no scorching will be visible later.
Other advantage of heating versus melting is again no chance of destroyed skin or eyes. If you have a friend with a torch that will be safer.
Last edited by WGB; 01-03-22 at 05:33 PM.
01-03-22, 05:32 PM
#18
Junior Member
Thread Starter
For anyone else considering lye:
If you pour water onto the lye it can, and probably will, splatter. Lye splatter can blind you or burn your skin. It will also destroy paint on the fork.
Wear eye protection. Goggles best, glasses as a second choice. No exposed skin.
To prevent splatter either add lye to water first or fill container to desired level with cold water then add lye.
Have an extra pail of cold water ready.
Cold water is good as the reaction will rapidly heat up the water anyway.
Wrap a rag around fork to prevent any bubbling getting out and on the paint or you.
Insert wrapped fork into lye/water solution. Leave inserted until bubbling stops. I found it took at least 10 minutes time for each soak and that was in sub zero weather.
Remove fork and rinse in clean water before inspection because you don't want to flick any solution around when you turn the fork for inspection.
Have a safe place to dump the used solution.
Repeat until sliver of fork
01-03-22, 06:17 PM
#19
WGB
Join Date: Jul 2017
Location: Niagara Region
Posts: 2,917
Bikes: Panasonic PT-4500
Mentioned: 46 Post(s)
Tagged: 0 Thread(s)
Quoted: 1800 Post(s)
Liked 2,334 Times
in
1,378 Posts
67Carlton my apologies.
For anyone reading this thread there is no reason to suggest you had done this in an unsafe fashion. Was thinking some fool like me might read the thread and say "a ha! I know how I'll get my stuck stem out".
I should have said that the first time I melted a stem I added water to the lye and it splattered and I got some on a hand. Very sharp learning curve. Just offering my two cents worth to allow my pain as an example of how not to do it.
Last edited by WGB; 01-03-22 at 06:26 PM.
01-03-22, 06:38 PM
#20
Junior Member
Thread Starter
67Carlton my apologies.
For anyone reading this thread there is no reason to suggest you had done this in an unsafe fashion. Was thinking some fool like me might read the thread and say "a ha! I know how I'll get my stuck stem out".
I should have said that the first time I melted a stem I added water to the lye and it splattered and I got some on a hand. Very sharp learning curve. Just offering my two cents worth to allow my pain as an example of how not to do it.
For anyone reading this thread there is no reason to suggest you had done this in an unsafe fashion. Was thinking some fool like me might read the thread and say "a ha! I know how I'll get my stuck stem out".
I should have said that the first time I melted a stem I added water to the lye and it splattered and I got some on a hand. Very sharp learning curve. Just offering my two cents worth to allow my pain as an example of how not to do it.
01-04-22, 06:13 AM
#21
Senior Member
Join Date: Jan 2016
Posts: 3,448
Mentioned: 33 Post(s)
Tagged: 0 Thread(s)
Quoted: 874 Post(s)
Liked 2,287 Times
in
1,278 Posts
Well something shifted or worse , twisted, in the steerer tube and you want to make sure that it is still straight and in line. Also steel can be terminally affected by that much "twist". It could fail at a most undesirable time . I had a friend that had an accident on his Schwinn Circuit(Columbus tube and Tange fork) . It seemed the only damage was a bent front wheel. The fork and frame appeared unscathed. Almost exactly one year later he was riding and felt a wobble . Thinking he had a flat he pulled off the road and found that the head tube had a fracture all the way through the frame!
Likes For Kabuki12:
