


I Like That Dent
 05-24-21, 01:16 PM
#1
Full Member
Thread Starter
I Like That Dent
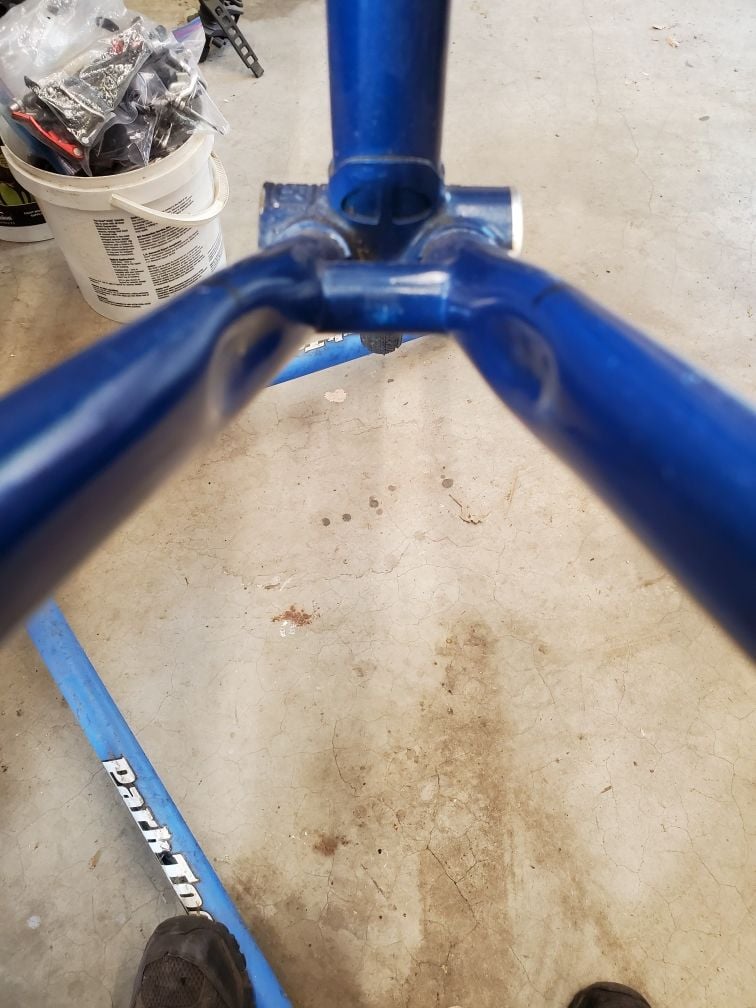
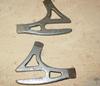
I used my forging skills to fabricate a chainstay dimpling die. Tried it out first on a scrapped frame and then dimpled the chainstays of my 700c conversion all-road bike build. The frame is a 1982 Trek 710 with clearance for a 40mm tire everywhere except at the chainstays. I fixed that.
If I were to use this die again I would convert it to a four post die instead of just two and probably lengthen the dimpling punch in stead of walking it along to elongate the dent. It got the job done though..
Thought this might entertain some bike wrenchers here.
Thanks.


If I were to use this die again I would convert it to a four post die instead of just two and probably lengthen the dimpling punch in stead of walking it along to elongate the dent. It got the job done though..
Thought this might entertain some bike wrenchers here.
Thanks.

Likes For Sjtaylor:
05-24-21, 02:26 PM
#2

Senior Member

Join Date: Jan 2005
Location: Baltimore, MD
Posts: 5,371
Mentioned: 15 Post(s)
Tagged: 0 Thread(s)
Quoted: 2482 Post(s)
Liked 2,952 Times
in
1,677 Posts
You might want to ask the moderators to move this thread to the Framebuilders section. There are people there with stories to tell about dimpling chainstays.
05-24-21, 05:07 PM
#4
Full Member
Thread Starter
Opening up for tire clearance is sure going to make this build a lot more fun.
05-24-21, 05:11 PM
#5
Full Member
Thread Starter
05-24-21, 05:39 PM
#6

Old fart
Join Date: Nov 2004
Location: Appleton WI
Posts: 24,784
Bikes: Several, mostly not name brands.
Mentioned: 153 Post(s)
Tagged: 0 Thread(s)
Quoted: 3587 Post(s)
Liked 3,400 Times
in
1,934 Posts
One of my first jobs at Trek involved indenting chainstays for tire and chainring clearance. This was done before the tubes were brazed, but after the dropout end was milled and slotted. There were Arbor presses with forms similar to those @Sjtaylor used. The dropout slot was used to index the indentation in the proper orientation. I'd crank through a box of chainstays, miter the bottom bracket end (again, a dedicated fixture); mill, slot, and trim a box of seat stays, braze TREK caps on the ends of the seat stays, finish the cap so it was flush with the tube, grab a box of dropouts and braze them all together in another dedicated fixture that set the proper seat stay/chainstay angle for each frame size, and hang them on a rack to have the flux removed before being attached to the main frame triangles.
Likes For JohnDThompson:
05-28-21, 04:23 PM
#7
Senior Member
Join Date: Jun 2002
Location: San Jose, CA
Posts: 3,691
Bikes: Too many bikes, too little time to ride
Mentioned: 2 Post(s)
Tagged: 0 Thread(s)
Quoted: 430 Post(s)
Liked 460 Times
in
318 Posts
I already know the answer to this but...
... can this be done to a 3/2.5 Ti chainstay?
05-29-21, 09:52 AM
#8
Sr Member on Sr bikes

Can it be used on the exterior of the chainstay? A couple of my bikes have dimples on the interior AND exterior of the drive side stay...to accommodate the inner chainring.
Also...it doesn�t appear that you blemished the paint finish (unless painted after you made the dimples). Good job.
Dan
Also...it doesn�t appear that you blemished the paint finish (unless painted after you made the dimples). Good job.
Dan
05-30-21, 09:05 PM
#9
Full Member
Thread Starter
Can it be used on the exterior of the chainstay? A couple of my bikes have dimples on the interior AND exterior of the drive side stay...to accommodate the inner chainring.
Also...it doesn�t appear that you blemished the paint finish (unless painted after you made the dimples). Good job.
Dan
Also...it doesn�t appear that you blemished the paint finish (unless painted after you made the dimples). Good job.
Dan
This was a fun experiment. I don't have enough parts in my stash to build this frame so I may look for a donor bike or take one from my fleet. I did 20 miles on an unpaved rail trail today on the bike in the photo. It got me thinking how I can perfect an all-road bike build.
 05-30-21, 09:53 PM
#10
Sr Member on Sr bikes
Well anyway...I love constructing of, and the uses of ones own tools. Well done.
Dan
Dan
