


Good Rack for Disc Brakes?
 03-06-13, 06:33 PM
#26
Bike ≠ Car ≠ Ped.

Okay, got my super-tourist rack and mounted it. What a PITA. The stupid mounting braces are a pain to get to match the holes on the seat stays and they hang under and look like a hazard. I bent them up a bit but will probably need to trim them. Not much clearance with the bigger 700c cross tires.
They have to be able to be used with many different bike frames, so every rack has to be adapted similarly.
 03-06-13, 06:49 PM
#27
Member

Join Date: Jul 2006
Location: Northern Colorado
Posts: 38
Bikes: Cannondale T2, Motobecane Century Comp Ti, Bike Friday Silk, Motobecane LeChampion Ti Heat
Mentioned: 0 Post(s)
Tagged: 0 Thread(s)
Quoted: 0 Post(s)
Likes: 0
Liked 0 Times
in
0 Posts
 03-06-13, 07:25 PM
#28
Member
Join Date: Jul 2006
Location: Northern Colorado
Posts: 38
Bikes: Cannondale T2, Motobecane Century Comp Ti, Bike Friday Silk, Motobecane LeChampion Ti Heat
Mentioned: 0 Post(s)
Tagged: 0 Thread(s)
Quoted: 0 Post(s)
Likes: 0
Liked 0 Times
in
0 Posts
After installing several of these, this is the method I eventually settled on:
1) Mount the rack to the bike, without the two bracket arms installed, using only the bolts down by the the droupouts. Use a level on the top of the rack to get it into a horizontal position, then tighten down the bolts to help keep it in place. (having someone else there to hold the rack in position really helps).
2) Measure from the center of your seat stay boss bolt hole to the bottom front edge of the rack deck. This will give you a good idea of where your downward bend on the bracket arm should be. Also, the angle of your ruler or tape measure with respect to the botom of the rack should give you a good idea of the angle for your bend.
3) On one of the bracket arms, measure the same distance (obtained from step two above) from the center of the forward mounting hole, and mark that spot with some tape. Now do a test bend at that spot, with the bracket arm in a vise.
4) Install that bracket arm for a test fit. You will probably have to bend and twist the front of the bracket arm a little so it rests flush on the seat stay boss of your frame. Tweak the bracket arm until the fit is good.
5) Finally, remove the fitted bracket arm and use it as a template to bend the remaining arm. Don't forget that the other arm needs to be a right-left reversed mirror image of the fitted arm.
03-06-13, 07:54 PM
#29

Senior Member

Join Date: Jan 2008
Location: Beaverton, OR
Posts: 14,744
Bikes: Yes
Mentioned: 525 Post(s)
Tagged: 0 Thread(s)
Quoted: 3230 Post(s)
Liked 3,868 Times
in
1,439 Posts
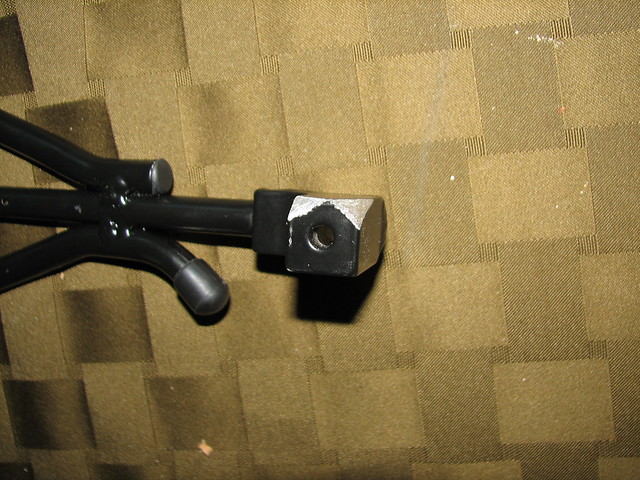
After taking the picture above, I colored the exposed aluminum on mine with a Sharpie marker. It worked surprisingly well.
__________________
My Bikes
My Bikes
03-06-13, 11:44 PM
#30
Beer >> Sanity
Thread Starter
Join Date: Oct 2010
Location: Colorado
Posts: 3,449
Bikes: 2014 Evo DA2, 2010 Caad9-4, 2011 Synapse-4, 2013 CaadX-disc
Mentioned: 0 Post(s)
Tagged: 0 Thread(s)
Quoted: 0 Post(s)
Likes: 0
Liked 0 Times
in
0 Posts
I know the racks are generic and you have to mess with most of them but seems some are a better match than others or use a better approach. The curved tubes that attach to the seat stays on my daughter's rack seem to work really well.
Anyway, not the best pic, but this is what I ended up with. Hard to see how I had to torque the braces outward and bend them to fit the fairly large frame.

Seems like the clearance to the bolt under the braces and the braces themselves (I bent them up to be more out of the way) is rather minimal but nothing is hitting.
Anyway, not the best pic, but this is what I ended up with. Hard to see how I had to torque the braces outward and bend them to fit the fairly large frame.
Seems like the clearance to the bolt under the braces and the braces themselves (I bent them up to be more out of the way) is rather minimal but nothing is hitting.
03-11-13, 09:19 PM
#31
Senior Member
Join Date: Mar 2012
Posts: 114
Bikes: Surly Ogre, Transit Rock Creek
Mentioned: 0 Post(s)
Tagged: 0 Thread(s)
Quoted: 0 Post(s)
Likes: 0
Liked 0 Times
in
0 Posts
I had the Topeak disc mount rack but was never happy with how far it stuck out from where it mounted near the dropouts. Changed it out for a Bontrager BackRack Deluxe L. Used a 1/4 inch spacer from ACE hardware on the left mount which gave me just enough clearance to get around my caliper.


03-12-13, 01:27 AM
#32
Banned
I know the racks are generic and you have to mess with most of them but seems some are a better match than others or use a better approach. The curved tubes that attach to the seat stays on my daughter's rack seem to work really well.
Anyway, not the best pic, but this is what I ended up with. Hard to see how I had to torque the braces outward and bend them to fit the fairly large frame.
Seems like the clearance to the bolt under the braces and the braces themselves (I bent them up to be more out of the way) is rather minimal but nothing is hitting.


