


why bottom bracket no go in?
 11-09-21, 01:04 PM
#26
Senior Member
Join Date: Jul 2013
Location: Nor-Cal
Posts: 3,767
Bikes: lots
Mentioned: 7 Post(s)
Tagged: 0 Thread(s)
Quoted: 1958 Post(s)
Liked 2,932 Times
in
1,489 Posts
36mm x 24tpi.
 11-09-21, 01:46 PM
#27

working on my sandal tan

Join Date: Aug 2011
Location: CID
Posts: 22,629
Bikes: 1991 Bianchi Eros, 1964 Armstrong, 1988 Diamondback Ascent, 1988 Bianchi Premio, 1987 Bianchi Sport SX, 1980s Raleigh mixte (hers), All-City Space Horse (hers)
Mentioned: 98 Post(s)
Tagged: 0 Thread(s)
Quoted: 3871 Post(s)
Liked 2,568 Times
in
1,579 Posts
It's just like car tires. People around the world get to experience the lovely mix of millimeters and inches when they need new tires. 
11-09-21, 01:48 PM
#28
Senior Member
Thread Starter
 11-09-21, 02:29 PM
#29
Really Old Senior Member
 11-09-21, 03:18 PM
#30
Senior Member
Join Date: Jun 2014
Location: Ontario, Canada
Posts: 4,624
Bikes: iele Latina, Miele Suprema, Miele Uno LS, Miele Miele Beta, MMTB, Bianchi Model Unknown, Fiori Venezia, Fiori Napoli, VeloSport Adamas AX
Mentioned: 16 Post(s)
Tagged: 0 Thread(s)
Quoted: 1324 Post(s)
Liked 927 Times
in
640 Posts
Here in Ontario Canada I see plywood advertised as 4 feet by 8 feet by whatever thickness in milimeters. We're supposedly on the metric system.
Two bad your cartridge unit isn't for a double in a steel frame as I'd be very interested in buying it if it was.
A nice thing about cartridge bottom brackets is how easy they are to install compared to cup and cone units.
Cheers
Two bad your cartridge unit isn't for a double in a steel frame as I'd be very interested in buying it if it was.
A nice thing about cartridge bottom brackets is how easy they are to install compared to cup and cone units.
Cheers
11-09-21, 04:30 PM
#31
Senior Member
Thread Starter
Thank goodness you found the Italian marking first!
When you do get the right unit, 3alarmer 's observation about the BB shell threading may still apply. When installing a Velo-Orange cartridge unit in my '87 Bianchi, I had to file down some of the leading threads on the drive-side cup before it would go in all the way!
I don't think it's worth pulling the cranks and the bottom bracket to find out what kind it is or see if it has a washer or if that's just the way the drive side of the bottom bracket looks, but I figured it didn't hurt to ask anyway.
 11-09-21, 06:10 PM
#32
Senior Member
Join Date: Jul 2013
Location: Nor-Cal
Posts: 3,767
Bikes: lots
Mentioned: 7 Post(s)
Tagged: 0 Thread(s)
Quoted: 1958 Post(s)
Liked 2,932 Times
in
1,489 Posts
I've never heard of anyone grinding off any threads. I'm sure that spacer is an attempt to make chainline better.
11-09-21, 11:31 PM
#33
Senior Member
Thread Starter
11-10-21, 12:09 AM
#34
Really Old Senior Member
https://www.sheldonbrown.com/bbsize.html
Scroll down just a bit to the spindles.
Note the Italian (5N) center spacing is 3mm more than British.
IF one had an Italian spindle and wanted to use it in a British BB shell, you wouldn't have enough purchase on the adjustable cup. This would gain the thickness of the spacer.
I have no clue if that's even close, but it's an answer.
11-10-21, 06:48 AM
#35
Old fart

Join Date: Nov 2004
Location: Appleton WI
Posts: 24,784
Bikes: Several, mostly not name brands.
Mentioned: 153 Post(s)
Tagged: 0 Thread(s)
Quoted: 3587 Post(s)
Liked 3,400 Times
in
1,934 Posts
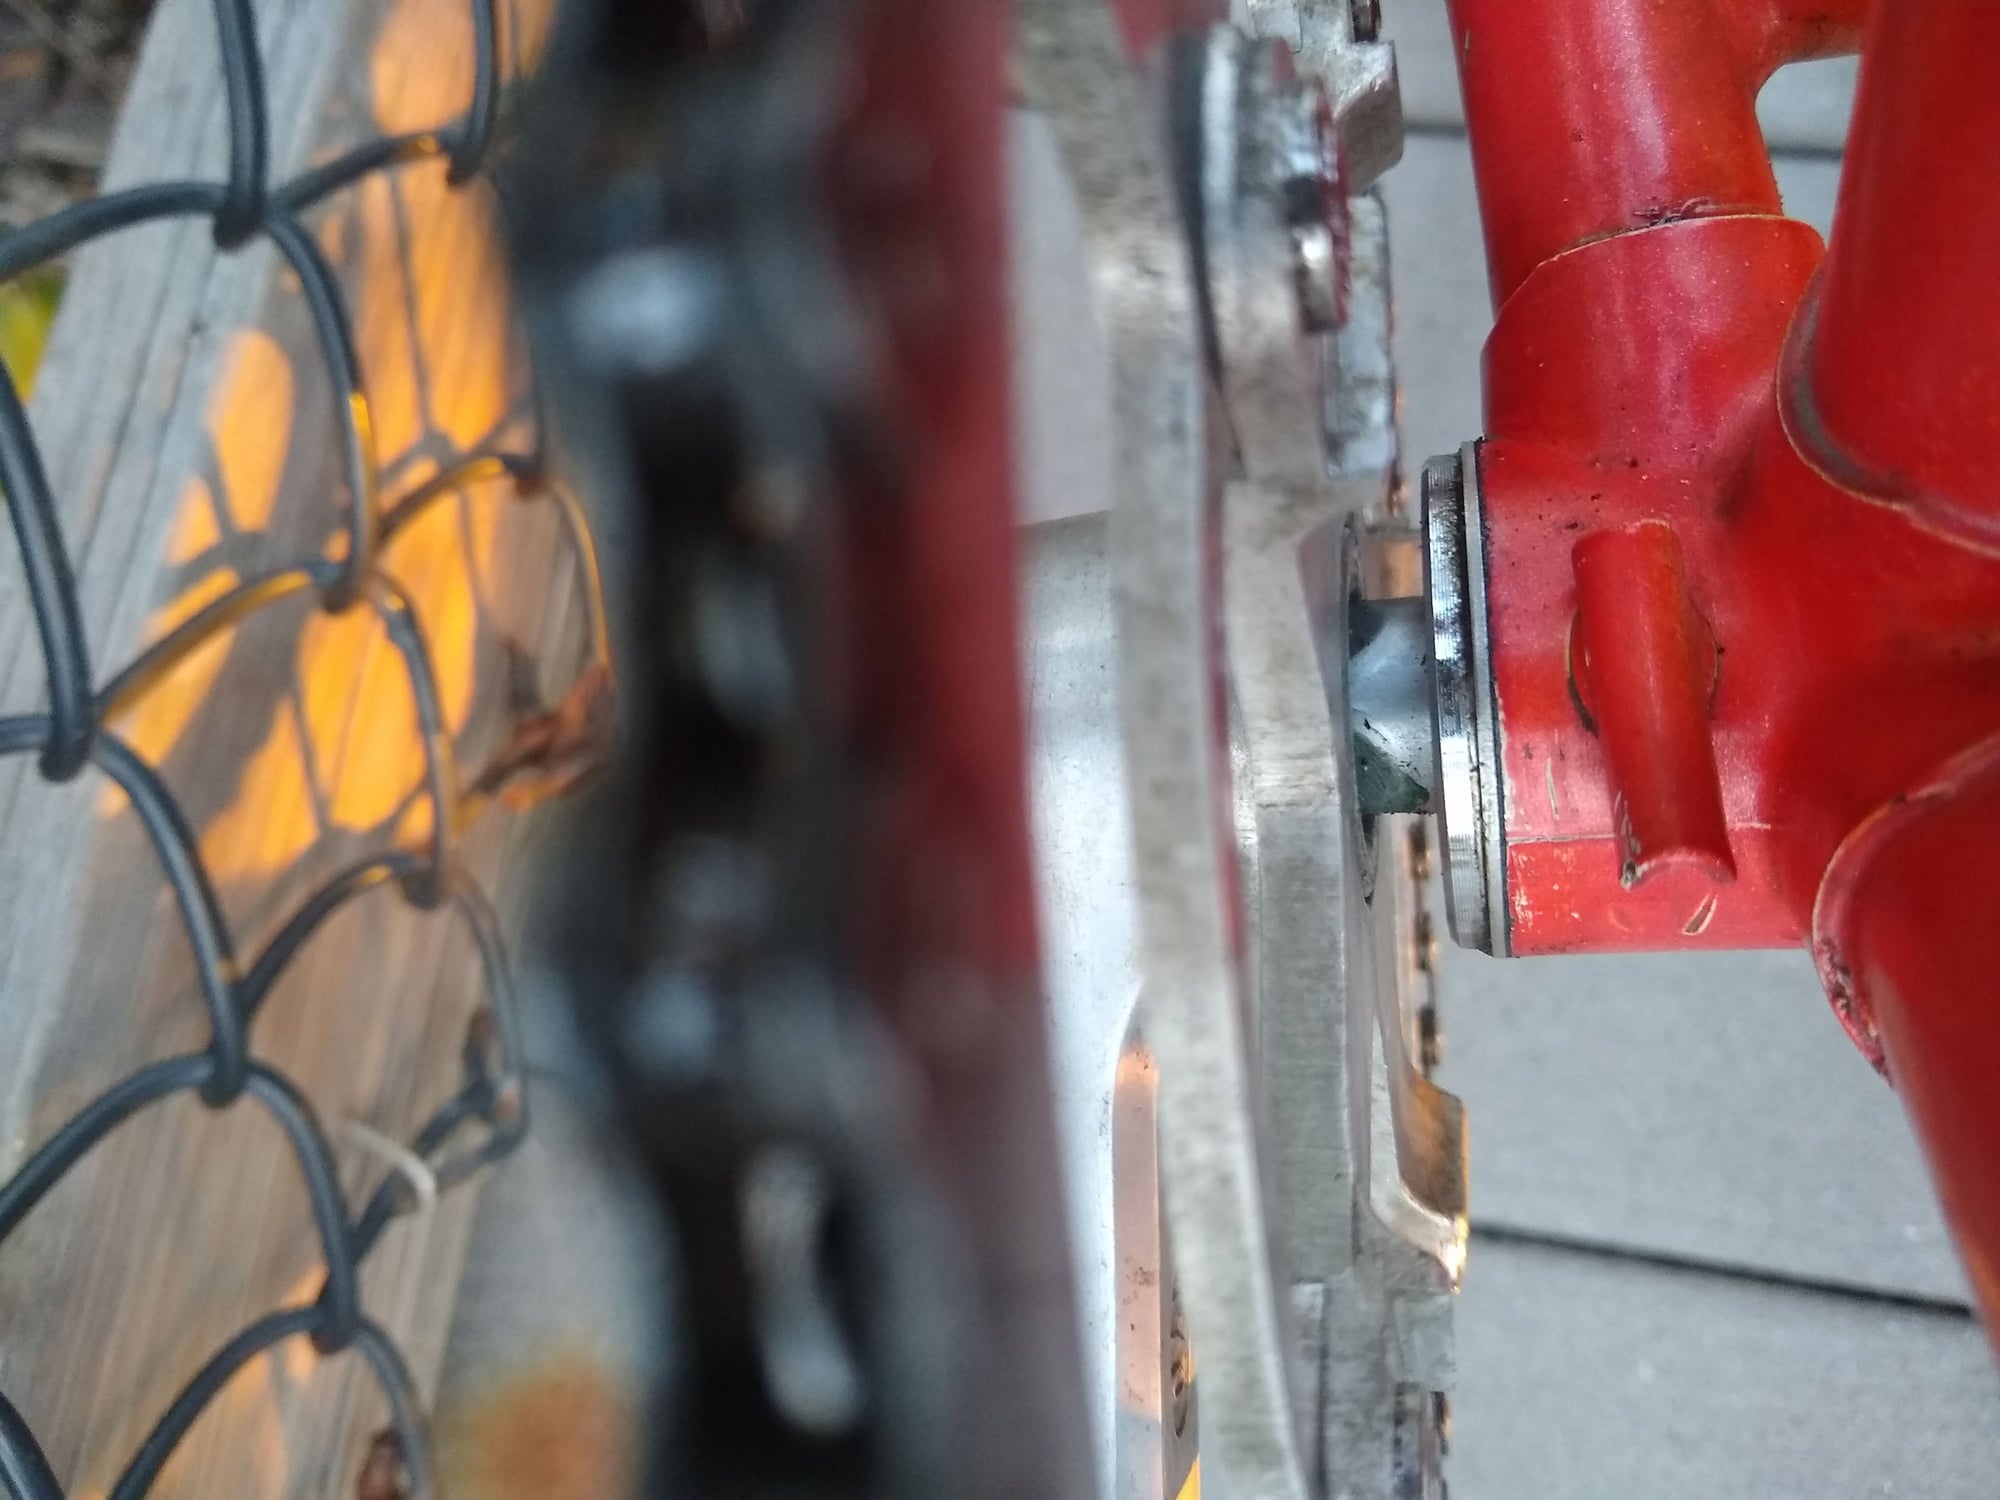
This is a photo of the drive side of my bike. I had this bottom bracket installed several years ago before I knew how to do anything so I have no idea what kind it is or if this is what happened, but it looks like there might be a washer spacer between the bottom bracket and the bottom bracket shell.
I wonder if this would be an option rather than grinding off more threads? It seems like you're going to engage the same amount of threads either way. Whether you don't get it all the way in and miss some of the inner threads or grind off the first few outer threads so that it can go all the way in I can't imagine there would be much of a difference (unless it's not getting far enough in for the other side to tighten). Just a thought.
I don't think it's worth pulling the cranks and the bottom bracket to find out what kind it is or see if it has a washer or if that's just the way the drive side of the bottom bracket looks, but I figured it didn't hurt to ask anyway.
11-10-21, 09:29 AM
#36
working on my sandal tan
Join Date: Aug 2011
Location: CID
Posts: 22,629
Bikes: 1991 Bianchi Eros, 1964 Armstrong, 1988 Diamondback Ascent, 1988 Bianchi Premio, 1987 Bianchi Sport SX, 1980s Raleigh mixte (hers), All-City Space Horse (hers)
Mentioned: 98 Post(s)
Tagged: 0 Thread(s)
Quoted: 3871 Post(s)
Liked 2,568 Times
in
1,579 Posts
I wonder if that's what happened here. This is a photo of the drive side of my bike. I had this bottom bracket installed several years ago before I knew how to do anything so I have no idea what kind it is or if this is what happened, but it looks like there might be a washer spacer between the bottom bracket and the bottom bracket shell. I wonder if this would be an option rather than grinding off more threads? It seems like you're going to engage the same amount of threads either way. Whether you don't get it all the way in and miss some of the inner threads or grind off the first few outer threads so that it can go all the way in I can't imagine there would be much of a difference (unless it's not getting far enough in for the other side to tighten). Just a thought. Wondering if anybody might weigh in on it.
11-10-21, 09:30 AM
#37
Senior Member
Thread Starter
11-10-21, 11:08 AM
#38
working on my sandal tan
Join Date: Aug 2011
Location: CID
Posts: 22,629
Bikes: 1991 Bianchi Eros, 1964 Armstrong, 1988 Diamondback Ascent, 1988 Bianchi Premio, 1987 Bianchi Sport SX, 1980s Raleigh mixte (hers), All-City Space Horse (hers)
Mentioned: 98 Post(s)
Tagged: 0 Thread(s)
Quoted: 3871 Post(s)
Liked 2,568 Times
in
1,579 Posts
Here we go. Steel loose-ball fixed up on the left, Shimano UN-55 on the right, my Velo-Orange BB in the middle. You can see that the VO's cup is a few millimeters longer than the other ones. Even though the threading is tapered to aid in getting it started, it still met obstacles before it could go in all the way.
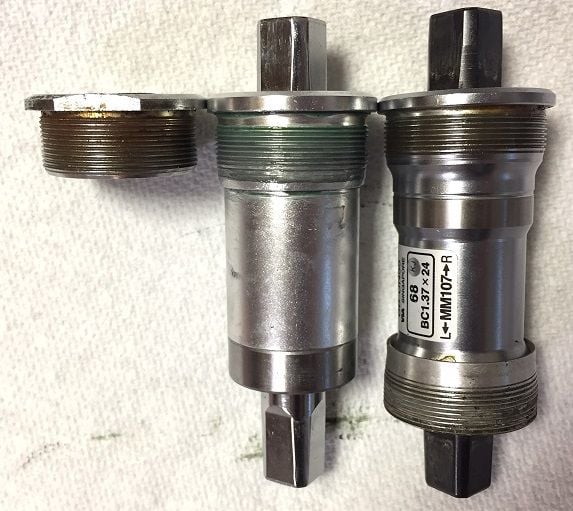
I wish I had taken this picture at the beginning of the process, that would have shown the difference more clearly. I had already started to file down the threads on the leading end by this point.
I wish I had taken this picture at the beginning of the process, that would have shown the difference more clearly. I had already started to file down the threads on the leading end by this point.
11-10-21, 06:42 PM
#39
Senior Member
Thread Starter
Here we go. Steel loose-ball fixed up on the left, Shimano UN-55 on the right, my Velo-Orange BB in the middle. You can see that the VO's cup is a few millimeters longer than the other ones. Even though the threading is tapered to aid in getting it started, it still met obstacles before it could go in all the way.
I wish I had taken this picture at the beginning of the process, that would have shown the difference more clearly. I had already started to file down the threads on the leading end by this point.
I wish I had taken this picture at the beginning of the process, that would have shown the difference more clearly. I had already started to file down the threads on the leading end by this point.
11-10-21, 08:56 PM
#40
Old fart
Join Date: Nov 2004
Location: Appleton WI
Posts: 24,784
Bikes: Several, mostly not name brands.
Mentioned: 153 Post(s)
Tagged: 0 Thread(s)
Quoted: 3587 Post(s)
Liked 3,400 Times
in
1,934 Posts
Here we go. Steel loose-ball fixed up on the left, Shimano UN-55 on the right, my Velo-Orange BB in the middle. You can see that the VO's cup is a few millimeters longer than the other ones. Even though the threading is tapered to aid in getting it started, it still met obstacles before it could go in all the way.
Still, the real fix for this is to have the threads in the shell chased with a set of piloted taps. These are expensive, so like a bike shop job if this is to be a "one-off" task.
