


Does this Woodrup look bent?


")


Likes For Chombi1:
 12-16-22, 09:28 AM
#77

Senior Member

Join Date: Jan 2005
Location: Baltimore, MD
Posts: 5,373
Mentioned: 15 Post(s)
Tagged: 0 Thread(s)
Quoted: 2482 Post(s)
Liked 2,952 Times
in
1,677 Posts
RJ did it on YouTube with an impact wrench.
How do you set Problem is properly securing the frame or fork I've found success holding fork crowns down in my vise with a pair of thick, 1/2" hard rubber blocks installed on either side. For frames, it's always a vise to the bottom bracket. You aren't necessarily going to get that prep when working with a auto repair shop, unless you're on very good terms with the mechanics and have worked together on projects before.
I have an air hammer, but I'm having trouble wrapping my head around how you'd pull a stuck post or stem with it, unless you're smashing it down into the frame. Slide hammer attachment or something like that?
About clamping the frame: you missed my later edit. The problem with clamping the frame in a vise or a heavy stand before using the air hammer is that the vise or stand will absorb too much of the impact, lessening the likelihood that the stem/seatpost will move. One person should hold the frame/fork (loosely, with heavy gloves or such, as far from the point of impact as possible) while the other uses the air hammer under the stem/seatpost. To hammer out a stem, I held the frame by the seat stays while the mechanic held the bars steady with one hand and used the air hammer with the other. For a seatpost, I held the bars and head tube.

Likes For Trakhak:
12-16-22, 02:10 PM
#79


Randomhead
Join Date: Aug 2008
Location: Happy Valley, Pennsylvania
Posts: 24,396
Mentioned: 0 Post(s)
Tagged: 0 Thread(s)
Quoted: 4 Post(s)
Liked 3,696 Times
in
2,517 Posts
I tried the air hammer trick and I guess my air hammer isn't good enough. I wanted to try to bore it out on a lathe anyway. Unfortunately I ended up ruining the seat tube. Which I then replaced.
12-20-22, 04:46 PM
#80
www.theheadbadge.com
Thread Starter

Join Date: Sep 2005
Location: Southern Florida
Posts: 28,513
Bikes: https://www.theheadbadge.com
Mentioned: 124 Post(s)
Tagged: 0 Thread(s)
Quoted: 2422 Post(s)
Liked 4,391 Times
in
2,092 Posts
Major progress today.
First - a bit of backstory: I was lucky enough to find someone on OfferUp willing to trade their barely-used compressor (didn't really want to shell out even more of my fun money on one) for a couple of e-bike batteries (of which I have more than I'll ever use), so my die grinder finally has a power source again. O
nly took 10 years to sort this out
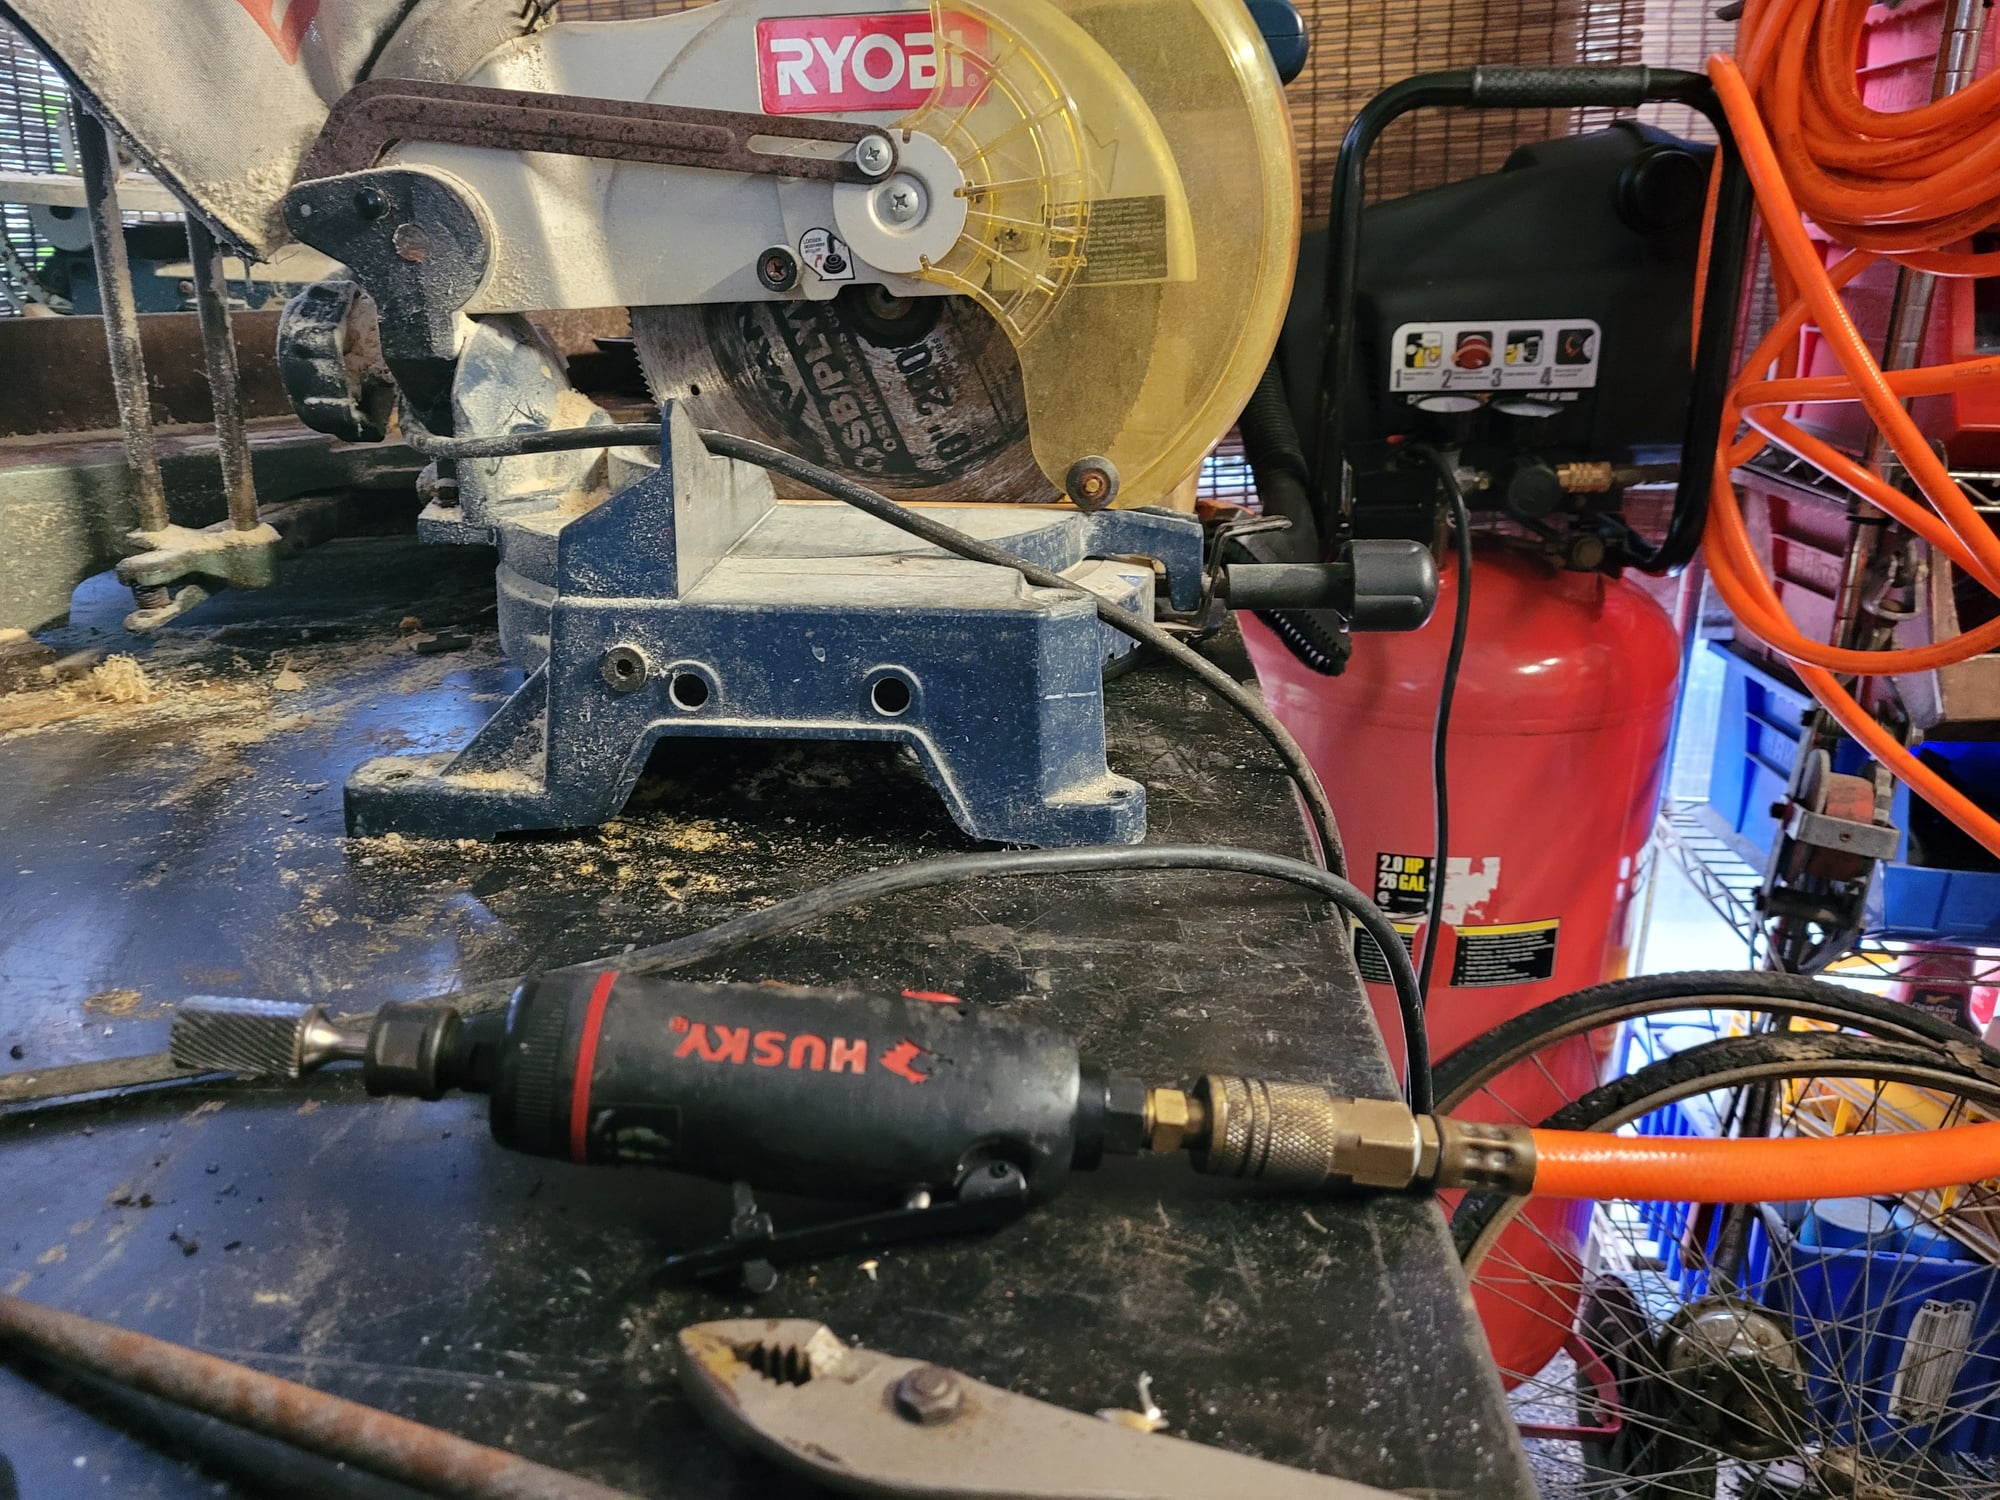
Beware, all photos to follow purposefully curated to annoy those folks on this forum who can't stand messy work areas.
Existing chainstay stubs were cut short, as close to the BB shell as possible. This took a wee bit of effort on the left side to avoid nicking the cable guide.
Time to grind. For some reason - even when held tight - the carbide bit would occasionally hang on something and cause the tool to oscillate wildly in the hole. Some careful work with the speed regulator and the angle of attack overcame this, for the most part.
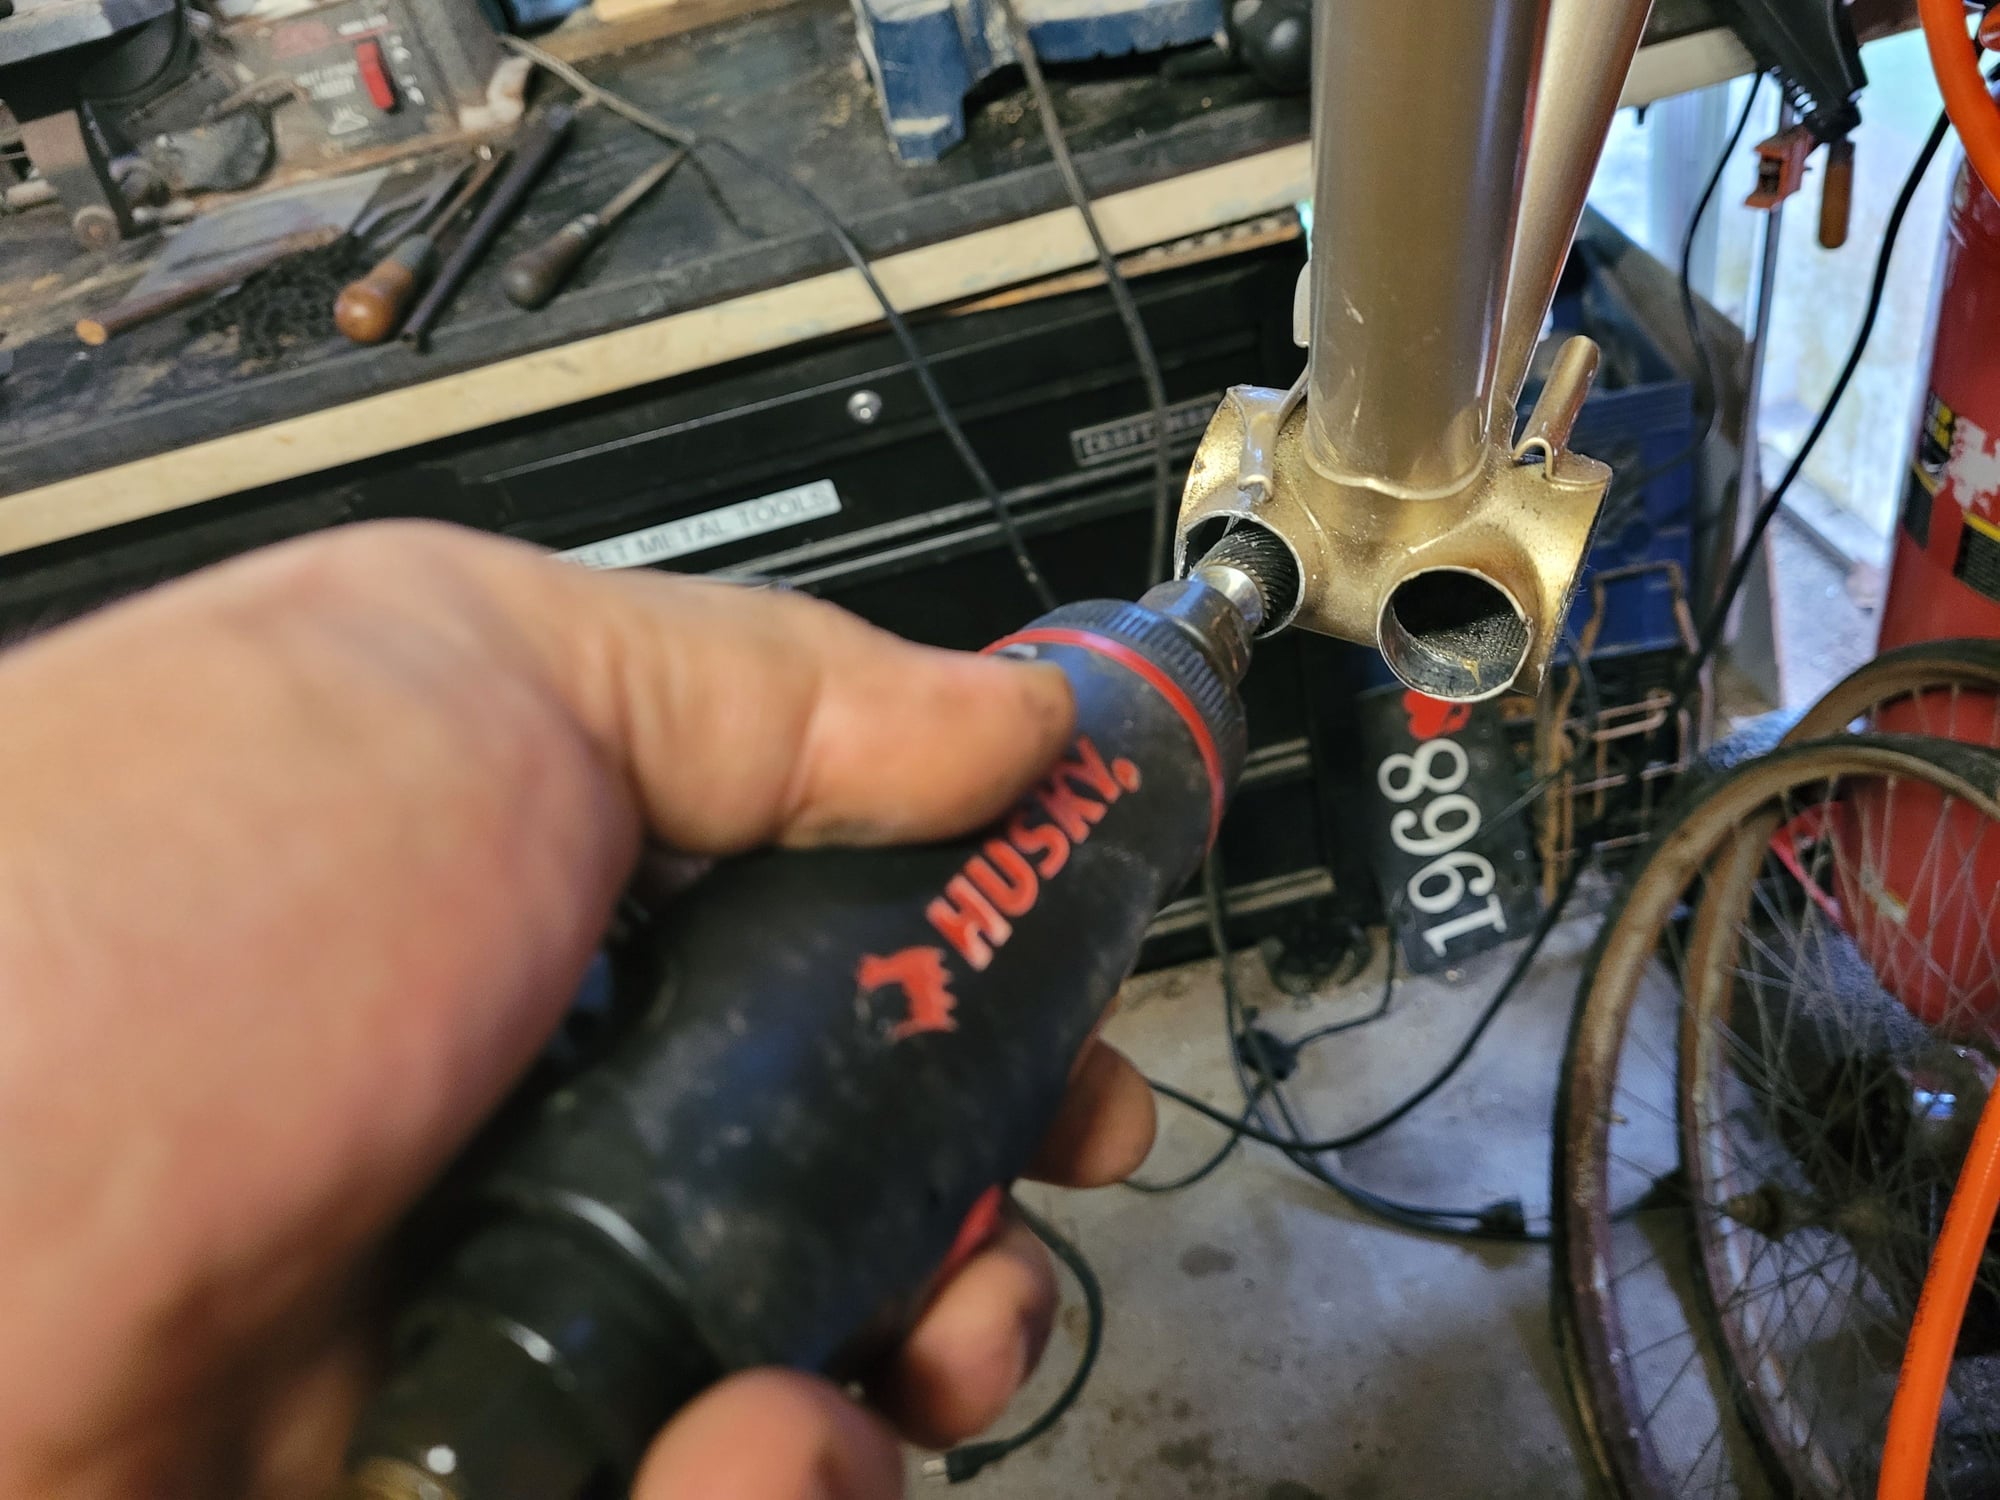
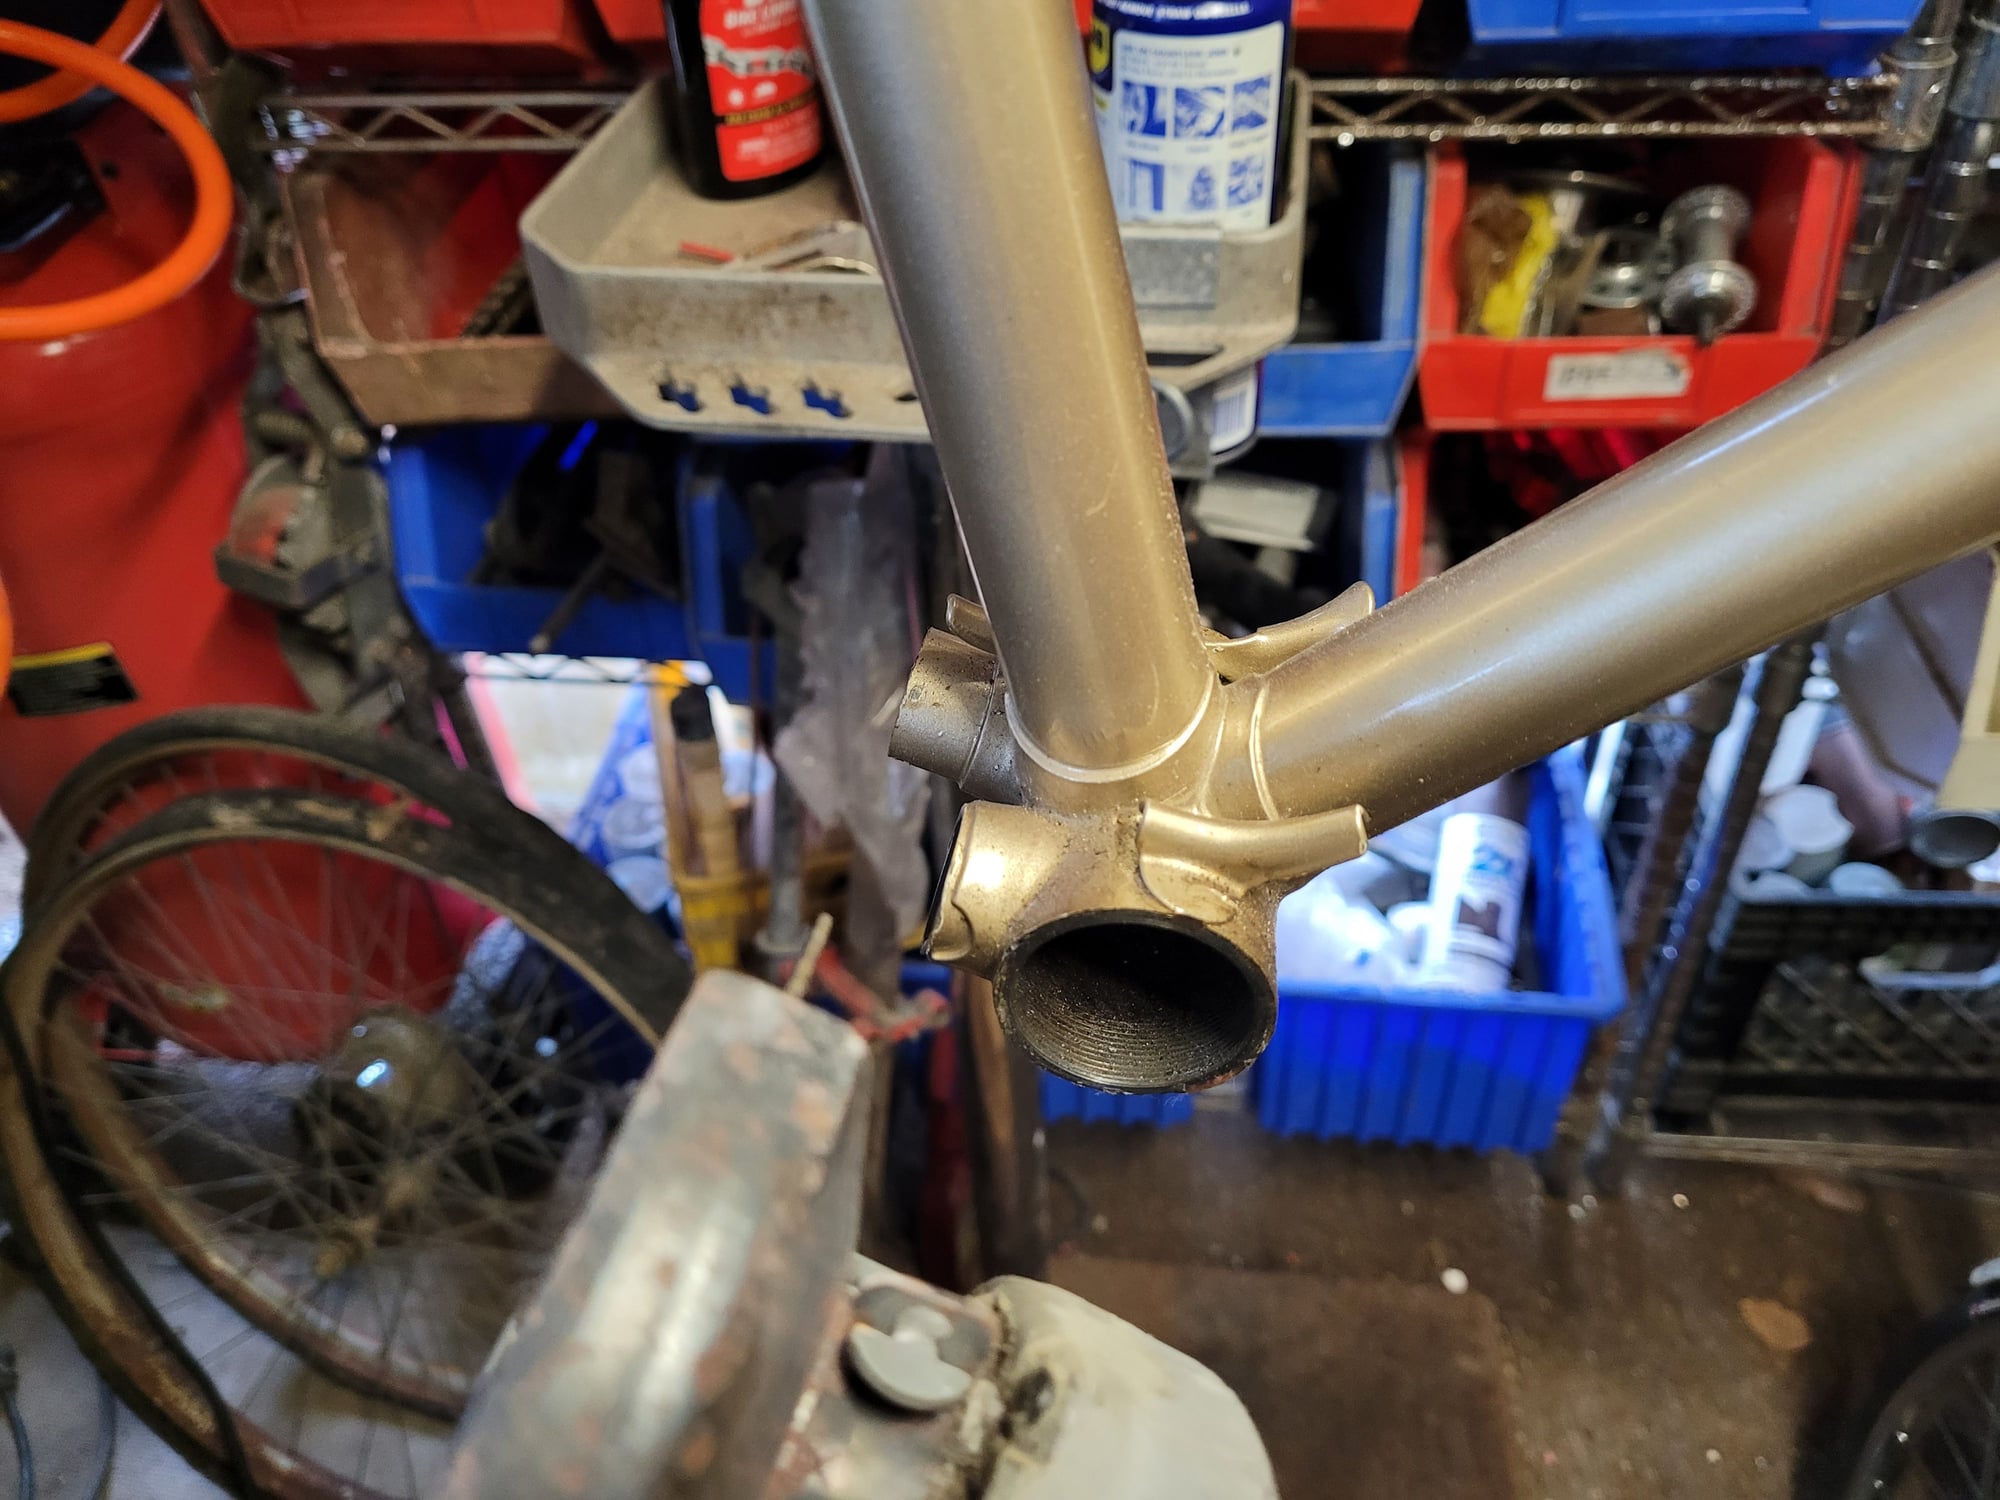
Did the right side first (photo above is out of order to tell the story better). I was surprised that it not only went a lot quicker with the current bit I have in the tool, it also came out really nice.

Filing the burrs smooth:

We have fitment!


Any slop will probably be filled in by brass, and the socket edges can always be tapped in a bit (a bit) when they're warm.
Left side came out good too. Note the slight crinkling of paint around the seatpost due to the crash. Soon to be burnt off once the torch is put to the stays.

bulgie helped out by providing a correct 1010 left dropout with an eyelet - THANK YOU!

Next stop will be at Mike's to get it all put together. Should be interesting. I'll take pictures, of course.
-Kurt
First - a bit of backstory: I was lucky enough to find someone on OfferUp willing to trade their barely-used compressor (didn't really want to shell out even more of my fun money on one) for a couple of e-bike batteries (of which I have more than I'll ever use), so my die grinder finally has a power source again. O
nly took 10 years to sort this out
Beware, all photos to follow purposefully curated to annoy those folks on this forum who can't stand messy work areas.
Existing chainstay stubs were cut short, as close to the BB shell as possible. This took a wee bit of effort on the left side to avoid nicking the cable guide.
Time to grind. For some reason - even when held tight - the carbide bit would occasionally hang on something and cause the tool to oscillate wildly in the hole. Some careful work with the speed regulator and the angle of attack overcame this, for the most part.
Did the right side first (photo above is out of order to tell the story better). I was surprised that it not only went a lot quicker with the current bit I have in the tool, it also came out really nice.
Filing the burrs smooth:
We have fitment!
Any slop will probably be filled in by brass, and the socket edges can always be tapped in a bit (a bit) when they're warm.
Left side came out good too. Note the slight crinkling of paint around the seatpost due to the crash. Soon to be burnt off once the torch is put to the stays.
bulgie helped out by providing a correct 1010 left dropout with an eyelet - THANK YOU!
Next stop will be at Mike's to get it all put together. Should be interesting. I'll take pictures, of course.
-Kurt
__________________


12-20-22, 06:18 PM
#81
ambulatory senior
Join Date: Dec 2016
Location: Peoria Il
Posts: 5,998
Bikes: Austro Daimler modified by Gugie! Raleigh Professional and lots of other bikes.
Mentioned: 76 Post(s)
Tagged: 0 Thread(s)
Quoted: 1955 Post(s)
Liked 3,661 Times
in
1,679 Posts
I keep looking at framesets in the sub 250 range and think they are too expensive. You're making them look like screaming deals.
Likes For 52telecaster:
12-20-22, 06:37 PM
#82
Senior Member

Join Date: Jun 2010
Location: Medford MA
Posts: 2,089
Bikes: Ron Cooper touring, 1959 Jack Taylor 650b ladyback touring tandem, Vitus 979, Joe Bell painted Claud Butler Dalesman, Colin Laing curved tube tandem, heavily-Dilberted 1982 Trek 6xx, Ren� Herse tandem
Mentioned: 80 Post(s)
Tagged: 0 Thread(s)
Quoted: 964 Post(s)
Liked 1,451 Times
in
723 Posts
If I had a frame that needed chainstays, I'd probably custom make a chainstay crown, or bent stays, to accommodate big tires. But to be fair, I'd also be making my own vertical dropouts with a chainrest and stuff because I have quibbles with every other dropout I've seen! Props for keeping this one original! That is probably harder!
__________________
Owner & co-founder, Cycles Ren� Hubris. Unfortunately attaching questionable braze-ons to perfectly good frames since about 2015. With style.
Owner & co-founder, Cycles Ren� Hubris. Unfortunately attaching questionable braze-ons to perfectly good frames since about 2015. With style.
Likes For scarlson:
12-21-22, 12:56 PM
#83
www.theheadbadge.com
Thread Starter
Join Date: Sep 2005
Location: Southern Florida
Posts: 28,513
Bikes: https://www.theheadbadge.com
Mentioned: 124 Post(s)
Tagged: 0 Thread(s)
Quoted: 2422 Post(s)
Liked 4,391 Times
in
2,092 Posts
Well, to be fair, a good $250 frameset should be plug-and-play with your component bits, and hopefully have a properly aligned rear triangle.
If I had a frame that needed chainstays, I'd probably custom make a chainstay crown, or bent stays, to accommodate big tires. But to be fair, I'd also be making my own vertical dropouts with a chainrest and stuff because I have quibbles with every other dropout I've seen! Props for keeping this one original! That is probably harder!
-Kurt
__________________
Likes For cudak888:
12-21-22, 08:00 PM
#84
The Huffmeister

Join Date: Jul 2008
Location: The Le Grande HQ
Posts: 2,735
Bikes: '79 Trek 938, '86 Jim Merz Allez SE, '90 Miyata 1000, '68 PX-10, '80 PXN-10, '73 Super Course, '87 Guerciotti, '83 Trek 600, '80 Huffy Le Grande
Mentioned: 45 Post(s)
Tagged: 0 Thread(s)
Quoted: 1225 Post(s)
Liked 3,543 Times
in
1,407 Posts
This is excellent. Please keep going!
Likes For AdventureManCO:
01-29-23, 05:27 PM
#85
www.theheadbadge.com
Thread Starter
Join Date: Sep 2005
Location: Southern Florida
Posts: 28,513
Bikes: https://www.theheadbadge.com
Mentioned: 124 Post(s)
Tagged: 0 Thread(s)
Quoted: 2422 Post(s)
Liked 4,391 Times
in
2,092 Posts
Some progress, finally. None directly to the frame as it is, but it's still a lot farther than this frame has been in a while.
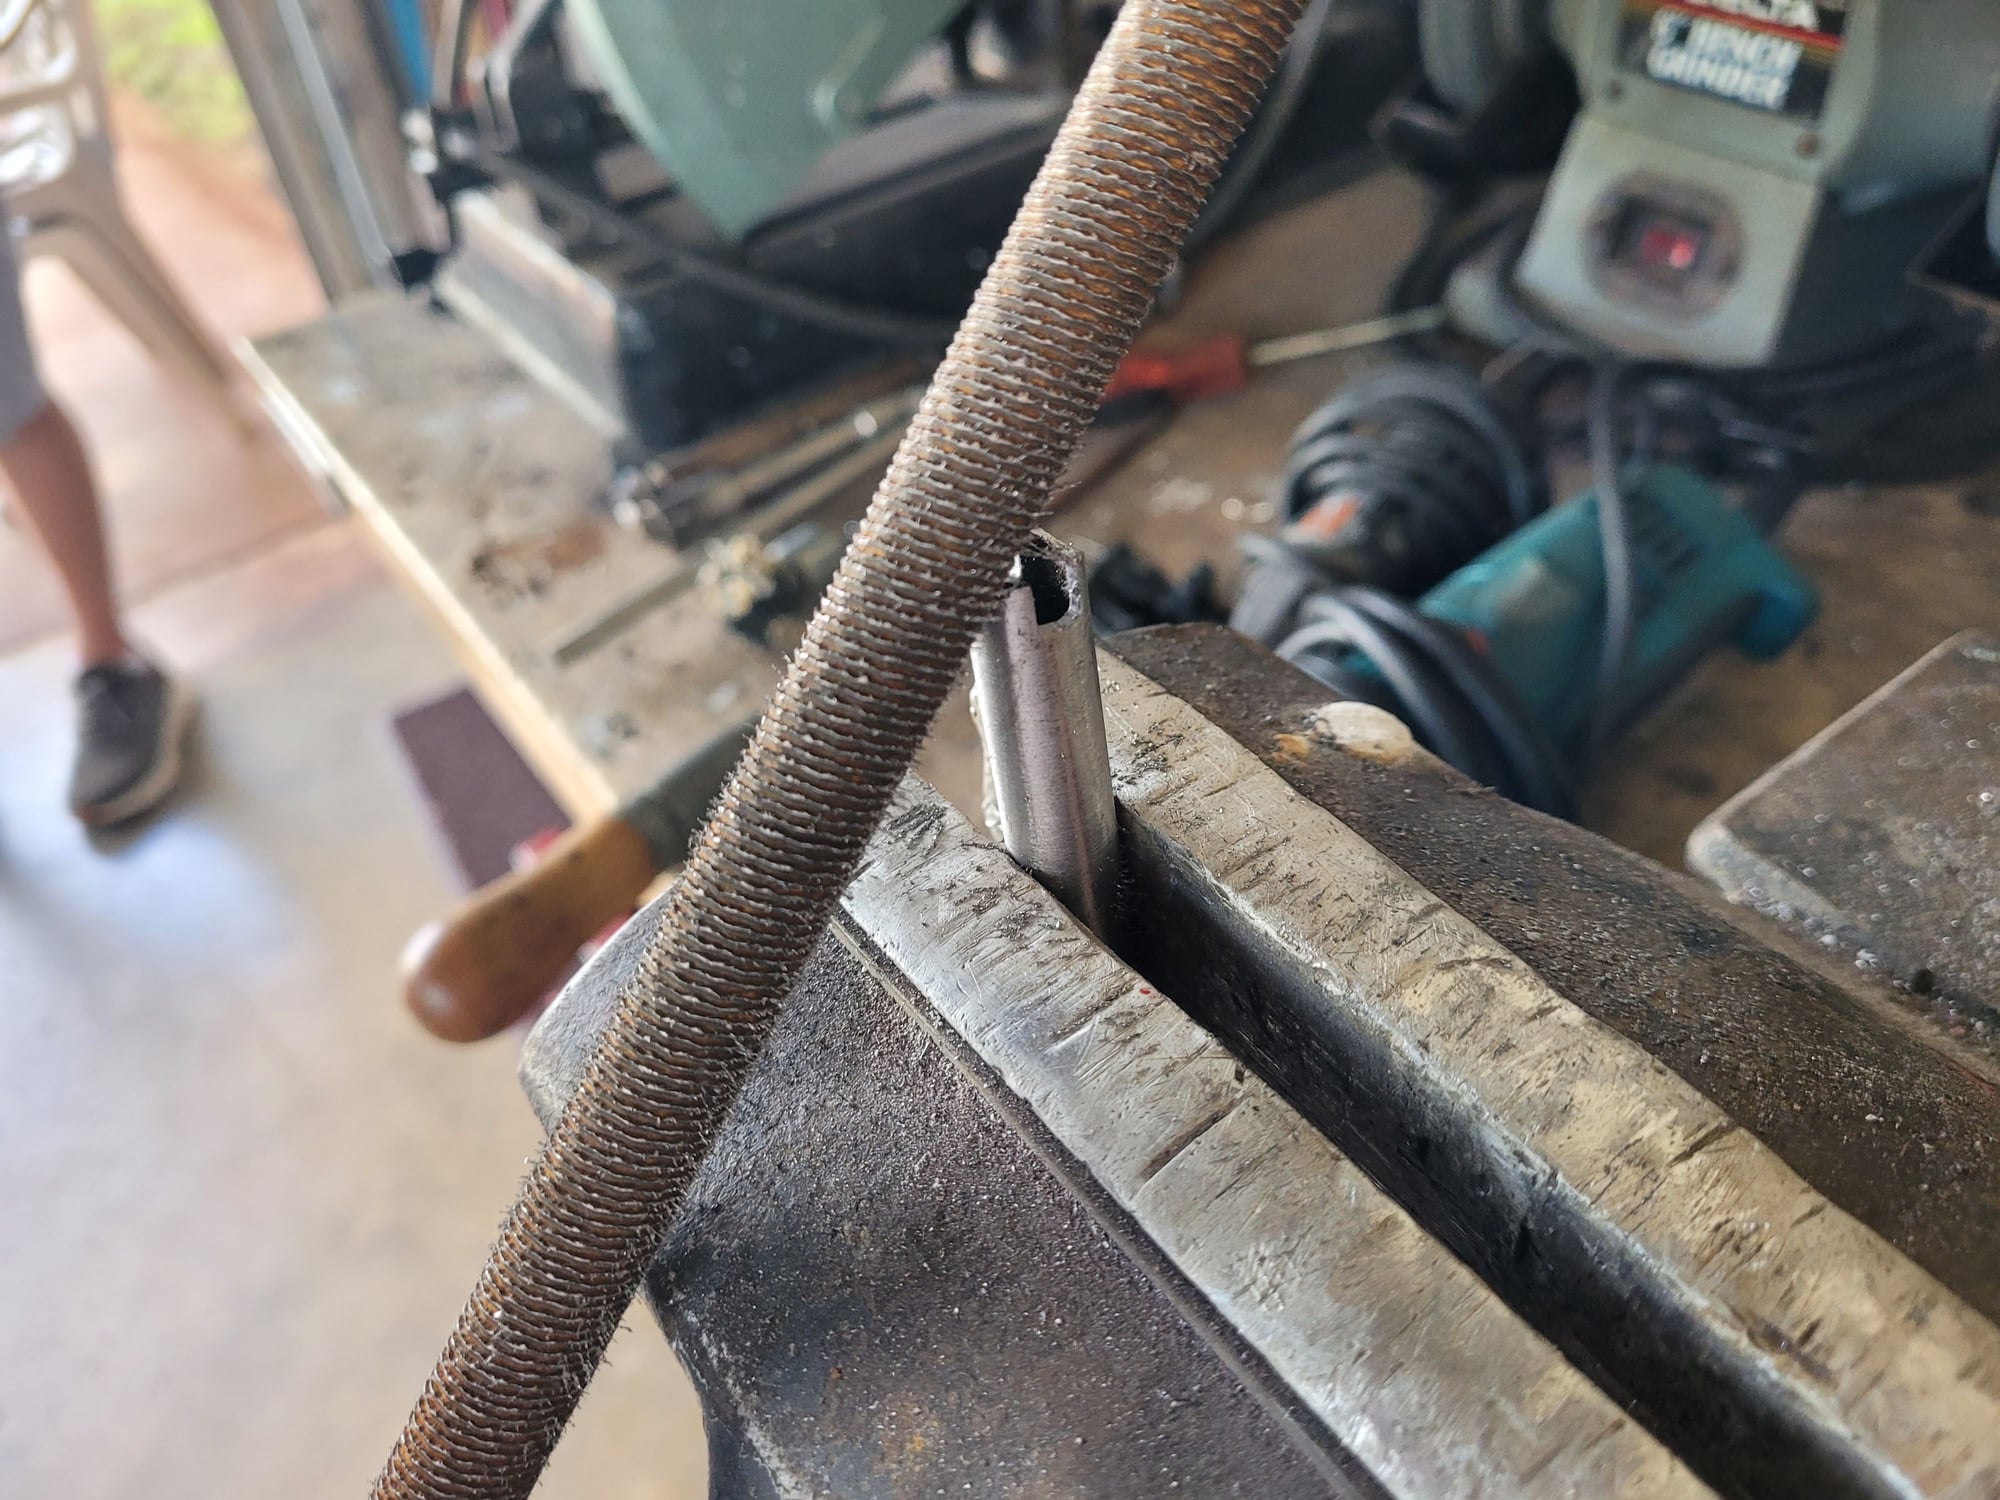
First off, polishing up the dropout ends and filing the tab to fit inside the chainstay:

Cutting a slot into the tube to help the file get started:

Filing the chainstay slot open to accommodate the dropout:

Giving the ends a little bevel to match what Woodrup did. Didn't come out perfect, but nothing a bit of extra brass and shaping can't sort out.
All fit with the replacement dropout from bulgie.

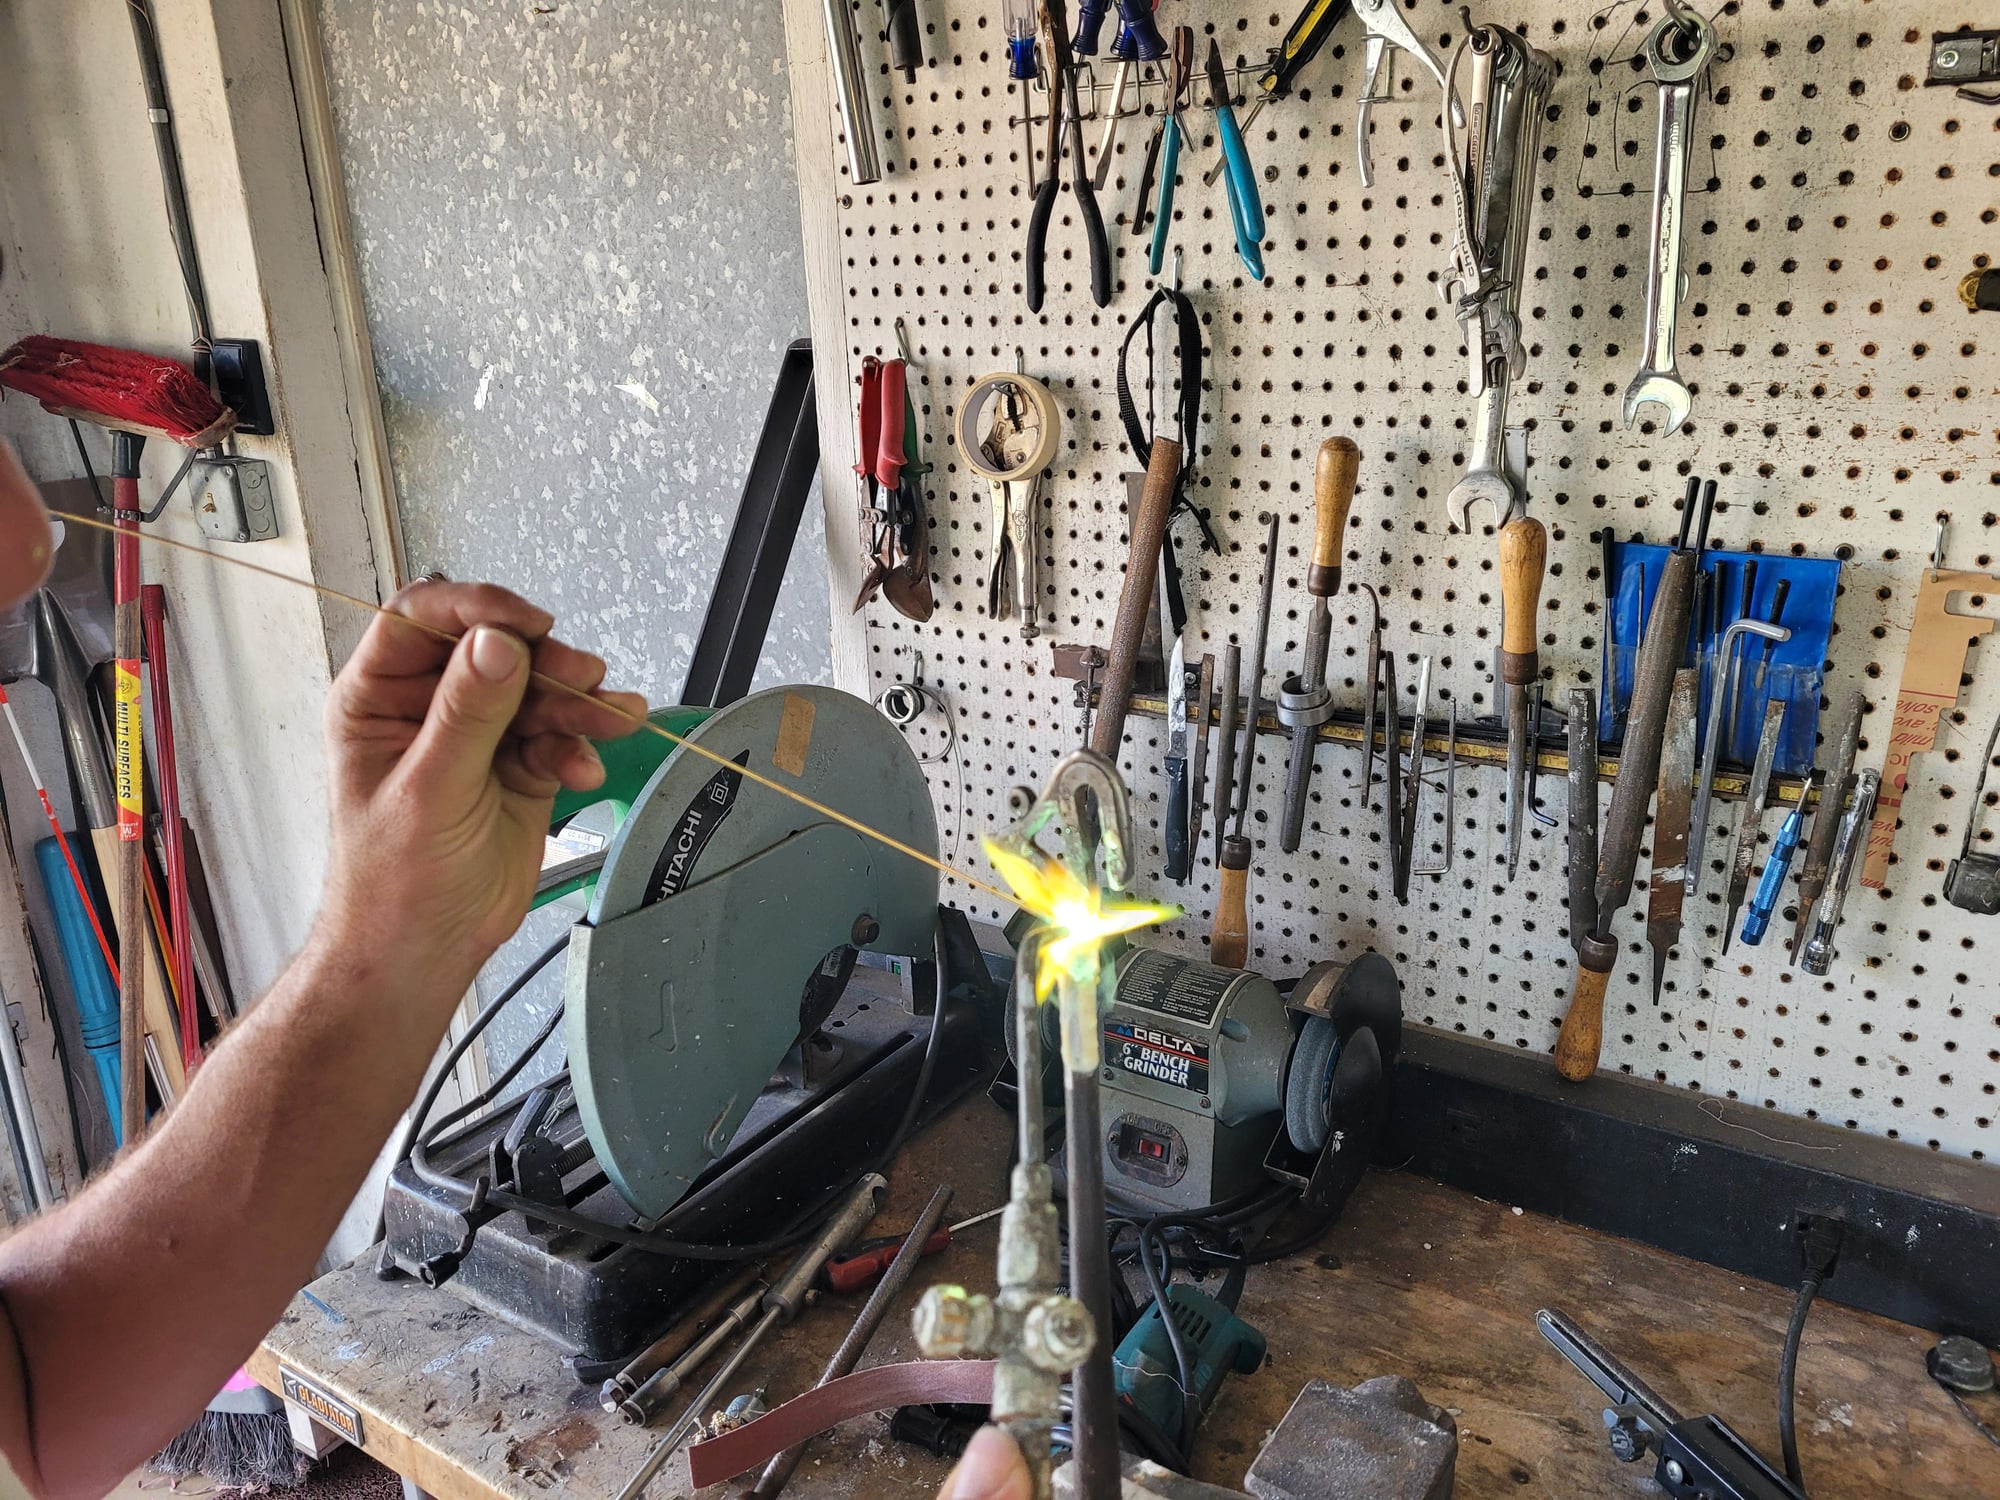
Fluxed up. Time for the torch (and someone much more skilled than I to wield it):

Mike doing what he does best.
All joined up. Obviously, not prettied up yet, but there are no voids here, and that's how it's supposed to be.


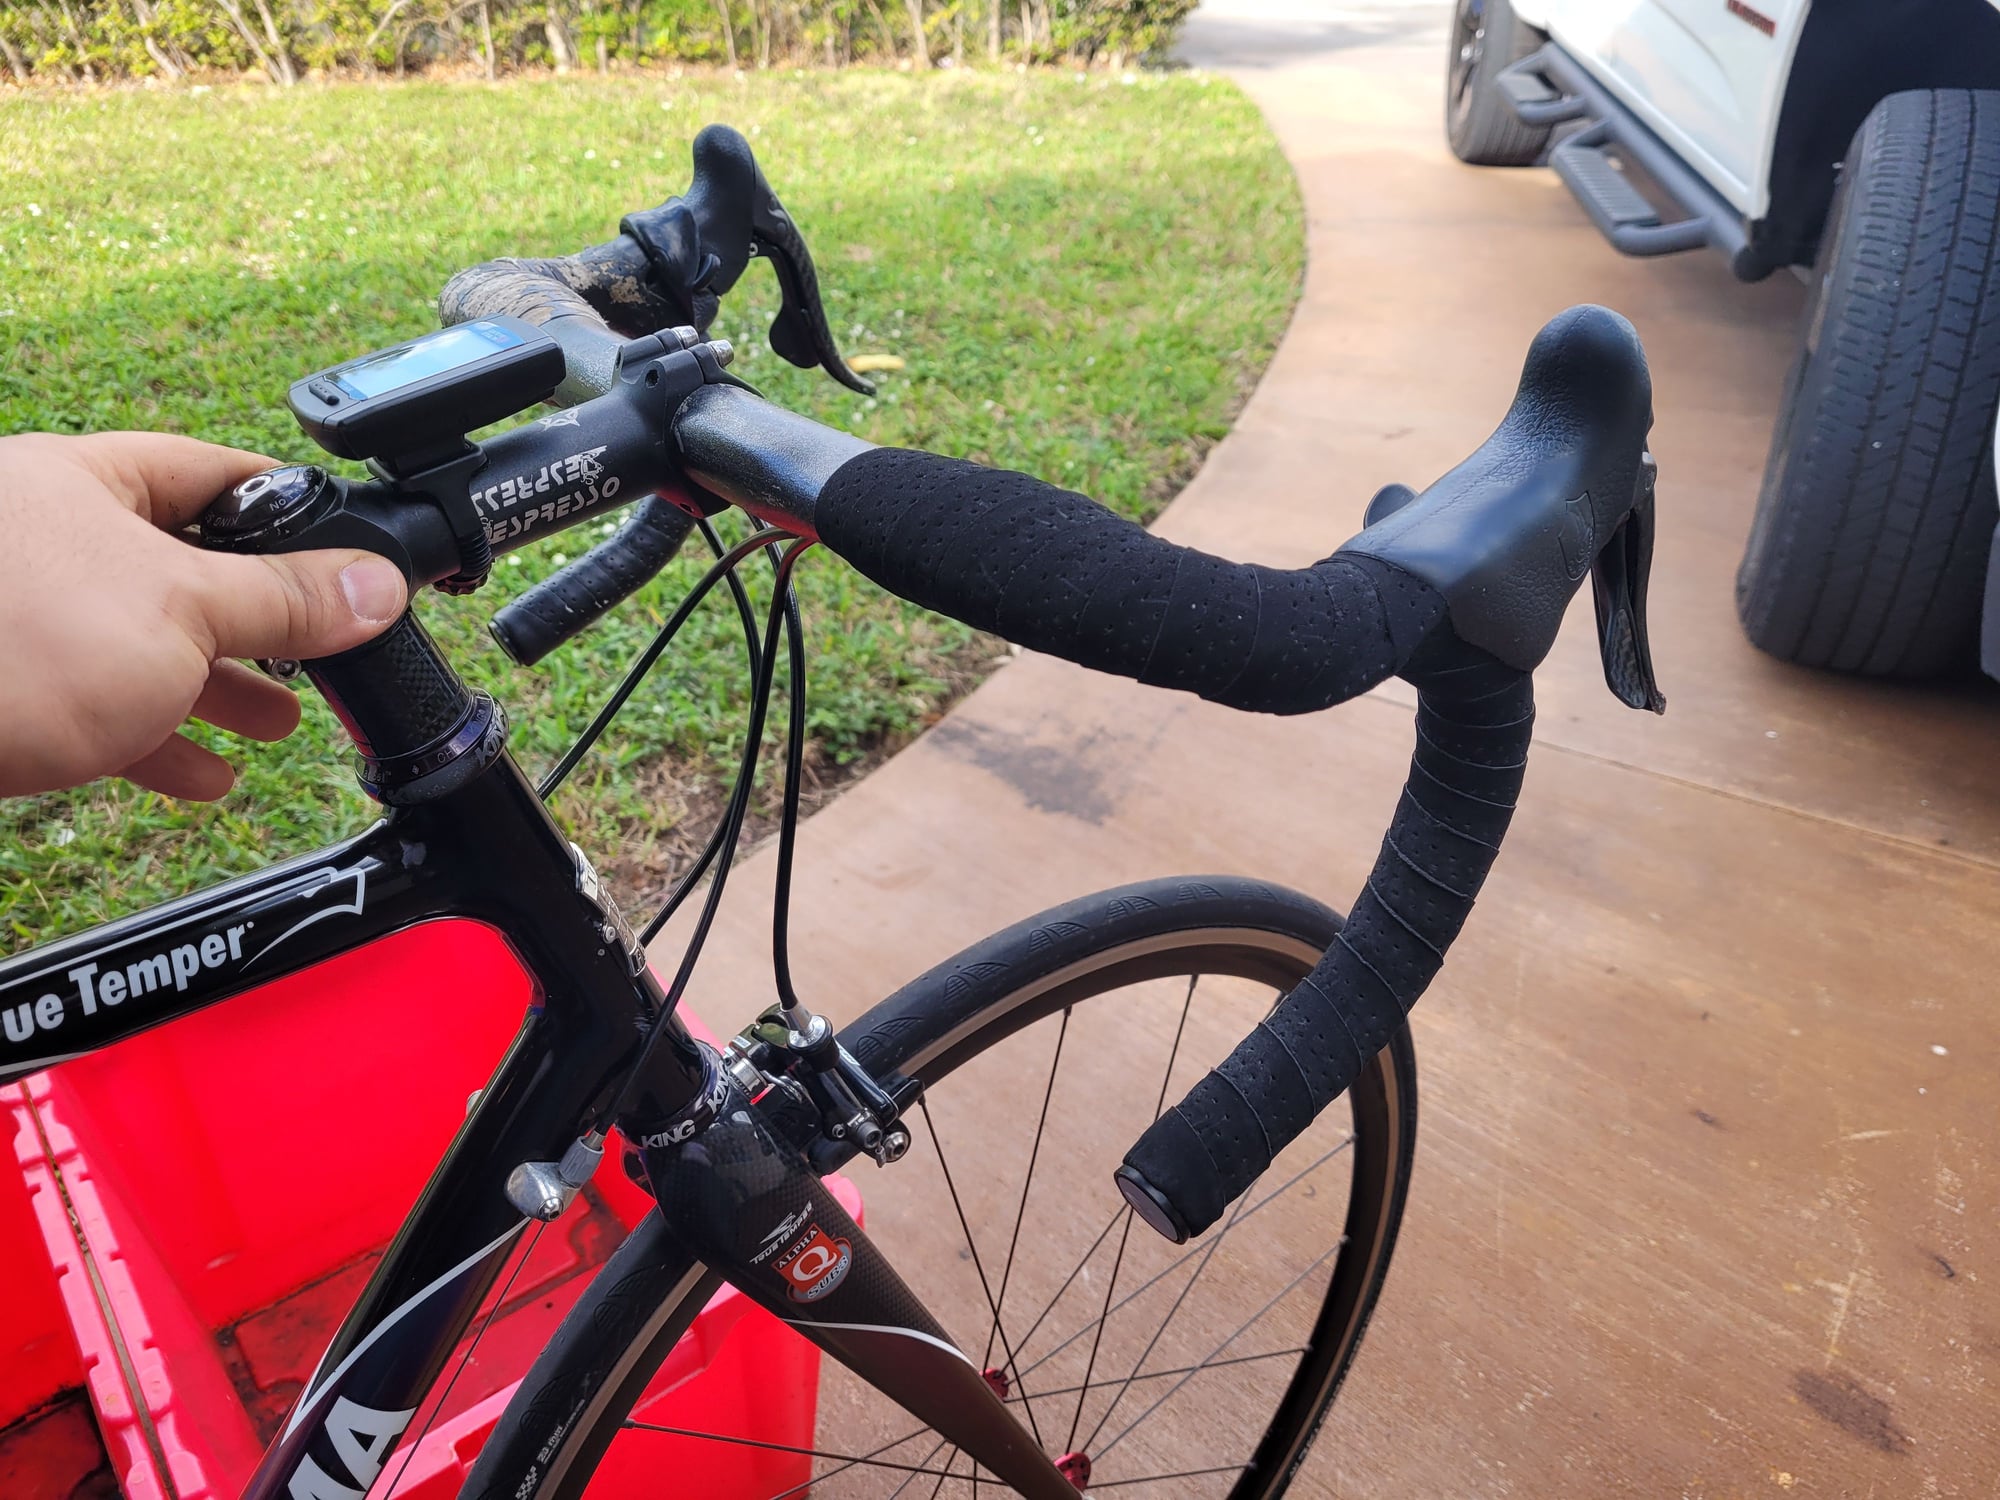
Mike grinding the brass out of the seatstay. Would have done it myself, but I was re-wrapping his bars while he was doing this.

First off, polishing up the dropout ends and filing the tab to fit inside the chainstay:
Cutting a slot into the tube to help the file get started:
Filing the chainstay slot open to accommodate the dropout:
Giving the ends a little bevel to match what Woodrup did. Didn't come out perfect, but nothing a bit of extra brass and shaping can't sort out.
All fit with the replacement dropout from bulgie.
Fluxed up. Time for the torch (and someone much more skilled than I to wield it):
Mike doing what he does best.
All joined up. Obviously, not prettied up yet, but there are no voids here, and that's how it's supposed to be.
Mike grinding the brass out of the seatstay. Would have done it myself, but I was re-wrapping his bars while he was doing this.
__________________
Likes For cudak888:
01-29-23, 05:27 PM
#86
www.theheadbadge.com
Thread Starter
Join Date: Sep 2005
Location: Southern Florida
Posts: 28,513
Bikes: https://www.theheadbadge.com
Mentioned: 124 Post(s)
Tagged: 0 Thread(s)
Quoted: 2422 Post(s)
Liked 4,391 Times
in
2,092 Posts
Yes, I did it top-down. That's the way he had it. If it's good enough for Eddy...
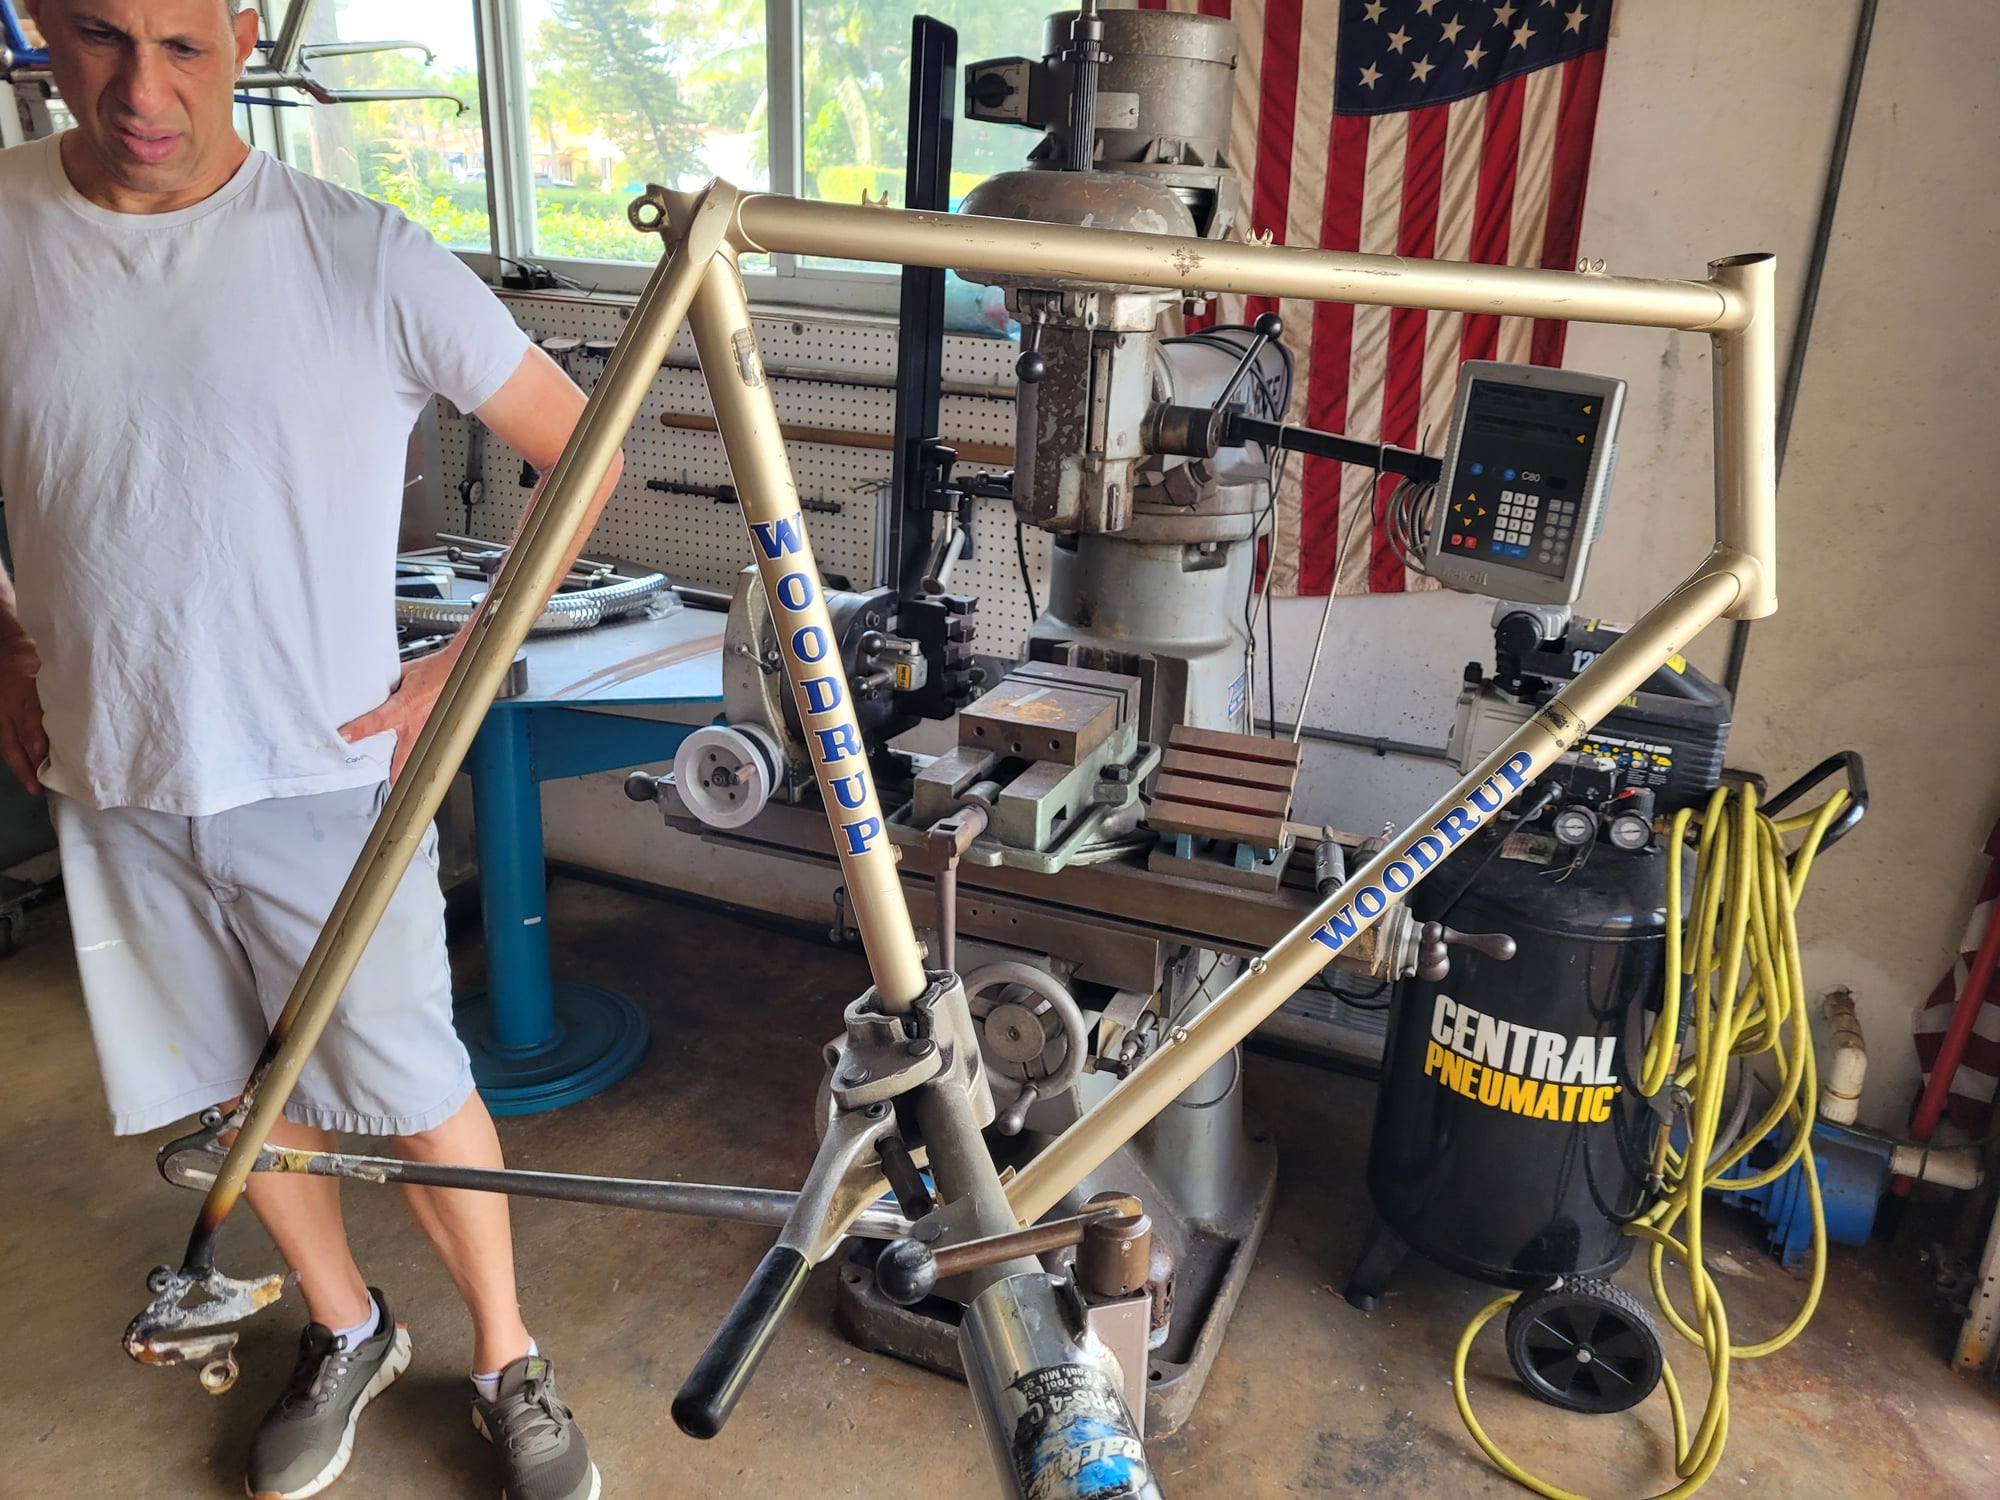
Test fit and looking good:

The phoenix is slowly rising from the ashes...
Actual brazing to the frame will have to wait for a little longer. Then we'll brace the chainstays together and attempt to straighten out the bent bit on the right side.
-Kurt
Test fit and looking good:
The phoenix is slowly rising from the ashes...
Actual brazing to the frame will have to wait for a little longer. Then we'll brace the chainstays together and attempt to straighten out the bent bit on the right side.
-Kurt
__________________
Likes For cudak888:
04-30-23, 11:18 PM
#87
www.theheadbadge.com
Thread Starter
Join Date: Sep 2005
Location: Southern Florida
Posts: 28,513
Bikes: https://www.theheadbadge.com
Mentioned: 124 Post(s)
Tagged: 0 Thread(s)
Quoted: 2422 Post(s)
Liked 4,391 Times
in
2,092 Posts
Minimal progress as of today, but progress nonetheless.
First off, this whole idea of bridging the seatstays didn't work, though most of that is on me for leaving those scrapes of steel in the recesses I filed out.
Mike tacking them in with silver. Good thing it'll be easy to melt off.

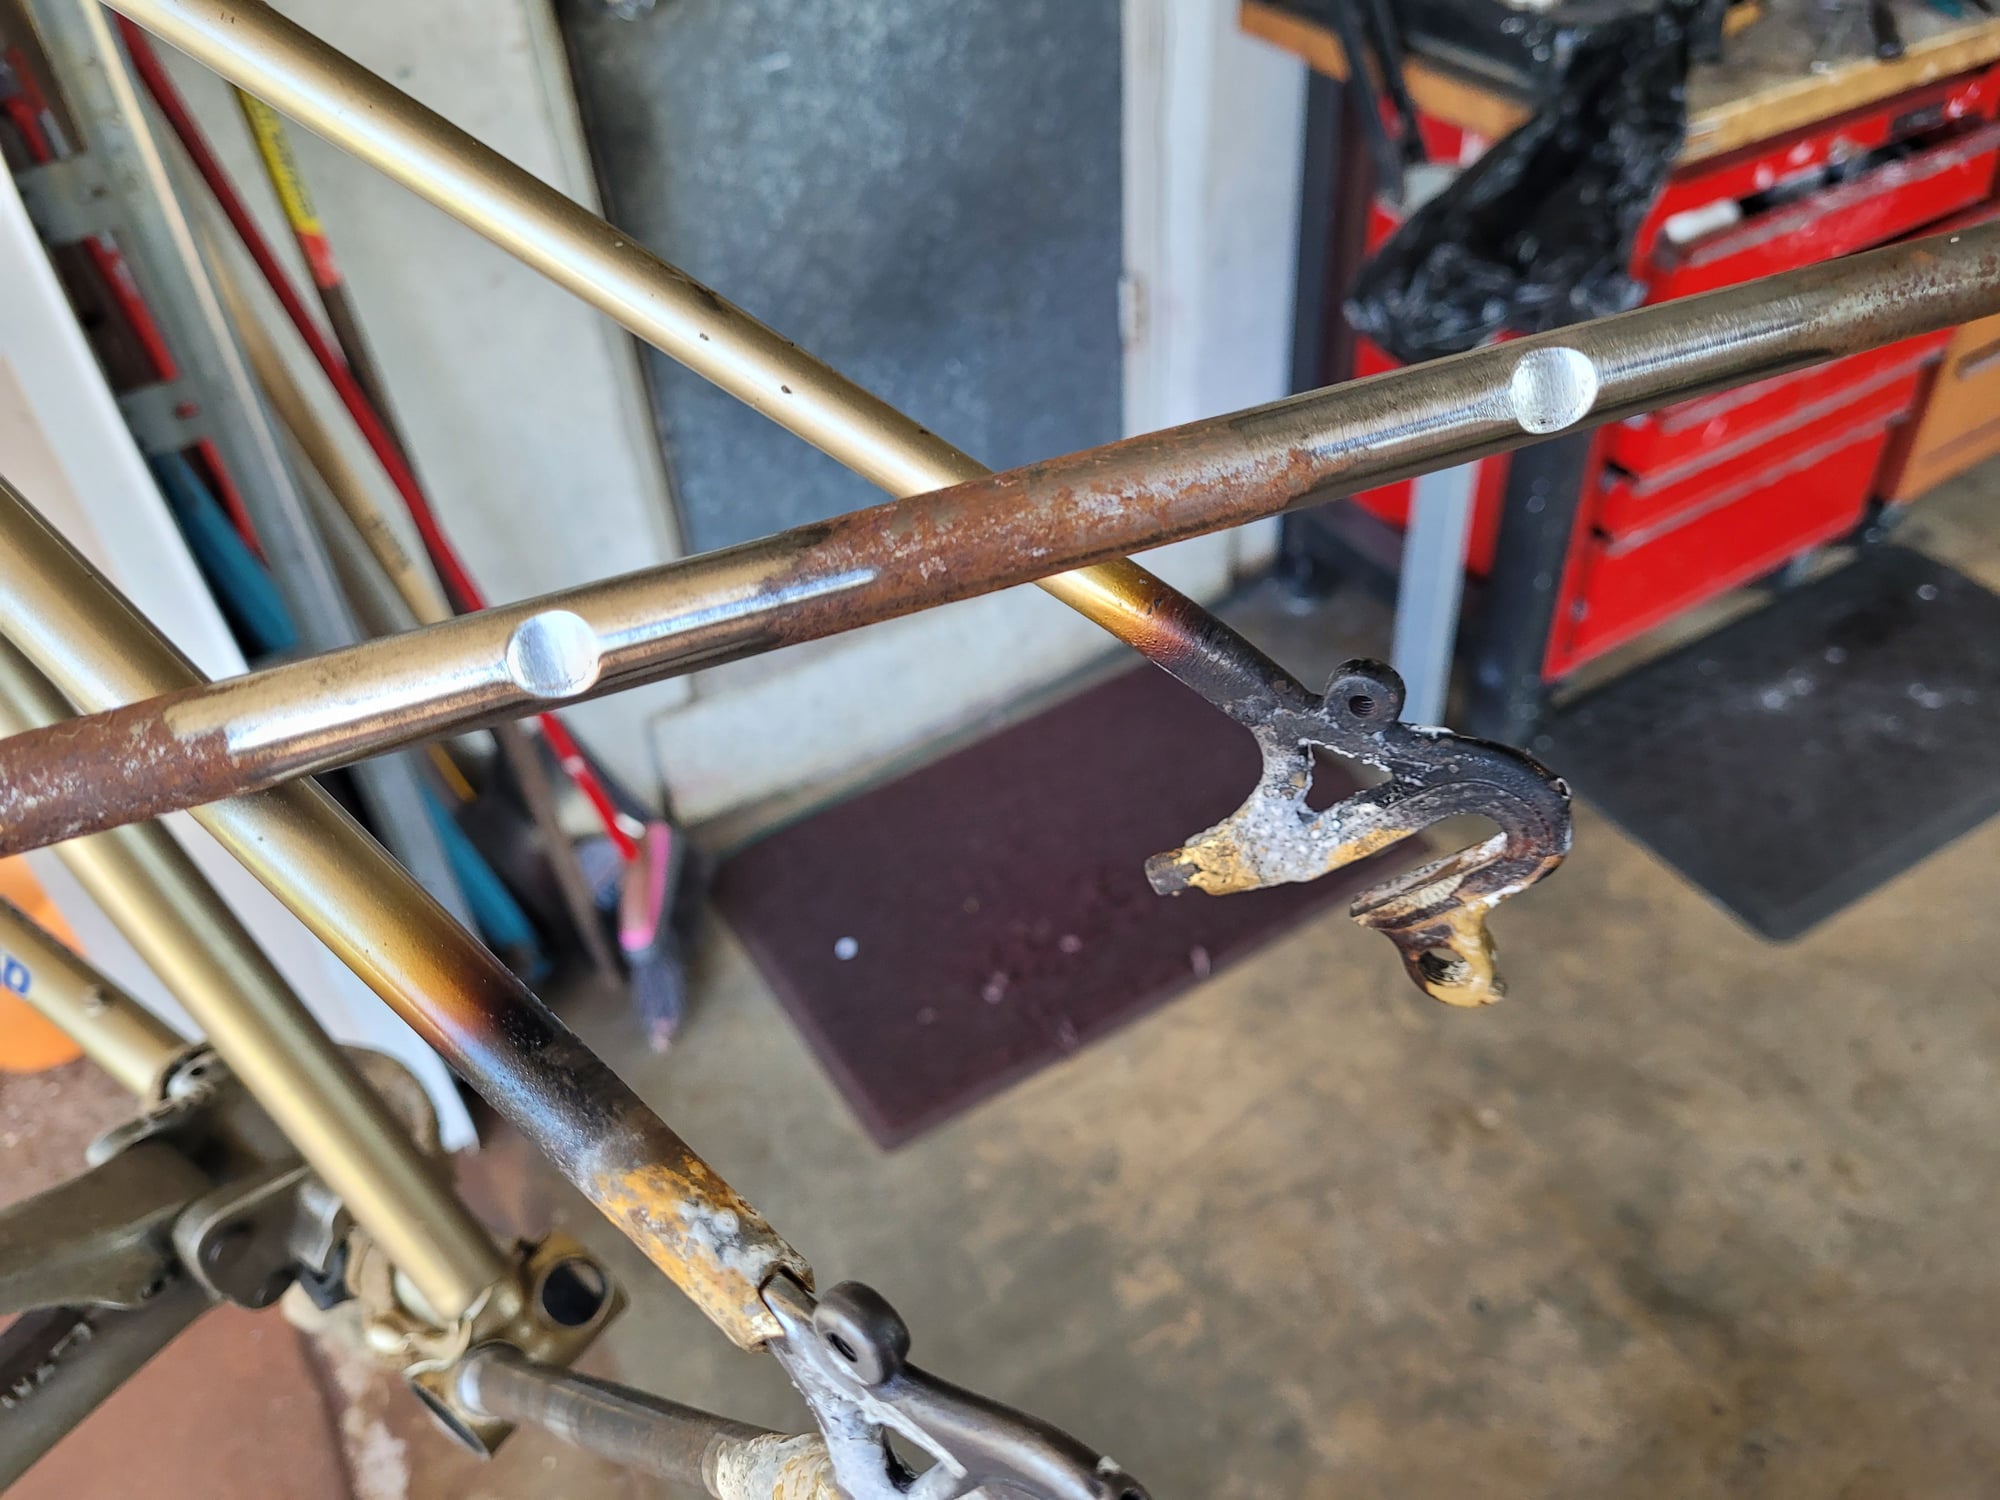
I tried a few ways to wrestle with this, but finally realized the only way was to clamp that sucker of a (admittedly already trash) dropout in the vise and apply some very careful force to the seatstay.

After some bending, repositioning, and the silver tacks on the bridge becoming less than useful:

Good enough for government work, I'd say.


-Kurt
First off, this whole idea of bridging the seatstays didn't work, though most of that is on me for leaving those scrapes of steel in the recesses I filed out.
Mike tacking them in with silver. Good thing it'll be easy to melt off.
I tried a few ways to wrestle with this, but finally realized the only way was to clamp that sucker of a (admittedly already trash) dropout in the vise and apply some very careful force to the seatstay.
After some bending, repositioning, and the silver tacks on the bridge becoming less than useful:
Good enough for government work, I'd say.
-Kurt
__________________
Likes For cudak888:
05-01-23, 11:03 PM
#88
The Huffmeister
Join Date: Jul 2008
Location: The Le Grande HQ
Posts: 2,735
Bikes: '79 Trek 938, '86 Jim Merz Allez SE, '90 Miyata 1000, '68 PX-10, '80 PXN-10, '73 Super Course, '87 Guerciotti, '83 Trek 600, '80 Huffy Le Grande
Mentioned: 45 Post(s)
Tagged: 0 Thread(s)
Quoted: 1225 Post(s)
Liked 3,543 Times
in
1,407 Posts
You know, I've been hearing this a lot, myself, lately.
I'd be concerned, but concern was thrown out long ago.
THIS, on the other hand, is very cool, and reminds me to ask you a question. How do you juggle this, the Moulton, the Bianchi, and any other host of things I don't know that are going on but probably are?
The Huffy is a black hole.

__________________
There were 135 Confentes, but only one...Huffente!

There were 135 Confentes, but only one...Huffente!
Likes For AdventureManCO:
05-01-23, 11:26 PM
#89
www.theheadbadge.com
Thread Starter
Join Date: Sep 2005
Location: Southern Florida
Posts: 28,513
Bikes: https://www.theheadbadge.com
Mentioned: 124 Post(s)
Tagged: 0 Thread(s)
Quoted: 2422 Post(s)
Liked 4,391 Times
in
2,092 Posts
I've done nothing on Blasptwenty, or the '36 Sports from nlerner, or the '70s DL-1 frame from thumpism (Mike and I did try pulling the fork blades, but the nails are still in the way), or the '56 DL-5.
I did some minor work on the '52 Sports for a show a few weeks ago but it still needs the correct brake lever clamp bolt, and the '50 Superbe still needs the front fender tabbed washer and me to get off my duff and finish the front brake cable housing. The '46 Humber needs the factory spot welds on the rear fender cut off with a rotabroach and re-spotted because they're that off, and I do NOT want to think about that job for a while.
Oh, and there's this Woodrup. Mike does the brazing, so that's one task off my shoulders! I'm in charge of surface prep and slotting stays though.
It honestly takes longer to write these posts and constantly come up with witty woolsheet for the Huffy thread

-Kurt
__________________
Last edited by cudak888; 05-01-23 at 11:29 PM.
Likes For cudak888:
