


How to Beautify an Uglified Component (Crabon Fibber Edition)
 03-01-23, 10:30 PM
#1

Banned.
Thread Starter

Join Date: Jul 2009
Location: PAZ
Posts: 12,294
Mentioned: 255 Post(s)
Tagged: 0 Thread(s)
Quoted: 2588 Post(s)
Liked 4,824 Times
in
1,709 Posts
How to Beautify an Uglified Component (Crabon Fibber Edition)
Hello everyonebody! It's time to tackle a new project.
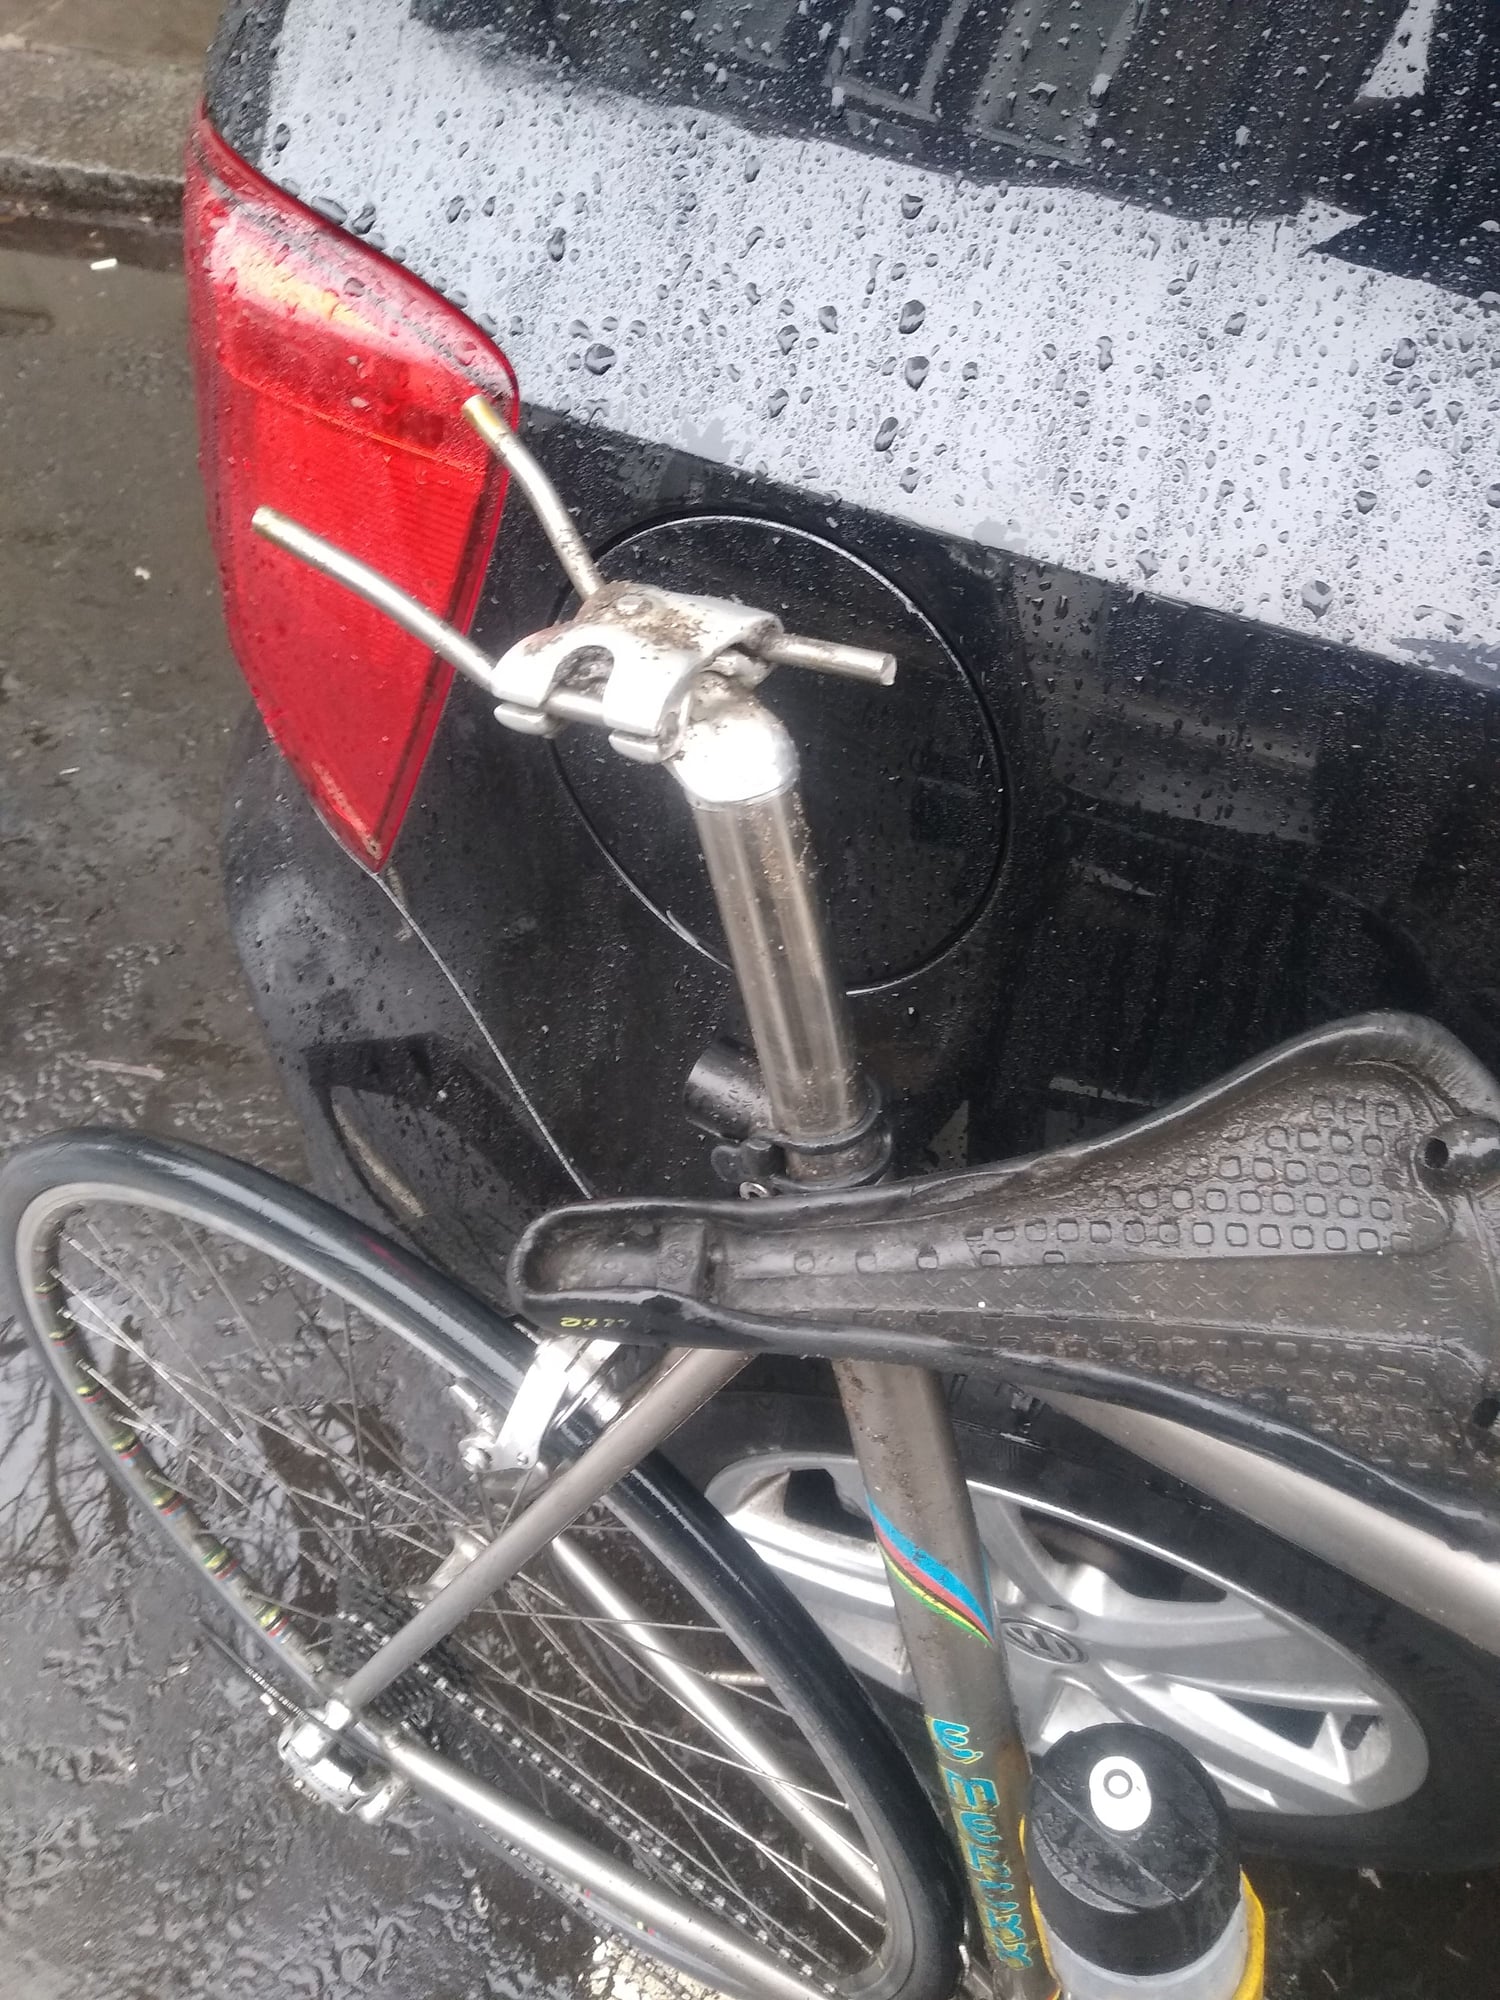
Some of you may recall some months back my having to first repair (after the front rail mounting failed while in the middle of a ride), then refinish a badly-abraded/cracked corner as a result of an unplanned car/bike interface (Lexus vs. Davidson - the rear wheel lost). After affecting the repair/refinish, I retired that particular saddle - IMHO, it had received one knock too many. The repair and refinish process yielded a beautiful saddle, albeit redundant for anything but a display case. Not to worry, because the insurance settlement paid for an almost-new, undamaged replacement.
Well, the problem is this: I love these saddles - and not just to look at. They're flexible, and incredibly light in the bargain - plus, they just look fantastic (yeah, that's coming from me, Mr. Super and Nuovo Record all the way). However, being an F1 fan since the late 70's, I've been aware of carbon fiber applications for decades, and the stuff is fascinating to me. I love the way the weave looks, especially in direct sunlight, and of course it's extremely light and strong. The Flite Evolution looks at home on the 8-speed-equipped Davidson, but I also gave it a go for a bit on the Medici - and it looks super-cool on that Super Record-equipped bike, too. But, I only had the extra one - you know, the one I can't trust anymore not to carve up my gluteus maximus in use.
Lucky me, I found this about a week ago:

Spent 5 days discussing things back-and-forth with the seller, receiving details regarding the condition, and how low he'd go (he was looking for $299, but was also using the 'Make Offer' option). He suggested his low was half the ask; that's all I needed to hear! Once he'd provided me a photo showing the one area of concern I had, I was convinced this was the best chance to get a rider at a decent price - and I had the refinishing skills to gussy it up thanks to the two previous mishaps. It arrived today, exactly as described and photographed.
You might have noticed it lacks any identification marks/logos. That was in my favor when negotiating the price down to a reasonable sum, but even before buying I knew exactly how I was going to rectify the bland look. My solution is still a secret, but all will be revealed before the thread is done.
For now, I've begun the cleaning process - and the tiny aesthetic repair, too. Pics follow - because this is a 'How To' guide, and what's a guide without pics, amiright?
There was a tiny chip in the first ply on the drive-side rear corner. I poked a bit of epoxy into the gap with a toothpick, and clamped it closed with a hemostat; I'm leaving it to cure overnight:
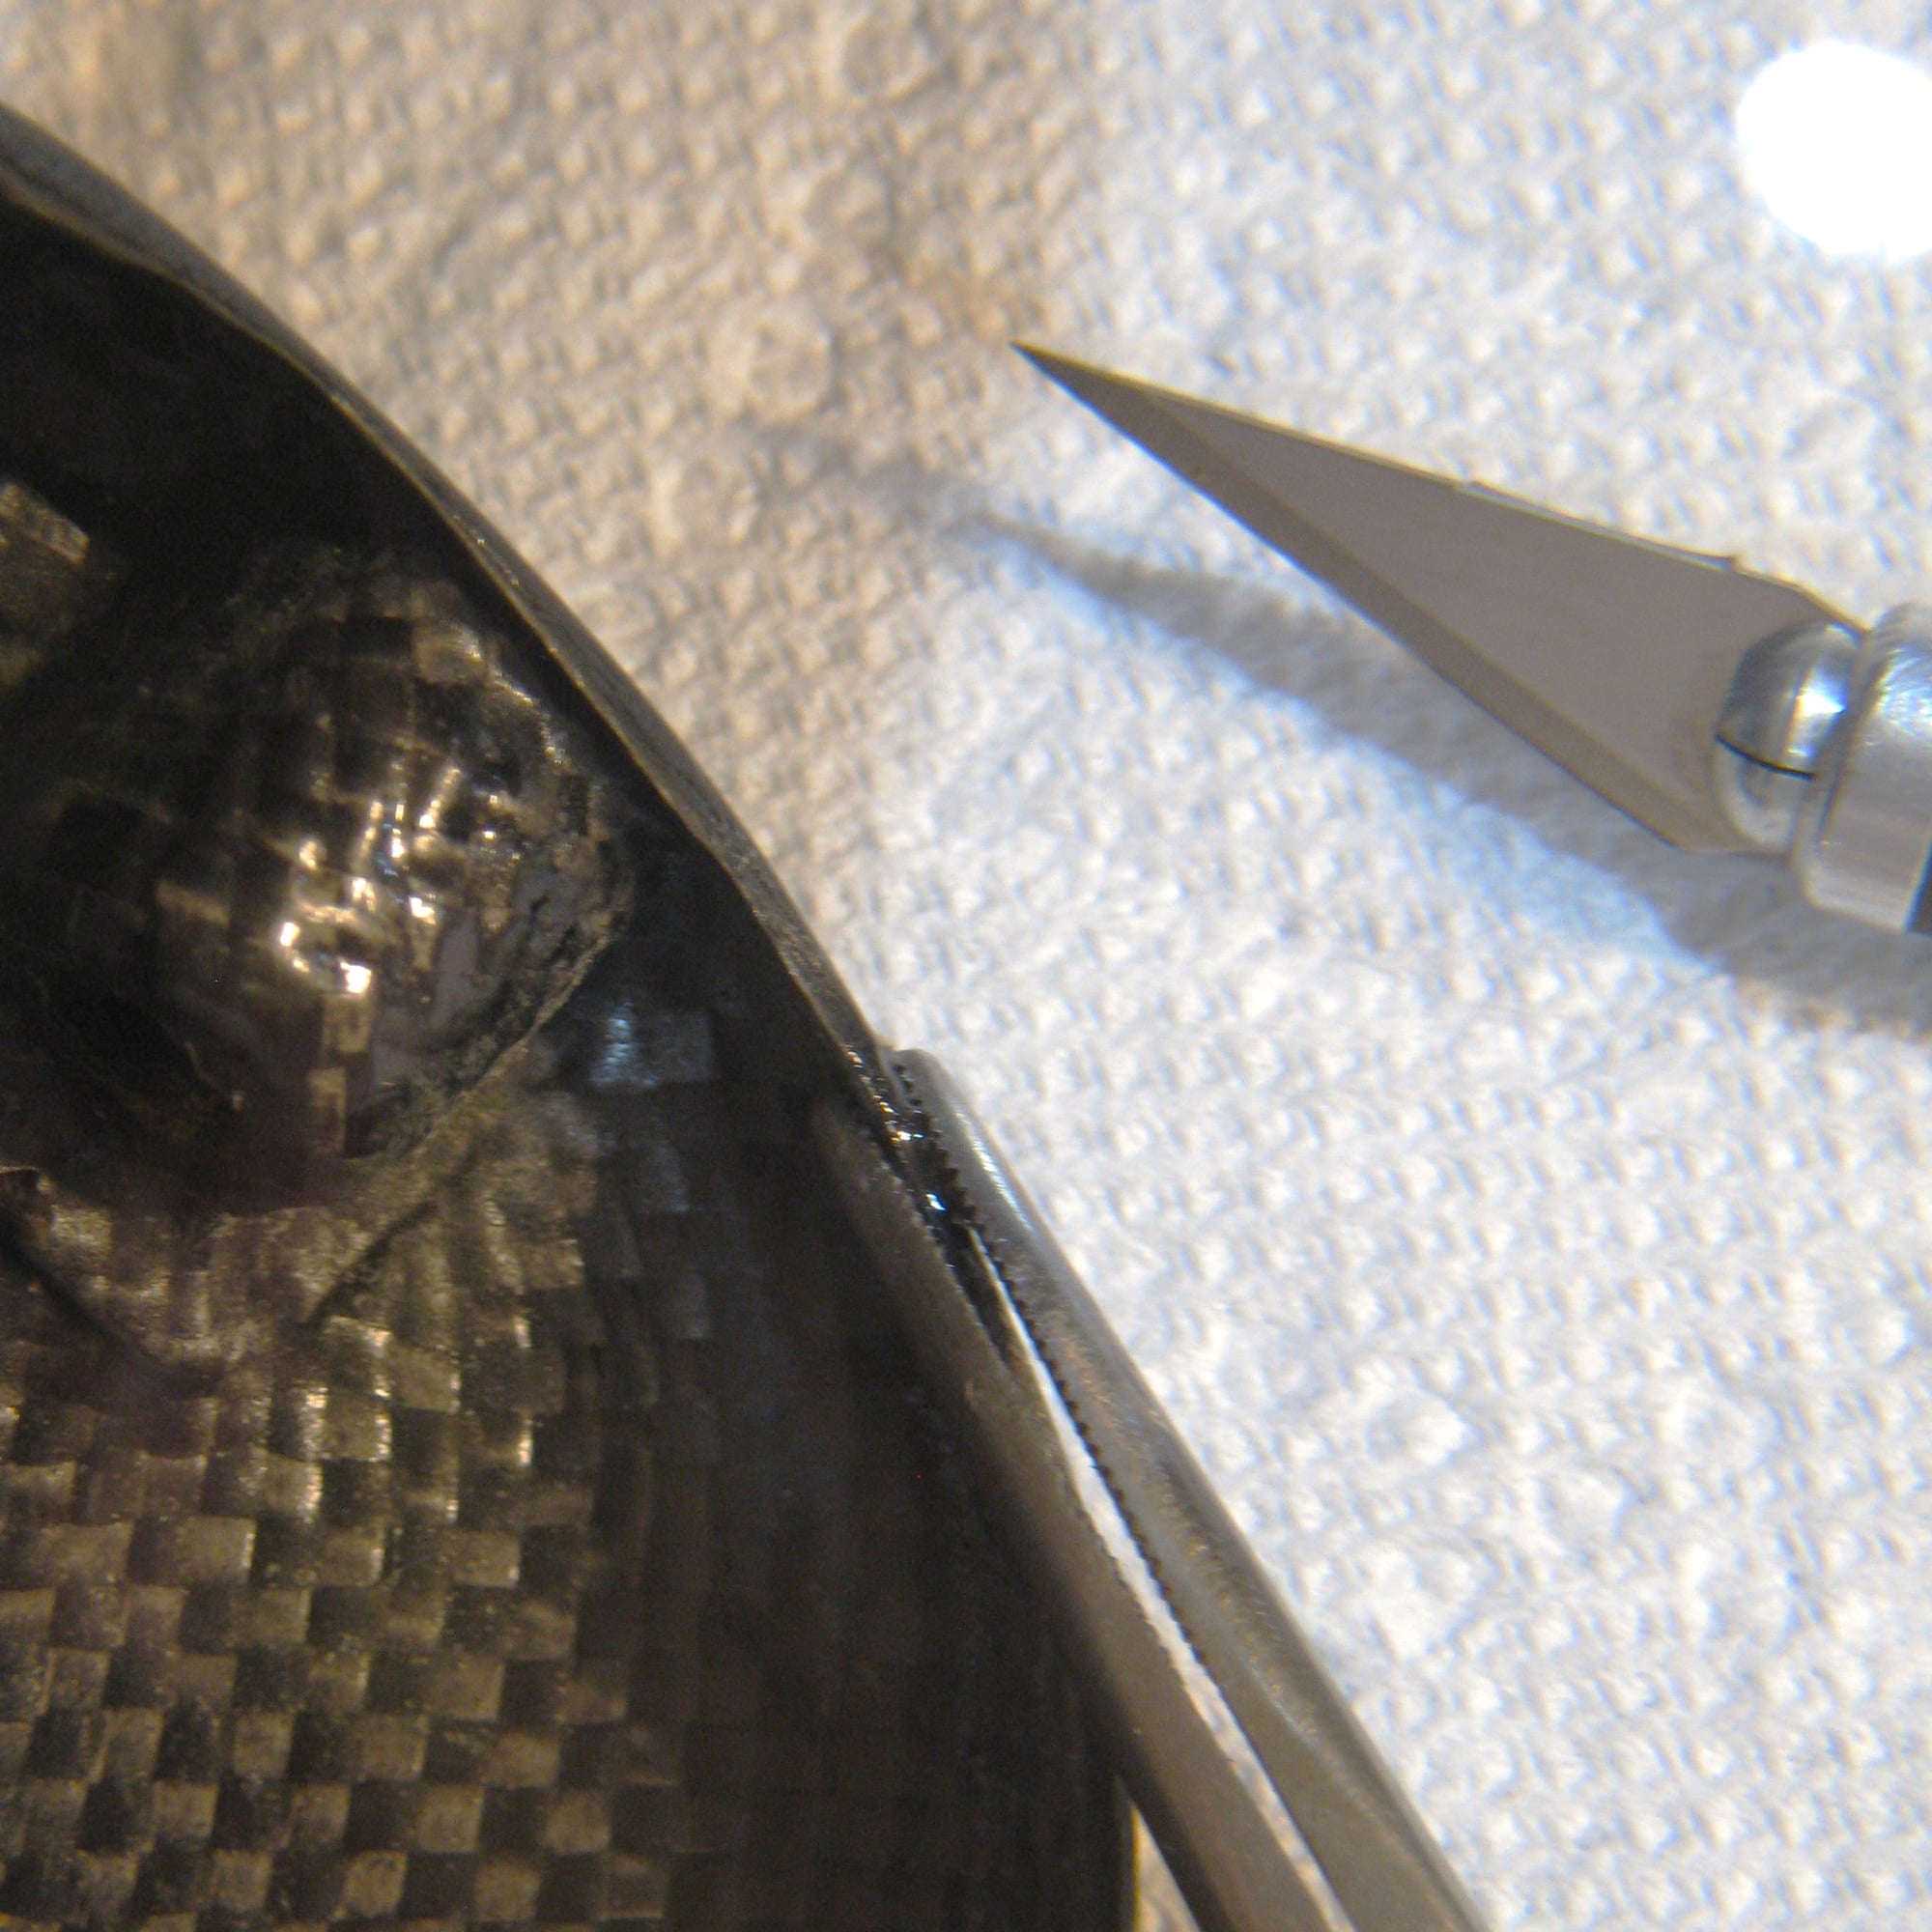
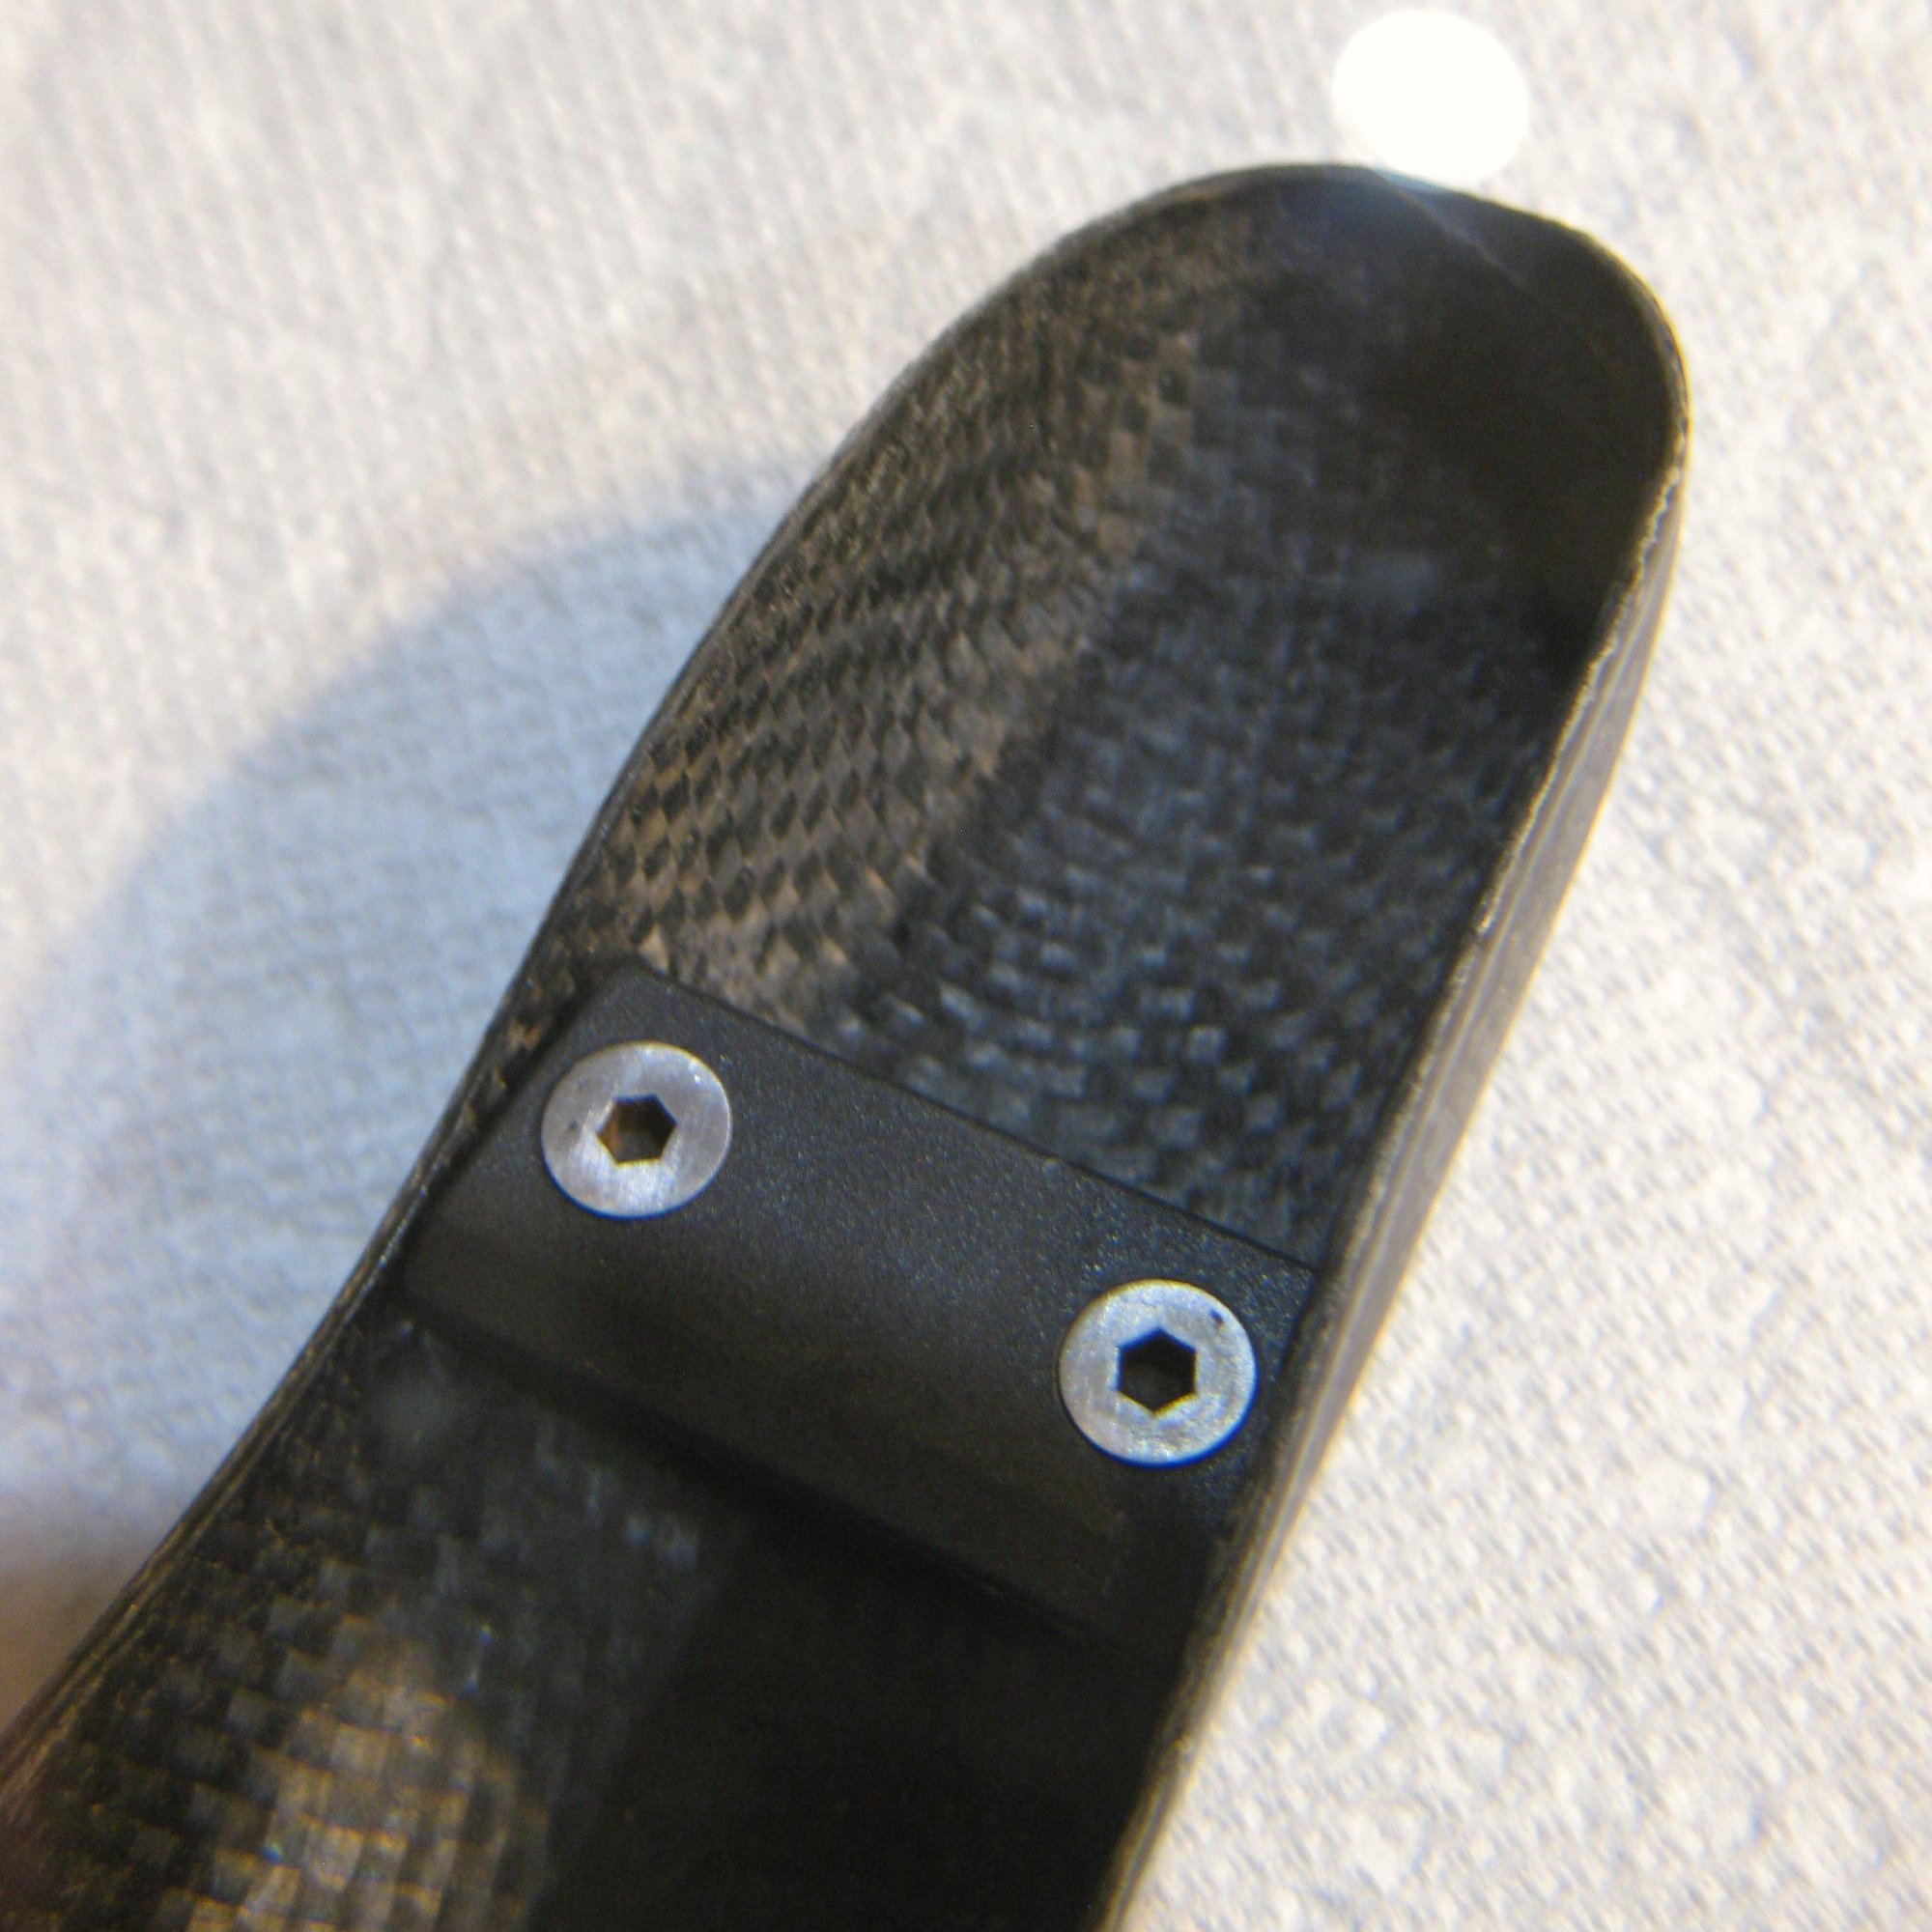
Next, I unscrewed the forward mounting plate and dressed the two Allen screws with a fine sanding film. Before:
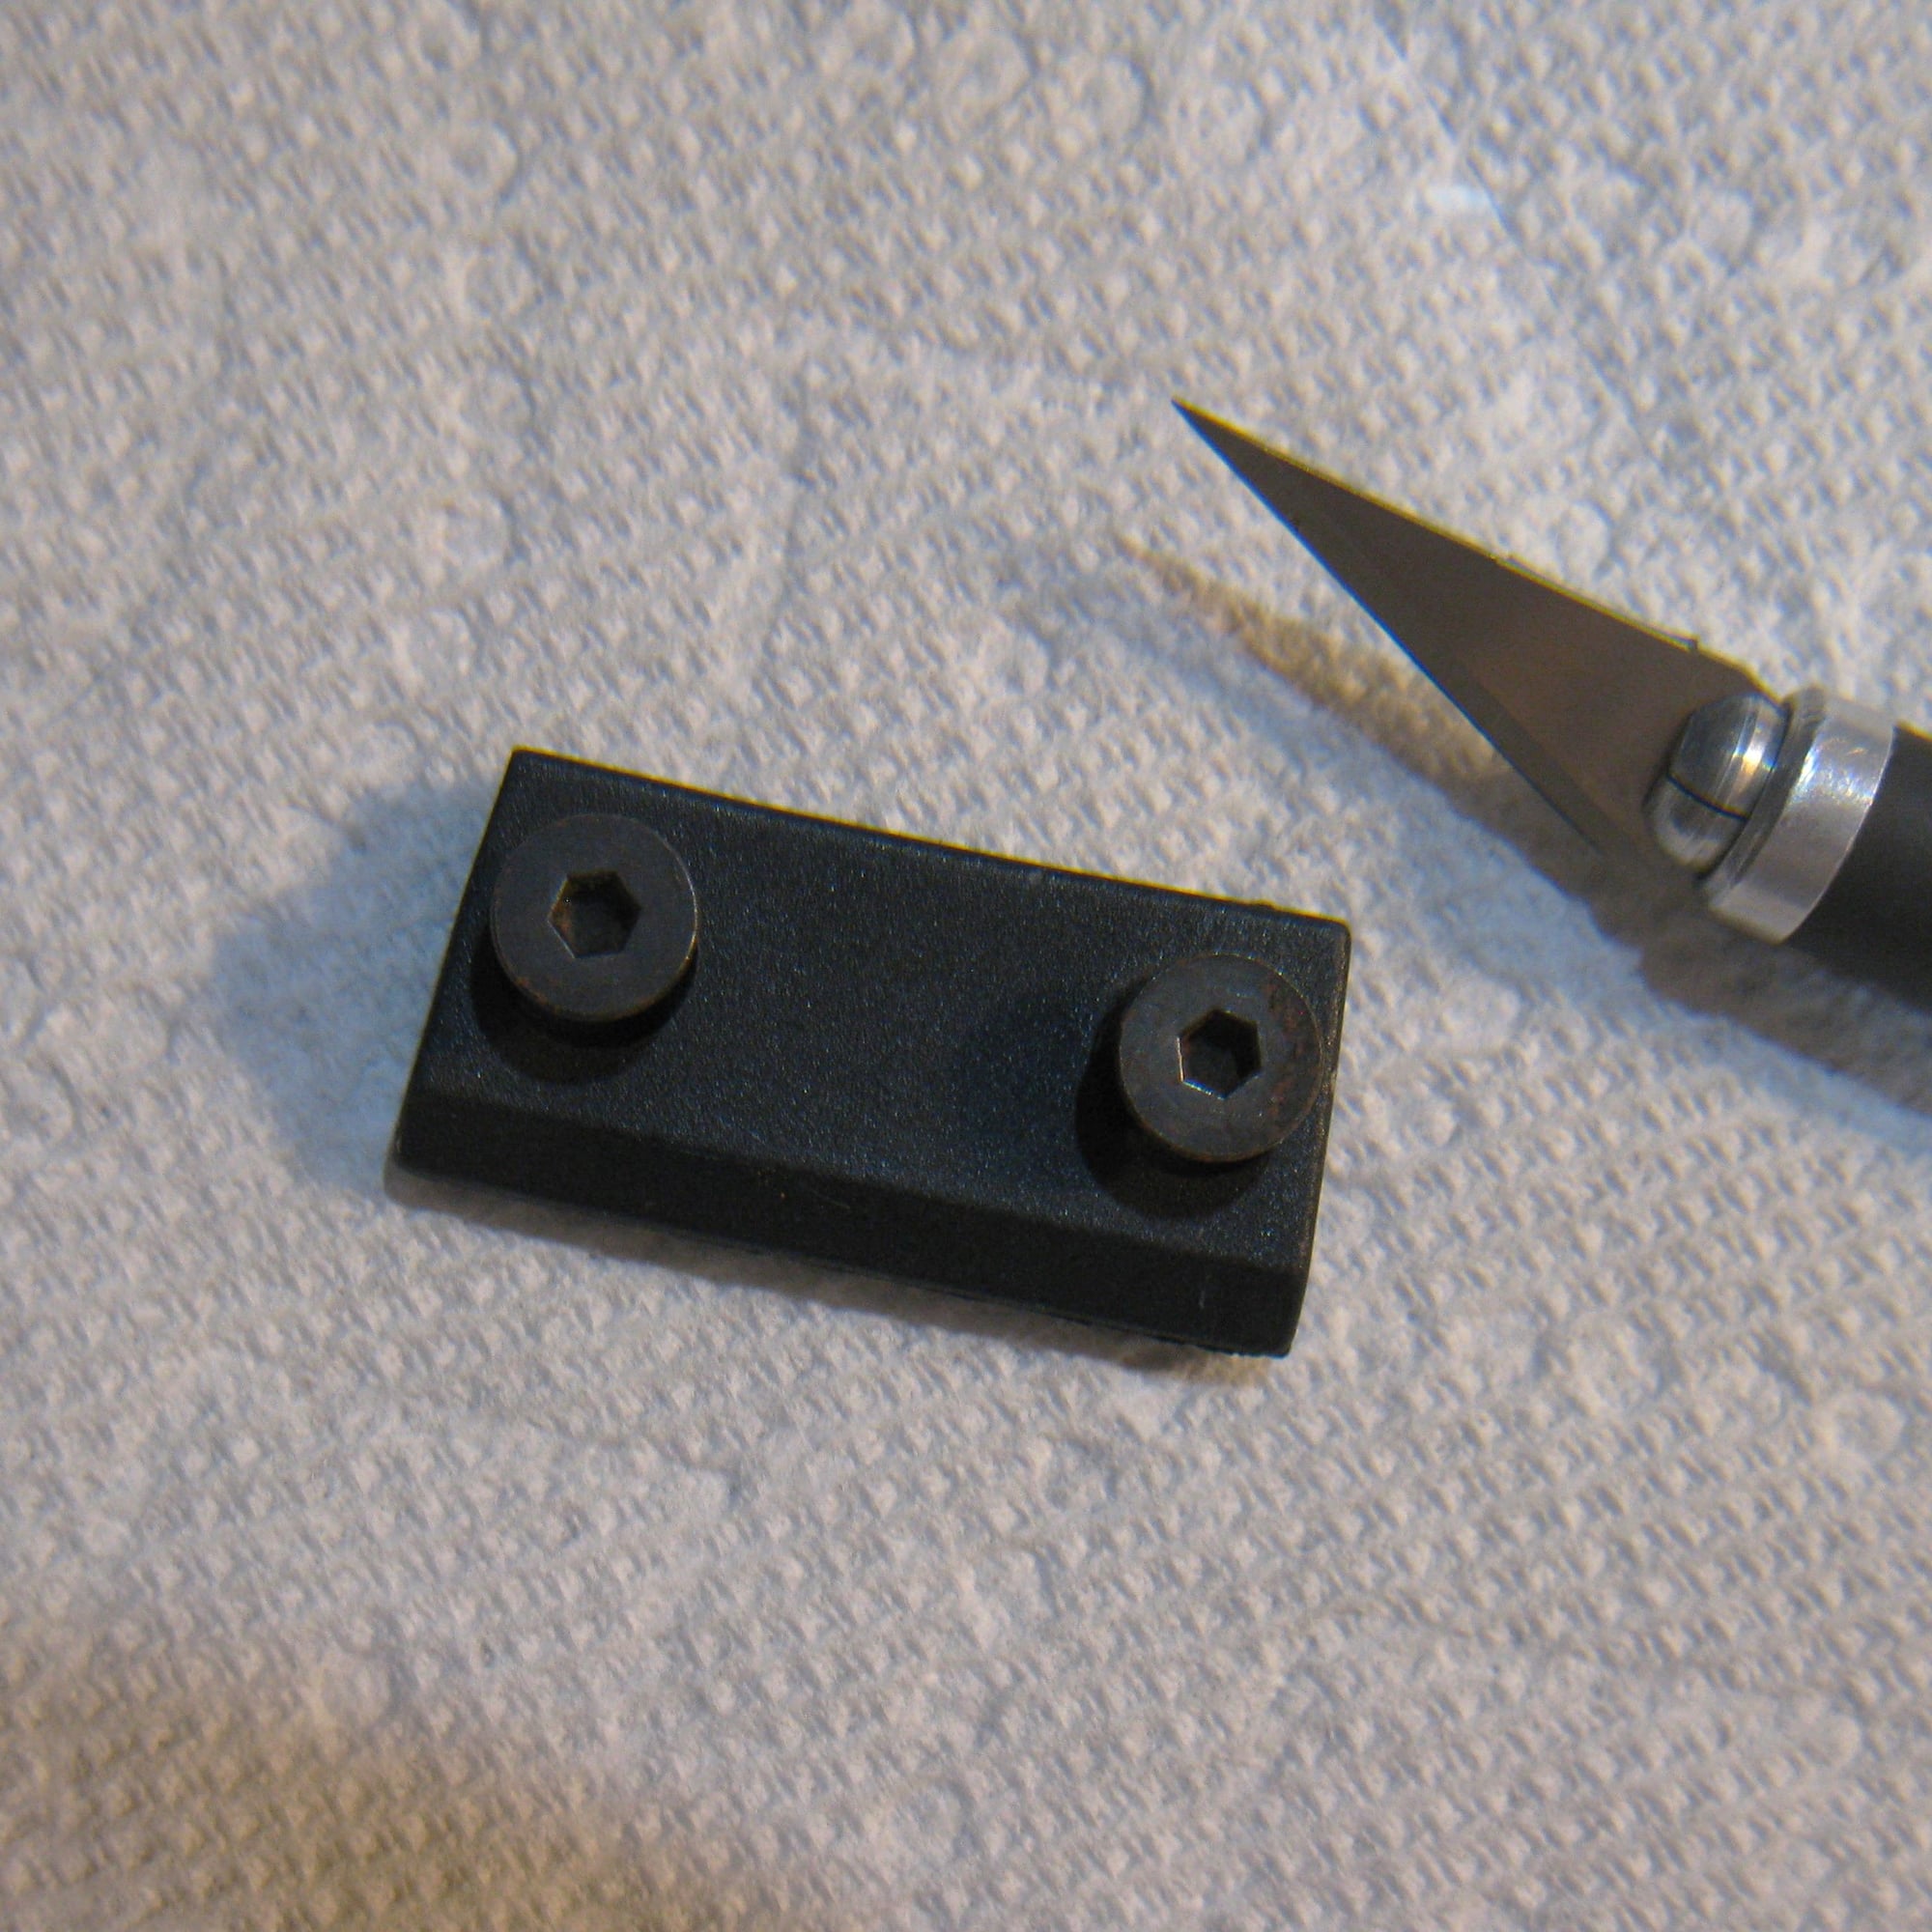
After:

Finally, I used the same sanding film to clean up the seatpost marks from the Ti saddle rail. Before:
After:
Until the epoxy has cured, I'll have to wait to tackle the removal of the original, slightly marred clear-coat. Then, it'll be time to apply the bits and bobs of my 're-badge' - after which I'll lay down three or four coats of clear.
Anyhoo, I'm off and running. Hopefully before the lights go out for the start of this weekend's F1 season-opening Bahrain Grand Prix, I'll have a finished article. Stay tuned...
DD
Some of you may recall some months back my having to first repair (after the front rail mounting failed while in the middle of a ride), then refinish a badly-abraded/cracked corner as a result of an unplanned car/bike interface (Lexus vs. Davidson - the rear wheel lost). After affecting the repair/refinish, I retired that particular saddle - IMHO, it had received one knock too many. The repair and refinish process yielded a beautiful saddle, albeit redundant for anything but a display case. Not to worry, because the insurance settlement paid for an almost-new, undamaged replacement.
Well, the problem is this: I love these saddles - and not just to look at. They're flexible, and incredibly light in the bargain - plus, they just look fantastic (yeah, that's coming from me, Mr. Super and Nuovo Record all the way). However, being an F1 fan since the late 70's, I've been aware of carbon fiber applications for decades, and the stuff is fascinating to me. I love the way the weave looks, especially in direct sunlight, and of course it's extremely light and strong. The Flite Evolution looks at home on the 8-speed-equipped Davidson, but I also gave it a go for a bit on the Medici - and it looks super-cool on that Super Record-equipped bike, too. But, I only had the extra one - you know, the one I can't trust anymore not to carve up my gluteus maximus in use.
Lucky me, I found this about a week ago:
Spent 5 days discussing things back-and-forth with the seller, receiving details regarding the condition, and how low he'd go (he was looking for $299, but was also using the 'Make Offer' option). He suggested his low was half the ask; that's all I needed to hear! Once he'd provided me a photo showing the one area of concern I had, I was convinced this was the best chance to get a rider at a decent price - and I had the refinishing skills to gussy it up thanks to the two previous mishaps. It arrived today, exactly as described and photographed.
You might have noticed it lacks any identification marks/logos. That was in my favor when negotiating the price down to a reasonable sum, but even before buying I knew exactly how I was going to rectify the bland look. My solution is still a secret, but all will be revealed before the thread is done.
For now, I've begun the cleaning process - and the tiny aesthetic repair, too. Pics follow - because this is a 'How To' guide, and what's a guide without pics, amiright?
There was a tiny chip in the first ply on the drive-side rear corner. I poked a bit of epoxy into the gap with a toothpick, and clamped it closed with a hemostat; I'm leaving it to cure overnight:
Next, I unscrewed the forward mounting plate and dressed the two Allen screws with a fine sanding film. Before:
After:
Finally, I used the same sanding film to clean up the seatpost marks from the Ti saddle rail. Before:
After:
Until the epoxy has cured, I'll have to wait to tackle the removal of the original, slightly marred clear-coat. Then, it'll be time to apply the bits and bobs of my 're-badge' - after which I'll lay down three or four coats of clear.
Anyhoo, I'm off and running. Hopefully before the lights go out for the start of this weekend's F1 season-opening Bahrain Grand Prix, I'll have a finished article. Stay tuned...
DD

Last edited by Drillium Dude; 03-02-23 at 02:25 AM.

Likes For Drillium Dude:
03-02-23, 01:31 AM
#2
Senior Member

Join Date: Nov 2015
Posts: 4,485
Mentioned: 102 Post(s)
Tagged: 0 Thread(s)
Quoted: 1639 Post(s)
Likes: 0
Liked 829 Times
in
538 Posts
Very cool CF saddle....... Down to the bare minimum for big weight weenie points.I never owned/ridden on one yet because I'd feel like I'd be sitting on a potato chip that could suddenly asplode to pieces.......
__________________
72 Line Seeker
83 Davidson Signature
84 Peugeot PSV
84 Peugeot PY10FC
84 Gitane Tour de France.
85 Vitus Plus Carbone 7
86 ALAN Record Carbonio
86 Medici Aerodynamic (Project)
88 Pinarello Montello
89 Bottecchia Professional Chorus SL
95 Trek 5500 OCLV (Project)
72 Line Seeker
83 Davidson Signature
84 Peugeot PSV
84 Peugeot PY10FC
84 Gitane Tour de France.
85 Vitus Plus Carbone 7
86 ALAN Record Carbonio
86 Medici Aerodynamic (Project)
88 Pinarello Montello
89 Bottecchia Professional Chorus SL
95 Trek 5500 OCLV (Project)
Likes For Chombi1:
03-02-23, 02:47 AM
#3
Banned.
Thread Starter
Join Date: Jul 2009
Location: PAZ
Posts: 12,294
Mentioned: 255 Post(s)
Tagged: 0 Thread(s)
Quoted: 2588 Post(s)
Liked 4,824 Times
in
1,709 Posts
@Chombi1 Believe it or not, Flite Evos are the most comfortable saddle I've ever perched upon. The secret to this comfort is in the carbon's ability to flex; compared to the Concor and 3ttt saddles I use on everything else, it's heaven. Even when compared to a leather-covered Flite, the Evo wins out.
I usually 'ride light' on the saddle, but I was on the nose when I hit a bump with a bang, which sheared off the composite forward rail mounting point. When I repaired it, I judiciously applied epoxy underneath, and even added a fillet of epoxy front and rear of the mounting. Worked a treat - right up until the collision which abraded and cracked (all the way through the shell) the drive-side rear corner. Even so, the mount stayed in place. I guess the added epoxy did the trick!
Btw, it's my understanding this type of failure is common with the first-generation Evos; I've certainly seen my share of photos of Evos with snapped-off front mounting points. Could be why the later versions had a modification to the front mount, which appears to be screwed in from the top of the shell vice underneath. Perhaps if this one turns out as well as the last, I might think about providing a cottage-industry repair service - I'm sure others would like to extend the life of their 'broken dream' saddles.
Once this is completed, it'll go back onto the Medici for trials, and if all is well, it'll stay. It won't make much difference to the overall weight, but it'll look cool
DD
Likes For Drillium Dude:
03-02-23, 07:51 AM
#4
Freewheel Medic

Join Date: Oct 2005
Location: An Island on the Coast of GA!
Posts: 12,882
Bikes: Snazzy* Schwinns, Classy Cannondales & a Super Pro Aero Lotus (* Ed.)
Mentioned: 140 Post(s)
Tagged: 0 Thread(s)
Quoted: 1452 Post(s)
Liked 2,194 Times
in
962 Posts
Looking forward to your creative work and the big reveal.
I should try one, since it avoids all that unnecessary foam padding, which I find so unbearable on my 'Gatorcet.
I should try one, since it avoids all that unnecessary foam padding, which I find so unbearable on my 'Gatorcet.
__________________
Bob
Enjoying the GA coast all year long!
Thanks for visiting my website: www.freewheelspa.com
Bob
Enjoying the GA coast all year long!
Thanks for visiting my website: www.freewheelspa.com
Likes For pastorbobnlnh:
03-02-23, 11:20 AM
#5
The Huffmeister

Join Date: Jul 2008
Location: The Le Grande HQ
Posts: 2,735
Bikes: '79 Trek 938, '86 Jim Merz Allez SE, '90 Miyata 1000, '68 PX-10, '80 PXN-10, '73 Super Course, '87 Guerciotti, '83 Trek 600, '80 Huffy Le Grande
Mentioned: 45 Post(s)
Tagged: 0 Thread(s)
Quoted: 1225 Post(s)
Liked 3,543 Times
in
1,407 Posts
Never knew about these� great work and awesome content!
Likes For AdventureManCO:

Likes For unworthy1:
03-02-23, 04:55 PM
#7
Senior Member

Join Date: May 2012
Location: Point Reyes Station, California
Posts: 4,527
Bikes: Indeed!
Mentioned: 92 Post(s)
Tagged: 0 Thread(s)
Quoted: 1507 Post(s)
Liked 3,469 Times
in
1,131 Posts
I learned something new already. I hadn't previously heard of sanding film. I looked it up, seems like ideal stuff for sanding small radius items and intricate details. Thanks!
Brent
Brent
__________________
"I have a tendency to meander sometimes." B.G.
"I have a tendency to meander sometimes." B.G.
Last edited by obrentharris; 03-02-23 at 04:56 PM. Reason: spelling
Likes For obrentharris:
03-02-23, 09:55 PM
#8
Banned.
Thread Starter
Join Date: Jul 2009
Location: PAZ
Posts: 12,294
Mentioned: 255 Post(s)
Tagged: 0 Thread(s)
Quoted: 2588 Post(s)
Liked 4,824 Times
in
1,709 Posts
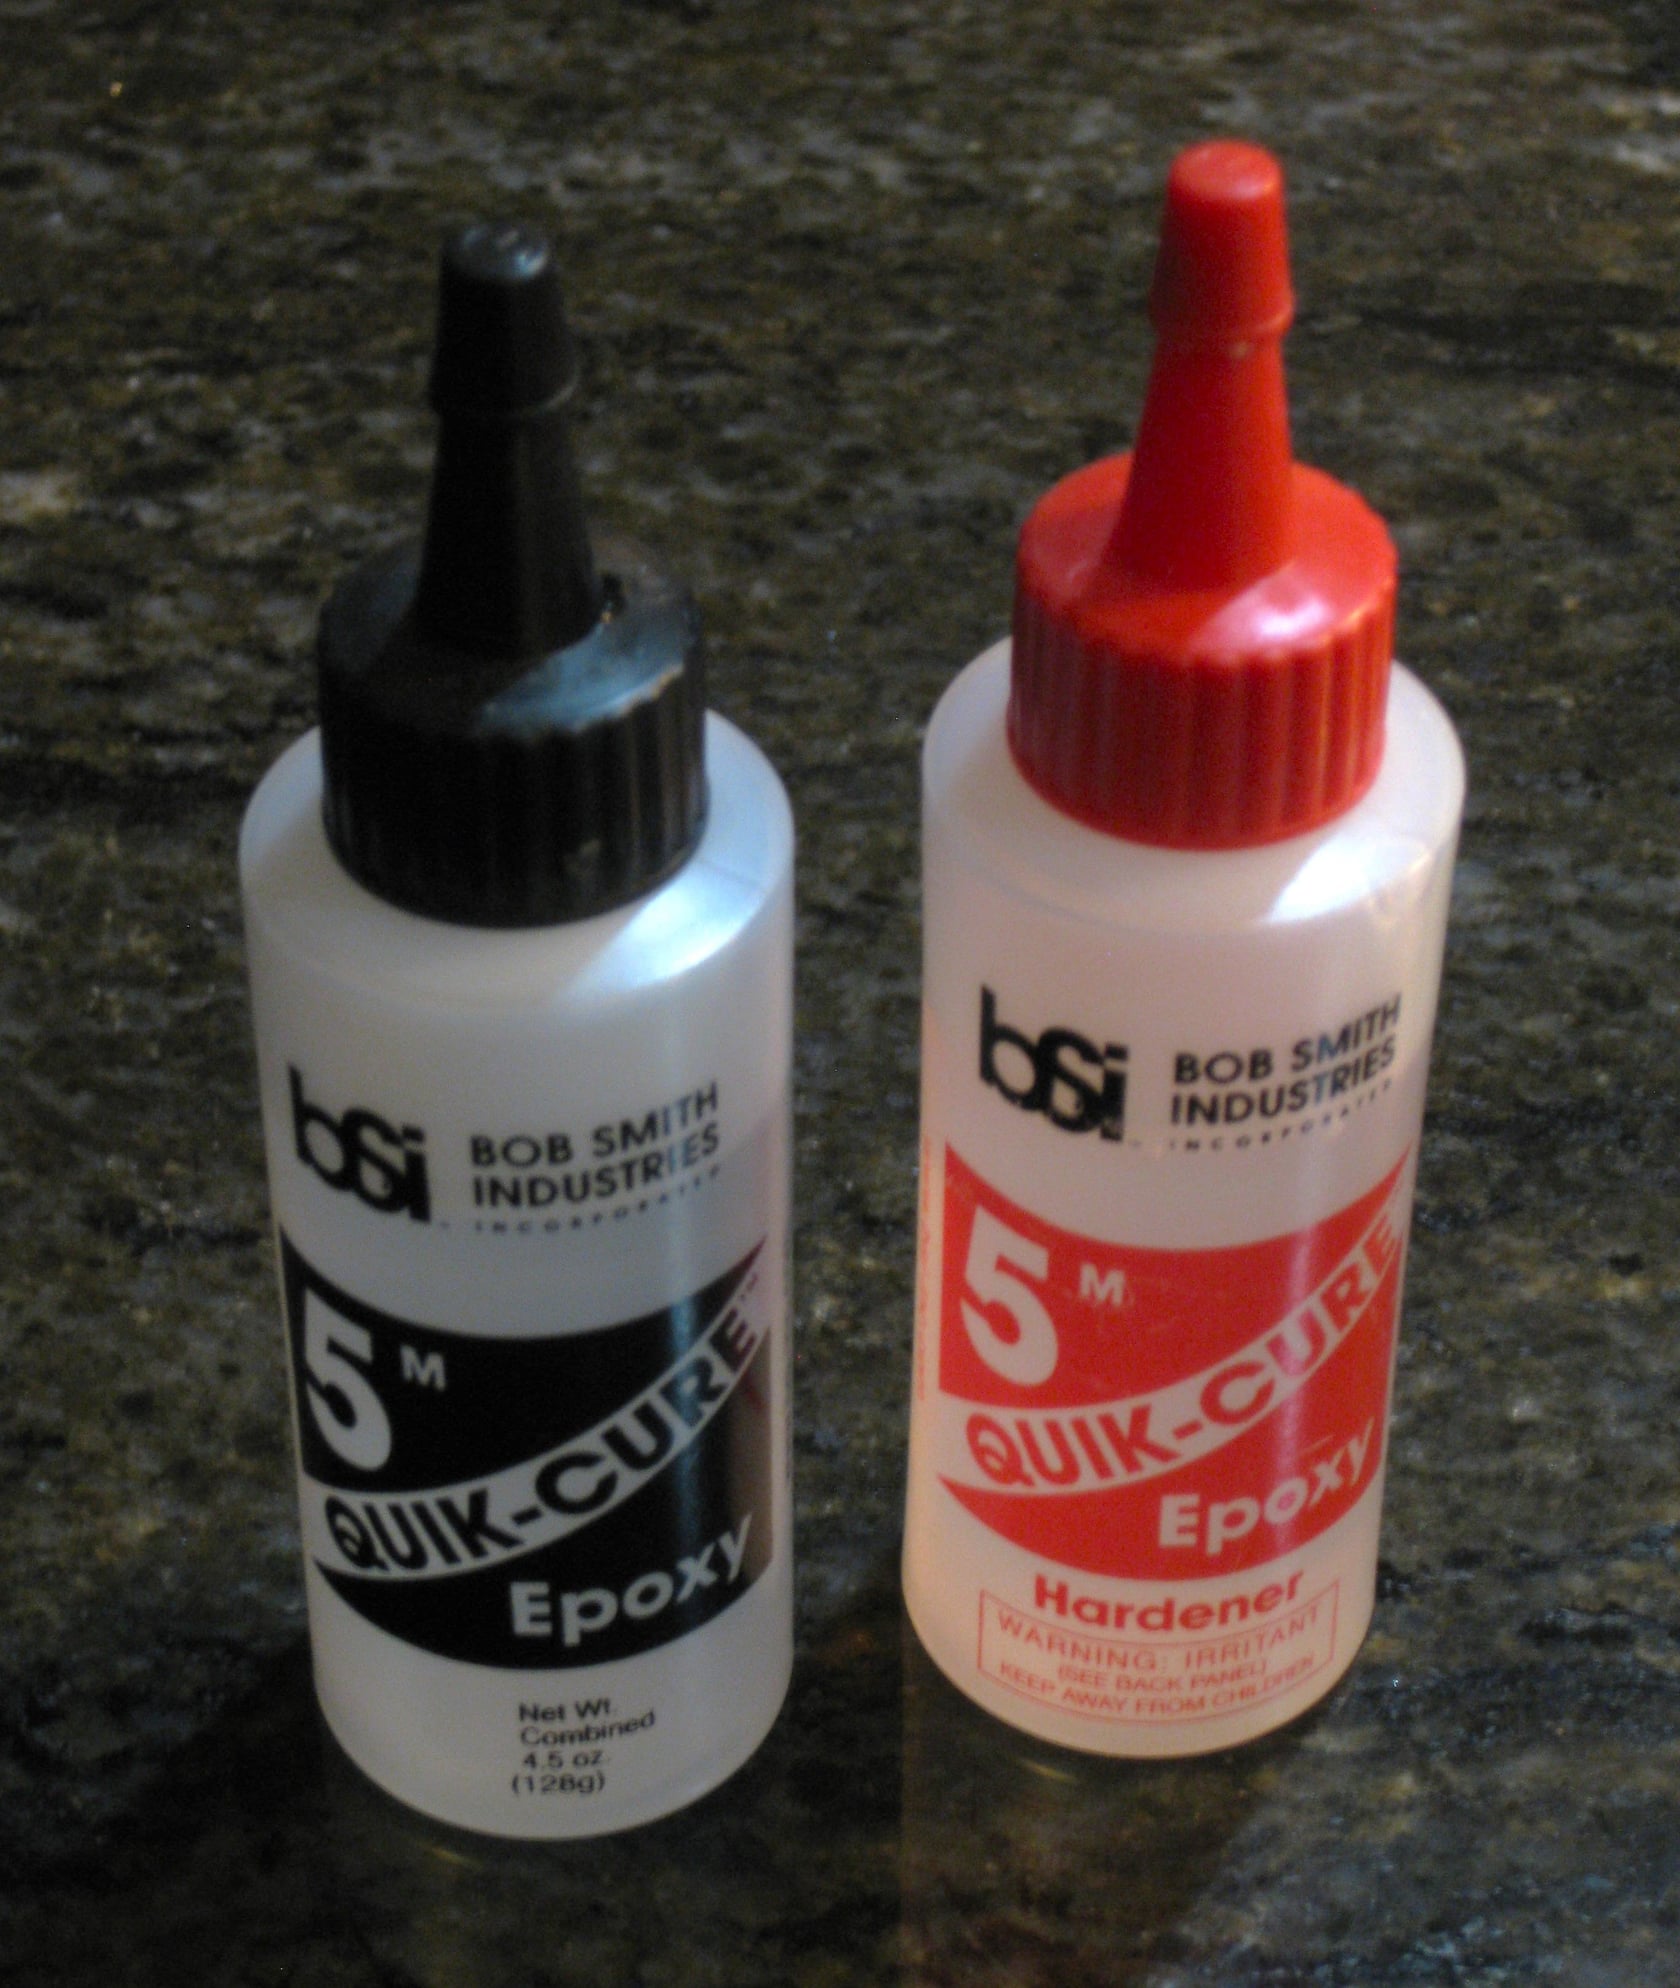
Don't quote me, but I believe I paid a little over $15 for the epoxy and hardener set.
You should be able to find it at any quality hobby shop. Even used it to repair one of the screen-hinge mountings on my ASUS laptop, extending that important component's life, too
DD
Last edited by Drillium Dude; 03-02-23 at 11:22 PM. Reason: Added additional info
Likes For Drillium Dude:
03-02-23, 09:59 PM
#9
Banned.
Thread Starter
Join Date: Jul 2009
Location: PAZ
Posts: 12,294
Mentioned: 255 Post(s)
Tagged: 0 Thread(s)
Quoted: 2588 Post(s)
Liked 4,824 Times
in
1,709 Posts
Many of the tools I use in model-building transfer over to the bikes. In fact, I had my Dremel at the model bench long before I used it to poke holes in aluminum bike bits
DD
Likes For Drillium Dude:
03-02-23, 11:07 PM
#10
Banned.
Thread Starter
Join Date: Jul 2009
Location: PAZ
Posts: 12,294
Mentioned: 255 Post(s)
Tagged: 0 Thread(s)
Quoted: 2588 Post(s)
Liked 4,824 Times
in
1,709 Posts
Don't know if this will be as cool as the 'Gatorcet (or a certain Huffy currently stirring up a bit o' controversy), but I'm giving it a go anyway.
I wouldn't over-rate padding, honestly, excepting this bad boy. The flexing is 'padding' enough for at least 80 miles - as my tush has discovered!
DD
Likes For Drillium Dude:
03-02-23, 11:10 PM
#11
Banned.
Thread Starter
Join Date: Jul 2009
Location: PAZ
Posts: 12,294
Mentioned: 255 Post(s)
Tagged: 0 Thread(s)
Quoted: 2588 Post(s)
Liked 4,824 Times
in
1,709 Posts
Thank you, Dave! And the same goes right back at you; I've never been so entertained by a thread about a Huffy as I've been with yours
DD
DD
Likes For Drillium Dude:
03-03-23, 05:01 AM
#12
Banned.
Thread Starter
Join Date: Jul 2009
Location: PAZ
Posts: 12,294
Mentioned: 255 Post(s)
Tagged: 0 Thread(s)
Quoted: 2588 Post(s)
Liked 4,824 Times
in
1,709 Posts
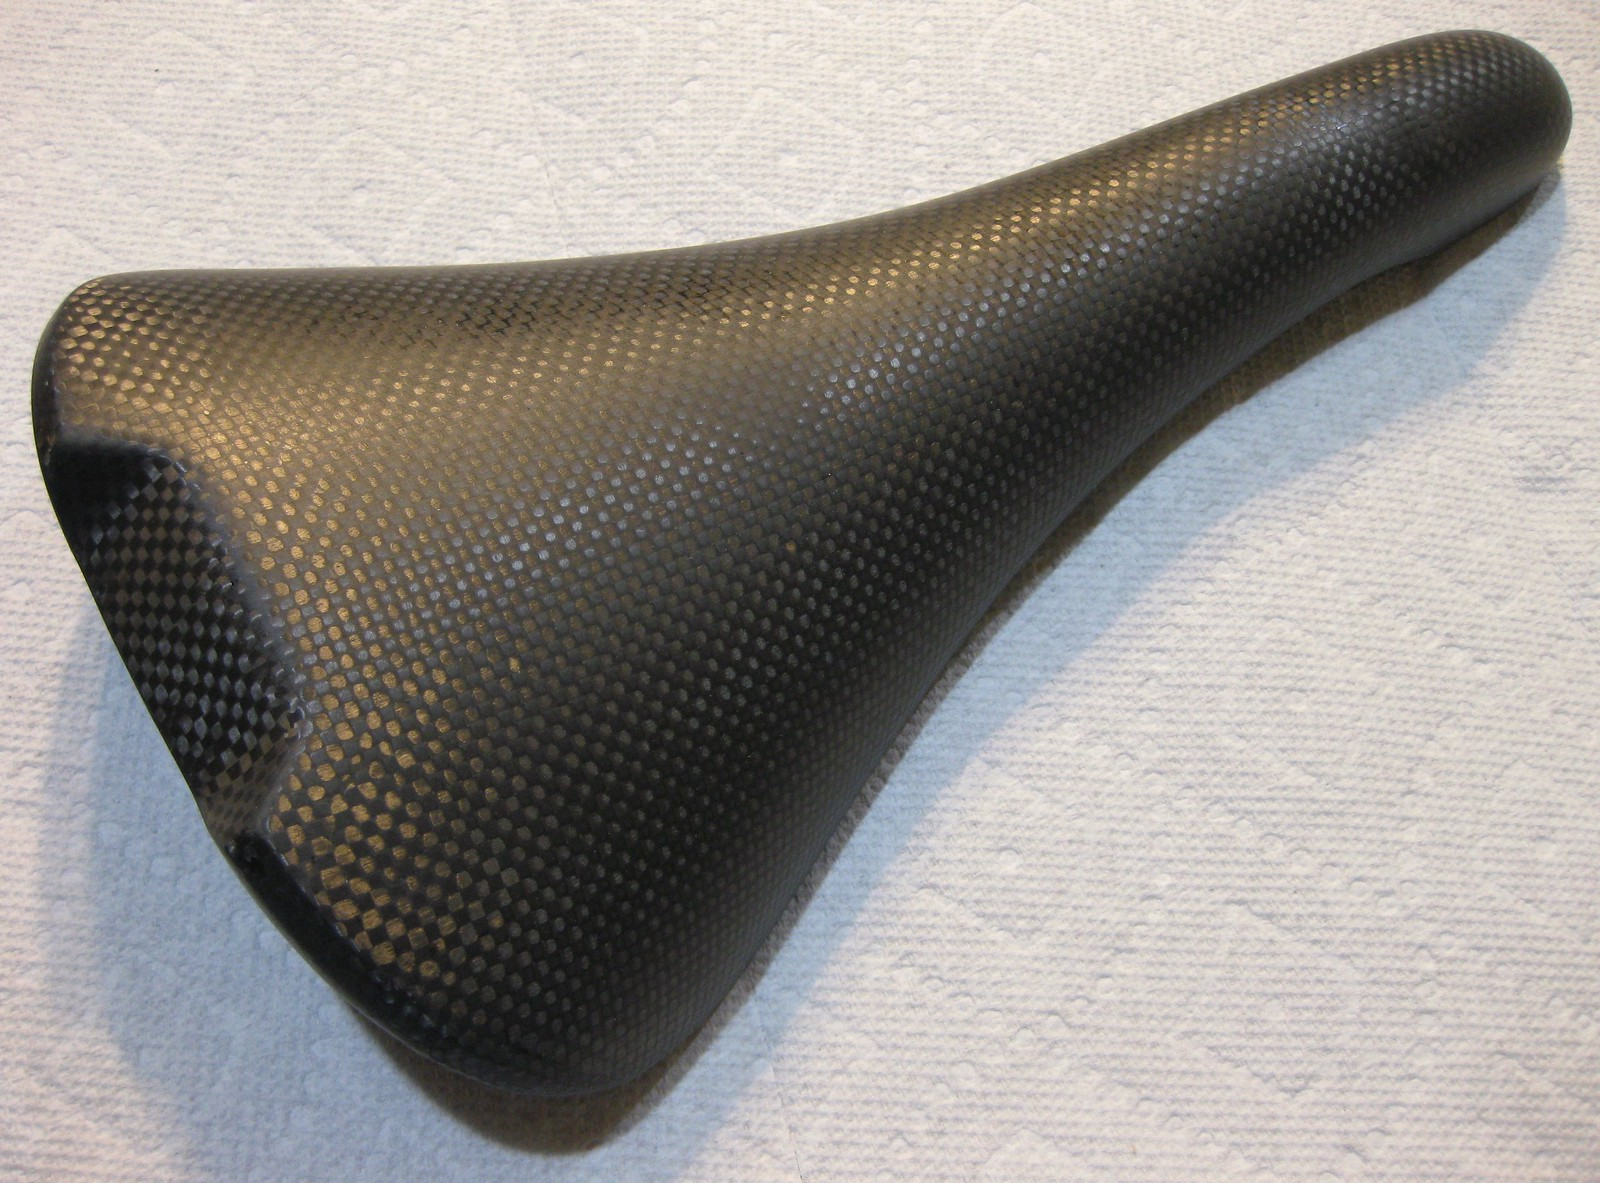
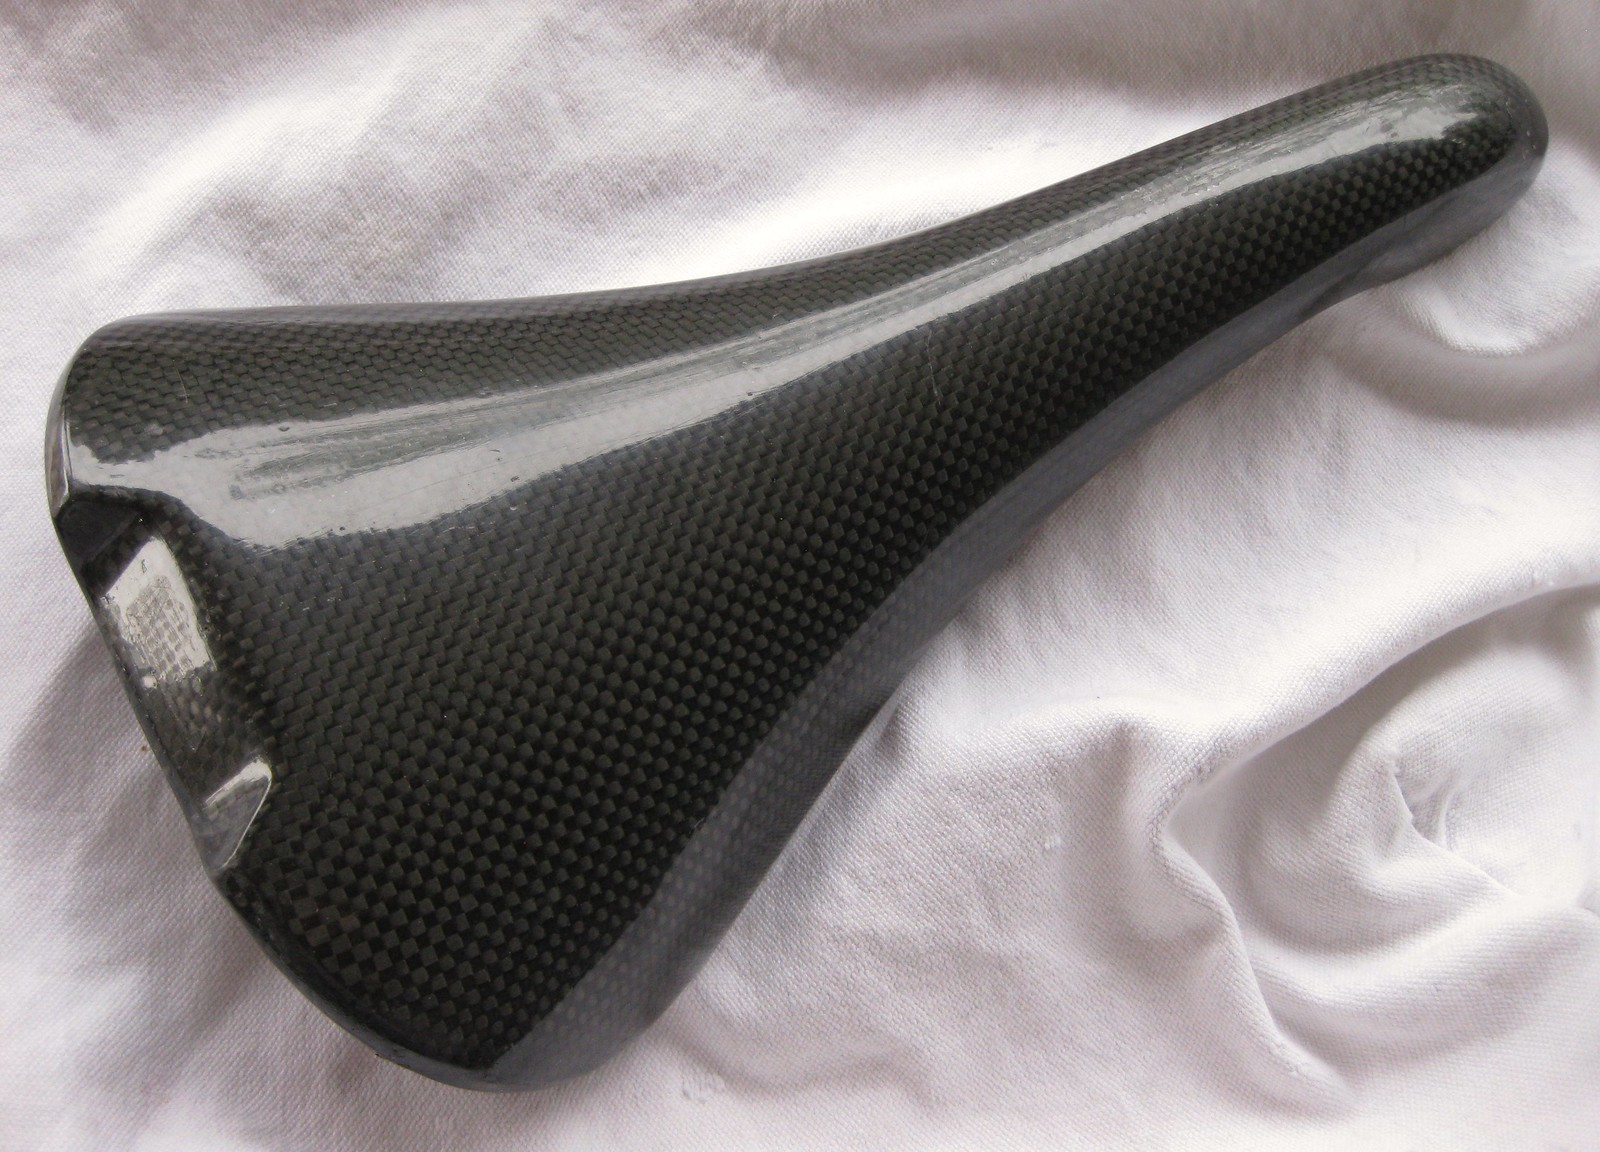
Clear-coat removal stage is complete. Today I'll begin 'making it my own'.
Looks pretty clean in bare carbon fiber, don't you think?

Clear-coat removal from the 'swallowtail' indentation at the rear was a bit of a pain, but I got there in the end:

It's rather difficult to see with the shadows, but the tiny aesthetic fix to the rear corner is complete - and nearly invisible:
That's all for now, folks!
DD
Looks pretty clean in bare carbon fiber, don't you think?
Clear-coat removal from the 'swallowtail' indentation at the rear was a bit of a pain, but I got there in the end:
It's rather difficult to see with the shadows, but the tiny aesthetic fix to the rear corner is complete - and nearly invisible:
That's all for now, folks!
DD
Likes For Drillium Dude:
03-03-23, 05:04 AM
#13
Banned.
Thread Starter
Join Date: Jul 2009
Location: PAZ
Posts: 12,294
Mentioned: 255 Post(s)
Tagged: 0 Thread(s)
Quoted: 2588 Post(s)
Liked 4,824 Times
in
1,709 Posts
Before and after comparison:

DD
DD
Likes For Drillium Dude:
03-03-23, 08:51 AM
#14
Banned.
Thread Starter
Join Date: Jul 2009
Location: PAZ
Posts: 12,294
Mentioned: 255 Post(s)
Tagged: 0 Thread(s)
Quoted: 2588 Post(s)
Liked 4,824 Times
in
1,709 Posts
More progress this morning, masking and then laying the base layers of Tamiya Light Sand on the underside of the shell. Not to worry, as the top of the shell will be receiving a few layers of clear-coat.
Masking complete; the four little tabs sticking up are there to aid in gripping the shell during the painting process:
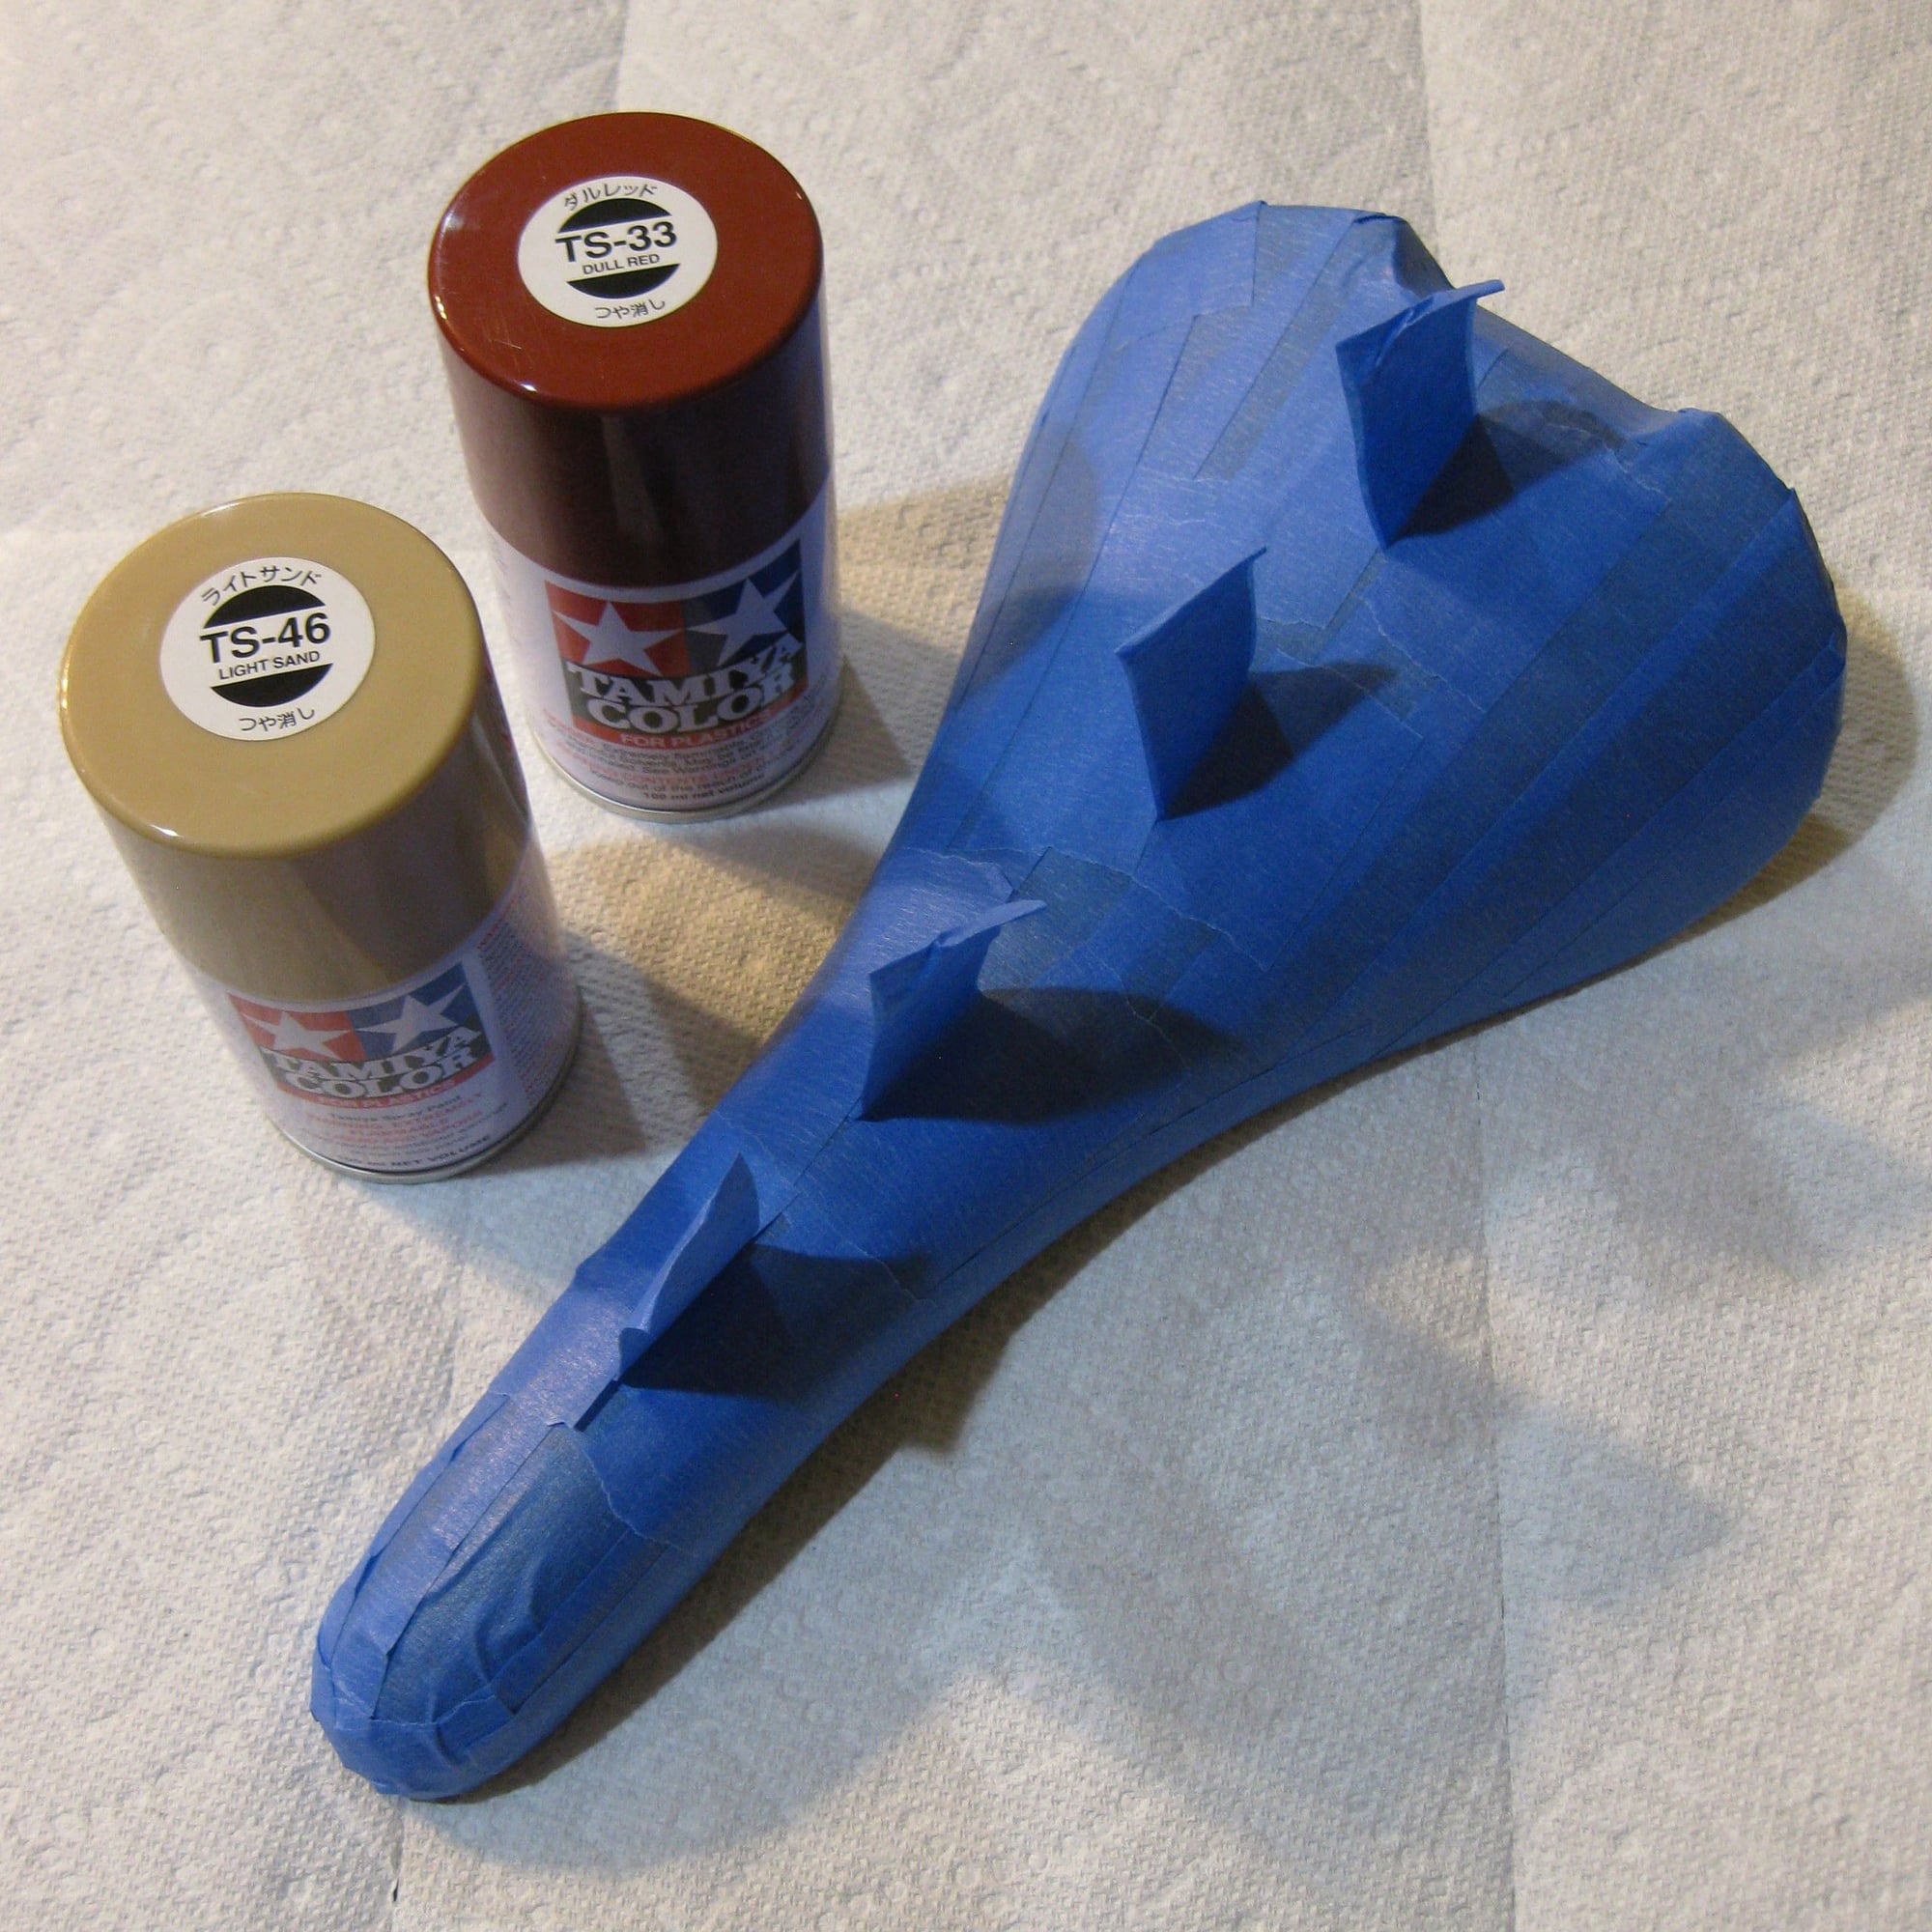
The result of the first two passes:

More later...
DD
Masking complete; the four little tabs sticking up are there to aid in gripping the shell during the painting process:
The result of the first two passes:
More later...
DD
Likes For Drillium Dude:
03-03-23, 11:21 AM
#15
Banned.
Thread Starter
Join Date: Jul 2009
Location: PAZ
Posts: 12,294
Mentioned: 255 Post(s)
Tagged: 0 Thread(s)
Quoted: 2588 Post(s)
Liked 4,824 Times
in
1,709 Posts
Color coats laid down:

The next post will reveal the final result - and the thought process which informed this concept.
DD
The next post will reveal the final result - and the thought process which informed this concept.
DD
Likes For Drillium Dude:
03-03-23, 02:43 PM
#16
Stop reading my posts!

Join Date: Sep 2004
Posts: 12,580
Mentioned: 89 Post(s)
Tagged: 0 Thread(s)
Quoted: 1443 Post(s)
Liked 1,061 Times
in
786 Posts
interesting 'how-to wiki"!
my 2-3 cents: I didn't know it was do-able or safe to sand any of the "coatings" applied to CF, I assumed they all were "resin" so integral to the strength of the final composite.
How do you know what to remove and what you dare NOT remove (ie: when to stop sanding)?
I don't know the Bob Smith brand of epoxy but I swear I have bought another brand in exactly the same squeeze bottles before, with the same graphics even, but not by that name...could be just my brain playing tricks (again).
My own rule of thumb is to use the slowest cure epoxy that works ("logic" being that slow curing is stronger than fast) so my go-to has always been for 30- or 90-minute cure, but (wouldn't ya know?) that is getting impossible to find at any Hardware or (what passes for) Hobby Shops, these days.
Have to order online...
Likes For unworthy1:
03-03-23, 03:40 PM
#17
Senior Member
Join Date: Jun 2018
Location: London, UK
Posts: 725
Bikes: Yes, probably too many but still have a roving eye...
Mentioned: 11 Post(s)
Tagged: 0 Thread(s)
Quoted: 316 Post(s)
Liked 2,799 Times
in
532 Posts
I've got Flite's in many color varieties but have never had a carbon one, and when I do rarely see one over her in the UK they are eye wateringly expensive so I've always been put off the idea, but loving what you've done with this DD. It looks great already and apparently you've not finished yet, in no way is this looking like a cheaper alternative, a fine artist at work.
And if the saddle is anything to go by, I'm sure I'm not the only one that is intrigued and would love to see some examples of your model making, have you any posted any of your work on here?
, in no way is this looking like a cheaper alternative, a fine artist at work.And if the saddle is anything to go by, I'm sure I'm not the only one that is intrigued and would love to see some examples of your model making, have you any posted any of your work on here?
Likes For botty kayer:
03-03-23, 04:01 PM
#18
Senior Member
Join Date: Jun 2018
Location: London, UK
Posts: 725
Bikes: Yes, probably too many but still have a roving eye...
Mentioned: 11 Post(s)
Tagged: 0 Thread(s)
Quoted: 316 Post(s)
Liked 2,799 Times
in
532 Posts
I've snapped the rails on 3 different Flite saddles, one of which completely collapsed in a terrifying way after hitting a pothole at speed. Luckily no body parts were skewered during the incident.
At 90kg I guess I'm borderline too fat for Flite
At 90kg I guess I'm borderline too fat for Flite
Likes For botty kayer:
03-03-23, 04:30 PM
#19
Senior Member

Join Date: Feb 2008
Location: Peoria, IL
Posts: 4,475
Mentioned: 86 Post(s)
Tagged: 0 Thread(s)
Quoted: 1829 Post(s)
Liked 3,373 Times
in
1,579 Posts
Any recollection whether those saddle rails were steel, titanium, aluminum alloy, or something else?
I've heard stories about seatpost clamps causing notching of saddle rails and leading to the failure of the rails. No doubt that those discussions can be found with a search, for those who are suddenly feeling cautious.
Steve in Peoria
(still waiting for the tubular steel rails to break where they are welded to the tubular cantle plate on my Lepper Voyager saddle)
 03-03-23, 04:40 PM
#20
Banned.
Thread Starter
Join Date: Jul 2009
Location: PAZ
Posts: 12,294
Mentioned: 255 Post(s)
Tagged: 0 Thread(s)
Quoted: 2588 Post(s)
Liked 4,824 Times
in
1,709 Posts
Bottom side of the shell is done - so why not show it? These shots might give an indication of what's to come on the top of the shell, but who cares?
Decals added, then two layers of clear-coat to seal them in place:

The Man, The Myth, The Legend - Gilles Villeneuve, Ferrari Piloti straordinario:

Nose detail:

A wider view of the tail end:

If you like the way the underside turned out, we're going to go even better on the top of the shell. I need one more tool from Lowe's before I can finish this, so I'll be finishing it up tomorrow afternoon - but it'll be ready by Sunday
DD
Decals added, then two layers of clear-coat to seal them in place:
The Man, The Myth, The Legend - Gilles Villeneuve, Ferrari Piloti straordinario:
Nose detail:
A wider view of the tail end:
If you like the way the underside turned out, we're going to go even better on the top of the shell. I need one more tool from Lowe's before I can finish this, so I'll be finishing it up tomorrow afternoon - but it'll be ready by Sunday
DD
Last edited by Drillium Dude; 03-03-23 at 07:04 PM.
Likes For Drillium Dude:
03-03-23, 04:47 PM
#21
Senior Member
Join Date: Jun 2018
Location: London, UK
Posts: 725
Bikes: Yes, probably too many but still have a roving eye...
Mentioned: 11 Post(s)
Tagged: 0 Thread(s)
Quoted: 316 Post(s)
Liked 2,799 Times
in
532 Posts
I think they were just regular Flite's with I guess alu rails, the other two just cracked and did not come apart as alarming as that. One I remember it took me a while to diagnose, riding just didn't feel right ad weirdly unstable in corners, I first thought I had a flat tyre, then that the rim cracked or some spokes had pinged, I was checking under the bottom bracket for frame and stay cracks, and then discovered a snapped rail. The snap happened about 1 inch up from the rail, so both clamps were still firmly attached to the rails, but one rail was not attached anything at one end
I have probably had 3 or 4 alu bottle cages snap too, all of those were in steel frames, and again usually after hitting a big pot hole at speed....I really should probably just slow down as the roads are not getting any better")
I guess with those the steel frames flexed more than the alu and just fatigued the alu over time until they eventually gave out, but don't actually know if that's the case.
I have probably had 3 or 4 alu bottle cages snap too, all of those were in steel frames, and again usually after hitting a big pot hole at speed....I really should probably just slow down as the roads are not getting any better
I guess with those the steel frames flexed more than the alu and just fatigued the alu over time until they eventually gave out, but don't actually know if that's the case.
Last edited by botty kayer; 03-03-23 at 04:52 PM.
Likes For botty kayer:
03-03-23, 05:57 PM
#22
Full Member
Join Date: Jan 2023
Posts: 485
Mentioned: 0 Post(s)
Tagged: 0 Thread(s)
Quoted: 175 Post(s)
Likes: 0
Liked 452 Times
in
232 Posts
Much remembrance. Gilles mastered the sport under turmoil and pressures of Ferrari team politics and racecars. And could wring them out in the rain! Such the era and huge loss.
Also his son Jacques, raced snowmobiles alongside a friend, professionally. Then by coincidence, and later when Jacques raced in CART, my brother was on that team- Player's.
Anyways, the saddle is really neat.
PS. Speaking of other great racing greats and cycling, Ayrton Senna at the time of his passing was involved in contracts with private labeled Audi in marketing bikes. Might be a bit fuzzy and don't hold me as accurate, but I think it was through potential deal with Carrera bicycles.
Likes For chain_whipped:
03-03-23, 06:00 PM
#23
Banned.
Thread Starter
Join Date: Jul 2009
Location: PAZ
Posts: 12,294
Mentioned: 255 Post(s)
Tagged: 0 Thread(s)
Quoted: 2588 Post(s)
Liked 4,824 Times
in
1,709 Posts
Interesting 'how-to wiki"!
My 2-3 cents: I didn't know it was do-able or safe to sand any of the "coatings" applied to CF, I assumed they all were "resin" so integral to the strength of the final composite.
How do you know what to remove and what you dare NOT remove (ie: when to stop sanding)?
I don't know the Bob Smith brand of epoxy but I swear I have bought another brand in exactly the same squeeze bottles before, with the same graphics even, but not by that name...could be just my brain playing tricks (again).
My own rule of thumb is to use the slowest cure epoxy that works ("logic" being that slow curing is stronger than fast) so my go-to has always been for 30- or 90-minute cure, but (wouldn't ya know?) that is getting impossible to find at any Hardware or (what passes for) Hobby Shops, these days. Have to order online...
The CF itself is pre-impregnated with resin, then cured in an autclave. In the case of both Flite saddles I've rehabbed, there's a clear gel-coat over the CF/epoxy matrix as well. In order to get a nice, uniform finish, it must be completely removed.
I use hobby sanding films for this because they're flexible, and come in various fine grits. I wet the surface often, and wipe dry every 5-10 minutes of wet sanding. Quite quickly, you begin to make out splotchy areas - these represent where the gel-coat has been removed. Once you 'see the light', it's simply a matter of repetition (much like drilling holes in things, hole after hole after hole...sounds tedious, but I totally get into the groove). Some areas are a bit thicker than others, which require a bit more elbow grease, but the gel-coat isn't all that difficult to remove once you get going. Once down to the CF, go slowly - if you continue sanding, the fibers begin to abrade and I'm sure lose some strength in the bargain.
The best indicator you're down to the CF is that the sanding residue turns from grey (gel-coat) to black (CF) - and it's quite obvious. I can't tell by feel, but I know to look for black as my signal to cease sanding. Once all the gel-coat is removed, I do a final dressing pass with a very fine sanding film over the entire upper surface (again, using water as a 'lubricant') to ensure that uniform appearance I referenced earlier. Today I felt as though I'd really got a handle on knowing just how hard to bear down, and how far to go.
Slow and steady and all that. You know
For me, epoxy for models will work here because the small chip really was cosmetic and didn't affect the saddle structurally. Once I was done with that, I mixed up some more and applied it liberally at the bases of the rear rail anchors, just to give them a little added strength. When I repaired the other one some time back, I used a CF-specific JB Weld, which is a light shade of tan and labeled as 'steel reinforced'. It worked a treat when I re-epoxied the front rail anchor back into place - in fact, it didn't even break loose during the accident in which a car hit me from behind.
Next up, I'll clear-coat the top after adding the new branding which will replace the missing logos - the lack of identifying brands was in fact the impetus for this little exercise in whimsy..
DD
Last edited by Drillium Dude; 03-16-23 at 11:28 AM. Reason: Emphasis added for clarity...
Likes For Drillium Dude:
03-03-23, 06:11 PM
#24
Banned.
Thread Starter
Join Date: Jul 2009
Location: PAZ
Posts: 12,294
Mentioned: 255 Post(s)
Tagged: 0 Thread(s)
Quoted: 2588 Post(s)
Liked 4,824 Times
in
1,709 Posts
I've got Flite's in many color varieties but have never had a carbon one, and when I do rarely see one over her in the UK they are eye wateringly expensive so I've always been put off the idea, but loving what you've done with this DD. It looks great already and apparently you've not finished yet
, in no way is this looking like a cheaper alternative, a fine artist at work.And if the saddle is anything to go by, I'm sure I'm not the only one that is intrigued and would love to see some examples of your model making, have you any posted any of your work on here?
Because it had slight cosmetic damage, and was missing all the logos, it was much easier to strike a deal for about half what these seem to go for on Ebay in very good/mint condition. Since it wasn't so dear as the ones in really nice shape, I had no problem pushing the boat out a bit on this one, and personalizing it as a tribute to my all-time favorite F1 driver to boot.
I've got like seven models currently in-work, but nothing finished here just yet. Having said that, here's a pic of a model I built several years ago: 1/20 scale Tamiya Lotus 79 - Mario's Championship-winning mount:

Close, but no cigar:

Not that 2nd Place is anything to sneeze at - particularly at one's first attempt!
DD
Likes For Drillium Dude:
03-03-23, 06:21 PM
#25
Banned.
Thread Starter
Join Date: Jul 2009
Location: PAZ
Posts: 12,294
Mentioned: 255 Post(s)
Tagged: 0 Thread(s)
Quoted: 2588 Post(s)
Liked 4,824 Times
in
1,709 Posts
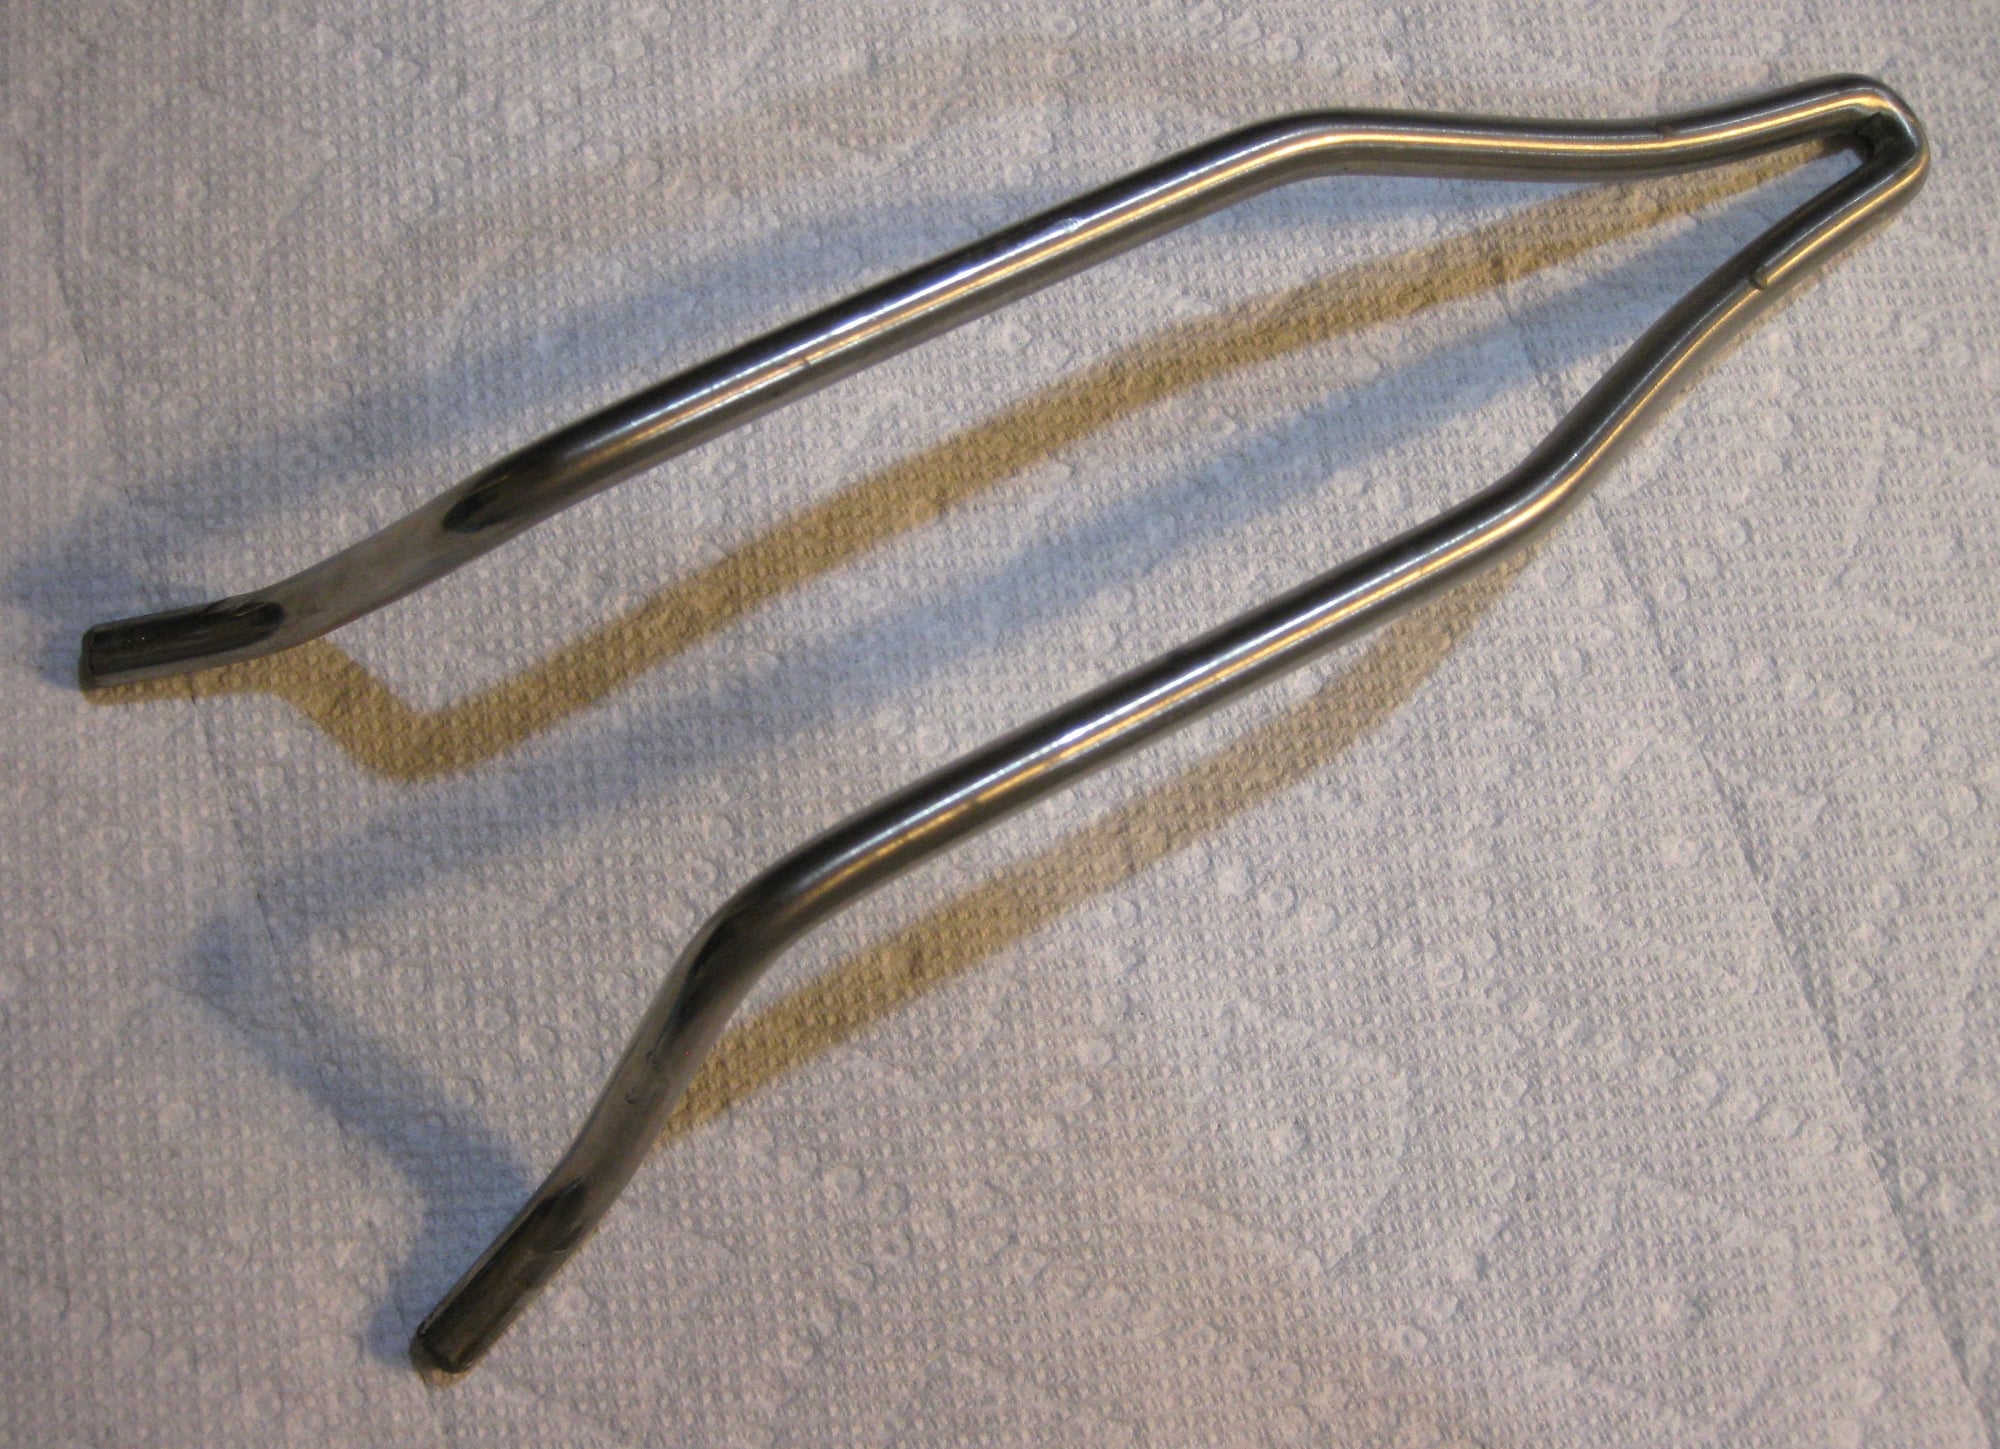
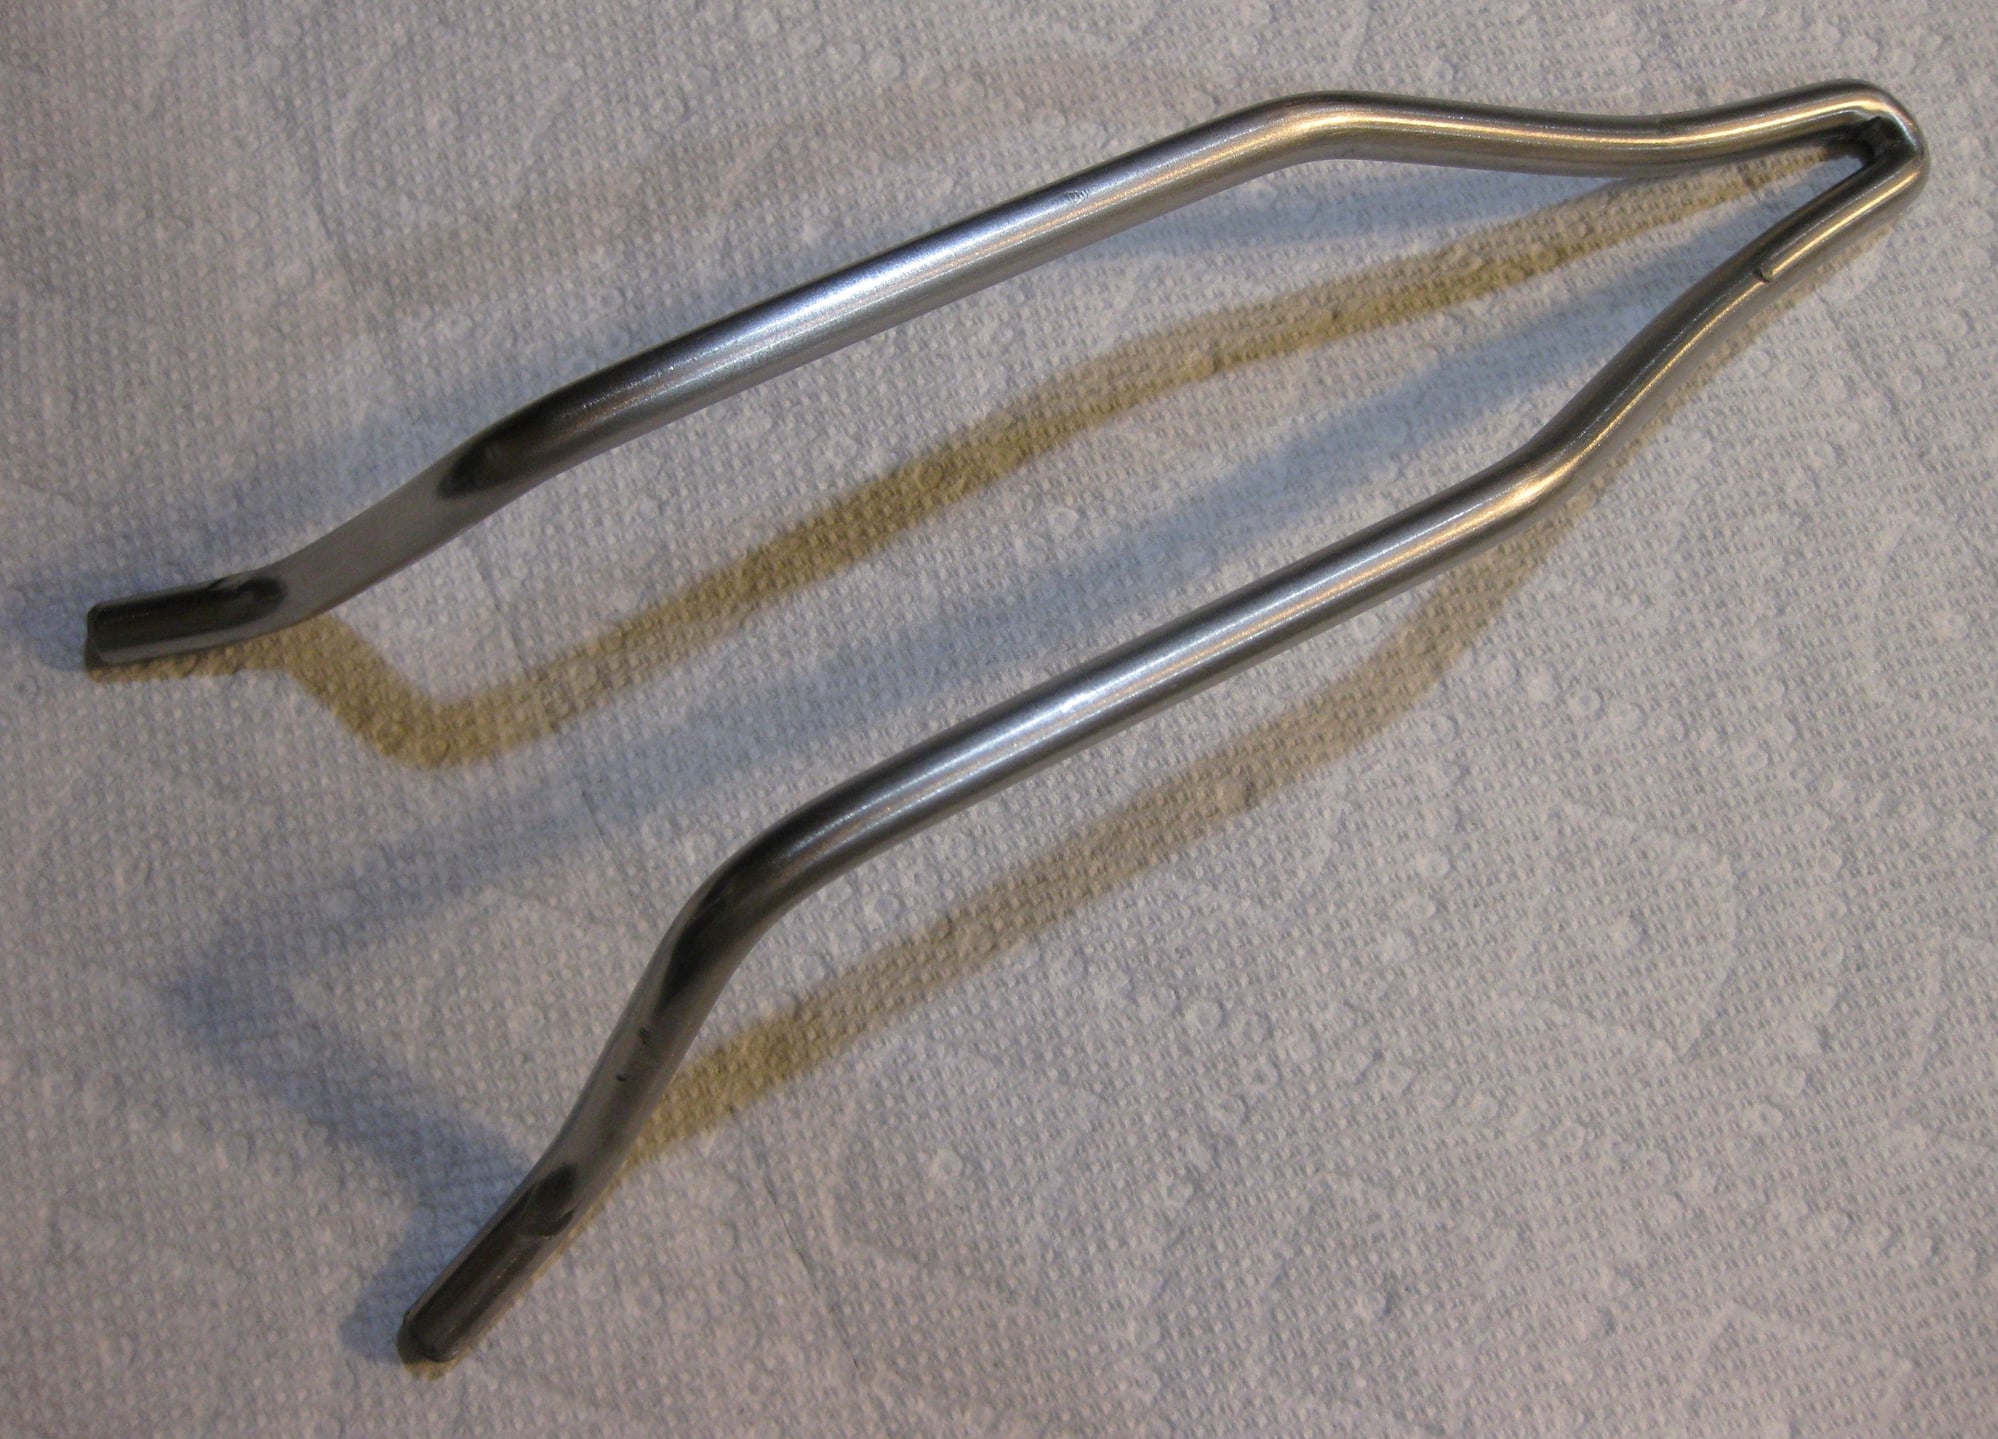
Those are likely Ti rails - Flites were absolutely known for them, and of course they carried 'Titanium' logos along the skirt. Never saw a Ti rail do that - I'm assuming you didn't hit the deck on account of that failure, or did you?
Mine was a bit different: the forward anchor snapped off after I hit a bump at cruising speed while perched on the nose:

Separated shell and composite forward rail anchor:

I was able to affect a repair, however; my first rodeo with repairing and refinishing a Flite Evolution. Came out just right IMHO.
DD
Likes For Drillium Dude: