


Harlequin starting at the bottom
 06-12-20, 03:58 AM
#1

Senior Member
Thread Starter
Join Date: Feb 2020
Posts: 2,819
Mentioned: 49 Post(s)
Tagged: 0 Thread(s)
Quoted: 1106 Post(s)
Likes: 0
Liked 1,327 Times
in
783 Posts
Harlequin starting at the bottom
I like starting bar tape at the bottom because when I ride my palms won't raise the edges of the tape.
I usually finish with short lengths of inner tube covering the top ends.
However I am going to try a harlequin wrap; has anyone done this starting at the bottom and how did you finish the top? I'd be using clear heatshrink and want it to look neat and tidy.
I usually finish with short lengths of inner tube covering the top ends.
However I am going to try a harlequin wrap; has anyone done this starting at the bottom and how did you finish the top? I'd be using clear heatshrink and want it to look neat and tidy.

 06-12-20, 04:50 AM
#3
Junior Member
Join Date: Sep 2016
Location: Gulf Coast
Posts: 183
Bikes: '93 Cannondale R500; '88 Centurion Ironman Expert, '97 Cannondale R900, '95 Serotta CSI, '83 Trek 700, '97 Lemond Zurich, '89 Bianchi Giro, '87 Schwinn Prologue, '83 Fuji TSIV + one perturbed wife
Mentioned: 1 Post(s)
Tagged: 0 Thread(s)
Quoted: 71 Post(s)
Liked 154 Times
in
58 Posts
I've done it a couple of ways with cloth tape. The harlequin below was started from the top and the bottom, finishing at the brake levers. The Bianchi was wrapped from the bottom up, as one normally would for any single color wrap, but finished with the twine like P!N20 noted.

09-22-20, 11:58 PM
#4
Newbie
Join Date: Aug 2020
Posts: 55
Bikes: 1986 Cannondale SR600
Mentioned: 2 Post(s)
Tagged: 0 Thread(s)
Quoted: 20 Post(s)
Likes: 0
Liked 7 Times
in
6 Posts
I realized a few things doing my first Harlequin wrap that I haven't seen described anywhere:
First is that the way the two strands of tape weave with each other, you basically have half of the wrap overlapping itself in the same manner as wrapping the bars from top to bottom, and the other half overlapping the same as wrapping from bottom to top. Whichever direction you actually do the wrap, the tape that lays in that direction will go down naturally, but you'll be folding up tape to tuck underneath to form the reverse direction wrap. It's best to plan things so that the tucking happens on the outside of the bend where each turn of tape doesn't overlap the previous turn (the gap being bridged by the other tape). If you get it the wrong way around, you end up scrunching the tape where you can't slide it under the previous turn and you get wrinkling and/or folded tape edges that mess up the aesthetic.
This means that if you want the tape where your palms rest (on the outside of the bend) to lay down as if you wrapped from bottom to top, you should wrap from top to bottom. I join the ends of the two tapes for a seamless start without needing any sort of finishing wrap. Wastedlife.org has a harlequin wrap how-to that shows how to do the join, but the photos there show a full turn of one colour of tape before starting the braiding. You can actually to start the braid immediately so the tape starts with a half-diamond rather than a solid band, but the joining of the tape ends is exactly as shown.
The other thing to realize is that the tips of flat wrapped diamonds basically lie along two lines opposite each other on the bar circumference. The distance along a line from each tip to the next is essentially fixed, being defined by the bar circumference and tape width. If you try to wrap with the tips on the inside and outside of the handlebar bend, you'll have gaps on the outside, bunching up on the inside, or both. The simple way to avoid this is to place the tips on the neutral axis of bending for the bars. I actually draw these lines on the bars with a marker before wrapping, and whenever laying down a new turn, aim to put the crossing on those lines instead of letting them land haphazardly.
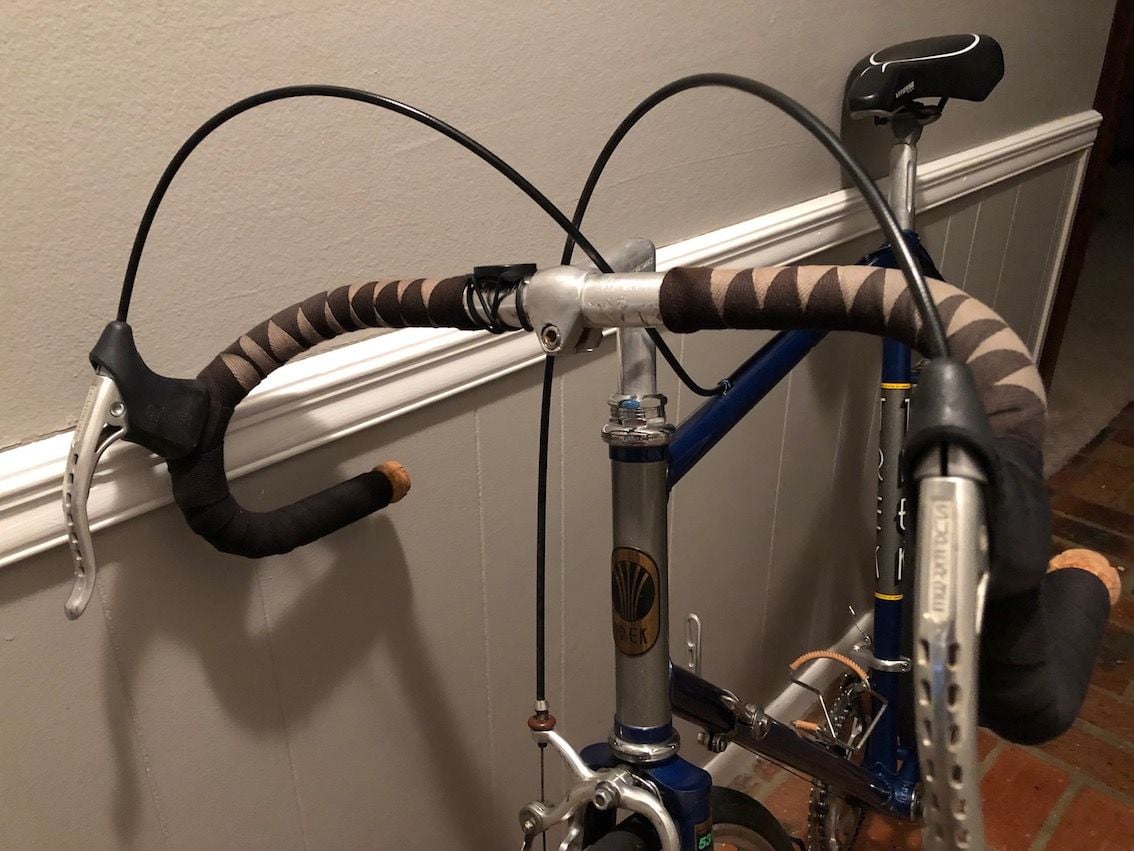
This works well from the stem to the brake levers. However, the bend of the bar from there down to the bottom of the bars is in a different direction, and I never figured out a satisfactory way of making the transition. So, as with Triplecrank92's first photo, I just pick one colour for the rest of the wrap from the brakes to the bar ends.
The first I'd ever heard of the harlequin wrap was in an article by Don Cuerdon in the Aug 1987 issue of Bicycling magazine. He has a diagram of wrapping around the brake levers, saying that done correctly it makes two tidy diamonds behind the brake levers. The figure as drawn, didn't seem physically possible to me with one loop of the tape being completely underneath an earlier turn. The text description didn't match the figure, so it's possible there's an error in the artwork, but still even getting just past the brake levers, I can't see continuing the diamonds without either folding the tape, or having a deliberate twist in the pattern.
First is that the way the two strands of tape weave with each other, you basically have half of the wrap overlapping itself in the same manner as wrapping the bars from top to bottom, and the other half overlapping the same as wrapping from bottom to top. Whichever direction you actually do the wrap, the tape that lays in that direction will go down naturally, but you'll be folding up tape to tuck underneath to form the reverse direction wrap. It's best to plan things so that the tucking happens on the outside of the bend where each turn of tape doesn't overlap the previous turn (the gap being bridged by the other tape). If you get it the wrong way around, you end up scrunching the tape where you can't slide it under the previous turn and you get wrinkling and/or folded tape edges that mess up the aesthetic.
This means that if you want the tape where your palms rest (on the outside of the bend) to lay down as if you wrapped from bottom to top, you should wrap from top to bottom. I join the ends of the two tapes for a seamless start without needing any sort of finishing wrap. Wastedlife.org has a harlequin wrap how-to that shows how to do the join, but the photos there show a full turn of one colour of tape before starting the braiding. You can actually to start the braid immediately so the tape starts with a half-diamond rather than a solid band, but the joining of the tape ends is exactly as shown.
The other thing to realize is that the tips of flat wrapped diamonds basically lie along two lines opposite each other on the bar circumference. The distance along a line from each tip to the next is essentially fixed, being defined by the bar circumference and tape width. If you try to wrap with the tips on the inside and outside of the handlebar bend, you'll have gaps on the outside, bunching up on the inside, or both. The simple way to avoid this is to place the tips on the neutral axis of bending for the bars. I actually draw these lines on the bars with a marker before wrapping, and whenever laying down a new turn, aim to put the crossing on those lines instead of letting them land haphazardly.
This works well from the stem to the brake levers. However, the bend of the bar from there down to the bottom of the bars is in a different direction, and I never figured out a satisfactory way of making the transition. So, as with Triplecrank92's first photo, I just pick one colour for the rest of the wrap from the brakes to the bar ends.
The first I'd ever heard of the harlequin wrap was in an article by Don Cuerdon in the Aug 1987 issue of Bicycling magazine. He has a diagram of wrapping around the brake levers, saying that done correctly it makes two tidy diamonds behind the brake levers. The figure as drawn, didn't seem physically possible to me with one loop of the tape being completely underneath an earlier turn. The text description didn't match the figure, so it's possible there's an error in the artwork, but still even getting just past the brake levers, I can't see continuing the diamonds without either folding the tape, or having a deliberate twist in the pattern.
