


What would you do? TT to ST tube diameters
 09-16-20, 02:36 AM
#101
Senior Member
Join Date: Dec 2019
Posts: 953
Mentioned: 3 Post(s)
Tagged: 0 Thread(s)
Quoted: 321 Post(s)
Liked 261 Times
in
212 Posts
That looks really good! But are those bottle cage boss holes on the back of the ST in the second picture? They can be filled in but I hope the BB shell is the right way round with the left-tighty side on the right. If it's not you'll actually be fine, just throw a bit of loctite on there. Have so far avoided that particular mistake myself but a friend got it on the wrong way around on a bamboo frame and I fortunately remembered his pain 
Angle iron is not the best reference surface but it's good enough especially for a first frame. It's not like one's going to be riding the bike on a road made out of Blanchard-ground steel plates.
Angle iron is not the best reference surface but it's good enough especially for a first frame. It's not like one's going to be riding the bike on a road made out of Blanchard-ground steel plates.

Likes For guy153:
09-17-20, 02:08 AM
#102
Member
Thread Starter
That looks really good! But are those bottle cage boss holes on the back of the ST in the second picture? They can be filled in but I hope the BB shell is the right way round with the left-tighty side on the right. If it's not you'll actually be fine, just throw a bit of loctite on there. Have so far avoided that particular mistake myself but a friend got it on the wrong way around on a bamboo frame and I fortunately remembered his pain
Angle iron is not the best reference surface but it's good enough especially for a first frame. It's not like one's going to be riding the bike on a road made out of Blanchard-ground steel plates.
Angle iron is not the best reference surface but it's good enough especially for a first frame. It's not like one's going to be riding the bike on a road made out of Blanchard-ground steel plates.

The angle iron indeed sucks. Wasn't planning on using it at first but didn't have any other ideas on how to hold the tubes etc. The BB needs to be angled slightly when it's standing on it's side so I used a square washer for the base with a threaded rod going through, pushing a corner of the washer, angling the BB in the direction of the ST. Looks pretty good now but I'm sure it's off so need to check alignment properly after I've faced the BB shell etc. Created a "Not so fancy alignment gauge" based on Paul Brodies "Fancy Alignment Gauge"
and checked the ST and DT that way and they're OK. Haven't been able to check twist though.
Likes For Aldatroid:
09-17-20, 11:19 AM
#103
Senior Member
Join Date: Dec 2019
Posts: 953
Mentioned: 3 Post(s)
Tagged: 0 Thread(s)
Quoted: 321 Post(s)
Liked 261 Times
in
212 Posts
I should also make myself a redneck version of Brodie's gauge. But I'm not sure it's so necessary to align the front triangle apart from twist, and I've never had it twist, at least not measurably by me.
Basically I get the BB shell as square as I can onto the bottom of the ST using a combination square with the ruler taken out. Then I get the dropouts and BB shell parallel using the laser and angle iron bolted to the table. Then I jig it up for the front triangle with everything laser-vertical. Then I make sure the ST is centered between a bit of string wrapped around the HT and the dropouts. After welding the front triangle the string can be recentered if necessary a small amount just by moving the chainstays both left or right together.
Compared to bending the front triangle this will leave the dropouts slightly misaligned and the BB shell slightly rotated around the vertical from where it should be. But the BB shell is only 68mm long compared to the 1m or so over which we're measuring the alignment with the string. So it's only a tiny change. All of the bikes I've made have actually ended up with squarer BBs than any of the commercially-made bikes I've owned.
A higher priority tool for me would be a precision "wheel" consisting of an axle and a perfectly square and centred rod to sweep up and down between the stays perhaps with an adjustable thingy that you could set to just brush against them on both sides. Currently I rely on a true and properly dished wheel which is usually a brand new one I've just made for the bike. But there's lots of agonizing and flipping of the wheel.
I think the best way to make precision tools without machining capability is to make things that can be strategically twisted and bent a bit so you can make them, check them with a laser, and tweak them as required. I also have some things a bit like yours with bolts that can be used to push things in and out a bit.
Likes For guy153:
03-31-21, 05:29 AM
#104
Member
Thread Starter
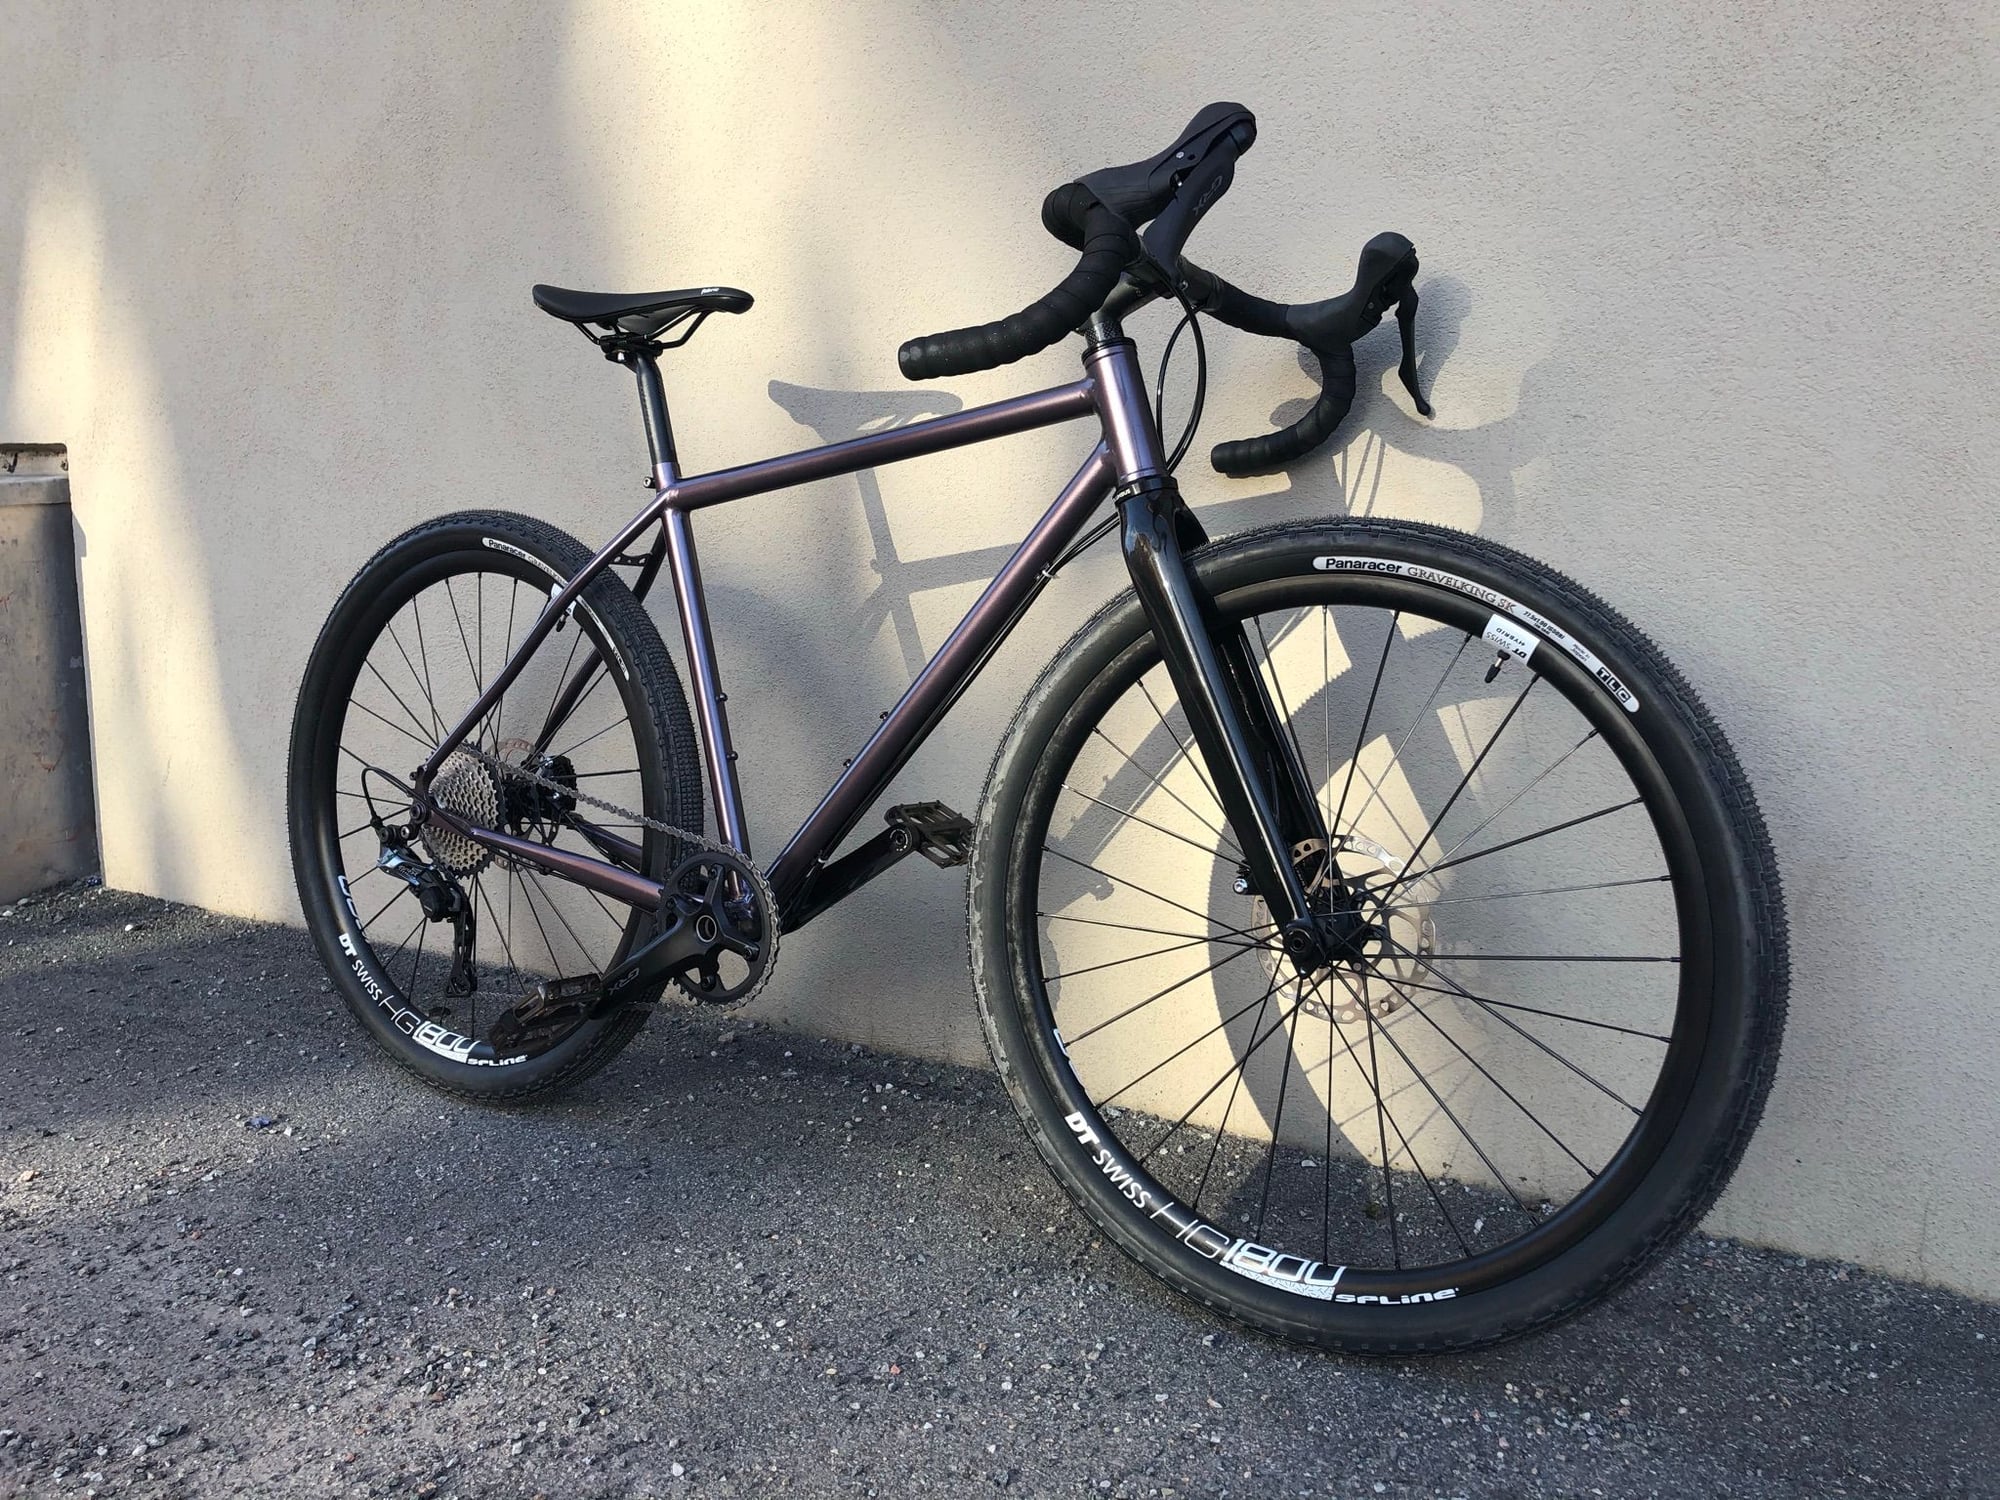
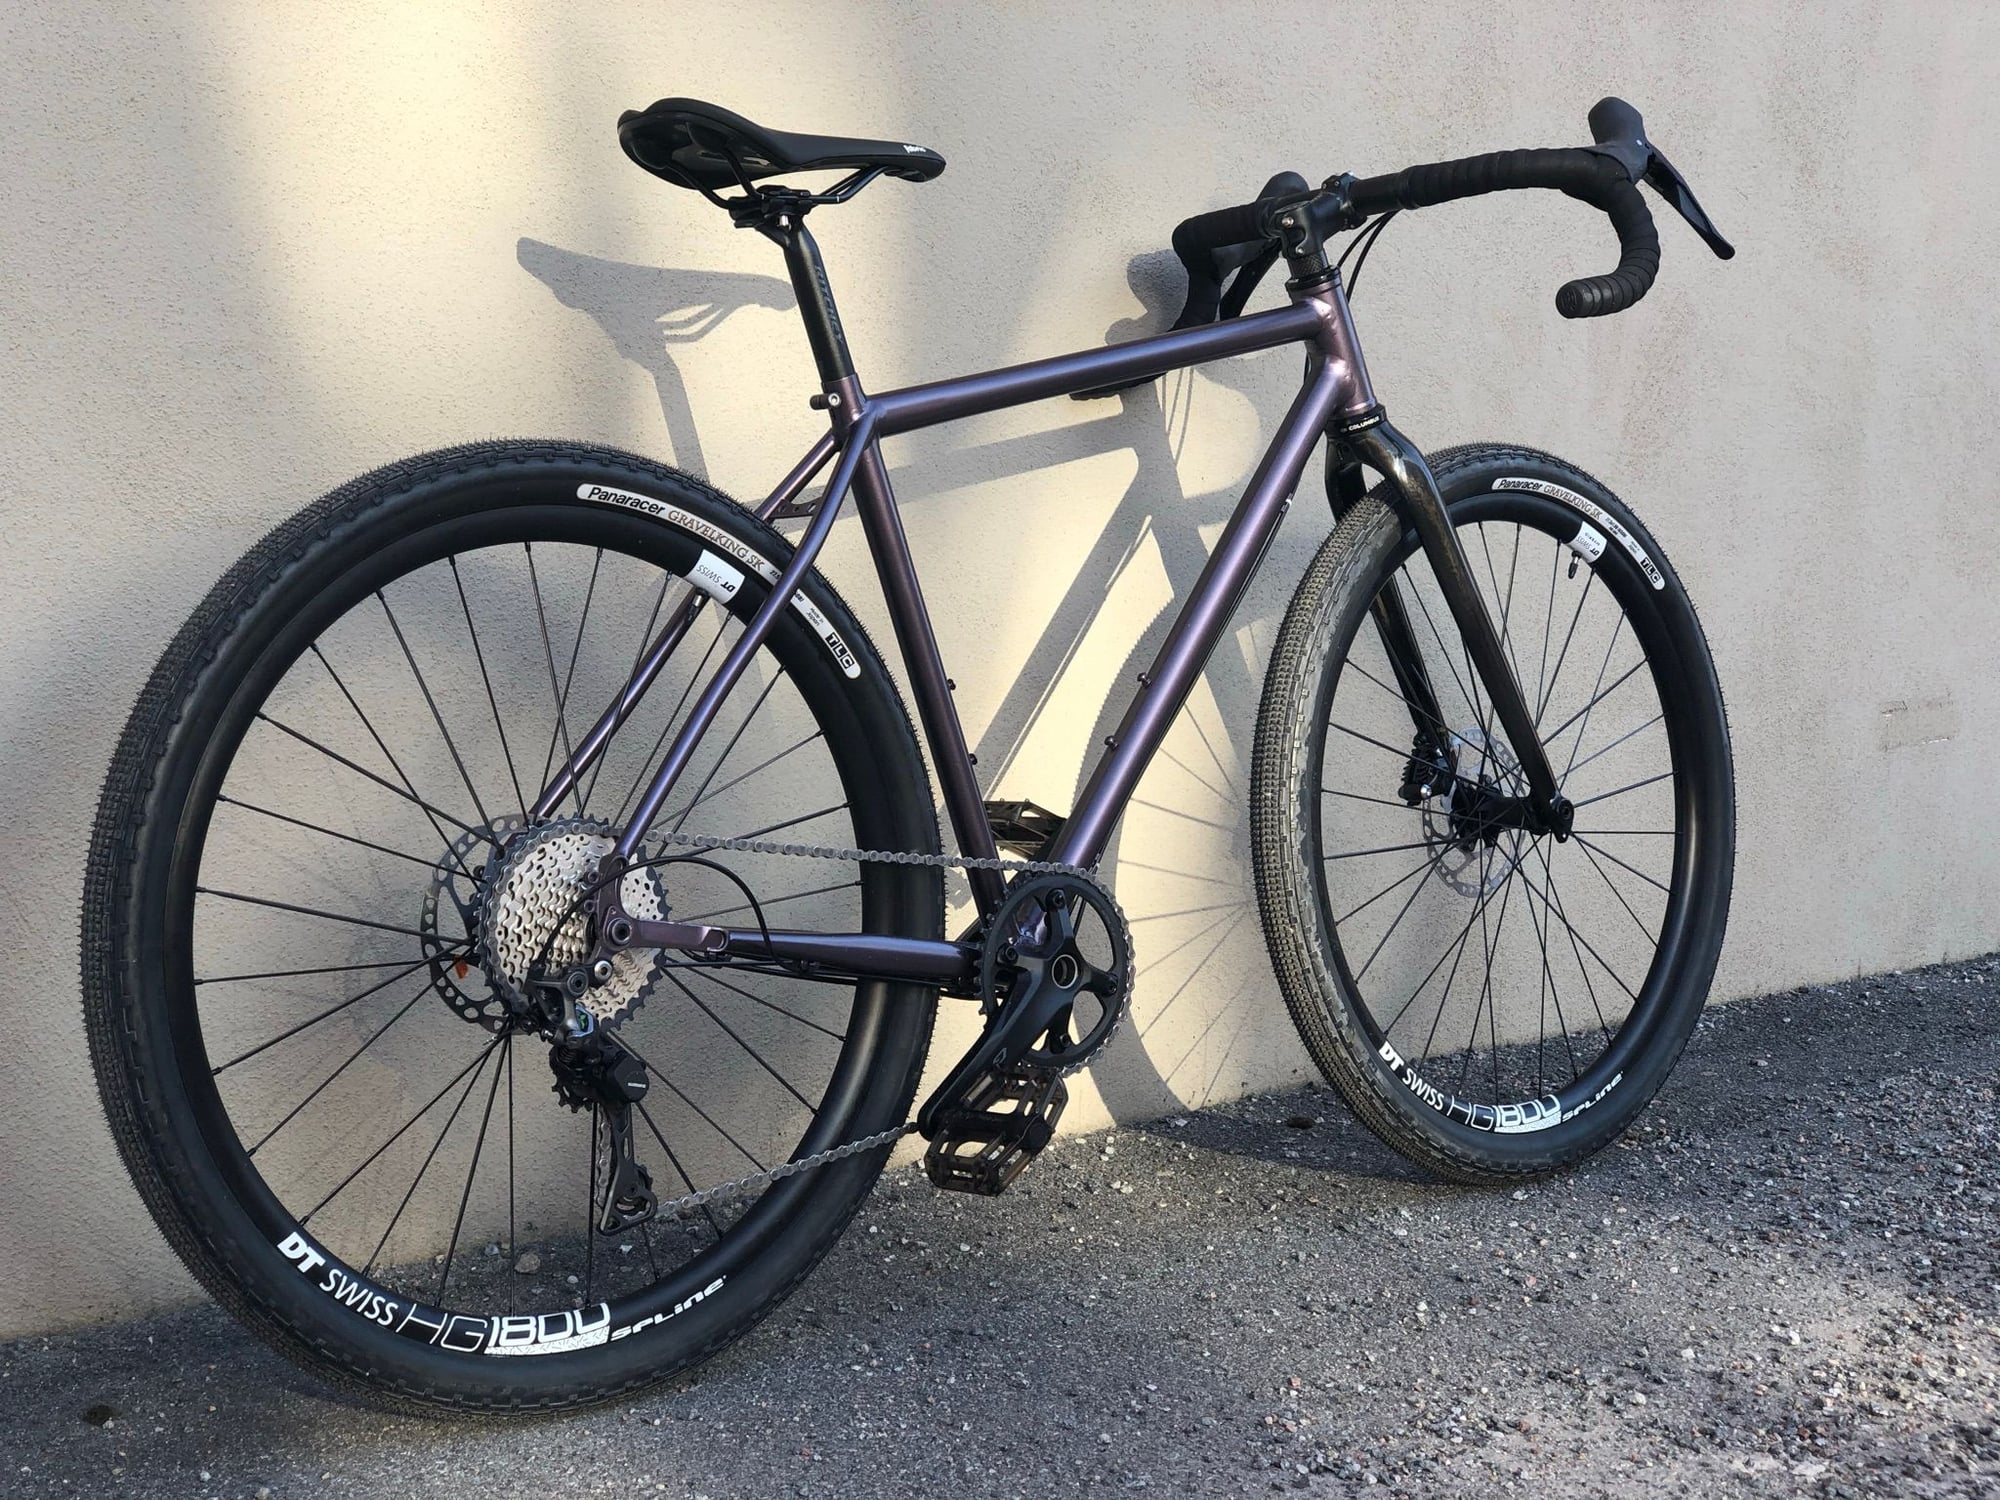
Hi guys! It's finally finished and I've taken her out on a few trails and seems to handle really well. I don't have that much to compare to so might not be that telling to be honest =)
But yeah, thought I could show some images of the finished bike. I ended up building a simple frame jig with Al extrusion to help with me setup my rear triangle. The jig works for the whole bike though and it's idea2cycle's design.
Thanks for the feedback on the build and I already have some things I want to tweak for V2
Likes For Aldatroid:
03-31-21, 03:11 PM
#106
Member
Thread Starter
Thanks!!
I used Montana spray cans. Montana metal primer, Montana Metallic and Montana Gloss Varnish. It looks better than it holds up 😂. I know my prep work is not great over the whole frame but it chips real easy even on places I know I prepped well before spraying. I�ll probably use a 2K varnish next time as well since the 1K scuffs really easy.
I used Montana spray cans. Montana metal primer, Montana Metallic and Montana Gloss Varnish. It looks better than it holds up 😂. I know my prep work is not great over the whole frame but it chips real easy even on places I know I prepped well before spraying. I�ll probably use a 2K varnish next time as well since the 1K scuffs really easy.
Likes For Aldatroid:
03-31-21, 05:15 PM
#107
Senior Member
Join Date: Dec 2019
Posts: 953
Mentioned: 3 Post(s)
Tagged: 0 Thread(s)
Quoted: 321 Post(s)
Liked 261 Times
in
212 Posts
Thanks!!
I used Montana spray cans. Montana metal primer, Montana Metallic and Montana Gloss Varnish. It looks better than it holds up 😂. I know my prep work is not great over the whole frame but it chips real easy even on places I know I prepped well before spraying. I�ll probably use a 2K varnish next time as well since the 1K scuffs really easy.
I used Montana spray cans. Montana metal primer, Montana Metallic and Montana Gloss Varnish. It looks better than it holds up 😂. I know my prep work is not great over the whole frame but it chips real easy even on places I know I prepped well before spraying. I�ll probably use a 2K varnish next time as well since the 1K scuffs really easy.
But much better than any of my paint jobs. And none of that matters because in no time there's mud etc. all over the place anyway. But I usually have to do a bit of touching up in the Spring after the grit-blasting of winter has removed bits of paint from the top of the ST and other vulnerable areas which is not ideal.Maybe one day a fun project might be to make a frame-sized powder coating oven. I've seen a few people powder coating on YT and it doesn't look too hard, you just need an oven big enough to put your parts into it, and frames are a bit bigger than regular kitchen ovens.
03-31-21, 06:50 PM
#108

Team Beer
Join Date: Apr 2004
Location: Sacramento CA
Posts: 6,339
Bikes: Too Many
Mentioned: 3 Post(s)
Tagged: 0 Thread(s)
Quoted: 114 Post(s)
Liked 159 Times
in
104 Posts
Thanks! I might try Montana. I've used 2k clear on the last couple of frames. It doesn't seem particularly robust either. I thought you might have done the paint yourself as I could see some tiny imperfections when I zoomed in But much better than any of my paint jobs. And none of that matters because in no time there's mud etc. all over the place anyway. But I usually have to do a bit of touching up in the Spring after the grit-blasting of winter has removed bits of paint from the top of the ST and other vulnerable areas which is not ideal.
Maybe one day a fun project might be to make a frame-sized powder coating oven. I've seen a few people powder coating on YT and it doesn't look too hard, you just need an oven big enough to put your parts into it, and frames are a bit bigger than regular kitchen ovens.
But much better than any of my paint jobs. And none of that matters because in no time there's mud etc. all over the place anyway. But I usually have to do a bit of touching up in the Spring after the grit-blasting of winter has removed bits of paint from the top of the ST and other vulnerable areas which is not ideal.Maybe one day a fun project might be to make a frame-sized powder coating oven. I've seen a few people powder coating on YT and it doesn't look too hard, you just need an oven big enough to put your parts into it, and frames are a bit bigger than regular kitchen ovens.
__________________
I'm not one for fawning over bicycles, but I do believe that our bikes communicate with us, and what this bike is saying is, "You're an idiot." BikeSnobNYC
I'm not one for fawning over bicycles, but I do believe that our bikes communicate with us, and what this bike is saying is, "You're an idiot." BikeSnobNYC
04-01-21, 03:06 AM
#109
Senior Member
Join Date: Dec 2019
Posts: 953
Mentioned: 3 Post(s)
Tagged: 0 Thread(s)
Quoted: 321 Post(s)
Liked 261 Times
in
212 Posts
I'm thinking why not make something only about a foot wide-- about the size of the cardboard boxes that frames ship in (except made of metal not cardboard obviously...). Then you really just need a heating wire, insulating bricks or similar, and a thermostat. They only run at a couple of hundred C.
04-01-21, 04:28 AM
#110
Member
Thread Starter
Oh man, a DIY powder coating solution would be amazing! Do you know how long it would need to bake?
Edit: yeah, ok whatever on the bake time haha. I was just thinking how it would feel to have a custom "oven" in the garage baking for several hours. Seems like we're talking about 20-30 mins here. =)
Edit: yeah, ok whatever on the bake time
haha. I was just thinking how it would feel to have a custom "oven" in the garage baking for several hours. Seems like we're talking about 20-30 mins here. =)
Last edited by Aldatroid; 04-01-21 at 05:12 AM.
04-01-21, 09:59 AM
#111
Senior Member
Join Date: Feb 2012
Location: Rochester, NY
Posts: 18,048
Bikes: Stewart S&S coupled sport tourer, Stewart Sunday light, Stewart Commuting, Stewart Touring, Co Motion Tandem, Stewart 3-Spd, Stewart Track, Fuji Finest, Mongoose Tomac ATB, GT Bravado ATB, JCP Folder, Stewart 650B ATB
Mentioned: 0 Post(s)
Tagged: 0 Thread(s)
Quoted: 4191 Post(s)
Liked 3,834 Times
in
2,293 Posts
I have considered making a wet spray baking box for years. A simple industrial heat gun or hair dryer stuck in a port seems like a good heat source. For the 150-200 degrees F that wet paint likes for baking the box wouldn't have to be too flame/heat safe although metal sides do add a safety margin.
I will advise to be careful how hot one gets their decaled and clear coated wet job though. I have had tiny "bubbles" appear through the dry app decals before when the temps got too hot. Don't try making a "tent" in front of your kitchen oven as the baking box... Andy
I will advise to be careful how hot one gets their decaled and clear coated wet job though. I have had tiny "bubbles" appear through the dry app decals before when the temps got too hot. Don't try making a "tent" in front of your kitchen oven as the baking box... Andy
__________________
AndrewRStewart
AndrewRStewart
Likes For Andrew R Stewart:
 04-01-21, 12:49 PM
#113


Randomhead
Join Date: Aug 2008
Location: Happy Valley, Pennsylvania
Posts: 24,383
Mentioned: 0 Post(s)
Tagged: 0 Thread(s)
Quoted: 4 Post(s)
Liked 3,684 Times
in
2,508 Posts
Penn State salvage had an oven that looked like it might be big enough to PC a bike frame with. I was tempted, but no space.
04-01-21, 12:54 PM
#114
Senior Member
Join Date: Feb 2012
Location: Rochester, NY
Posts: 18,048
Bikes: Stewart S&S coupled sport tourer, Stewart Sunday light, Stewart Commuting, Stewart Touring, Co Motion Tandem, Stewart 3-Spd, Stewart Track, Fuji Finest, Mongoose Tomac ATB, GT Bravado ATB, JCP Folder, Stewart 650B ATB
Mentioned: 0 Post(s)
Tagged: 0 Thread(s)
Quoted: 4191 Post(s)
Liked 3,834 Times
in
2,293 Posts
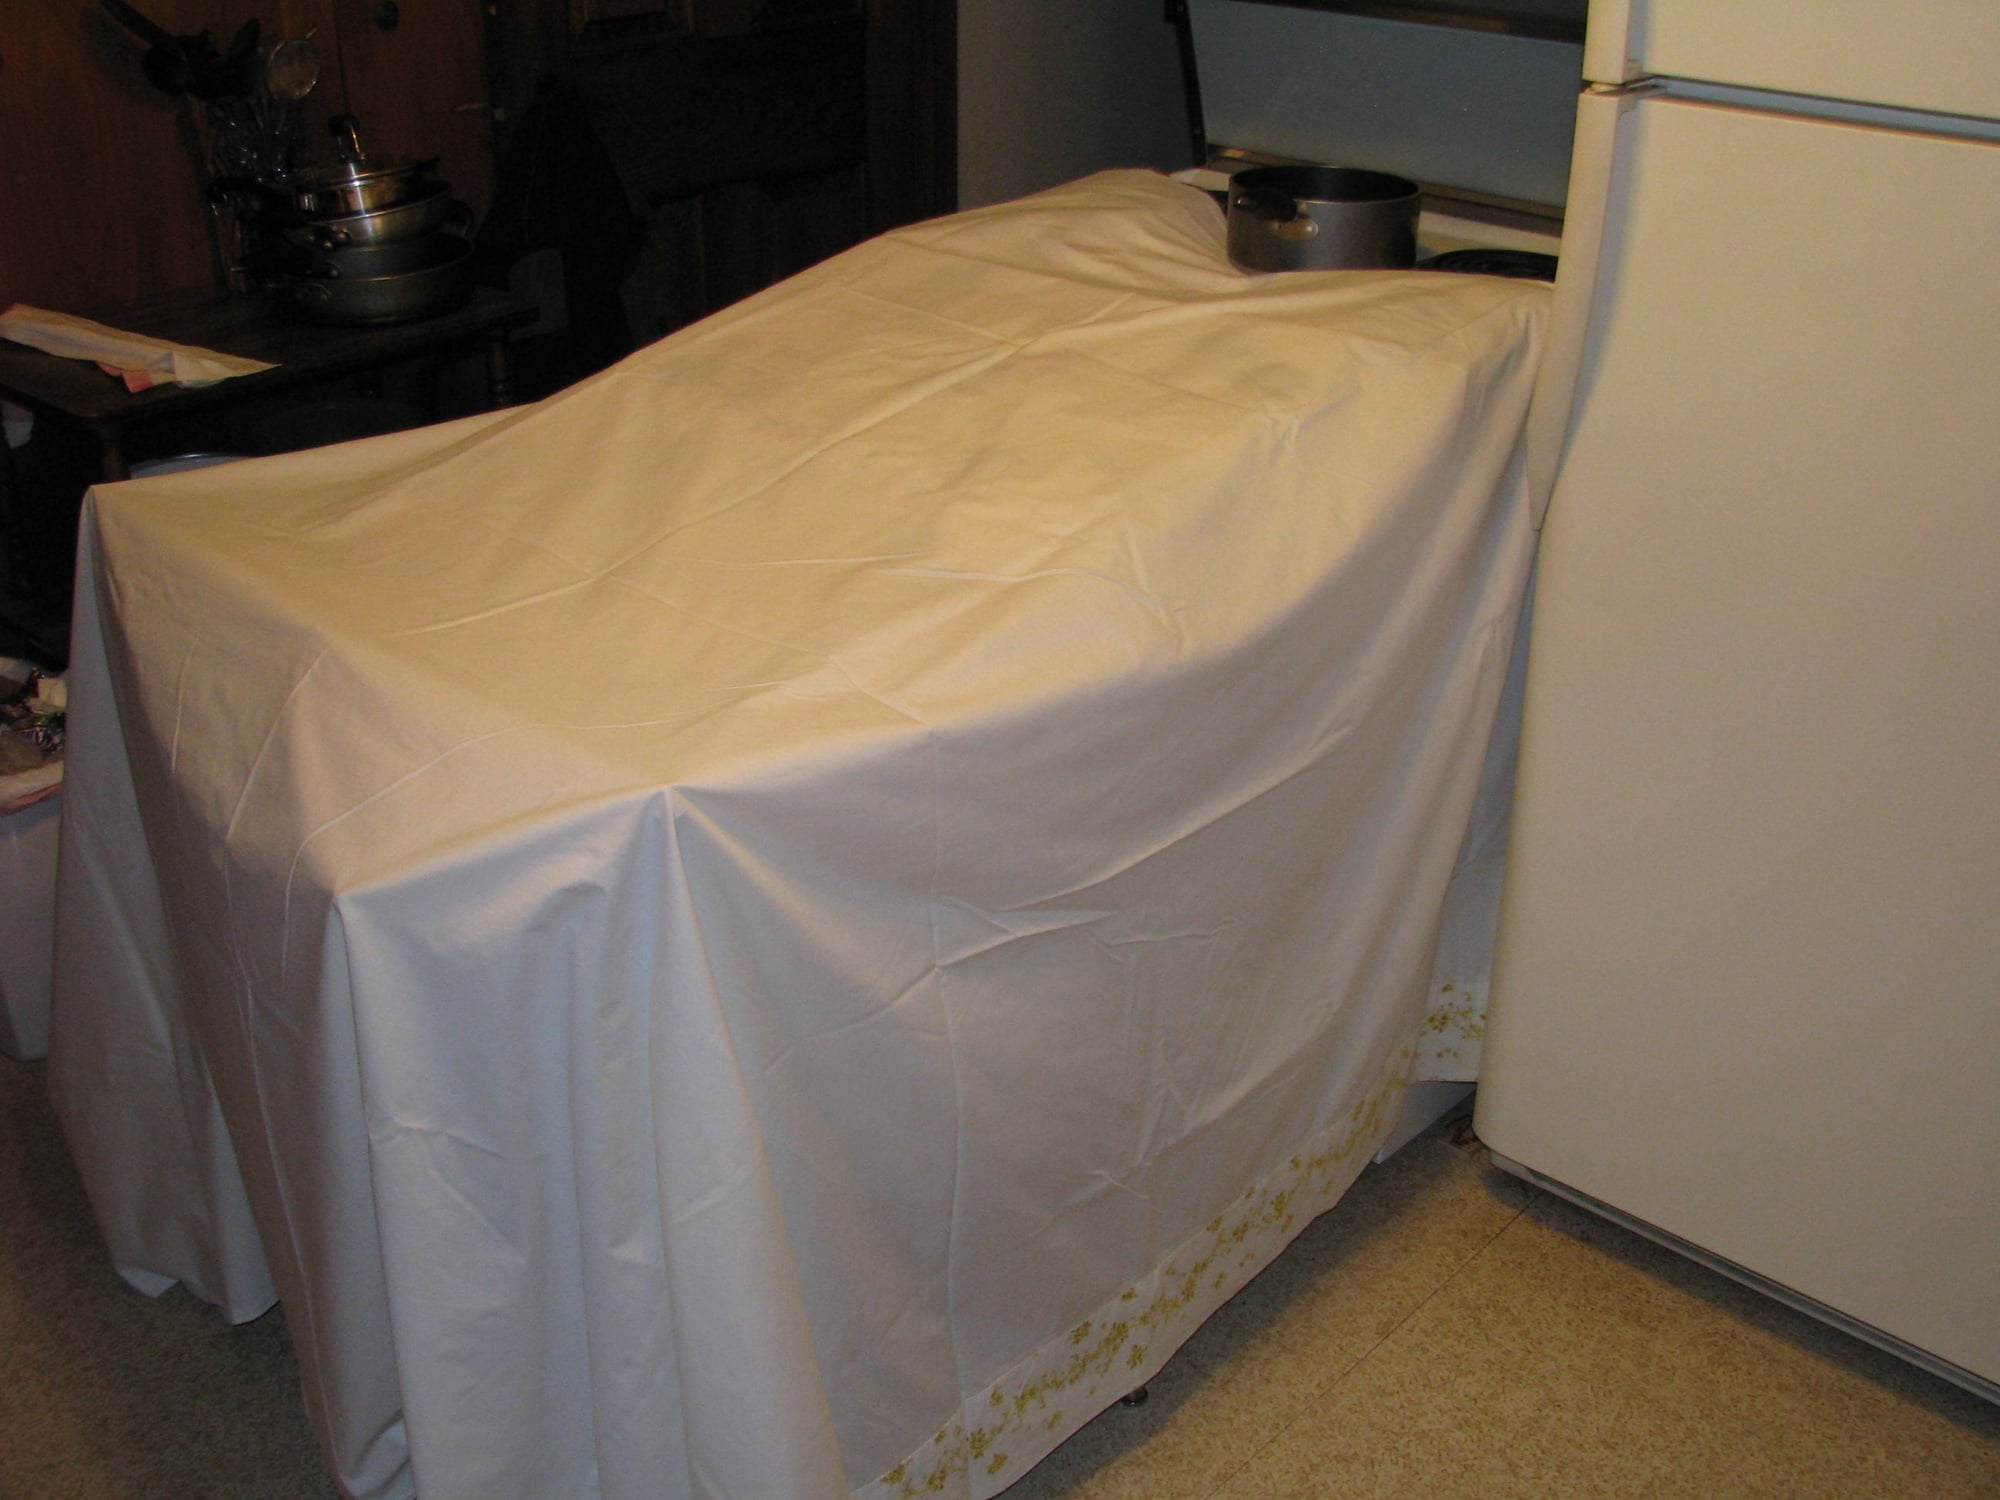
OK, here's the tent. To be sure I will not do this again, this way and in this place! I have no shots of the decal hickeys as i found them but they did recede to a degree (bad pun) as things cooled down. Live and learn. Andy
__________________
AndrewRStewart
AndrewRStewart
Likes For duanedr:
04-02-21, 10:36 AM
#116
Senior Member
Join Date: Feb 2012
Location: Rochester, NY
Posts: 18,048
Bikes: Stewart S&S coupled sport tourer, Stewart Sunday light, Stewart Commuting, Stewart Touring, Co Motion Tandem, Stewart 3-Spd, Stewart Track, Fuji Finest, Mongoose Tomac ATB, GT Bravado ATB, JCP Folder, Stewart 650B ATB
Mentioned: 0 Post(s)
Tagged: 0 Thread(s)
Quoted: 4191 Post(s)
Liked 3,834 Times
in
2,293 Posts
The paint did become harder after the hour or so I baked it for. Andy
__________________
AndrewRStewart
AndrewRStewart


