


Painting a lugged steel frame
 08-20-21, 12:48 PM
#1
Senior Member
Thread Starter
Join Date: Feb 2001
Location: Houston
Posts: 134
Mentioned: 0 Post(s)
Tagged: 0 Thread(s)
Quoted: 3 Post(s)
Likes: 0
Liked 2 Times
in
2 Posts
Painting a lugged steel frame
I have a mid 80's Puch 170 Touring bike since it was new. I want to disassemble and repaint the frame. My preference is to spray it in my garage. I'll rig up a makeshift booth with tarps to do so. I have looked at number of utube videos, but still have some questions. The frame is in OK shape but does have many thousands of miles on it and associated scrapes and chips and a little rust but nothing major. It was a commuter for many years and a weekender after that. The frame is 4130 CroMo lugged construction. The plan is to paint it Coleman stove green with an off-white filling on the head tube and maybe a same color panel on the seat tube. And highlight the lugs with a small modellers brush. The questions I have are:
Will chemically stripping the paint to start be harsh on the brazing material? I think I would have to do considerable sanding even after that.
Should I try to remove the headtube badge or just tape it off? It is riveted on so I guess I would need to tap the holes and replace those with screws.
I assume doing the cream filling will have to be done by either taping off the lugs and spraying over the primary color or taping off the headtube in the first place and then re-taping and spraying.
I am thinking about using automotive primer as the base over the stripped metal, will any type do?
Will enamel paint give a reasonable finish?
The internet is a big place and I get lost easily so if anyone has a good reference I will happily have a look at it.
Thanks
 08-20-21, 01:07 PM
#2

Senior Member

Join Date: Jan 2008
Location: Beaverton, OR
Posts: 14,744
Bikes: Yes
Mentioned: 525 Post(s)
Tagged: 0 Thread(s)
Quoted: 3230 Post(s)
Liked 3,868 Times
in
1,439 Posts
I've stripped and painted a grand total of two frames, so take my answers as one school boy comparing notes with another.
I used CitriStrip and was very happy with the results. It does leave a lot to be done around the lugs and such. I used belt sander strips for the bulk areas like the main tubes (always bits of paint left there) and brass wire brush attachments on a drill and/or dremel tool for the detail spots.It didn't seem to remove an brazing material and I think most of what's important is between the lug and tube anyway. Wear a mask or ventilator for this step too. Bits of paint go everywhere!

I used Rust-Oleum etching primer and Rust-Oleum Gloss Protective Enamel paint on the bike that turned out best. The manufacturers tend to recommend that you use their brand of primer. Of course, they would, but I think there's some scientific basis for this -- similar/compatible chemical composition and whatnot. The etching primer is supposed to bond better with the metal. Someone may recommend a filler primer over top of that. I didn't do that. Starting with a smooth surface is important though and filler helps with that I guess.
The key to the whole project is patience. You'll do more sanding than painting to get it right. Get lots of high grit (400-600-800-1000, as high as you care to go). You'll probably have some orange peel texture after a few coats of paint. Maintaining a proper distance and smooth motion helps with that, but I'm not sure you can avoid it entirely. You can wet sand to get rid of it, then either repaint or polish with something like Meguiars Ultimate Compound to get the gloss back. Keep going until you're happy. Here's the end result of my most recent attempt.

I used CitriStrip and was very happy with the results. It does leave a lot to be done around the lugs and such. I used belt sander strips for the bulk areas like the main tubes (always bits of paint left there) and brass wire brush attachments on a drill and/or dremel tool for the detail spots.It didn't seem to remove an brazing material and I think most of what's important is between the lug and tube anyway. Wear a mask or ventilator for this step too. Bits of paint go everywhere!
I used Rust-Oleum etching primer and Rust-Oleum Gloss Protective Enamel paint on the bike that turned out best. The manufacturers tend to recommend that you use their brand of primer. Of course, they would, but I think there's some scientific basis for this -- similar/compatible chemical composition and whatnot. The etching primer is supposed to bond better with the metal. Someone may recommend a filler primer over top of that. I didn't do that. Starting with a smooth surface is important though and filler helps with that I guess.
The key to the whole project is patience. You'll do more sanding than painting to get it right. Get lots of high grit (400-600-800-1000, as high as you care to go). You'll probably have some orange peel texture after a few coats of paint. Maintaining a proper distance and smooth motion helps with that, but I'm not sure you can avoid it entirely. You can wet sand to get rid of it, then either repaint or polish with something like Meguiars Ultimate Compound to get the gloss back. Keep going until you're happy. Here's the end result of my most recent attempt.
__________________
My Bikes
My Bikes
Likes For Andy_K:
08-20-21, 01:09 PM
#3
Senior Member

Join Date: Aug 2015
Posts: 3,297
Mentioned: 39 Post(s)
Tagged: 0 Thread(s)
Quoted: 1142 Post(s)
Liked 1,739 Times
in
960 Posts
If the paint is all off the only sanding I would do is a light biff to get any rust or oxidation then etch and immediately epoxy prime, or an etching primer immediately after the biff.
08-20-21, 01:17 PM
#4
Senior Member
Join Date: Jan 2008
Location: Beaverton, OR
Posts: 14,744
Bikes: Yes
Mentioned: 525 Post(s)
Tagged: 0 Thread(s)
Quoted: 3230 Post(s)
Liked 3,868 Times
in
1,439 Posts
Oh, I forgot to comment about the head badge. I suggest removing it. You'll need to knock off the backs of the rivets from inside the head tube. A screwdriver will usually do the trick with a few taps. The head badge is probably very thin, so remove it carefully. If you have to use much force, it means part of the rivet is still there. After you've painted and let it dry for several days, you can reattach the head badge using clear silicone caulking. The holes will guide you as to placement, but there's no need to re-rivet or screw it on.
__________________
My Bikes
My Bikes
08-20-21, 02:44 PM
#5
Senior Member
Thread Starter
Join Date: Feb 2001
Location: Houston
Posts: 134
Mentioned: 0 Post(s)
Tagged: 0 Thread(s)
Quoted: 3 Post(s)
Likes: 0
Liked 2 Times
in
2 Posts
Oh, I forgot to comment about the head badge. I suggest removing it. You'll need to knock off the backs of the rivets from inside the head tube. A screwdriver will usually do the trick with a few taps. The head badge is probably very thin, so remove it carefully. If you have to use much force, it means part of the rivet is still there. After you've painted and let it dry for several days, you can reattach the head badge using clear silicone caulking. The holes will guide you as to placement, but there's no need to re-rivet or screw it on.
08-20-21, 06:49 PM
#6
Senior Member
Join Date: Apr 2007
Location: Thunder Bay, Ontario, Canada - burrrrr!
Posts: 11,674
Bikes: 1958 Rabeneick 120D, 1968 Legnano Gran Premio, 196? Torpado Professional, 2000 Marinoni Piuma
Mentioned: 210 Post(s)
Tagged: 0 Thread(s)
Quoted: 1372 Post(s)
Likes: 0
Liked 1,751 Times
in
938 Posts
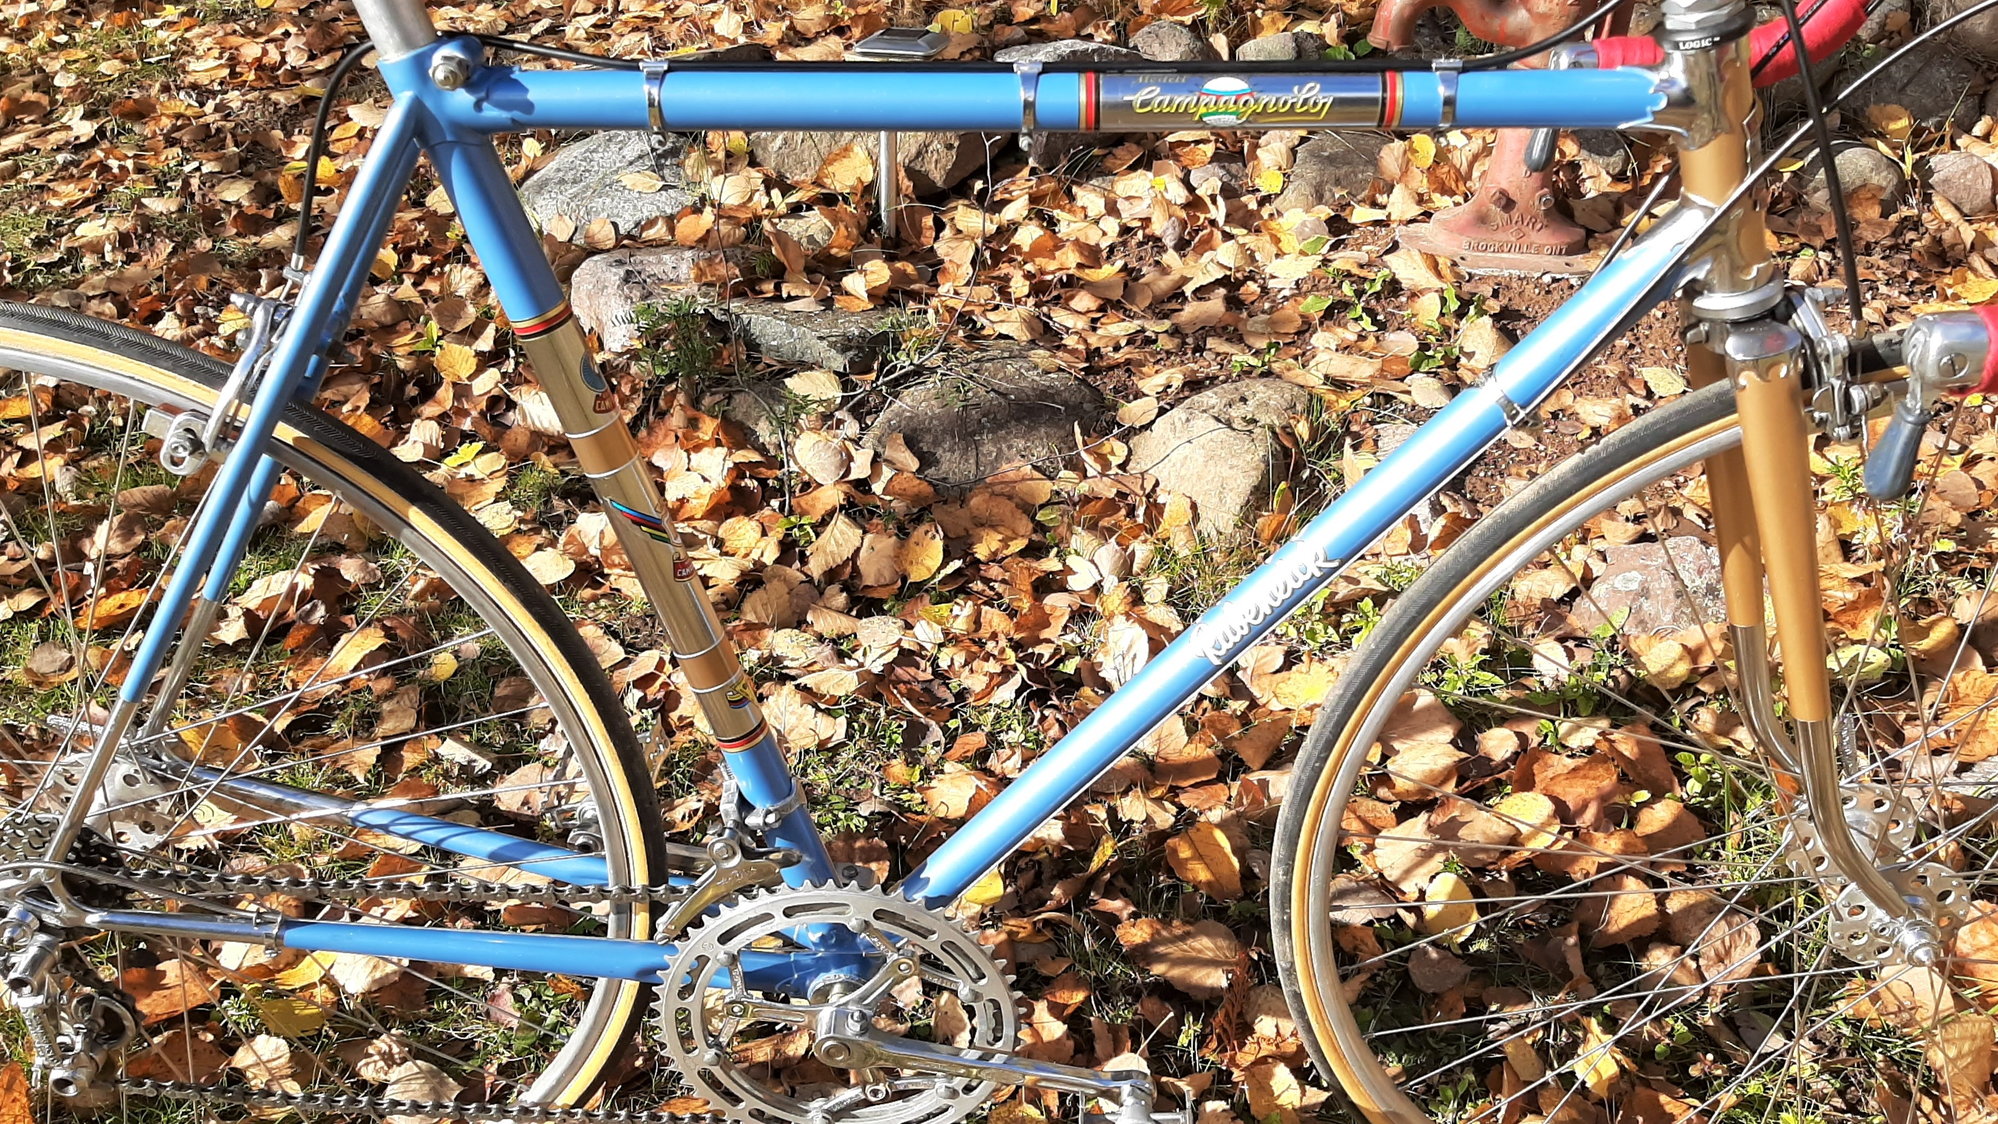
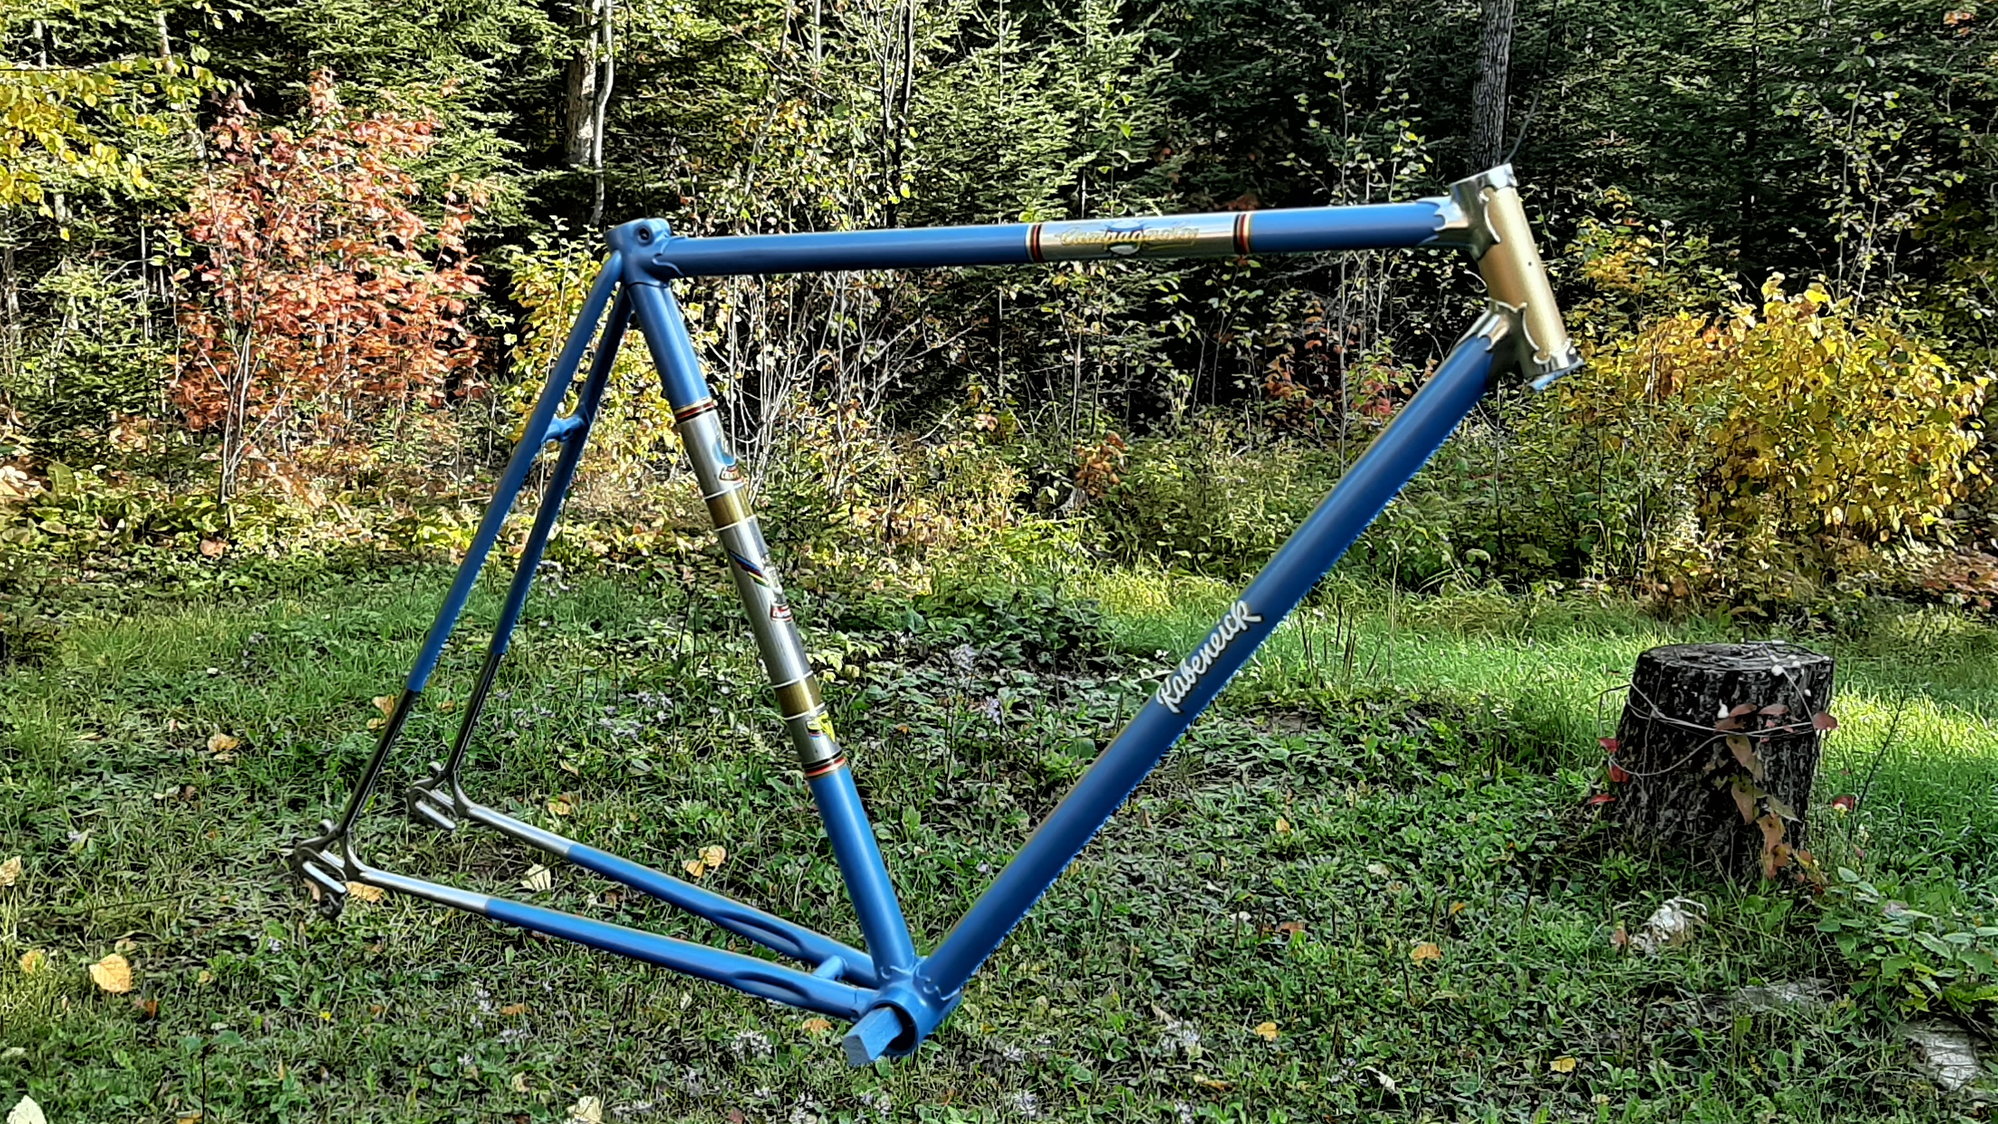
Though others might not understand, I prefer to paint my bikes with a brush. You learn and improve as you apply coats and this is what the result looks like...


__________________
"98% of the bikes I buy are projects".
"98% of the bikes I buy are projects".
Likes For randyjawa:
08-20-21, 07:10 PM
#7
Senior Member
Join Date: Jul 2009
Posts: 806
Mentioned: 4 Post(s)
Tagged: 0 Thread(s)
Quoted: 249 Post(s)
Likes: 0
Liked 29 Times
in
22 Posts
I had my frame bead blasted. If you do this, make sure you get the primer on within a day. Rust works quick.
I used an automotive etching primer. 3 coats with sanding in between. I used small pop rivets to reattach the head badge.
I used an automotive etching primer. 3 coats with sanding in between. I used small pop rivets to reattach the head badge.
Likes For Wulf:
08-20-21, 07:34 PM
#8
Senior Member

Join Date: Jan 2015
Location: Los Angeles
Posts: 4,704
Bikes: 82 Medici, 2011 Richard Sachs, 2011 Milwaukee Road
Mentioned: 55 Post(s)
Tagged: 0 Thread(s)
Quoted: 1949 Post(s)
Liked 2,010 Times
in
1,109 Posts
I followed Randy's tutorials and got great results brushing on Rustoleum. My Peugeot ended up looking nice and shiny while being quite durable as a commuter. Durability I attribute to letting each coat of primer and color dry for at least ONE WEEK. Shiny smoothiness was due to sanding between coats at the end of that week of drying.
Two other thing that I did and would do again are etching the stripped frame with muriatic acid, using latex gloves, and spraying some cleaner-paint prep-chemical-stuff between coats that I got at the auto parts store. Maybe the cleaner spray stuff helped and it also didn't cost much. 3 coats of primer and three coats of color is very very many rattle cans. I'm cheap and will use a brush from now on.
ummm...Pics of your Puch?
__________________
I don't do: disks, tubeless, e-shifting, or bead head nymphs.
I don't do: disks, tubeless, e-shifting, or bead head nymphs.
Last edited by Classtime; 08-20-21 at 07:39 PM.
08-21-21, 05:29 AM
#9
Senior Member
Join Date: Nov 2005
Location: NW Ohio
Posts: 3,419
Bikes: 1984 Miyata 310, 1986 Schwinn Sierra, 2011 Jamis Quest, 1980 Peugeot TH8 Tandem, 1992 Performance Parabola, 1987 Ross Mt. Hood, 1988 Schwinn LeTour, 1988 Trek 400T, 1981 Fuji S12-S LTD, 197? FW Evans
Mentioned: 24 Post(s)
Tagged: 0 Thread(s)
Quoted: 531 Post(s)
Liked 1,004 Times
in
514 Posts
If you are going with a two tone paint job, spray the lighter color first and let it dry for several days. After the light color is sufficiently hardened, mask it off and spray the darker color.
I sprayed my Fuji with Rustoleum Metallic in Cobalt Blue. They don't recommend sanding before applying the clear coat. I think the texture helps bring out the sparkle when the clear coat is applied. It had been repainted before, so it was pretty easy to strip it back to bare metal before spraying primer.

Rustoleum Cobalt Blue Metallic before clear

Rustoleum Cobalt Blue Metallic with clear
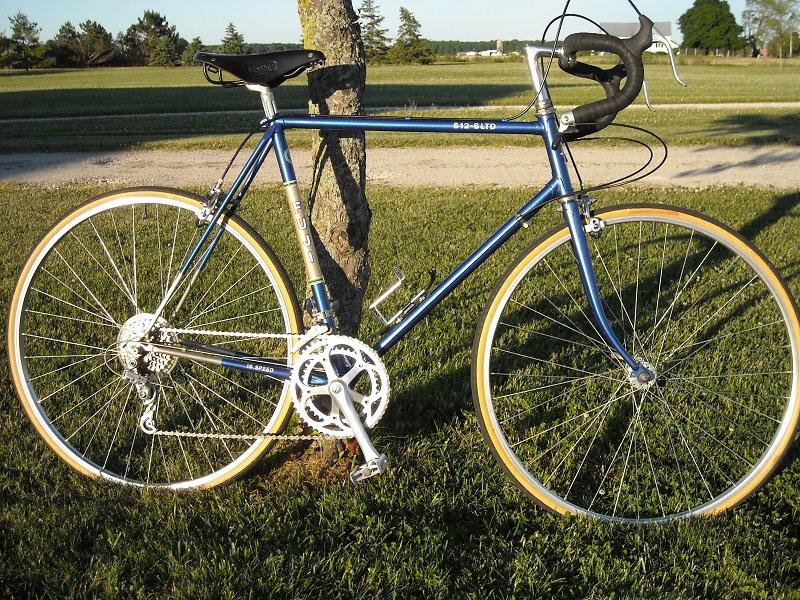
1981 Fuji S12-S LTD
I sprayed my Fuji with Rustoleum Metallic in Cobalt Blue. They don't recommend sanding before applying the clear coat. I think the texture helps bring out the sparkle when the clear coat is applied. It had been repainted before, so it was pretty easy to strip it back to bare metal before spraying primer.
Rustoleum Cobalt Blue Metallic before clear
Rustoleum Cobalt Blue Metallic with clear
1981 Fuji S12-S LTD
Likes For Pompiere:
08-21-21, 08:14 AM
#10
Senior Member
Join Date: Apr 2007
Location: Thunder Bay, Ontario, Canada - burrrrr!
Posts: 11,674
Bikes: 1958 Rabeneick 120D, 1968 Legnano Gran Premio, 196? Torpado Professional, 2000 Marinoni Piuma
Mentioned: 210 Post(s)
Tagged: 0 Thread(s)
Quoted: 1372 Post(s)
Likes: 0
Liked 1,751 Times
in
938 Posts
I do use rattle can when forced to do so. For example, the only art that I could get for my Rabeneick 120d were of the water slide variety. Meaning fragile and in need of a clear top coat for protection. I have never tried to brush a clear coat over waterslide decals, so I sprayed away...
My issue with spray is the mess that it makes everywhere in the room (Mrs. Me is rarely impressed) and, secondly, the tend to over spray resulting in poor surface appearance. This is my paint spray booth...

I never use oil based for spray painting, opting for lacquer every time. Once applied, the rubbing out process begins. Anyway, my most recent rattle can result with clear coat over everything, including chrome lugs and stays...

My issue with spray is the mess that it makes everywhere in the room (Mrs. Me is rarely impressed) and, secondly, the tend to over spray resulting in poor surface appearance. This is my paint spray booth...
I never use oil based for spray painting, opting for lacquer every time. Once applied, the rubbing out process begins. Anyway, my most recent rattle can result with clear coat over everything, including chrome lugs and stays...
__________________
"98% of the bikes I buy are projects".
"98% of the bikes I buy are projects".
08-21-21, 08:49 AM
#11
Senior Member
Thread Starter
Join Date: Feb 2001
Location: Houston
Posts: 134
Mentioned: 0 Post(s)
Tagged: 0 Thread(s)
Quoted: 3 Post(s)
Likes: 0
Liked 2 Times
in
2 Posts
Some excellent advice and gorgeous bikes on this thread. I try to post up some pictures of the Puch when I can.
08-21-21, 09:04 AM
#12
Friendship is Magic

Join Date: Nov 2010
Location: Sacramento, CA
Posts: 22,984
Bikes: old ones
Mentioned: 304 Post(s)
Tagged: 0 Thread(s)
Quoted: 26413 Post(s)
Liked 10,379 Times
in
7,207 Posts
.
...you can get reasonable results with an enamel paint, or even a lacquer paint. But if you don't overcoat them with a final finish of a two part clear urethane or other epoxy paint, the end result will be a little more fragile. They do tend to harden as they cure longer, and will eventually be about as durable as your original finish. But still not as durable as an epoxy paint, with a hardener, applied correctly. They do sell urethane paints in a few colors, and clear, in a do it yourself spray can form now. Look for them online or where they sell automotive paints near you.
I am aware of no chemical stripper that affects brazing material. They sell a couple of different brands, both in brush on and spray on form, at my local Home Depot. They work best when it is hot outside. They do make a mess, so put down newsprint or a dropcloth.
You will be a lot happier if you remove the head badge first, as recommended by AndyK . There are various methods of reattachment. one of which is to simply remount it using a small piece of 3M double sided car trim tape, which actually works pretty well. If nothing else, removing the head badge first makes it less at risk during the paint stripping process.
AS in all things, the first couple of times you do this, go slowly, and don't be afraid to stop and think about something. Generally, I think that repaints look better with some reproduction graphics applied. Those are available online from a number of guys, and they are not cheap. There are some other threads already going on painting. I think you can find hem using he site search function, or Google, with the limiting term "bike forums".
08-21-21, 10:31 AM
#13
smelling the roses

Join Date: Nov 2010
Location: Tixkokob, Yucat�n, M�xico
Posts: 15,320
Bikes: 79 Trek 930, 80 Trek 414, 84 Schwinn Letour Luxe (coupled), 92 Schwinn Paramount PDG 5
Mentioned: 104 Post(s)
Tagged: 1 Thread(s)
Quoted: 7081 Post(s)
Liked 901 Times
in
612 Posts
And then there are the contrarians. I have two bikes in need of a paint job. Both are dark, a black Trek, and a dark chocolate brown Paramount. Neither will be stripped. Both will be sanded down and likely painted with a brush, back to their original colors. Some of us prefer non-descript, non-flashy bikes. The kind tha tend to go unnoticed.
08-22-21, 07:15 AM
#14
Full Member
Join Date: Dec 2020
Posts: 288
Bikes: Bianchi Nyala, Bianchi Volpe, Bianchi Campione D'Italia, Trek 640, Luxus folding bike, Schwinn Speedster, Bianchi Torino, KHS Aero Sport, probably something else around here somewhere
Mentioned: 1 Post(s)
Tagged: 0 Thread(s)
Quoted: 117 Post(s)
Liked 198 Times
in
100 Posts
I�m currently painting my third, a Schwinn LeTour, and put the first coat of paint on yesterday:
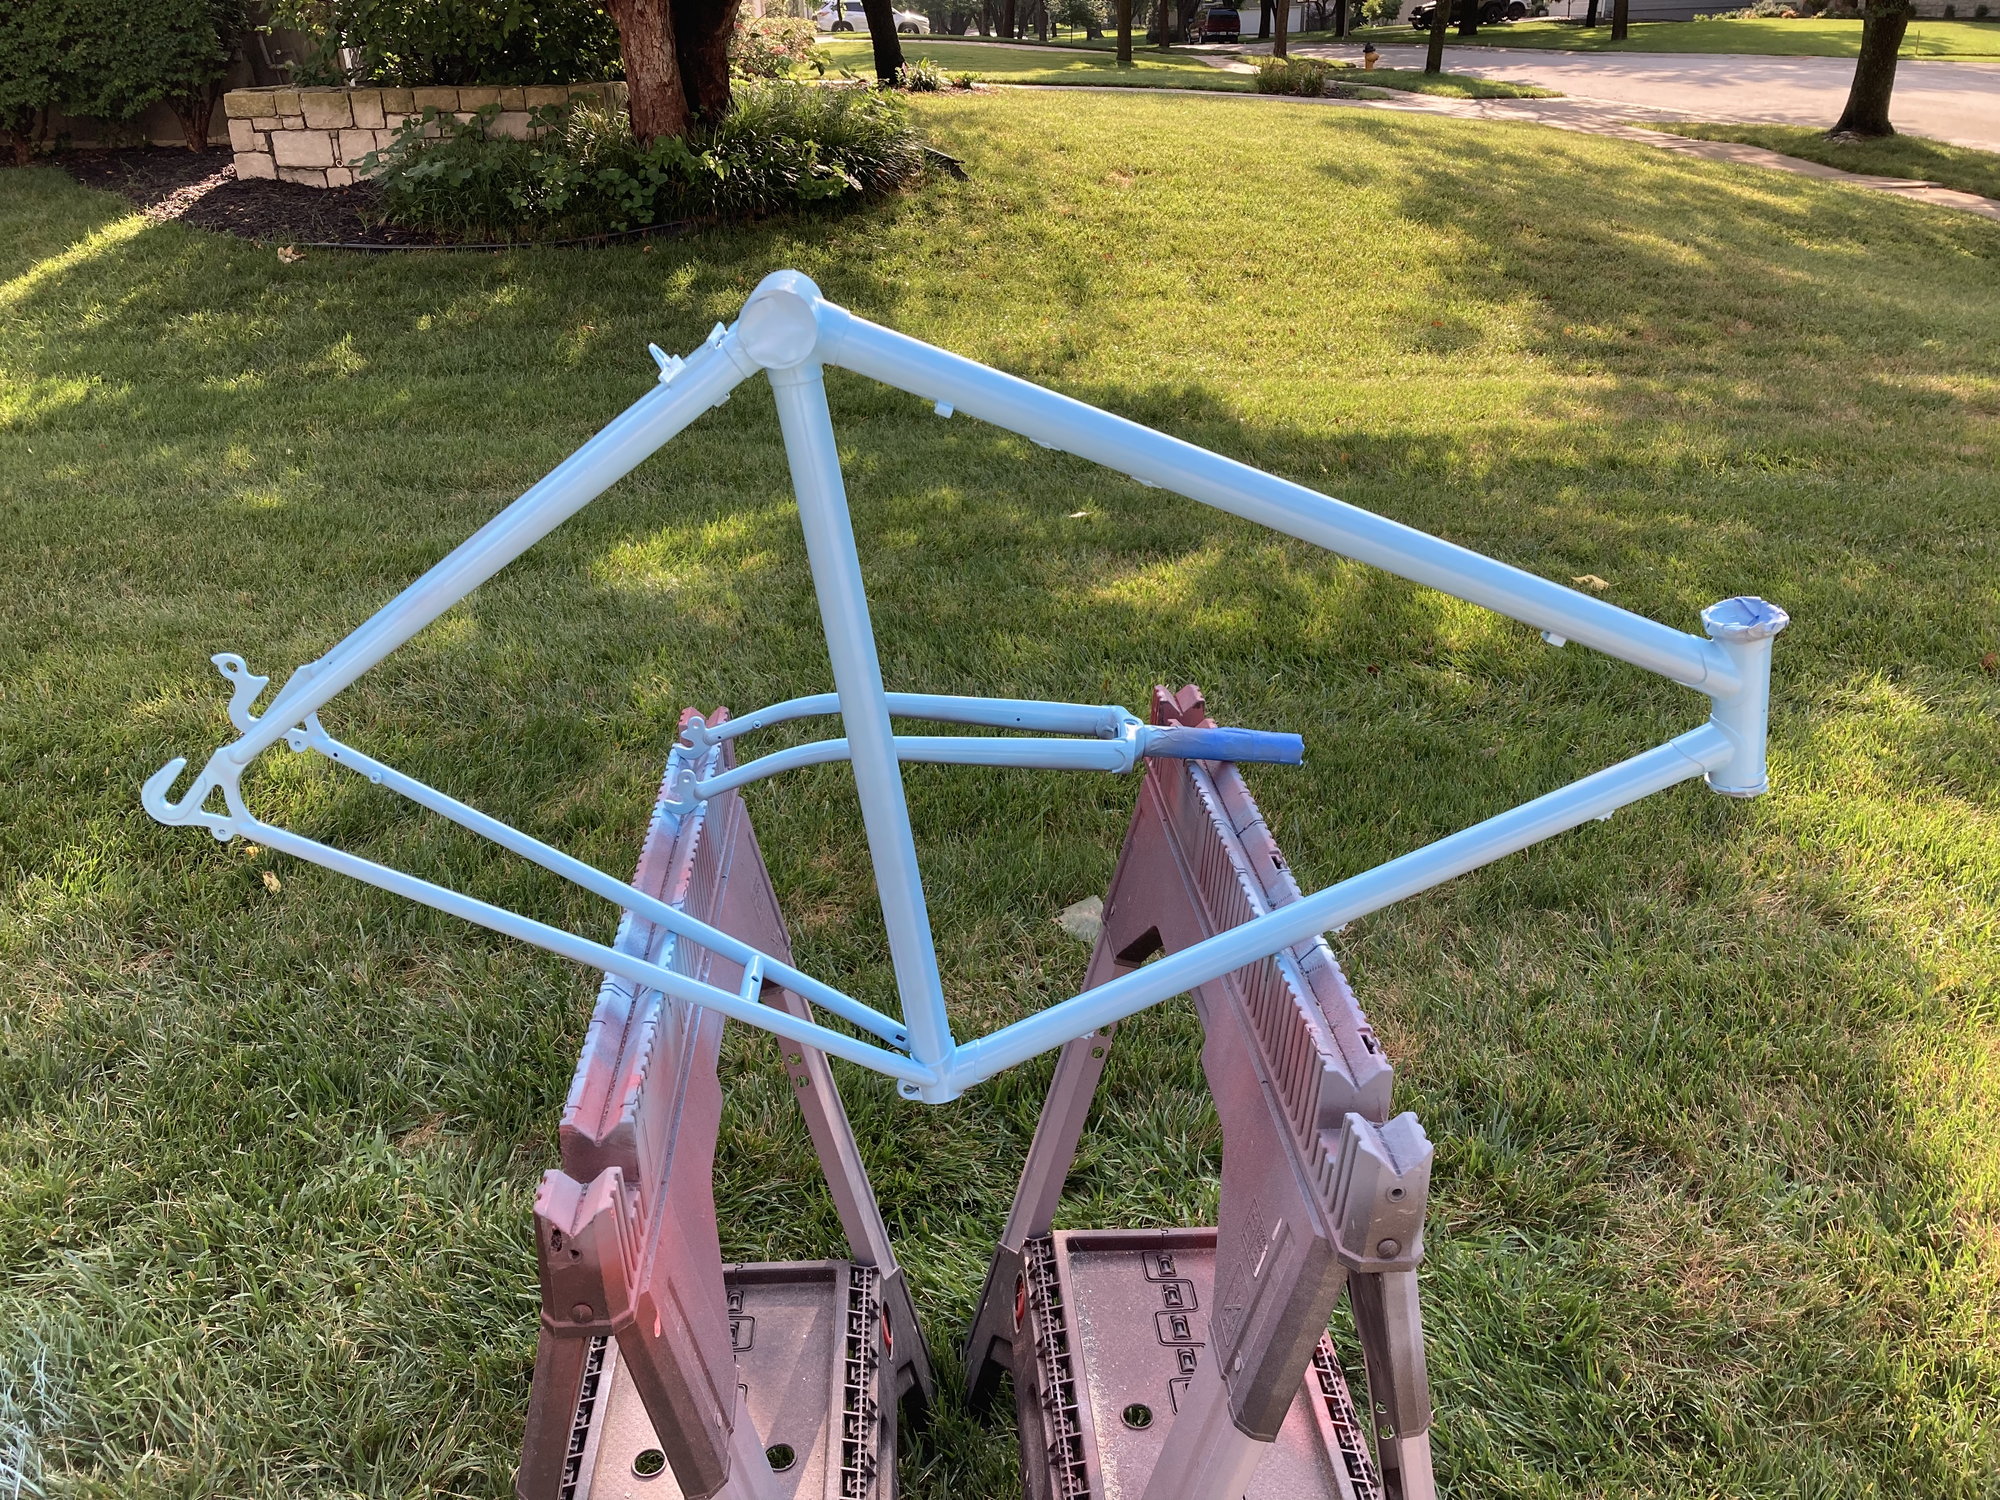
Here�s what�s worked well for me, and plenty of folks have commented on the quality of the finishes:
I don�t usually strip them. Its too hard to get in all the crevices, and there�s no good reason in my mind to do it if there isn�t excessive paint build up from prior sprays. They don�t strip cars for resorts, right?
you do need to clean thoroughly and sand thoroughly. I like 400 grit for this. It must be perfectly clean and You must go every inch. If there is any contamination, your paint won�t stick. If you don�t rough up the whole thing with sandpaper, you�ll get poor adhesion. Take your time and do this right.
Spray your primer. I like krypton 2-in1 filling primer. Spray a light coat. Then, when it�s dry, take 1000 grit and sand any defects. They�ll be there. Again, take your time. Don�t just use your eyes to find them. Run your fingertips lightly over it. They�ll find things your eyes won�t see.
Now that half your primer is sanded off, go prime it again. Repeat until you�re fully primered and can�t find defects.
Now you�re ready to spray. If a bike is worth it, go to an auto paint store snd have them blend a can for you. You can get a perfect match for your color, and it�s much much better paint. If it�s not worth it, plain old rattle can will work. Some are much better than others.
Read the instructions and follow them. Spray very light coats. You don�t want runs. They�re hard to fix. You can always spray another light coat.
After the first light coat, inspect for defect again. If you still find them, light sand with thousand grit again.
if you plan to clearcoat, apply stickers now, then spray your clear.
After you finally have it sprayed, leave it alone. If you used auto paint, don�t touch it for 3 days. If you used rattle can, leave it alone for at least a week. That stuff takes forever to harden.
When it�s hard, you gently wet sand with 1500 grit followed by 2000 grit, then a polishing compound.
