


One piece BMX sprocket + crank loose: how to fix?
 09-11-19, 03:30 PM
#1
Senior Member
Thread Starter

One piece BMX sprocket + crank loose: how to fix?
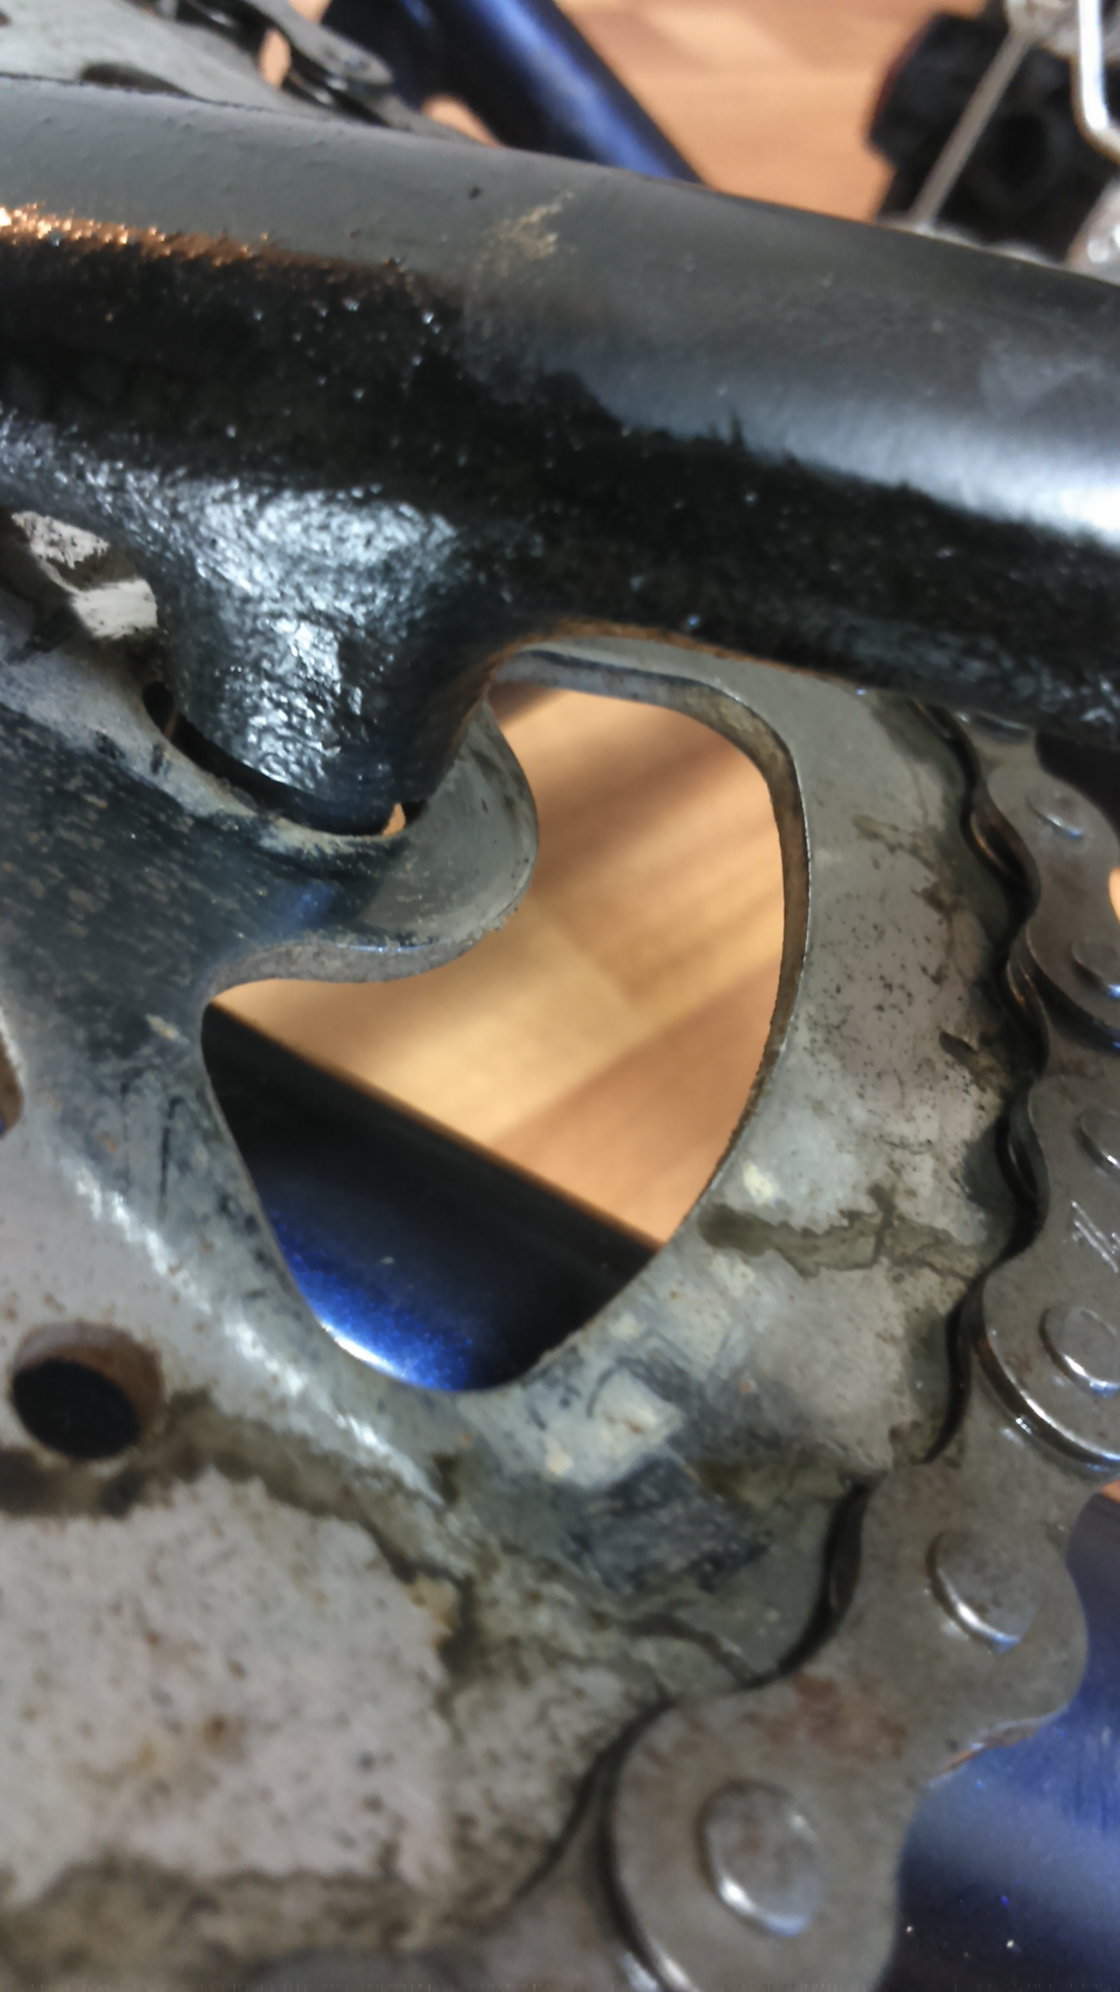
Below is a similar crank to the one I'm using. The connection of the crank to the frame is fine; it has no 'play' on the bike and peddles around smooth. The issue is that the little dimple on the crank (that goes into the sprocket for support) seems a move around a little inside the hole of the sprocket. There is approx. a 1mm gap between the two. This results in a slight feeling of the chain shifting when peddling hard the as sprocket moves. I can confirm that the chain is not slipping on the sprocket.
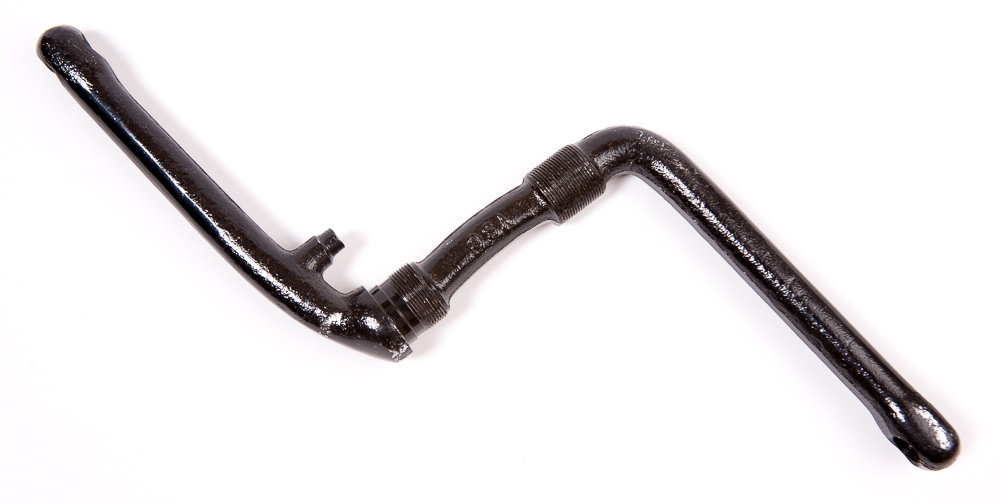
Sprocket is not mine, but it is essentially the same and used for visualization:
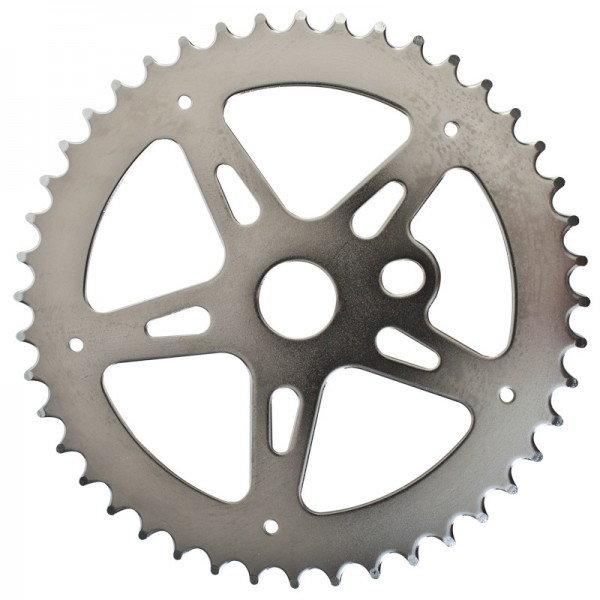
What can I do to make it not move around? Shove something in there? My other sprocket was fine until I changed it.
Ideas?
Sprocket is not mine, but it is essentially the same and used for visualization:
What can I do to make it not move around? Shove something in there? My other sprocket was fine until I changed it.
Ideas?
 09-11-19, 03:55 PM
#2
Member
My SUB has one of those cranks, and there is some play on the pin but the sprocket doesn't move, the nut that is the first bearing on the crank should be tight against the sprocket, mine has 2 washers as well. Did you miss out a washer?
Likes For Foxonabike:
09-11-19, 04:37 PM
#3
Senior Member
Thread Starter
 09-11-19, 04:52 PM
#4

Senior Member
Join Date: Feb 2012
Location: Rochester, NY
Posts: 18,071
Bikes: Stewart S&S coupled sport tourer, Stewart Sunday light, Stewart Commuting, Stewart Touring, Co Motion Tandem, Stewart 3-Spd, Stewart Track, Fuji Finest, Mongoose Tomac ATB, GT Bravado ATB, JCP Folder, Stewart 650B ATB
Mentioned: 0 Post(s)
Tagged: 0 Thread(s)
Quoted: 4199 Post(s)
Liked 3,853 Times
in
2,303 Posts
This type of crank and sprocket are often a tad "loose" in their interfacing. Being pretty much the bottom of the cycling crank/ring world that is no surprise. Make sure the crank's RH cone is well tightened. Some cones have a built on shoulder/spacer and some don't. So no separate spacing washer under the cone isn't what counts. That the cone is placed away from the sprocket/ring enough to allow proper assembly WRT the cups is what counts. In a perfect wheel the crank arm's finger (a dimple is an inward feature, the finger is an outward one) would fit the ring's hole with a velvet slip fit. But these things are made in a "cost is what maters" world.
As you go up the ladder of cost, design and manufacture tolerances the finger/hole fit gets tighter. Andy (Wow! That ending line got past the auto censor)
As you go up the ladder of cost, design and manufacture tolerances the finger/hole fit gets tighter. Andy (Wow! That ending line got past the auto censor)
__________________
AndrewRStewart
AndrewRStewart
09-11-19, 05:03 PM
#5
Senior Member
Thread Starter
This type of crank and sprocket are often a tad "loose" in their interfacing. Being pretty much the bottom of the cycling crank/ring world that is no surprise. Make sure the crank's RH cone is well tightened. Some cones have a built on shoulder/spacer and some don't. So no separate spacing washer under the cone isn't what counts. That the cone is placed away from the sprocket/ring enough to allow proper assembly WRT the cups is what counts. In a perfect wheel the crank arm's finger (a dimple is an inward feature, the finger is an outward one) would fit the ring's hole with a velvet slip fit. But these things are made in a "cost is what maters" world.
As you go up the ladder of cost, design and manufacture tolerances the finger/hole fit gets tighter. Andy (Wow! That ending line got past the auto censor)
As you go up the ladder of cost, design and manufacture tolerances the finger/hole fit gets tighter. Andy (Wow! That ending line got past the auto censor)
Will let you guys know how it goes.
09-12-19, 03:43 AM
#6
Member
That pin/hole play looks normal to me, I think it's the fact that the sprocket is not clamped tightly is why you are noticing it. Be interesting to see what you find with the crank out again.
Likes For Foxonabike:
09-12-19, 04:52 AM
#7
Senior Member
Thread Starter
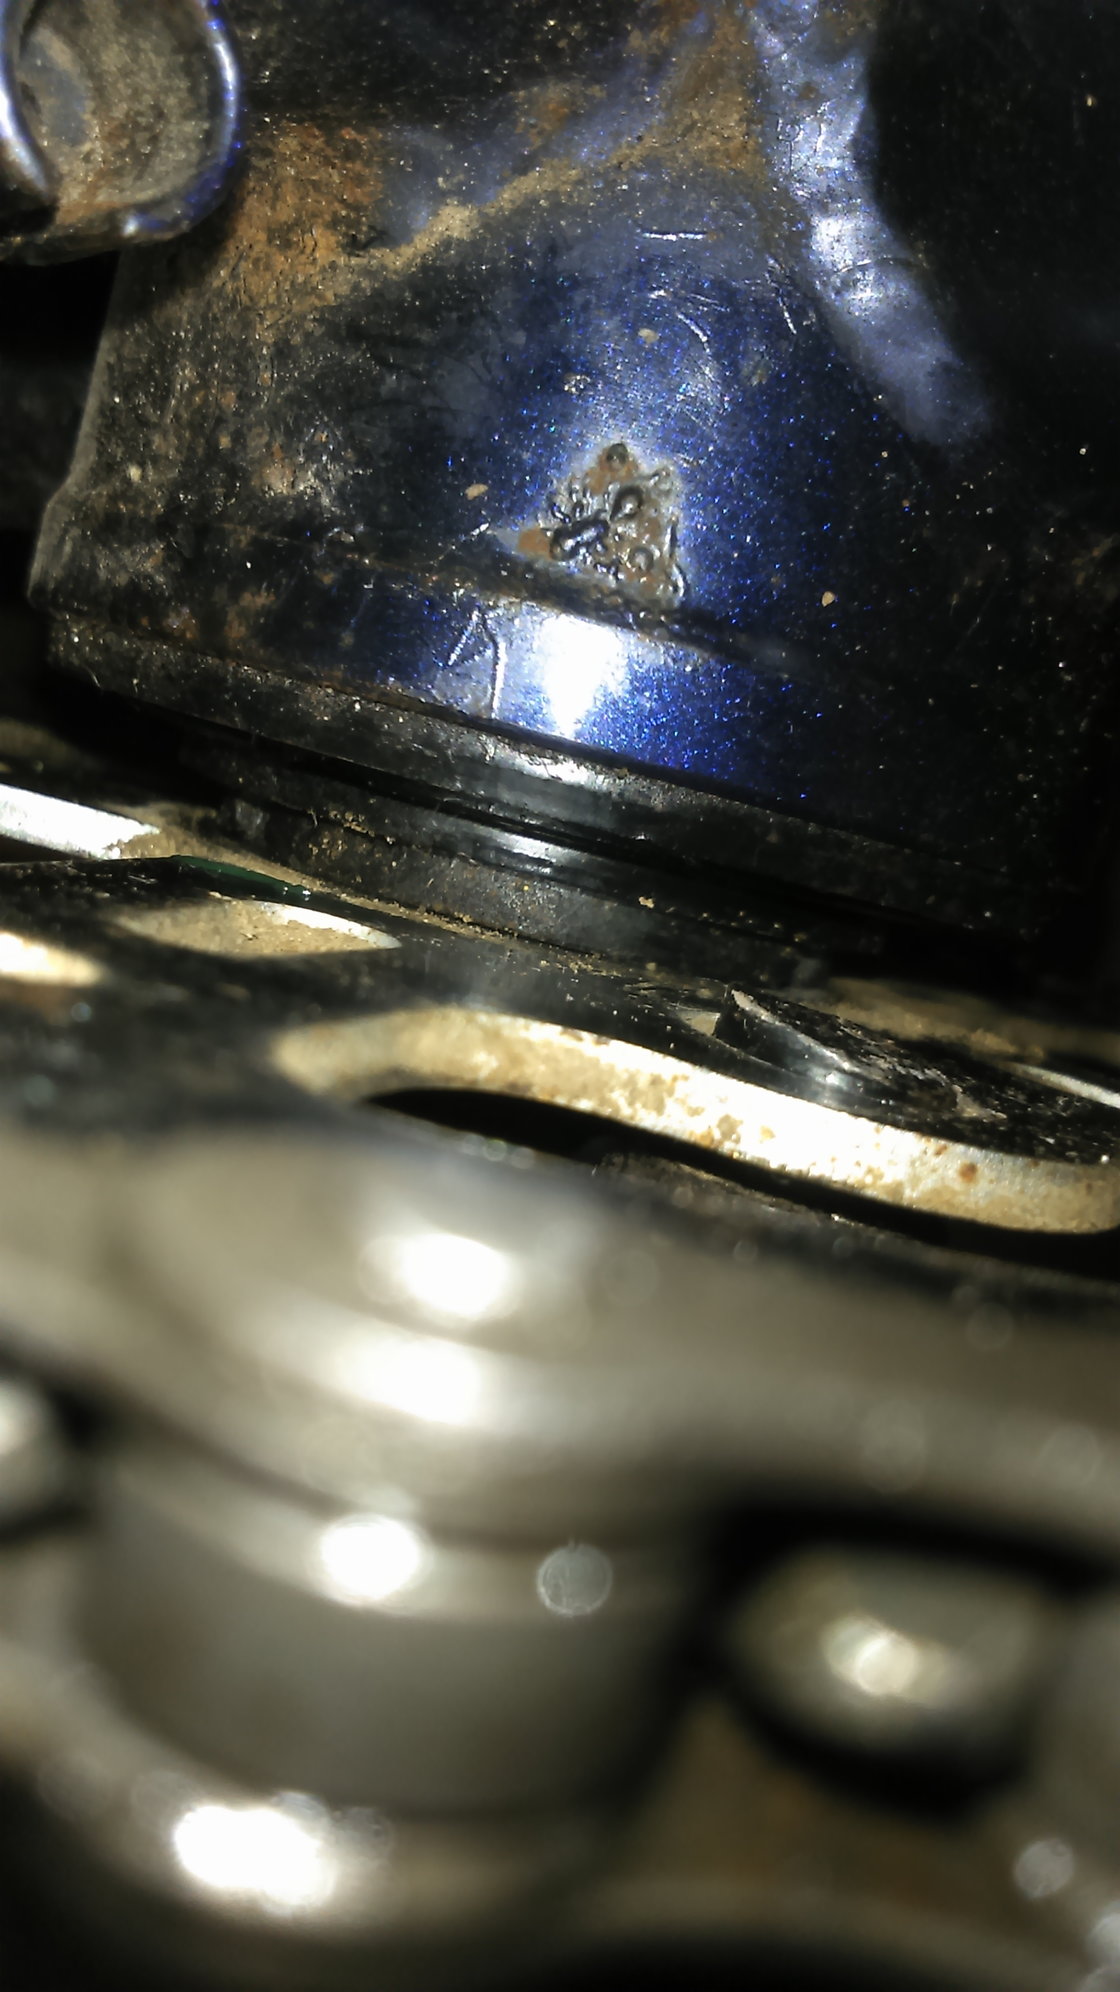
Thinking back, I remember not tightening the sprocket that tightly; I had just made it snug with a short wrench but didn't do the usual leveraged tightening.. This is very likely the issue.
09-12-19, 03:18 PM
#8
The dropped

Join Date: Oct 2018
Location: Columbus, OH
Posts: 2,144
Bikes: Pake C'Mute Touring/Commuter Build, 1989 Kona Cinder Cone, 1995 Trek 5200, 1973 Raleigh Super Course FG, 1960/61 Montgomery Ward Hawthorne "thrift" 3 speed, by Hercules (sold) : 1966 Schwinn Deluxe Racer (sold)
Mentioned: 10 Post(s)
Tagged: 0 Thread(s)
Quoted: 1739 Post(s)
Liked 1,014 Times
in
696 Posts
Sounds like you found the problem! while I wasted a good few minutes looking to see if there was a published torque recommendation, you wouldn't be able to use it with a cone wrench anyway. You could probably tighten the cone against the sprocket on the bike with a cone wrench, but your bearings will need to be adjusted to account for the play.
Likes For Unca_Sam:
09-12-19, 07:42 PM
#9
Senior Member
Join Date: Feb 2012
Location: Rochester, NY
Posts: 18,071
Bikes: Stewart S&S coupled sport tourer, Stewart Sunday light, Stewart Commuting, Stewart Touring, Co Motion Tandem, Stewart 3-Spd, Stewart Track, Fuji Finest, Mongoose Tomac ATB, GT Bravado ATB, JCP Folder, Stewart 650B ATB
Mentioned: 0 Post(s)
Tagged: 0 Thread(s)
Quoted: 4199 Post(s)
Liked 3,853 Times
in
2,303 Posts
If the RH cone is Wald like and has two flats I clamp it in the vice and use the crank arm as the lever. If the c one has notches on it's circumference I use a lock ring tool. All done before any assembly of the BB.
One more aspect of this type of ring/arm design. It works pretty well for a drive system with no foot brake or no fixed gear. But when one needs to put a "******ing" (hey auto censor this means a slowing or back pedaling force, not a reference to a person) force to the rear wheel that loose crank arm finger in the ring's hole will allow the ring to rotate. With a power forward it rotates back. In time this can cause the cone to loosen and the ring's hole to slowly mold larger. Andy
One more aspect of this type of ring/arm design. It works pretty well for a drive system with no foot brake or no fixed gear. But when one needs to put a "******ing" (hey auto censor this means a slowing or back pedaling force, not a reference to a person) force to the rear wheel that loose crank arm finger in the ring's hole will allow the ring to rotate. With a power forward it rotates back. In time this can cause the cone to loosen and the ring's hole to slowly mold larger. Andy
__________________
AndrewRStewart
AndrewRStewart
09-13-19, 06:11 AM
#10
Senior Member
Thread Starter
Sounds like you found the problem! while I wasted a good few minutes looking to see if there was a published torque recommendation, you wouldn't be able to use it with a cone wrench anyway. You could probably tighten the cone against the sprocket on the bike with a cone wrench, but your bearings will need to be adjusted to account for the play.

Good thing that the bike coop has just about every single bike tool I'd ever need. I'll be back later today with the results.
09-15-19, 09:17 AM
#11
Senior Member
Thread Starter
Tightening the sprocket didn't work; it still moves.
I'm going to try using my Gorilla glue to glue it in place, and if that doesn't work, I'll buy some J-B Weld and try that.
I'm going to try using my Gorilla glue to glue it in place, and if that doesn't work, I'll buy some J-B Weld and try that.
09-15-19, 09:53 AM
#12
The dropped
Join Date: Oct 2018
Location: Columbus, OH
Posts: 2,144
Bikes: Pake C'Mute Touring/Commuter Build, 1989 Kona Cinder Cone, 1995 Trek 5200, 1973 Raleigh Super Course FG, 1960/61 Montgomery Ward Hawthorne "thrift" 3 speed, by Hercules (sold) : 1966 Schwinn Deluxe Racer (sold)
Mentioned: 10 Post(s)
Tagged: 0 Thread(s)
Quoted: 1739 Post(s)
Liked 1,014 Times
in
696 Posts
It should be reversible!
For example:
The lock nut on the headset on my latest bike almost locked the top cone before bottoming out on the steer tube, so I measured and figured out how much additional spacer i needed, and picked it up. Adjusted the headset, and mounted the cranks onto the bottom bracket. The 125mm symmetric spindle, as feared, was just enough to allow the chainrings to clear the chainstay. Went back the next day for a ~2mm bracket spacer to adjust the chainline. But i learned to trust myself when i know my measurements. I predicted that the 2.5 mm in spindle length would make the chainrings really close, but went for trial and error anyway.
I'm sure you can find a 2mm flat washer in the appropriate ID to give you the clamp you need. Scuffing the sprocket/crank interface with some sandpaper will increase friction there too, if a washer doesn't do the trick.
Likes For Unca_Sam:
09-15-19, 09:59 AM
#13
The dropped
Join Date: Oct 2018
Location: Columbus, OH
Posts: 2,144
Bikes: Pake C'Mute Touring/Commuter Build, 1989 Kona Cinder Cone, 1995 Trek 5200, 1973 Raleigh Super Course FG, 1960/61 Montgomery Ward Hawthorne "thrift" 3 speed, by Hercules (sold) : 1966 Schwinn Deluxe Racer (sold)
Mentioned: 10 Post(s)
Tagged: 0 Thread(s)
Quoted: 1739 Post(s)
Liked 1,014 Times
in
696 Posts
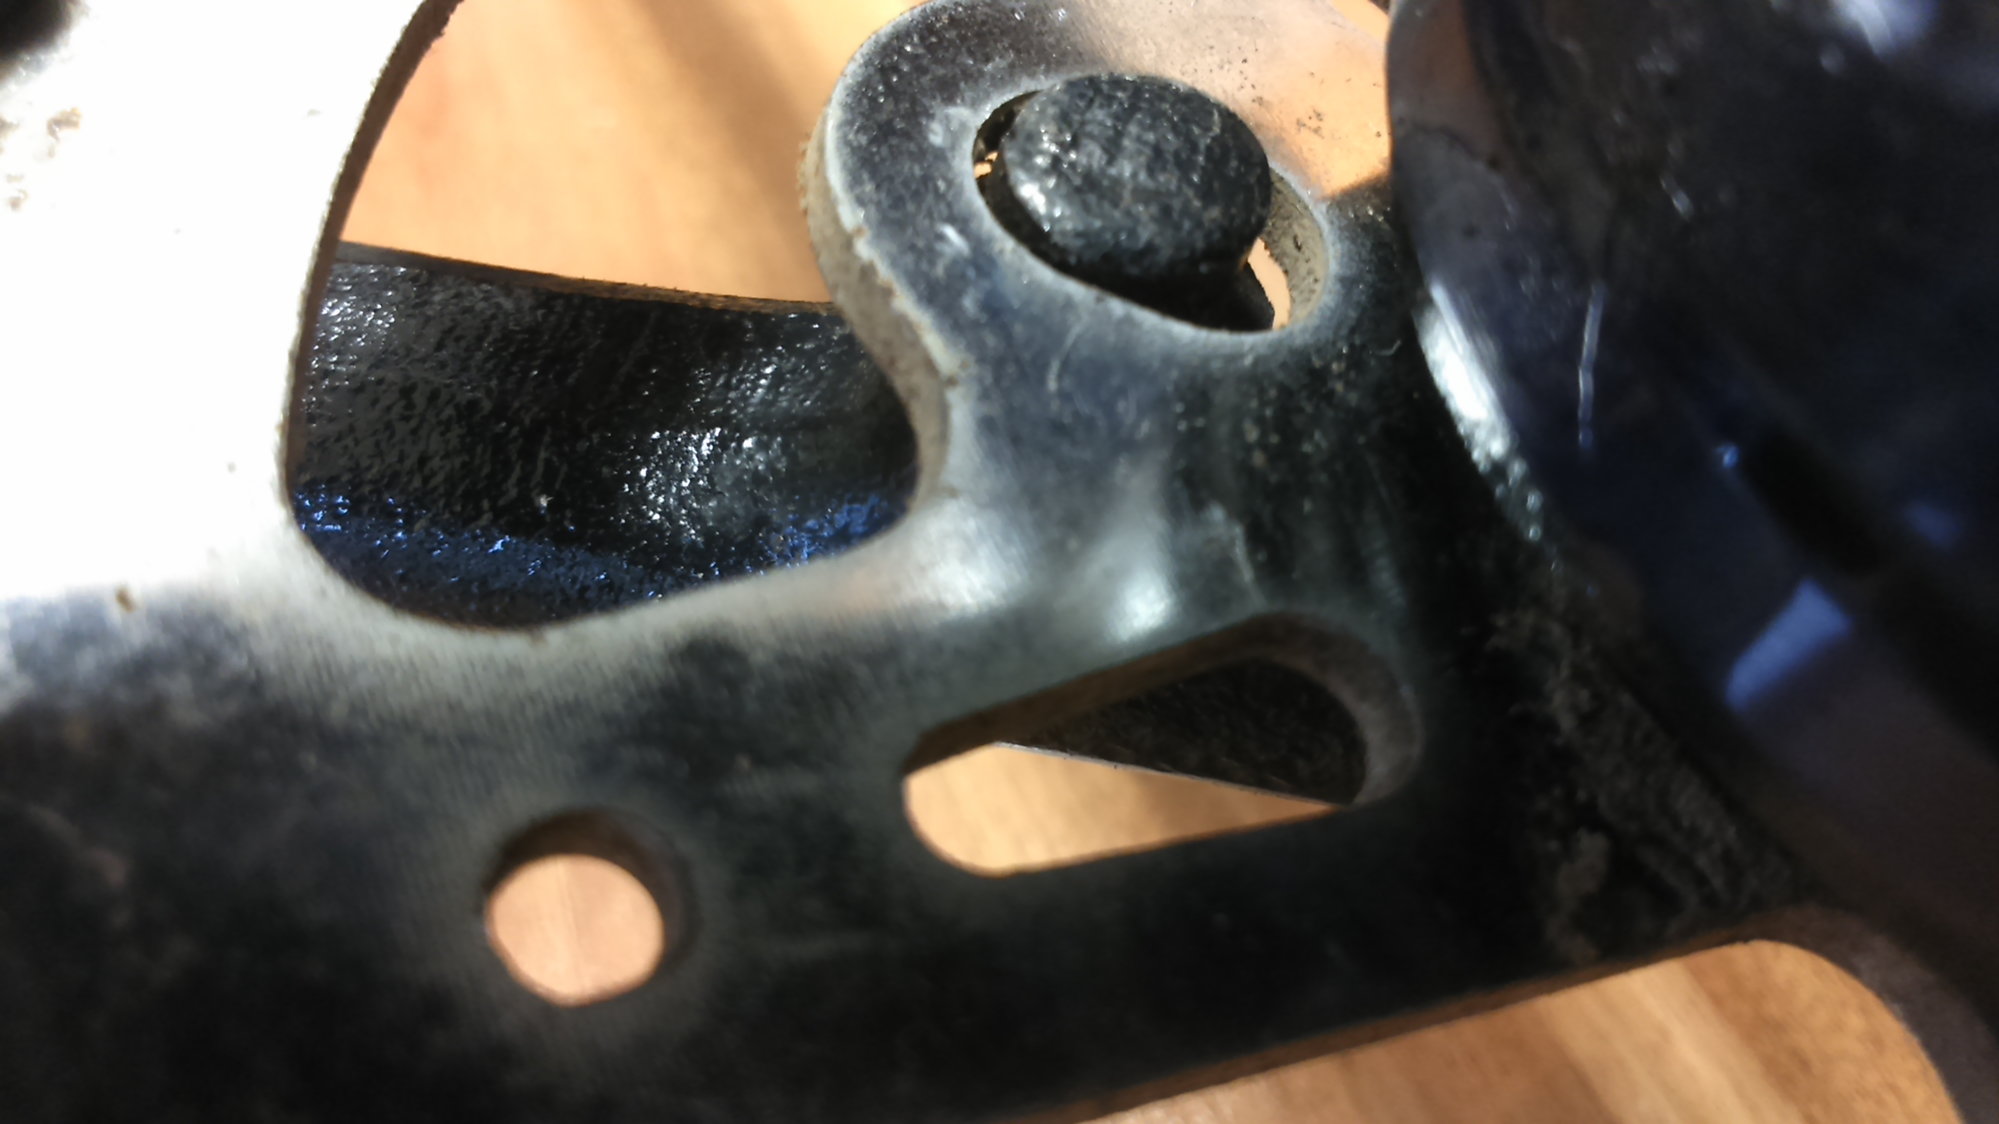
Where to scuff
From Sheldon Brown's website: editing by me. 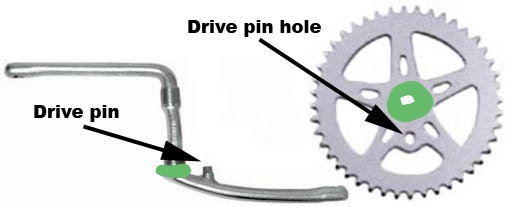
Scuff the sprocket face where it meets the crank flange, as well as the flange's face towards the sprocket, in addition to adding a washer
Scuff the sprocket face where it meets the crank flange, as well as the flange's face towards the sprocket, in addition to adding a washer
09-15-19, 10:36 AM
#14
Senior Member
Thread Starter
Whoa there! Don't glue/epoxy that sprocket in place! You likely need a washer between the bearing cone and the sprocket so you have more threads to clamp with. I know it sucks going back and forth to the co-op, but I learn from it too.
For example:
The lock nut on the headset on my latest bike almost locked the top cone before bottoming out on the steer tube, so I measured and figured out how much additional spacer i needed, and picked it up. Adjusted the headset, and mounted the cranks onto the bottom bracket. The 125mm symmetric spindle, as feared, was just enough to allow the chainrings to clear the chainstay. Went back the next day for a ~2mm bracket spacer to adjust the chainline. But i learned to trust myself when i know my measurements. I predicted that the 2.5 mm in spindle length would make the chainrings really close, but went for trial and error anyway.
I'm sure you can find a 2mm flat washer in the appropriate ID to give you the clamp you need. Scuffing the sprocket/crank interface with some sandpaper will increase friction there too, if a washer doesn't do the trick.
I'll try this on Tuesday when I'm at the bike coop.
09-15-19, 02:51 PM
#15
Senior Member
Join Date: Feb 2012
Location: Rochester, NY
Posts: 18,071
Bikes: Stewart S&S coupled sport tourer, Stewart Sunday light, Stewart Commuting, Stewart Touring, Co Motion Tandem, Stewart 3-Spd, Stewart Track, Fuji Finest, Mongoose Tomac ATB, GT Bravado ATB, JCP Folder, Stewart 650B ATB
Mentioned: 0 Post(s)
Tagged: 0 Thread(s)
Quoted: 4199 Post(s)
Liked 3,853 Times
in
2,303 Posts
I think you will find that no amount of torque or "glue" will keep the loose fitting finger stationary in the ting's hole. Andy
__________________
AndrewRStewart
AndrewRStewart
09-16-19, 04:58 AM
#16
Senior Member
Thread Starter
Sadly, I suspect this is the case; that's what my instinct is telling me. I have put the Gorilla Glue on it for now but have yet to test it. Will be riding the bike in a few hours and see, but I'm not holding my breath.
09-16-19, 09:13 AM
#17
Senior Member
Thread Starter
I had to use the bike just a few hours ago, and the Gorilla Glue seems to be holding, even with it not fully set. So I have hope that this just might be sufficient. If so, I won't bother with changing anything; and there is no danger if the glue breaks anyways.
One thing is that I was rather easy on the bike; I hadn't given it my all by standing up and peddling hard from a standstill, so it remains to be seen if it truly can hold under great pressure. I did do tricks on it, though.
Will keep you guys updated.
*** UPDATE ***
I've been riding the bike for hours and doing tricks on it. The glue has held beautifully. As time goes on the glue can only cure and harden more, making it stronger, so I can only assume that it will hold if such is the case.
Last edited by bedtime; 09-17-19 at 06:50 PM. Reason: Update

