


Good replacement tire?
 11-22-19, 01:57 AM
#26
"Broke College Student"
Thread Starter

Thanks, I think this tire looks amazing on the bike. The best part is the reflective stripe - it really matches the bike IMHO. I'm probably going to go ahead and make it a matching set because it looks so nice on this bike.
I found another really cool thing about this tire after doing another dumb experiment. (See my first... I know, I even admitted it was a dumb idea.)
I knew someone who swore by tubeless (including the Ghetto Tubeless method) so I wanted to try it. I've watched various videos on Ghetto Tubeless setups and have tried it at random times with no luck. Usually the air would immediately leak out. I decided to try it tonight and to my amazement, it actually worked. While the Schwalbe Marathon is a strictly "tube-type" tire (says so on sidewall), I was able to get it to hold air without any tubes. The rim is the stock, non-tubeless-ready rim.
I split a 20x1.75 BMX tube and mounted the Marathon on it. It inflated with no help, just a little pressure from my hands to hold the bead close to the rim. I used a ordinary floor pump to inflate it - no air compressors here. The fit of this tire is good enough that it didn't even really require that, as I wasn't putting that much pressure on it. With no sealant or anything, I inflated it to ~35 PSI a couple hours ago and it has held perfectly fine. I'm amazed.
The real test will be how well it holds air and how well it holds up. I unfortunately did this on the front rim, so I may unseat and move it to the rear rim before doing a test ride just in case something happens. I didn't expect it to work. If it ends up working well I may actually keep it tubeless and add some sealant.

 11-22-19, 02:13 PM
#28
"Broke College Student"
Thread Starter
It has been a little over 13 hours since I topped the tire off at ~35 PSI. It has since dropped a couple pounds, but that's likely due to the pump head not wanting to fit right on the crooked valve. Because I didn't think it was going to work, I didn't make sure the valve was straight.
12-20-19, 06:25 PM
#29
"Broke College Student"
Thread Starter
I got the other tire about a week ago. It wouldn’t mount tubeless right out of the box. I inflated it with a tube (how it’s supposed to be since it is a tube-type tire) and let it sit over a couple nights to let it “stretch” out. While it was doing that, I added sealant (Stan’s No Tubes) to the rear tire since it held up well as a dry setup.
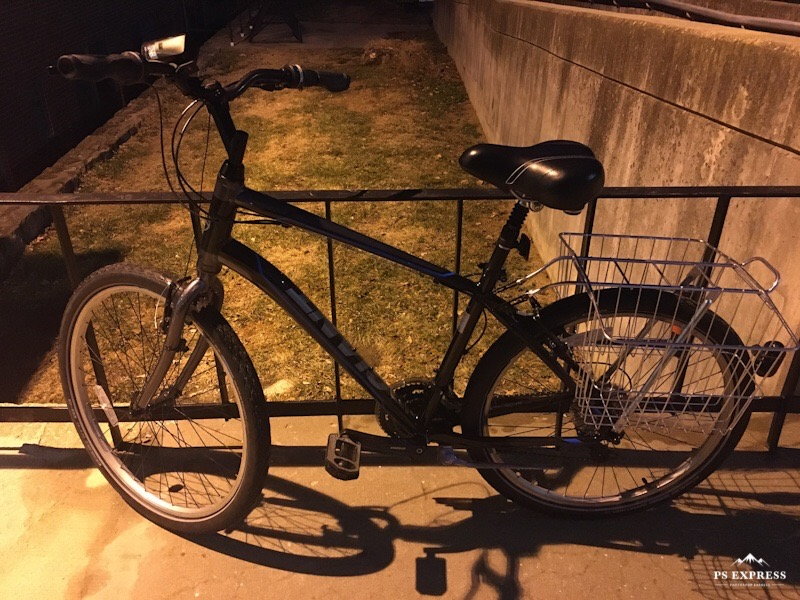
Back to the new (front) tire, I tried it again. This time, it worked. I was able to mount it tubeless. I didn’t add any sealant to it, just to see how well it held air. Installed it on the bike and took the following pictures. The Sedona is now 100% tubeless, using the “ghetto” style using the split-tube method.
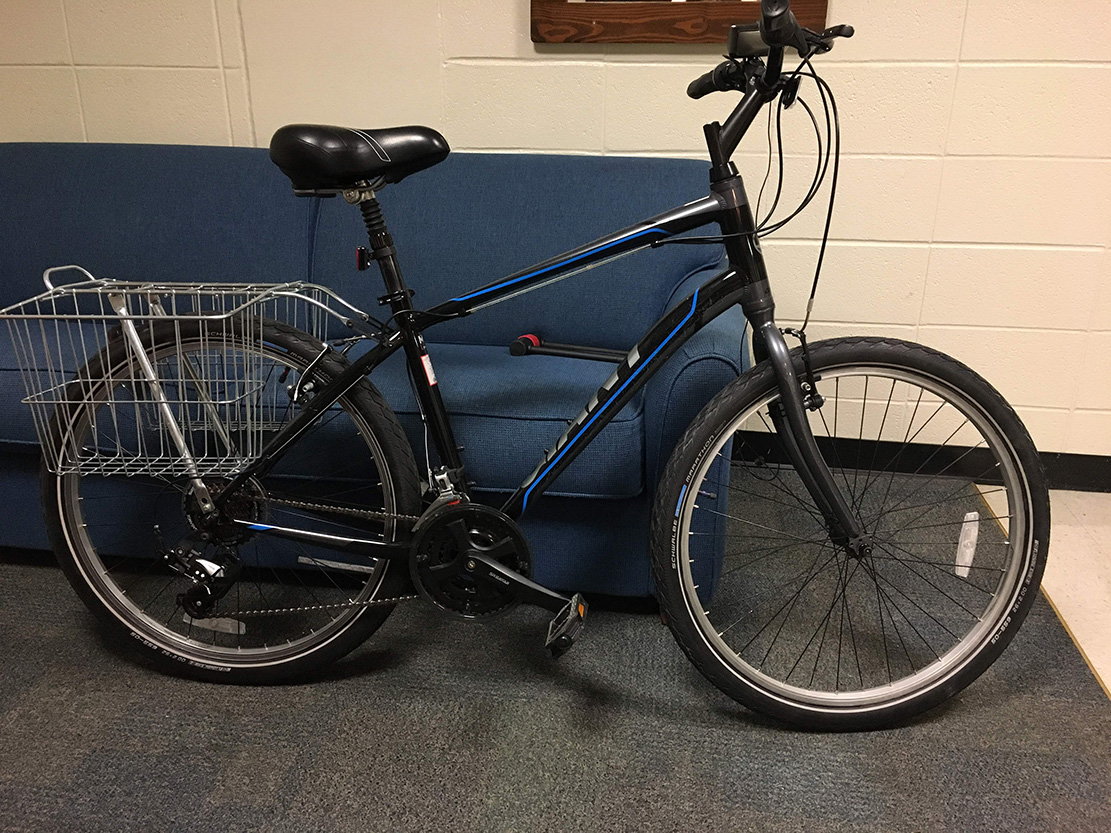
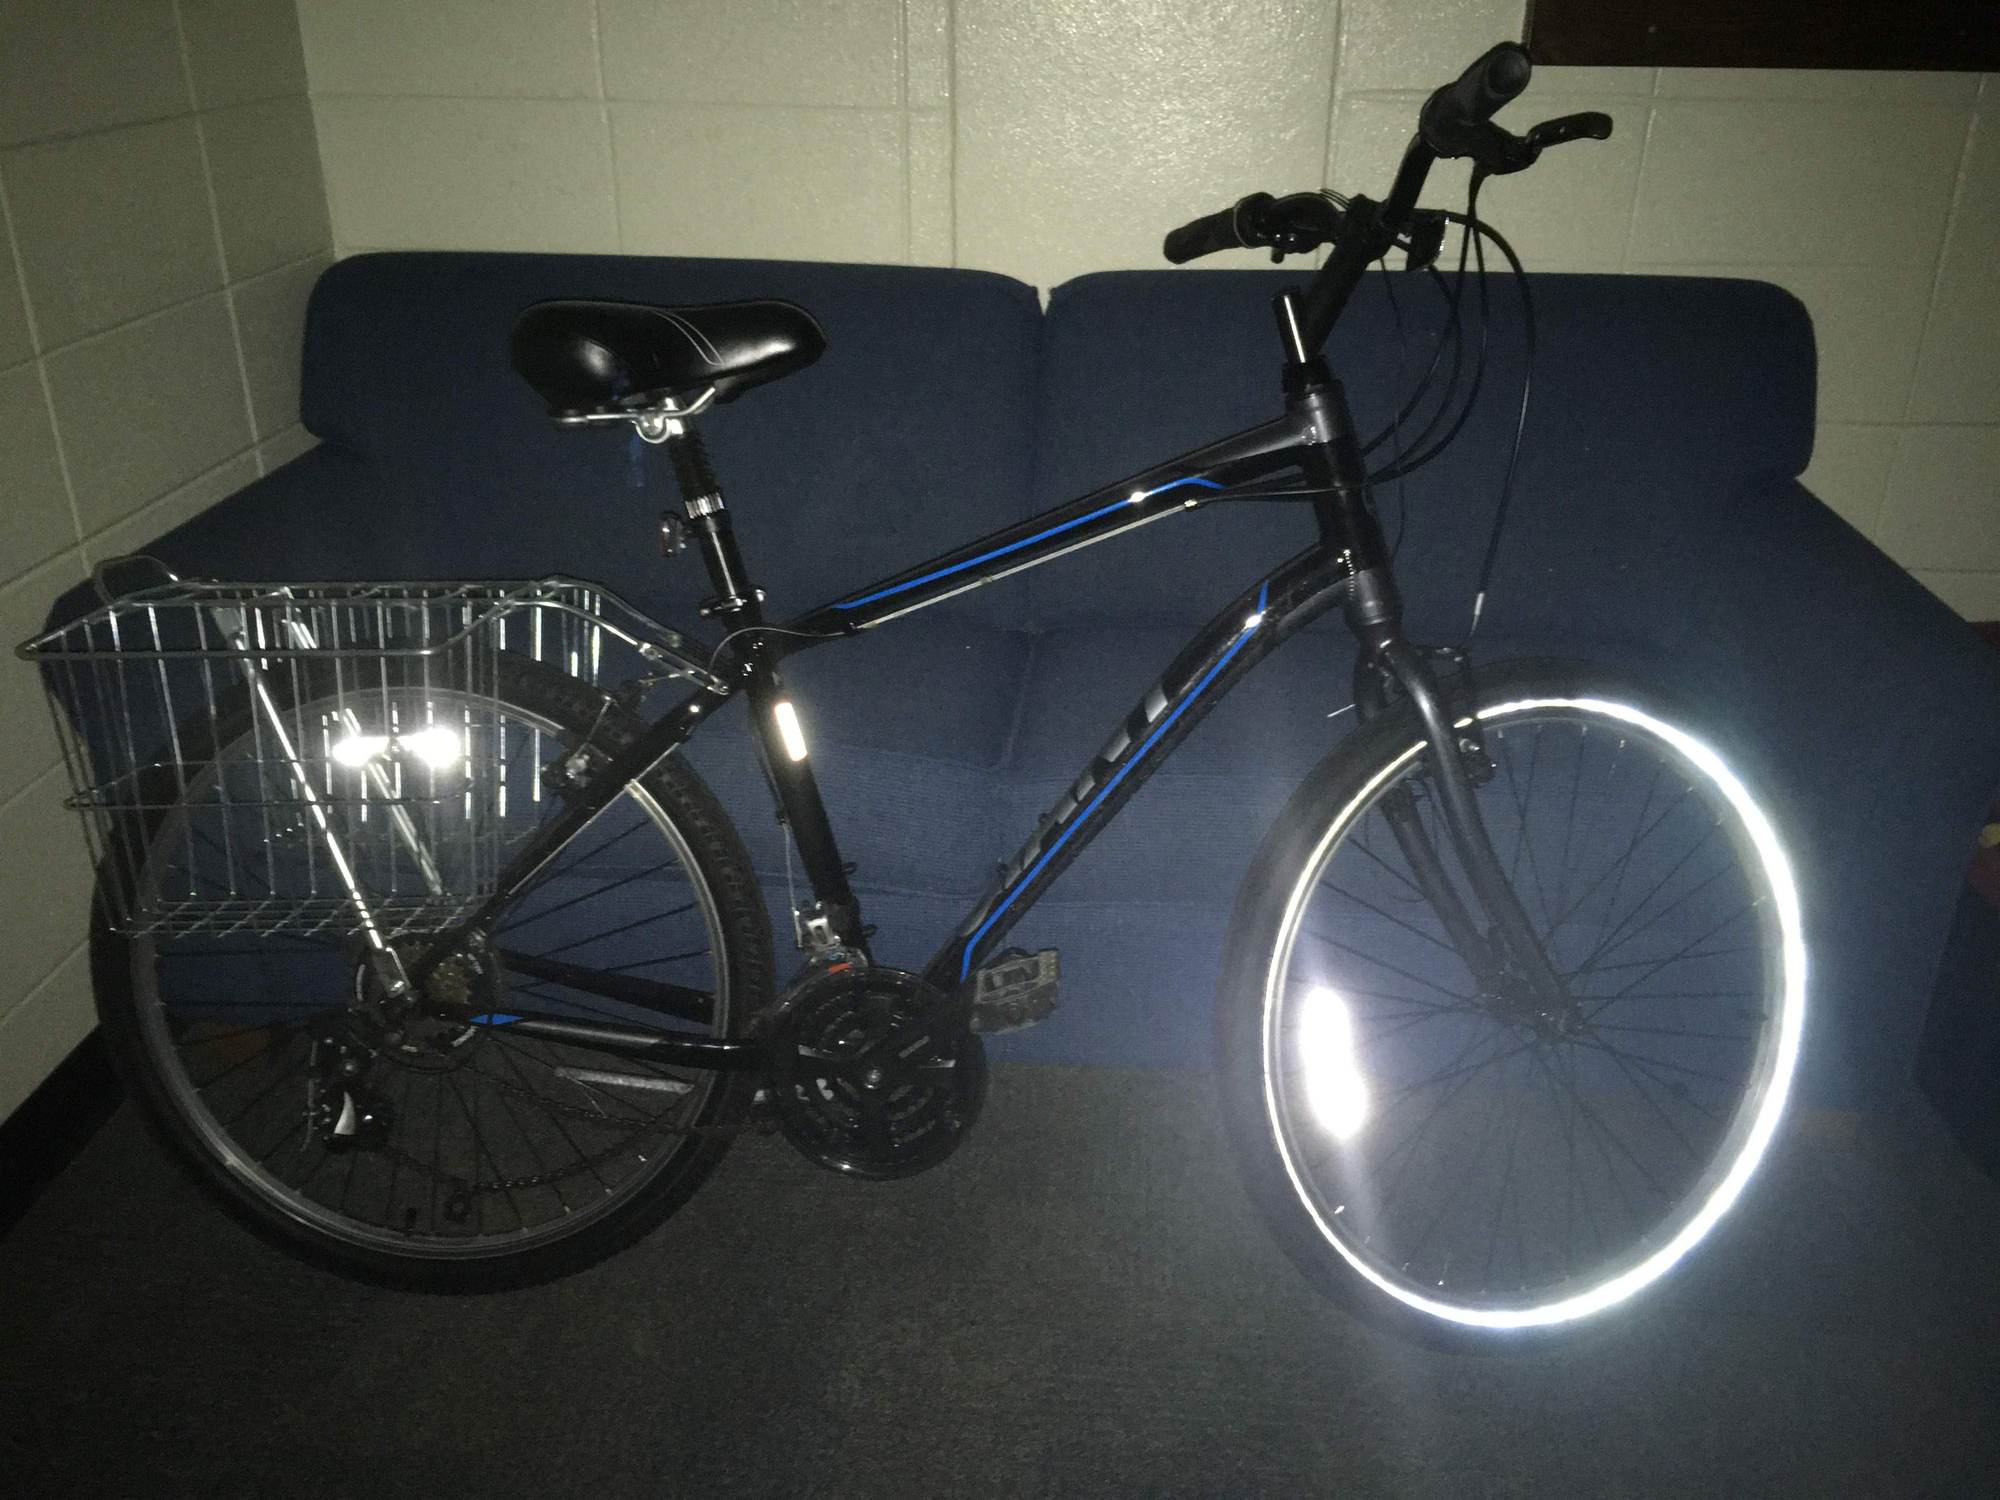
“Light” mode

“Dark” mode
I think the bike looks really spiffy with both new tires, especially in the dark with their reflective sidewalls.
Unfortunately, a couple problems. I couldn’t get the rear brakes re-installed because the cable had so much tension on it that I could not route it through the quick release mechanism. Second, the front brake was having problems as it kept rubbing on the little bits of excess tube that weren’t trimmed off because they were really close to the tire.
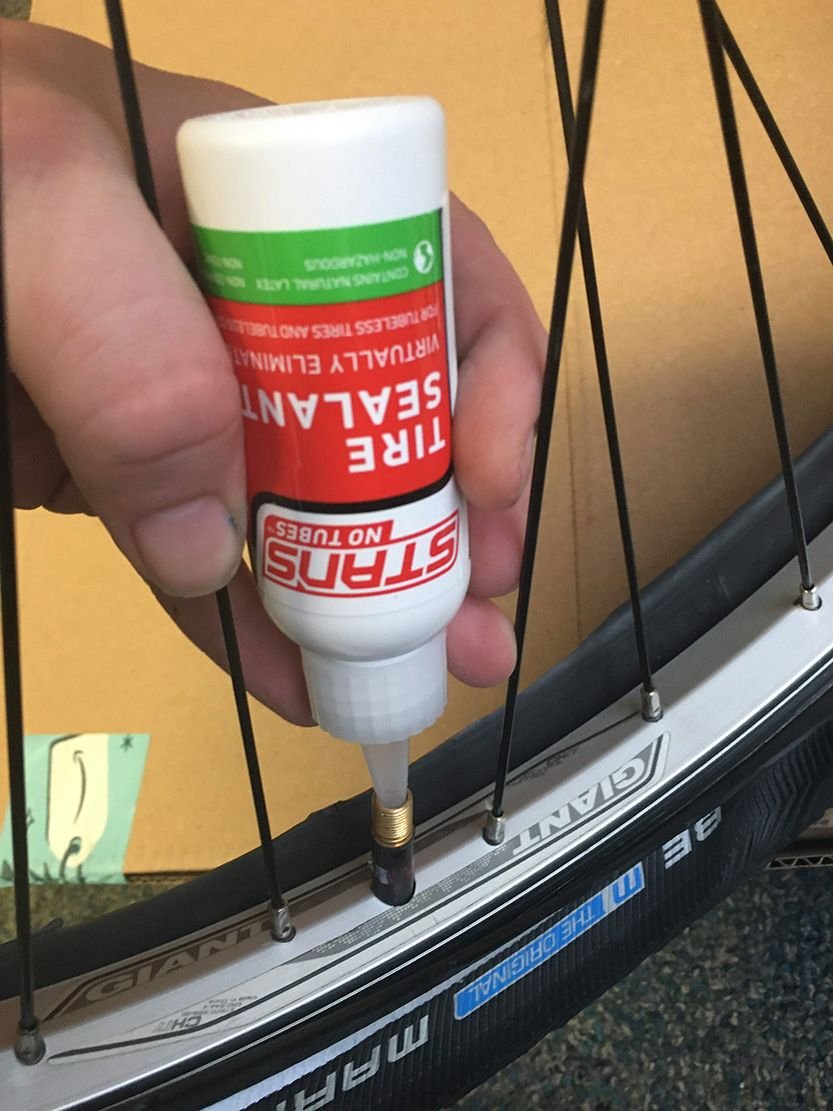
I decided to take the front wheel back off the bike and install sealant. It wouldn’t seal back up after deflating, so I had to remove and restretch the tire as some parts of the tire was fairly loose. After redoing it, it sealed up and I was able to install about 1.5 ounces of sealant. Then I deflated the tire back down to around 10 PSI to trim off the excess tube. Then I reinflated.
That brings me to today. I was able to finally get the rear brake situation fixed - I adjusted the tension and used some brute force to route the cable into its quick release holder. I’m not sure why, but ever since installing this new tire the rear brakes have been super tight and the cable has lots of tension on it. The tire is barely wider, and there is no spots where the tire is rubbing on the brakes. Anyhow, I got it fixed.
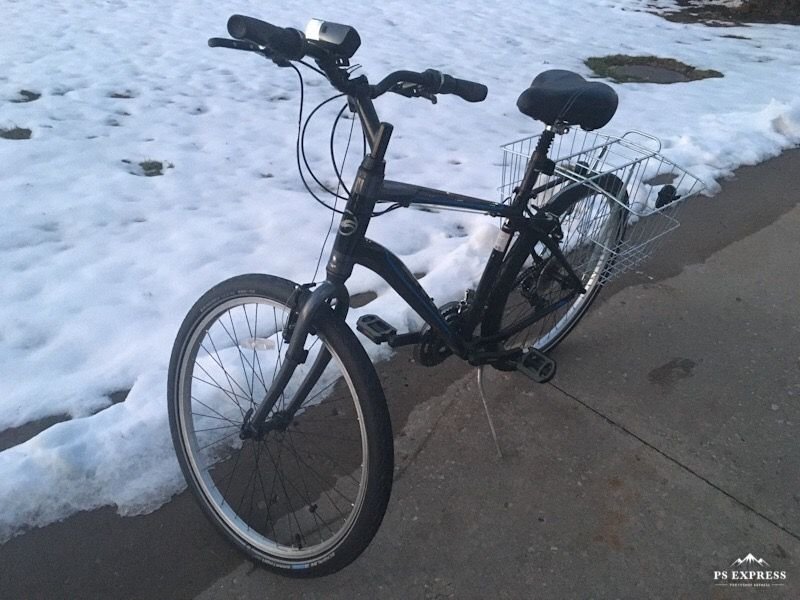
It snowed this week but thankfully tonight was fairly decent and a lot of the snow has melted/been treated on the sidewalks and roads. So I took the bike out for a spin. The Schwalbe Marathons rode very smooth - a night-and-day improvement over the stock tires that came with that bike. I’m not sure how much of the feel of the tire can be credited to the tubeless setup. I once again ran the tubeless setup through its paces - cornering, braking, even hitting a small curb. No burps and the tires held up fantastically.
Back to the new (front) tire, I tried it again. This time, it worked. I was able to mount it tubeless. I didn’t add any sealant to it, just to see how well it held air. Installed it on the bike and took the following pictures. The Sedona is now 100% tubeless, using the “ghetto” style using the split-tube method.
“Light” mode
“Dark” mode
I think the bike looks really spiffy with both new tires, especially in the dark with their reflective sidewalls.
Unfortunately, a couple problems. I couldn’t get the rear brakes re-installed because the cable had so much tension on it that I could not route it through the quick release mechanism. Second, the front brake was having problems as it kept rubbing on the little bits of excess tube that weren’t trimmed off because they were really close to the tire.
I decided to take the front wheel back off the bike and install sealant. It wouldn’t seal back up after deflating, so I had to remove and restretch the tire as some parts of the tire was fairly loose. After redoing it, it sealed up and I was able to install about 1.5 ounces of sealant. Then I deflated the tire back down to around 10 PSI to trim off the excess tube. Then I reinflated.
That brings me to today. I was able to finally get the rear brake situation fixed - I adjusted the tension and used some brute force to route the cable into its quick release holder. I’m not sure why, but ever since installing this new tire the rear brakes have been super tight and the cable has lots of tension on it. The tire is barely wider, and there is no spots where the tire is rubbing on the brakes. Anyhow, I got it fixed.
It snowed this week but thankfully tonight was fairly decent and a lot of the snow has melted/been treated on the sidewalks and roads. So I took the bike out for a spin. The Schwalbe Marathons rode very smooth - a night-and-day improvement over the stock tires that came with that bike. I’m not sure how much of the feel of the tire can be credited to the tubeless setup. I once again ran the tubeless setup through its paces - cornering, braking, even hitting a small curb. No burps and the tires held up fantastically.
12-21-19, 03:11 AM
#30
Senior Member
Some day I'll have to have a lesson in all the tubeless variations. I never understood the need, a tube is just so easy to replace on the road if necessary.
12-21-19, 07:49 PM
#31
"Broke College Student"
Thread Starter
Here’s a good video talking about tubeless:
There are some obvious downfalls to tubeless. As you mentioned, repair is more difficult. But most small punctures (i.e. glass, thumbtacks, etc.) will be sealed easily with the sealant. It’s always a good idea to carry a spare tube just in case a bigger puncture happens or the tire is unseated.
The variation I’m running is the ghetto tubeless - which allows you to make any ordinary “tube-type” rim and tire combination into a tubeless setup. The split-tube method involves taking an undersized tube (in my case - a 20” BMX tube for a 26” wheel) and splitting it down the middle, unfolding the sides and installing the tire on top of it. I got lucky with the Schwalbe Marathons - they have a (mostly) tight fit to the rim, and I had no problems running them without sealant at even 60 PSI. However, with ghetto tubeless it can greatly vary - different tire/wheel combinations have different effects.
In my experience (and many other’s experiences) ghetto tubeless is a good compromise for having a tubeless setup without paying out the $$$ for a proper UST (Universal Standard Tubeless) setup. The problem I’ve found with the split tube method is that while it works great with my tire/wheel combination, the only complaint is that it’s “one-and-done.” I have to repeat the whole process with a new 20” tube if the tire bead separates from the rim. There are other methods out there (Gorilla Tape, etc.) but I plan on sticking with the split-tube method as it’s easy and quick.
Last edited by fullergarrett; 12-21-19 at 07:53 PM.
12-21-19, 08:37 PM
#32
Senior Member
Join Date: Jan 2017
Posts: 1,064
Mentioned: 6 Post(s)
Tagged: 0 Thread(s)
Quoted: 350 Post(s)
Likes: 0
Liked 122 Times
in
90 Posts
If your "ghetto tubeless" is like what the YouTube video below shows, inserting a cut up tube and sandwiching it in between the tire bead and the rim wall, then I really don't see what the advantage of doing this is, since you say that you are riding on the road (so without big bumps and jumps, you won't get snakebites), and you're already pumping the air pressure to the maximum 60psi / 4 bar for the 2" tire (so you don't get the supposed ability to run lower pressure).
For the weight savings, let's say you are using a 3/4 width of a cut up 20" tube, instead of a full 26" tube.
A big problem is that you're inserting a thick material in between the tire bead and the rim wall, which will cause seating problems with the tire bead. And then you say that you need to repeat this entire process of cutting up a tube whenever you want to remove and reinstall the tire. Wouldn't it be simpler to use an intact 26" tube and add some sealant into the tube if you want some extra protection in case of puncture? Although you'd then be adding 100g from the 100ml of sealant. But the Marathon tires that you've just bought and installed already have a good amount of puncture protection. With the Marathon tires and the other models with greenguard, I don't get punctures within the first 1-2 years of usage (with a tube, without any sealant).
- light 20" tube = 95g
- regular 20" tube = 145g
- light 26" tube = 130g
- regular 26" tube = 190g
A big problem is that you're inserting a thick material in between the tire bead and the rim wall, which will cause seating problems with the tire bead. And then you say that you need to repeat this entire process of cutting up a tube whenever you want to remove and reinstall the tire. Wouldn't it be simpler to use an intact 26" tube and add some sealant into the tube if you want some extra protection in case of puncture? Although you'd then be adding 100g from the 100ml of sealant. But the Marathon tires that you've just bought and installed already have a good amount of puncture protection. With the Marathon tires and the other models with greenguard, I don't get punctures within the first 1-2 years of usage (with a tube, without any sealant).
Last edited by tomtomtom123; 12-21-19 at 08:45 PM.
12-21-19, 09:22 PM
#33
"Broke College Student"
Thread Starter
If your "ghetto tubeless" is like what the YouTube video below shows, inserting a cut up tube and sandwiching it in between the tire bead and the rim wall, then I really don't see what the advantage of doing this is, since you say that you are riding on the road (so without big bumps and jumps, you won't get snakebites), and you're already pumping the air pressure to the maximum 60psi / 4 bar for the 2" tire (so you don't get the supposed ability to run lower pressure).
https://youtu.be/ByBAItDM3Ws
For the weight savings, let's say you are using a 3/4 width of a cut up 20" tube, instead of a full 26" tube.
A big problem is that you're inserting a thick material in between the tire bead and the rim wall, which will cause seating problems with the tire bead. And then you say that you need to repeat this entire process of cutting up a tube whenever you want to remove and reinstall the tire. Wouldn't it be simpler to use an intact 26" tube and add some sealant into the tube if you want some extra protection in case of puncture? Although you'd then be adding 100g from the 100ml of sealant. But the Marathon tires that you've just bought and installed already have a good amount of puncture protection. With the Marathon tires and the other models with greenguard, I don't get punctures within the first 1-2 years of usage (with a tube, without any sealant).
https://youtu.be/ByBAItDM3Ws
For the weight savings, let's say you are using a 3/4 width of a cut up 20" tube, instead of a full 26" tube.
- light 20" tube = 95g
- regular 20" tube = 145g
- light 26" tube = 130g
- regular 26" tube = 190g
A big problem is that you're inserting a thick material in between the tire bead and the rim wall, which will cause seating problems with the tire bead. And then you say that you need to repeat this entire process of cutting up a tube whenever you want to remove and reinstall the tire. Wouldn't it be simpler to use an intact 26" tube and add some sealant into the tube if you want some extra protection in case of puncture? Although you'd then be adding 100g from the 100ml of sealant. But the Marathon tires that you've just bought and installed already have a good amount of puncture protection. With the Marathon tires and the other models with greenguard, I don't get punctures within the first 1-2 years of usage (with a tube, without any sealant).
t has worked well for me so far. While I did inflate it to 60 PSI originally, I since run 45-50 PSI in the rear and 40 PSI in the front. (On the stock tires with tubes I ran 65 rear, 60 front.) I was originally concerned about how well the bead would seat, but I've really torture tested (for me) the tubeless setup and it has held up fine - not a single burp.
As said, I'm not a weight weenie. In fact, the tubes I ran on this bike (and the tubes I used for the tubeless setup) are the thicker kind that claim to be "80% thicker than ordinary tubes."
As for puncture resistance, I know you can use Stan's in tubes. I've tried Slime in tubes but found it was more trouble than it was worth.
