Post your Centurion Ironman.. For the love of 80s paint jobs!
 01-13-21, 05:36 PM
#9551

Senior Member

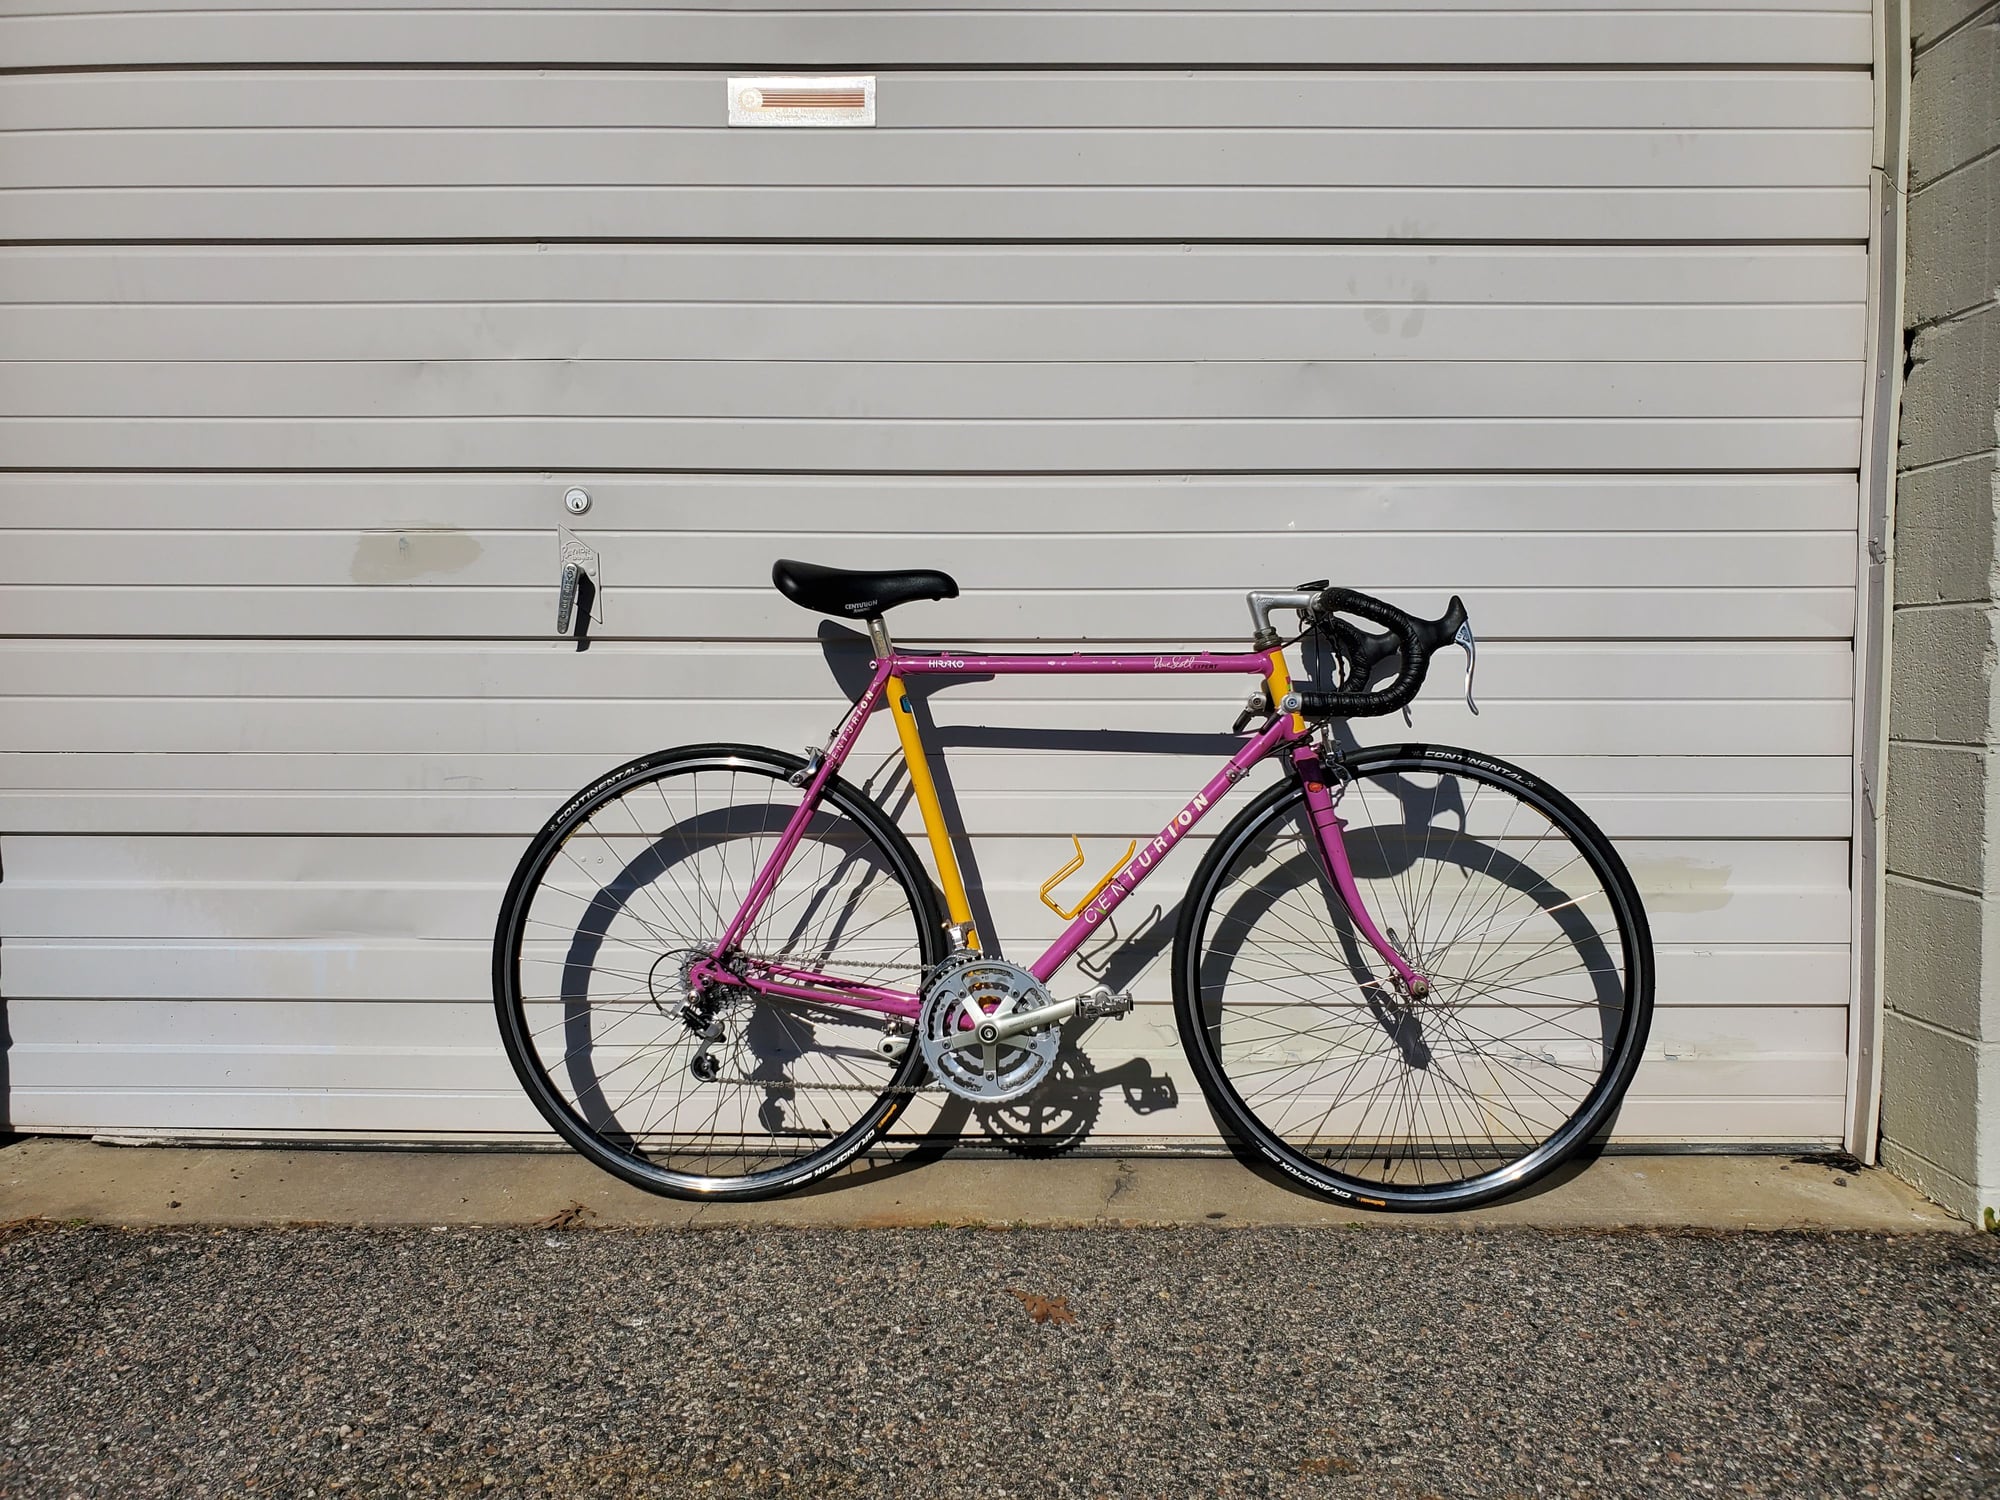
looks to be a early Comp TA, with the 83 Graphics and gold color headtube.

__________________


 01-13-21, 06:08 PM
#9553
Senior Member
I have an '85,'86,'87,'88,'89 Ironman...Now I have the Pre-Ironman.
RT sent it to me .
.
I was gonna post the question, who will be the first to post a 'New" Ironman this year? I Won! Technically it's not an Ironman, so someone can still be the first in 2021.
The other question, how long will it take for me to get it on the road?
52cm, Shimano 600 HS. It's really light. And the red is Very Nice. I think I have everything needed to get it road ready.
I'm very grateful, Thanks@RobbieTunes.
RT sent it to me
.I was gonna post the question, who will be the first to post a 'New" Ironman this year? I Won! Technically it's not an Ironman, so someone can still be the first in 2021.
The other question, how long will it take for me to get it on the road?
52cm, Shimano 600 HS. It's really light. And the red is Very Nice. I think I have everything needed to get it road ready.
I'm very grateful, Thanks@RobbieTunes.
Last edited by texaspandj; 01-14-21 at 05:41 AM.
Likes For texaspandj:
01-13-21, 06:16 PM
#9554
Senior Member
I have an '85,'86,'87,'88,'89 Ironman...Now I have the Pre-Ironman.
RT sent it to me.
I was gonna post the question, who will be the first to post an Ironman this year? I Won! Technically it's not an Ironman, so someone can still be the first in 2021.
The other question, how long will it take for me to get it on the road?
52cm, Shimano 600 HS. It's really light. And the red is Very Nice. I think I have everything needed to get it road ready.
I'm very grateful, Thanks@RobbieTunes.
RT sent it to me
.I was gonna post the question, who will be the first to post an Ironman this year? I Won! Technically it's not an Ironman, so someone can still be the first in 2021.
The other question, how long will it take for me to get it on the road?
52cm, Shimano 600 HS. It's really light. And the red is Very Nice. I think I have everything needed to get it road ready.
I'm very grateful, Thanks@RobbieTunes.
Likes For seypat:
01-13-21, 06:24 PM
#9555
Senior Member
Join Date: Jan 2019
Location: Toledo Ohio
Posts: 1,581
Bikes: 1964 Huffy Sportsman, 1972 Fuji Newest, 1973 Schwinn Super Sport (3), 1982 Trek 412, 1983 Trek 700, 1989 Miyata 1000LT, 1991 Bianchi Boardwalk, plus others
Liked 737 Times
in
417 Posts
Same as my 85
I found your pic interesting as I too have an 85. I posted it a few years ago and haven�t ridden it much or serviced it yet. Reason I am posting is mine also has the aero brake levers and the short stem. Discussion from before said they had been changed as the levers were from an 86. Mine is the 58cm frame and it seemed quite stock, but I figured there were more knowledge folks here. Mine had some tri bars on it so I assumed the change was made to not have cables in the way. I will be curious as to the originality of yours. Pretty color scheme that year.

 01-13-21, 09:09 PM
#9556
Senior Member
Yep yep.
The frame is so light. And the red is fantastic looking. If someone has an '85 Ironman they know what I'm talking about.
It's gonna be a fun project, the problem is, I'll probably have it done by the weekend.
The frame is so light. And the red is fantastic looking. If someone has an '85 Ironman they know what I'm talking about.
It's gonna be a fun project, the problem is, I'll probably have it done by the weekend.
Likes For texaspandj:
01-13-21, 10:11 PM
#9557
Senior Member
My 83 SR Semi Pro is that color combo. As you said, the red is fantastic.
Likes For seypat:
01-14-21, 03:32 AM
#9558
Senior Member
 It's hard to capture just how deep, rich, and vibrant the colors are on camera. It's so much better in person!
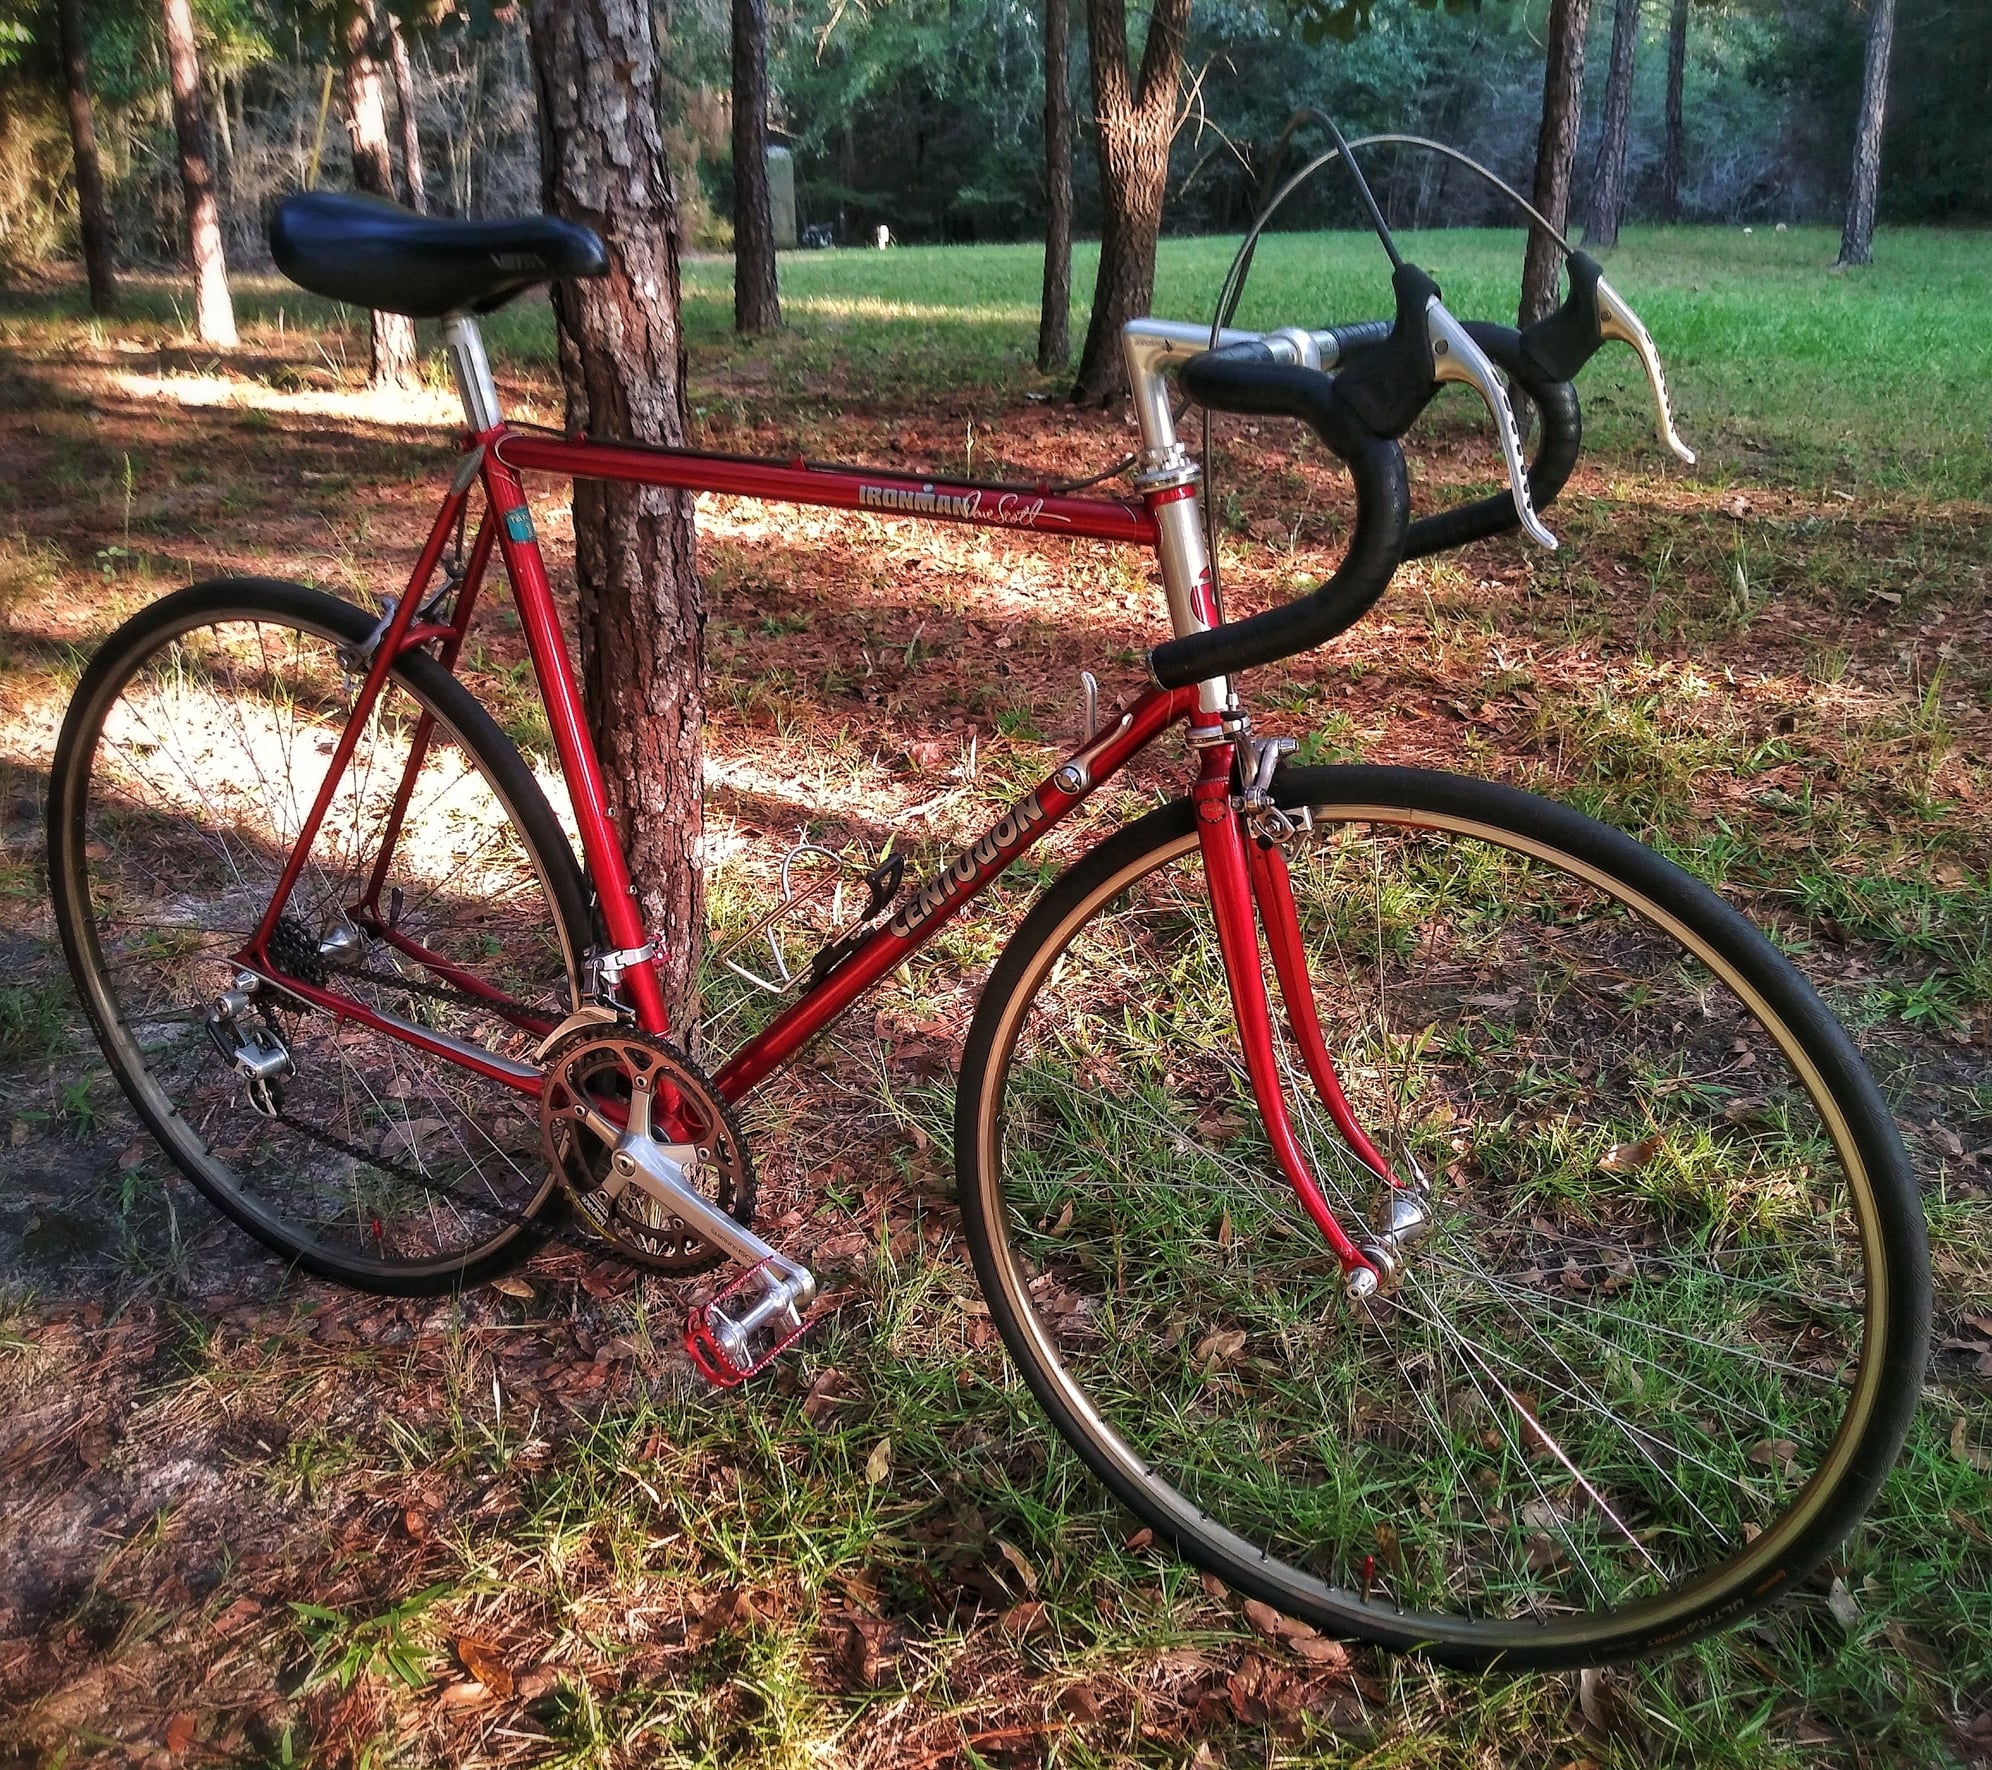 01-14-21, 07:45 AM
#9559
Senior Member
The parts are still trickling in for the black Turbo. One shipment that is evidently lost in the mail is the rest of the original headset from the previous owner. So, I have to install a new headset. The new one will be a Tange Levin. I will post the tools used/ method now in seperate/continued posts from my phone with pics.
01-14-21, 07:50 AM
#9560
aka: Dr. Cannondale
Is this an opportunity to post this '85 once again?
Or this '86?

Or this '86?
__________________
Hard at work in the Secret Underground Laboratory...
Hard at work in the Secret Underground Laboratory...
Likes For rccardr:
01-14-21, 07:57 AM
#9561
Senior Member
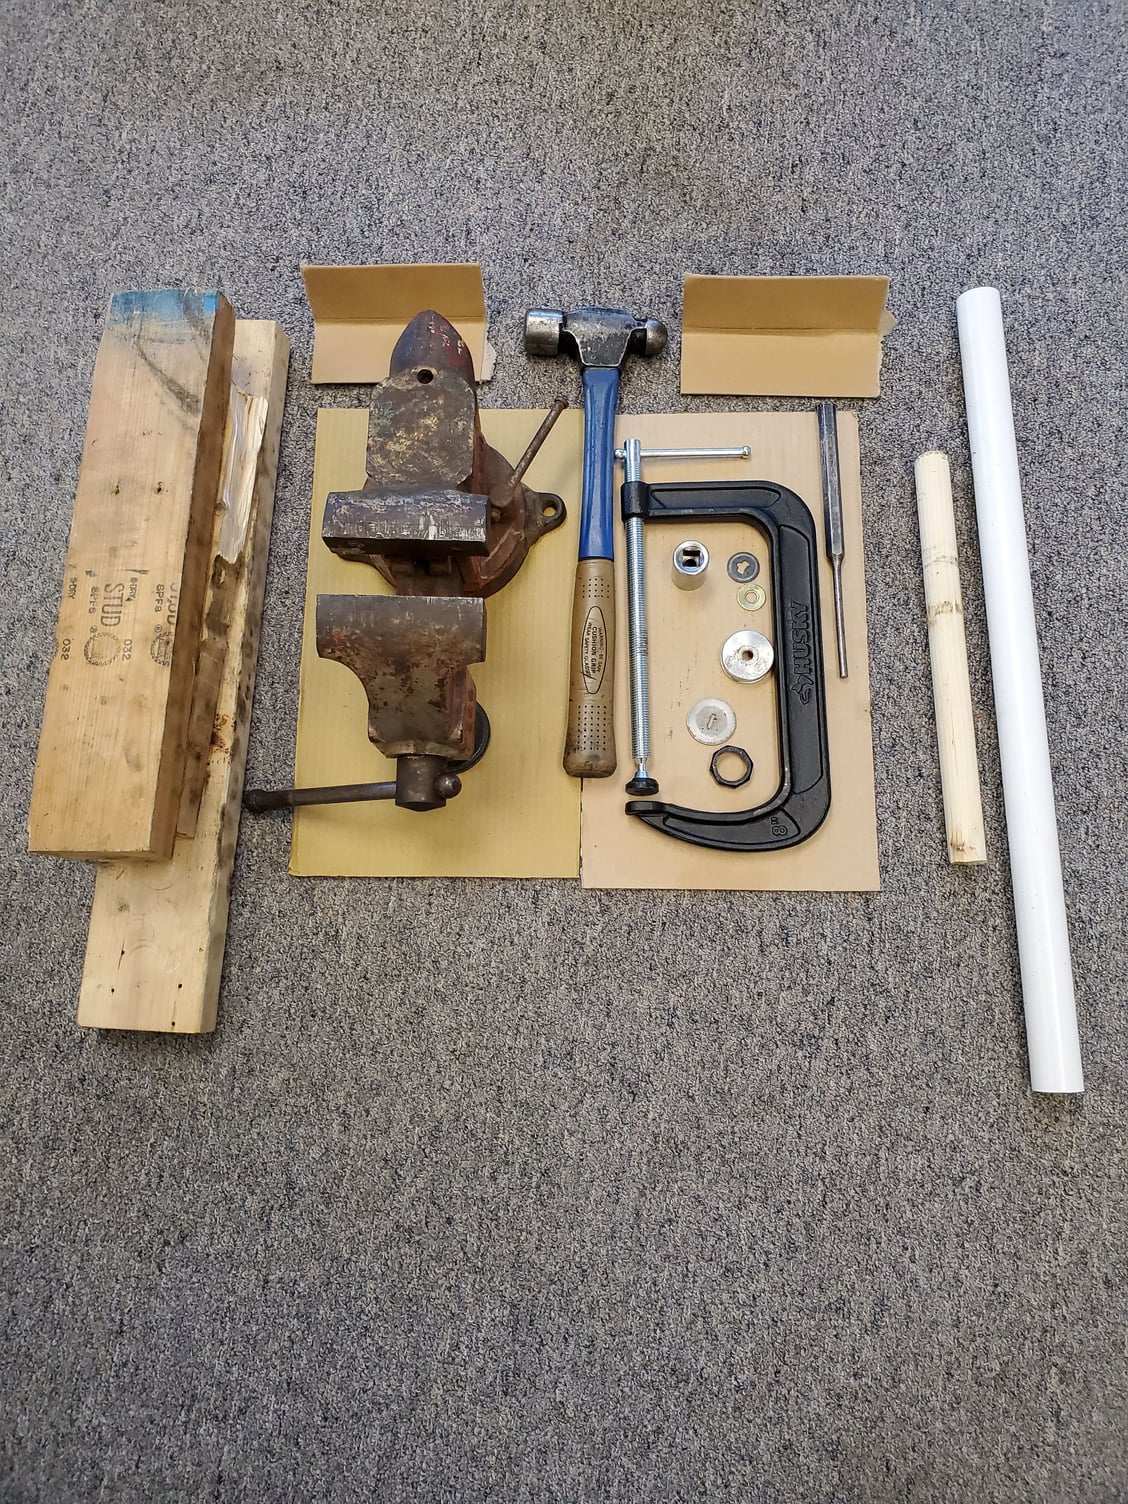
Here we go. The tools used were:
Bench vise, hammer, punch.
7/8" dowel, 1" ID PVC pipe( both from Lowes/HD.)
C/G clamp, sections of 2�4.
various sizes of washers and socket heads to match the sizes of the headset parts.
Cardboard, etc for surface protection.
Old headset nut.
Bench vise, hammer, punch.
7/8" dowel, 1" ID PVC pipe( both from Lowes/HD.)
C/G clamp, sections of 2�4.
various sizes of washers and socket heads to match the sizes of the headset parts.
Cardboard, etc for surface protection.
Old headset nut.
01-14-21, 08:04 AM
#9562
Senior Member
Headset replacement continued.
Put the old headset nut on the fork. Wrap the fork in protective covering. Put it in the vise with the blades vertical of each other. TIghten the vise tight enough to act as a ledge for the crown race. Do not tighten enough to engage the fork blades. Hold a 2x4 section on the headset nut. Strike the 2x4 section with hammer until the crown race comes off.
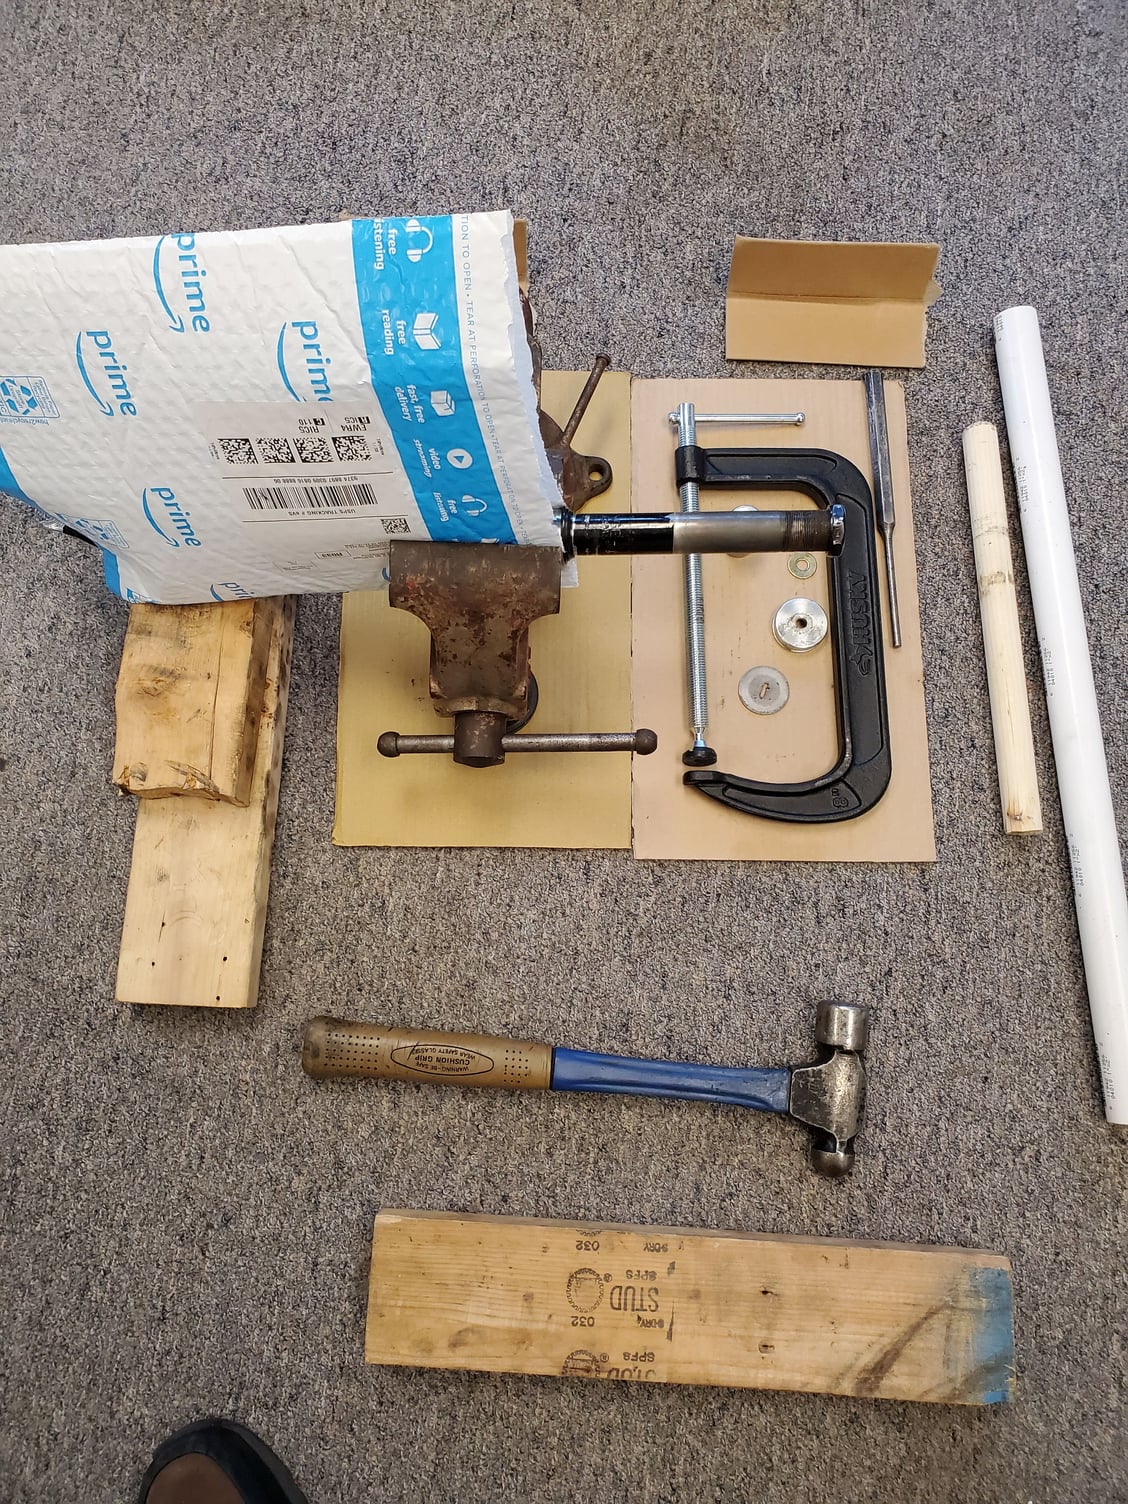
Put the old headset nut on the fork. Wrap the fork in protective covering. Put it in the vise with the blades vertical of each other. TIghten the vise tight enough to act as a ledge for the crown race. Do not tighten enough to engage the fork blades. Hold a 2x4 section on the headset nut. Strike the 2x4 section with hammer until the crown race comes off.
01-14-21, 08:16 AM
#9563
Senior Member
Headset replacement continued.
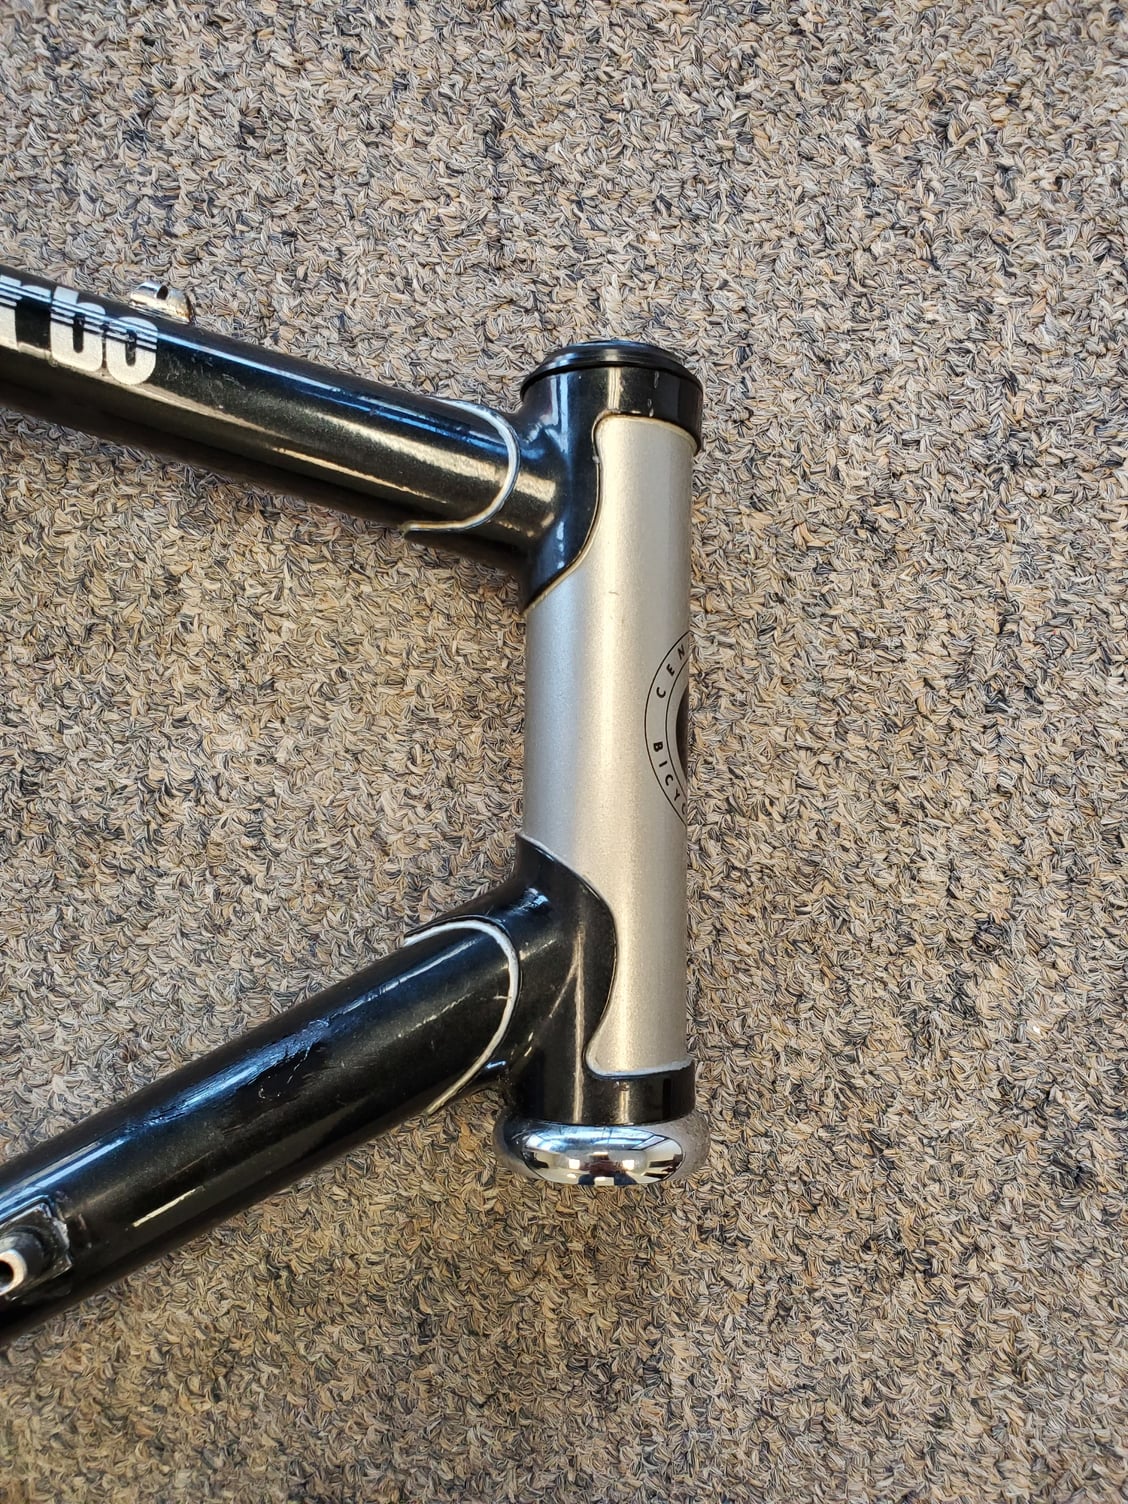
Mount the fork on a 2�4 section sitting on something the has the fork dangling as pictured. The boxes are for reference only. I actually used stacks of bricks. Remove the old headset nut. Slip on the new fork crown race. Turn the old fork crown race upside down and slip on above the fork crown race. Slip on section of PVC pipe. Hold section of 2x4 to PVC pipe. Strike 2x4 with hammer until crown race is fully installed. Remove old crown race and PVC pipe.
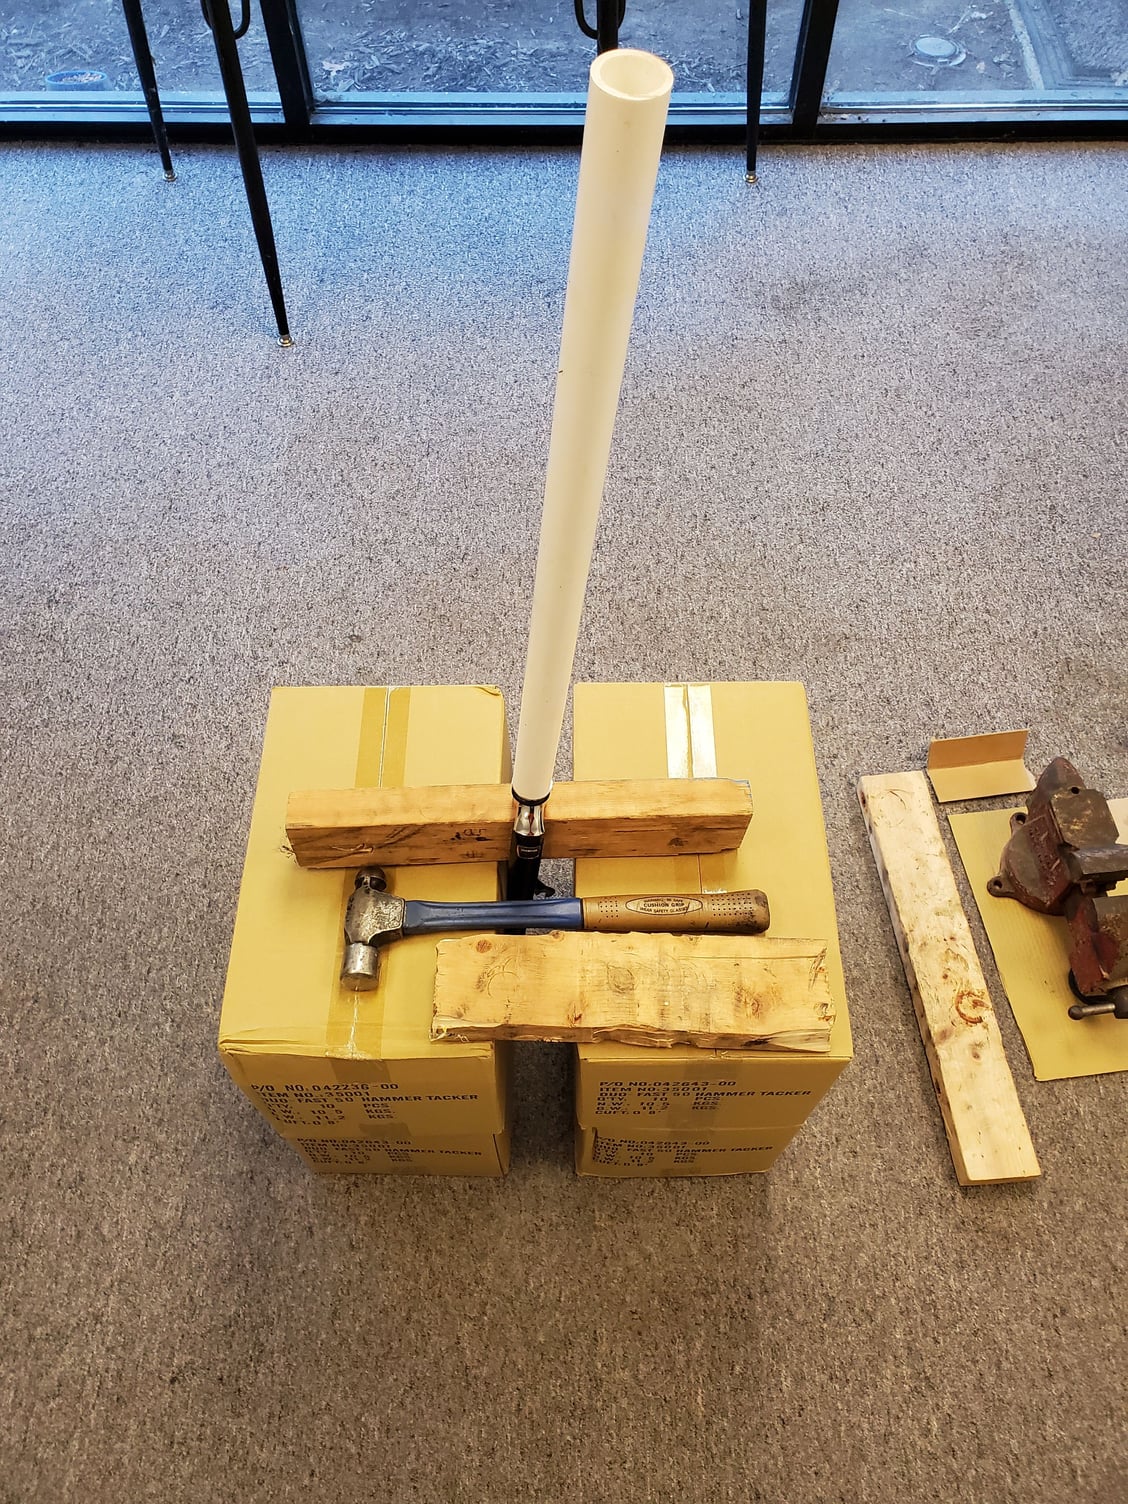
Mount the fork on a 2�4 section sitting on something the has the fork dangling as pictured. The boxes are for reference only. I actually used stacks of bricks. Remove the old headset nut. Slip on the new fork crown race. Turn the old fork crown race upside down and slip on above the fork crown race. Slip on section of PVC pipe. Hold section of 2x4 to PVC pipe. Strike 2x4 with hammer until crown race is fully installed. Remove old crown race and PVC pipe.
01-14-21, 08:28 AM
#9565
Senior Member
Headset replacement continued:
Use punch and hammer inside the head tube to get one end of the headset started moving. Insert a washer/socket small enough to barely slip through the headset hole and sit on top of end you got to move. Use the hammer and punch on top of the washer to finish removing the headset part.
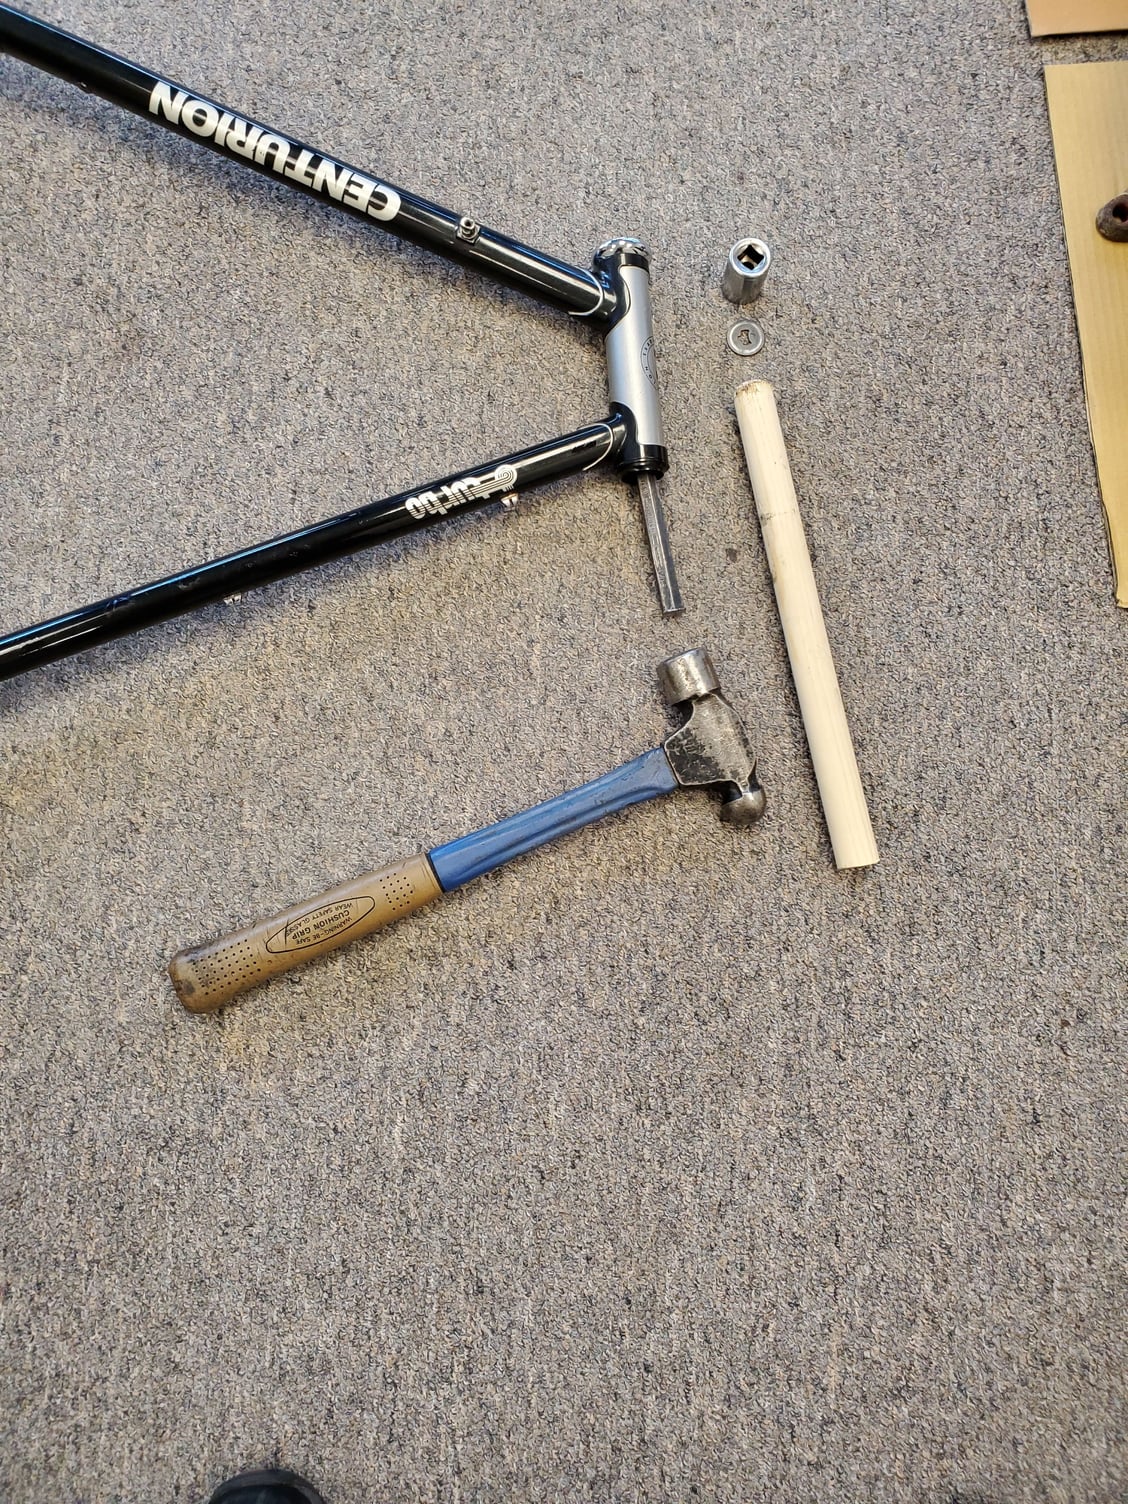
Insert a washer/socket through the end with the headset part removed. Insert the 7/8" dowel on top of the washer. Strike the dowel with the hammer until the other headset part is removed.
Use punch and hammer inside the head tube to get one end of the headset started moving. Insert a washer/socket small enough to barely slip through the headset hole and sit on top of end you got to move. Use the hammer and punch on top of the washer to finish removing the headset part.
Insert a washer/socket through the end with the headset part removed. Insert the 7/8" dowel on top of the washer. Strike the dowel with the hammer until the other headset part is removed.
Last edited by seypat; 01-14-21 at 08:36 AM.
01-14-21, 08:43 AM
#9566
Sunshine

Join Date: Aug 2014
Location: Des Moines, IA
Posts: 17,035
Bikes: '18 class built steel roadbike, '19 Fairlight Secan, '88 Schwinn Premis , Black Mountain Cycles Monstercross V4, '89 Novara Trionfo
Liked 8,063 Times
in
4,472 Posts
this is an interesting way to remove an old headset.
I just sawed some lines into a copper pipe, bent the ends out, and slip it down to grab the edges of the old headset cup, then hit the end with a hammer. Its a homemade version of a commonly sold tool.
This washer and punch setup is very interesting though.
And for the crown race, I just use a chisel and hammer with a handful of hits all around the race to loosen it. Maybe thats always worked thru the luck of not having difficult races to remove?
Anyways, cool process. Its neat to see alternative ways to how I do things. A different perspective helps with knowledge and problem solving.
01-14-21, 08:46 AM
#9567
Senior Member
Headset replacement continued:
Use the C/G clamp and washers big enough to press the new parts into the head tube. This should be a 2 person job. One person needs to hold the cups straight while they begin to seat. The preferred method is a threaded bar with washers/nuts at each end. There are examples of this method online. However, I have another mounted bench vise big enough to press the cups in. I used the clamp method just to get the cups started.
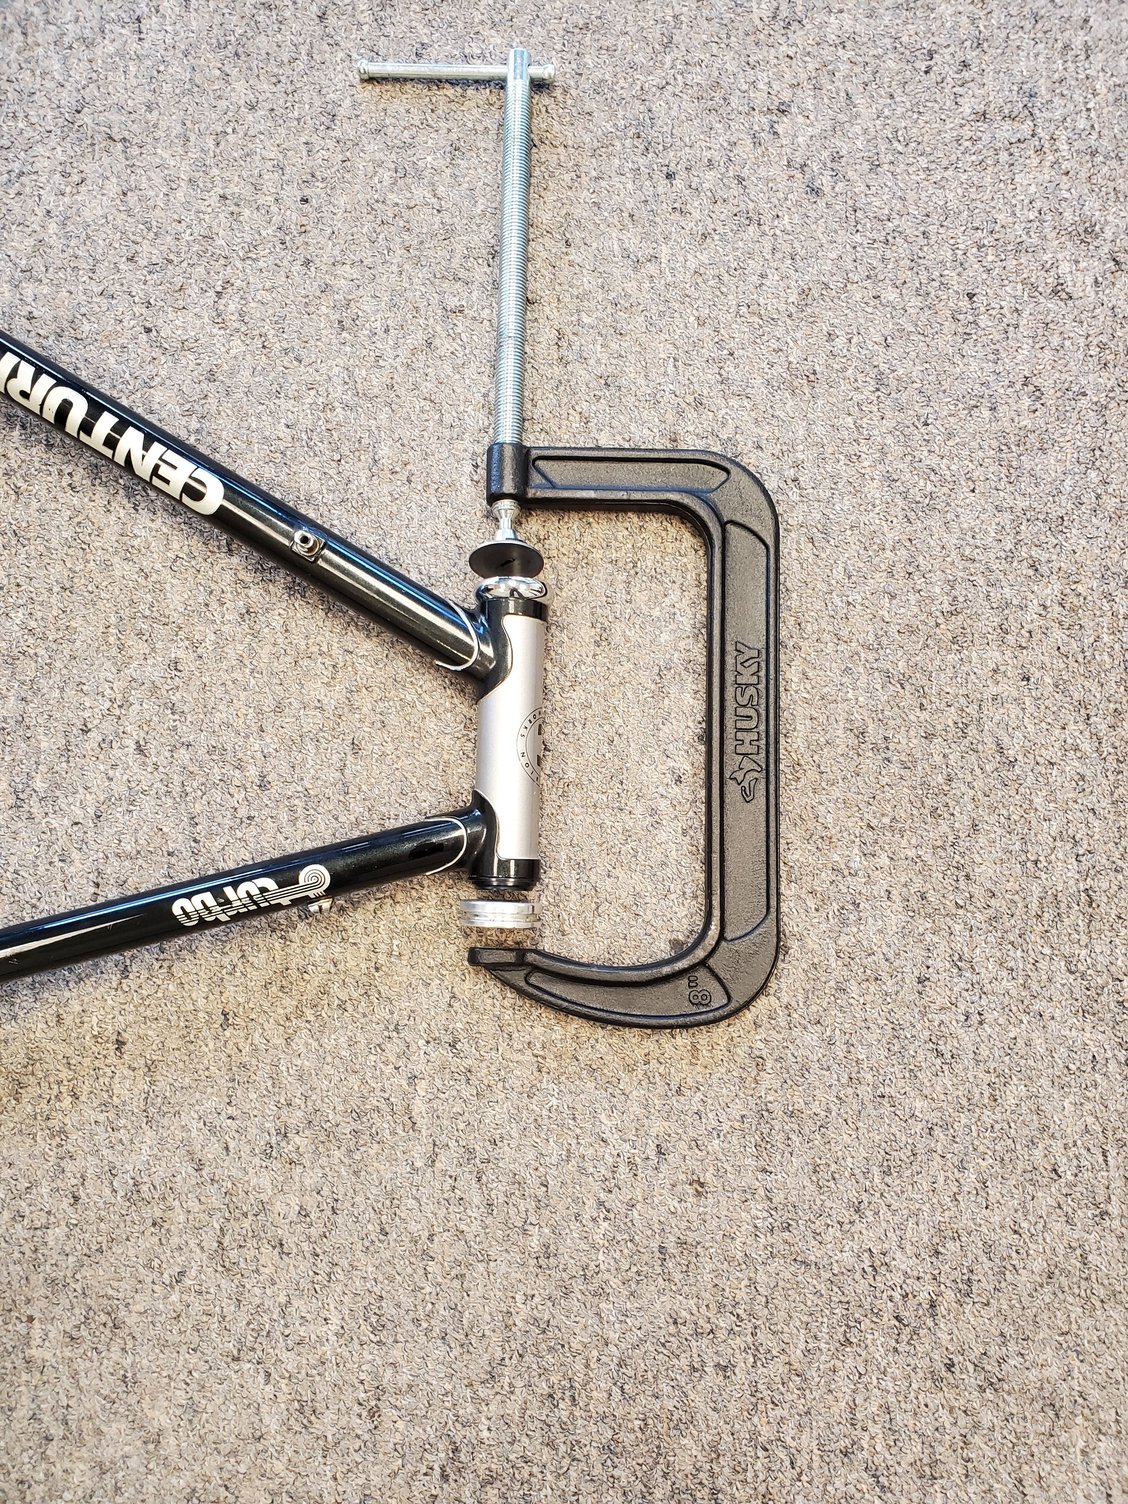
Use the C/G clamp and washers big enough to press the new parts into the head tube. This should be a 2 person job. One person needs to hold the cups straight while they begin to seat. The preferred method is a threaded bar with washers/nuts at each end. There are examples of this method online. However, I have another mounted bench vise big enough to press the cups in. I used the clamp method just to get the cups started.
01-14-21, 08:58 AM
#9568
Senior Member
Headset replacement continued:
Once I got the cups started with the clamp, I moved to the bigger vise with some thick cardboard for surface protection. Pressed the cups in the rest of the way. Done.

Once I got the cups started with the clamp, I moved to the bigger vise with some thick cardboard for surface protection. Pressed the cups in the rest of the way. Done.
01-14-21, 09:12 AM
#9569
Senior Member
this is an interesting way to remove an old headset.
I just sawed some lines into a copper pipe, bent the ends out, and slip it down to grab the edges of the old headset cup, then hit the end with a hammer. Its a homemade version of a commonly sold tool.
This washer and punch setup is very interesting though.
And for the crown race, I just use a chisel and hammer with a handful of hits all around the race to loosen it. Maybe thats always worked thru the luck of not having difficult races to remove?
Anyways, cool process. Its neat to see alternative ways to how I do things. A different perspective helps with knowledge and problem solving.
I just sawed some lines into a copper pipe, bent the ends out, and slip it down to grab the edges of the old headset cup, then hit the end with a hammer. Its a homemade version of a commonly sold tool.
This washer and punch setup is very interesting though.
And for the crown race, I just use a chisel and hammer with a handful of hits all around the race to loosen it. Maybe thats always worked thru the luck of not having difficult races to remove?
Anyways, cool process. Its neat to see alternative ways to how I do things. A different perspective helps with knowledge and problem solving.
My methods generally are based on how I can do something with the least amount of possible damage to the frame/parts. The old headset(if the rest of it ever shows up) is a very valuable part. I don't want to damage it in any way if I can avoid it. If the rest of it had shown up by now I wouldn't have replaced it. I would be afraid of gouging the area around the fork crown with a punch/chisel. That's just me and my shaky hand coordination talking.
Last edited by seypat; 01-14-21 at 09:27 AM.
01-14-21, 09:21 AM
#9570
Senior Member
That frame has a lot of paint blemishes. I normally wouldn't do much touch up because of having to match paint and my shaky hand coordination skills. But since it's black, the paint will be easy to match. I'm going to make a good effort to make the paint look better.
From this day forward, when I work on this frame or one of the IMs, I'm going to start by listening to Don McClean's "American Pie."
Just because.
From this day forward, when I work on this frame or one of the IMs, I'm going to start by listening to Don McClean's "American Pie."
Just because.
Last edited by seypat; 01-14-21 at 09:27 AM.
01-14-21, 09:53 AM
#9571
Senior Member
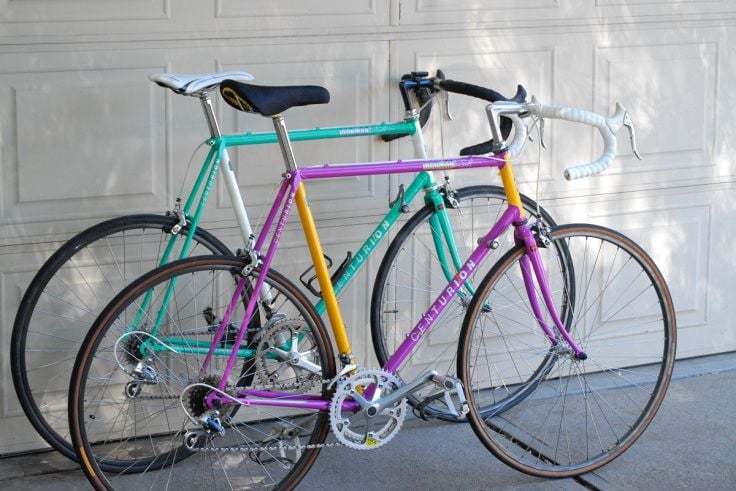
The red ones like this one and the one above are so hot. You have one pic of the charcoal one where it looks blue/silver to me. Maybe it's this pic and my memory is bad. The blue/silver combo would have been hot also. The 85 Prestige has the silver/charcoal combo also. But the catalog pic has a greenish backgound, so the bike appears(to me) to be silver/green. The catalog pic is awesome! I'm guessing the silver/charcoal combo is really affected by the background colors. The rims on the bottom one are SMOKING HOT! I don't know if they're original, but wow.
You've posted a pic of a red bike on one of the other threads. I think it was a Schwinn. Anyway, it had some matching red rims that were super hot. They almost glowed like molten lava!
You've posted a pic of a red bike on one of the other threads. I think it was a Schwinn. Anyway, it had some matching red rims that were super hot. They almost glowed like molten lava!
Last edited by seypat; 01-14-21 at 10:02 AM.
01-14-21, 10:24 AM
#9572
Senior Member

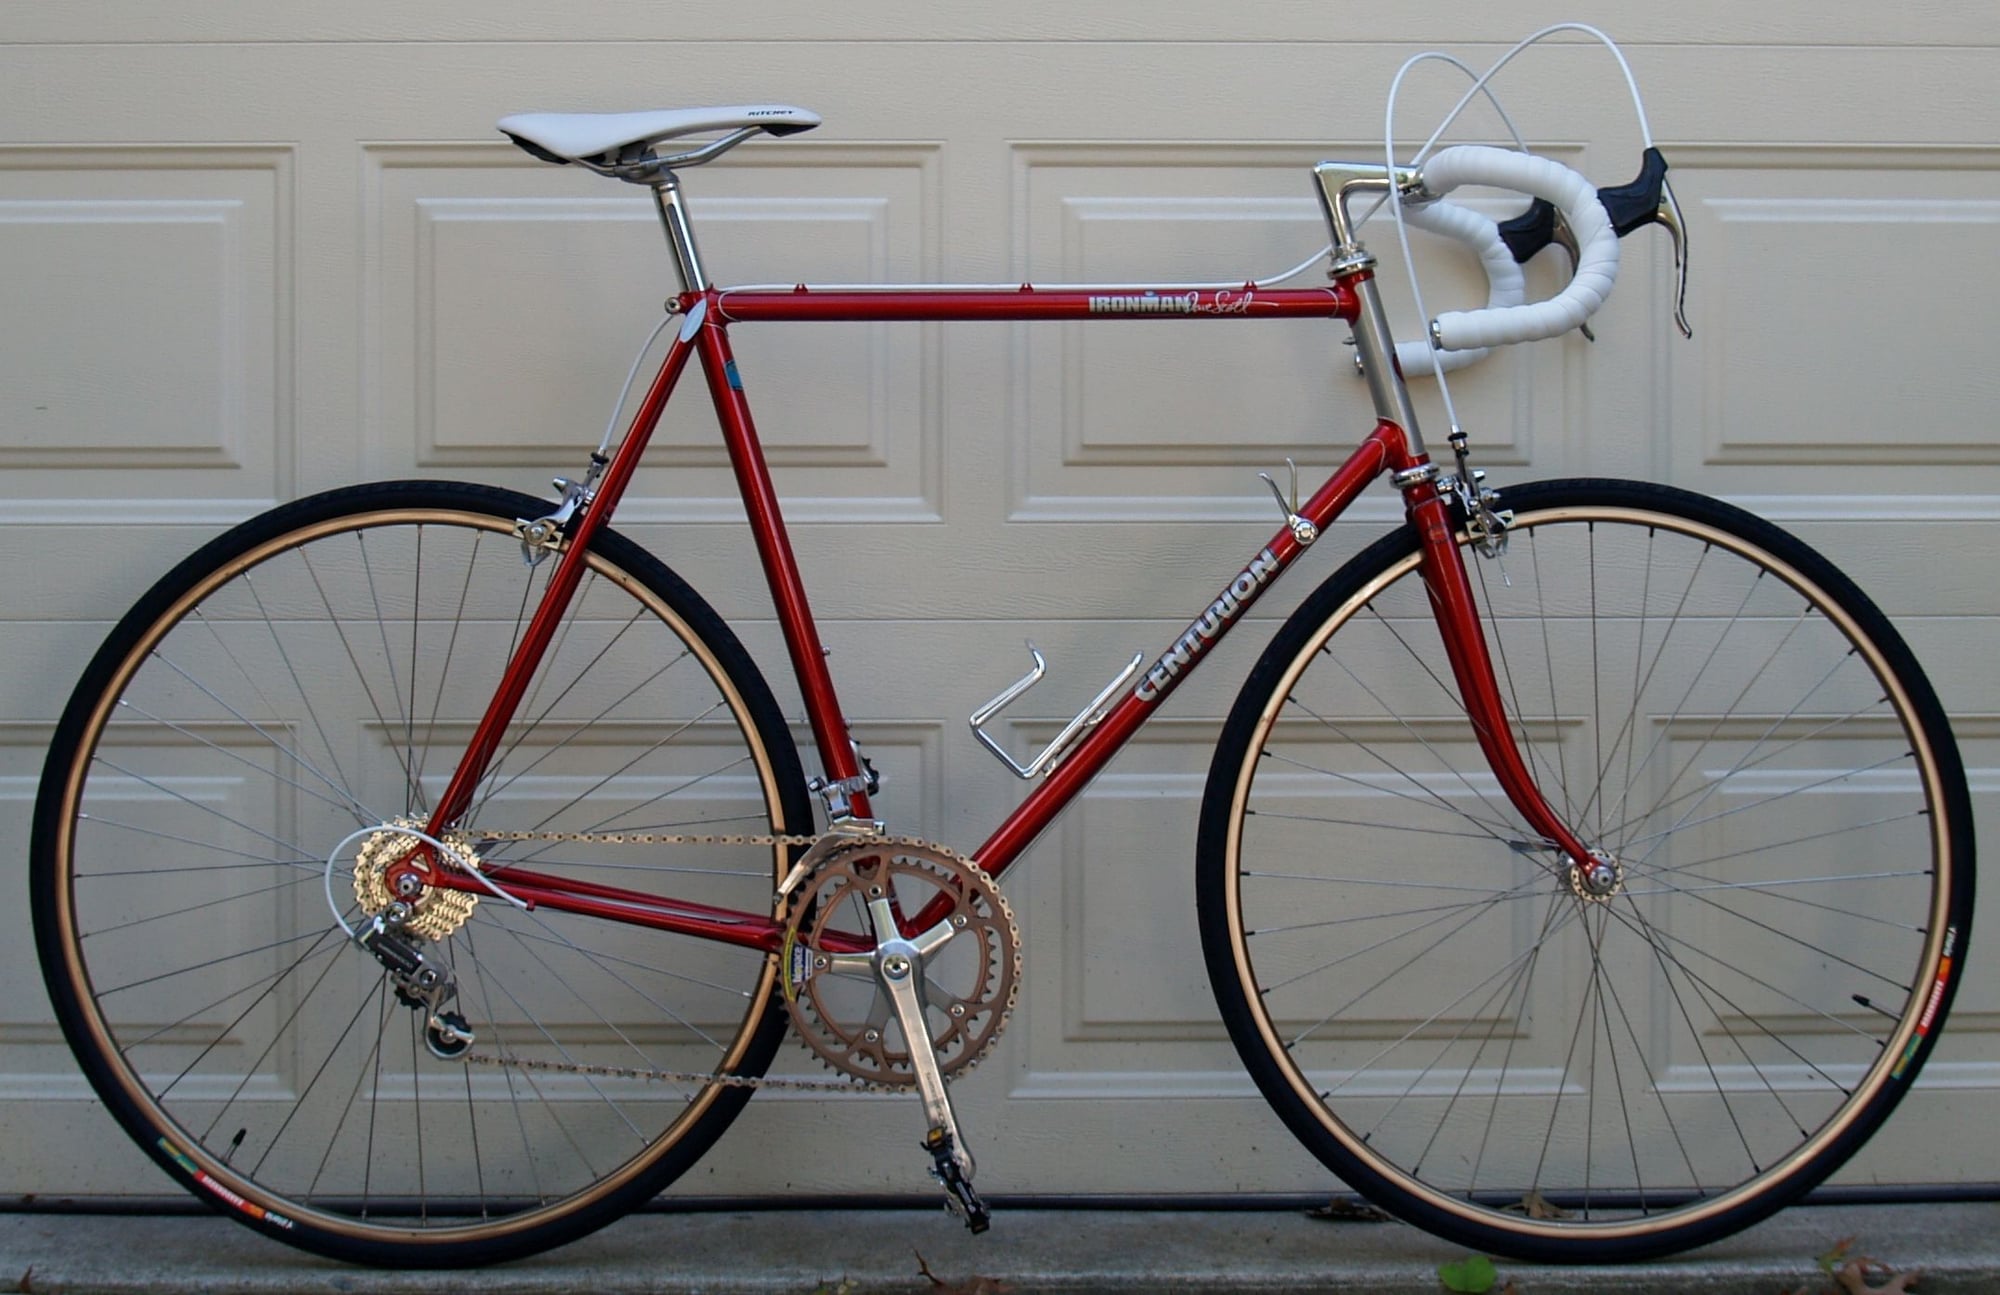
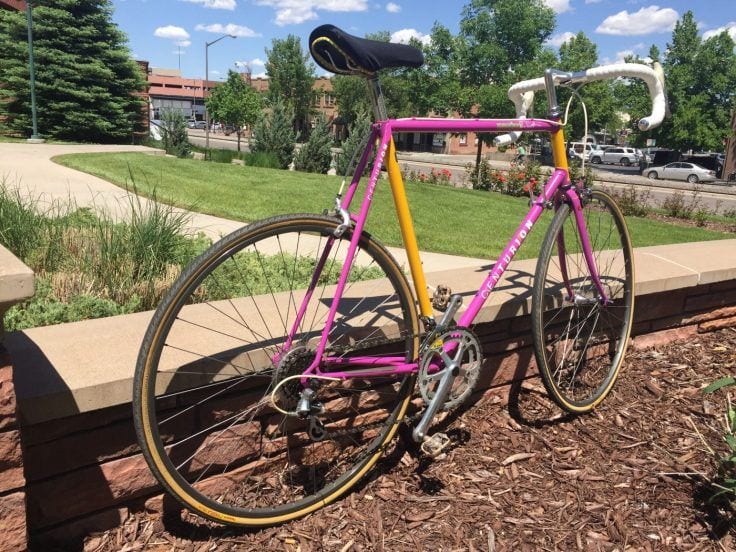
It's my favorite Ironman.
I built this to replicate my Pinarello from BITD. Also, I initially built the Pinarello to replicate the '86 Ironman.
 01-14-21, 10:29 AM
#9573
Senior Member
I found your pic interesting as I too have an 85. I posted it a few years ago and haven�t ridden it much or serviced it yet. Reason I am posting is mine also has the aero brake levers and the short stem. Discussion from before said they had been changed as the levers were from an 86. Mine is the 58cm frame and it seemed quite stock, but I figured there were more knowledge folks here. Mine had some tri bars on it so I assumed the change was made to not have cables in the way. I will be curious as to the originality of yours. Pretty color scheme that year.
For yours having tri bars i would suspect that yeah they changed the brake levers when they put the Tri bars on. not sure how well a non aero brake lever would function with Tri bars.
__________________
01-14-21, 10:34 AM
#9574
Senior Member
Page 387...Post your 87's!
__________________
01-14-21, 11:45 AM
#9575
Senior Member