


Need freehub body for FH-M565
 07-31-23, 06:05 PM
#1

aka Tom Reingold
Thread Starter

Join Date: Jan 2009
Location: New York, NY, and High Falls, NY, USA
Posts: 41,027
Bikes: 1962 Rudge Sports, 1971 Raleigh Super Course, 1971 Raleigh Pro Track, 1974 Raleigh International, 1975 Viscount Fixie, 1982 McLean, 1996 Lemond (Ti), 2002 Burley Zydeco tandem
Liked 3,012 Times
in
1,710 Posts
Need freehub body for FH-M565
My friend needs a new freehub body, as the pawls are no longer catching. I suppose we could take it apart and overhaul it, but where can we get the tool? So are these freehub bodies available anywhere?
The hub is a Shimano Deore LX (Parallax) also known as FH-M565.
Thanks.
The hub is a Shimano Deore LX (Parallax) also known as FH-M565.
Thanks.
__________________
Tom Reingold, tom@noglider.com
New York City and High Falls, NY
Blogs: The Experienced Cyclist; noglider's ride blog
�When man invented the bicycle he reached the peak of his attainments.� � Elizabeth West, US author
Please email me rather than PM'ing me. Thanks.
Tom Reingold, tom@noglider.com
New York City and High Falls, NY
Blogs: The Experienced Cyclist; noglider's ride blog
�When man invented the bicycle he reached the peak of his attainments.� � Elizabeth West, US author
Please email me rather than PM'ing me. Thanks.
 07-31-23, 11:09 PM
#2
Likes For Schlafen:
08-01-23, 07:36 AM
#3
Senior Member
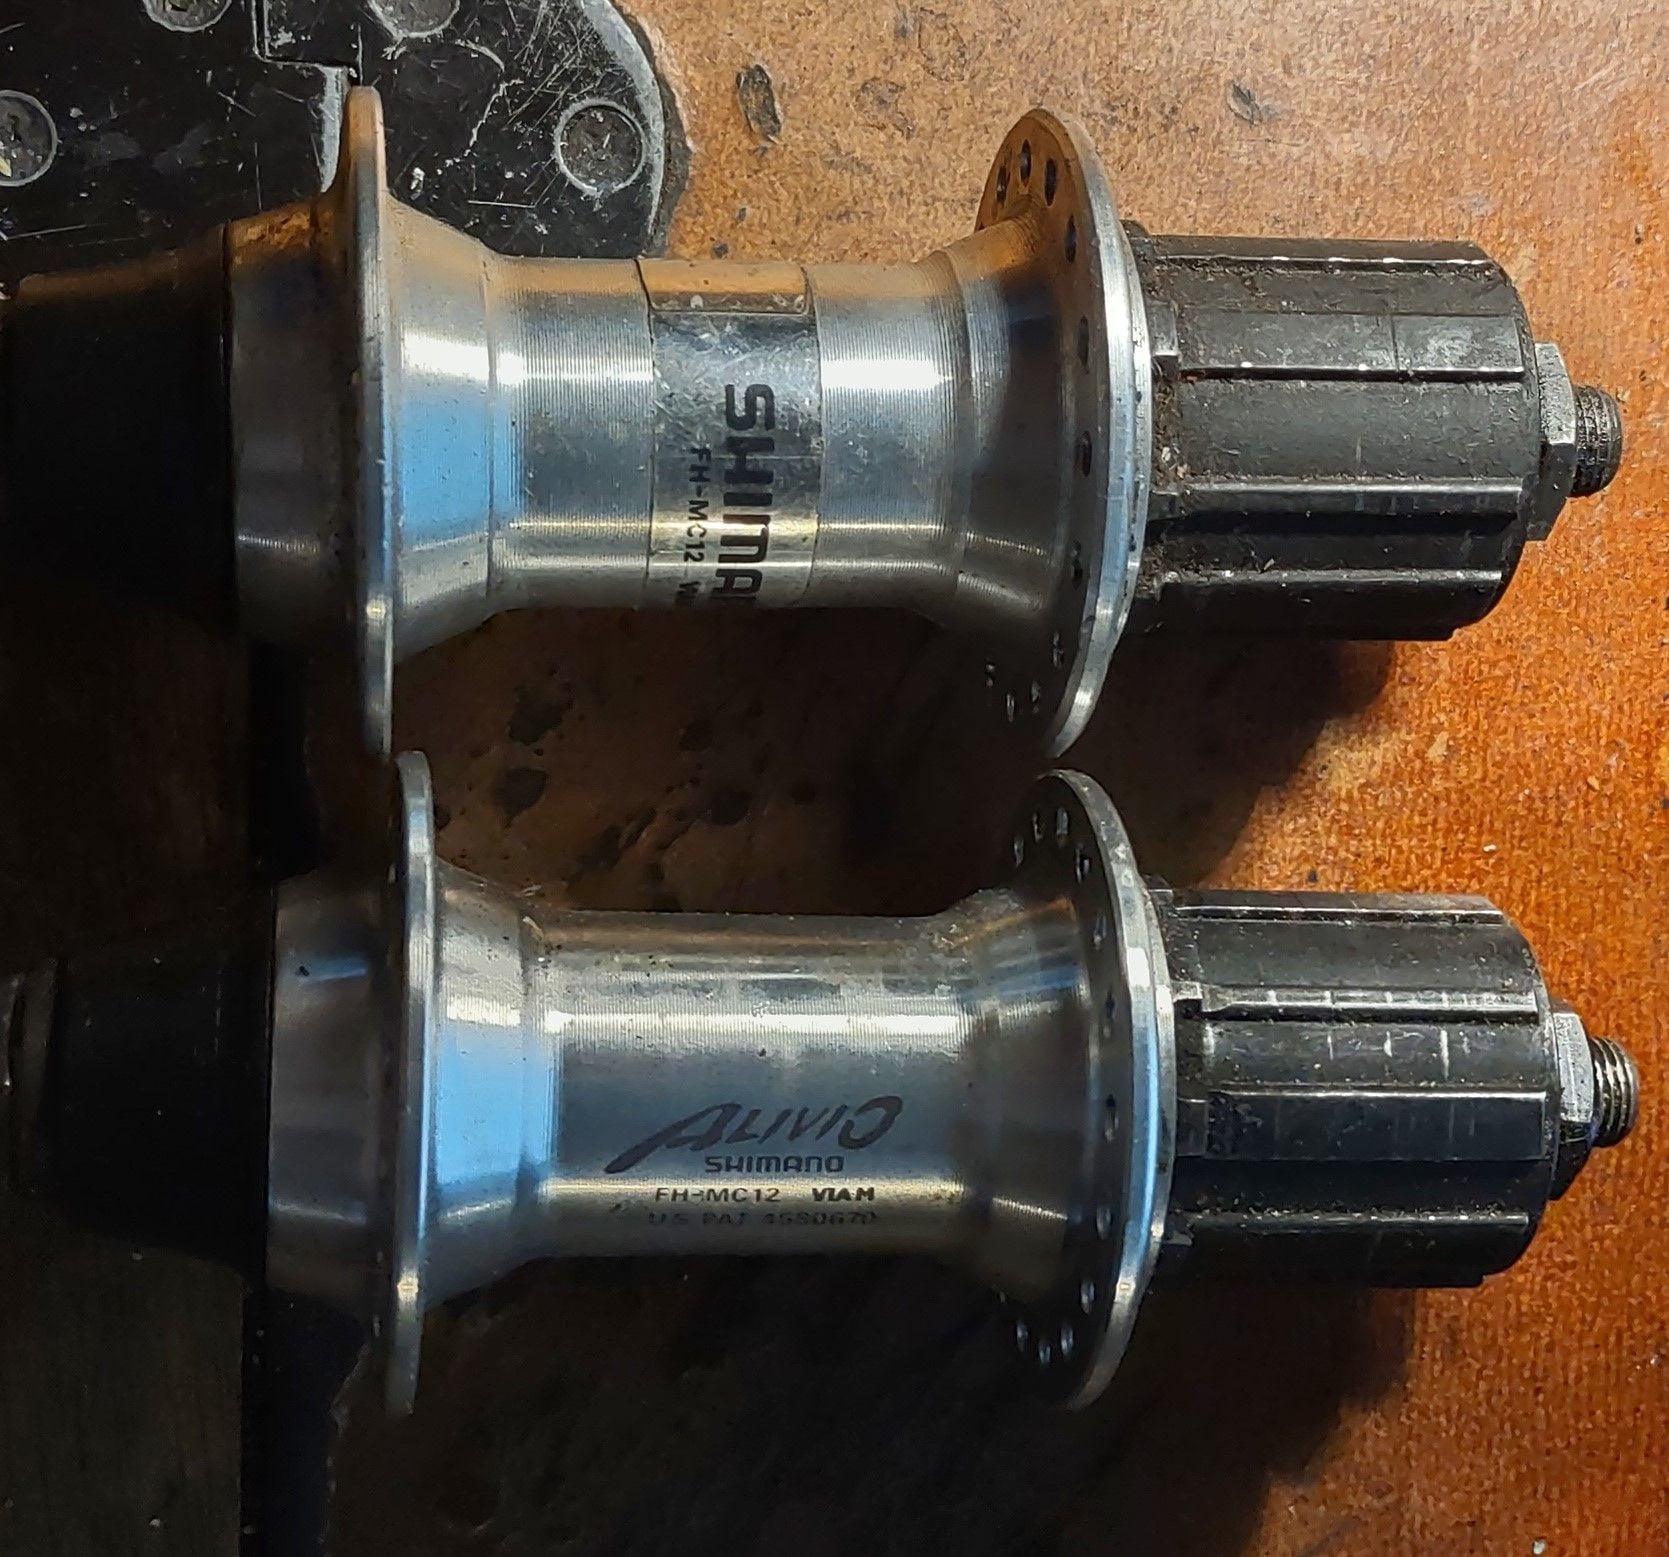
got a couple of MC12 Parallax hubs in good shape if the freehub will fit yours
Likes For Schweinhund:
08-01-23, 08:55 AM
#4
aged to perfection

Join Date: Jun 2009
Location: PacNW
Posts: 1,927
Bikes: Dinucci Allez 2.0, Richard Sachs, Alex Singer, Serotta, Masi GC, Raleigh Pro Mk.1, Hetchins, etc
Liked 1,345 Times
in
715 Posts
Tom I put "shimano freehub body" into ebay search and got a large number of results in the $20 range
this part may be common across a wide range of Shimano hubs.
put a lot of grease in it before install
/markp
this part may be common across a wide range of Shimano hubs.
put a lot of grease in it before install
/markp
08-01-23, 03:30 PM
#5
Senior Member
Join Date: May 2019
Location: Bloomington, IN
Posts: 3,192
Bikes: Paramount, Faggin, Ochsner, Ciocc, Basso
Liked 2,174 Times
in
1,271 Posts
Tom,
I have a tool for the rebuild and the rebuild is easy. If you want to borrow it let me know, or I can likely make a tool for you. Smiles, MH
I have a tool for the rebuild and the rebuild is easy. If you want to borrow it let me know, or I can likely make a tool for you. Smiles, MH
Likes For Mad Honk:
08-01-23, 08:43 PM
#6
aka Tom Reingold
Thread Starter
Join Date: Jan 2009
Location: New York, NY, and High Falls, NY, USA
Posts: 41,027
Bikes: 1962 Rudge Sports, 1971 Raleigh Super Course, 1971 Raleigh Pro Track, 1974 Raleigh International, 1975 Viscount Fixie, 1982 McLean, 1996 Lemond (Ti), 2002 Burley Zydeco tandem
Liked 3,012 Times
in
1,710 Posts
Thanks to you and everyone so far.
__________________
Tom Reingold, tom@noglider.com
New York City and High Falls, NY
Blogs: The Experienced Cyclist; noglider's ride blog
�When man invented the bicycle he reached the peak of his attainments.� � Elizabeth West, US author
Please email me rather than PM'ing me. Thanks.
Tom Reingold, tom@noglider.com
New York City and High Falls, NY
Blogs: The Experienced Cyclist; noglider's ride blog
�When man invented the bicycle he reached the peak of his attainments.� � Elizabeth West, US author
Please email me rather than PM'ing me. Thanks.
08-01-23, 10:09 PM
#8
Senior Member
Ever read a tech doc and realize aww crap.
In three different docs what I have been calling a freehub or a freehub body is referred to as a freewheel body
The whole thing is a freehub, the part that goes click is a freewheel body.
eGads.
In three different docs what I have been calling a freehub or a freehub body is referred to as a freewheel body
The whole thing is a freehub, the part that goes click is a freewheel body.
eGads.
Last edited by Schweinhund; 08-01-23 at 10:13 PM.
08-02-23, 01:45 PM
#9
Senior Member
Join Date: May 2019
Location: Bloomington, IN
Posts: 3,192
Bikes: Paramount, Faggin, Ochsner, Ciocc, Basso
Liked 2,174 Times
in
1,271 Posts
Well this is for Tom and jdawginsc on the subject of the freehub overhaul. (Also see the discussion in the Huffiente thread)
I pulled out the original tool so that you can see how it engages the freehub lock ring. And then I will show how to make the cheap junk yard version. And I do mean cheap!
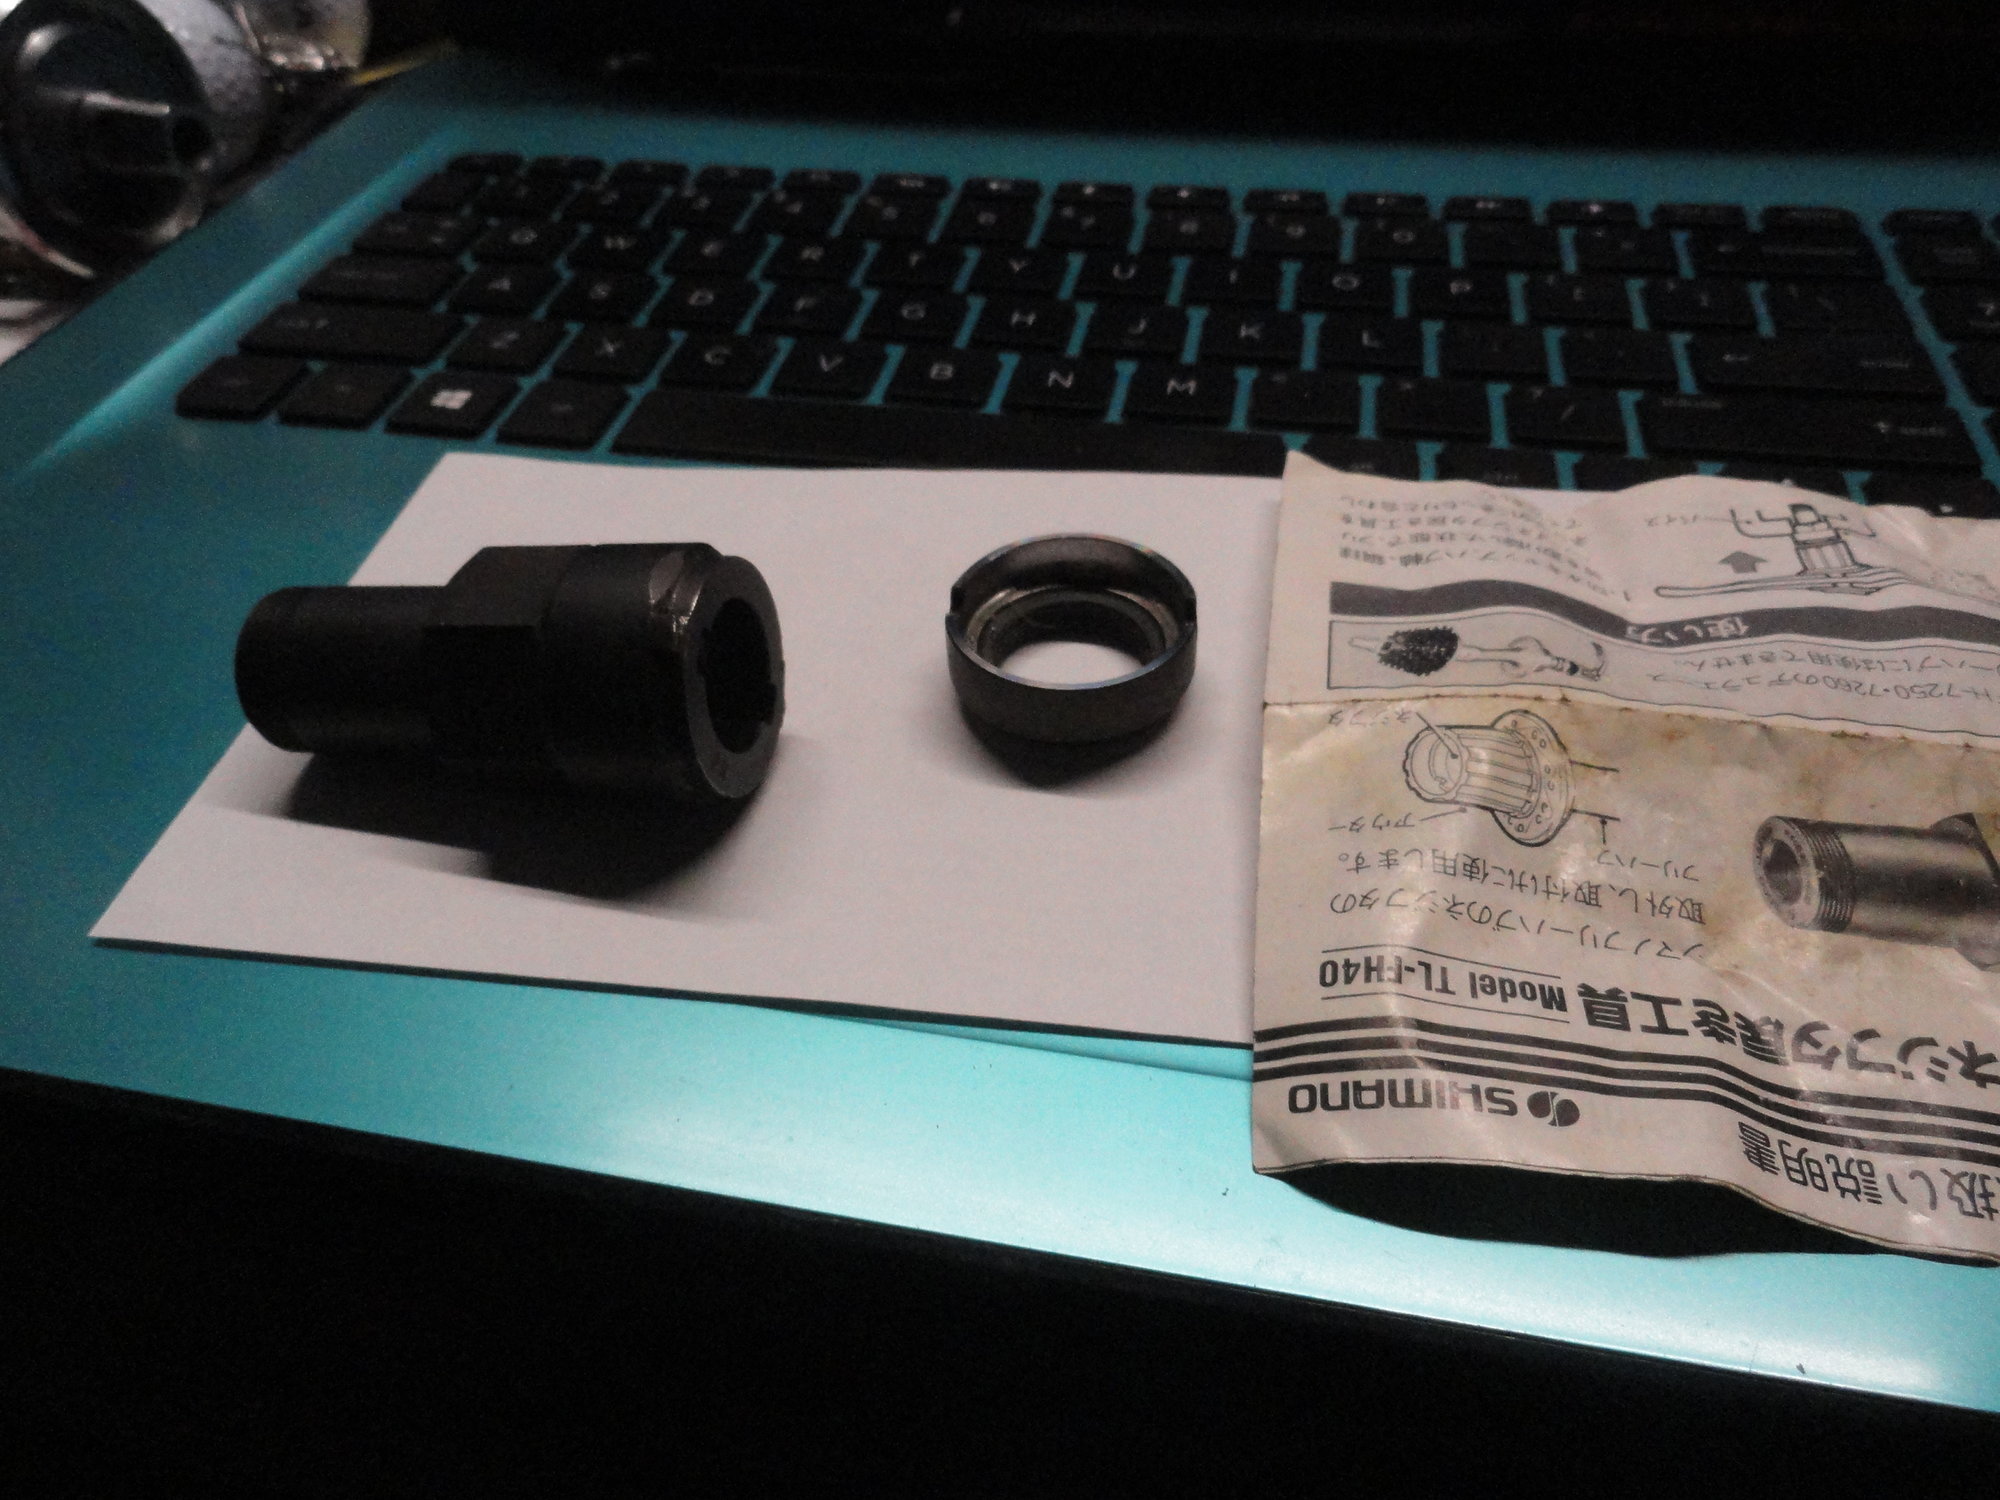
The original tool from Shimano with pictures of how to use it.
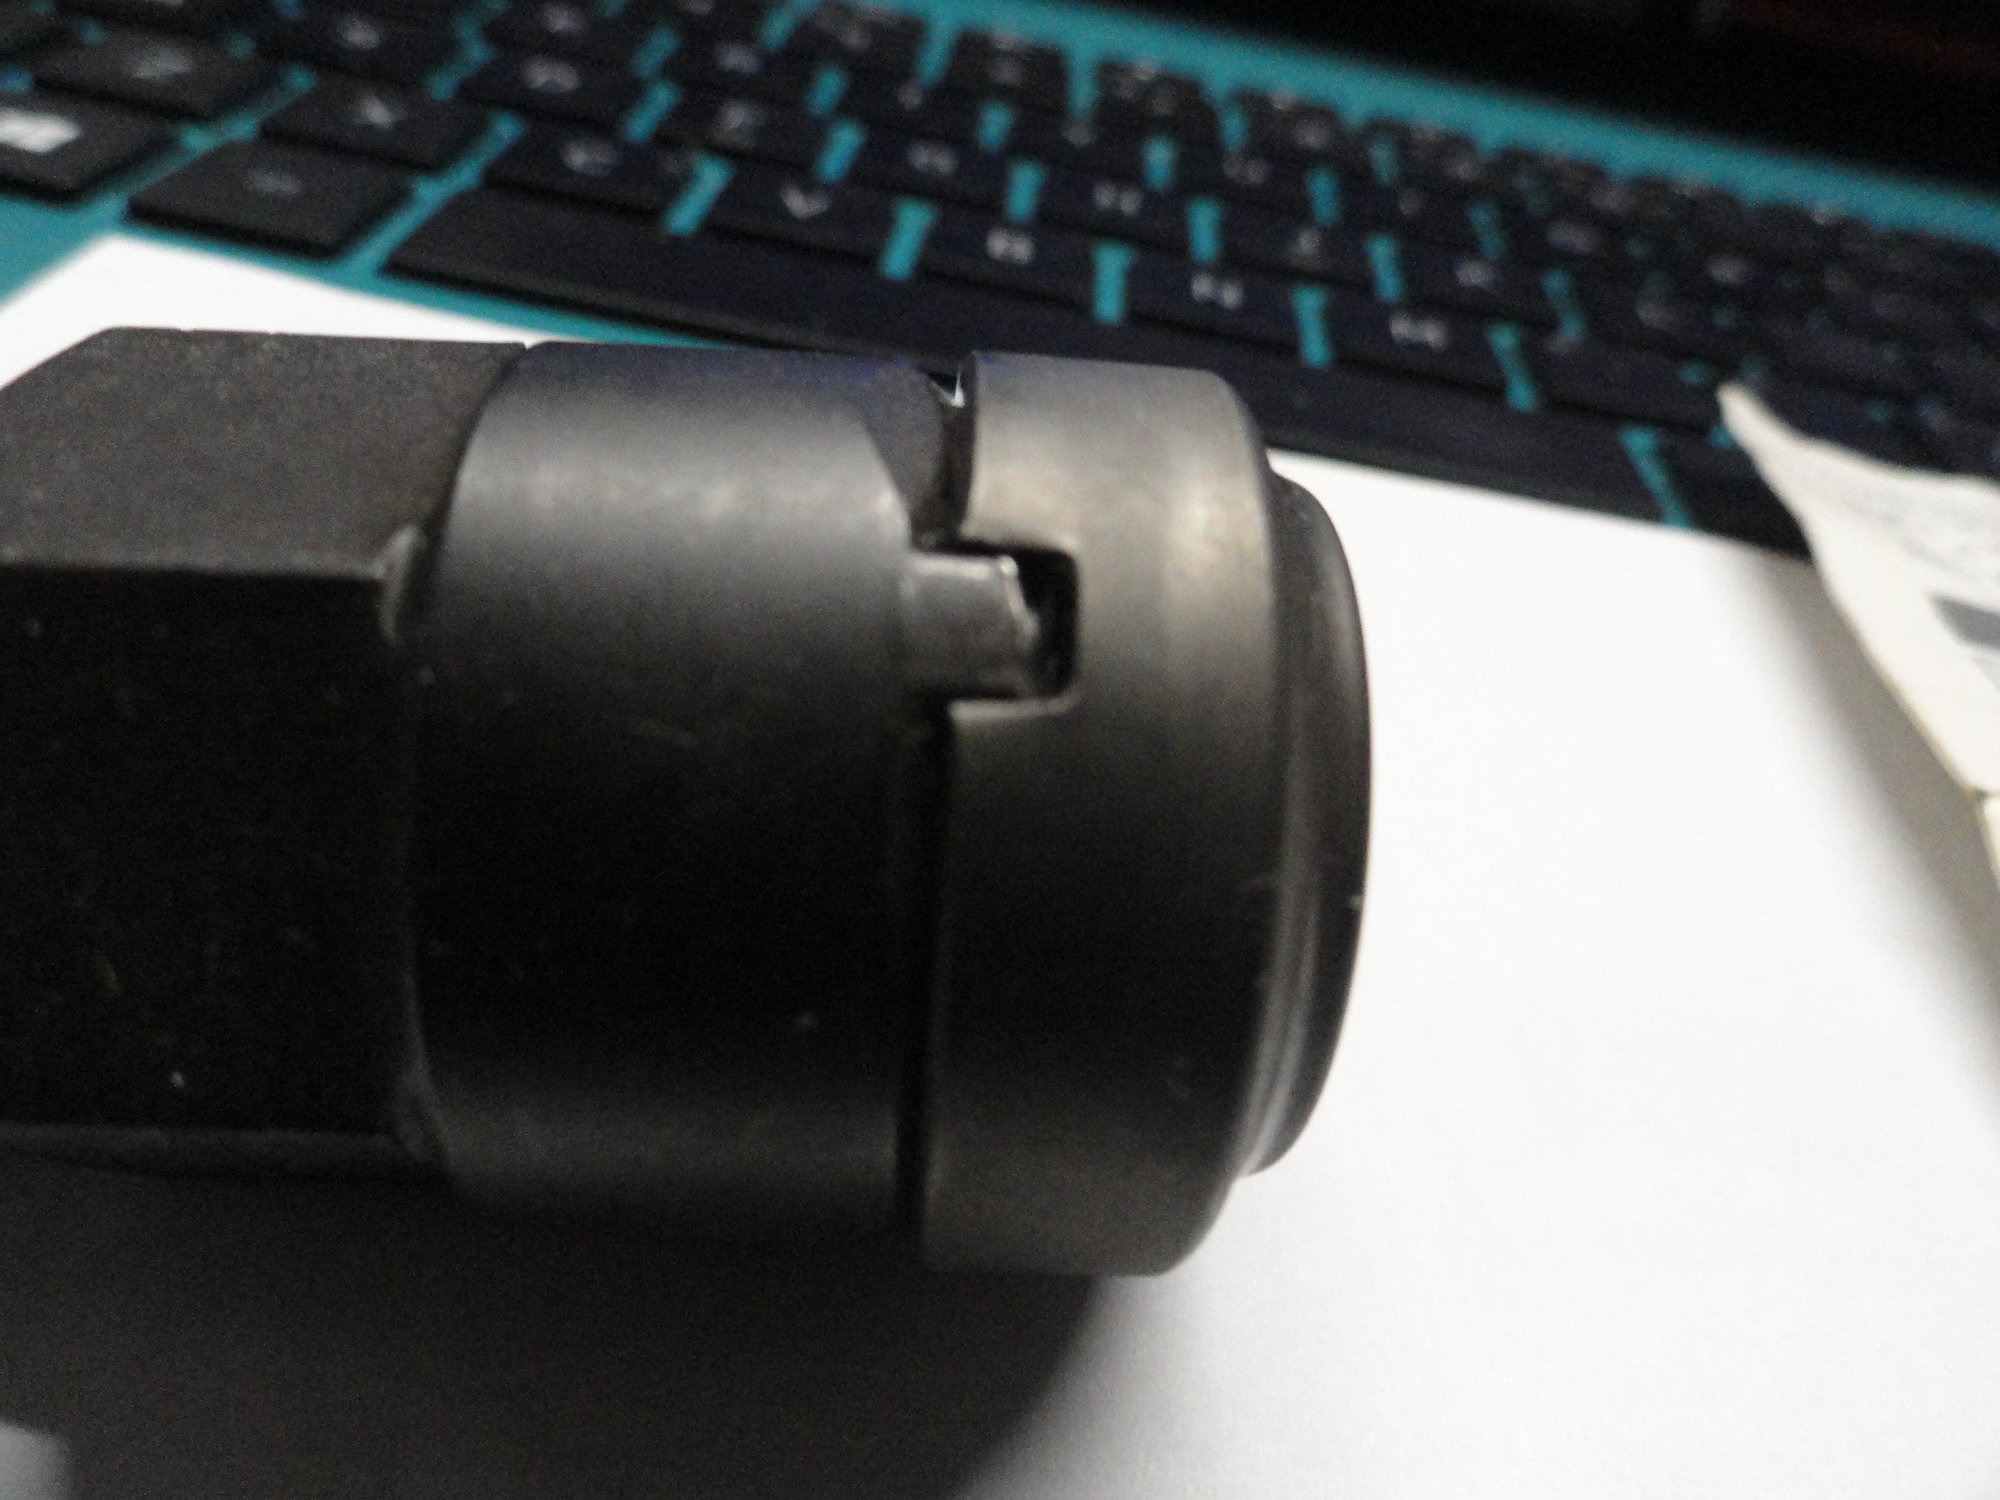
Th engagement of the tool with a lock ring. The ring had left-hand threads so it is important to turn it the right way to dis-engage it from the freehub.
I think I paid a reasonable amount for it 35 years ago, but can't recall how much. And now a couple of posts on how to make the cheap junk yard model. Smiles, MH
I pulled out the original tool so that you can see how it engages the freehub lock ring. And then I will show how to make the cheap junk yard version. And I do mean cheap!
The original tool from Shimano with pictures of how to use it.
Th engagement of the tool with a lock ring. The ring had left-hand threads so it is important to turn it the right way to dis-engage it from the freehub.
I think I paid a reasonable amount for it 35 years ago, but can't recall how much. And now a couple of posts on how to make the cheap junk yard model. Smiles, MH
08-02-23, 02:08 PM
#10
Senior Member
Join Date: May 2019
Location: Bloomington, IN
Posts: 3,192
Bikes: Paramount, Faggin, Ochsner, Ciocc, Basso
Liked 2,174 Times
in
1,271 Posts
Here is the process to make a tool for about $3 and about 45 minutes of work. First to the pawn shops to find a socket that will work. After three shops I found a black socket that was just few thousands of an inch too large to fit in the free-hub. So back to the shop and do some creative metal removal. I found one a couple of years ago that was a good fit I think it was and SK socket, but didn't find any this morning so the second best thing will work. I am going to use a bit that fits my drill/driver and converts to a 3/8" driver bit. I take the socket and head to the grinder spinning the socket against the turning wheel to remove enough metal to fit snugly in the free-hub body.
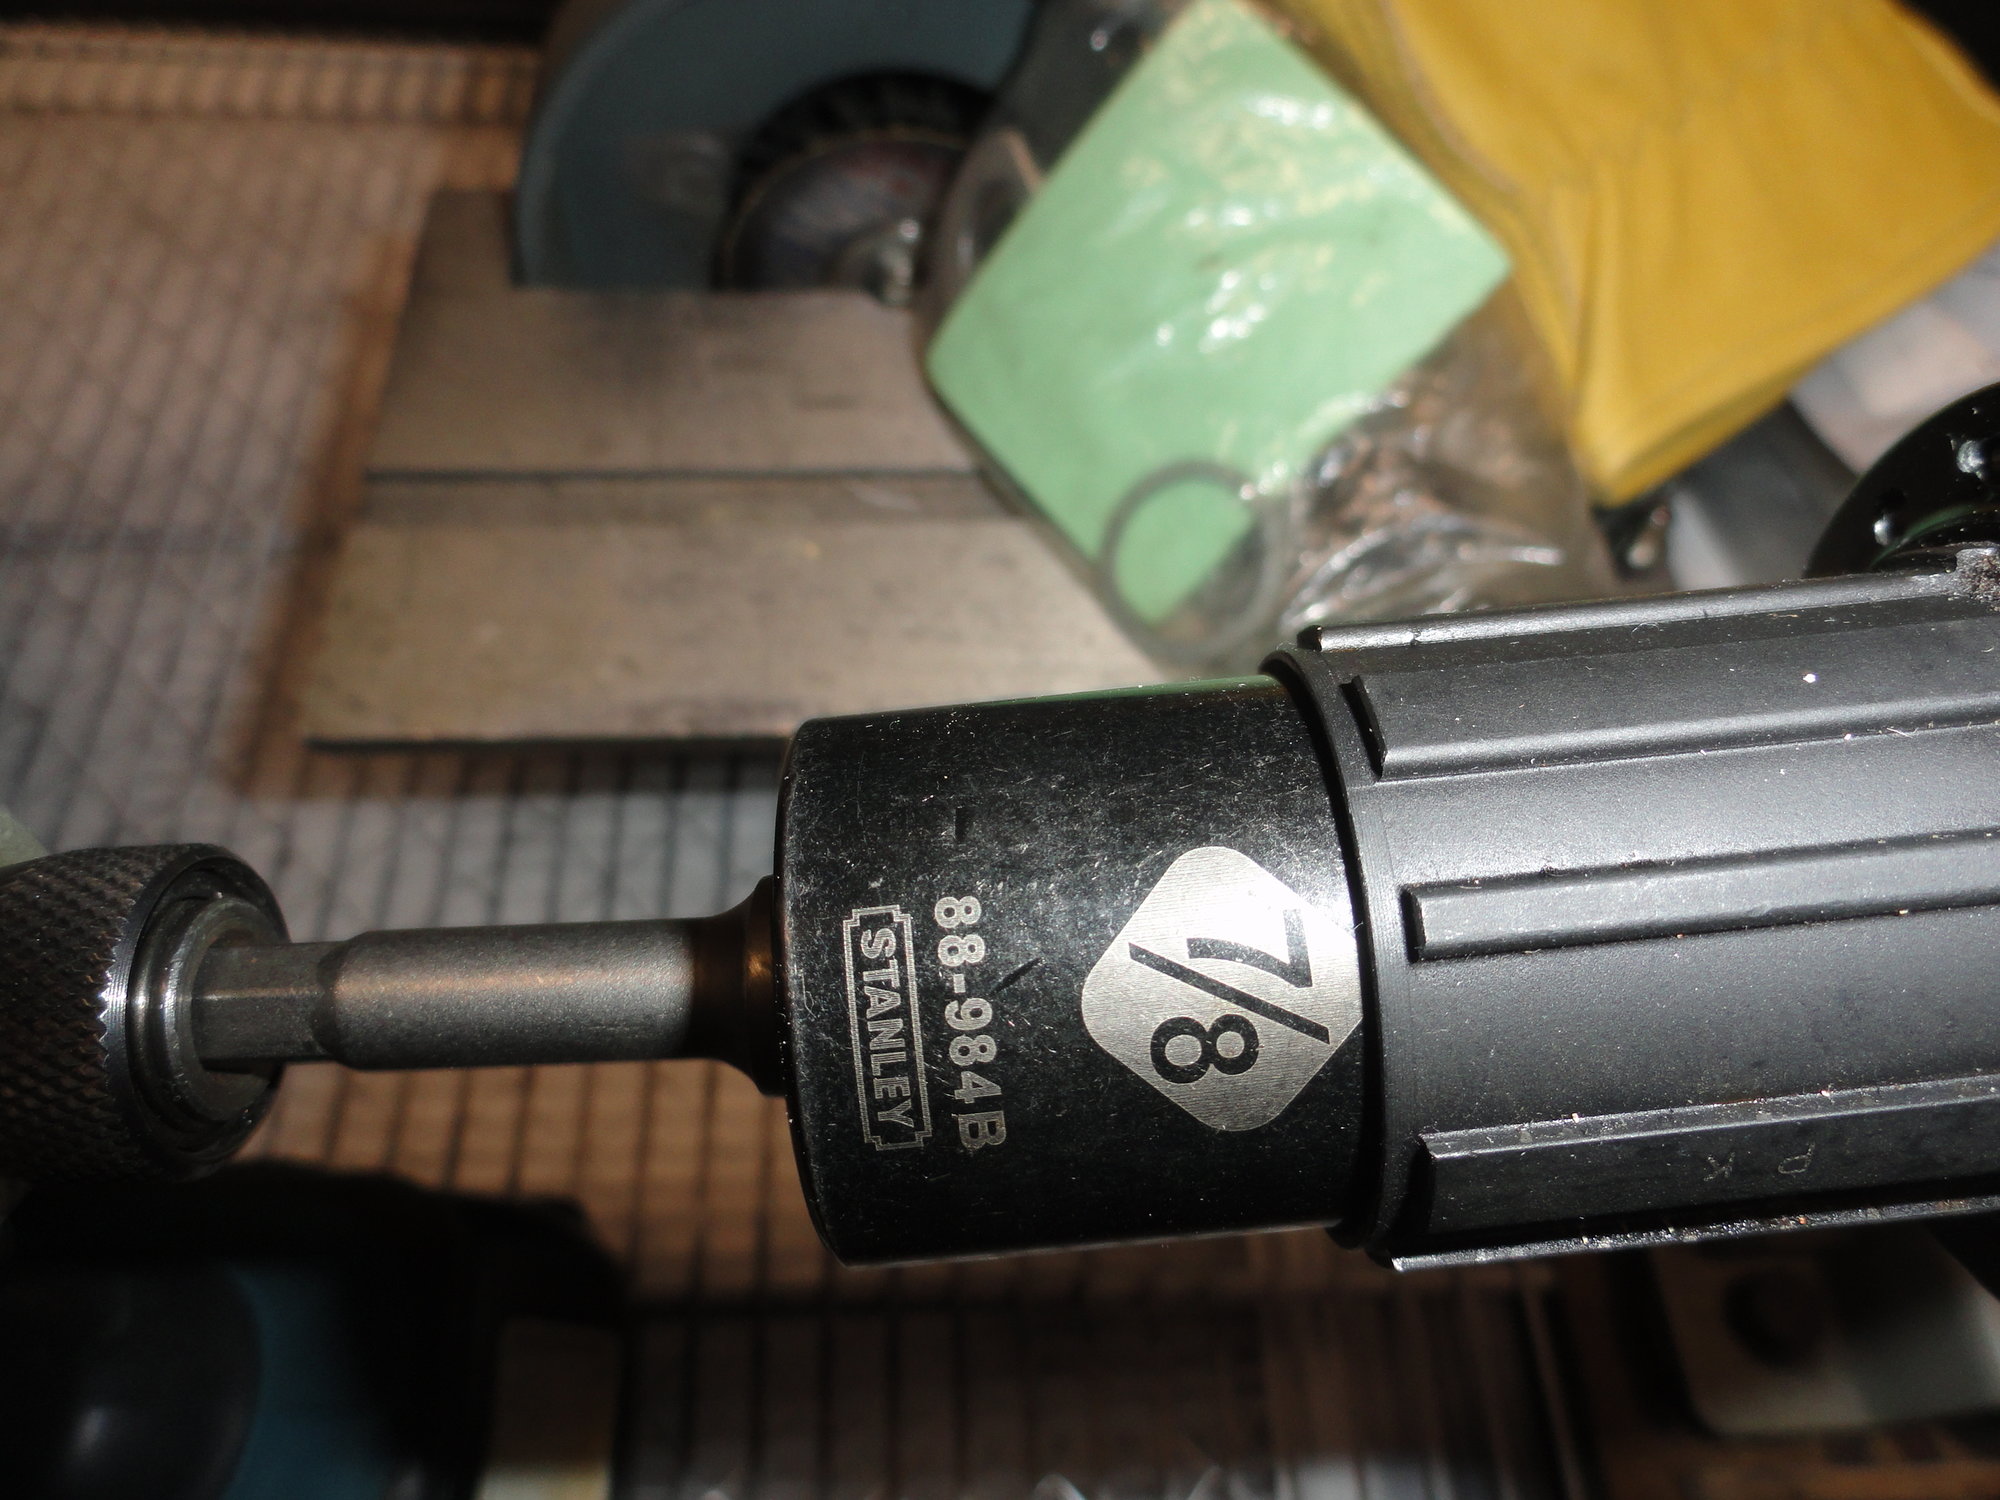
This was the "fity" cent socket from the pawn shop. You can see the outside diameter of the socket is just a bit large to fit in the body.
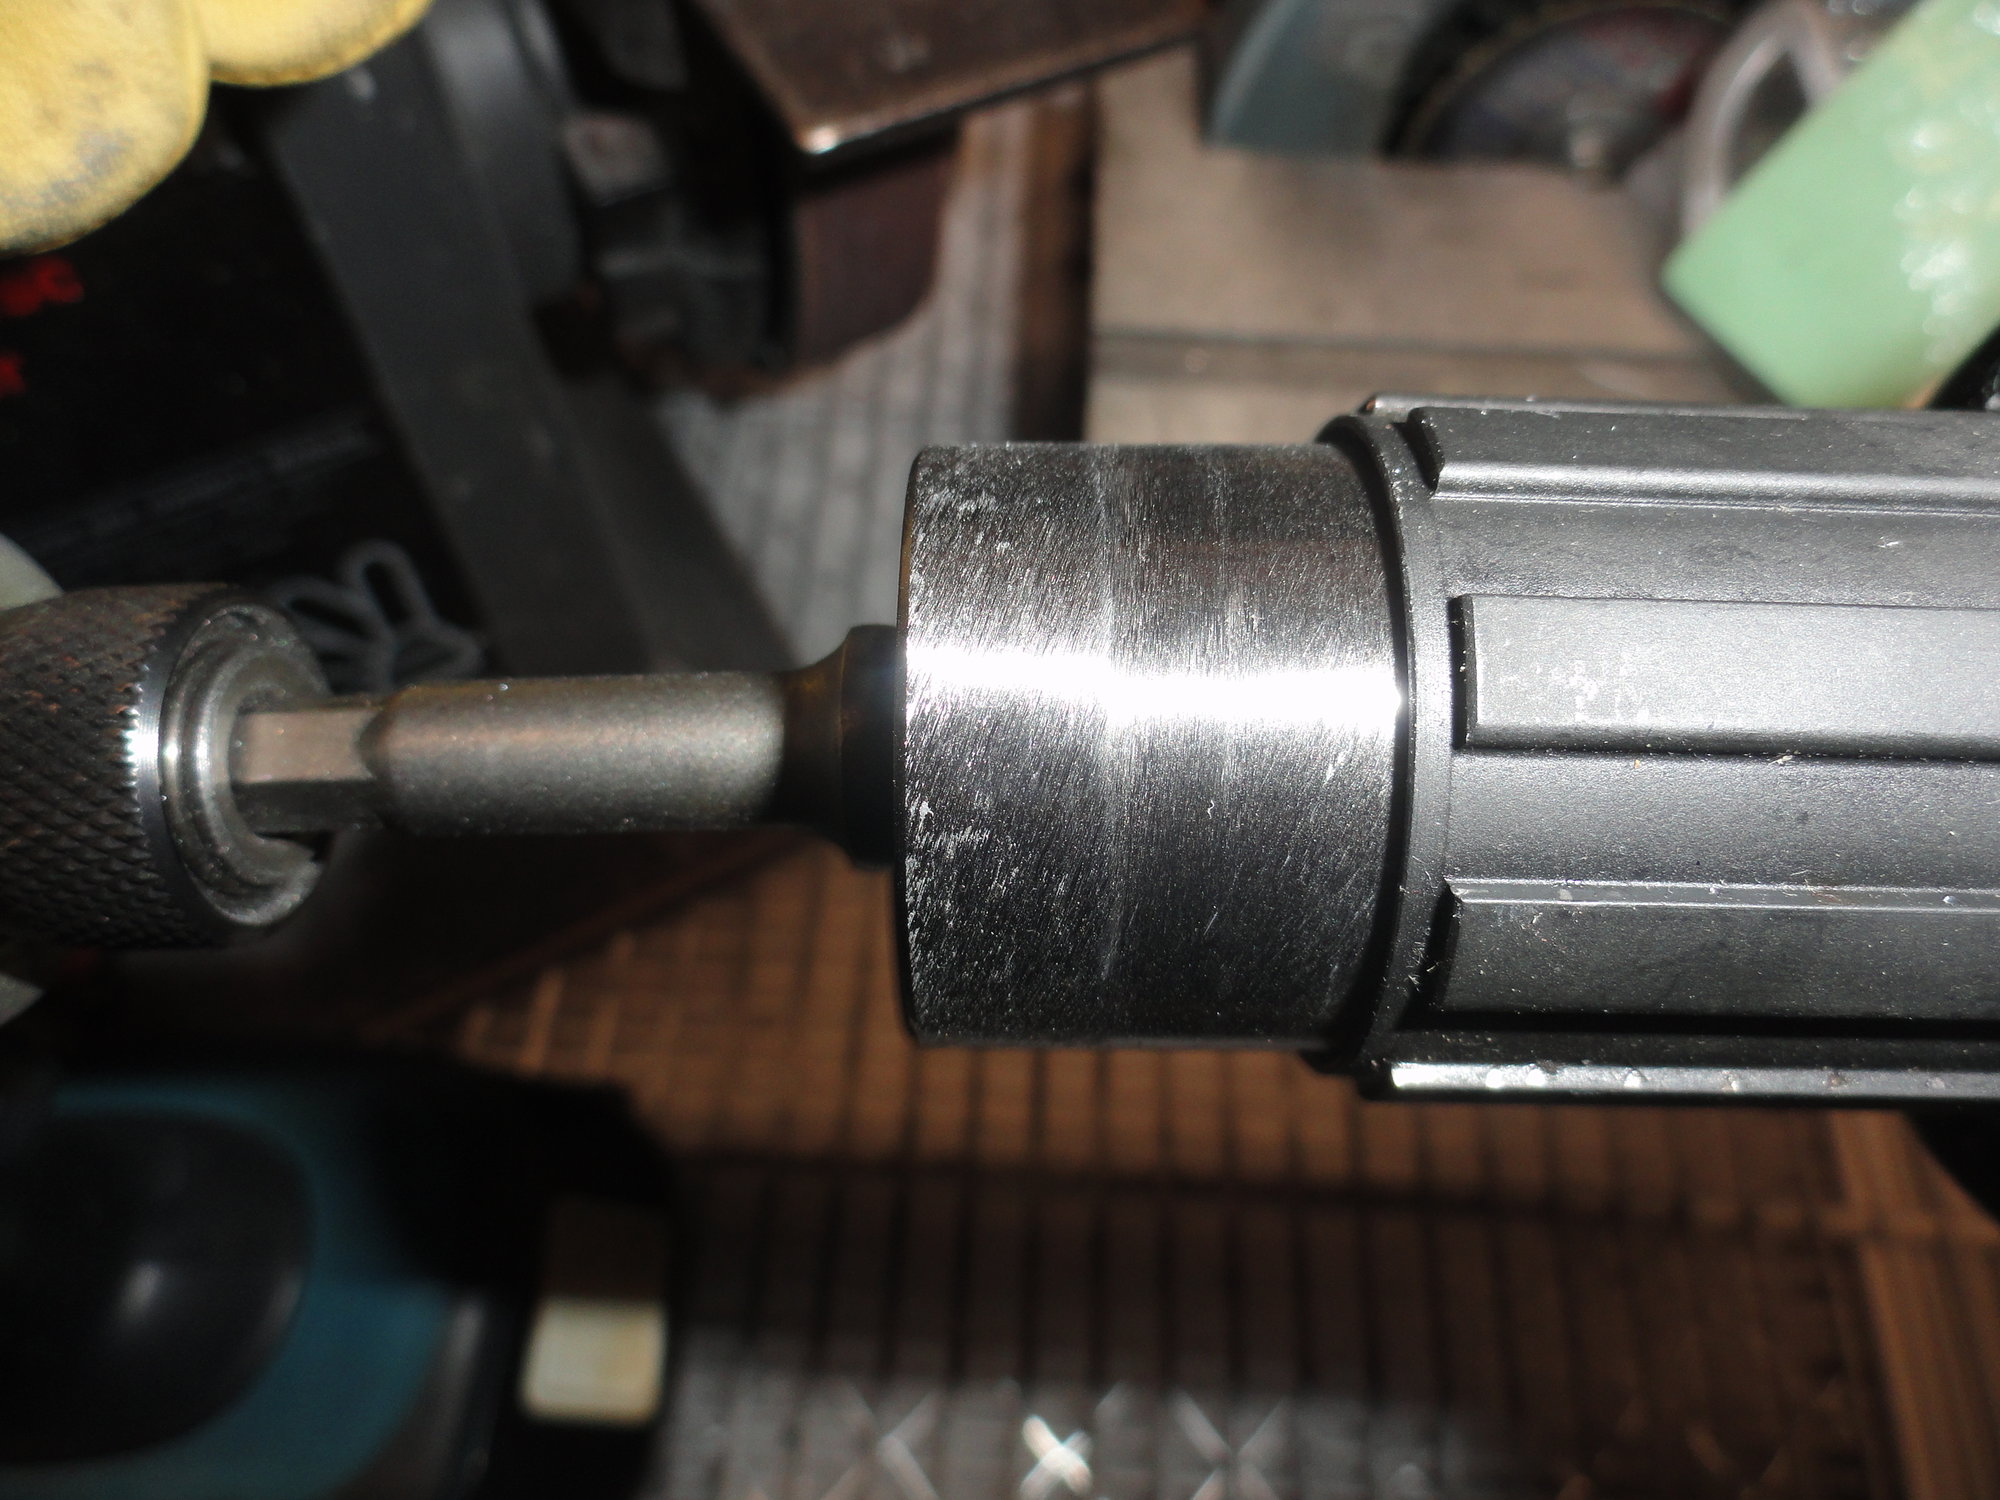
A little grinding and the fit is nice and smooth.
Now on to the process of making it into a free-hub tool. I start by cutting two slots in the widest section of the socket wall about the same size as the slots in the lock ring. Next is two slots across the socket to make the other pin for the tool to fit in the ring.
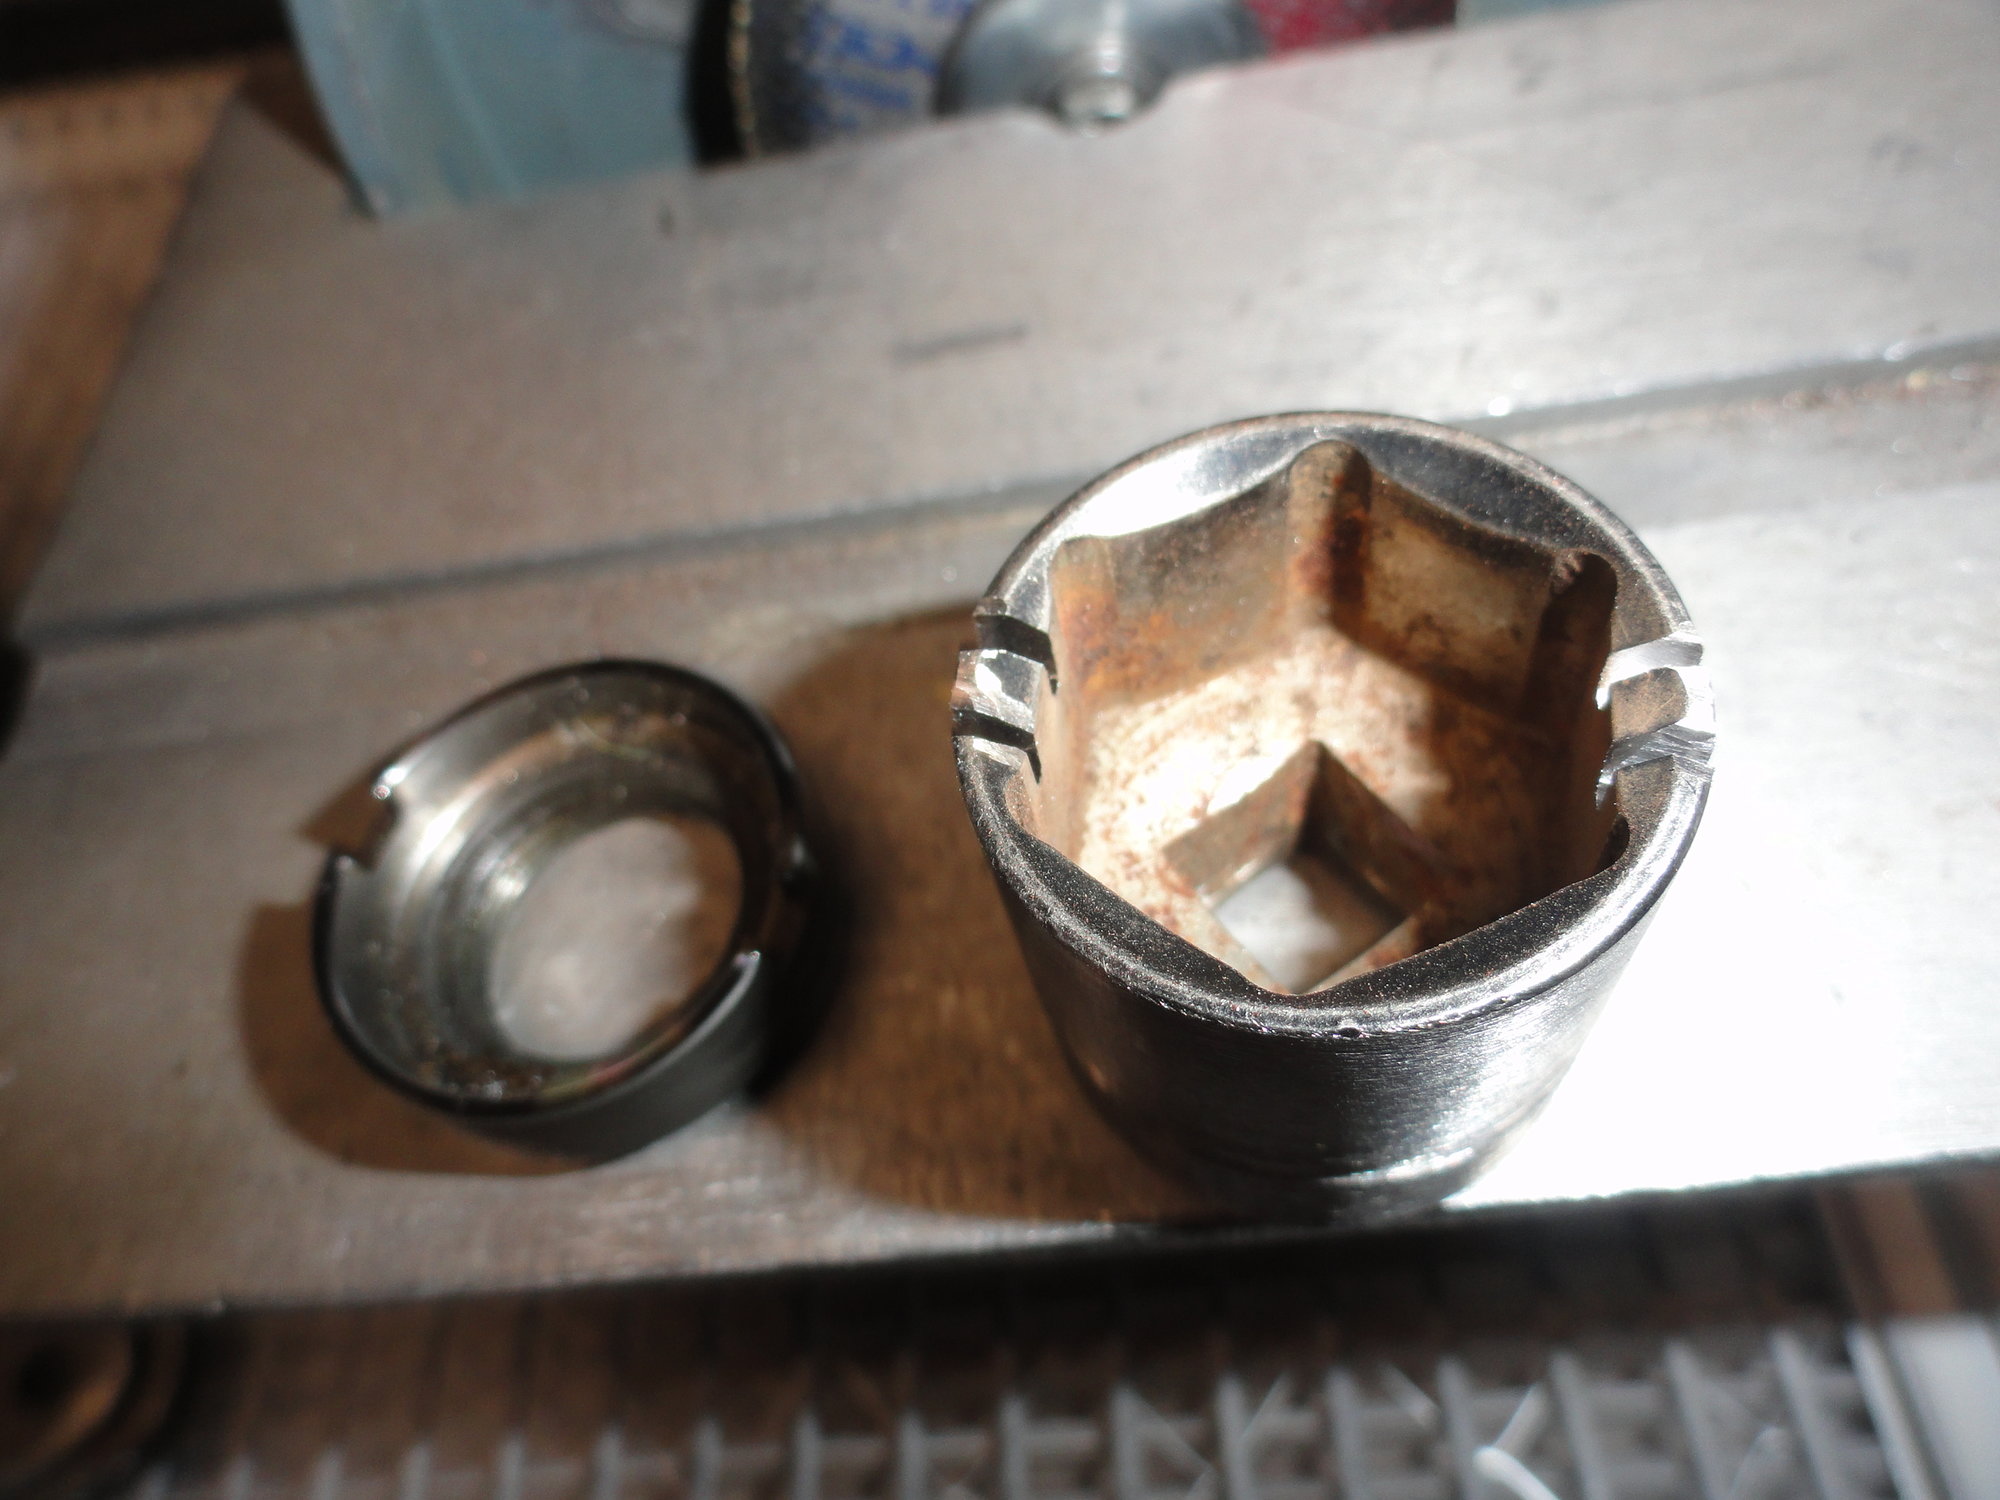
A lock ring and the socket with the two pins cut away on either side of the socket.
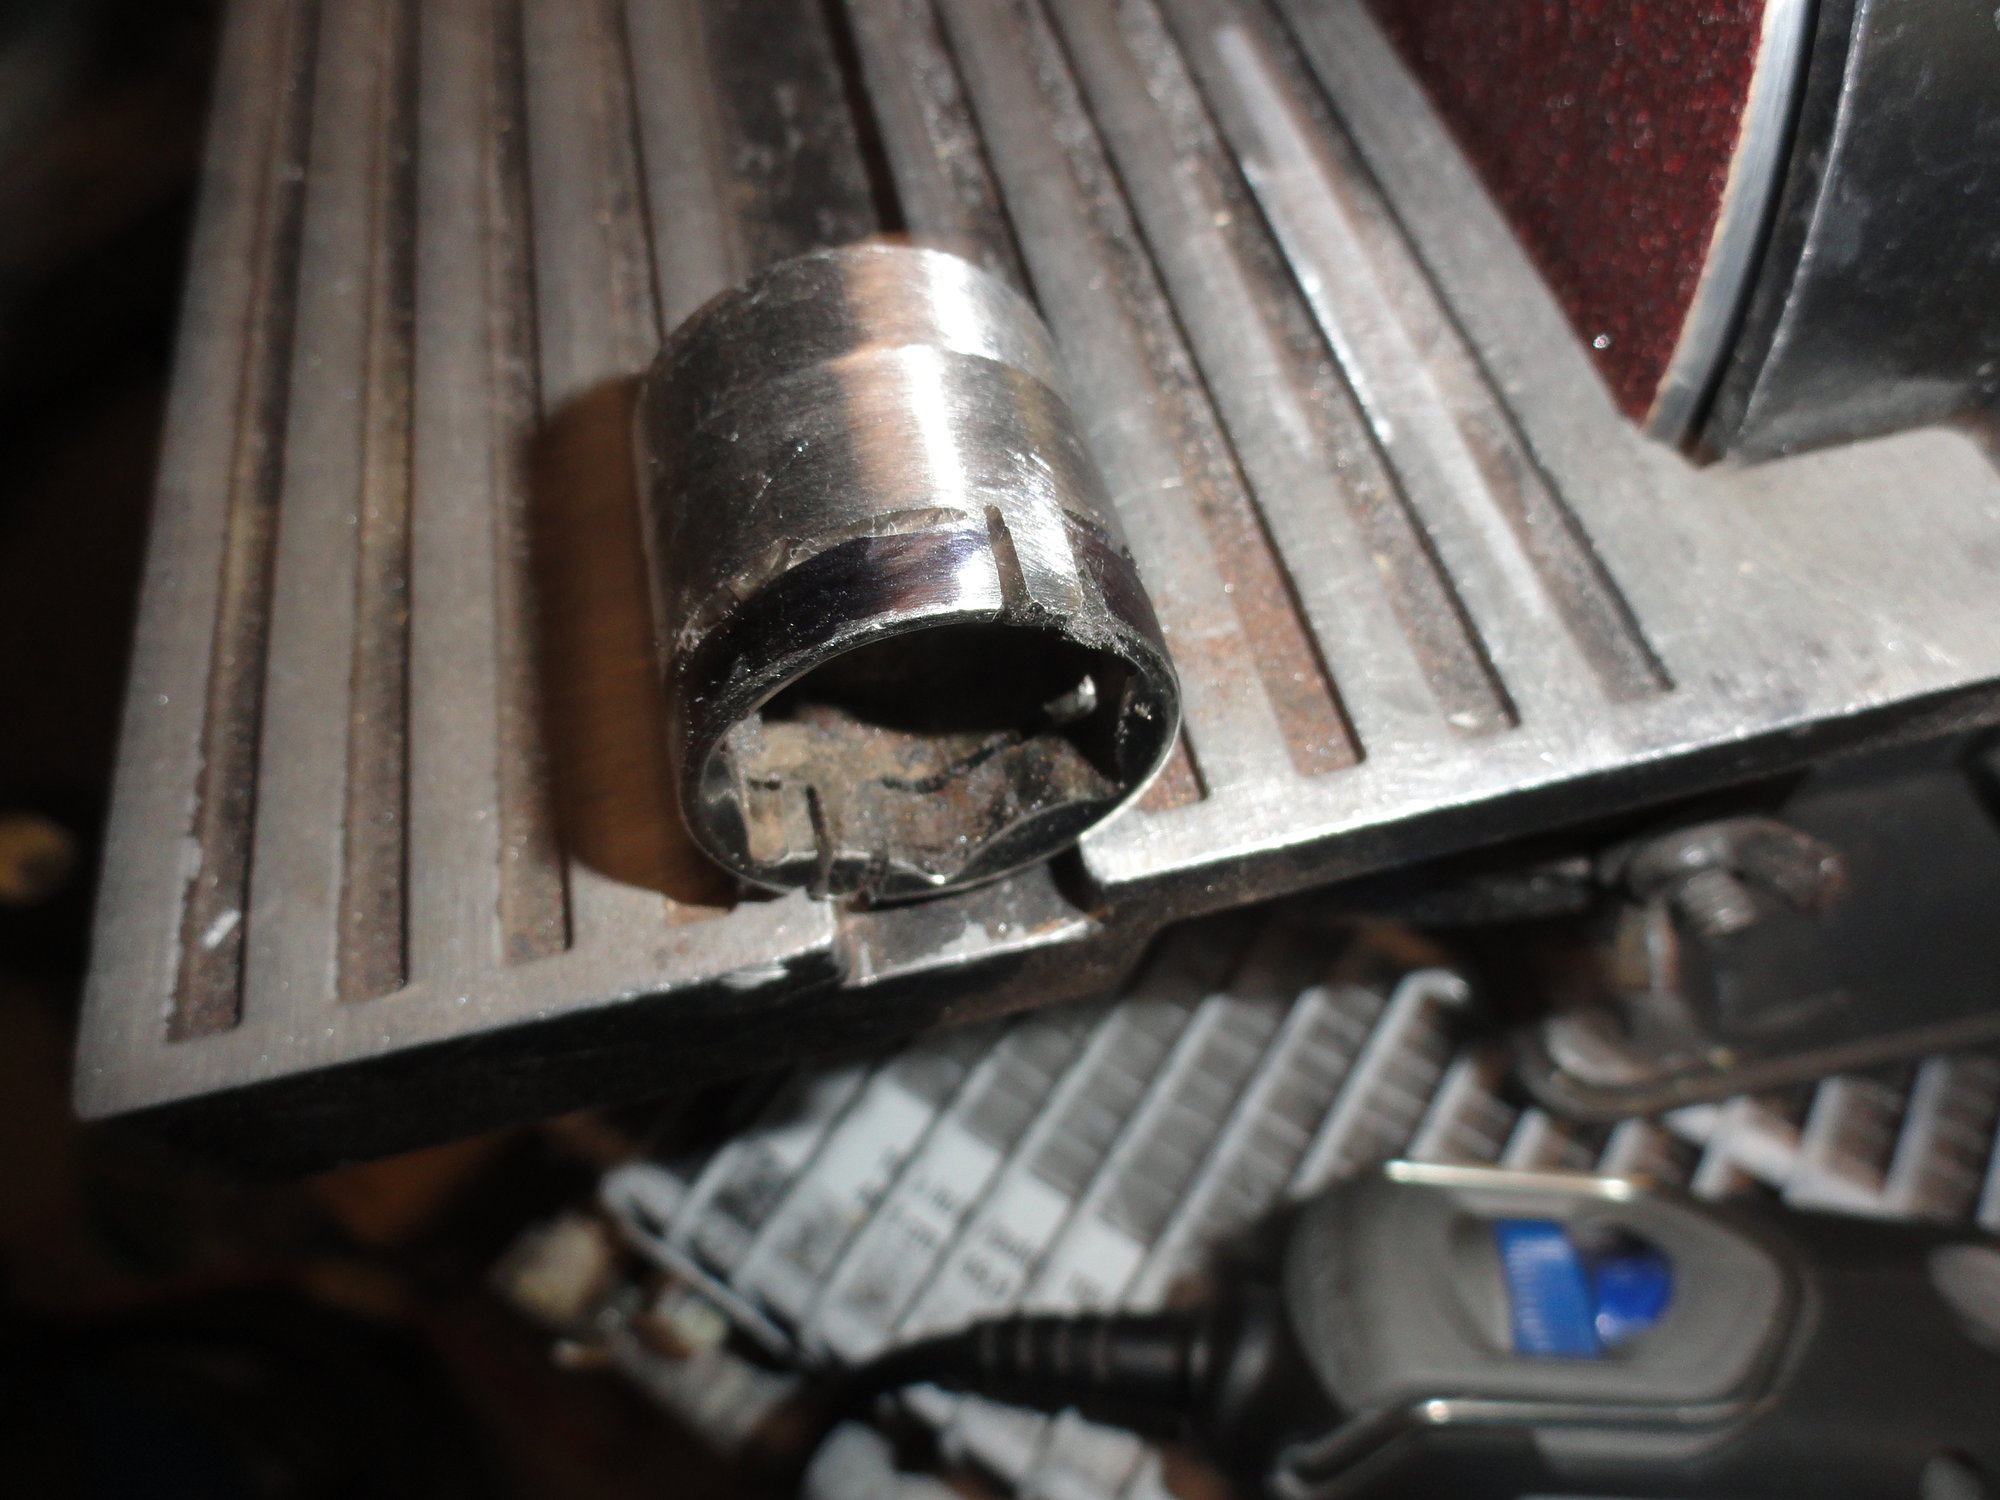
Next step is to remove anything that doesn't look like a lock ring tool. I have marked it black to show what is going to leave.
A bit more work on removing material and the tool is close to being finished. Some final burr removal and smoothing of the outer sidewalls of the tool.
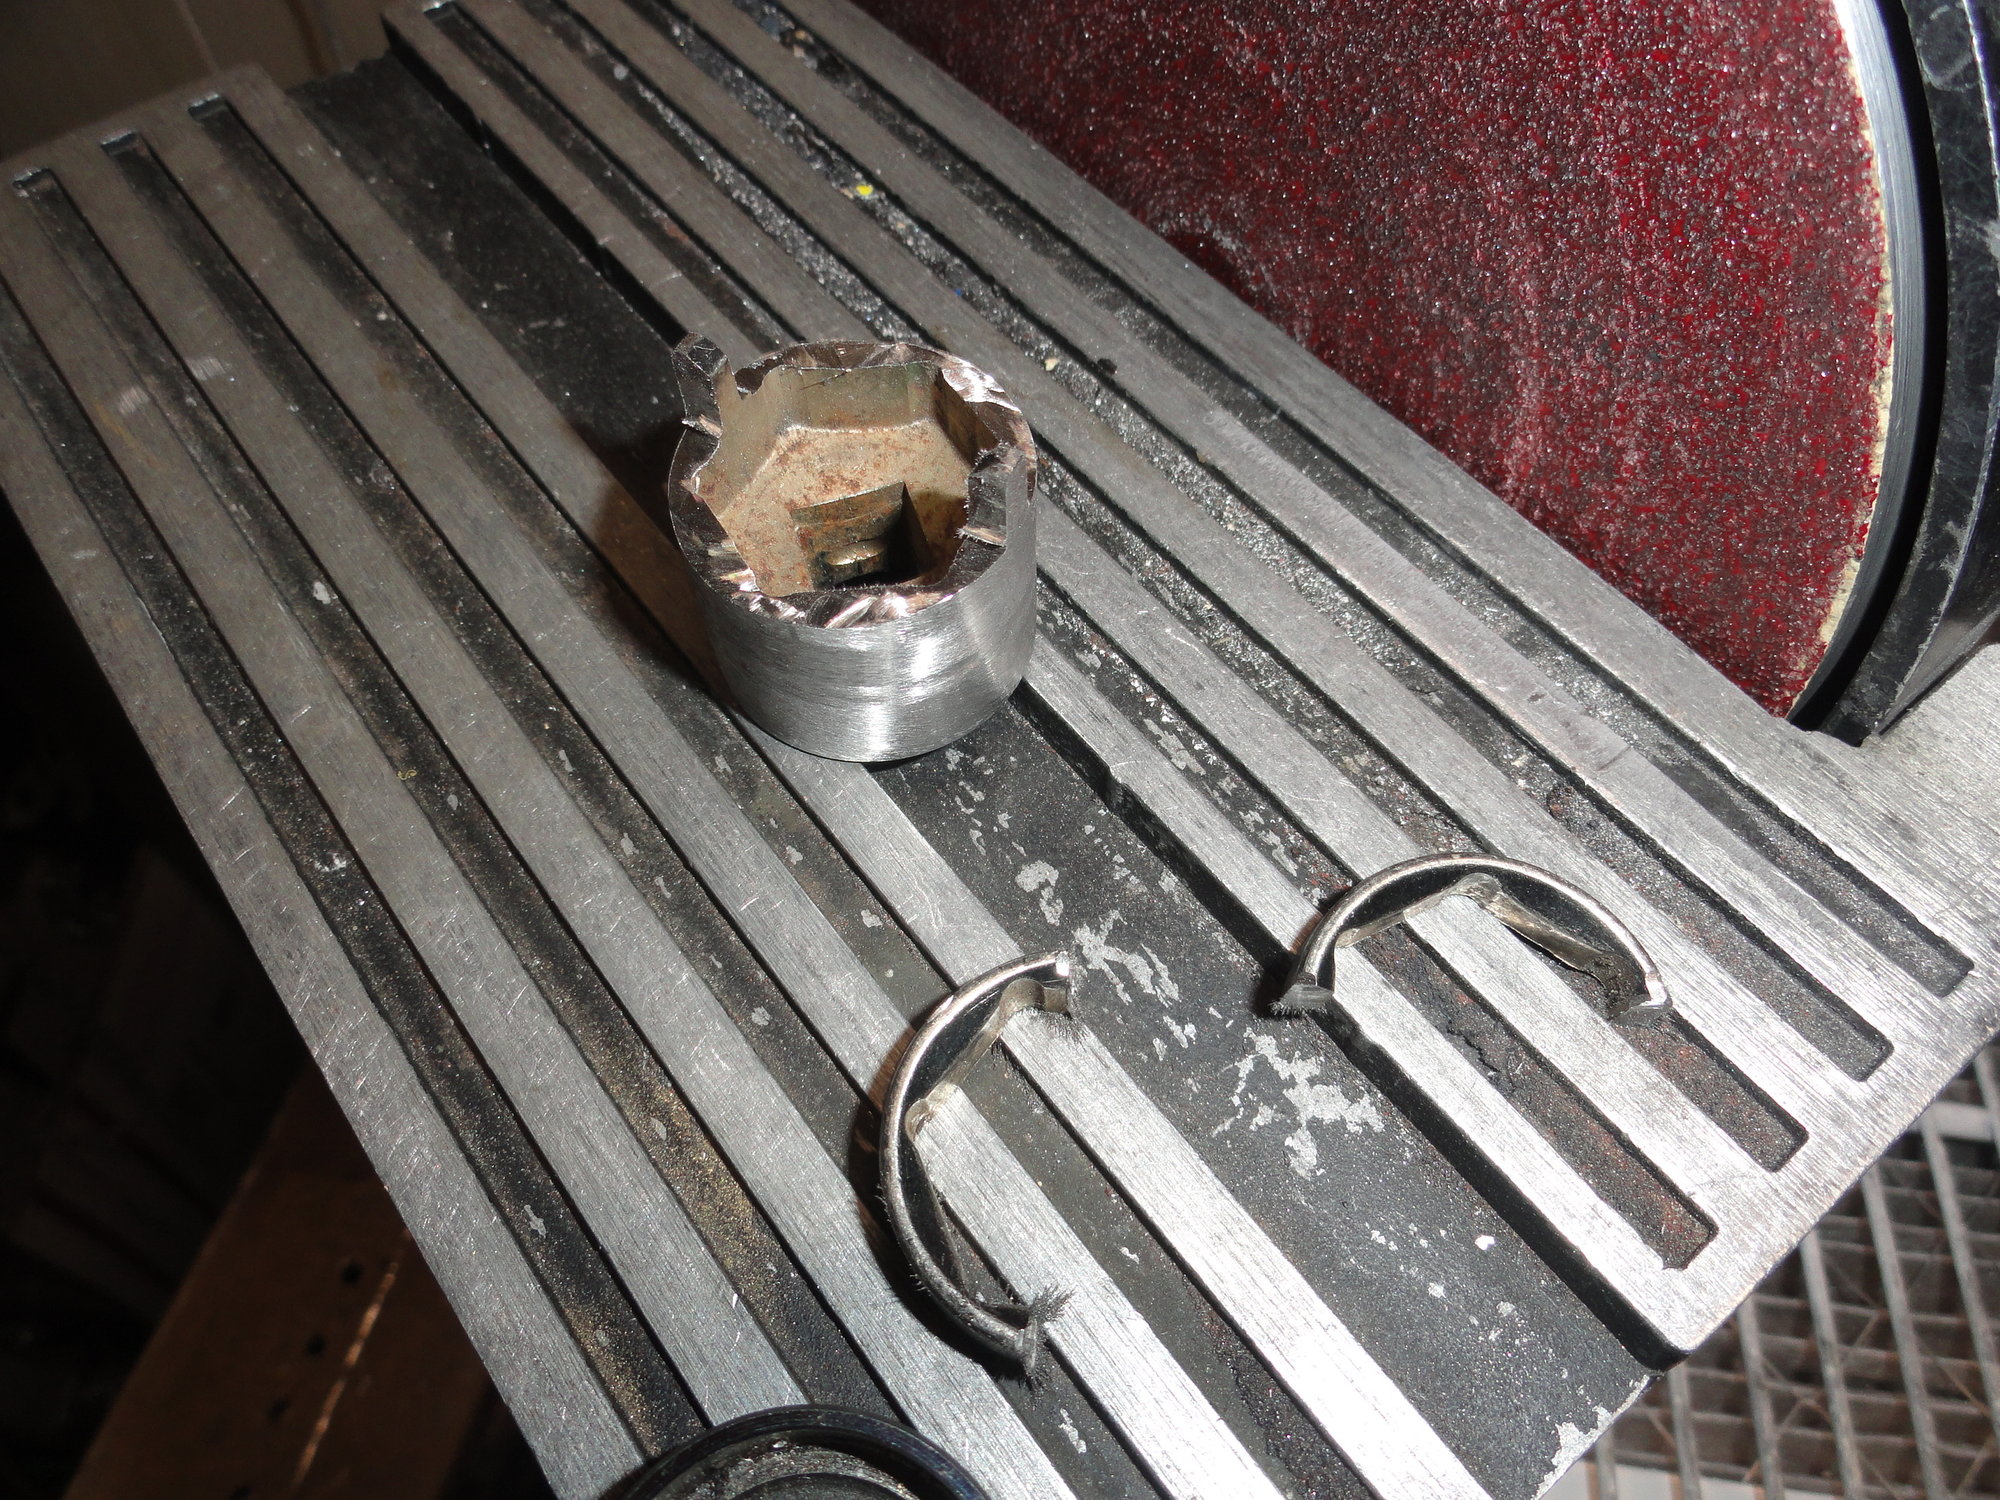
The socket with the bits of metal removed.
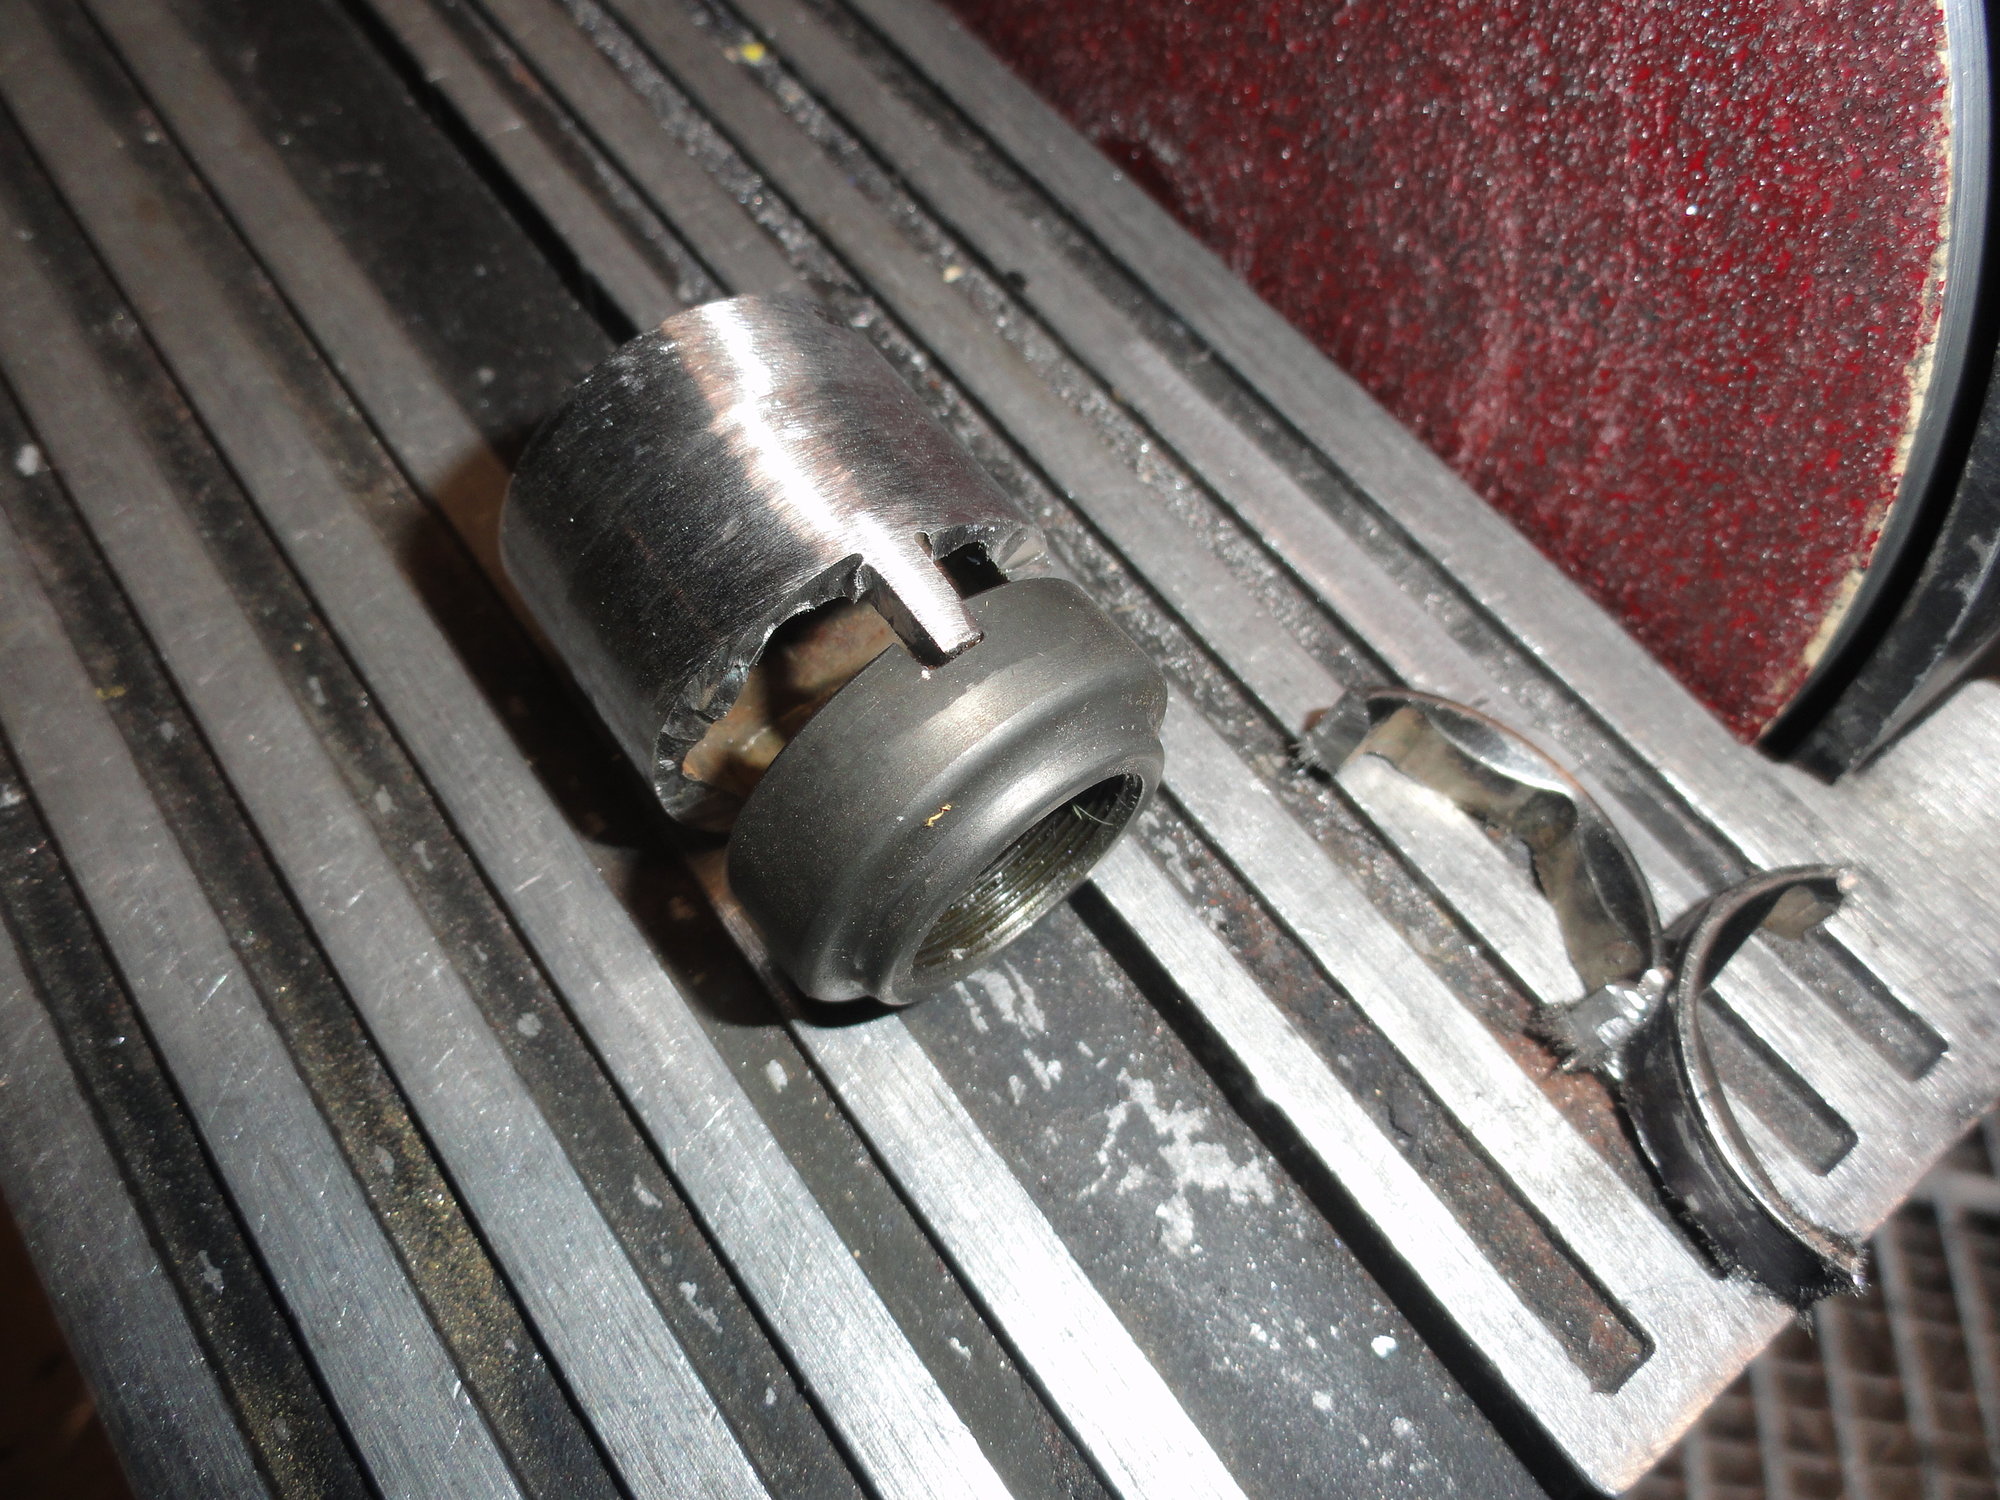
The tool as it meshes with the lock ring.
I have used three Dremel thin cut blades some grinding time with the socket and the cost of a cheap socket. Next to try to put it into action on a freehub. Smiles, MH
This was the "fity" cent socket from the pawn shop. You can see the outside diameter of the socket is just a bit large to fit in the body.
A little grinding and the fit is nice and smooth.
Now on to the process of making it into a free-hub tool. I start by cutting two slots in the widest section of the socket wall about the same size as the slots in the lock ring. Next is two slots across the socket to make the other pin for the tool to fit in the ring.
A lock ring and the socket with the two pins cut away on either side of the socket.
Next step is to remove anything that doesn't look like a lock ring tool. I have marked it black to show what is going to leave.
A bit more work on removing material and the tool is close to being finished. Some final burr removal and smoothing of the outer sidewalls of the tool.
The socket with the bits of metal removed.
The tool as it meshes with the lock ring.
I have used three Dremel thin cut blades some grinding time with the socket and the cost of a cheap socket. Next to try to put it into action on a freehub. Smiles, MH
Last edited by Mad Honk; 08-02-23 at 04:20 PM.
Likes For Mad Honk:
08-02-23, 02:42 PM
#11
working on my sandal tan

Join Date: Aug 2011
Location: CID
Posts: 22,670
Bikes: 1991 Bianchi Eros, 1964 Armstrong, 1988 Diamondback Ascent, 1988 Bianchi Premio, 1987 Bianchi Sport SX, 1980s Raleigh mixte (hers), All-City Space Horse (hers)
Liked 2,600 Times
in
1,593 Posts
A drag link socket of the right blade width ought to do the job, too. Maybe start with a 1.5" wide one (less than $20) and grind it down until it's 29mm wide. 
08-02-23, 05:59 PM
#12
Senior Member
Join Date: May 2019
Location: Bloomington, IN
Posts: 3,192
Bikes: Paramount, Faggin, Ochsner, Ciocc, Basso
Liked 2,174 Times
in
1,271 Posts
So here is the final result of the project earlier today: I used a hub with the freehub still attached, as it is easier to break the freehub body apart with the hub attached to a shell. So here goes...
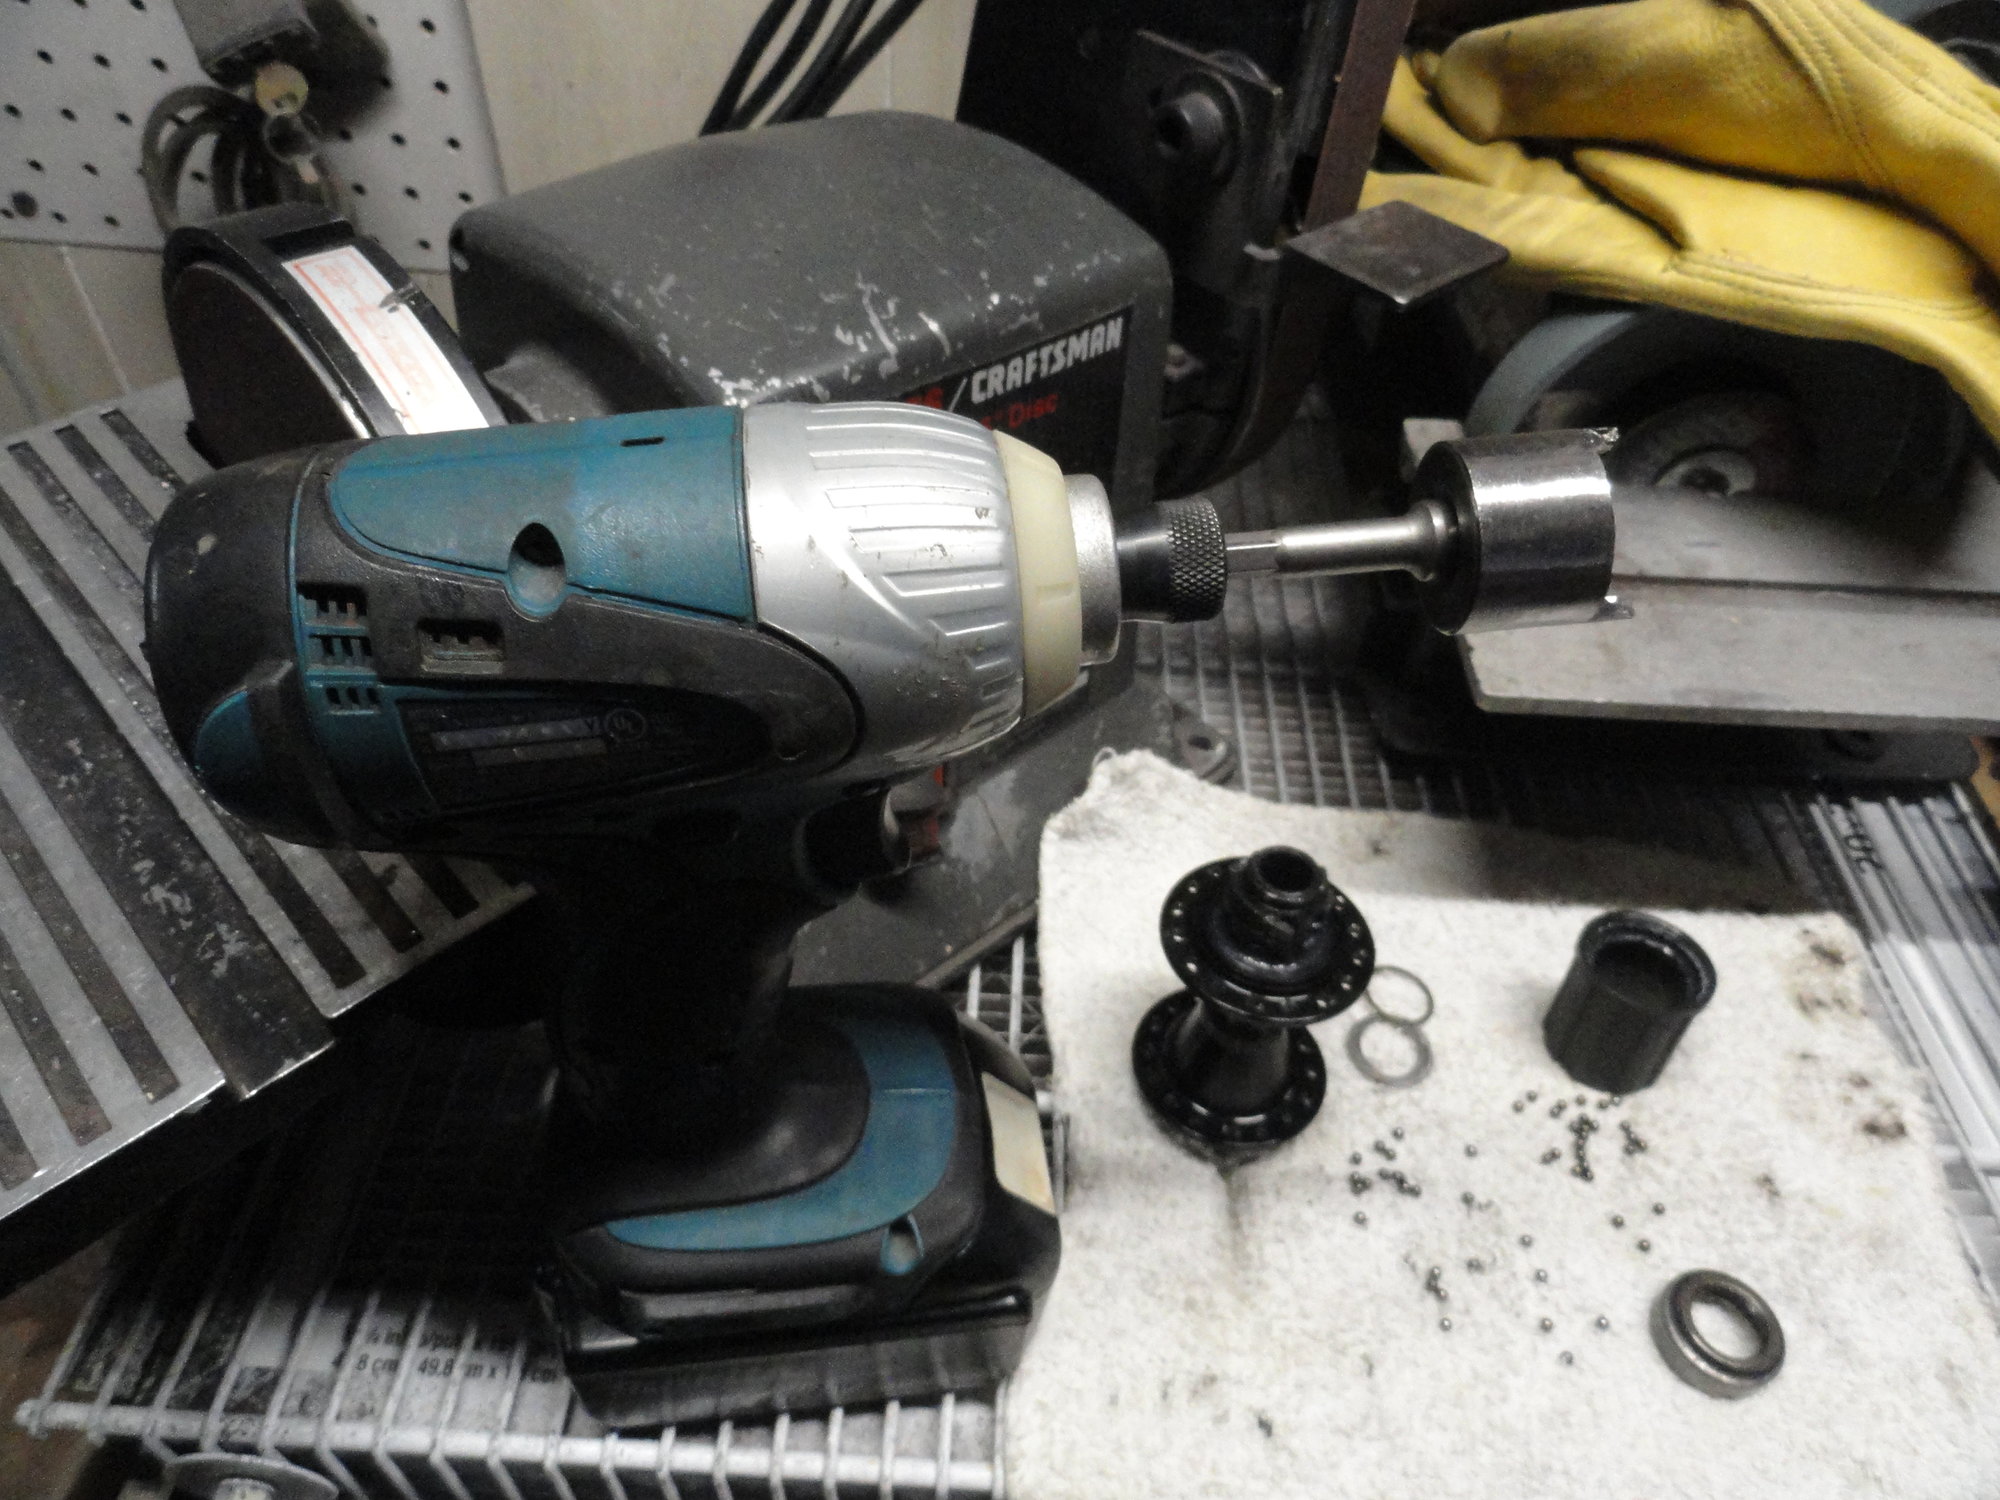
The tool attached to a small battery operated impact driver, that is going to be used to do the work.
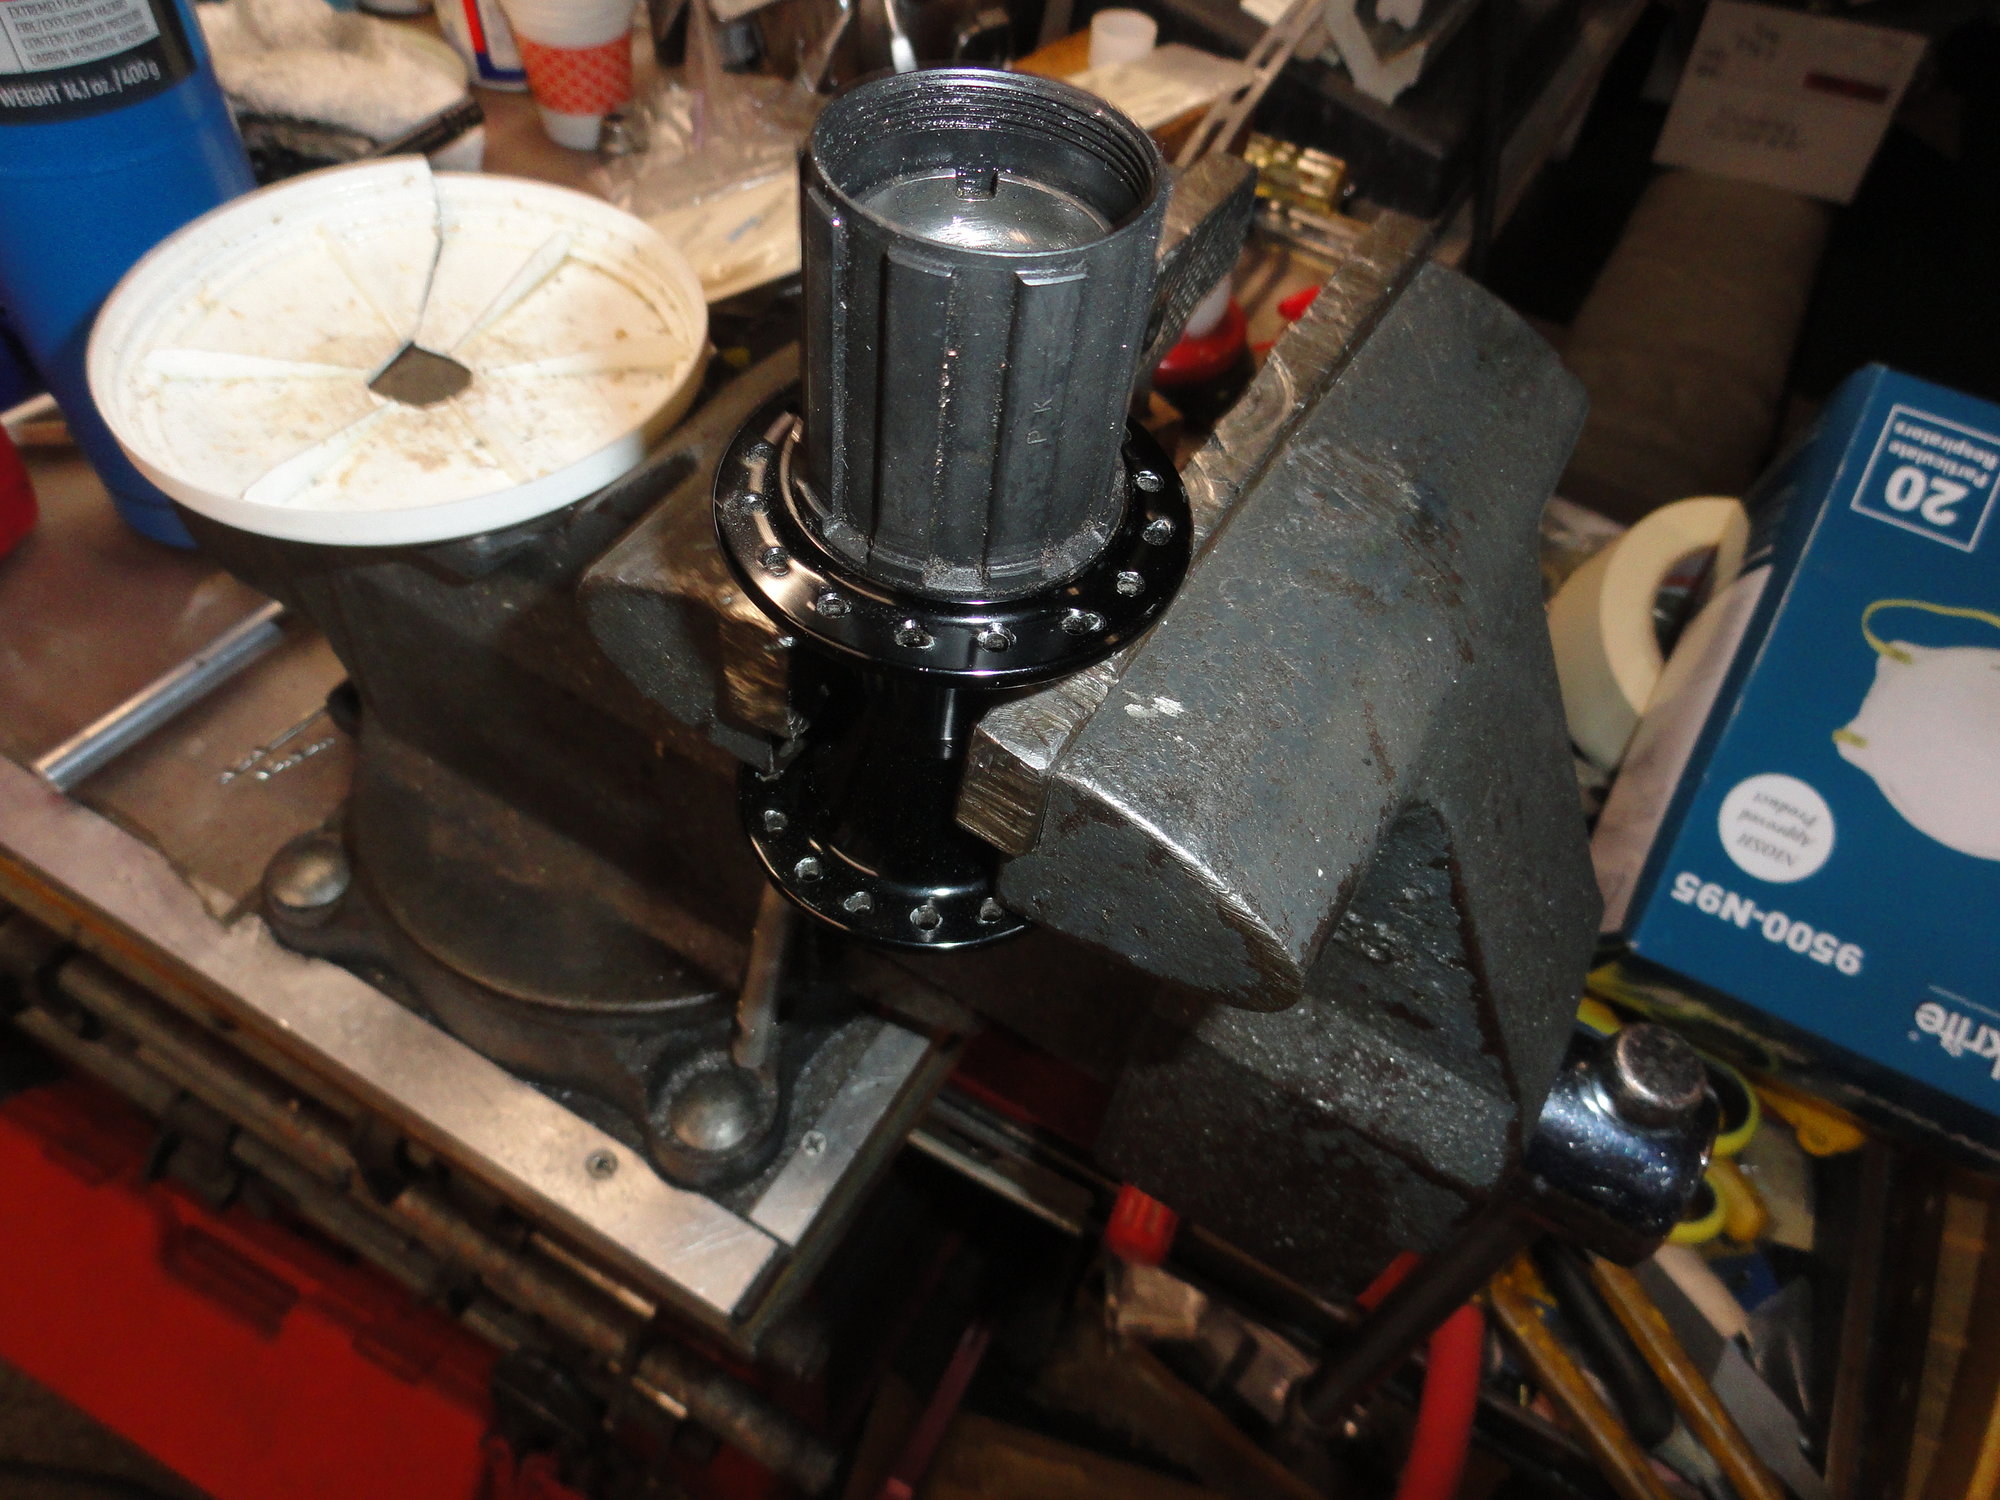
The hub shell with the freehub attached in the shop vise.

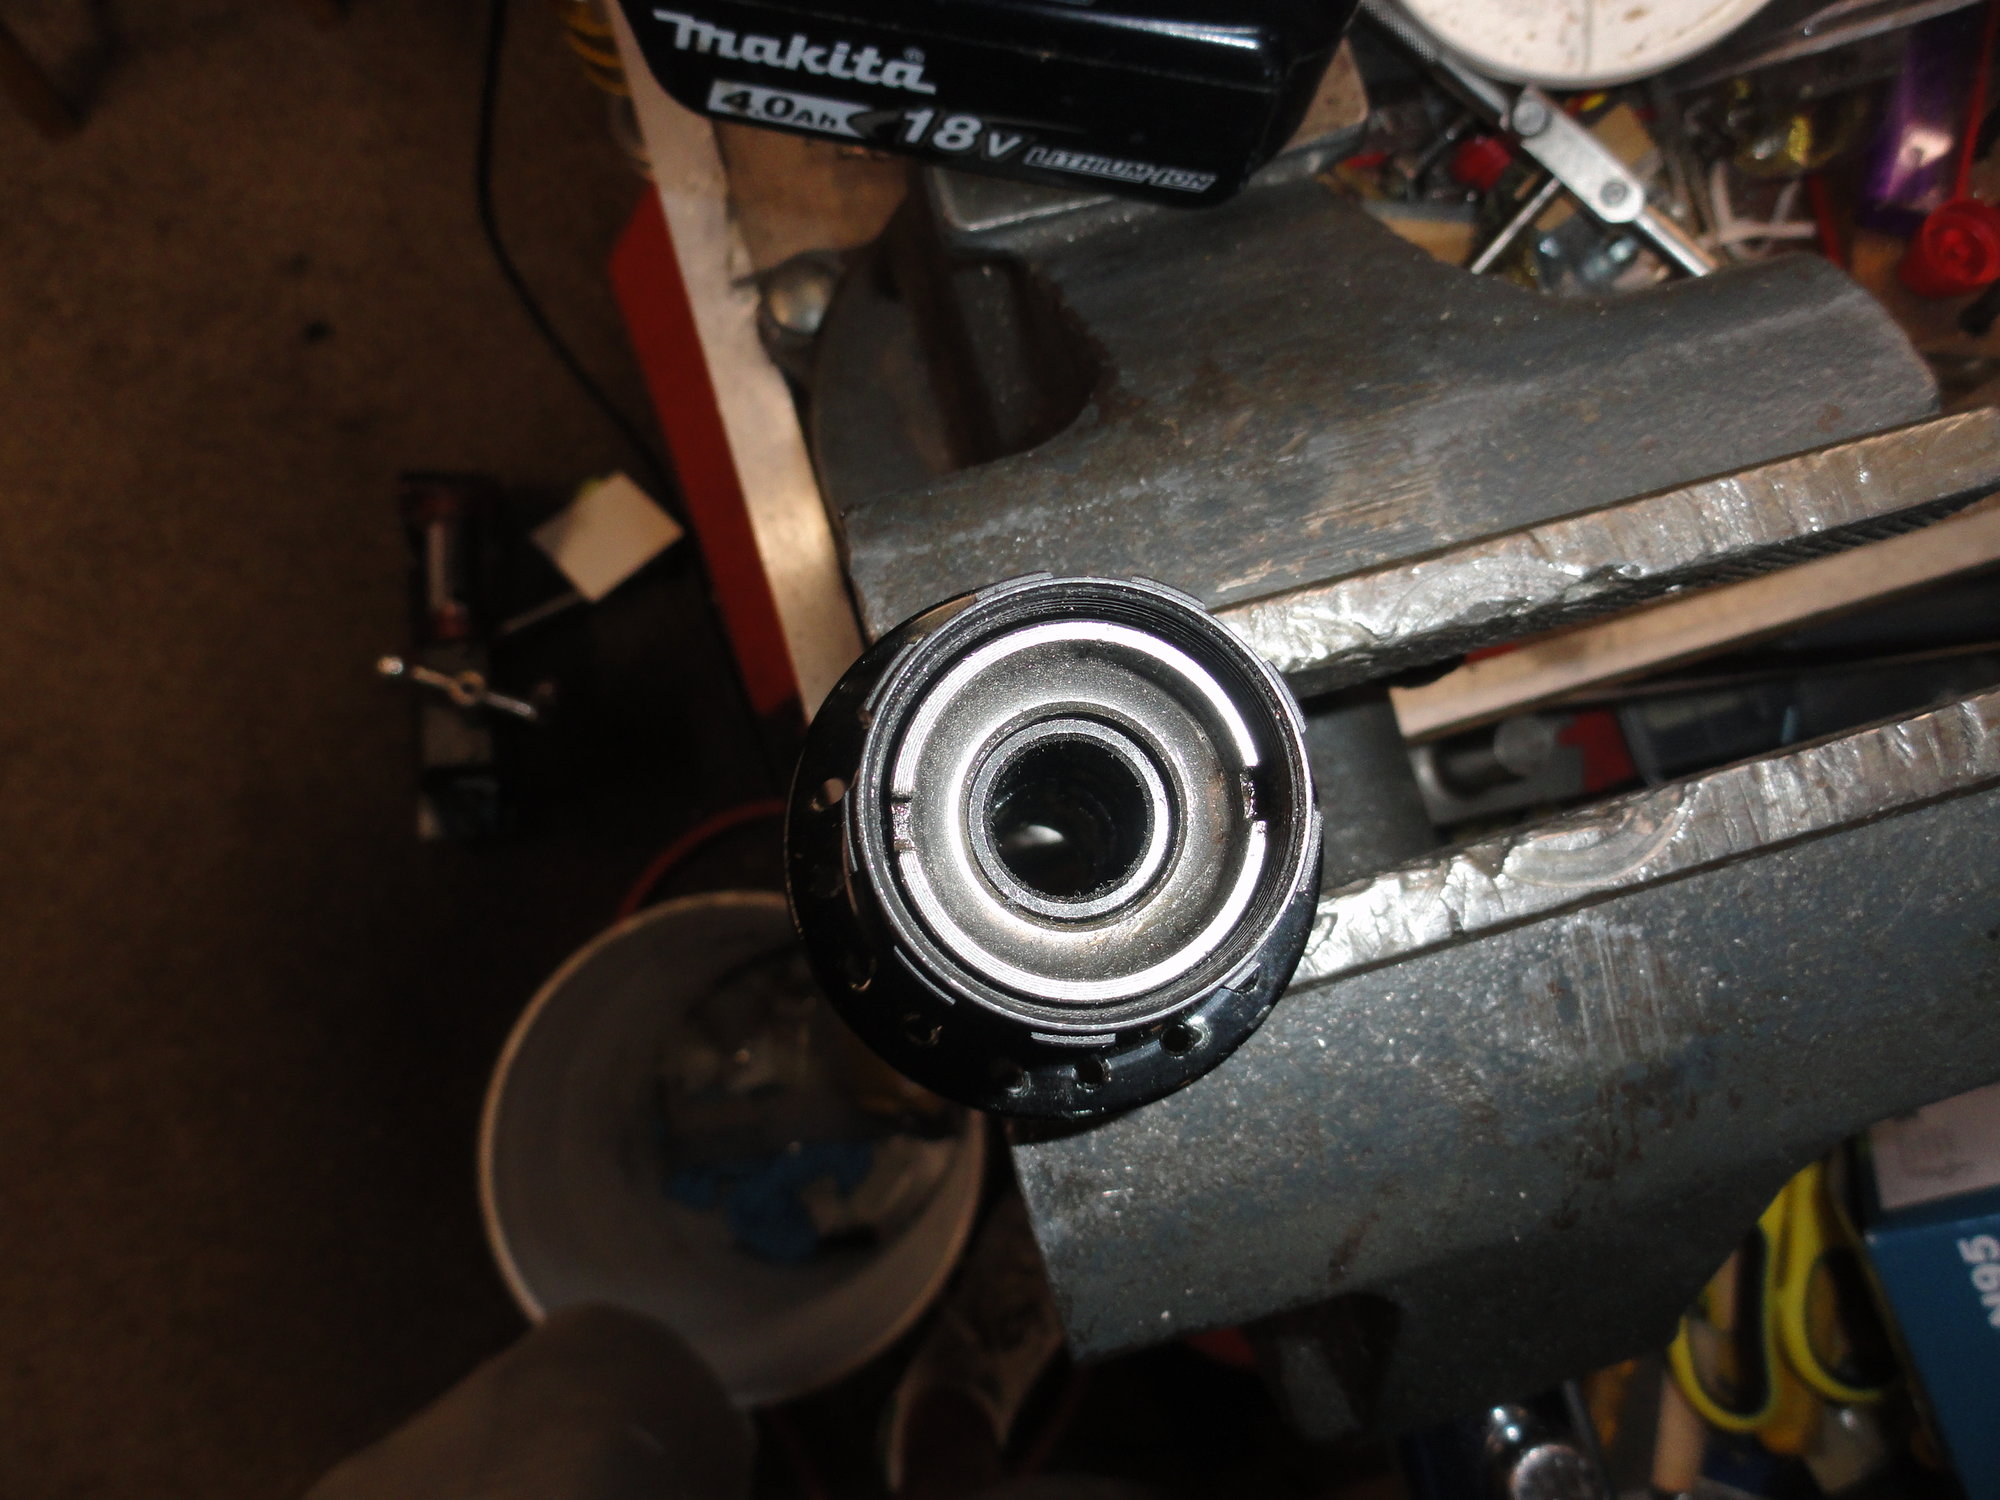
The lock ring as it came to me.
A single burst of power on the driver and tool combination and the lock ring is loose. About five seconds to open the freehub.
So the tool does indeed work as designed..
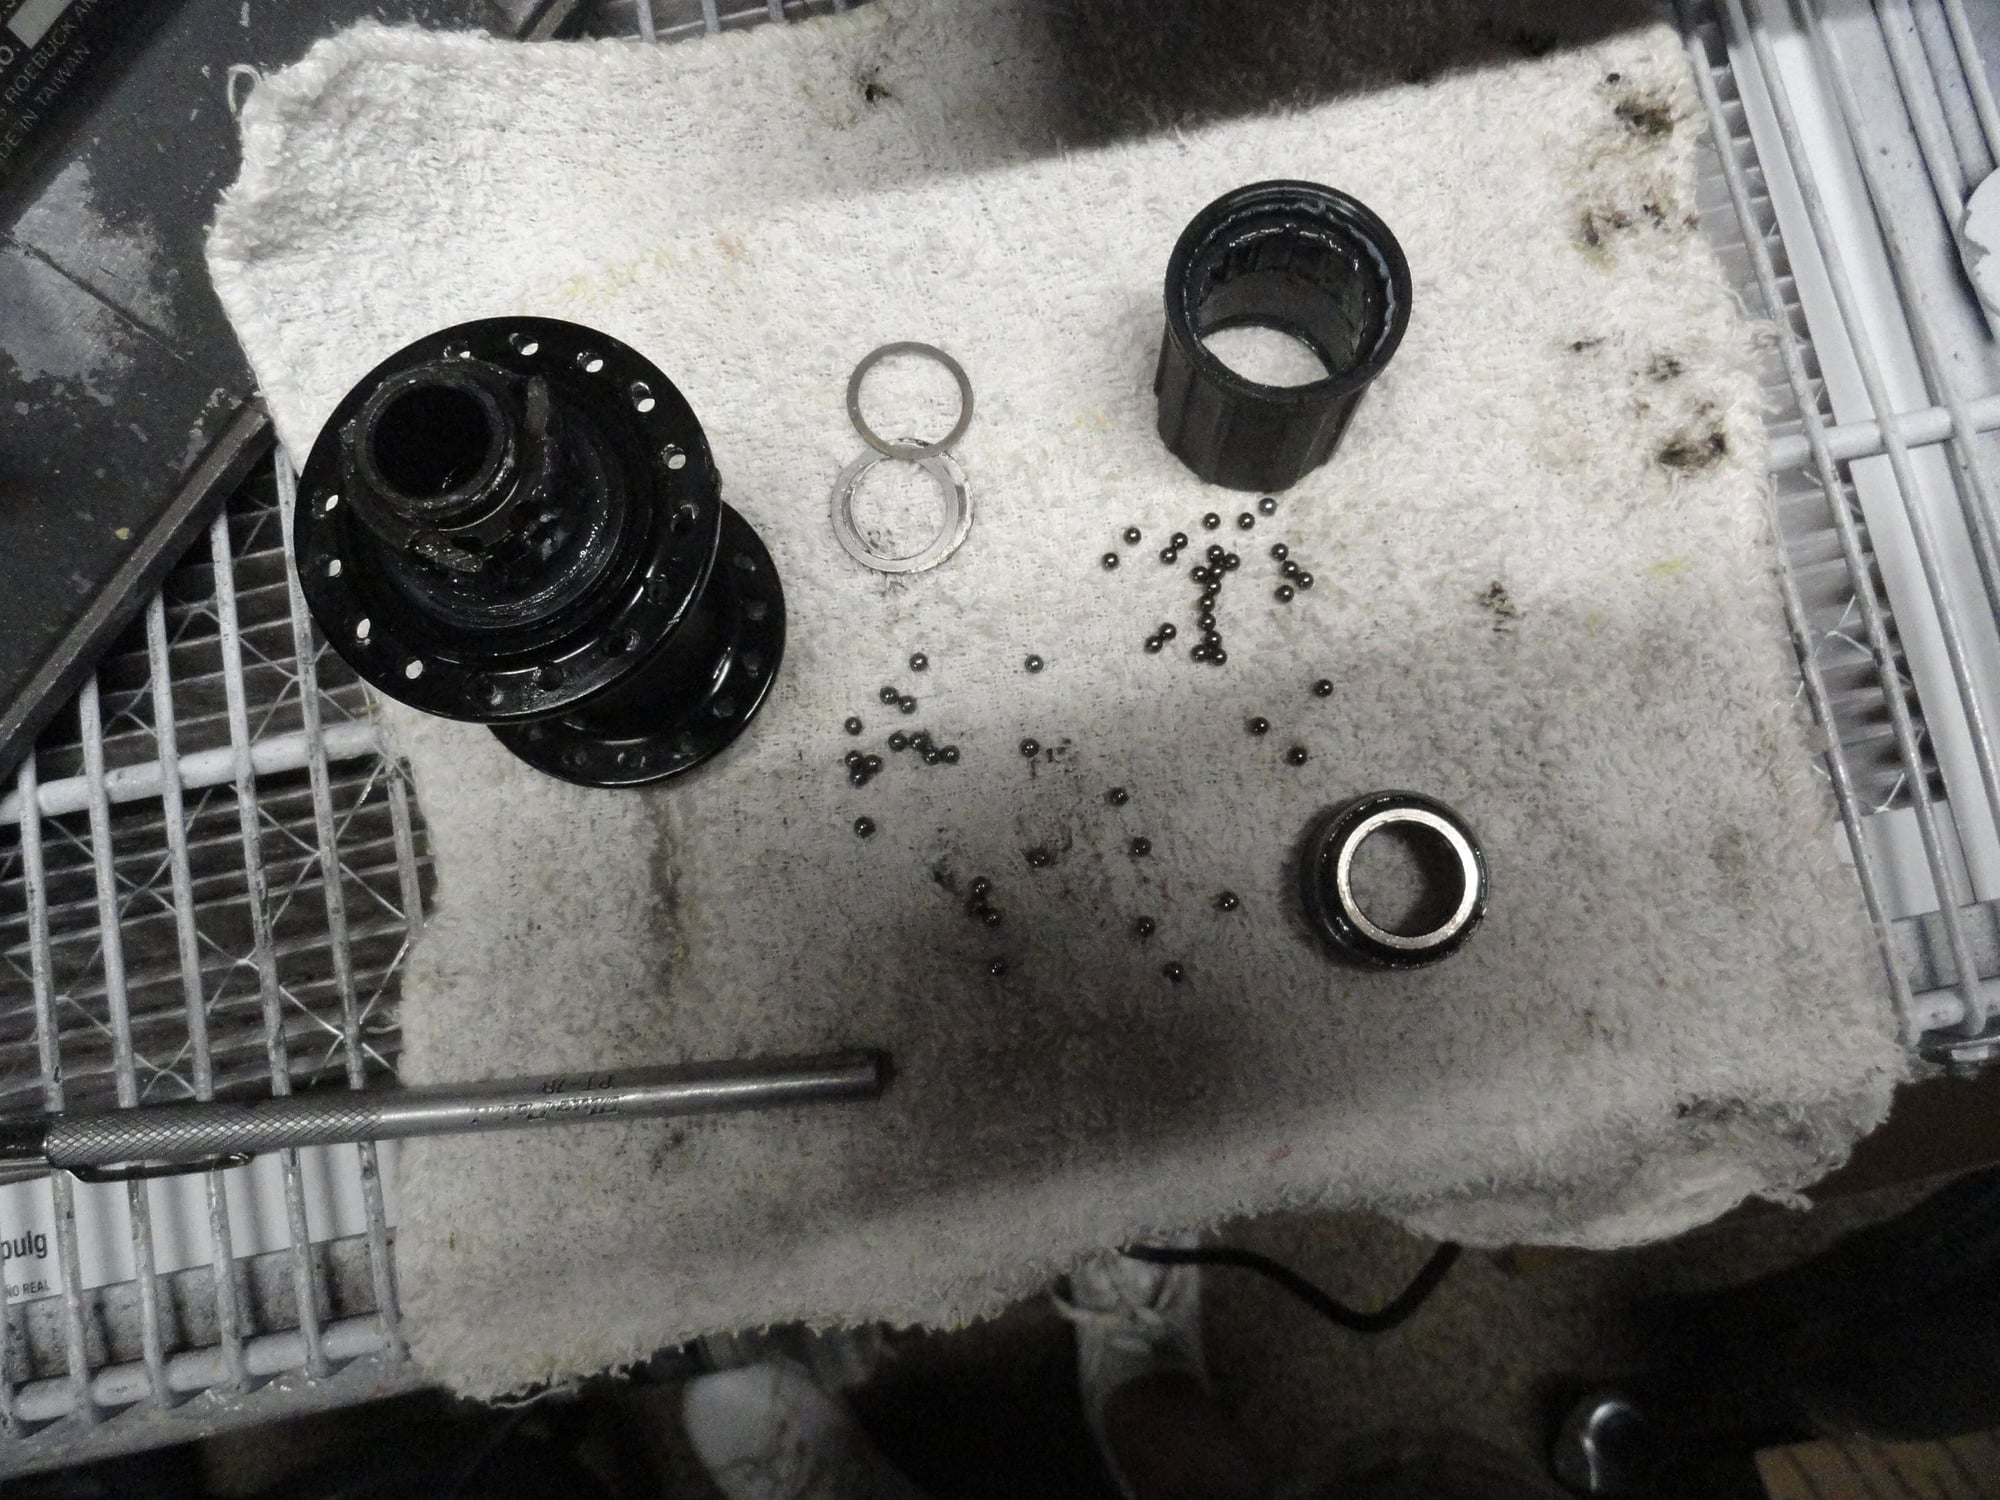
The hub shell and freehub parts after the short disassembly work.
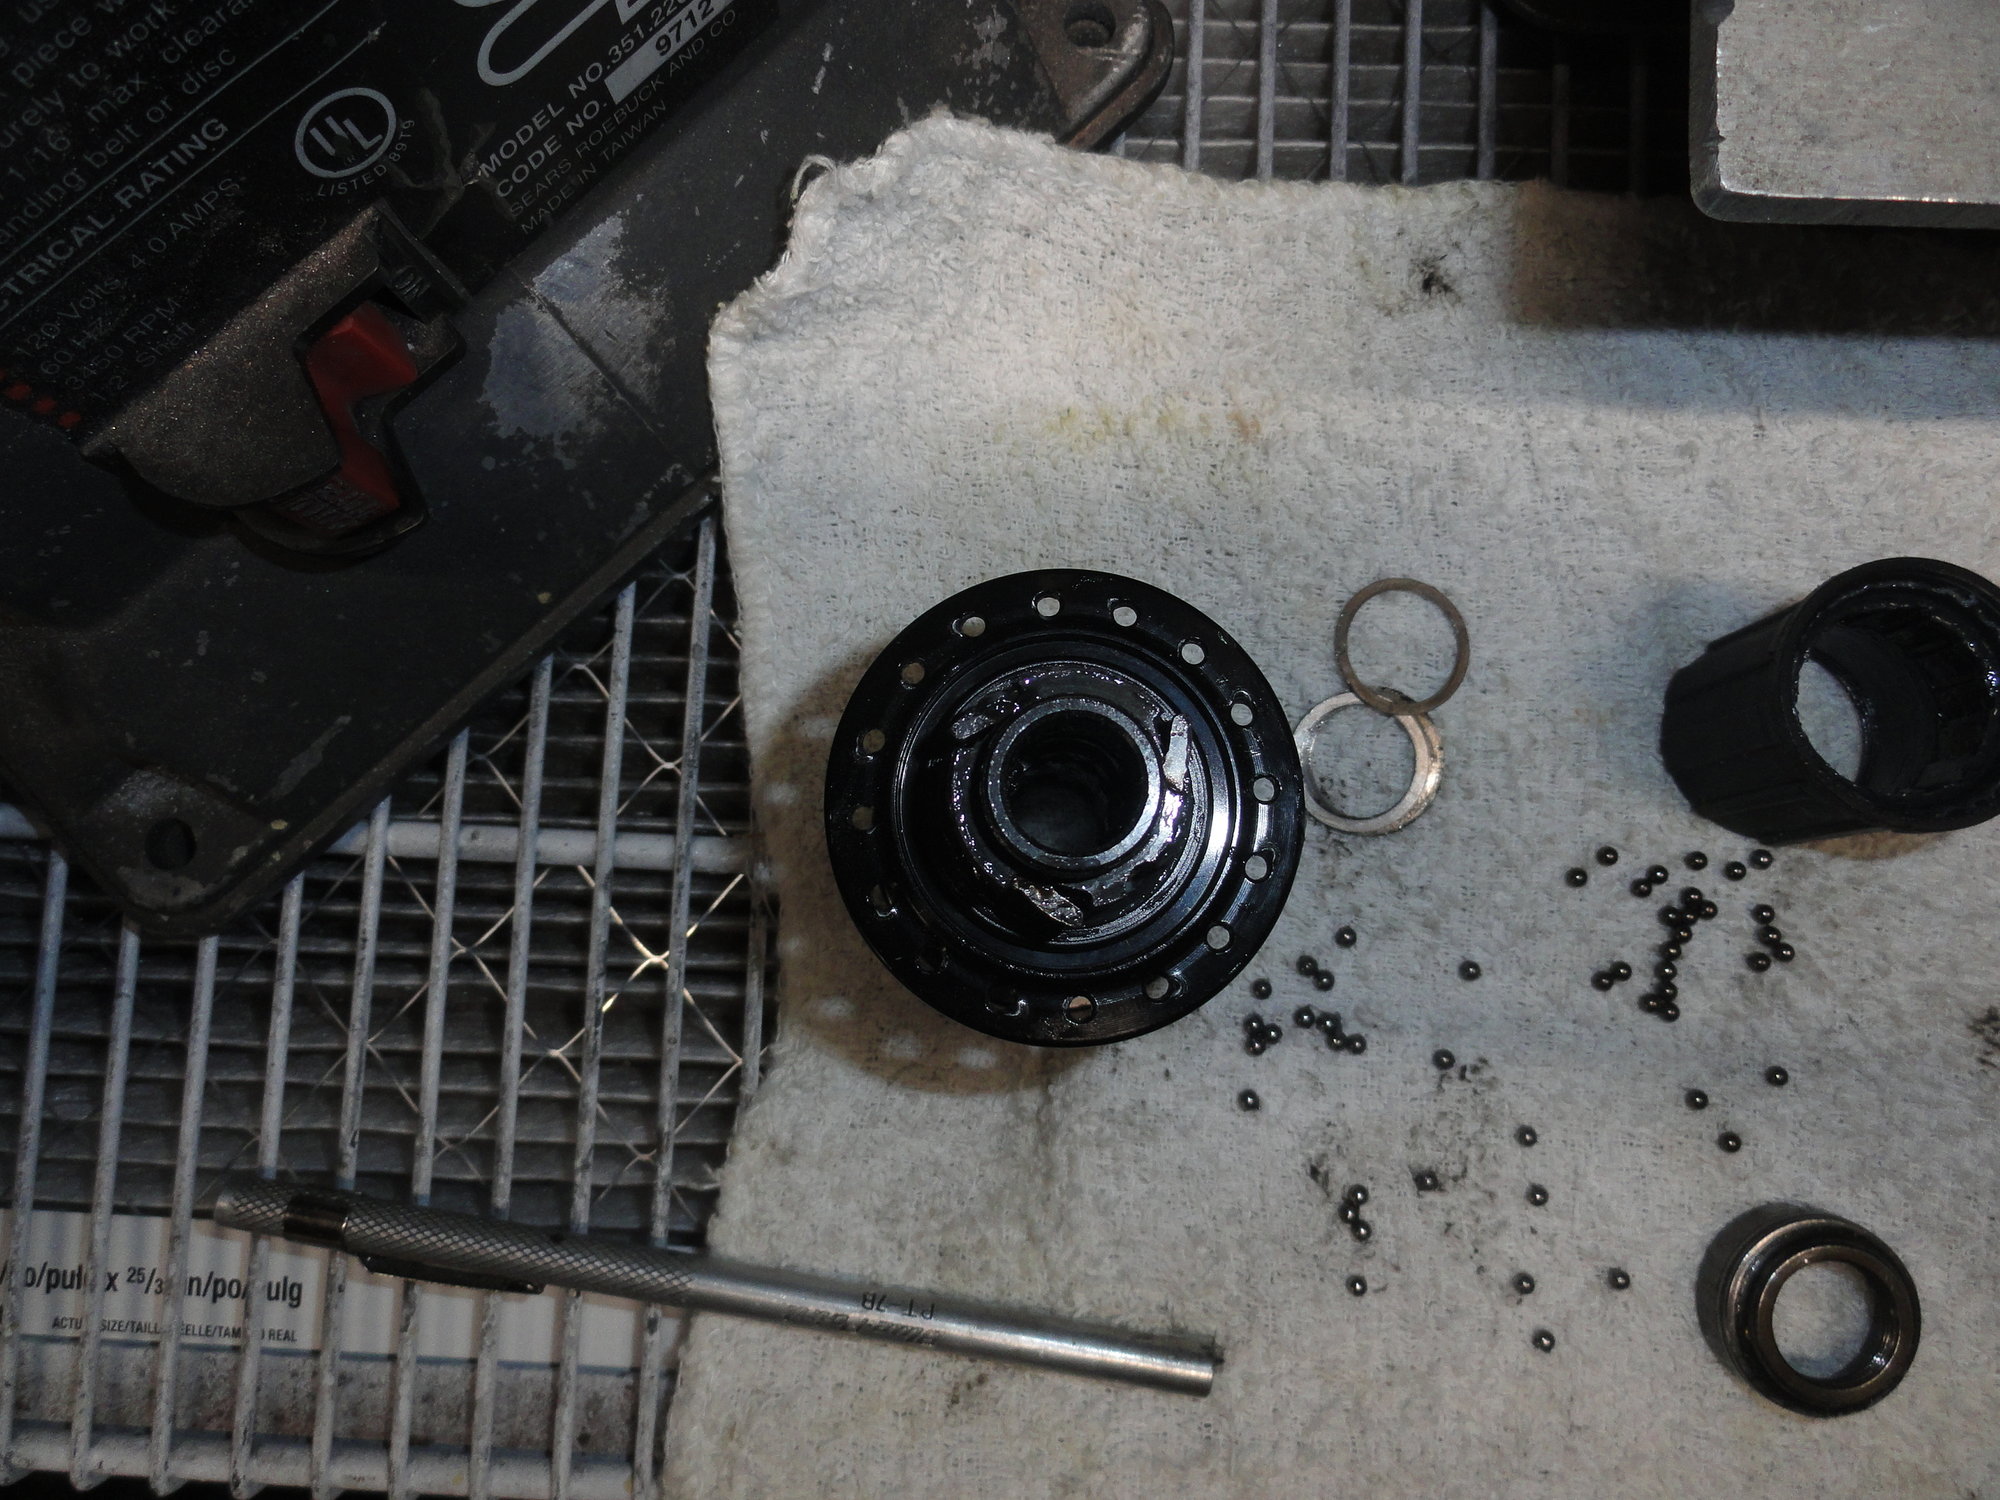
This picture does not do justice to the group of parts that came out of the freehub. Note the very few bearings in the freehub assembly.
I have been having a discussion with pastorbobnlnh (who owns the freewheel spa) about how the number of bearings is always fewer than optimum for a freewheel to work correctly. So the process is fairly easy and doesn't require a lot of expensive tools. I hope this shows how easy it is to rebuild the freehubs. Smiles, MH
The tool attached to a small battery operated impact driver, that is going to be used to do the work.
The hub shell with the freehub attached in the shop vise.
The lock ring as it came to me.
A single burst of power on the driver and tool combination and the lock ring is loose. About five seconds to open the freehub.
So the tool does indeed work as designed..
The hub shell and freehub parts after the short disassembly work.
This picture does not do justice to the group of parts that came out of the freehub. Note the very few bearings in the freehub assembly.
I have been having a discussion with pastorbobnlnh (who owns the freewheel spa) about how the number of bearings is always fewer than optimum for a freewheel to work correctly. So the process is fairly easy and doesn't require a lot of expensive tools. I hope this shows how easy it is to rebuild the freehubs. Smiles, MH
Likes For Mad Honk:
08-02-23, 08:06 PM
#13
You can buy the tool for $10-15 off Amazon
https://www.amazon.com/Yosoo-Health-...dp/B08C7XPV4X/
Youtube video of disassembly/reassembly
I rebuilt a bunch of freehubs from 2020 when parts were scarce.
https://www.amazon.com/Yosoo-Health-...dp/B08C7XPV4X/
Youtube video of disassembly/reassembly
I rebuilt a bunch of freehubs from 2020 when parts were scarce.
Likes For Spoonrobot:
08-02-23, 08:28 PM
#14
Senior Member
Join Date: May 2019
Location: Bloomington, IN
Posts: 3,192
Bikes: Paramount, Faggin, Ochsner, Ciocc, Basso
Liked 2,174 Times
in
1,271 Posts
I guess I should have just done a google search on this. Smiles, MH
