


Cracked Chainstay repair
 12-17-23, 06:34 PM
#1
Senior Member
Thread Starter
Cracked Chainstay repair
My friend stopped building frames a few years ago and sold all of his framebuilding tools, so he's been referring local customers to me for repairs. This frame is owned by a rider that is particularly hard on frames and has cracked a number of them over the years. The drive side chainstay cracked at the bottom bracket and the owner requested more tire clearance. I could have just replaced the stay and dimpled both stays deeper, but that just felt like a recipe for another cracked stay in the future. We settled on replacing it with a yoke of the same style that I use on my MTB frames.
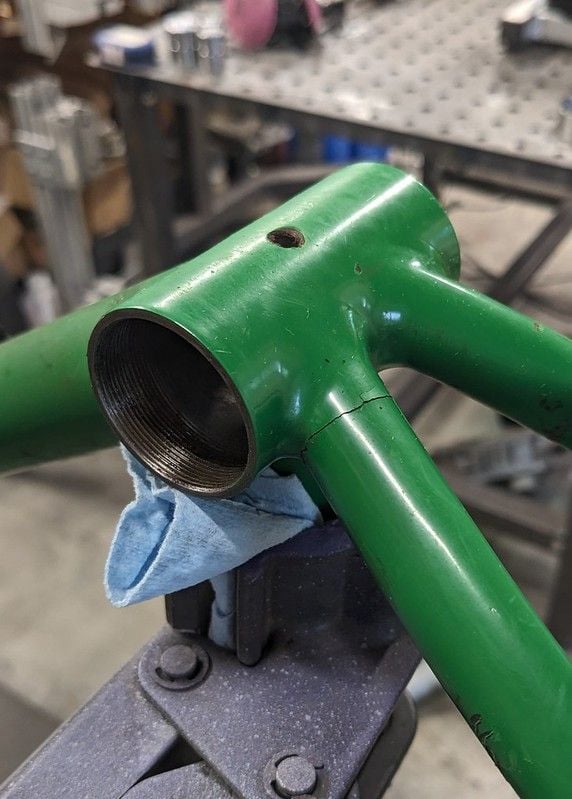
Cracked drive side chainstay
After some careful measuring and nervous moments, I cut the chainstays with a hole saw of the same diameter as the section of tube that would make up the yoke. Then I carefully removed the ends that were still attached to the bottom bracket and cleaned it up to prepare for welding.
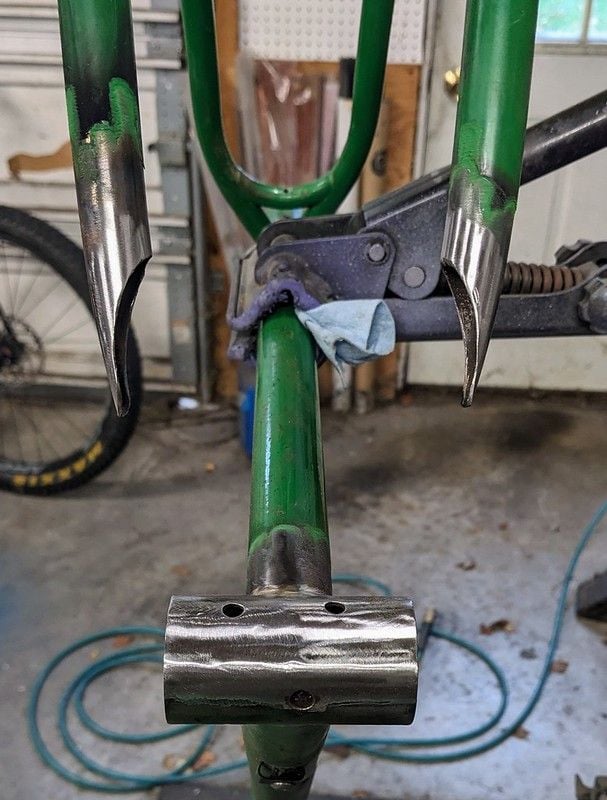
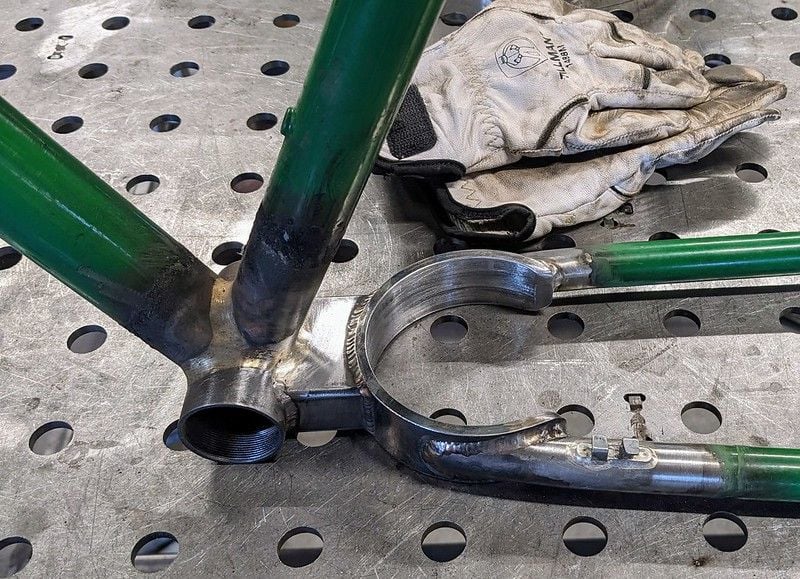
I made the yoke from a section of 3.75" mild steel tube that was turned down to .200" wall thickness in the lathe. That section of tube was welded to a 2" x .75" section of .065" wall mild steel rectangle tube that was mitered in the mill to fith the tube. I marked and rough cut out a section of the tube and then milled it to make a symmetrical opening for the tire. After some more careful measuring, I mitered the rectangle section of tube to fit the bottom bracket. It actually took several test fits and incremental cuts to get the perfect fit before welding it into the frame.
The frame was originally fillet brazed, so I couldn't weld the section where the yoke overlapped the seat tube/bottom bracket joint. I welded as close to it as possible and then TIG brazed the rest with silver filler.
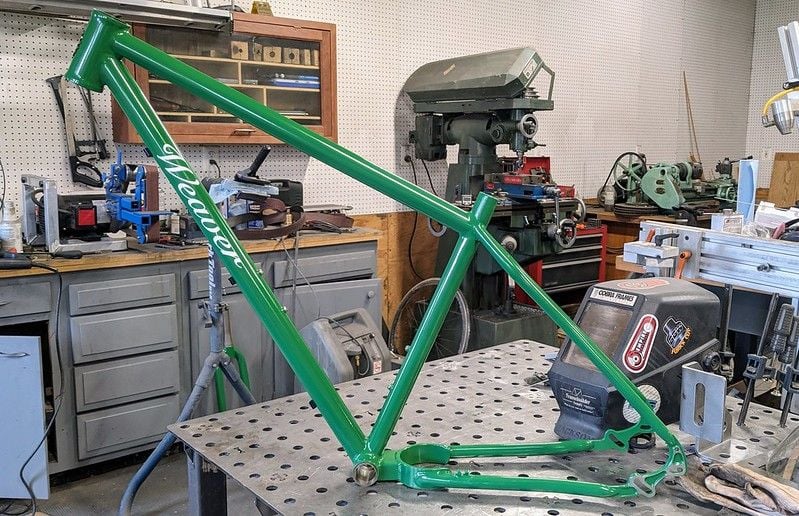
This is the repaired frame with fresh powder coating and some new decals. Hopefully it lasts for many more years.
Cracked drive side chainstay
After some careful measuring and nervous moments, I cut the chainstays with a hole saw of the same diameter as the section of tube that would make up the yoke. Then I carefully removed the ends that were still attached to the bottom bracket and cleaned it up to prepare for welding.
I made the yoke from a section of 3.75" mild steel tube that was turned down to .200" wall thickness in the lathe. That section of tube was welded to a 2" x .75" section of .065" wall mild steel rectangle tube that was mitered in the mill to fith the tube. I marked and rough cut out a section of the tube and then milled it to make a symmetrical opening for the tire. After some more careful measuring, I mitered the rectangle section of tube to fit the bottom bracket. It actually took several test fits and incremental cuts to get the perfect fit before welding it into the frame.
The frame was originally fillet brazed, so I couldn't weld the section where the yoke overlapped the seat tube/bottom bracket joint. I welded as close to it as possible and then TIG brazed the rest with silver filler.
This is the repaired frame with fresh powder coating and some new decals. Hopefully it lasts for many more years.

Likes For dsaul:


Likes For spclark:
12-17-23, 06:55 PM
#3
blahblahblah chrome moly

I love your little knee mill. I used one of those at work for 10 years, fond memories. Only have room for a benchtop mill now alas.
Is your belt grinder home-built? Am I seeing right, that it can be stood up to use it horizontally?
C'mon, give us a shop tour!
Is your belt grinder home-built? Am I seeing right, that it can be stood up to use it horizontally?
C'mon, give us a shop tour!
Likes For bulgie:
12-17-23, 07:55 PM
#4
framebuilder
This would make an excellent separate subject thread. I'd like to see other shop's as well. Seeing what tooling others have and how things are done could spark many other subject threads.
Likes For Doug Fattic:
12-18-23, 02:47 AM
#5
Senior Member
Beautiful job! Do the chainrings still fit?
12-18-23, 06:15 AM
#6
Newbie
frame repairs down under
there is one frame repairer in aussie,I just had the frame builder braze in a new rear brake bridge on my older tange tubing gemini bike,did not cost alot either,some previous owner thought it was a cool idea to drill out the brake bridge so i got a new one put there,there are not many people left doing this work now,alot of these older bike from the 80s and 90s are definatly worth saving,if your fixing it up yourself its not big deal,it can get very expensive if you get someone else to build it up,so far i have 3 older retro ones going all built up with modern parts,its not too cheap even if you do it all yourself,powdercoating alone was $250 for one bike.I learnt quiet a bit about older parts and what fits and what does not work,the frame builder charges 4 grand for a custom made columbus tubing bike,if you want a nice lighter one he can do a triple butted racing one
12-18-23, 06:16 AM
#7
Senior Member
Thread Starter
Likes For dsaul:
12-18-23, 06:36 AM
#8
Senior Member
Thread Starter
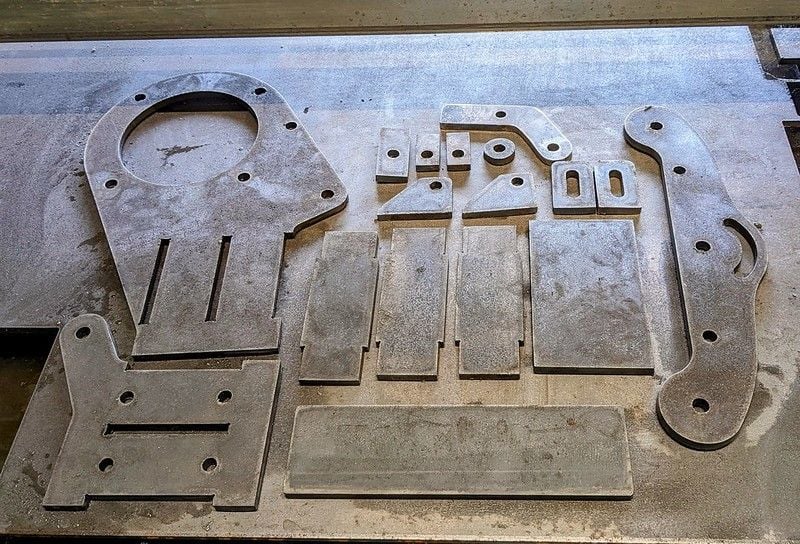
Here are most of the parts after I cut them on my plasma table.
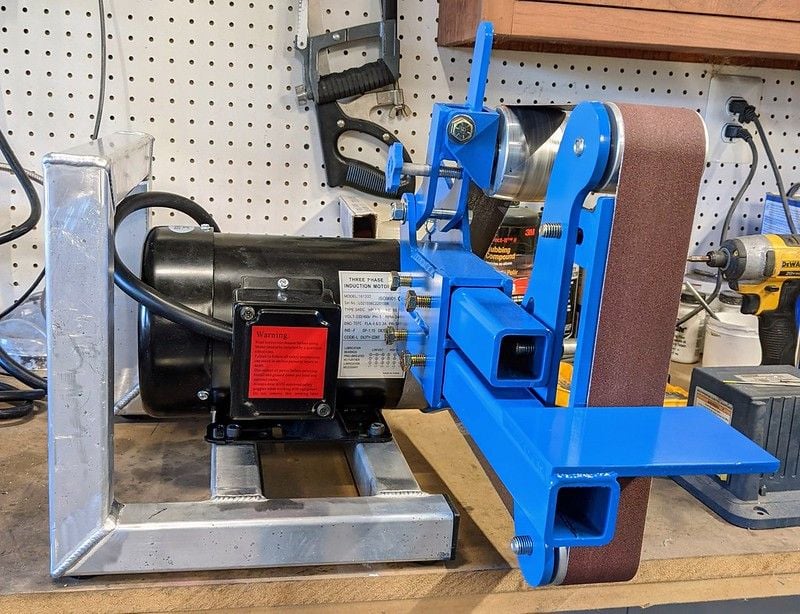
I had a can of this Blue paint left over from another project, so it got painted blue. You can see the cheap VFD on the wall, that allows me to run this 3 phase 220 motor from a 110 outlet. It works well, but you lose some of the rated horsepower on the motor.
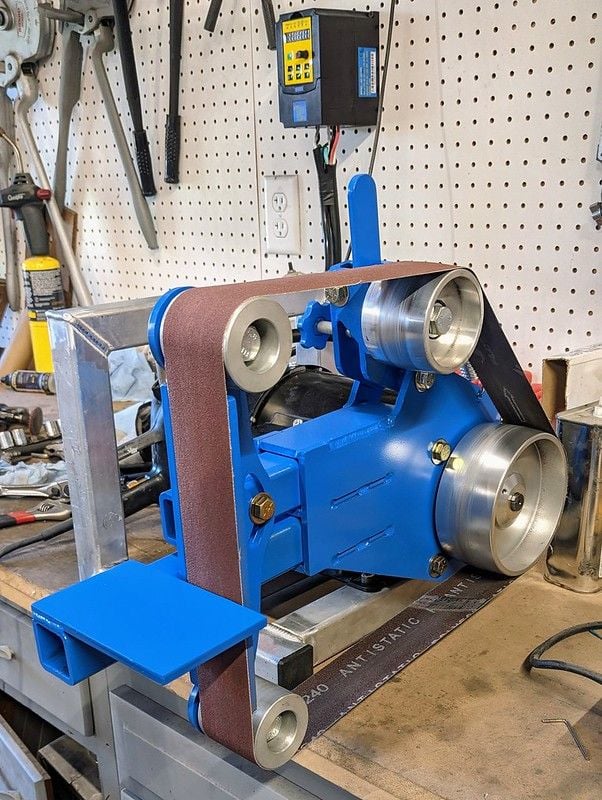
The stand was made from some aluminum square tube that was left over from another project. This picture was taken before I put the rubber feet on it.
Likes For dsaul:
12-18-23, 12:36 PM
#9


Randomhead
Join Date: Aug 2008
Location: Happy Valley, Pennsylvania
Posts: 24,874
Liked 4,042 Times
in
2,753 Posts
That looks really nice. I want a sander like that, but I don't have any place to put it and I probably wouldn't use it. Nestor C. is doing good work with his, I assume most people here follow him somewhere on social media.
12-18-23, 04:15 PM
#10
framebuilder
A belt sander was the tool I didn't have at our workshop where we made frames in Bucha, Ukraine that I missed the most. When the Russians broke in to steal whatever they wanted, they took many of our basic tools like drills and grinders and probably would have taken the grinder if we actually had one. I couldn't buy a belt sander at the local big box store (now totally destroyed). When I started building frames in 1975, I didn't think a belt sander would have been that valuable. However a machinist friend said he liked his a lot so I took his advice and got one. They are just so handy,
By the way the Russians didn't bother to take any of the bike specific tools like our frame and fork fixtures so I was very thankful for that. Now they would be much more difficult and expensive to replace. Yuriy, the guy in charge of the shop, bought new general tools in the western part of Ukraine where they fled to escape the worst of the war. He just wrote me this week to say they see drone bombs flying overhead. Our shop was about 20km from the center of Kyiv. As a refresher, Bucha was the staging area for the Russian push into Kyiv but got stopped by being unable to cross the Irpin river/raven. The Ukrainian blew up the bridge so they couldn't. The airport was just to the north of the college campus where the workshop is located. I heard the world's biggest cargo plane land one time (that is where it was stored) and it made an enormous sound.
df
Likes For Doug Fattic:
