


I have a problem with my rear derailleur (300EX)
 08-09-19, 06:23 AM
#1
Senior Member
Thread Starter
I have a problem with my rear derailleur (300EX)
Hi.
I took my back wheel off to replace the bearings and clean out of the cup and cone (first time ever doing this). When I put the back wheel back on the derailleur is looking strange. When I shift into the higher gears it scrunches up like in the photo. I have adjusted the b screw to no avail.
I am not too au fait with adjusting derailleurs so I don't want to tamper with it any more until I get some advice from here. After watching some videos on YT I adjusted my derailleur on my hydrid once, which took a lot of trial and error and at the end it did click in my head how to do it but now I have forgotten the knack.
Please see picture and advice best course of action.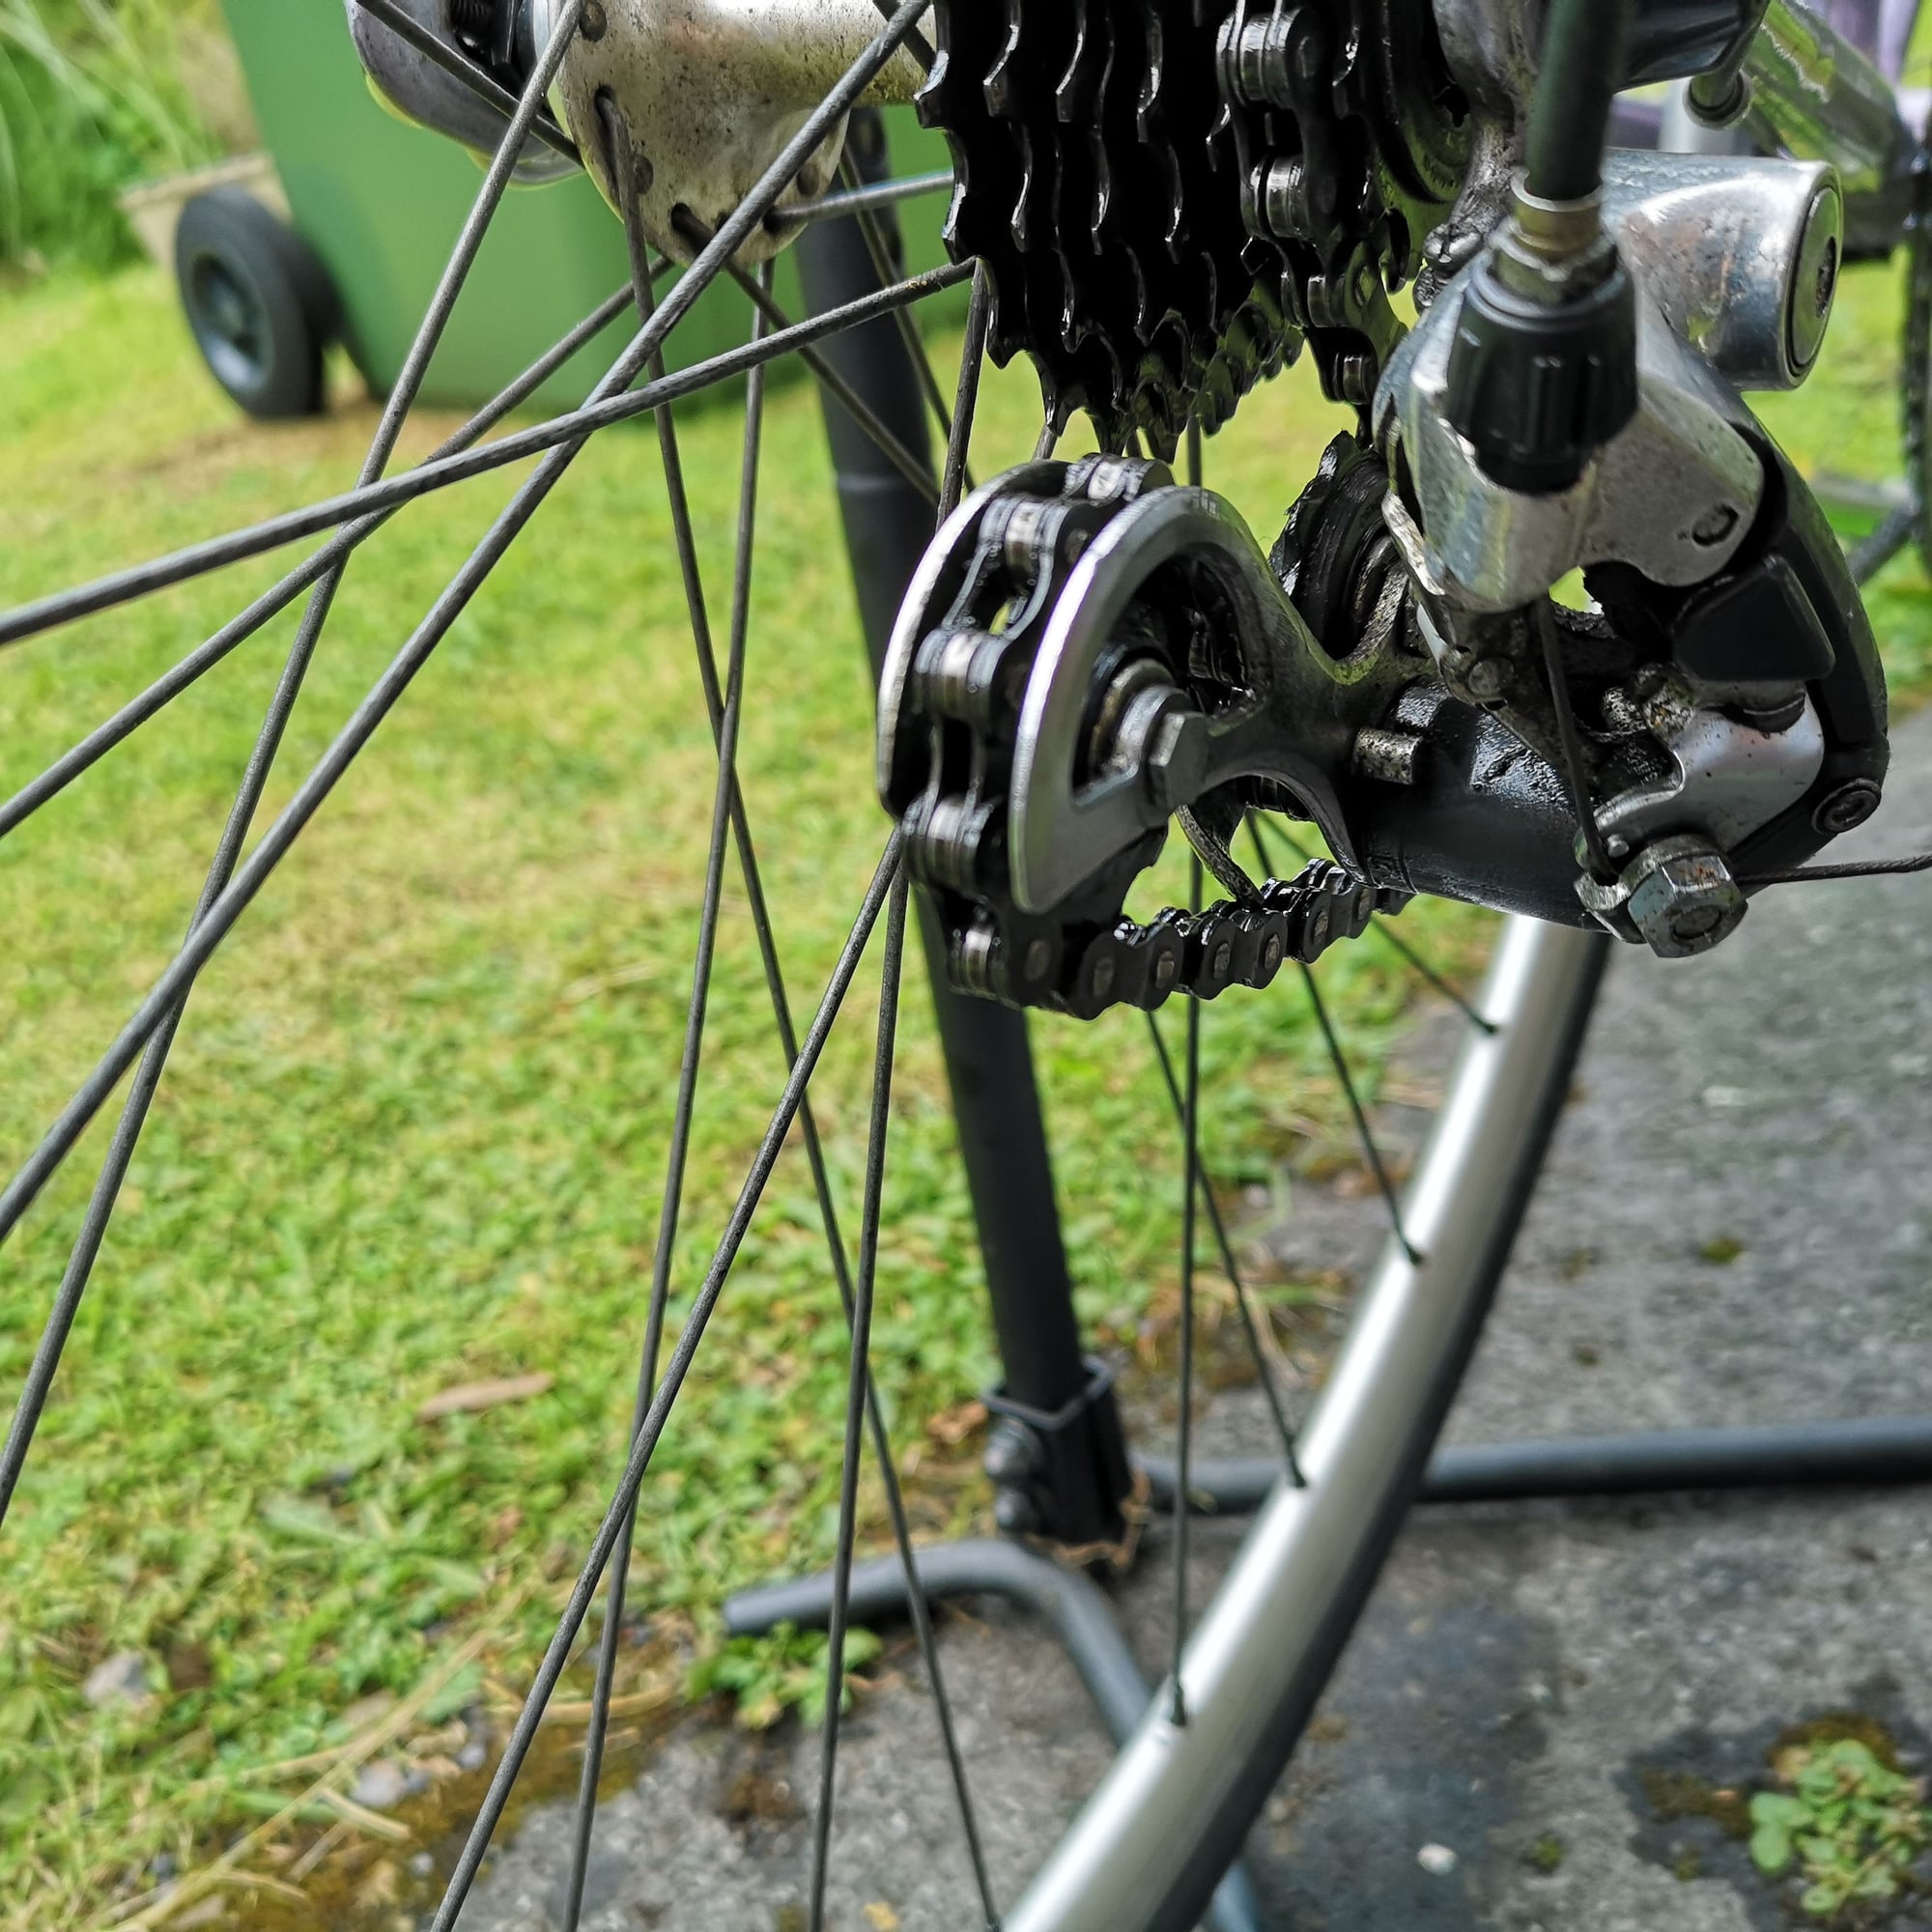
 08-09-19, 07:41 AM
#2
Senior Member
Join Date: Aug 2006
Posts: 1,895
Mentioned: 8 Post(s)
Tagged: 0 Thread(s)
Quoted: 184 Post(s)
Likes: 0
Liked 67 Times
in
53 Posts
Small sprocket and small chainring combo?
If it is, how does it look small sprocket and large chainring combo or the large sprocket and large chainring combo?
If it is, how does it look small sprocket and large chainring combo or the large sprocket and large chainring combo?
08-09-19, 07:55 AM
#3

Senior Member
Join Date: Feb 2012
Location: Rochester, NY
Posts: 18,131
Bikes: Stewart S&S coupled sport tourer, Stewart Sunday light, Stewart Commuting, Stewart Touring, Co Motion Tandem, Stewart 3-Spd, Stewart Track, Fuji Finest, Mongoose Tomac ATB, GT Bravado ATB, JCP Folder, Stewart 650B ATB
Mentioned: 0 Post(s)
Tagged: 0 Thread(s)
Quoted: 4228 Post(s)
Liked 3,926 Times
in
2,341 Posts
What I see is the chain touching the cage's tab. cobba's suggestion to check chain length when in the big/big combo is a good one as from this view it looks like the chain is a tad long.
Another possibility is that the B pivot spring is not doing it's job. Without it's counteracting force pulling the parallelogram rearward the cage pivot will wind all the way it can. If this is going on then when in small front and large rear (lowest gear) the upper pulley will contact the cog's underside (pulley knock). It's not hard to pull apart the B pivot but reassembling them with only two hands can be tricky, a bench vice is your friend. Andy
Another possibility is that the B pivot spring is not doing it's job. Without it's counteracting force pulling the parallelogram rearward the cage pivot will wind all the way it can. If this is going on then when in small front and large rear (lowest gear) the upper pulley will contact the cog's underside (pulley knock). It's not hard to pull apart the B pivot but reassembling them with only two hands can be tricky, a bench vice is your friend. Andy
__________________
AndrewRStewart
AndrewRStewart
08-09-19, 08:11 AM
#4
Not racing.
Is the wheel in the same position in the dropouts as before? If you have it farther forward than it previously was then the chain is effectively longer. Try moving the wheel rearward.
08-09-19, 08:17 AM
#5
Senior Member
Thread Starter
Hi.
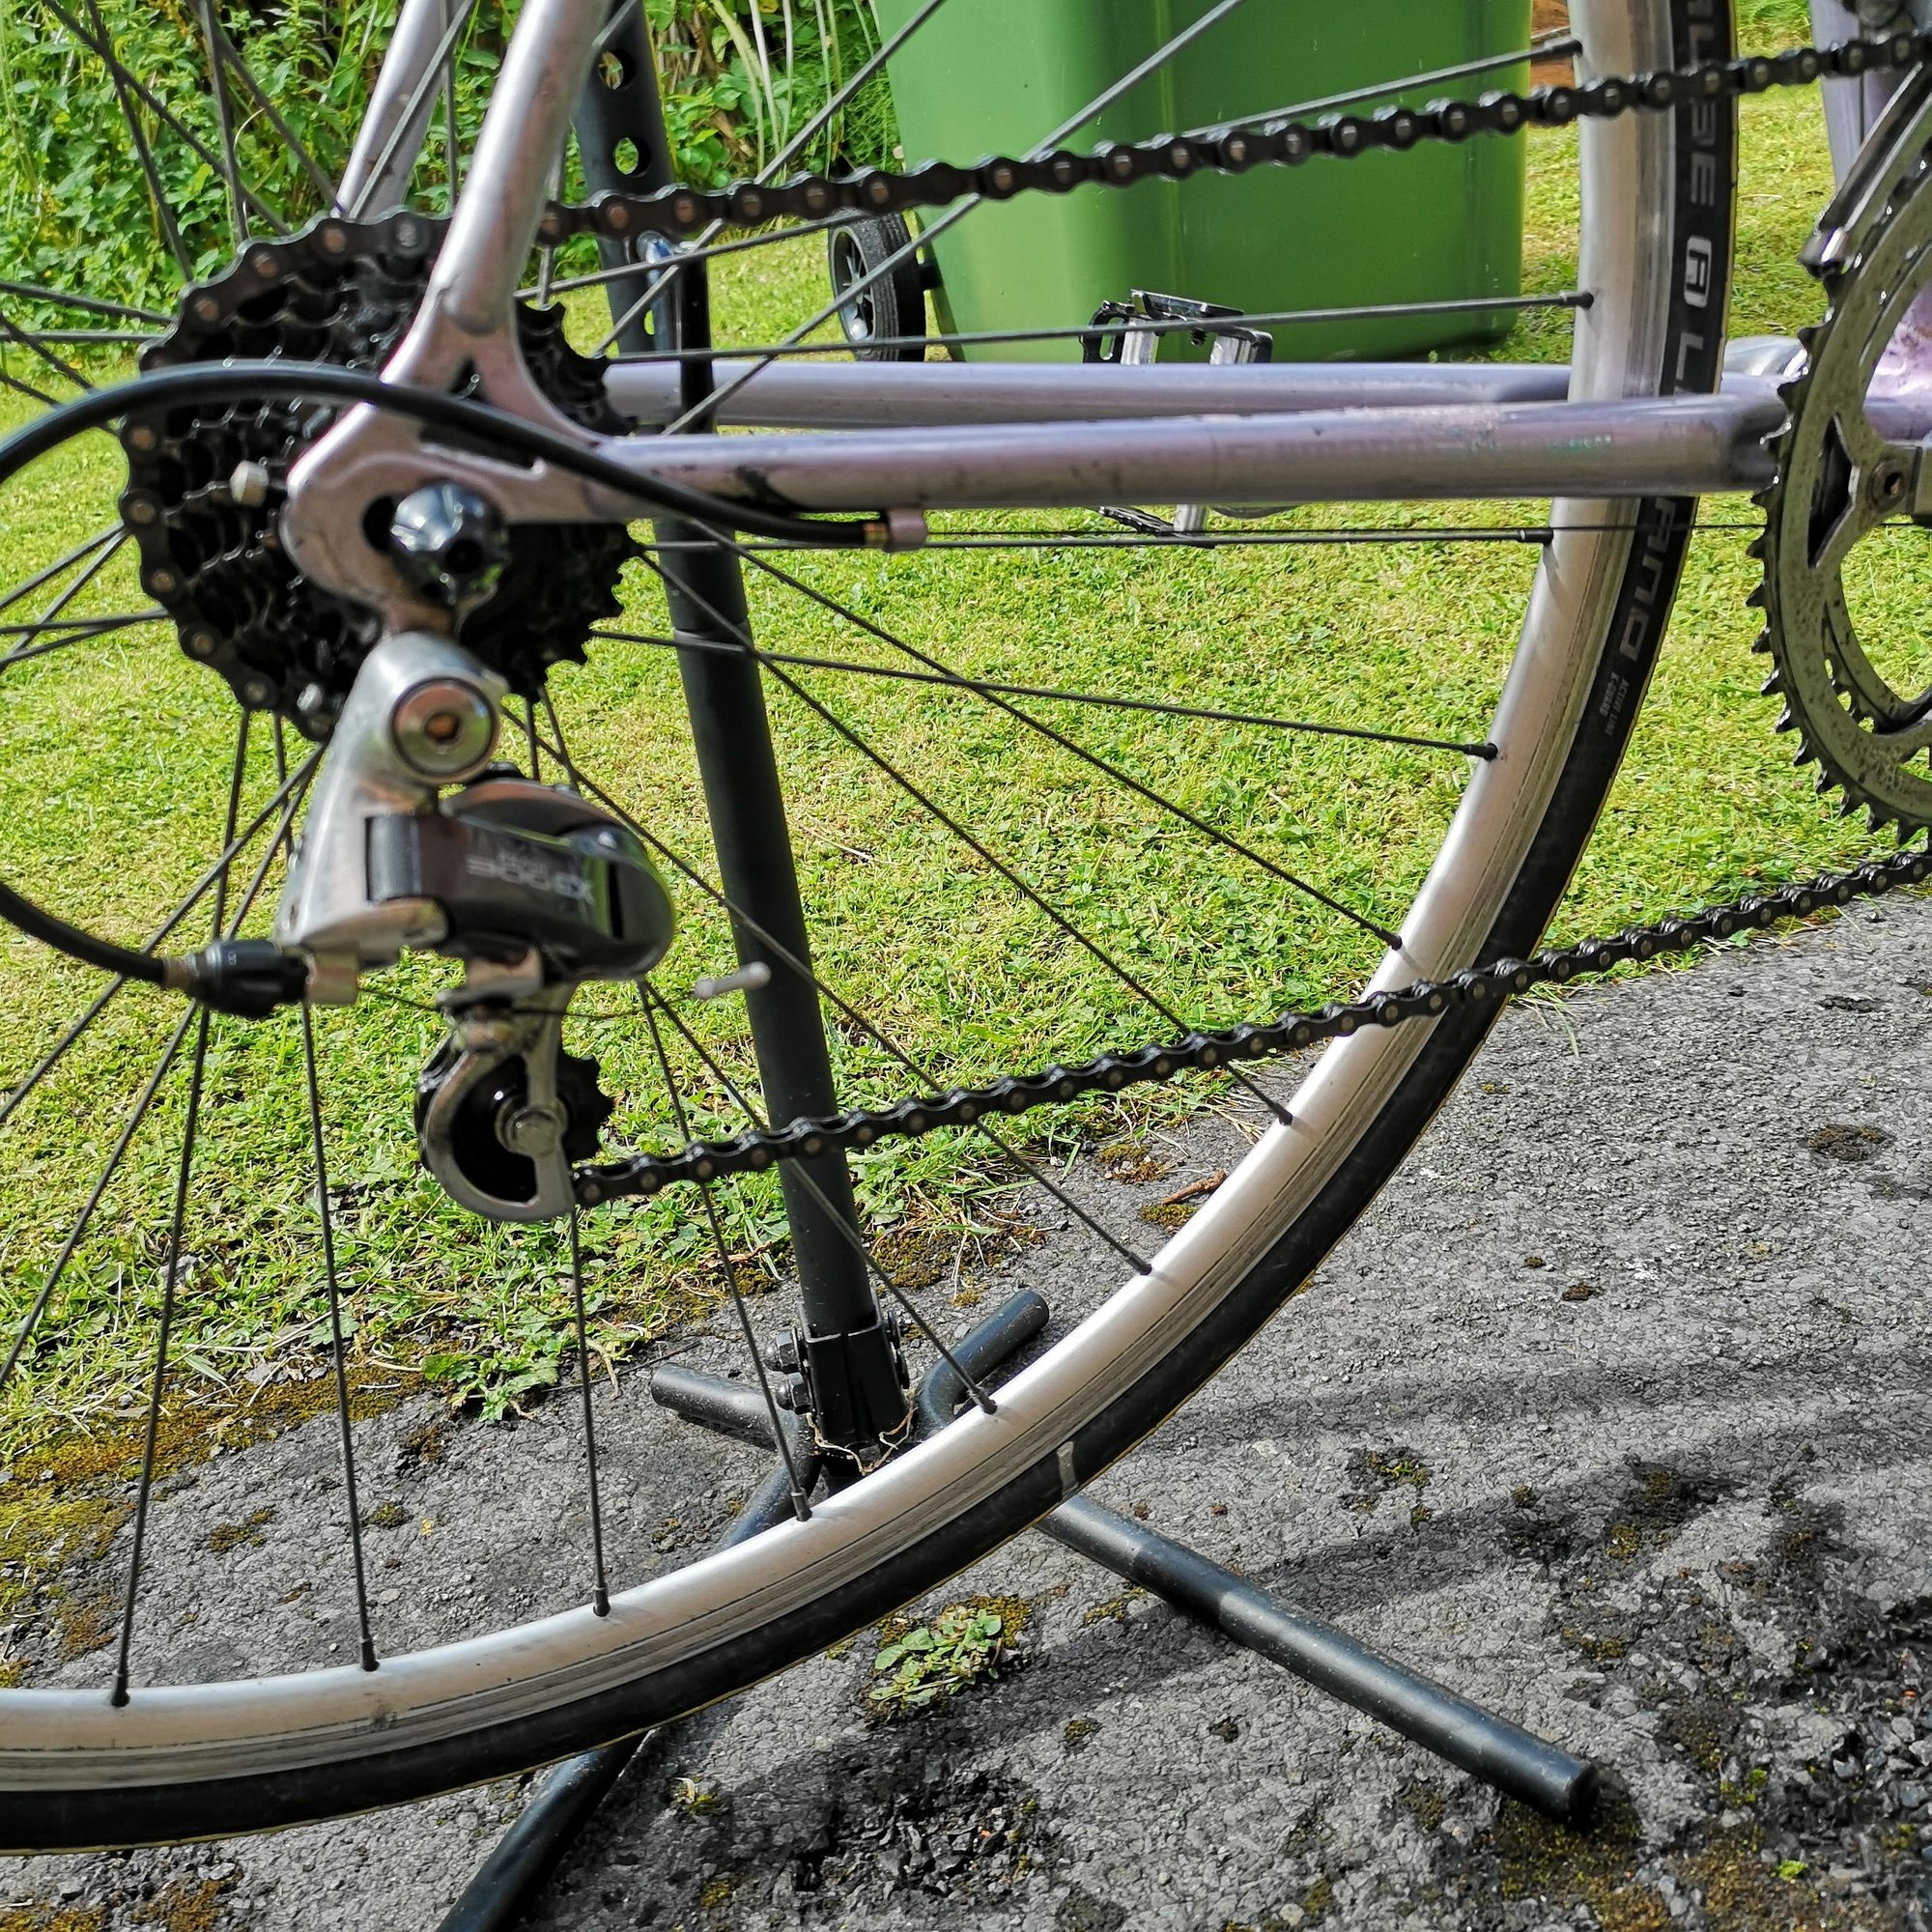
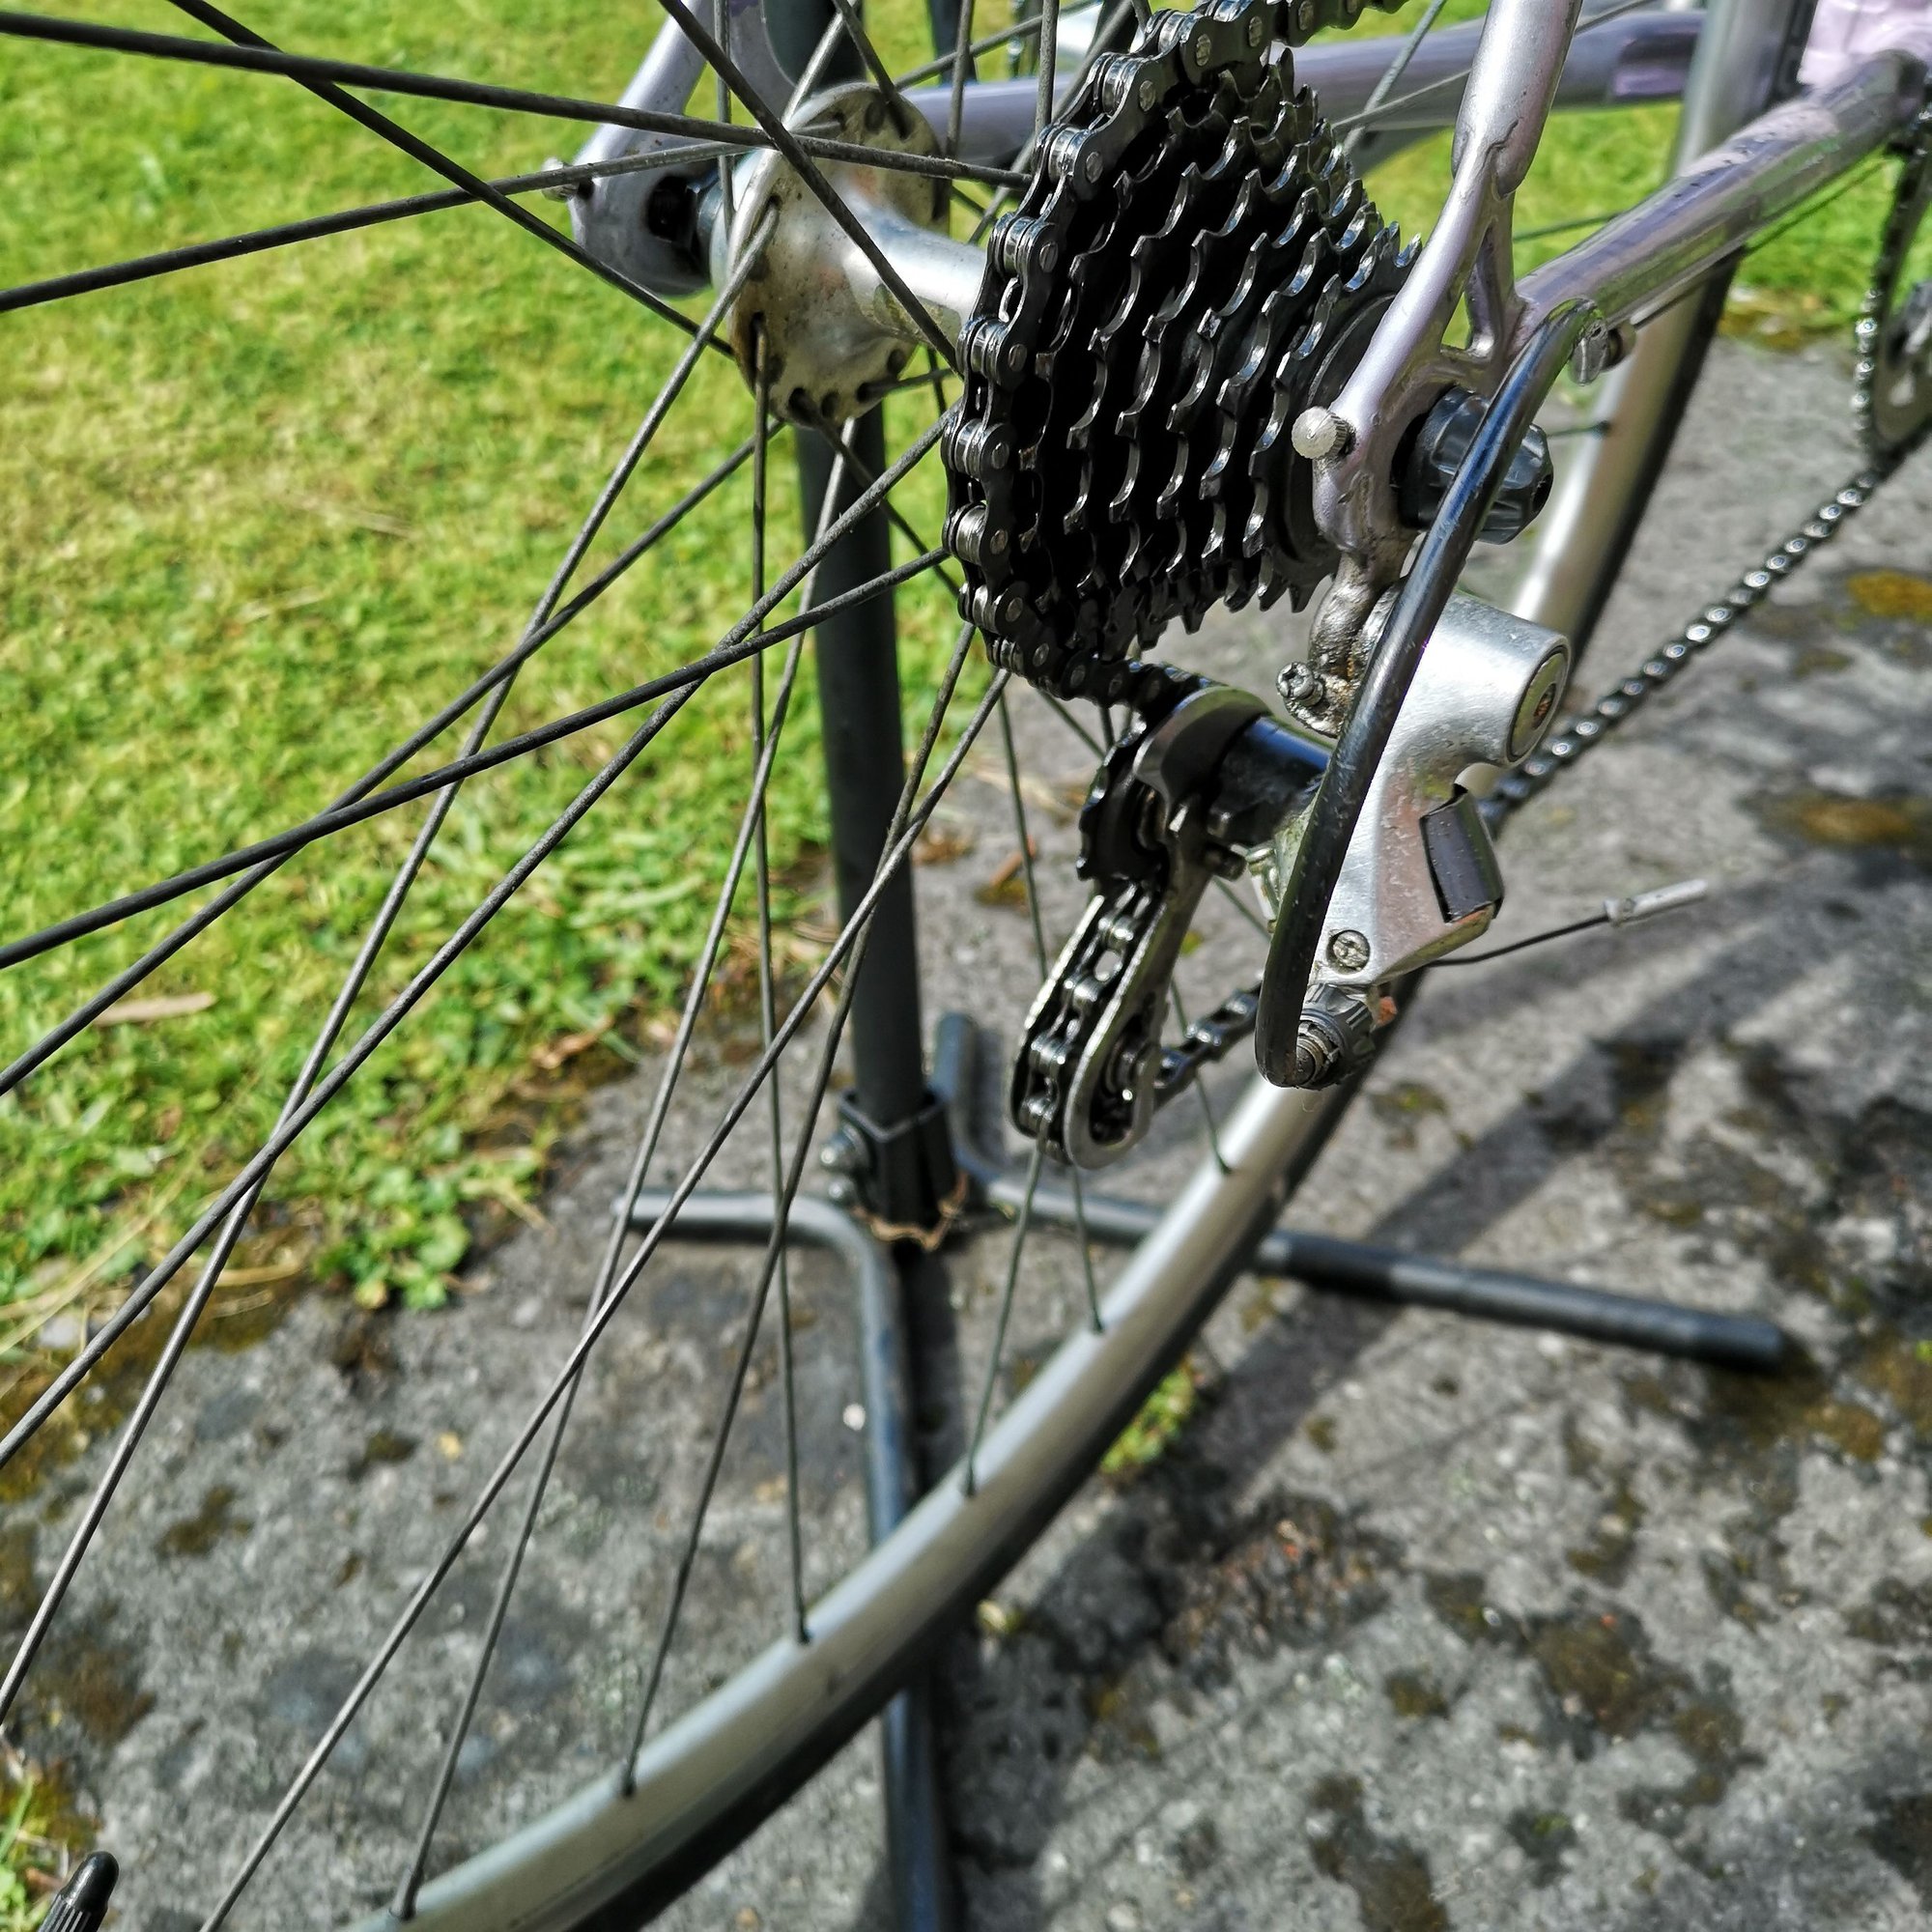
Yes the original photo was taken with small sprocket and small chainring combo. This is a 2nd hand bike that I haven't used a great deal and I have mainly used it with the big chainring and not the small so maybe this issue has always been here but I just never noticed it.
Here are some photos with the big chainring engaged. It rides ok with this chainring. It is just the small chainring that is the issue.
Last edited by Wozza2014; 08-09-19 at 08:21 AM.
08-09-19, 08:21 AM
#6
Senior Member
Thread Starter
Hi. It is in exactly the same position as before. I could try moving it backwards more to counteract the problem? Do I need to unscrew the springs to be able to push the wheel back into the dropouts more on these frames?
Last edited by Wozza2014; 08-09-19 at 08:26 AM.
08-09-19, 08:21 AM
#7
Senior Member

Join Date: Feb 2004
Location: St Peters, Missouri
Posts: 30,225
Bikes: Catrike 559 I own some others but they don't get ridden very much.
Mentioned: 16 Post(s)
Tagged: 0 Thread(s)
Quoted: 1572 Post(s)
Liked 644 Times
in
365 Posts
Take 2 links out of your chain. That will fix your immediate problem and it will still be long enough to safely cover the big/big combination.
__________________
My greatest fear is all of my kids standing around my coffin and talking about "how sensible" dad was.
My greatest fear is all of my kids standing around my coffin and talking about "how sensible" dad was.
08-09-19, 08:31 AM
#8
Not racing.
I wouldn't necessarily change that yet. I always try to take an investigative approach and look for what could be different from before. Start with simple things and go from there. The complicating factor here is you don't know with any certainty whether this was a problem previously. That's ok. It looks to me like you could either shorten the chain as Retro Grouch suggests or move the wheel position to take up more chain. Looking at the picture of it in the big/big combo I agree that you could shorten the chain a bit.
08-09-19, 08:33 AM
#9
Senior Member
Thread Starter
How hard is it to shorten the chain? I have never done that before. What tool do I need?
But I'll try pulling the wheel back first and that seems like an easier option for now.
But I'll try pulling the wheel back first and that seems like an easier option for now.
Likes For Wozza2014:
08-09-19, 08:48 AM
#10
Not racing.
You would need a chain tool like this:

If you don't have one then moving the wheel back just might be enough. It doesn't look like you need a lot.
If you don't have one then moving the wheel back just might be enough. It doesn't look like you need a lot.
08-09-19, 01:23 PM
#12
Senior Member
Join Date: Feb 2004
Location: St Peters, Missouri
Posts: 30,225
Bikes: Catrike 559 I own some others but they don't get ridden very much.
Mentioned: 16 Post(s)
Tagged: 0 Thread(s)
Quoted: 1572 Post(s)
Liked 644 Times
in
365 Posts
The dropout screws were an aid making it easier to get the wheel straight between the stays. Loosen the QR and pull your hub backward until it bottoms against the QR screws. Now retighten your QR.
If it was right before, my bet is that'll fix everything.
__________________
My greatest fear is all of my kids standing around my coffin and talking about "how sensible" dad was.
My greatest fear is all of my kids standing around my coffin and talking about "how sensible" dad was.
08-11-19, 08:32 AM
#13
Senior Member
Join Date: Jun 2005
Location: Kentucky
Posts: 2,610
Bikes: 06 Lemond Reno, 98 GT Timberline mtn.bike
Mentioned: 8 Post(s)
Tagged: 0 Thread(s)
Quoted: 427 Post(s)
Liked 705 Times
in
439 Posts
[QUOTE=Wozza2014;21067431]
.I'm a bit confused by the pics. In one pic, the rear der.cable goes straight thru the cable stop(as it should), while in the other pic it looks like the cable goes into the cable stop, then takes a right angle turn? Am I looking at something the wrong way--the cable stop shouldn't have changed positions, but appears it has! Does the piece with the right angle slide off of the stop? If it does, line it up with the stop, so that the cable runs straight thru instead of making a right angle turn. I've not seen a stop with a piece that slides over it, but there's always a first time!
.I'm a bit confused by the pics. In one pic, the rear der.cable goes straight thru the cable stop(as it should), while in the other pic it looks like the cable goes into the cable stop, then takes a right angle turn? Am I looking at something the wrong way--the cable stop shouldn't have changed positions, but appears it has! Does the piece with the right angle slide off of the stop? If it does, line it up with the stop, so that the cable runs straight thru instead of making a right angle turn. I've not seen a stop with a piece that slides over it, but there's always a first time!
Last edited by freeranger; 08-11-19 at 09:10 AM.
08-11-19, 05:30 PM
#14
Senior Member
Join Date: Jun 2019
Posts: 580
Mentioned: 7 Post(s)
Tagged: 0 Thread(s)
Quoted: 254 Post(s)
Likes: 0
Liked 182 Times
in
141 Posts
.I'm a bit confused by the pics. In one pic, the rear der.cable goes straight thru the cable stop(as it should), while in the other pic it looks like the cable goes into the cable stop, then takes a right angle turn? Am I looking at something the wrong way--the cable stop shouldn't have changed positions, but appears it has! Does the piece with the right angle slide off of the stop? If it does, line it up with the stop, so that the cable runs straight thru instead of making a right angle turn. I've not seen a stop with a piece that slides over it, but there's always a first time!

Thread
Thread Starter
Forum
Replies
Last Post
Badzilla
Bicycle Mechanics
3
08-01-15 07:18 AM
johnadarin
Bicycle Mechanics
11
03-15-12 08:13 AM
dvroberts
Bicycle Mechanics
16
01-03-11 07:22 PM
