


For the love of English 3 speeds...
 05-05-19, 05:29 AM
Senior Member
Join Date: Apr 2012
Location: Toronto
Posts: 2,572
Bikes: 1971 Hercules, 1978 Raleigh Superbe, 1978 Raleigh Tourist, 1964 Glider 3 Speed, 1967 Raleigh Sprite 5 Speed, 1968 Hercules AMF 3 Speed, 1972 Raleigh Superbe, 1976 Raleigh Superbe, 1957 Flying Pigeon, 1967 Dunelt 3 Speed
Mentioned: 57 Post(s)
Tagged: 0 Thread(s)
Quoted: 1028 Post(s)
Liked 443 Times
in
288 Posts
 05-05-19, 05:59 AM
Senior Member
Join Date: Apr 2012
Location: Toronto
Posts: 2,572
Bikes: 1971 Hercules, 1978 Raleigh Superbe, 1978 Raleigh Tourist, 1964 Glider 3 Speed, 1967 Raleigh Sprite 5 Speed, 1968 Hercules AMF 3 Speed, 1972 Raleigh Superbe, 1976 Raleigh Superbe, 1957 Flying Pigeon, 1967 Dunelt 3 Speed
Mentioned: 57 Post(s)
Tagged: 0 Thread(s)
Quoted: 1028 Post(s)
Liked 443 Times
in
288 Posts
Did you follow Sheldon Brown's Instructions, step 11 spells out critical setting of Drive Side Cone which if not correctly followed upsets gear mechanism. It is reproduced below:-
Re-Assembly
1. If the left hand ball cup has been removed from the hub shell, replace it by screwing anti clockwise (it has a left-hand thread).
2. Prepare the following subassemblies:
o Fit the ball cage into the driver, with the ring of the ball-retainer facing outwards and the recess in the dust cap also facing outwards. If a new ball retainer is being fitted, the dust cap also should be new. If the sprocket has been removed, see No. 23 below.
o Fit the balls (only 24) and the inner dust cap to the right-hand ball ring, making sure that the balls can revolve freely with the dust cap in place.
o Fit the pawls, pins and springs into the gear ring as described in the general instructions to 'The Re-Assembling of Sturmey Archer Hubs'. (The planet-cage pawls, pins and springs are not fitted at this stage.)
o Smear grease in the channels of the dust cap of the driver and in the recess of the right-hand ball ring. Do not use grease anywhere else.
3. Hold the left-hand end of the axle in a vise, so that the slot for the axle key is above the sun pinion, and fit the planet cage.
4. Ad the planet pinions and pins. (The small ends of the pins protrude.)
5. Fit the sleeve (flange first), the sliding clutch with the recess over the flange of the sleeve and the axle key (with the flat of the key facing upwards), and screw in the indicator rod to hold them in that position.
6. Fit the thrust ring and washer, making sure that the flattened ends of the key engage properly in the slots of the thrust ring. [These parts are combined into one in later production.]
7. Fit the previously prepared gear ring sub-assembly.
8. Fit the previously prepared right-hand ball-ring sub-assembly.
9. Fit the previously prepared driver sub-assembly.
10.Drop the clutch spring over the axle.
11.Fit the cap and screw up the right-hand cone finger-tight. Then Loosen it back half a turn and lock it in that position with the special washer and locknut. On no account must the cone be unscrewed more than half a turn, as that would throw the gear mechanism out of adjustment.
12.Invert the assembly in the vise and pour about two teaspoonfuls of good quality thin oil into the planet cage, then fit the planet cage pawls as described in the general instructions to 'The Re-assembling of Sturmey-Archer Hubs'.
13.Screw up the left-hand cone.
14.If the magnet and armature have been separated, take the magnet and keeper ring in the left hand and, with the right hand, lay the armature alongside it.
15.While holding the magnet with the chamfer facing outwards, push the armature and the keeper through so that the magnet slides from the keeper on to the armature
16.Fit the card disc (carrying patent numbers) inside the cover plate, with its notches opposite the magnet notches.
17.Fit the cover plate over the magnet, chamfer inwards, making sure that the four holes in the cover plate are in line with the notches in the card and the magnet.
18.Fit the metal spacing ring into the hub shell.
19.Fit the shim washer.
20.Push the complete dynamo unit into the hub shell, making sure that the holes in the cover plate are in line with those in the hub shell.
21.Fit the magnet fixing screws, washers and nuts.
22.Fit the spacing washers, adjusting washers and dynamo cone lock nut in arrangement noted when dismantling. Check wheel adjustment.
23.If the sprocket has been removed from the driver, fit the outer dust cap over the driver before replacing the sprocket, and see that the dust cap is properly centerd on the flange of the driver. Replace the sprocket and spacing washers in the arrangement noted when dismantling, and add the circlip.
24.Replace the wheel in the cycle frame and adjust the gear as described in 'The Installation and Adjustment of Sturmey-Archer Hubs.'
and very complicated.
Perhaps we'd all be better off going
to Walmart and getting a new bike.

They don't cost much and when they break you just
throw them in the garbage.
05-05-19, 06:26 AM

Senior Member

Join Date: Mar 2014
Location: Southport, North Carolina, USA & Pevensey, East Sussex, UK
Posts: 309
Bikes: 1)1992 Trek 970, 2)2010 Trek 6500, 3)1973 Colnago Super, 4)1955 Freddie Grubb Meteor. 5)1993 Airborne Ti-Hag Titanium. 6)1936 BSA 602DX Roadster. 7)1957 Philips P2 Sports. 8)1955 Dayton Roadmaster. 9)1948 Humber Clubman. 10) 1949 Sunbeam WA3 Wayfarer
Mentioned: 5 Post(s)
Tagged: 0 Thread(s)
Quoted: 157 Post(s)
Liked 85 Times
in
34 Posts
I thought we were into saving bikes & parts not throwing them away when they need fixing!!!!!
Rebuilding 3 Speed hubs is not hard or complicated if you do it right. An hours work maybe or even less with experience.
Walmart do not sell decent bikes. But of course you know that!!!!!!
Last edited by PeterLYoung; 05-05-19 at 06:33 AM.
05-05-19, 06:31 AM
Senior Member
Join Date: Apr 2012
Location: Toronto
Posts: 2,572
Bikes: 1971 Hercules, 1978 Raleigh Superbe, 1978 Raleigh Tourist, 1964 Glider 3 Speed, 1967 Raleigh Sprite 5 Speed, 1968 Hercules AMF 3 Speed, 1972 Raleigh Superbe, 1976 Raleigh Superbe, 1957 Flying Pigeon, 1967 Dunelt 3 Speed
Mentioned: 57 Post(s)
Tagged: 0 Thread(s)
Quoted: 1028 Post(s)
Liked 443 Times
in
288 Posts
I have to hope you are not serious, have tongue in cheek making these remarks.
I thought we were into saving bikes & parts not throwing them away when they need fixing!!!!!
Rebuilding 3 Speed hubs is not hard or complicated if you do it right. An hours work maybe or even less with experience.
Walmart do not sell decent bikes.
I thought we were into saving bikes & parts not throwing them away when they need fixing!!!!!
Rebuilding 3 Speed hubs is not hard or complicated if you do it right. An hours work maybe or even less with experience.
Walmart do not sell decent bikes.
05-05-19, 08:05 AM
Senior Member

Join Date: Jan 2015
Posts: 3,240
Mentioned: 103 Post(s)
Tagged: 0 Thread(s)
Quoted: 1299 Post(s)
Likes: 0
Liked 103 Times
in
85 Posts
05-05-19, 08:39 AM
Senior member

Join Date: Oct 2004
Location: Oakville Ontario
Posts: 8,117
Mentioned: 25 Post(s)
Tagged: 0 Thread(s)
Quoted: 943 Post(s)
Liked 658 Times
in
371 Posts
It was an old used set when we got it in about 1958.
05-05-19, 02:37 PM
Senior Member

Join Date: May 2018
Location: Ottawa, Ontario, Canada
Posts: 582
Bikes: 1951 Sun Wasp, 1953 Armstrong Consort, 1975 Raleigh Competition, 1980 Apollo Gran Sport, 1988 Schwinn Voyageur, Mystery MTB
Mentioned: 31 Post(s)
Tagged: 0 Thread(s)
Quoted: 360 Post(s)
Liked 467 Times
in
192 Posts
1950 Superbe update
Today I had some time so I went and putzed around with the Raleigh. I had to adjust the bottom bracket because the axle had too much play. I used my press and installed the cotters and cranks. The cotters slid nicely into place after I followed advice posted here. The book mentions riding the bike for a dozen miles or so and pressing them again, and tightening down the nuts. Is that recommended? I think that advice refers to cotters put in with brute force.
I had another crack at adjusting the hub, but when the wheel is run backward it engages the hub and the cog runs back and I understand this means the adjustment is too tight. I'll loosen the cone a little more. Once it is adjusted I'll do another with the chain on the bike. Since I will be using the Cyclo 3 speed derailer I think I should keep a few links on, and once the AG is dialled in I'll install the Cyclo. It looks a bit tricky. Not in the photos but I've put the brakes in place too with kool stop pads and nice shiny calipers.


I had another crack at adjusting the hub, but when the wheel is run backward it engages the hub and the cog runs back and I understand this means the adjustment is too tight. I'll loosen the cone a little more. Once it is adjusted I'll do another with the chain on the bike. Since I will be using the Cyclo 3 speed derailer I think I should keep a few links on, and once the AG is dialled in I'll install the Cyclo. It looks a bit tricky. Not in the photos but I've put the brakes in place too with kool stop pads and nice shiny calipers.
05-05-19, 02:42 PM
Senior Member
Join Date: Apr 2012
Location: Toronto
Posts: 2,572
Bikes: 1971 Hercules, 1978 Raleigh Superbe, 1978 Raleigh Tourist, 1964 Glider 3 Speed, 1967 Raleigh Sprite 5 Speed, 1968 Hercules AMF 3 Speed, 1972 Raleigh Superbe, 1976 Raleigh Superbe, 1957 Flying Pigeon, 1967 Dunelt 3 Speed
Mentioned: 57 Post(s)
Tagged: 0 Thread(s)
Quoted: 1028 Post(s)
Liked 443 Times
in
288 Posts
 05-05-19, 02:47 PM
Senior Member
Join Date: Apr 2012
Location: Toronto
Posts: 2,572
Bikes: 1971 Hercules, 1978 Raleigh Superbe, 1978 Raleigh Tourist, 1964 Glider 3 Speed, 1967 Raleigh Sprite 5 Speed, 1968 Hercules AMF 3 Speed, 1972 Raleigh Superbe, 1976 Raleigh Superbe, 1957 Flying Pigeon, 1967 Dunelt 3 Speed
Mentioned: 57 Post(s)
Tagged: 0 Thread(s)
Quoted: 1028 Post(s)
Liked 443 Times
in
288 Posts
Today I had some time so I went and putzed around with the Raleigh. I had to adjust the bottom bracket because the axle had too much play. I used my press and installed the cotters and cranks. The cotters slid nicely into place after I followed advice posted here. The book mentions riding the bike for a dozen miles or so and pressing them again, and tightening down the nuts. Is that recommended? I think that advice refers to cotters put in with brute force.
I had another crack at adjusting the hub, but when the wheel is run backward it engages the hub and the cog runs back and I understand this means the adjustment is too tight. I'll loosen the cone a little more. Once it is adjusted I'll do another with the chain on the bike. Since I will be using the Cyclo 3 speed derailer I think I should keep a few links on, and once the AG is dialled in I'll install the Cyclo. It looks a bit tricky. Not in the photos but I've put the brakes in place too with kool stop pads and nice shiny calipers.
I had another crack at adjusting the hub, but when the wheel is run backward it engages the hub and the cog runs back and I understand this means the adjustment is too tight. I'll loosen the cone a little more. Once it is adjusted I'll do another with the chain on the bike. Since I will be using the Cyclo 3 speed derailer I think I should keep a few links on, and once the AG is dialled in I'll install the Cyclo. It looks a bit tricky. Not in the photos but I've put the brakes in place too with kool stop pads and nice shiny calipers.
Good work.
05-05-19, 04:22 PM
Full Member
Join Date: Dec 2011
Location: Canberra Australia
Posts: 240
Bikes: 30's Speedwell Club Racer, 40's Speedwell 'Z' racer, 50's Unknown Aussie with nice lugs, 50's Speedwell Roadster, 50's Repco Roadster, '63 Raleigh DL-1, 70's Raleigh Sprite, Puch Promenade with Nexus 8
Mentioned: 5 Post(s)
Tagged: 0 Thread(s)
Quoted: 149 Post(s)
Liked 30 Times
in
23 Posts
I borrowed my Mums luggage scales yesterday and tried them out on a few bikes.
My DL-1 sans chainguard and fenders weighs in at 18.4kg (40.5 lbs) This has a B33 saddle and rod operated drum brakes front and rear, so may be a little heavier than a standard rod brake model?
A MTB that I built ages ago with a SA 8 speed drum brake hub, and a drum/dyno up front is 18.8kg (41.5 lbs) With 3.4kg (7.5 lbs) of hubs, the frame must be quite heavy. May have to rethink this one & possibly ditch the lead frame & front hub.
A standard 3 x 7 derailleur MTB (steel frame) weighed in at 13kg (28.5 lbs)
A Viscount Aerospace Victor (steel frame) I have for sale is 11.3kg (25 lbs). I'd keep this but need some travelling money for an upcoming holiday. Any cool bike swapmeets or rides in DC in late May, early June?
My favourite ride of these 4 is the DL-1.
Last edited by arty dave; 05-05-19 at 04:44 PM.
05-05-19, 05:24 PM
Phyllo-buster

Join Date: Jan 2010
Location: Nova Scotia
Posts: 8,847
Bikes: roadsters, club bikes, fixed and classic
Mentioned: 133 Post(s)
Tagged: 0 Thread(s)
Quoted: 2298 Post(s)
Liked 2,054 Times
in
1,254 Posts
 05-05-19, 07:12 PM
Verified Antique
Join Date: Nov 2011
Posts: 480
Mentioned: 1 Post(s)
Tagged: 0 Thread(s)
Quoted: 22 Post(s)
Likes: 0
Liked 2 Times
in
2 Posts
Faces
Good to see some of the same faces here as were here waaaayback...
I have accumulated a fine stable of Brit and American - primarily 3-speed - steel - and will probably order about 150 Flying Pigeons for a bike rental business we plan to open in a coastal [east] city with fine attributes.
The question I have is this...
Since the relief varies by only about 10' at most; do y'all think I should order some, or part, of them with 3-speeds?
05-05-19, 07:13 PM
Verified Antique
Join Date: Nov 2011
Posts: 480
Mentioned: 1 Post(s)
Tagged: 0 Thread(s)
Quoted: 22 Post(s)
Likes: 0
Liked 2 Times
in
2 Posts
about 6
Have not checked the barn but I guess I have 5 or 6 DL-1's.
05-05-19, 07:17 PM
Senior Member
Join Date: Apr 2012
Location: Toronto
Posts: 2,572
Bikes: 1971 Hercules, 1978 Raleigh Superbe, 1978 Raleigh Tourist, 1964 Glider 3 Speed, 1967 Raleigh Sprite 5 Speed, 1968 Hercules AMF 3 Speed, 1972 Raleigh Superbe, 1976 Raleigh Superbe, 1957 Flying Pigeon, 1967 Dunelt 3 Speed
Mentioned: 57 Post(s)
Tagged: 0 Thread(s)
Quoted: 1028 Post(s)
Liked 443 Times
in
288 Posts
05-05-19, 07:52 PM
Phyllo-buster
Join Date: Jan 2010
Location: Nova Scotia
Posts: 8,847
Bikes: roadsters, club bikes, fixed and classic
Mentioned: 133 Post(s)
Tagged: 0 Thread(s)
Quoted: 2298 Post(s)
Liked 2,054 Times
in
1,254 Posts
 05-05-19, 07:56 PM
Phyllo-buster
Join Date: Jan 2010
Location: Nova Scotia
Posts: 8,847
Bikes: roadsters, club bikes, fixed and classic
Mentioned: 133 Post(s)
Tagged: 0 Thread(s)
Quoted: 2298 Post(s)
Liked 2,054 Times
in
1,254 Posts
05-05-19, 08:04 PM
Verified Antique
Join Date: Nov 2011
Posts: 480
Mentioned: 1 Post(s)
Tagged: 0 Thread(s)
Quoted: 22 Post(s)
Likes: 0
Liked 2 Times
in
2 Posts
Relief: the difference between the lowest point and the highest point. For example, in Annapolis this would be about 8 feet. Tx.!
05-05-19, 08:11 PM
Phyllo-buster
Join Date: Jan 2010
Location: Nova Scotia
Posts: 8,847
Bikes: roadsters, club bikes, fixed and classic
Mentioned: 133 Post(s)
Tagged: 0 Thread(s)
Quoted: 2298 Post(s)
Liked 2,054 Times
in
1,254 Posts
interesting. Some market research may tell you whether if you're customers will be strong and youthful and suited to single speeds. Or not? Mmnnn
05-05-19, 08:18 PM
Senior Member
Join Date: Apr 2012
Location: Toronto
Posts: 2,572
Bikes: 1971 Hercules, 1978 Raleigh Superbe, 1978 Raleigh Tourist, 1964 Glider 3 Speed, 1967 Raleigh Sprite 5 Speed, 1968 Hercules AMF 3 Speed, 1972 Raleigh Superbe, 1976 Raleigh Superbe, 1957 Flying Pigeon, 1967 Dunelt 3 Speed
Mentioned: 57 Post(s)
Tagged: 0 Thread(s)
Quoted: 1028 Post(s)
Liked 443 Times
in
288 Posts
Good to see some of the same faces here as were here waaaayback...
I have accumulated a fine stable of Brit and American - primarily 3-speed - steel - and will probably order about 150 Flying Pigeons for a bike rental business we plan to open in a coastal [east] city with fine attributes.
The question I have is this...
Since the relief varies by only about 10' at most; do y'all think I should order some, or part, of them with 3-speeds?
I have accumulated a fine stable of Brit and American - primarily 3-speed - steel - and will probably order about 150 Flying Pigeons for a bike rental business we plan to open in a coastal [east] city with fine attributes.
The question I have is this...
Since the relief varies by only about 10' at most; do y'all think I should order some, or part, of them with 3-speeds?
Those Roadsters are heavier than a DL-1.
I've got one that's supposed to be from the 50's...

Last edited by gster; 05-05-19 at 08:22 PM.
05-05-19, 08:31 PM
Verified Antique
Join Date: Nov 2011
Posts: 480
Mentioned: 1 Post(s)
Tagged: 0 Thread(s)
Quoted: 22 Post(s)
Likes: 0
Liked 2 Times
in
2 Posts
Thanks for the measured reply. I think they are hecho'ed in Chine to the original Chairman Mao specs.
Here are a couple of links:
https://m.alibaba.com/product/605864...7da1482amQefs9
https://www.bicycling.com/rides/a200...ling-in-china/
Here are a couple of links:
https://m.alibaba.com/product/605864...7da1482amQefs9
https://www.bicycling.com/rides/a200...ling-in-china/
05-05-19, 08:31 PM
Senior Member
Join Date: Apr 2012
Location: Toronto
Posts: 2,572
Bikes: 1971 Hercules, 1978 Raleigh Superbe, 1978 Raleigh Tourist, 1964 Glider 3 Speed, 1967 Raleigh Sprite 5 Speed, 1968 Hercules AMF 3 Speed, 1972 Raleigh Superbe, 1976 Raleigh Superbe, 1957 Flying Pigeon, 1967 Dunelt 3 Speed
Mentioned: 57 Post(s)
Tagged: 0 Thread(s)
Quoted: 1028 Post(s)
Liked 443 Times
in
288 Posts
show a few years ago. I asked her where it was.
She said she had to leave it outside because she couldn't
lug it up the stairs...
Bike was stolen.
05-05-19, 08:50 PM
Verified Antique
Join Date: Nov 2011
Posts: 480
Mentioned: 1 Post(s)
Tagged: 0 Thread(s)
Quoted: 22 Post(s)
Likes: 0
Liked 2 Times
in
2 Posts
Couple of years ago I had a patched together mens's DL-1 shipped to me from Connecticut. Full chain case. Plan to bring it out in a few days. Will try to do some pics.
05-06-19, 12:32 AM
Senior Member
Join Date: Mar 2014
Location: Southport, North Carolina, USA & Pevensey, East Sussex, UK
Posts: 309
Bikes: 1)1992 Trek 970, 2)2010 Trek 6500, 3)1973 Colnago Super, 4)1955 Freddie Grubb Meteor. 5)1993 Airborne Ti-Hag Titanium. 6)1936 BSA 602DX Roadster. 7)1957 Philips P2 Sports. 8)1955 Dayton Roadmaster. 9)1948 Humber Clubman. 10) 1949 Sunbeam WA3 Wayfarer
Mentioned: 5 Post(s)
Tagged: 0 Thread(s)
Quoted: 157 Post(s)
Liked 85 Times
in
34 Posts
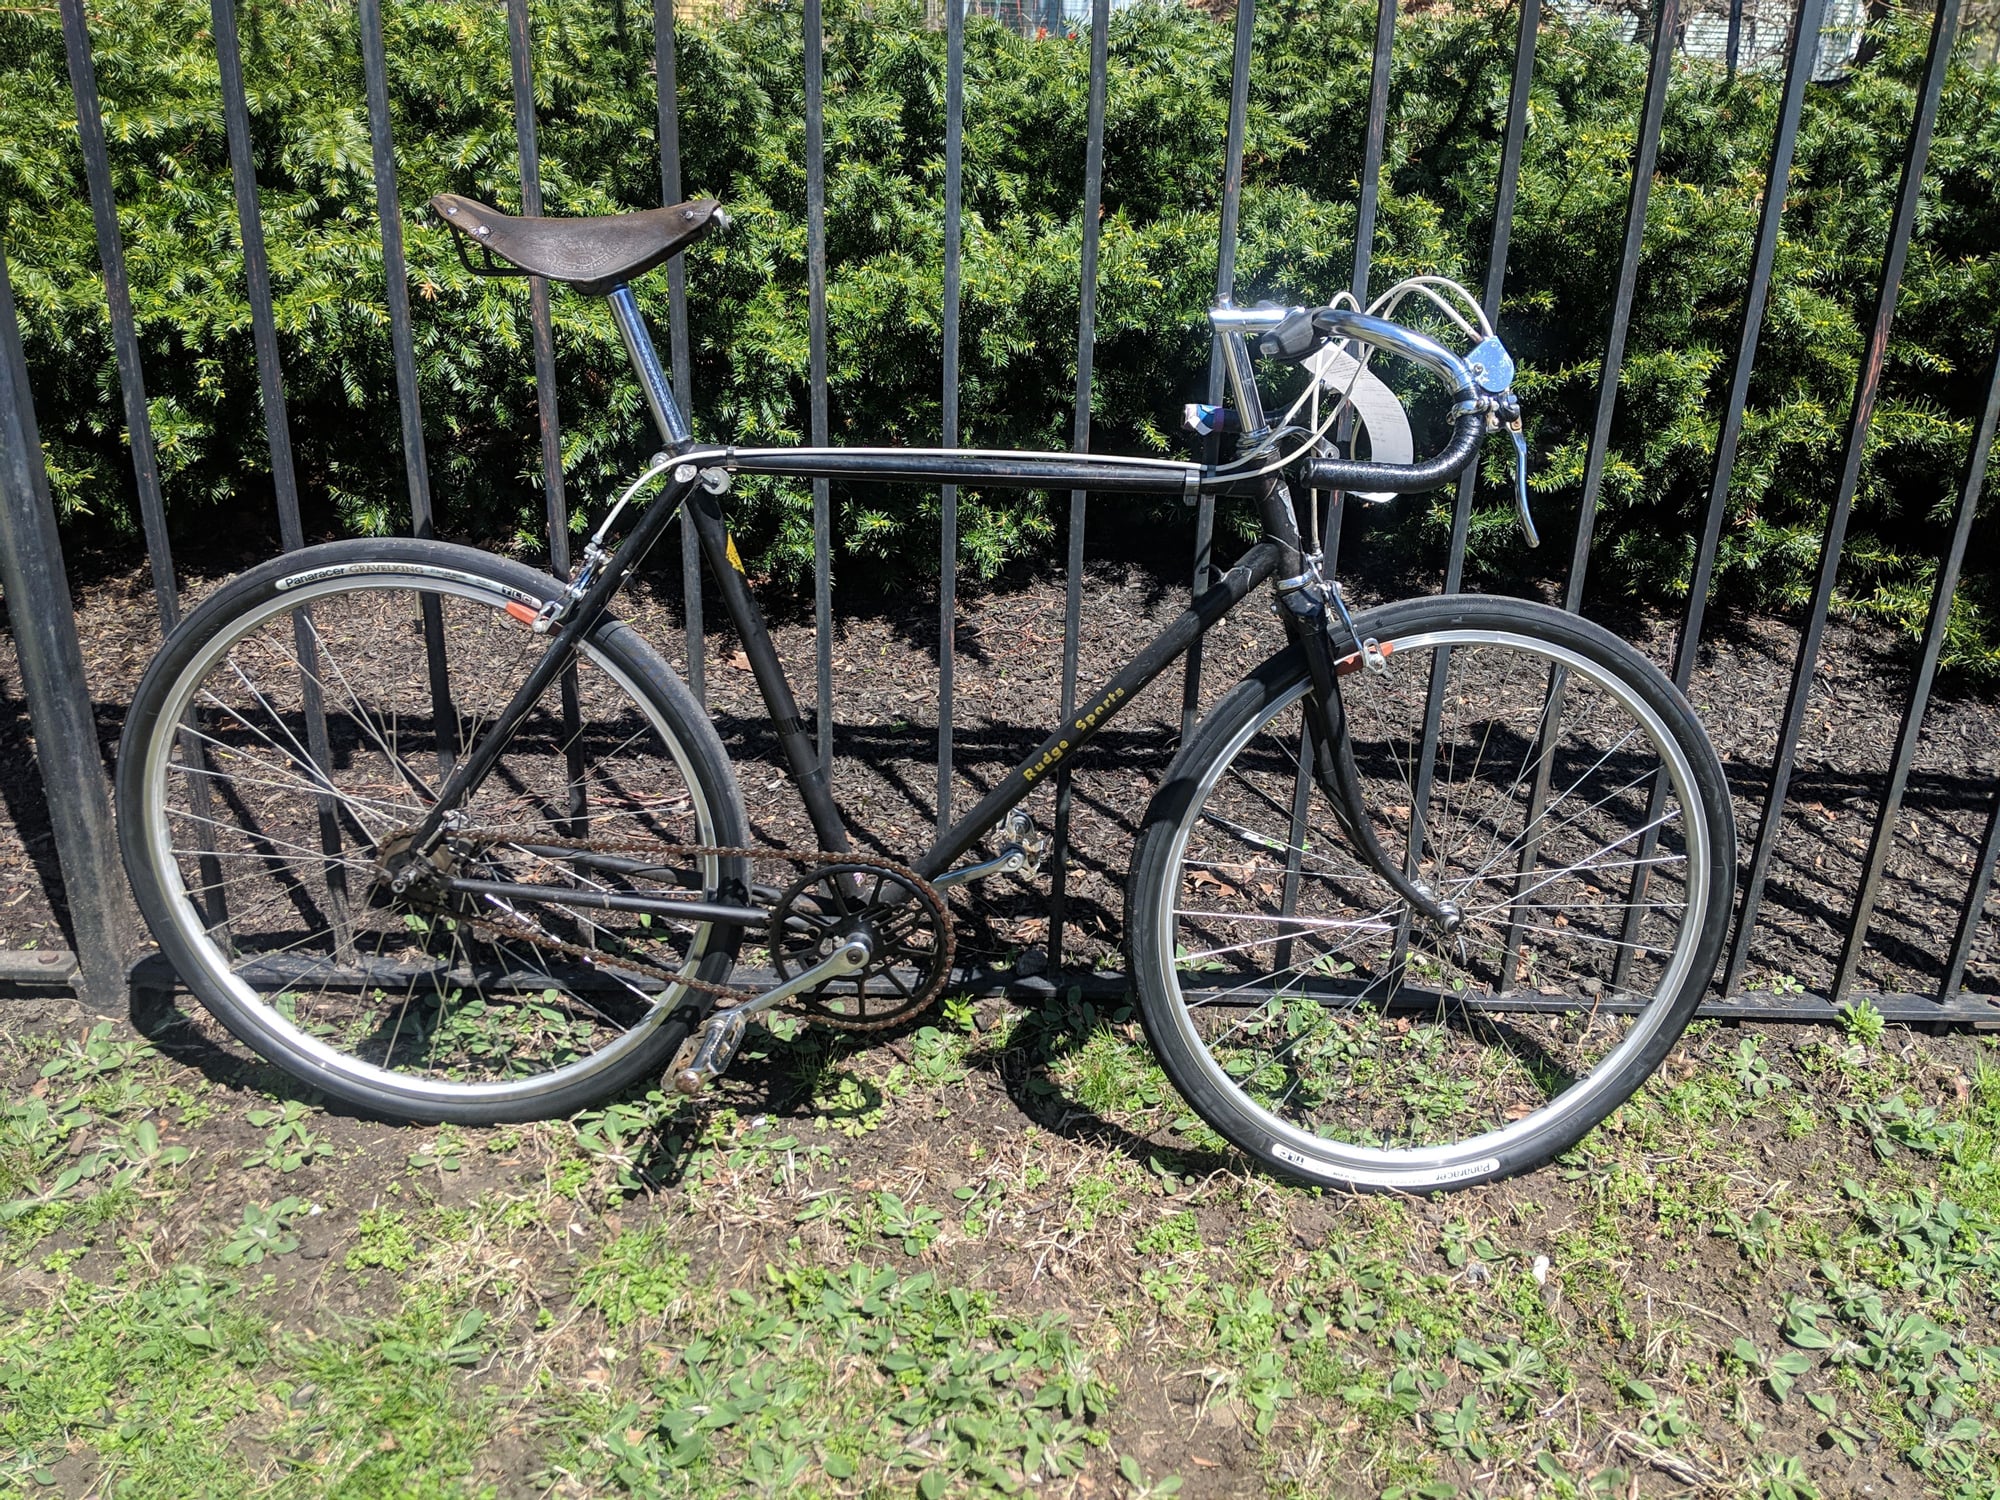
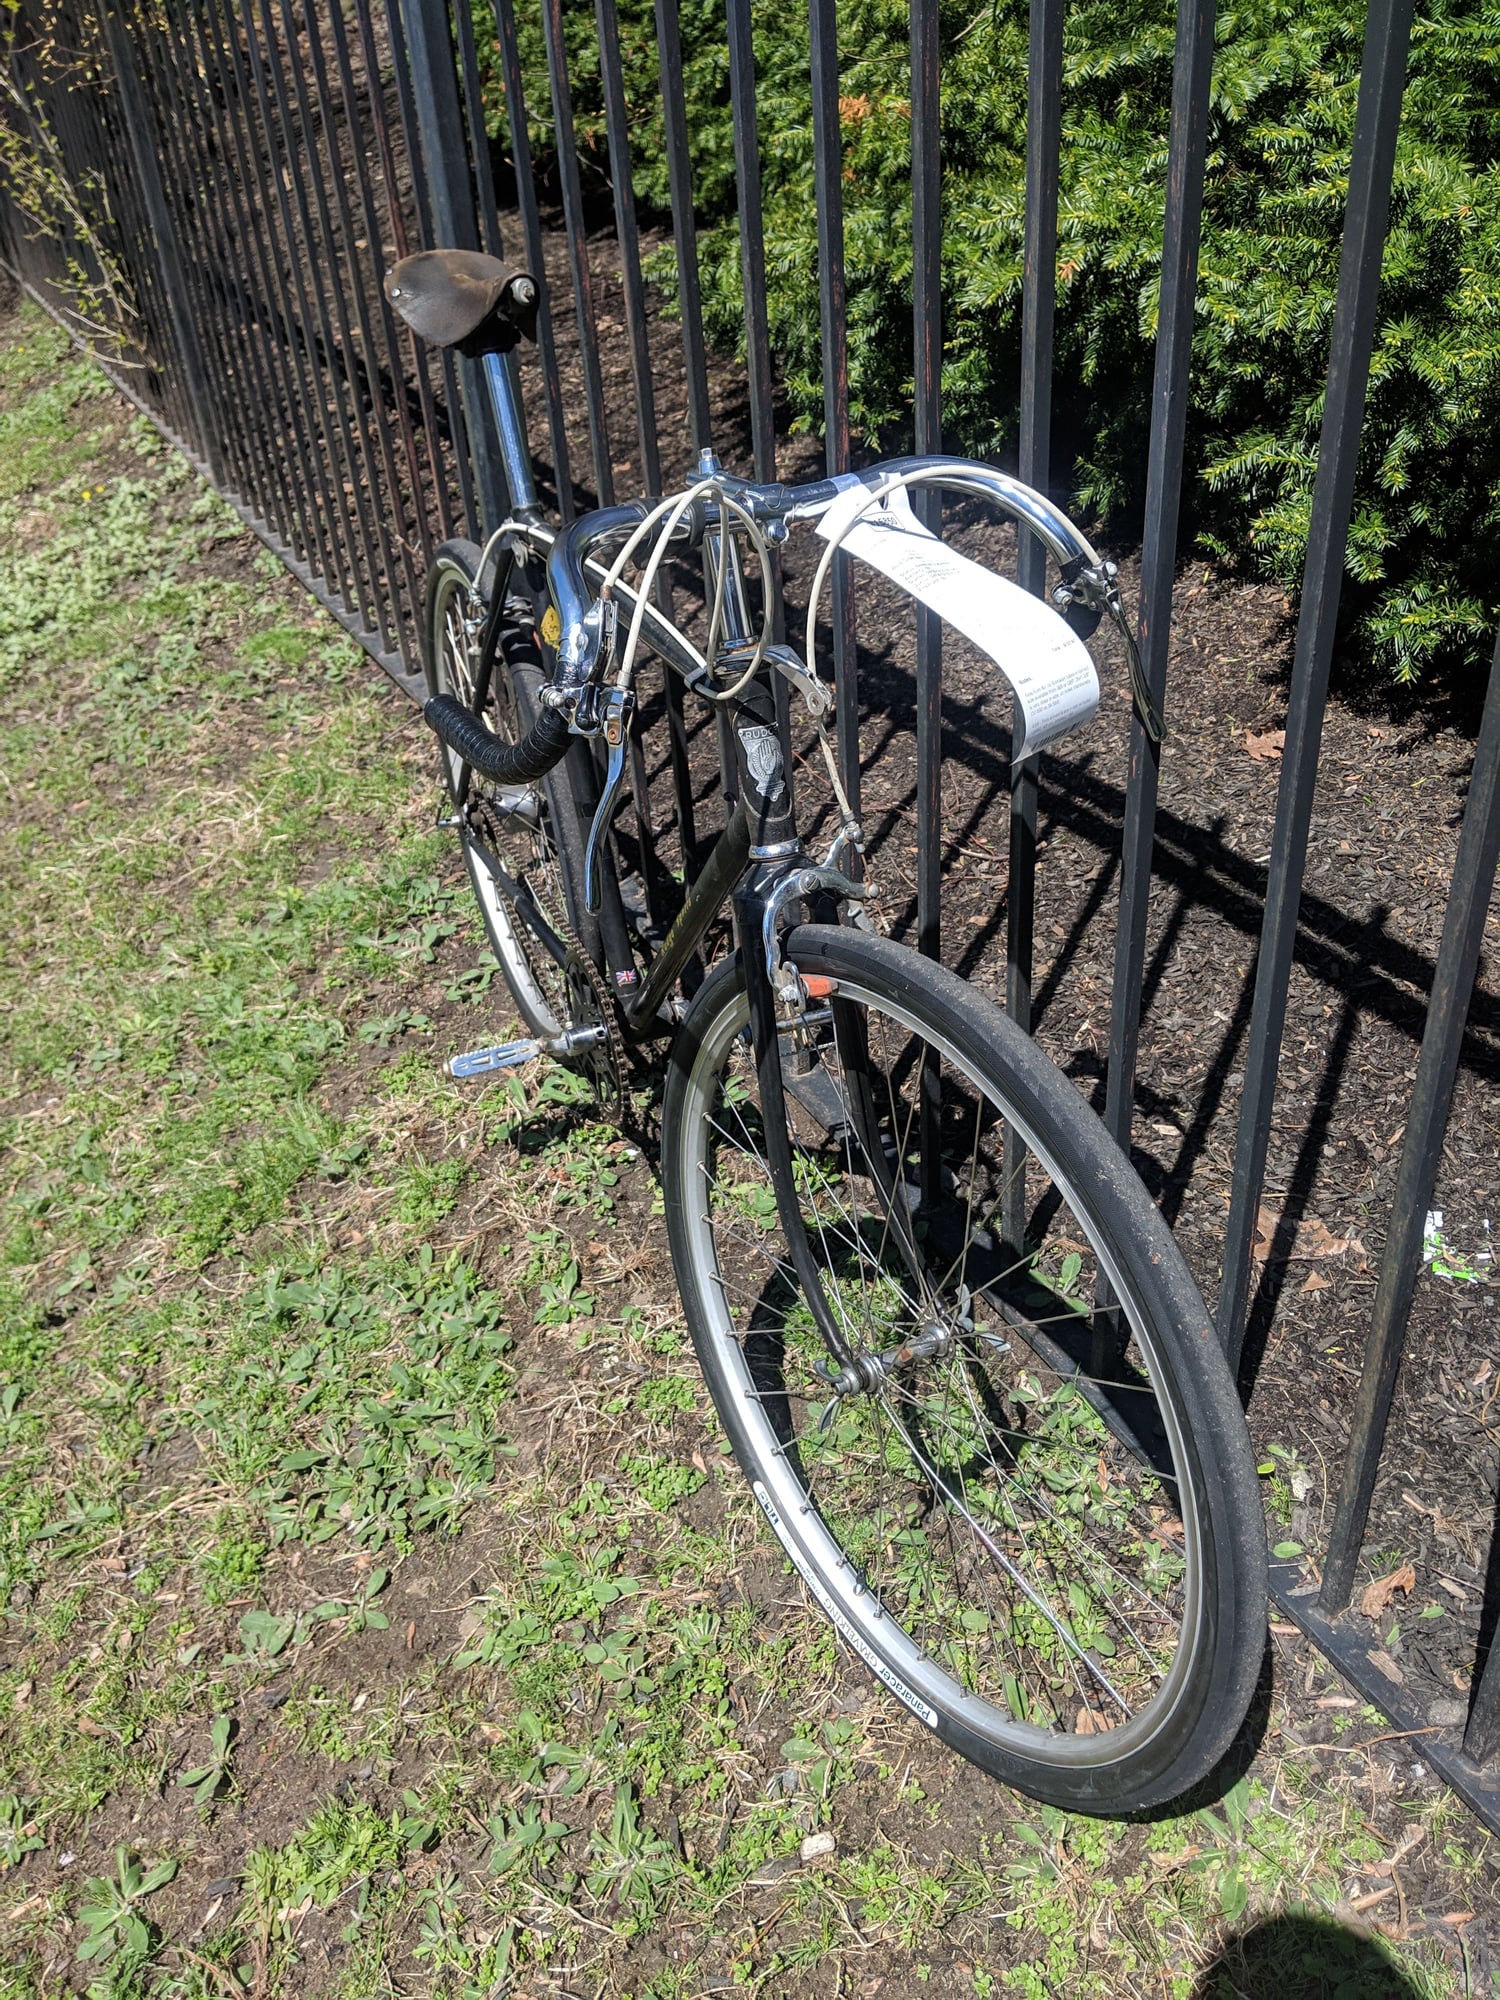
We had an interesting bike come into my shop today for new tires. The frame is a Rudge Sports, looks to be c.1950s, with a late-'70s (I didn't check the date stamp but it had those lines on it) AW hub. It's in overall rough shape and needs some more work, but it's a cool build. Someone laced a pair of SA hubs to 650B wheels, so the bike's owner and I decided on a pair of 38mm Gravel Kings!


Extract from 1947-48 Rudge Catalogue - VCC Library
Extract from 1947-48 Rudge Catalogue - VCC Library
05-06-19, 07:03 AM
Senior Member
Join Date: Jan 2015
Posts: 3,240
Mentioned: 103 Post(s)
Tagged: 0 Thread(s)
Quoted: 1299 Post(s)
Likes: 0
Liked 103 Times
in
85 Posts
It's odd how that happened. Originally the Sports was a sports/club type bike. Then they used the same frame to make a Sports Light Roadster. Then, the club version of this frame was eliminated leaving only the roadster which kept the Sports name. Confusing calling a roadster Sports, but there it is.
__________________
Inflate Hard
Inflate Hard
05-06-19, 07:34 AM
Senior Member
Join Date: Apr 2012
Location: Toronto
Posts: 2,572
Bikes: 1971 Hercules, 1978 Raleigh Superbe, 1978 Raleigh Tourist, 1964 Glider 3 Speed, 1967 Raleigh Sprite 5 Speed, 1968 Hercules AMF 3 Speed, 1972 Raleigh Superbe, 1976 Raleigh Superbe, 1957 Flying Pigeon, 1967 Dunelt 3 Speed
Mentioned: 57 Post(s)
Tagged: 0 Thread(s)
Quoted: 1028 Post(s)
Liked 443 Times
in
288 Posts
1954 Gold Medal..
Posted on Toronto Kijiji
$100.00
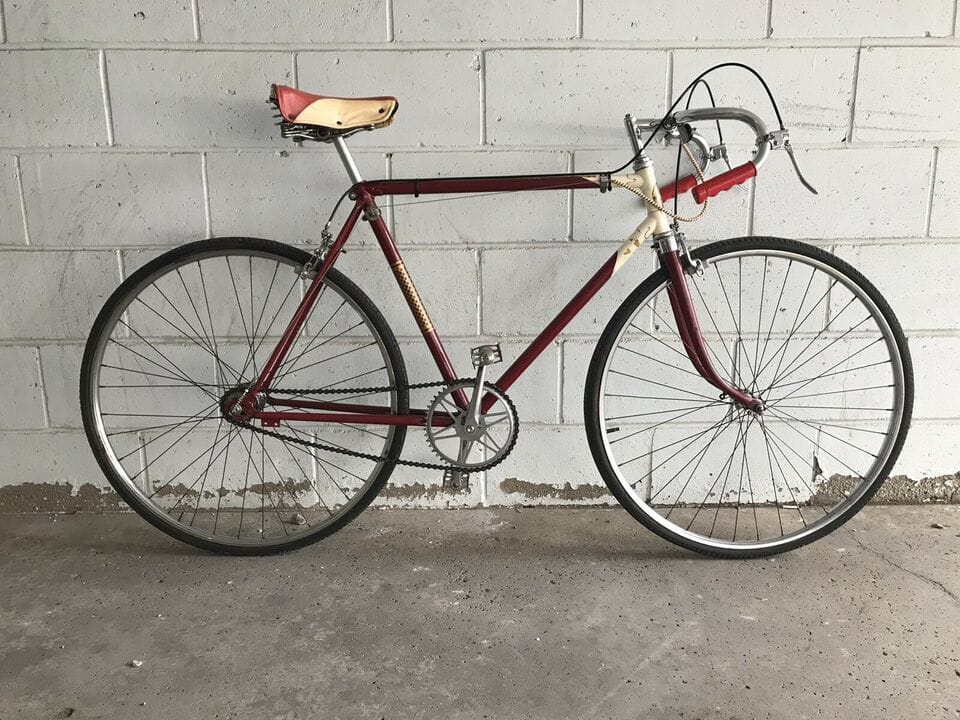
The seller's description:
Made in Canada 3 speed racer. Frame stamped 54 and hub stamped 54. Thoroughly cleaned up - seat post and stem greased. Brass head badge says “Gold Medal”. Lots of English components: Bayliss-Wiley BB, Nicklin cranks, Phillips pedals, Sturmey-Archer gears, Tru-Wel forks. The saddle is a Supercycle, which suggests Canadian Tire, but it may or may not be original (although coloring is right). Rims are spinning true but there is a ding on the rear where someone tried a home repair. Original (?) 28 x 1/14” (!) Dunlop Speedster tires hold air. There is a rear derailer mount, but judging by the paint, none was ever installed (see pics). New brake cables and brake pads. It rides, but one has to be gentle with it!
Posted on Toronto Kijiji
$100.00
The seller's description:
Made in Canada 3 speed racer. Frame stamped 54 and hub stamped 54. Thoroughly cleaned up - seat post and stem greased. Brass head badge says “Gold Medal”. Lots of English components: Bayliss-Wiley BB, Nicklin cranks, Phillips pedals, Sturmey-Archer gears, Tru-Wel forks. The saddle is a Supercycle, which suggests Canadian Tire, but it may or may not be original (although coloring is right). Rims are spinning true but there is a ding on the rear where someone tried a home repair. Original (?) 28 x 1/14” (!) Dunlop Speedster tires hold air. There is a rear derailer mount, but judging by the paint, none was ever installed (see pics). New brake cables and brake pads. It rides, but one has to be gentle with it!