


What have you been wrenching on lately?
 04-21-23, 01:32 AM
#6201
Bergz
Thanks, I have a set of those in the parts box but they look a bit "barnacle" like I think. Cable guides are a cleaner look in my opinion.
. Besides, who can pass up an opportunity to play with fire and get metal red hot!
. Besides, who can pass up an opportunity to play with fire and get metal red hot!

Likes For Bergz:
04-21-23, 03:21 AM
#6202
Senior Member
Join Date: Oct 2015
Location: PDX
Posts: 13,509
Bikes: Merz x 5 + Specialized Merz Allez x 2, Strawberry/Newlands/DiNucci/Ti x3, Gordon, Fuso/Moulton x2, Bornstein, Paisley,1958-74 Paramounts x3, 3rensho, 74 Moto TC, 73-78 Raleigh Pro's x5, Marinoni x2, 1960 Cinelli SC, 1980 Bianchi SC, PX-10 X 2
Liked 6,823 Times
in
3,897 Posts
And now that you bring it up, maybe I will paint some to match just to see if it works, maybe.

 04-21-23, 05:18 AM
#6203
ambulatory senior
Join Date: Dec 2016
Location: Peoria Il
Posts: 6,060
Bikes: Austro Daimler modified by Gugie! Raleigh Professional and lots of other bikes.
Liked 3,753 Times
in
1,716 Posts
Here is a fast and dirty picture of my 1984 Trek 830 mountain bike in my kitchen; finally all complete.

I am very proud how this bike turned out, and will be posting more photos and details soon. Seeing all these great builds on the C&V forum here has been very inspiring.👍🏼
I am very proud how this bike turned out, and will be posting more photos and details soon. Seeing all these great builds on the C&V forum here has been very inspiring.👍🏼
04-21-23, 05:55 AM
#6204
Full Member
>> they look a bit "barnacle"
That's fair, but since I look a bit barnacle myself these days, it's a good fit for my bikes.
cheers -mathias
That's fair, but since I look a bit barnacle myself these days, it's a good fit for my bikes.
cheers -mathias
Likes For steine13:
04-21-23, 06:50 AM
#6205
Senior Member

Join Date: May 2021
Location: London
Posts: 564
Bikes: Motobecane C41, Matsu$hita Nashonaru
Liked 443 Times
in
254 Posts
I tried enamel paint on some bolt heads and it turned out OKish, though it's not very long lasting. Pretty good on fluting (crank arms and seat post) as these are not things one tends to touch with any tools. So I'm interested in seeing what method you use and what's the result. For my next build I'm thinking about getting some Alu components black anodised (quill stem, shifter levers, hub shells).
04-21-23, 07:20 AM
#6206
Full Member
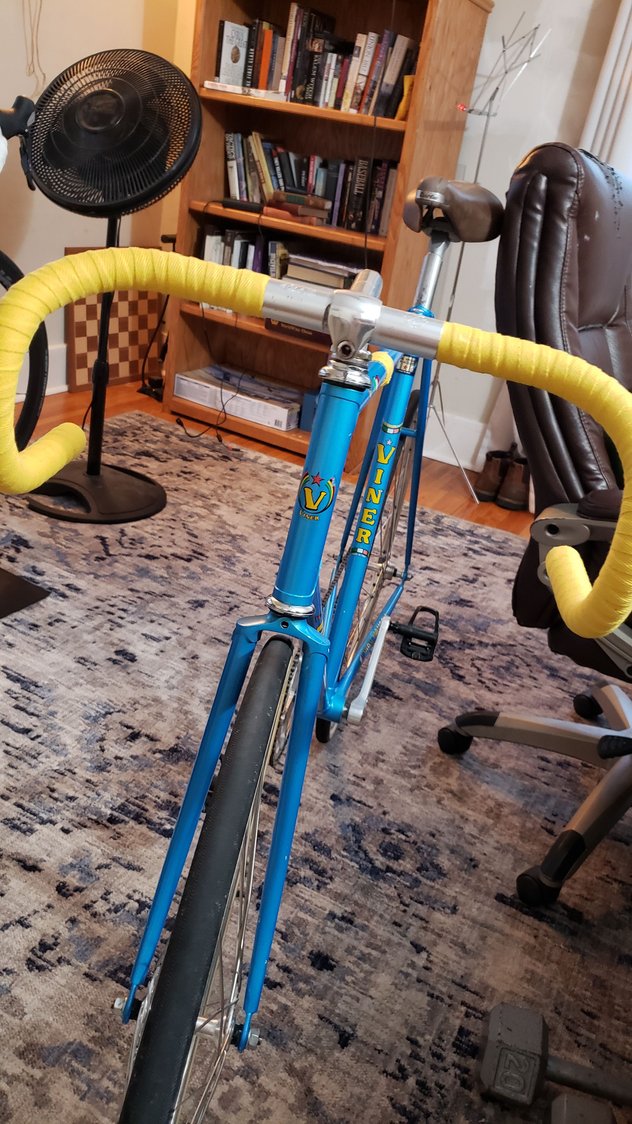
Vintage Cilo - New Brake Cables and Housings, Now working on Lizard Skins Bar Tape. Before and After pics.

PO had no hoods and ugly bar tape

PO had no hoods and ugly bar tape
Last edited by tjfastback66; 04-21-23 at 07:28 AM.
Likes For tjfastback66:
04-21-23, 10:06 AM
#6207

Cantilever believer

Just dropped off those bikes I fixed up at the nonprofit's storage space.
Good news: they got some new kid's bikes donated from a large distributor.
Bad news: "Some settling may occur during shipping & handling."


Good news: they got some new kid's bikes donated from a large distributor.
Bad news: "Some settling may occur during shipping & handling."
04-21-23, 12:11 PM
#6208
Senior Member
Join Date: Oct 2015
Location: PDX
Posts: 13,509
Bikes: Merz x 5 + Specialized Merz Allez x 2, Strawberry/Newlands/DiNucci/Ti x3, Gordon, Fuso/Moulton x2, Bornstein, Paisley,1958-74 Paramounts x3, 3rensho, 74 Moto TC, 73-78 Raleigh Pro's x5, Marinoni x2, 1960 Cinelli SC, 1980 Bianchi SC, PX-10 X 2
Liked 6,823 Times
in
3,897 Posts
I tried enamel paint on some bolt heads and it turned out OKish, though it's not very long lasting. Pretty good on fluting (crank arms and seat post) as these are not things one tends to touch with any tools. So I'm interested in seeing what method you use and what's the result. For my next build I'm thinking about getting some Alu components black anodised (quill stem, shifter levers, hub shells).
Would probably wait and touch up the tool socket after or leave it depending on how it looks.

Likes For merziac:
04-21-23, 05:51 PM
#6209
se�or miembro

Join Date: Dec 2018
Location: Pac NW
Posts: 6,712
Bikes: '70s - '80s Campagnolo
Liked 6,999 Times
in
3,448 Posts
Finished (for now) the rebuild of a '91 Bottecchia SL, basically just moving most of a Campy group from a donor over to this one.

Wrenching notes ... I moved the Triomphe crankset from its Triomphe bb (114mm BSE) to one a little shorter on the ds for this Italian frame, a symmetrical 116mm Shimano 6400. The chainline is in that reasonable/happy range, but the small ring is pretty close (3mm) to the stay.
Shifting was a little noisy in the stand until I removed a link of donor chain. The chainstays here are almost a half inch shorter than the '87 Falcon donor. From the middle of the dropout here, they're only slightly over 16", preventing the wheel from dismounting with an inflated 23.5mm tire.
But I'm very excited about the shifting on my maiden voyage. I was especially concerned with how the braze-on fd would work out after I had trouble with the same issue with an '84 Pinarello a month ago. Here, I left the old Shimano 6400 fd in place, but removed the labeling. Setup gave me all the adjustment options I needed. It's a joy to shift, sounds great, and doesn't require any unnecessary trimming.
For now, I'll be content with the old (1985) look of the non-aero Triomphe levers paired with the bike's (1991) aero top tube routing ... at least until I find some beautiful Chorus/Athena replacements.
Anyway, it turned out to be a great decision to "upgrade" to a bigger frame, and I'm fortunate no one else had the good taste and forethought to snag a $300 classic Italian that sat all sad and lonely on Craigs for two months. This is the biggest frame I've ever wanted to keep and am very happy I'm just tall enough to make that 6400 aero seatpost work.

More pics in the Bott thread here.
...
Wrenching notes ... I moved the Triomphe crankset from its Triomphe bb (114mm BSE) to one a little shorter on the ds for this Italian frame, a symmetrical 116mm Shimano 6400. The chainline is in that reasonable/happy range, but the small ring is pretty close (3mm) to the stay.
Shifting was a little noisy in the stand until I removed a link of donor chain. The chainstays here are almost a half inch shorter than the '87 Falcon donor. From the middle of the dropout here, they're only slightly over 16", preventing the wheel from dismounting with an inflated 23.5mm tire.
But I'm very excited about the shifting on my maiden voyage. I was especially concerned with how the braze-on fd would work out after I had trouble with the same issue with an '84 Pinarello a month ago. Here, I left the old Shimano 6400 fd in place, but removed the labeling. Setup gave me all the adjustment options I needed. It's a joy to shift, sounds great, and doesn't require any unnecessary trimming.
For now, I'll be content with the old (1985) look of the non-aero Triomphe levers paired with the bike's (1991) aero top tube routing ... at least until I find some beautiful Chorus/Athena replacements.
Anyway, it turned out to be a great decision to "upgrade" to a bigger frame, and I'm fortunate no one else had the good taste and forethought to snag a $300 classic Italian that sat all sad and lonely on Craigs for two months. This is the biggest frame I've ever wanted to keep and am very happy I'm just tall enough to make that 6400 aero seatpost work.
More pics in the Bott thread here.
...
Likes For SurferRosa:
04-21-23, 09:55 PM
#6210
se�or miembro
Join Date: Dec 2018
Location: Pac NW
Posts: 6,712
Bikes: '70s - '80s Campagnolo
Liked 6,999 Times
in
3,448 Posts
Now working on rebuilding the Falcon. Started off by destroying my poor little plastic under-shell cable guide after realizing the right side cartridge bb threads were just fine -- it just couldn't go in straight due to the tall ass overkill rivet holding the guide in place. 

Suggestions? Off to eBay for a replacement, I guess.
Suggestions? Off to eBay for a replacement, I guess.
Likes For SurferRosa:

Likes For EJM73:
04-22-23, 08:53 AM
#6212

This beautiful Red Rocket is from the Wildwood collection.
The Falcon gets my first ride, I put a new saddle the San Marco Concor Light with titanium rails. A slight tilt up on the bars. I still have to fit this for me but that shouldn't take much. Right now this bike has Modolo brakes and levers, Nervar cranks Campy hubs on GP4 tubulars.
Keeping with that of the Union Jack
The Raleigh Competition has gotten it new lease on life. Fork alignment successfully set, front triangle checked seatube checked good down tube and headtube needed (ahem) extra polishing are now spot on, rear triangle was not touched


The Raleigh is in the midddle of a hub and rim swap, the original wheels concave Weinman and Campy GS have broken spokes front and back. The wheels pictured are Mavic Module 3, the rear has Campy GS hub the front has a Shimano Arrow hubs that will be replaced with Campy one I get preferred spokes.
The Falcon gets my first ride,
I put a new saddle the San Marco Concor Light with titanium rails. A slight tilt up on the bars. I still have to fit this for me but that shouldn't take much. Right now this bike has Modolo brakes and levers, Nervar cranks Campy hubs on GP4 tubulars.Keeping with that of the Union Jack
The Raleigh Competition has gotten it new lease on life. Fork alignment successfully set, front triangle checked seatube checked good down tube and headtube needed (ahem) extra polishing are now spot on, rear triangle was not touched
The Raleigh is in the midddle of a hub and rim swap, the original wheels concave Weinman and Campy GS have broken spokes front and back. The wheels pictured are Mavic Module 3, the rear has Campy GS hub the front has a Shimano Arrow hubs that will be replaced with Campy one I get preferred spokes.
Likes For Mr. 66:
04-22-23, 02:27 PM
#6213
Senior Member
Join Date: May 2021
Location: London
Posts: 564
Bikes: Motobecane C41, Matsu$hita Nashonaru
Liked 443 Times
in
254 Posts
In case someone was wondering what Selle Italia Turbo looks like stripped to its shell, photo below. I had this saddle for a while and the padding and cover were mangled already. So I thought I might as well learn something new and see if I can modify it a bit, get new padding and new cover for it. The idea is to drill some holes along the centre line to make it more flexible, then glue on foam (of camping mat variety, most likely), but thinner than the original one (Turbo saddles have quite a lot of foam). Then sand it down to give it the right shape and cover with PU leather or a piece of suede. There's no particular purpose to this project, though I'm curious to see if I can make it a bit lighter and look nicer. Right now it weighs 275g. It will be a slow project though, I don't particualry need a saddle urgently.

Selle Italia Turbo, bare shell
Selle Italia Turbo, bare shell
Likes For VintageSteelEU:
04-23-23, 08:08 PM
#6214
Cantilever believer
Today's post-ride project was this Sun 3-speed that's been languishing in a half-rebuilt state for a while. I had grandiose plans to do a thorough de-rusting, but the oxides won this round and I just reassembled it into fully functional if not cosmetically perfect shape. Now I just have to decide who gets it, given it's a bit too beat up to sell and too much work to get pretty for a foster kid - so it'll probably go to Rusty Spoke for work trade or perhaps another bike-related nonprofit.
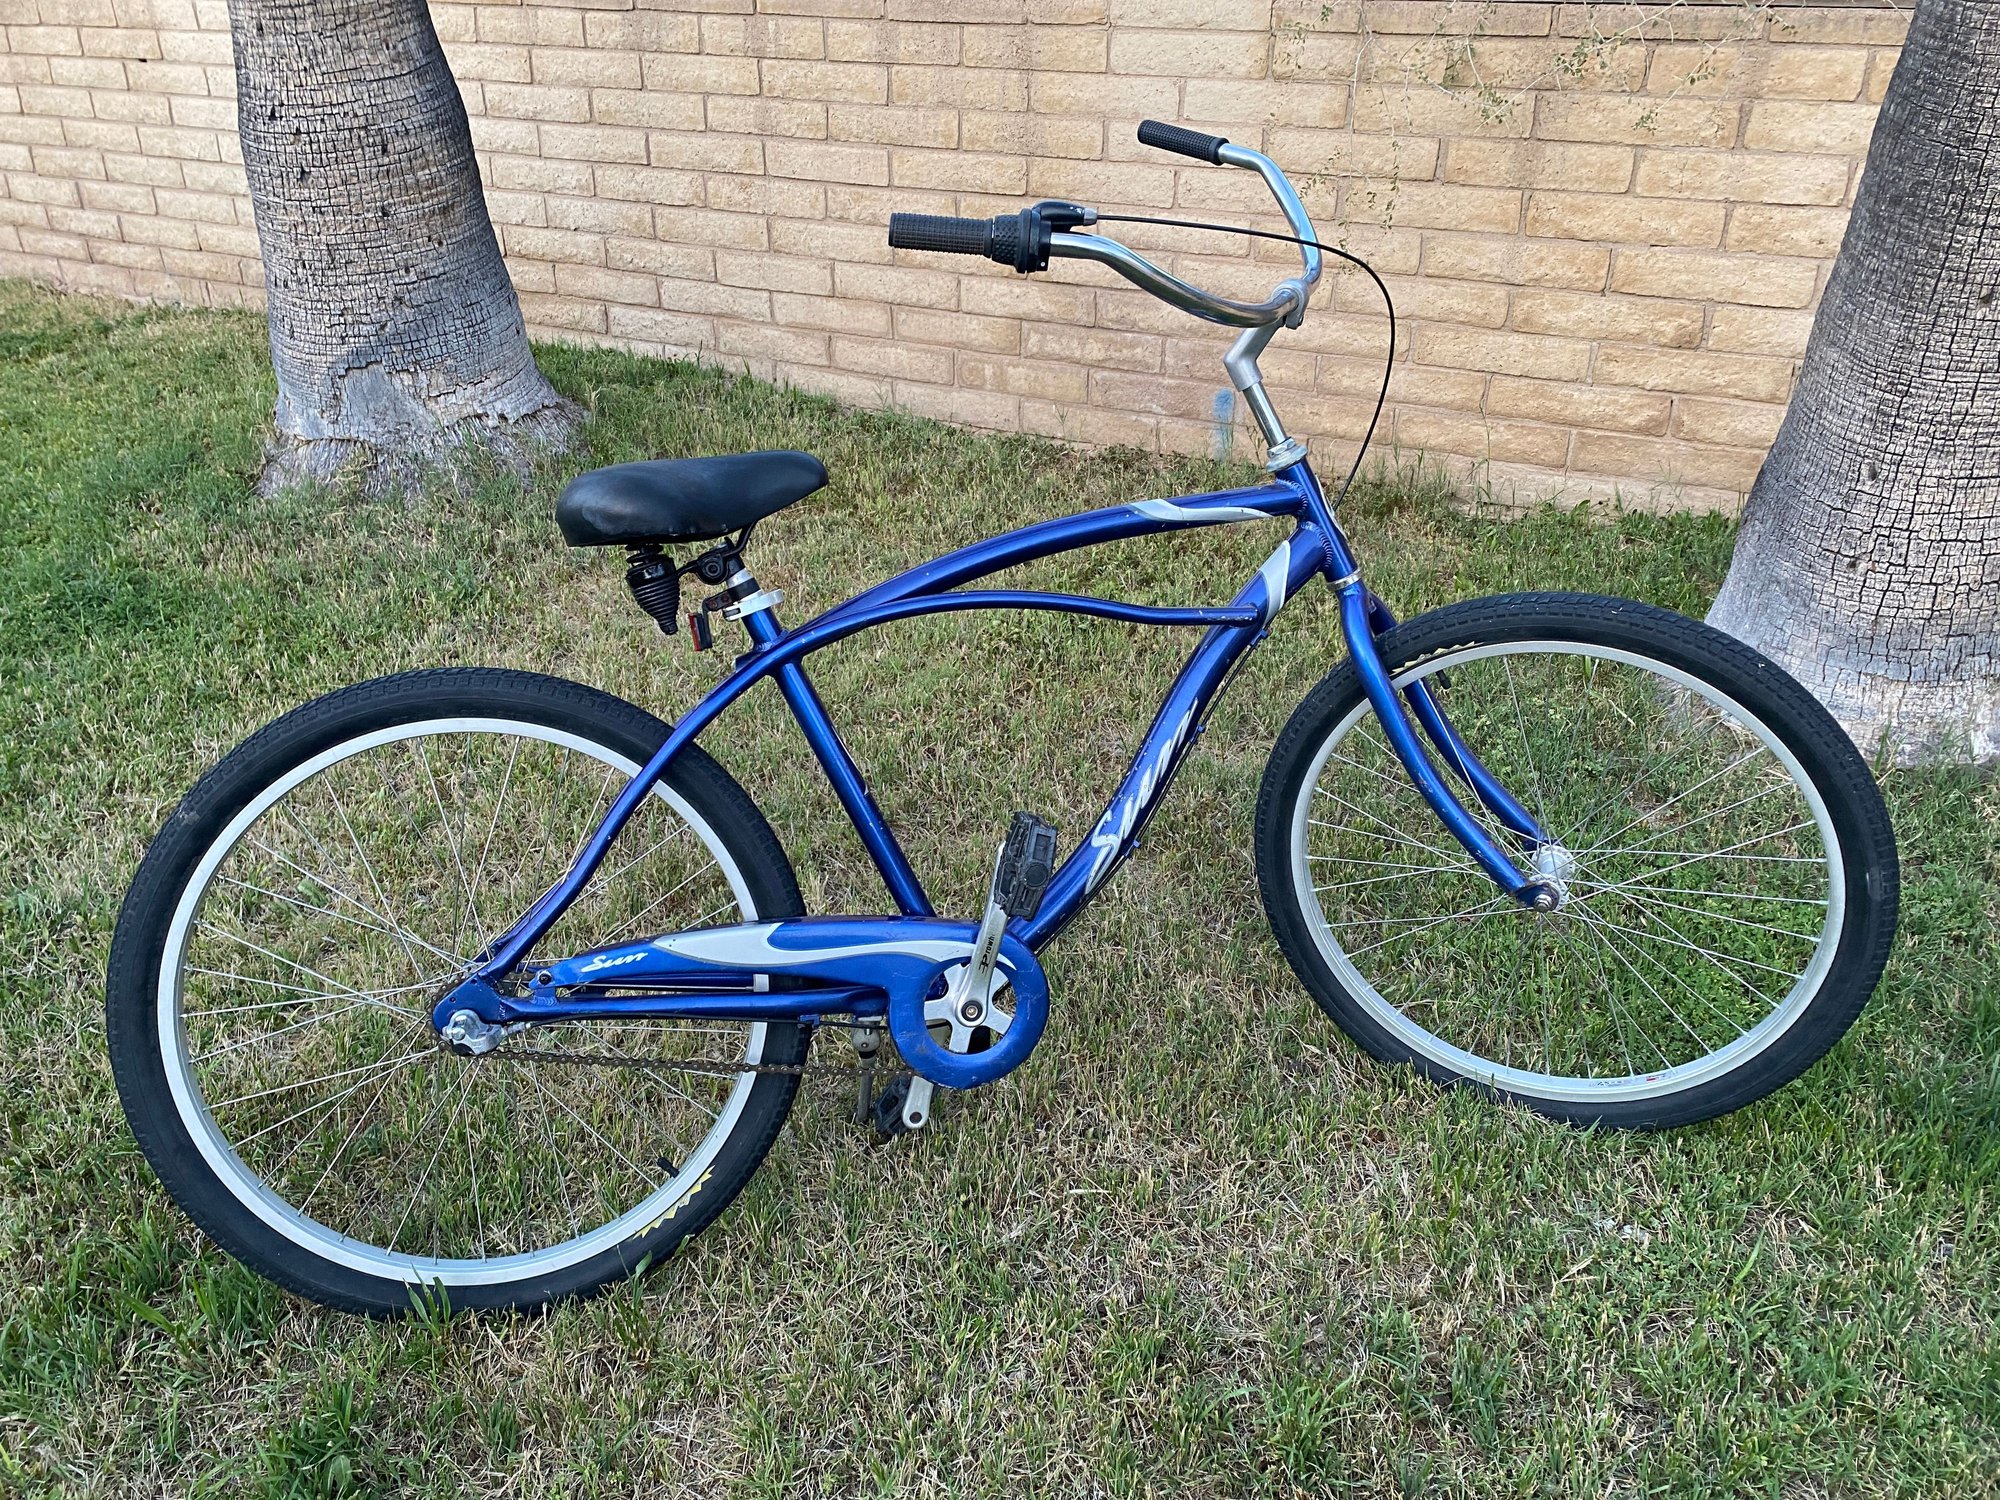
Now I'm getting around to dismantling a 700C wheel with a little teeny issue:

Now I'm getting around to dismantling a 700C wheel with a little teeny issue:
__________________
Richard C. Moeur, PE - Phoenix AZ, USA
https://www.richardcmoeur.com/bikestuf.html
Richard C. Moeur, PE - Phoenix AZ, USA
https://www.richardcmoeur.com/bikestuf.html
04-24-23, 05:32 PM
#6215
Senior Member
Join Date: Dec 2016
Location: Long Island, NY
Posts: 2,224
Bikes: Trek 800 x 2, Schwinn Heavy Duti, Schwinn Traveler, Schwinn Le Tour Luxe, Schwinn Continental, Cannondale M400 and Lambert, Schwinn Super Sport
Liked 1,114 Times
in
719 Posts
Defanging a chainring
On my Lambert, I have one chainring since I am using a hybrid gearing set up, Sturmey Archer AW + a derailleur. I had two 52 tooth chainrings available in my spare parts stash, so I thought I would turn one of them into a outer ring, pants leg protector.

Before

Almost there

Complete with sanded edges
Sans teeth it is down to only 86 grams now.
Before
Almost there
Complete with sanded edges
Sans teeth it is down to only 86 grams now.
04-24-23, 06:11 PM
#6216
Senior Member
Join Date: May 2021
Location: London
Posts: 564
Bikes: Motobecane C41, Matsu$hita Nashonaru
Liked 443 Times
in
254 Posts
There is no such thing like too many freewheels one can have. Especially Suntour ones. And it's also a cautionary tale, so I thought I'll share.
The one in the first photo, with the freewheel body still on the hub shell is what came with a bicycle I got about a year ago. Hub is Maillard, freewheel is Suntour NWN and the rim was Weinmann of the concave variety. Back then I didn't care about the freewheel as much as now and it was stuck and wouldn't come off. The spokes were dreadful and what I really wanted was the rim. If that happened right now, I would deal with the issue in a different way and that that stubborn freewheel off and have the whole deal: hub, freewheel and the rim (not the spokes, these were beyond unusable). Back then my solution was a wire cutter. I got the rim alright and still have it (together with the front one), but as I found out, both rims actually need some rounding before they can be successfully built into something useful. The lesson here: don't be impatient. You might think something is stuck without hope, but there's a good chance a bit of gentle persuasion and time will solve the problem.
The rims ended at the back of the rim cupboard. The hub and freewheel ended up at the bottom of the junk pile. Until recently. I had another Suntour NWN with NOS sprockets (and the body wasn't used much, if ever), but unfortunately only 5 sprockets. So I decided to dig out that hub shell and see if I can get the sprockets off and re-use them. Surprisingly, that stuck freewheel is quite smooth. Must be ages of soaking the darn thing in WD40 did it some good. And the sprockets came off no problem. As a result, I now have another fully functional 6 speed Suntour freewheel I can actually use (second photo). The gearing I'm not sure of yet. It's 13-24. I'm getting used to 13-21 right now and that works pretty well for me, but good to know I have another option available.
I decided I'm going to recover the hub and freewheel body as well when I have a moment. The plan is to remove the outer freehub body and bearing balls, lace the hub into a wheel with inner tube and tyre, soak the freewheel body / hub shell thread with penetrating oil for a few days and get the freewheel body off. Interestingly, I got recently Shimano 6207 hub with the same problem, so I will actually get to try this approach sometime next week.
Likes For VintageSteelEU:
04-25-23, 08:29 AM
#6217
Newbie
I have finished the bike and also refurbished the original wheels. 40 spoke Sansin rear and 36 spoke Sansin front. The rims are Arya, the rear is wider than the front. I replaced the original Deerhead derailleurs with Suntour 6 speed Accushift. Now to do some riding.
04-25-23, 08:52 AM
#6218
Newbie
I bought a 2000 KHS Flite 300 steel frame awhile back. I had to deal with a lot of small rust spots and found some Rust-Oleum that matched the original red paint. I picked up a used Cannondale R300 last week and am using the derailleurs, brakes, and wheels (the rear had broken spokes that I'm having fixed). It's a 97 R300 which had 7 speed downtube shifters. Catalog indicates RX100 8 speed for this year but it has all Exage 7 speed. I want to put the shifters (7 spd indexing Shaimano) on some sort of flat/city bars. Any ideas about adapters out there? I'm also look for new home for the Cannondale frame (small R300 CAD2
Thanks,
DA
Thanks,
DA
04-25-23, 11:27 AM
#6219
buy my bikes

Join Date: Jun 2014
Location: Michigan
Posts: 1,868
Bikes: my very own customized GUNNAR CrossHairs
Liked 503 Times
in
274 Posts
maybe hit more harder?
Overpaid for an Allez
Getting into it now and the wedge is stuck for the quill stem.
I keep smacking the quill bolt. No joy.
Soaking with penetrating oil now. Maybe some heat next�.

Getting into it now and the wedge is stuck for the quill stem.
I keep smacking the quill bolt. No joy.
Soaking with penetrating oil now. Maybe some heat next�.
Likes For mrv:
04-25-23, 01:19 PM
#6220
buy my bikes
Join Date: Jun 2014
Location: Michigan
Posts: 1,868
Bikes: my very own customized GUNNAR CrossHairs
Liked 503 Times
in
274 Posts
ok - wedge is loose. not i gotta get the stem loose.....
maybe gotta bring the heat.
https://cimg1.ibsrv.net/gimg/bikefor...da2079d7a.jpeg
maybe gotta bring the heat.
https://cimg1.ibsrv.net/gimg/bikefor...da2079d7a.jpeg
04-25-23, 03:32 PM
#6221
For your fork. Heat may help, a clamp or two a board and picnic table or bench. In some fashion the fork sandwich between the board and table clamped could secure things for man handling.
Likes For Mr. 66:
04-25-23, 04:33 PM
#6222
buy my bikes
Join Date: Jun 2014
Location: Michigan
Posts: 1,868
Bikes: my very own customized GUNNAR CrossHairs
Liked 503 Times
in
274 Posts
I stuck a 2 x 4 in the fork blades for some leverage- while standing on the handle bars.
But obviously didn�t want to go gonzo with that bad idea.
I�ll try your suggestion before I apply a torch to the stem. It�s specialized branded. I�d like to use it.
04-25-23, 05:17 PM
#6223
Senior Member
put the bolt back in, slam it to make sure the wedge is loose and up (or down if the bike is right side up). Add your various oils and lubricants and let it seep in, and then pound the stem in (not out- luckily you seem to have a lot of room) FAR easier to pound in than trying to get leverage to pull out. the point is you are now pushing the penetrating oils into the trouble spot. let sit, then pull out!
Likes For jetboy:
04-25-23, 08:49 PM
#6224
Cantilever believer
This afternoon's project is another "get something off the back porch" affair, where a 30+ year old Roadmaster frame, some old Huffy coaster brake wheels, and assorted odd parts are now assembled into a "frankenbike" that won't win any beauty contests but should serve someone well as a work trade bike.
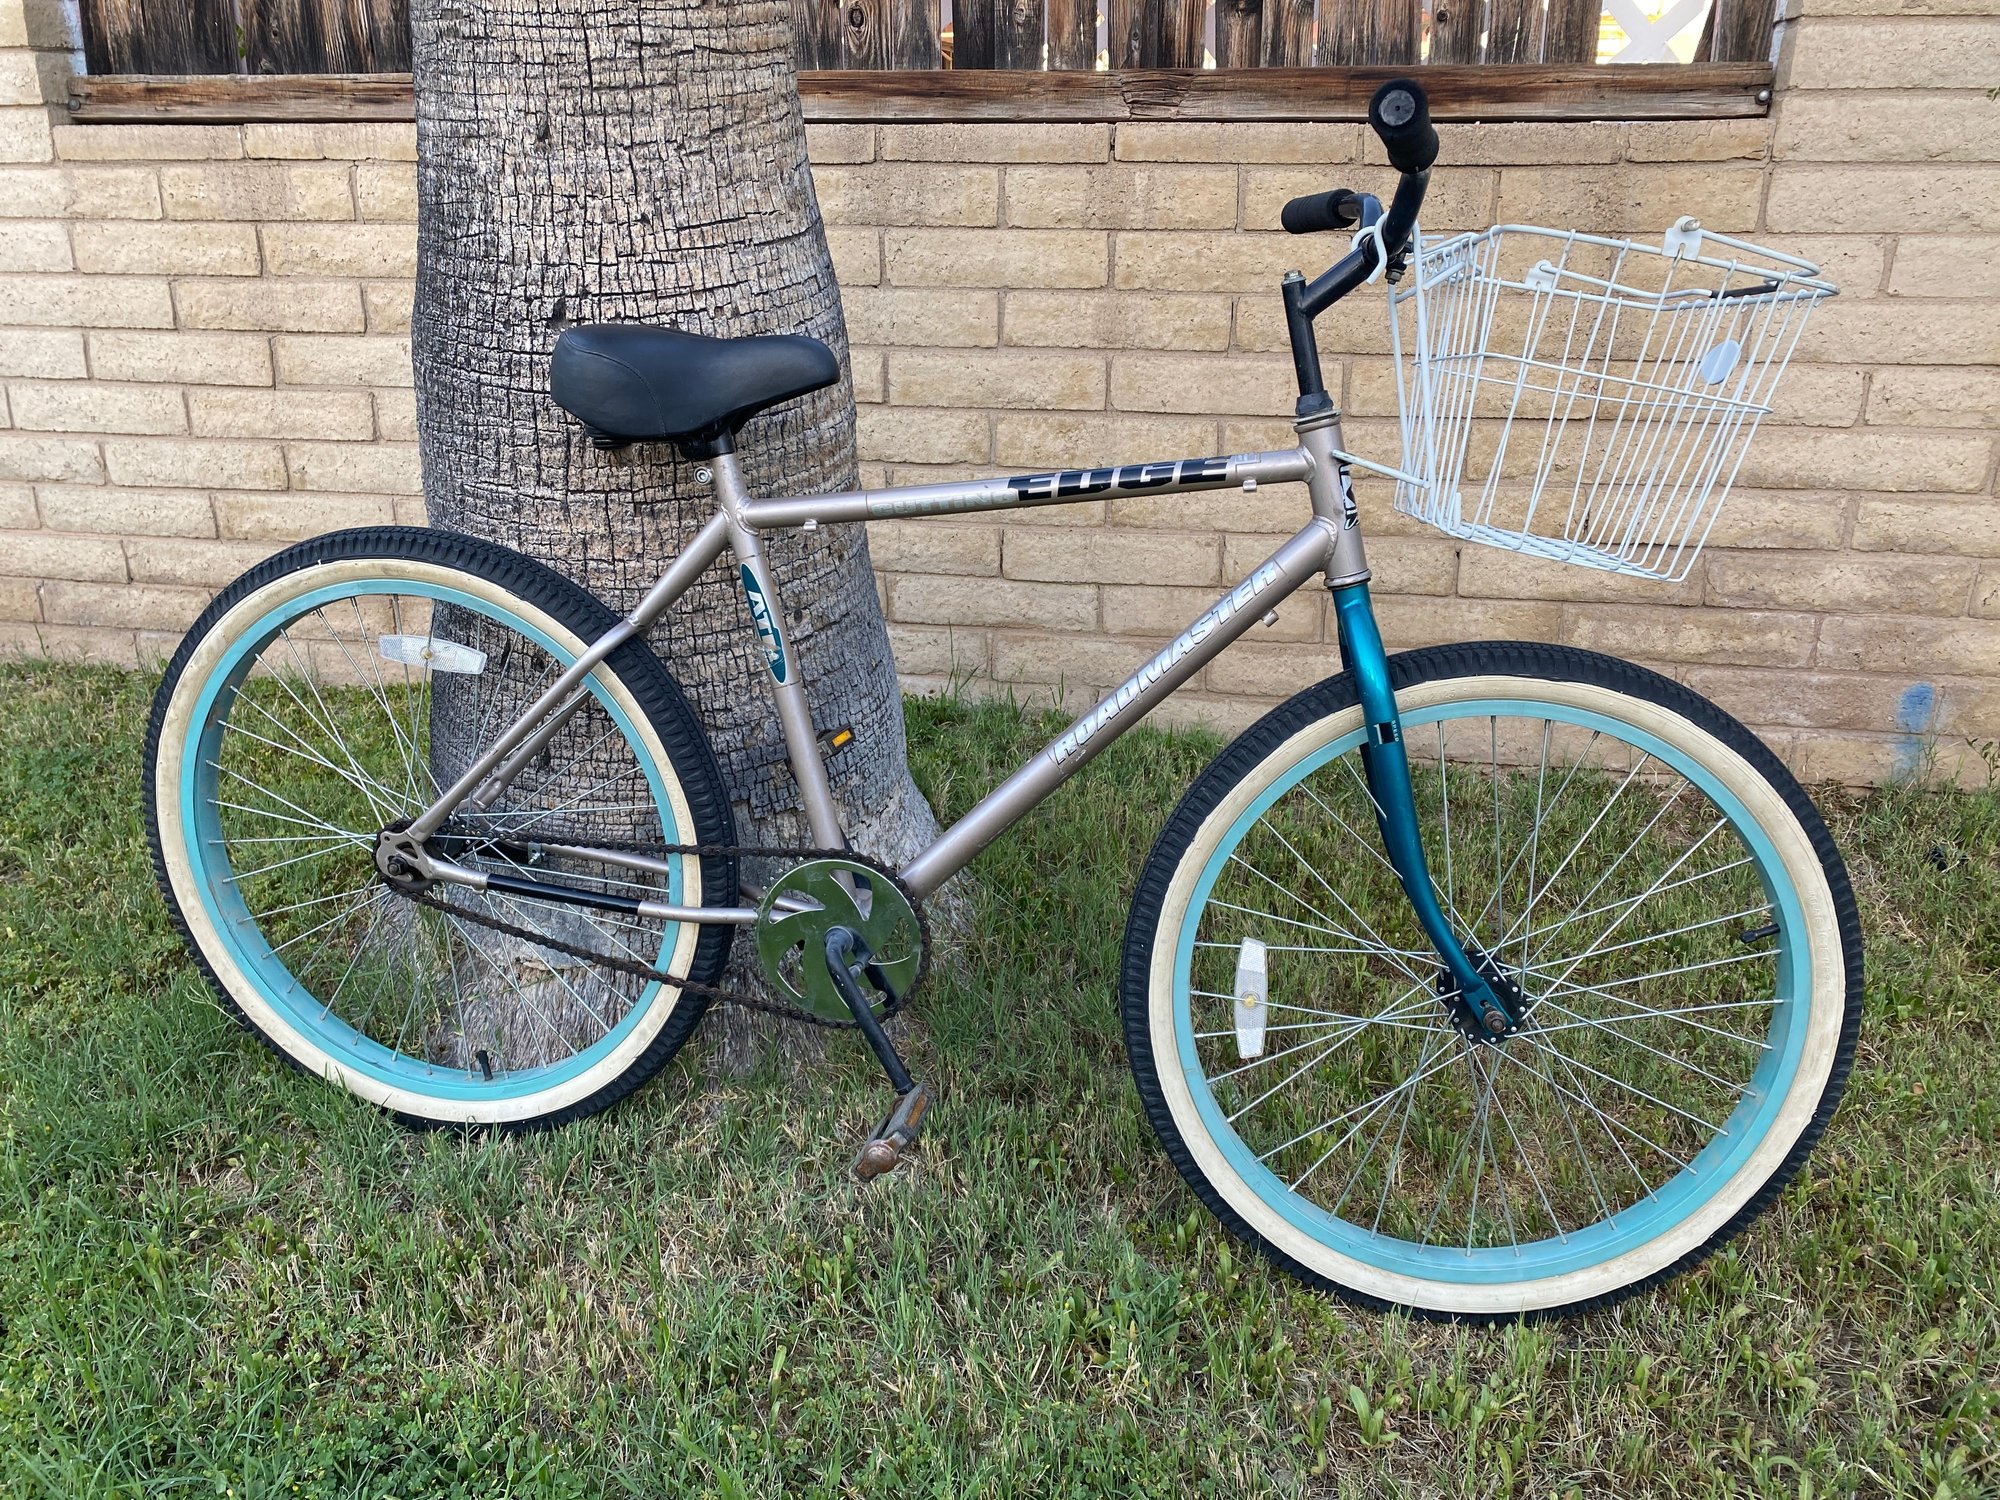
I'm not saying the frame is no-name steel, but I was able to cold set the rear triangle from 120 to 110 by hand without tools without pushing all that hard (and even overshot and had to hand-bend it back a bit). I swapped the stamped steel spot welded triple chainring for a single and added a basket to increase the usefulness. And made sure to adjust the message on the decals so as not to misrepresent its new status:
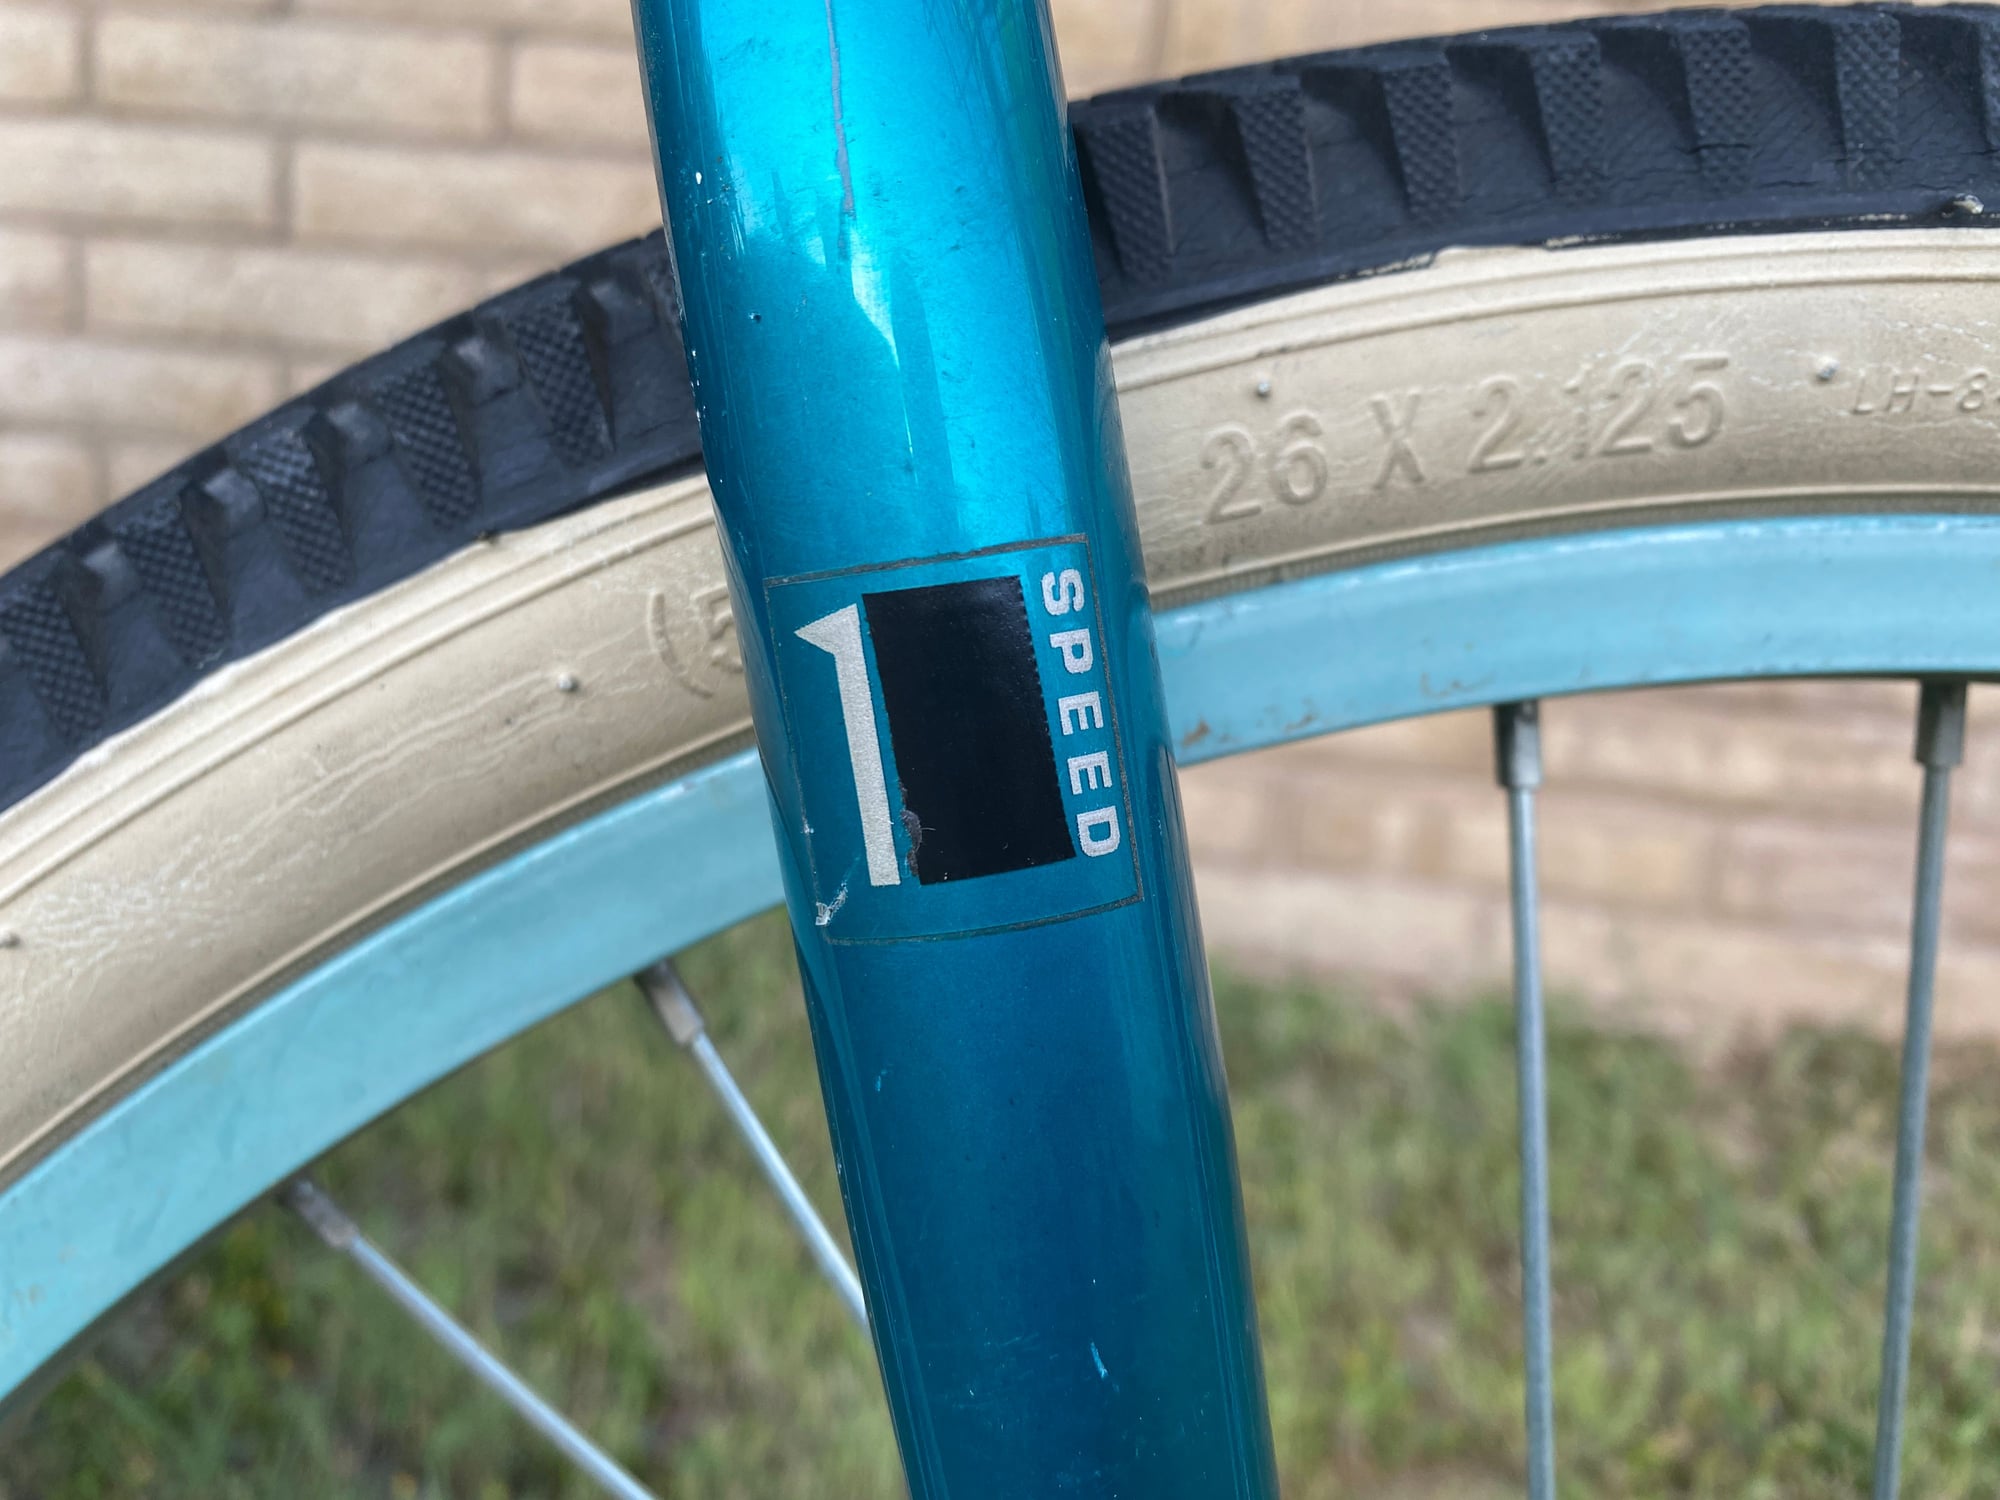
I'm not saying the frame is no-name steel, but I was able to cold set the rear triangle from 120 to 110 by hand without tools without pushing all that hard (and even overshot and had to hand-bend it back a bit). I swapped the stamped steel spot welded triple chainring for a single and added a basket to increase the usefulness. And made sure to adjust the message on the decals so as not to misrepresent its new status:
Likes For RCMoeur:
04-26-23, 08:36 AM
#6225
Newbie
I want to re-cover a Vetta LiteGel seat. I've removed the original covering and looks to be some sort of faux leather (vinyl bonded to a cotton or poly blend). Anyone know of a suitable fabric to replace this?
Thanks,
DA
Thanks,
DA