


'71 Raleigh International Garage Sale Find


Likes For JacobLee:
 01-01-20, 06:25 PM
#55
Senior Member

Join Date: Mar 2012
Location: Niagara Region, Canada
Posts: 1,455
Bikes: 1970s Alex Singer, 1960s Peugeot PX 10, 1960s Bertin C37, 1973 Carre Bertin C 37, 1972 Carlton Kermesse, 1981 Peugeot PX 14 Super Competition
Mentioned: 65 Post(s)
Tagged: 0 Thread(s)
Quoted: 346 Post(s)
Liked 266 Times
in
157 Posts
JacobLee-
The seat binder bolt is the old, British Whitworth standard which is why you ended up with the adjustable. They're available on EBay. The seat tube decal is reproduced, such as the one linked to at Velocals here: https://velocals.com/carlton-head-badge-decal/. It's also available in a UV resistant version for non--clear coated applications like yours.
The seat binder bolt is the old, British Whitworth standard which is why you ended up with the adjustable. They're available on EBay. The seat tube decal is reproduced, such as the one linked to at Velocals here: https://velocals.com/carlton-head-badge-decal/. It's also available in a UV resistant version for non--clear coated applications like yours.
01-01-20, 06:36 PM
#56
Total Scrounge
Thread Starter
Join Date: Nov 2019
Location: Portland, Oregon
Posts: 884
Bikes: 71 International 72 Super Course 83 Gap
Mentioned: 15 Post(s)
Tagged: 0 Thread(s)
Quoted: 327 Post(s)
Liked 924 Times
in
310 Posts
JacobLee-
The seat binder bolt is the old, British Whitworth standard which is why you ended up with the adjustable. They're available on EBay. The seat tube decal is reproduced, such as the one linked to at Velocals here: https://velocals.com/carlton-head-badge-decal/. It's also available in a UV resistant version for non--clear coated applications like yours.
The seat binder bolt is the old, British Whitworth standard which is why you ended up with the adjustable. They're available on EBay. The seat tube decal is reproduced, such as the one linked to at Velocals here: https://velocals.com/carlton-head-badge-decal/. It's also available in a UV resistant version for non--clear coated applications like yours.
01-01-20, 07:48 PM
#57
Total Scrounge
Thread Starter
Join Date: Nov 2019
Location: Portland, Oregon
Posts: 884
Bikes: 71 International 72 Super Course 83 Gap
Mentioned: 15 Post(s)
Tagged: 0 Thread(s)
Quoted: 327 Post(s)
Liked 924 Times
in
310 Posts
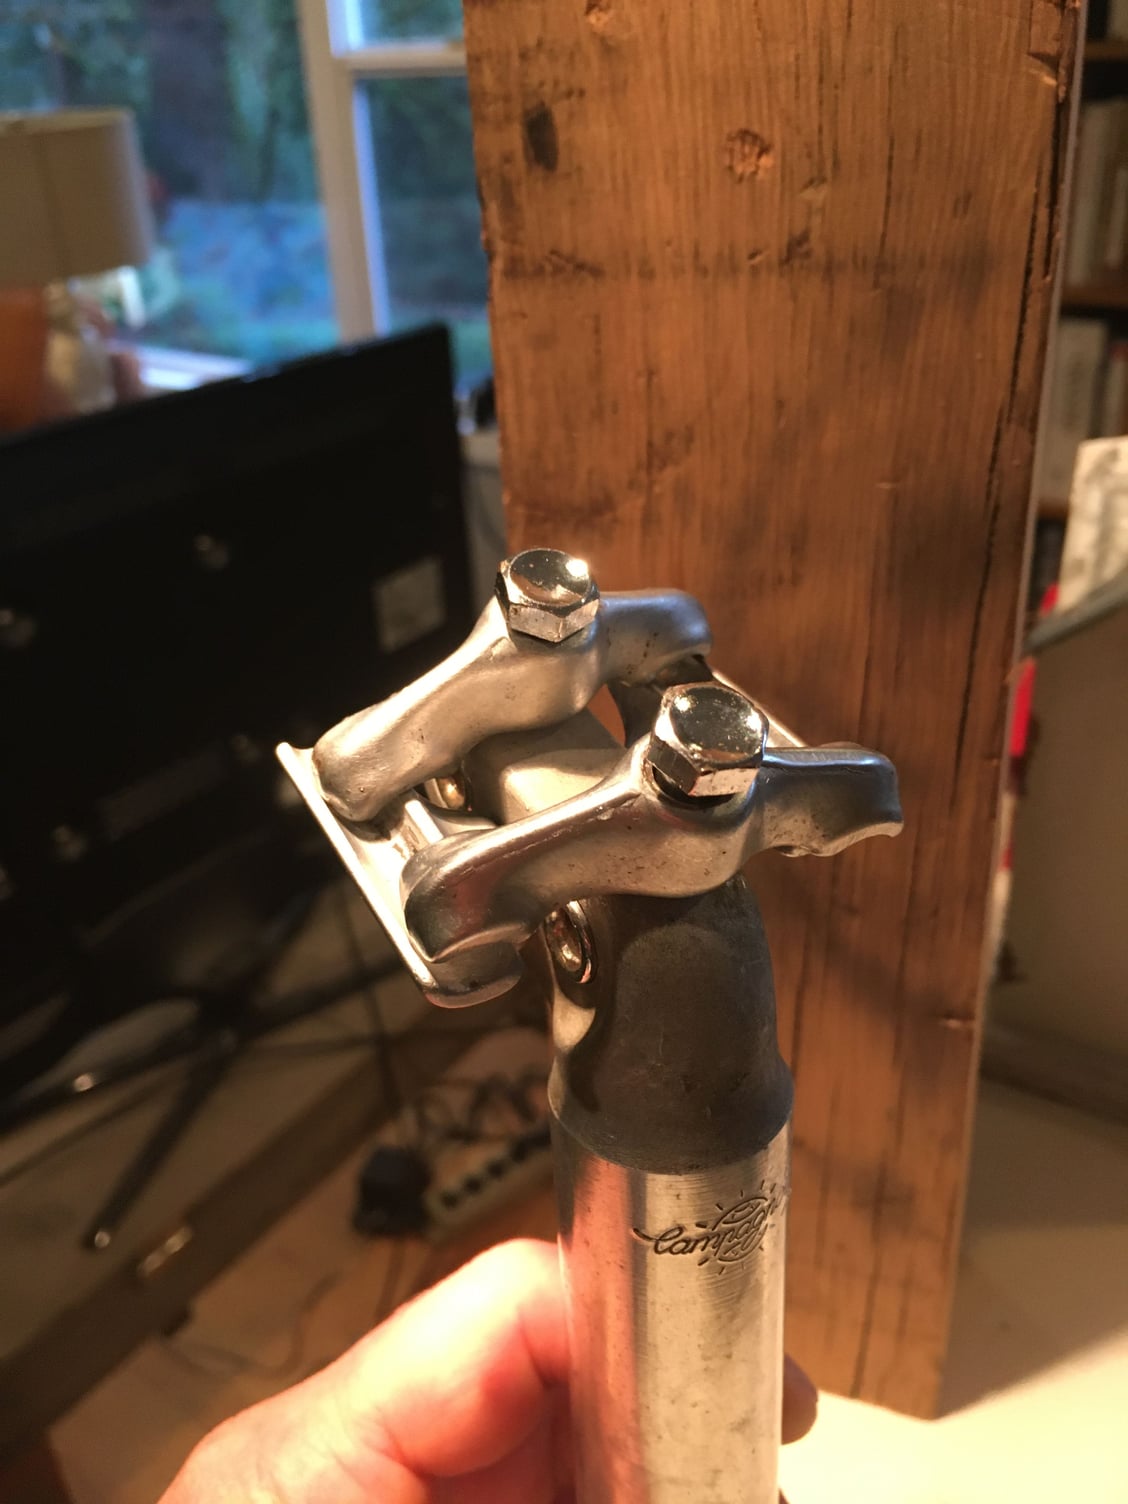
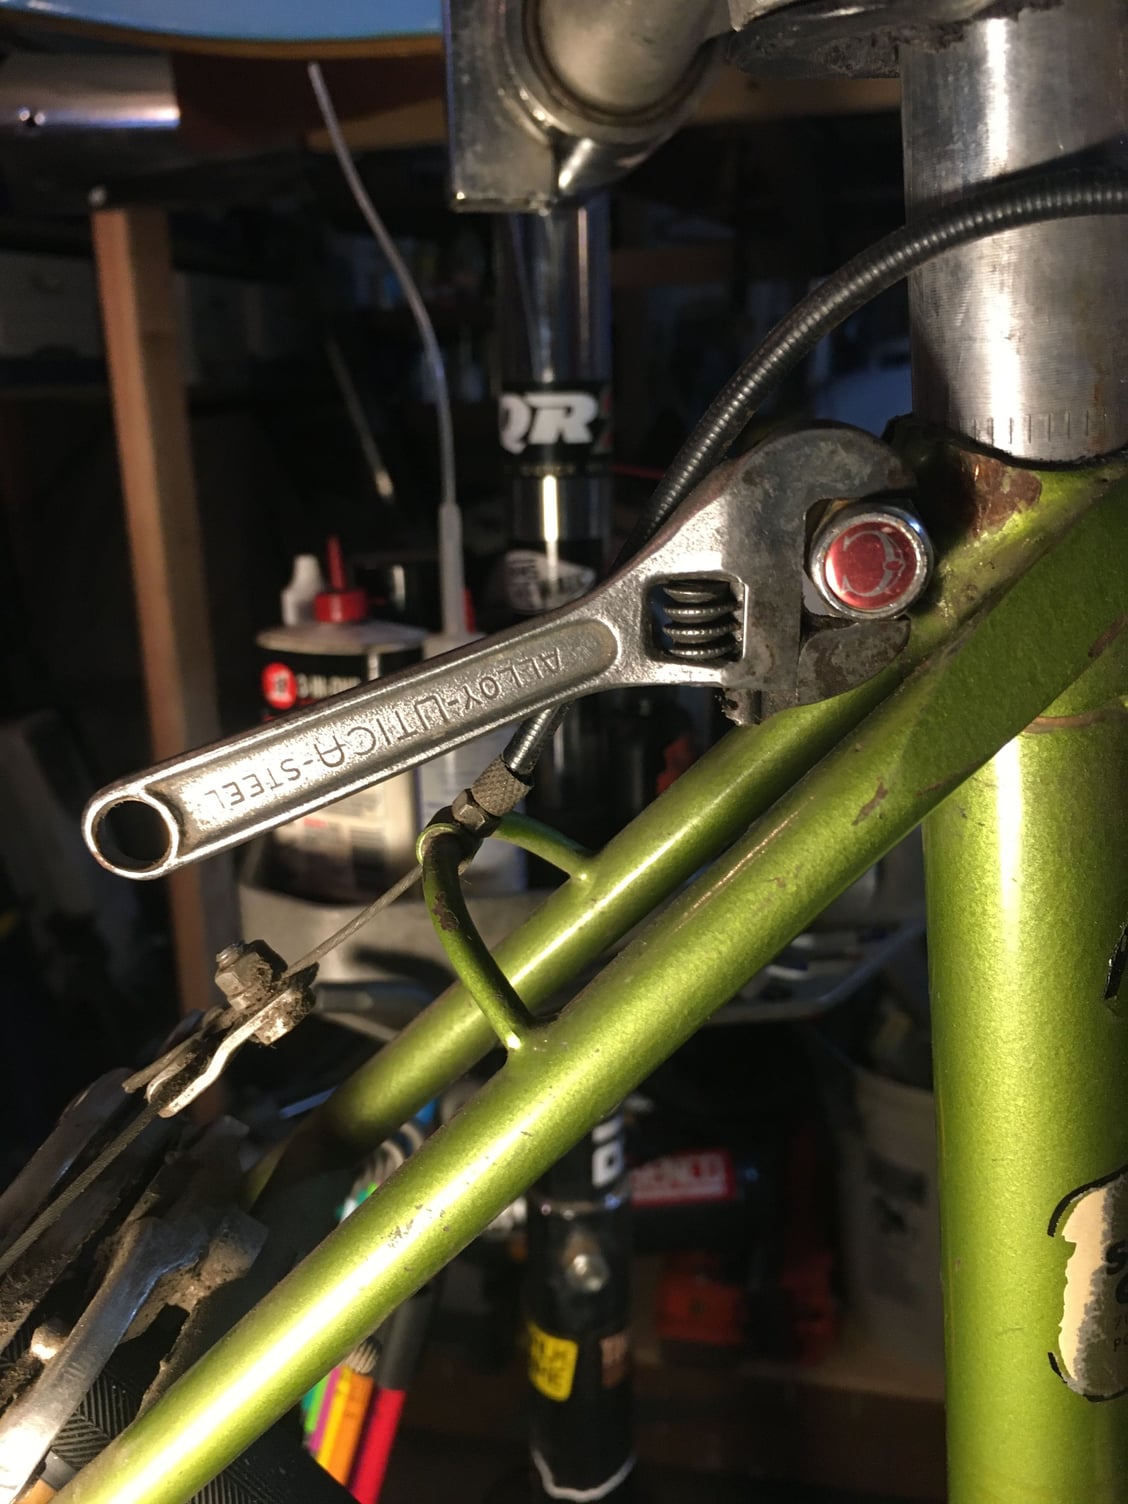
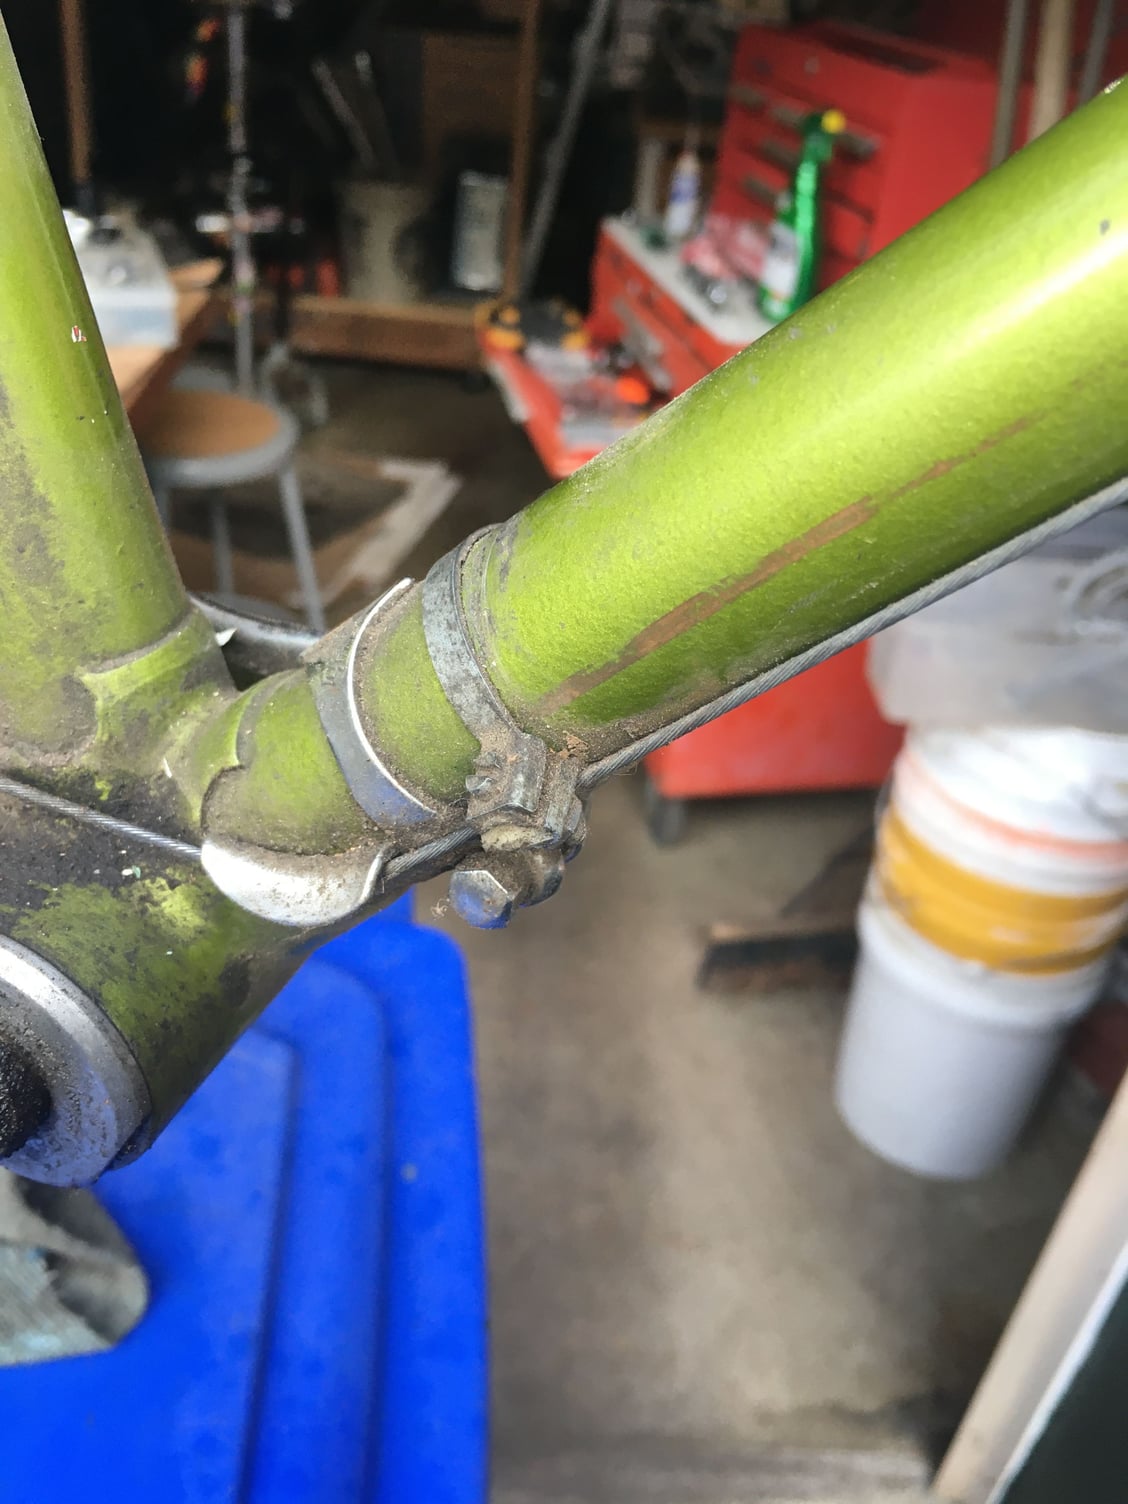
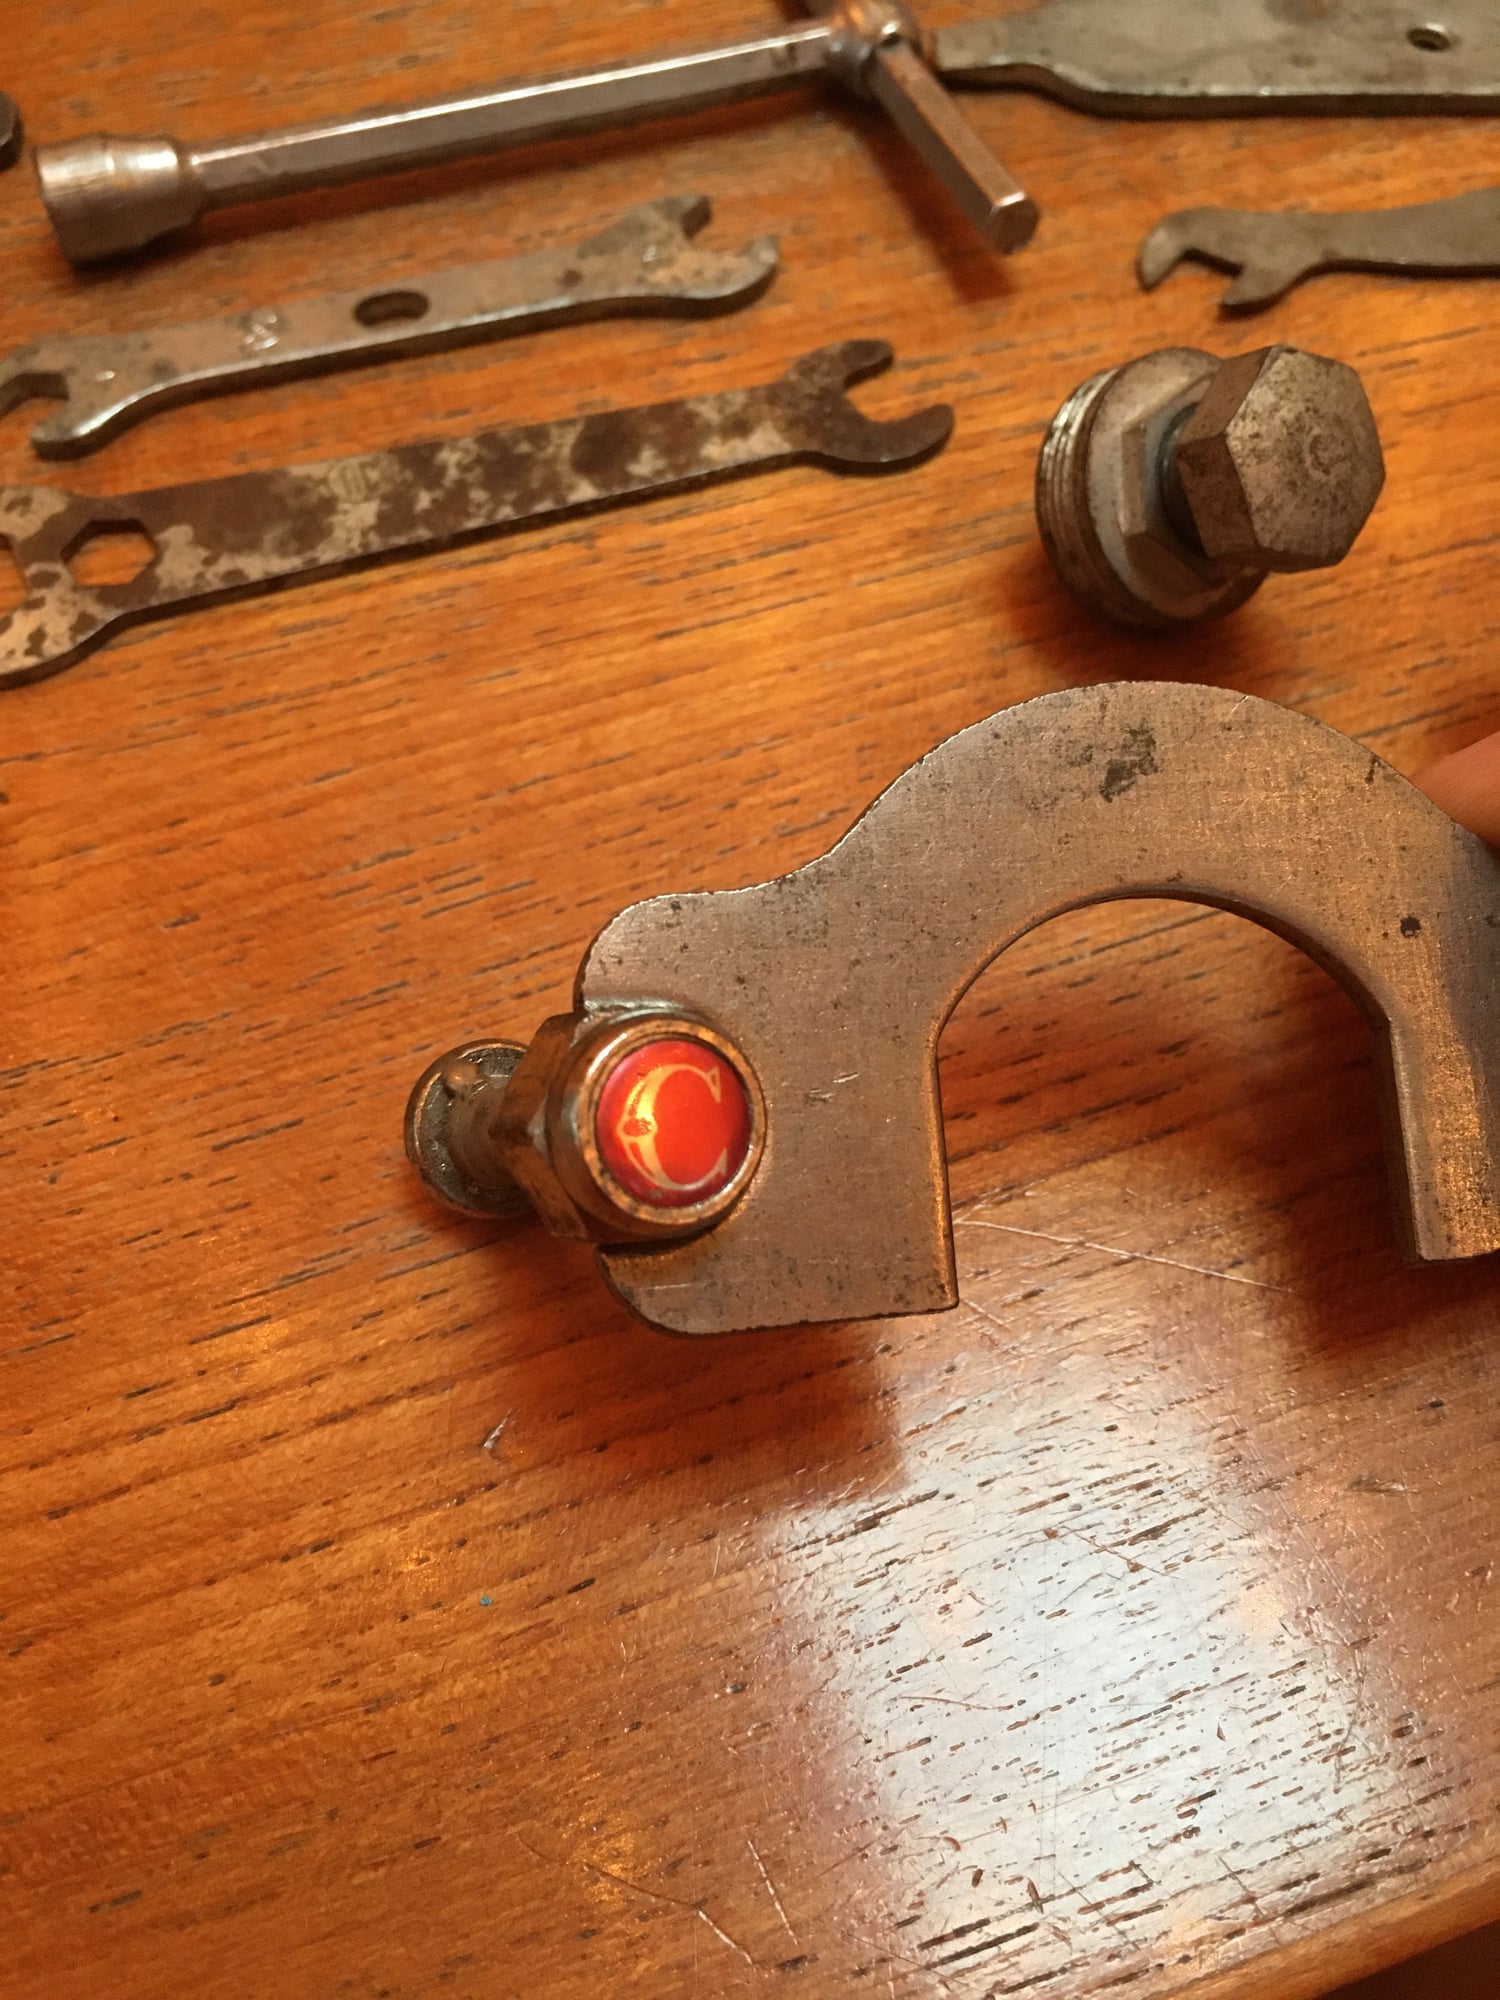
I wonder if this is intentional, or just sloppy ownership? It�s a broken off pump peg clamp placed so that the rear der cable sits closer to the frame. Any ideas?
01-01-20, 08:28 PM
#58
Senior Member
That binder bolt is probably the only hex on your bicycle that size. Same size as the stem clamp binder on Raleigh Sports, but you have a GB stem. I have a 1/2" open end that I filed to fit and painted the end red. The "Raleigh Wrench." Problem I have with an adjustable on that bolt is that there isn't a lot of angle to use the wrench and it's hard to line up with the flats.
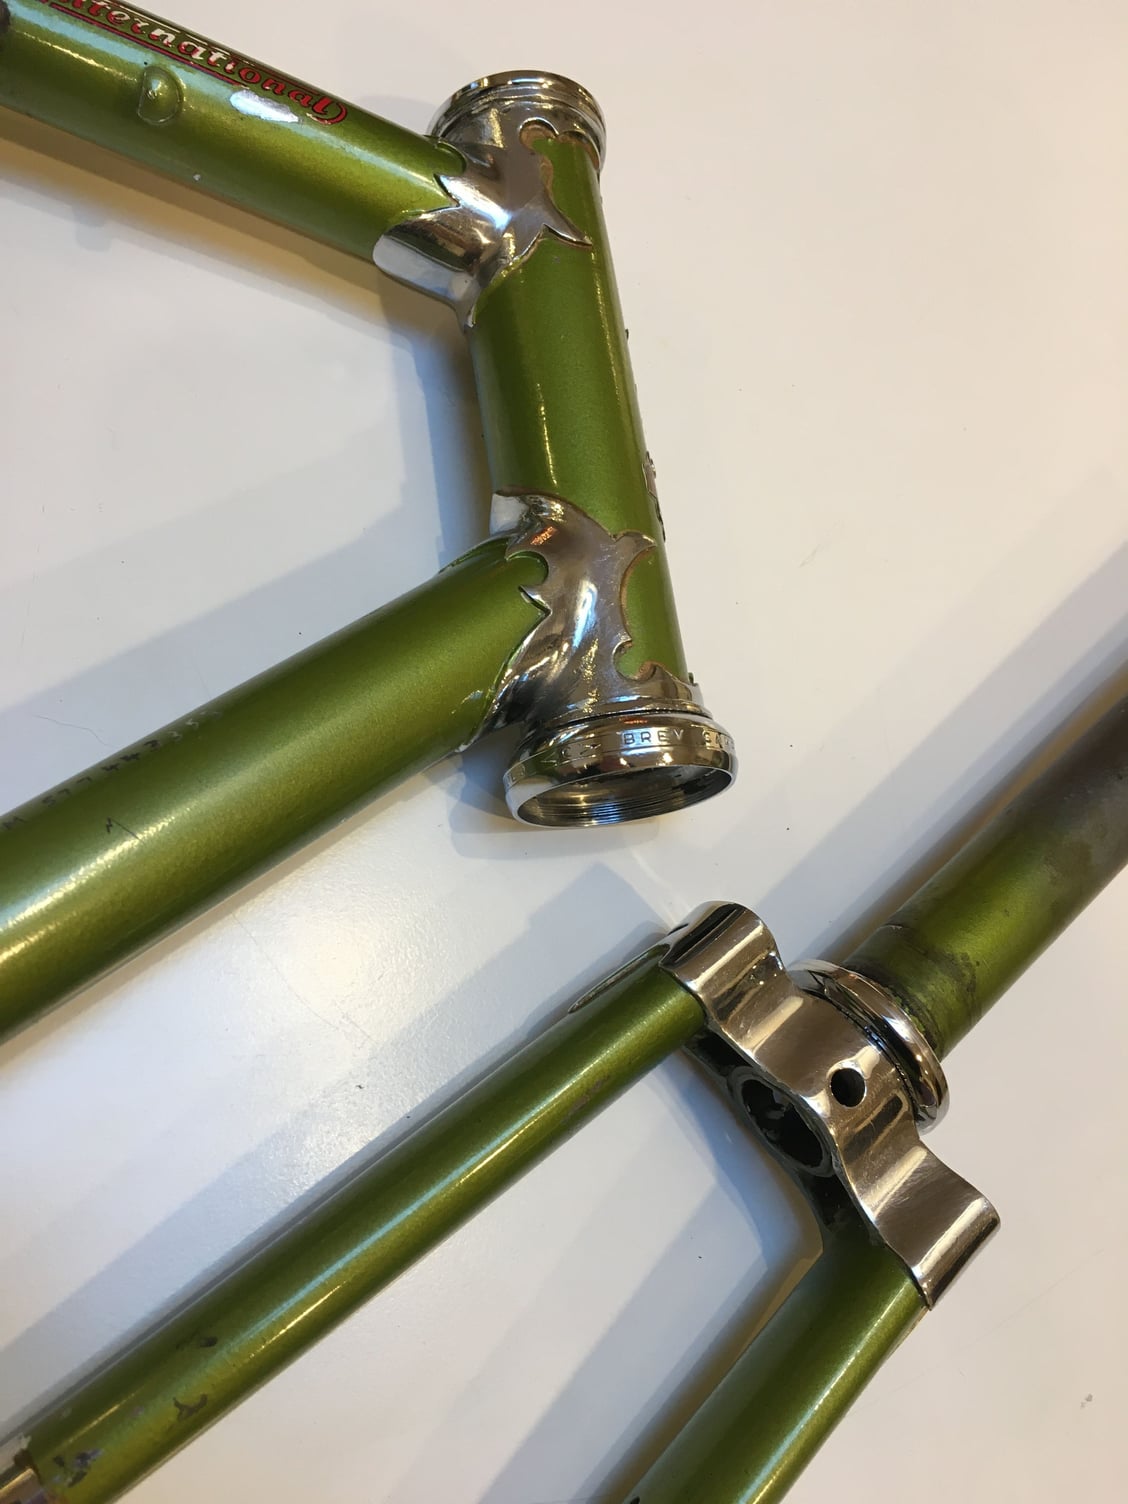
I just went out and looked on two bikes I have that use the Campagnolo cable guide like yours--Moto Grand Record and a 74 International. I see no reason why the cable path should need to be brought closer to the tube or angled down. Perhaps there was something idiosyncratic about the owner that the cable path presented some rare issue. Or maybe the guide was mispositioned resulting in that long scratch on the downtube and the extra clamp was to address that rather than properly placing the guide. That re-route sure won't make the shifting any crisper and if you opt for bar end shifters like the old Suntour ratcheting or the springy Shimano friction shifters (which work very well -- as good as the old Suntours, for me) you wouldn't want the extra drag, I'd think.
I just went out and looked on two bikes I have that use the Campagnolo cable guide like yours--Moto Grand Record and a 74 International. I see no reason why the cable path should need to be brought closer to the tube or angled down. Perhaps there was something idiosyncratic about the owner that the cable path presented some rare issue. Or maybe the guide was mispositioned resulting in that long scratch on the downtube and the extra clamp was to address that rather than properly placing the guide. That re-route sure won't make the shifting any crisper and if you opt for bar end shifters like the old Suntour ratcheting or the springy Shimano friction shifters (which work very well -- as good as the old Suntours, for me) you wouldn't want the extra drag, I'd think.
01-02-20, 07:07 PM
#59
Senior Member

It may have been to keep the cable from flopping out of the cable guide if all of the cable's tension was released + a lot of slack.
I'd definitely remove it.
I'd definitely remove it.
01-03-20, 10:34 AM
#60
Total Scrounge
Thread Starter
Join Date: Nov 2019
Location: Portland, Oregon
Posts: 884
Bikes: 71 International 72 Super Course 83 Gap
Mentioned: 15 Post(s)
Tagged: 0 Thread(s)
Quoted: 327 Post(s)
Liked 924 Times
in
310 Posts
Thanks for the info and advice! The story goes that the original owner rode this bike across the country on the 1976 Bikecentennial route, so maybe this was some sort of desperate fix in the middle of nowhere. The right crank arm is also heavily worn by the toe clip strap, so maybe the guy had a weird right foot and it was snagging things.
The Wikipedia page on the old Whitworth bolt standard is fascinating. I think I understood that they labeled the wrenches to coincide with the size of the bolt, not the size of the hex head. Makes sense, I think.
The Wikipedia page on the old Whitworth bolt standard is fascinating. I think I understood that they labeled the wrenches to coincide with the size of the bolt, not the size of the hex head. Makes sense, I think.
01-10-20, 05:27 PM
#61
Total Scrounge
Thread Starter
Join Date: Nov 2019
Location: Portland, Oregon
Posts: 884
Bikes: 71 International 72 Super Course 83 Gap
Mentioned: 15 Post(s)
Tagged: 0 Thread(s)
Quoted: 327 Post(s)
Liked 924 Times
in
310 Posts
CLM (PO�s initials engraved in downtube) must have had a big right foot
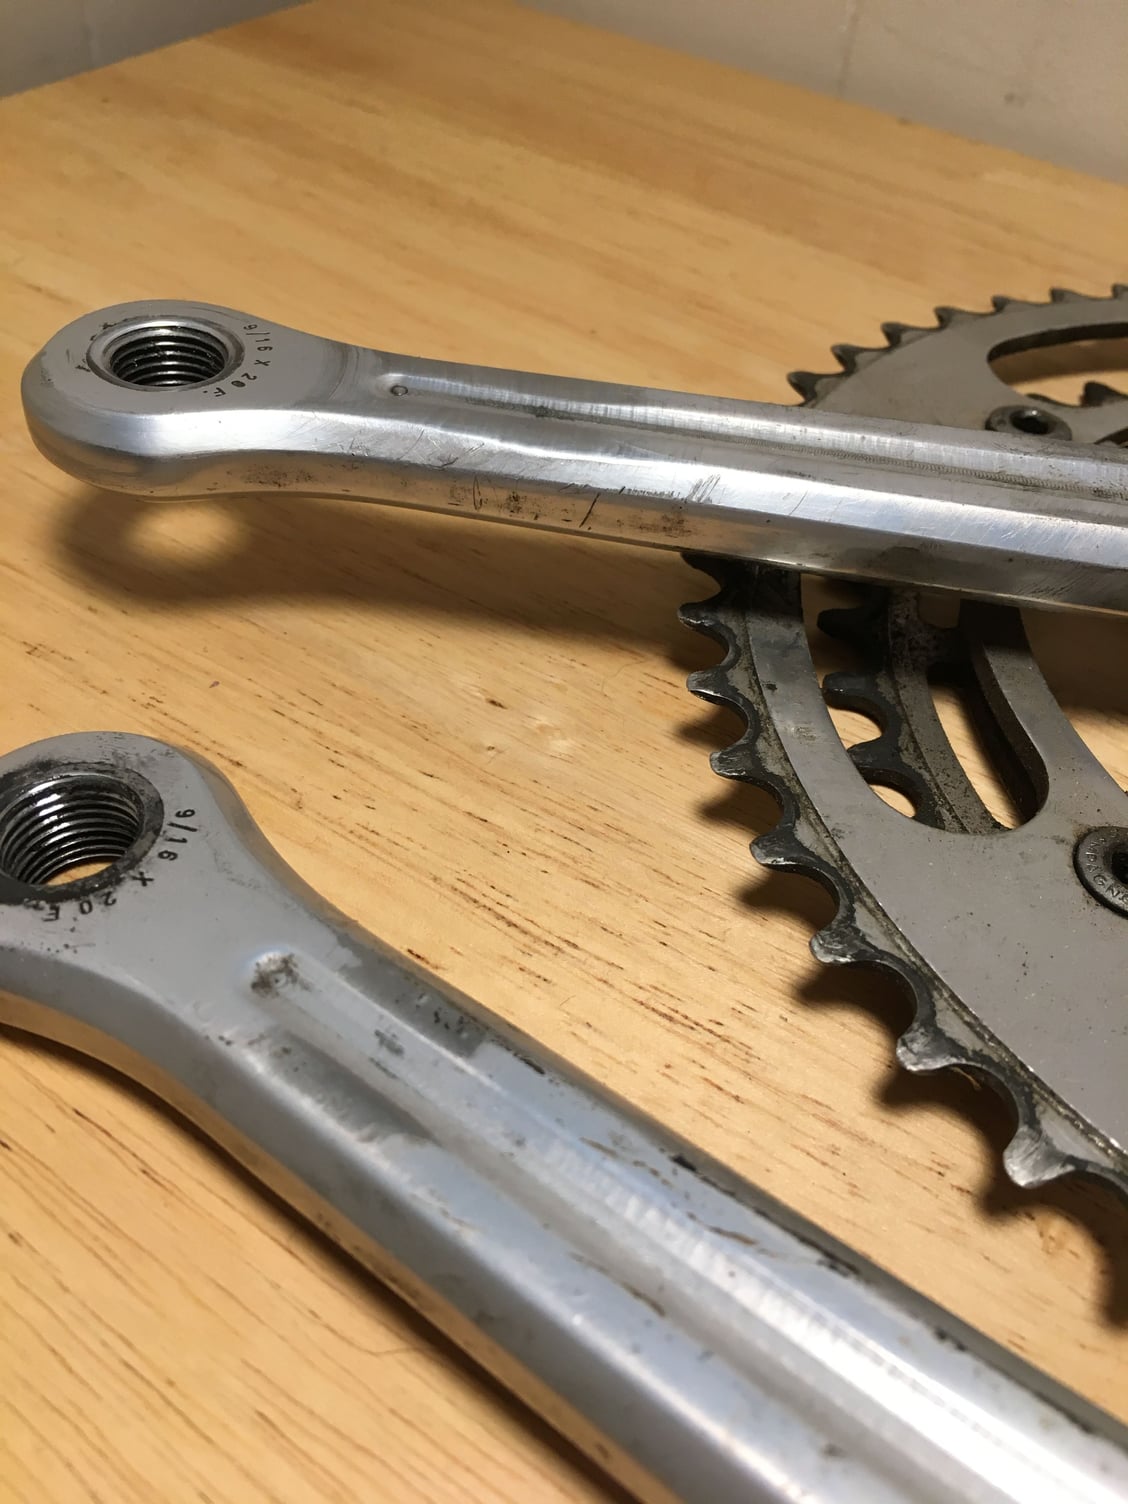
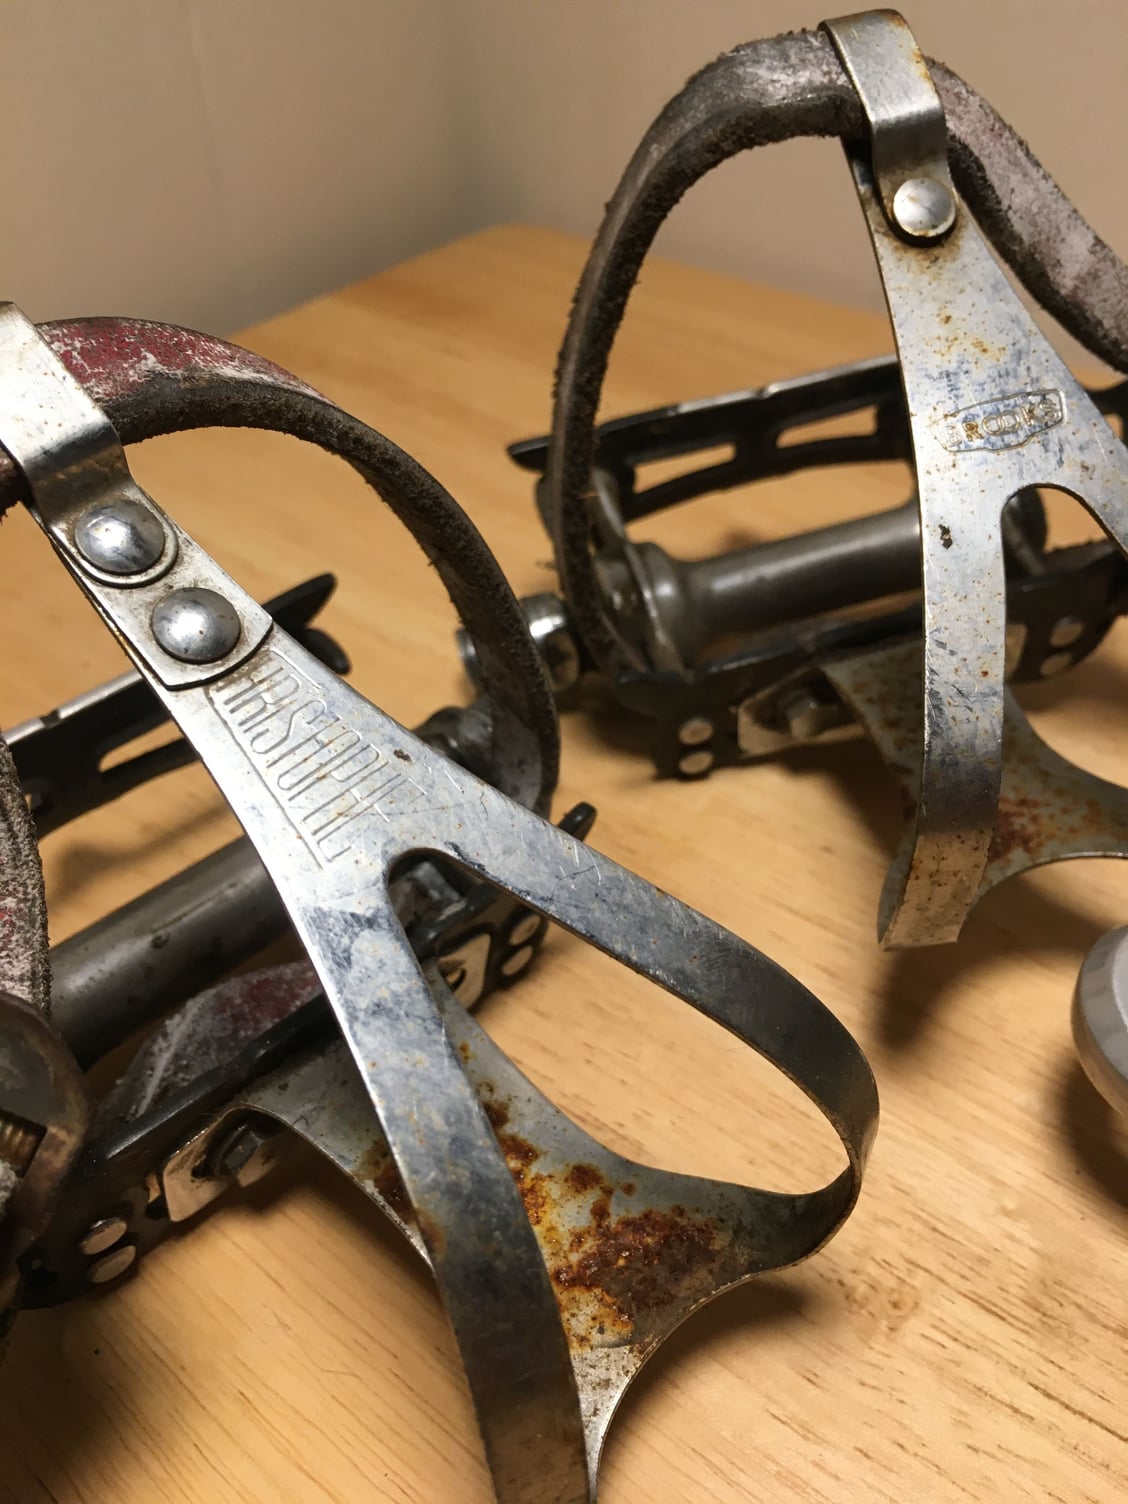
The offending strap:
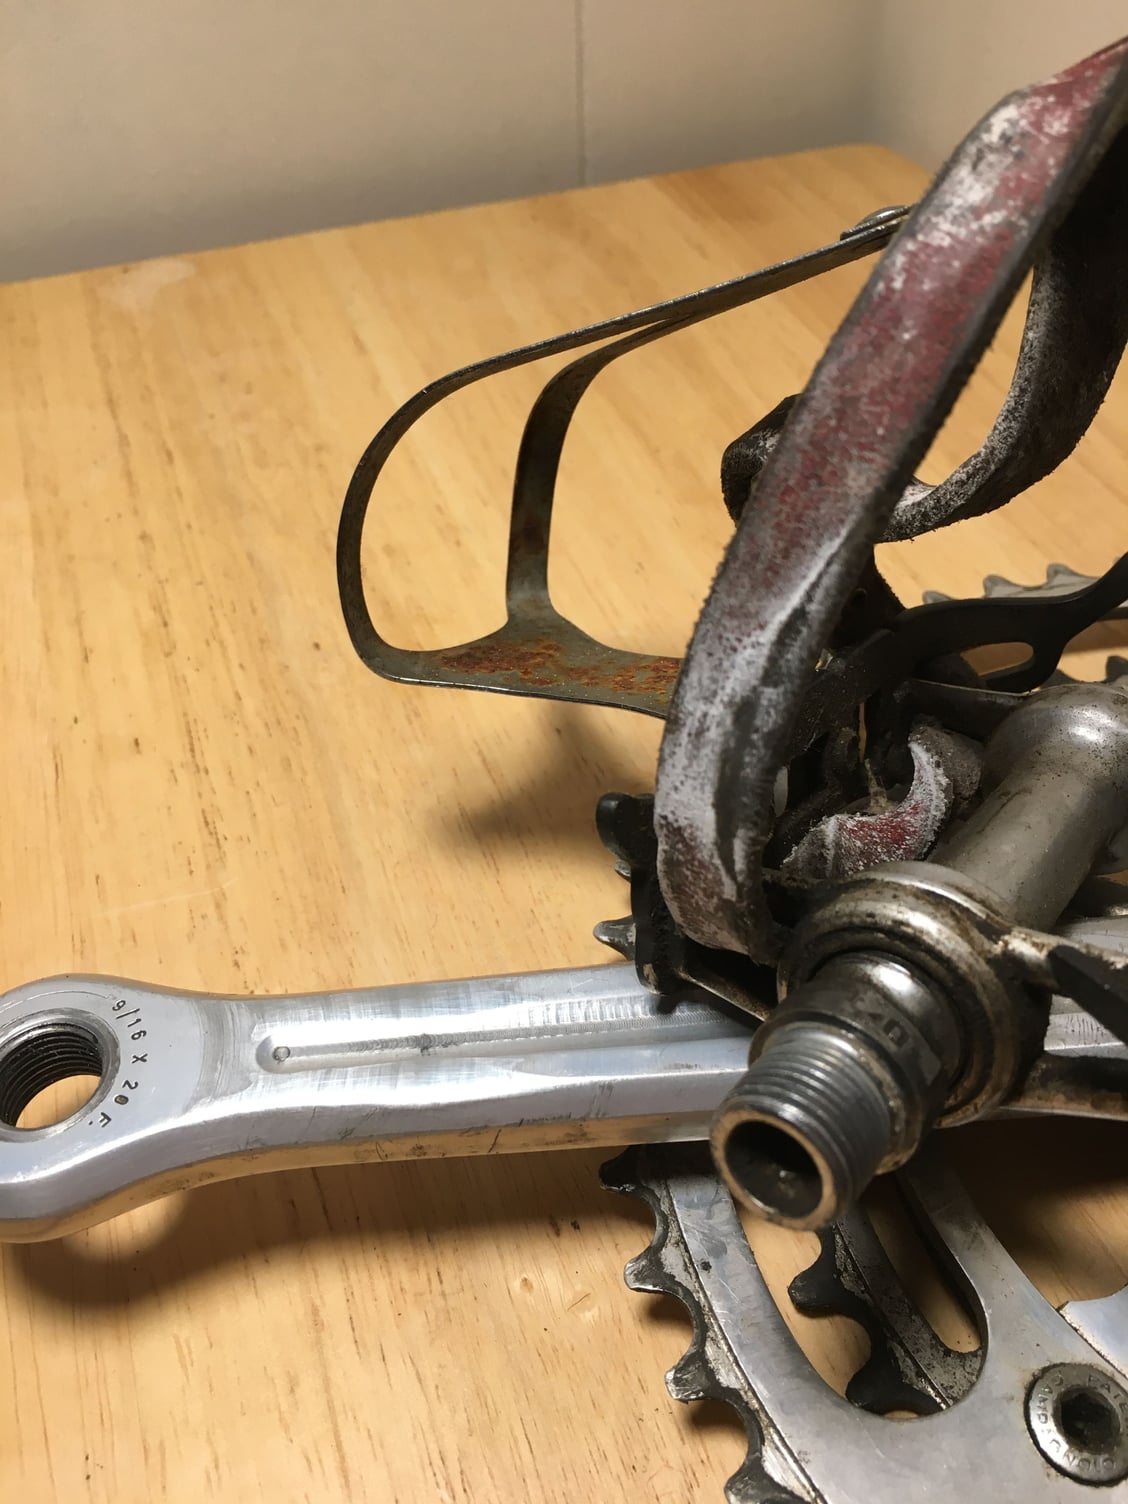
One Brooks, one Christophe.
The offending strap:
One Brooks, one Christophe.
 01-12-20, 11:52 AM
#63
Total Scrounge
Thread Starter
Join Date: Nov 2019
Location: Portland, Oregon
Posts: 884
Bikes: 71 International 72 Super Course 83 Gap
Mentioned: 15 Post(s)
Tagged: 0 Thread(s)
Quoted: 327 Post(s)
Liked 924 Times
in
310 Posts
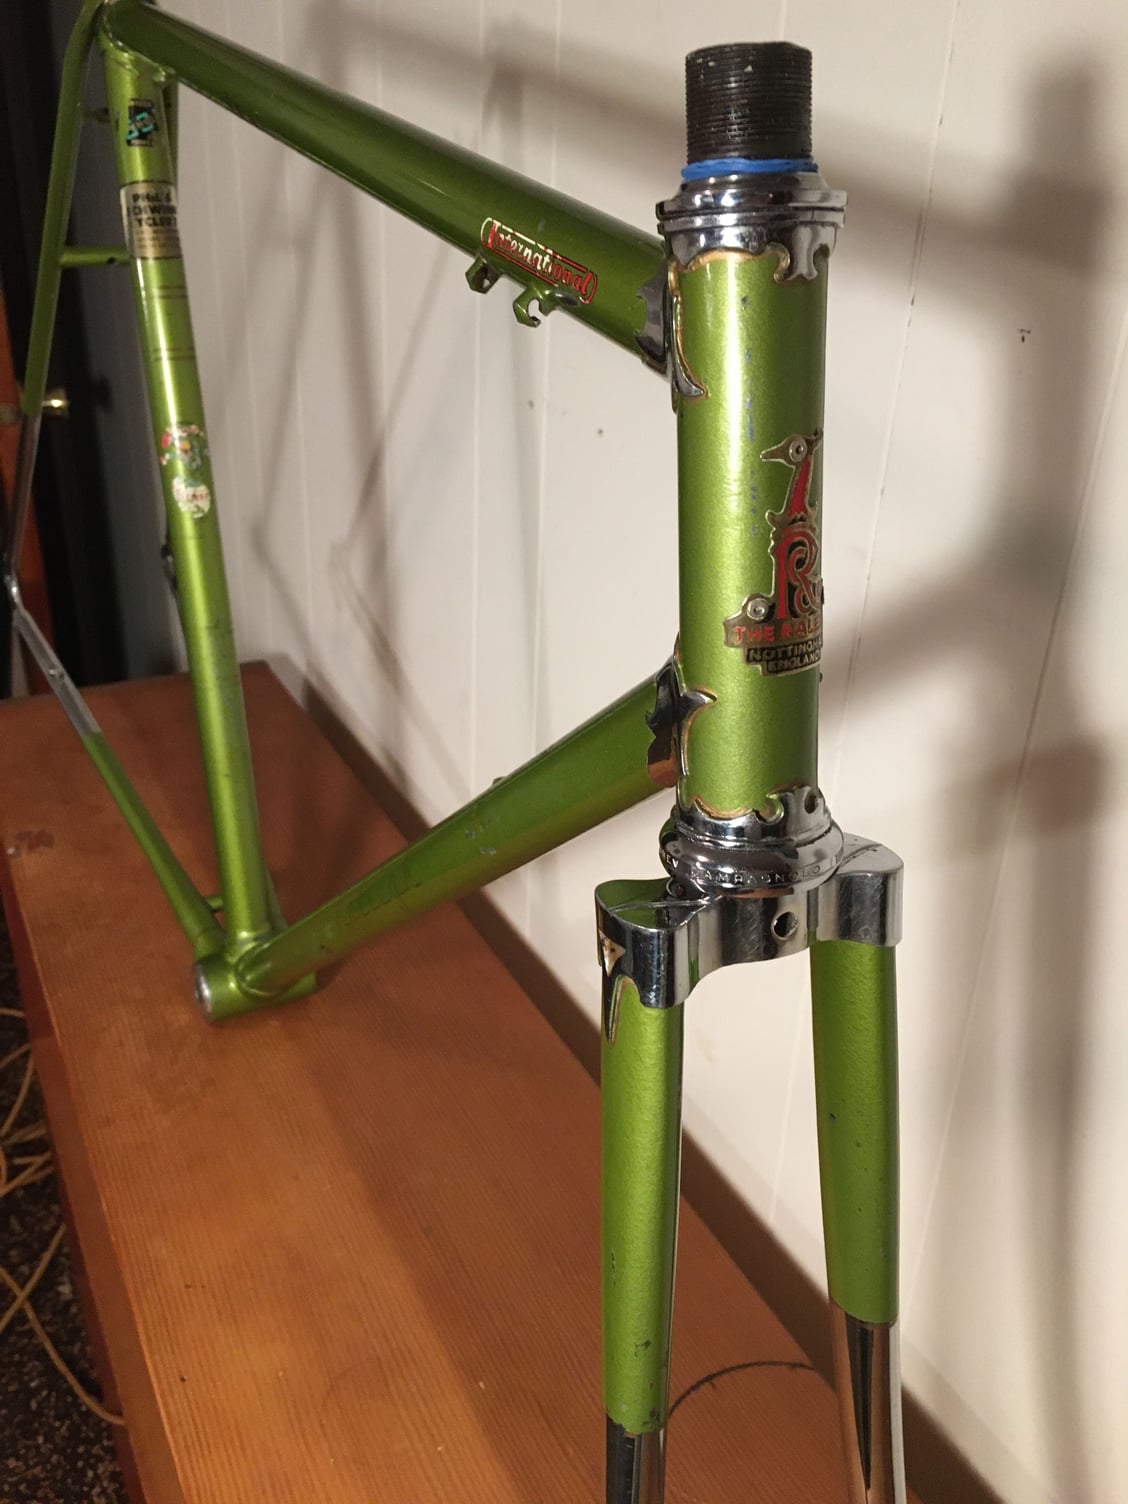
A couple of what looked like scratches turned out to be paint streaks, like it had rubbed up against other bikes. They came off with a little scrubbing, and a little wax helped bring some shine back.

Likes For JacobLee:
01-12-20, 12:01 PM
#64

Senior Member
Join Date: Jun 2006
Posts: 20,305
Mentioned: 130 Post(s)
Tagged: 0 Thread(s)
Quoted: 3464 Post(s)
Liked 2,831 Times
in
1,997 Posts
01-12-20, 12:09 PM
#65
Senior Member
Join Date: Jun 2006
Posts: 20,305
Mentioned: 130 Post(s)
Tagged: 0 Thread(s)
Quoted: 3464 Post(s)
Liked 2,831 Times
in
1,997 Posts
Replacement arms are not that expensive. Alternately, you could set the toe clips a bit more outboard, gamble. I would reference crack check dye in that case as used in the aircraft industry, aircraftspruce.com
 01-12-20, 12:27 PM
#67
Total Scrounge
Thread Starter
Join Date: Nov 2019
Location: Portland, Oregon
Posts: 884
Bikes: 71 International 72 Super Course 83 Gap
Mentioned: 15 Post(s)
Tagged: 0 Thread(s)
Quoted: 327 Post(s)
Liked 924 Times
in
310 Posts
My editorial comment. The cranks wear to me is the sign to retire them. Way Way back the Campagnolo cranks that came to the shop broken apart all exhibited this wear and fractured at the region of most wear. Some more worn, some not.
Replacement arms are not that expensive. Alternately, you could set the toe clips a bit more outboard, gamble. I would reference crack check dye in that case as used in the aircraft industry, aircraftspruce.com
Replacement arms are not that expensive. Alternately, you could set the toe clips a bit more outboard, gamble. I would reference crack check dye in that case as used in the aircraft industry, aircraftspruce.com
Thanks for the caution! The amount of input I�ve received from this forum is invaluable.

Likes For Narhay:
01-12-20, 02:43 PM
#69
Senior Member
Join Date: Jun 2006
Posts: 20,305
Mentioned: 130 Post(s)
Tagged: 0 Thread(s)
Quoted: 3464 Post(s)
Liked 2,831 Times
in
1,997 Posts
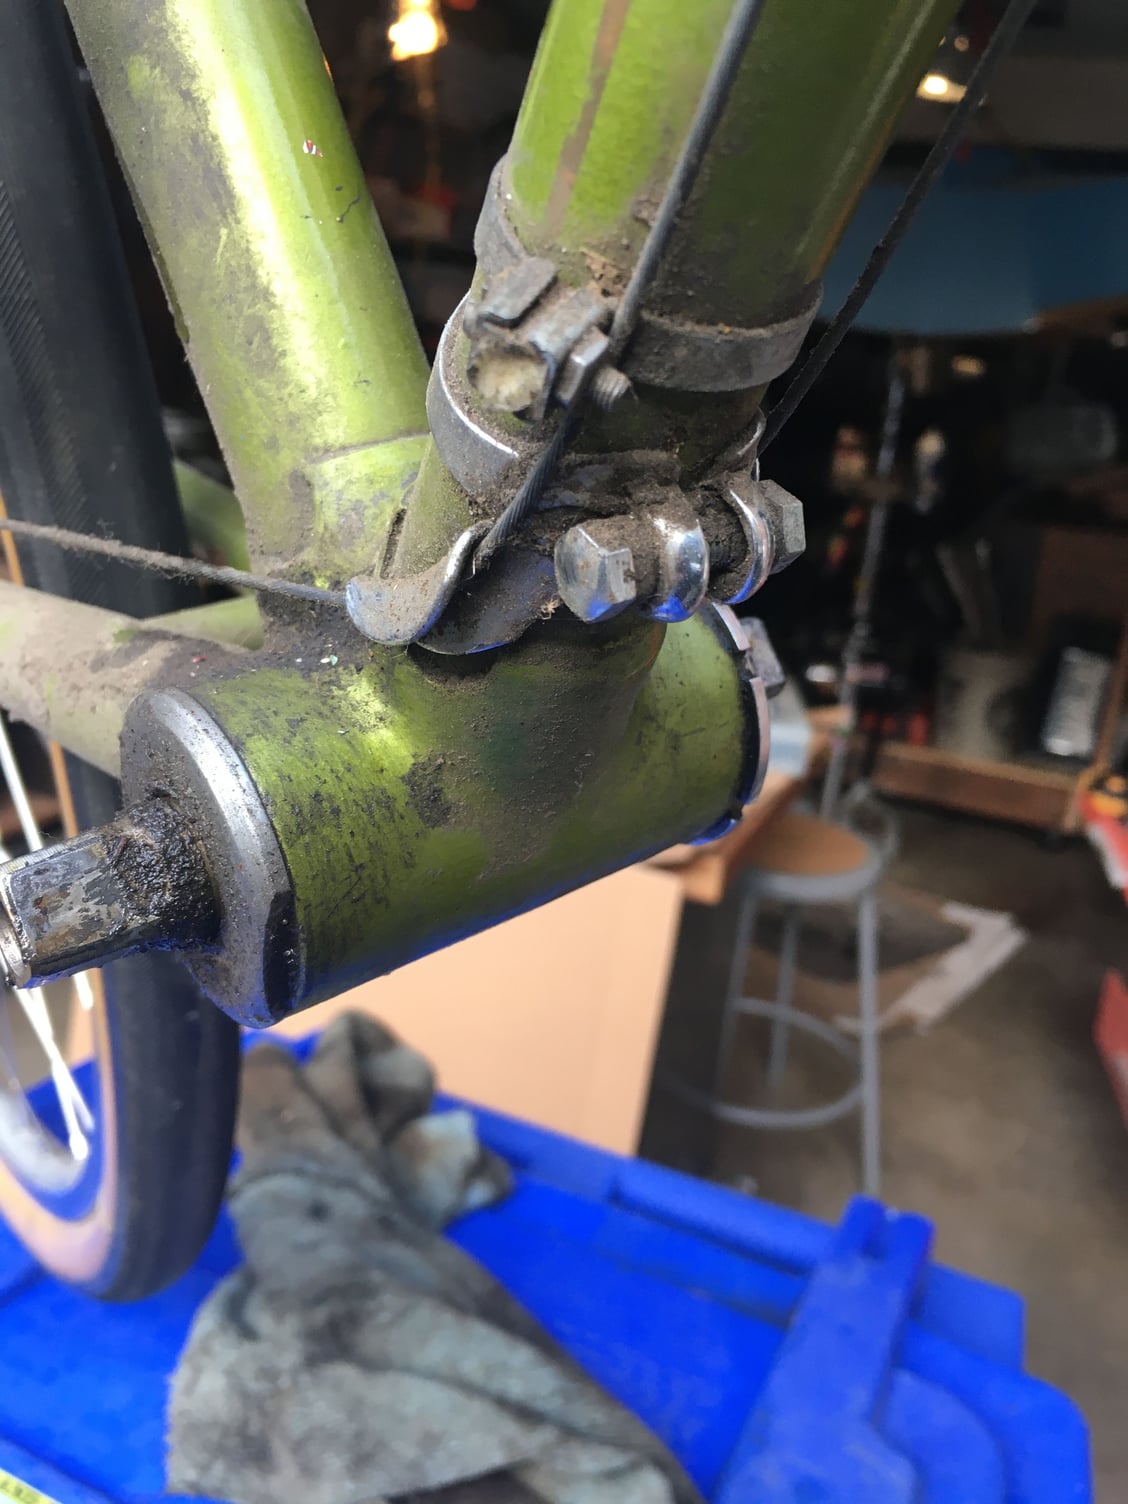
Note to the Internationalist's out there, the earlier Lime green bikes used a cast bottom bracket shell, much more stout than the later bulge formed units.
HLloyds in the UK may have the seat tube herald in a varnish fix or waterslide version, vs sticker. GusSalmon might have done these too.
HLloyds in the UK may have the seat tube herald in a varnish fix or waterslide version, vs sticker. GusSalmon might have done these too.
01-12-20, 04:41 PM
#70
Total Scrounge
Thread Starter
Join Date: Nov 2019
Location: Portland, Oregon
Posts: 884
Bikes: 71 International 72 Super Course 83 Gap
Mentioned: 15 Post(s)
Tagged: 0 Thread(s)
Quoted: 327 Post(s)
Liked 924 Times
in
310 Posts
I couldn�t figure out at first why the last three digits of his social security number looked different from the others, but I get it now: His engraver hit chrome for the last three!

02-08-20, 12:07 PM
#72
Total Scrounge
Thread Starter
Join Date: Nov 2019
Location: Portland, Oregon
Posts: 884
Bikes: 71 International 72 Super Course 83 Gap
Mentioned: 15 Post(s)
Tagged: 0 Thread(s)
Quoted: 327 Post(s)
Liked 924 Times
in
310 Posts
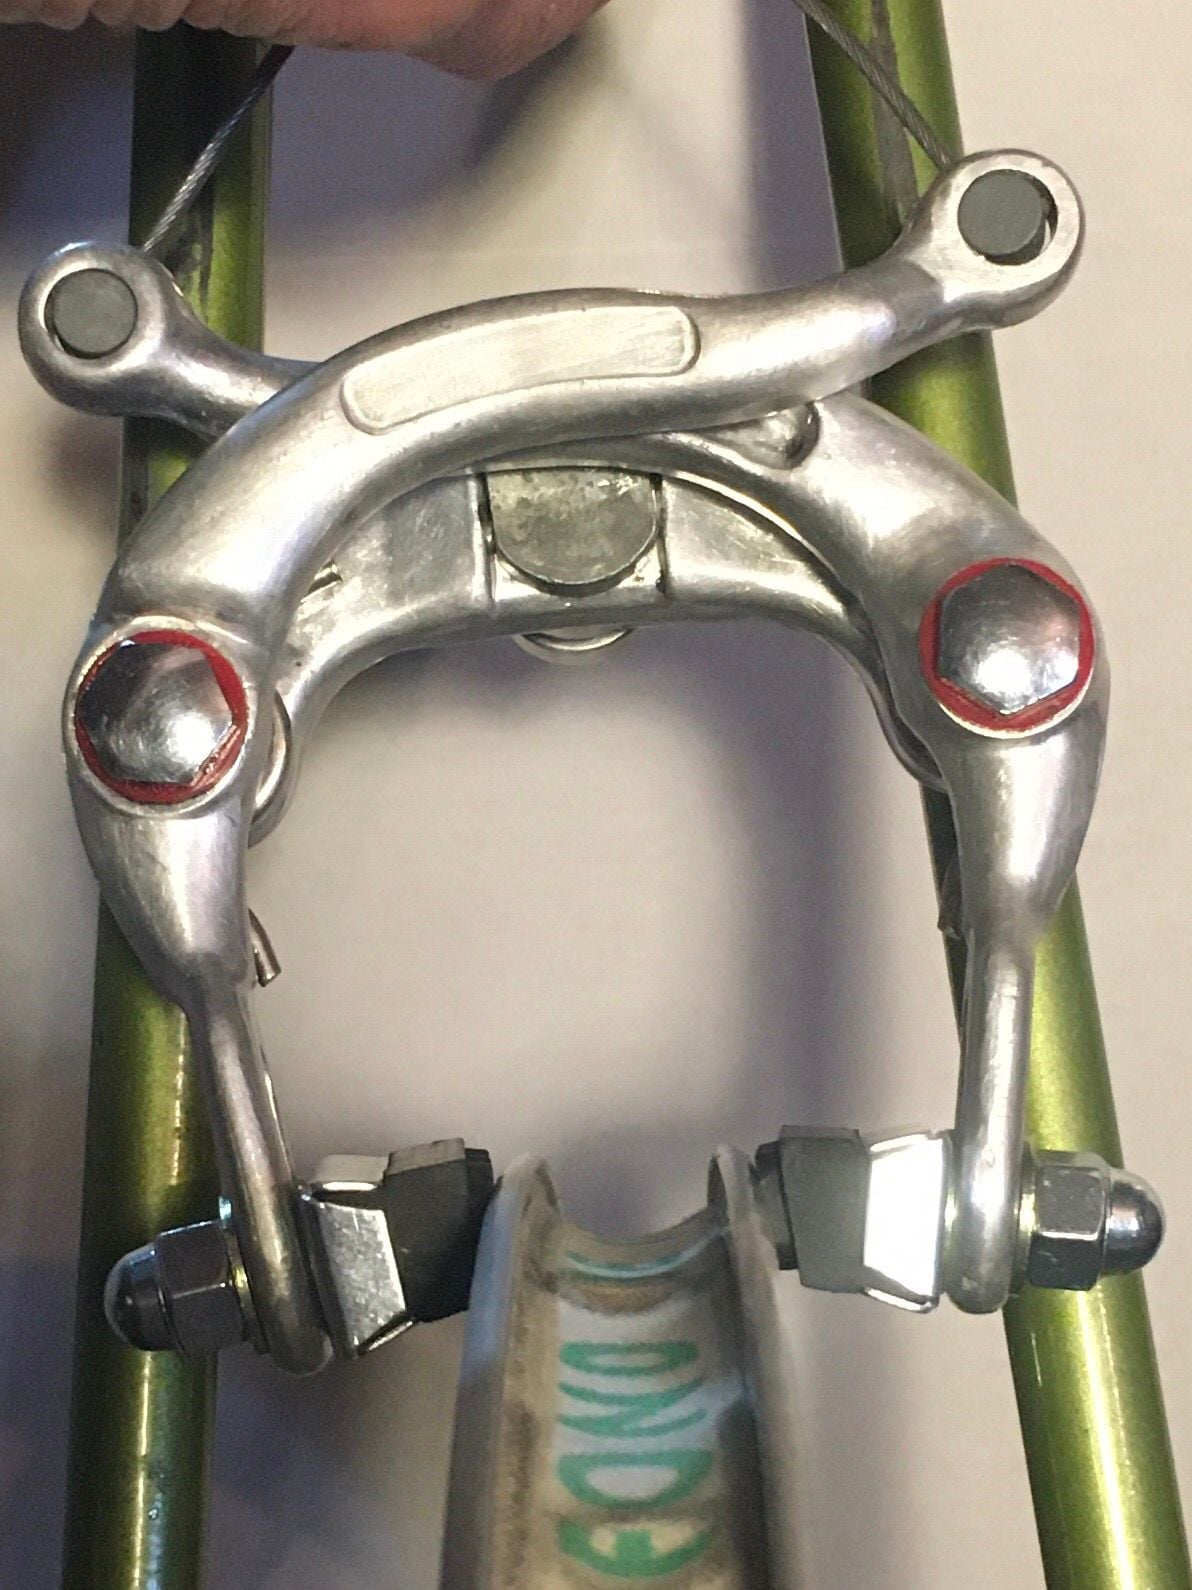
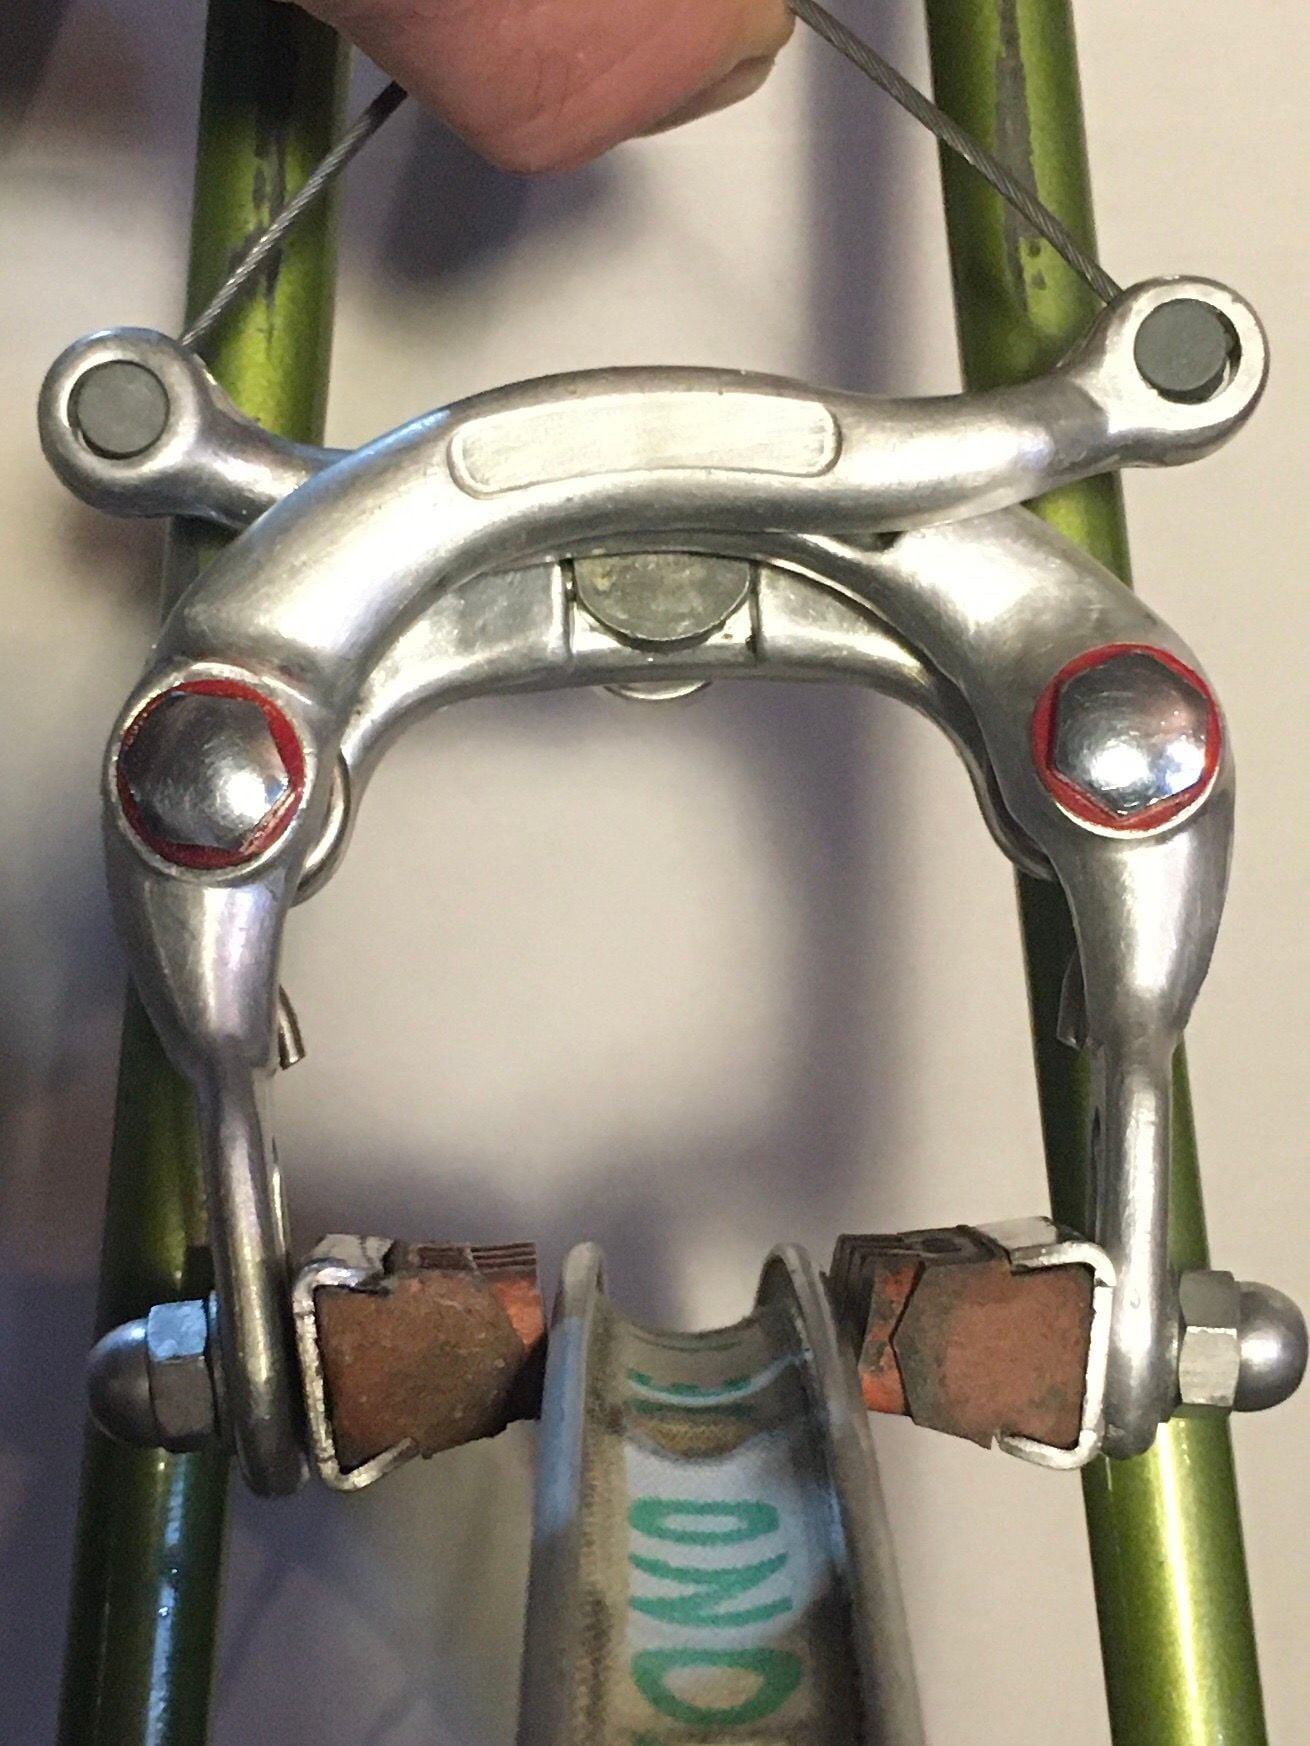
Finally, I�m in the last stages of re-assembly! I picked up some new brake pads, along with cables, etc, forgetting that I was going to have to fuss with a 700c wheel swap. I found the bike with two fronts, but no rear wheel, so I�m using a set from craigslist with the correct hubs, but Open Pro rims. I�m sure lots of folks have been through this process, but I eventually ended up using a set of cyclocross canti pad holders that take road size pads and have a big set of avid style shims. I took some pics with cardboard in the background so you could see the alignment.
These are the sunlight pads. Nope!
These are the originals. Nope!
Jagwire cross holders. Nice!
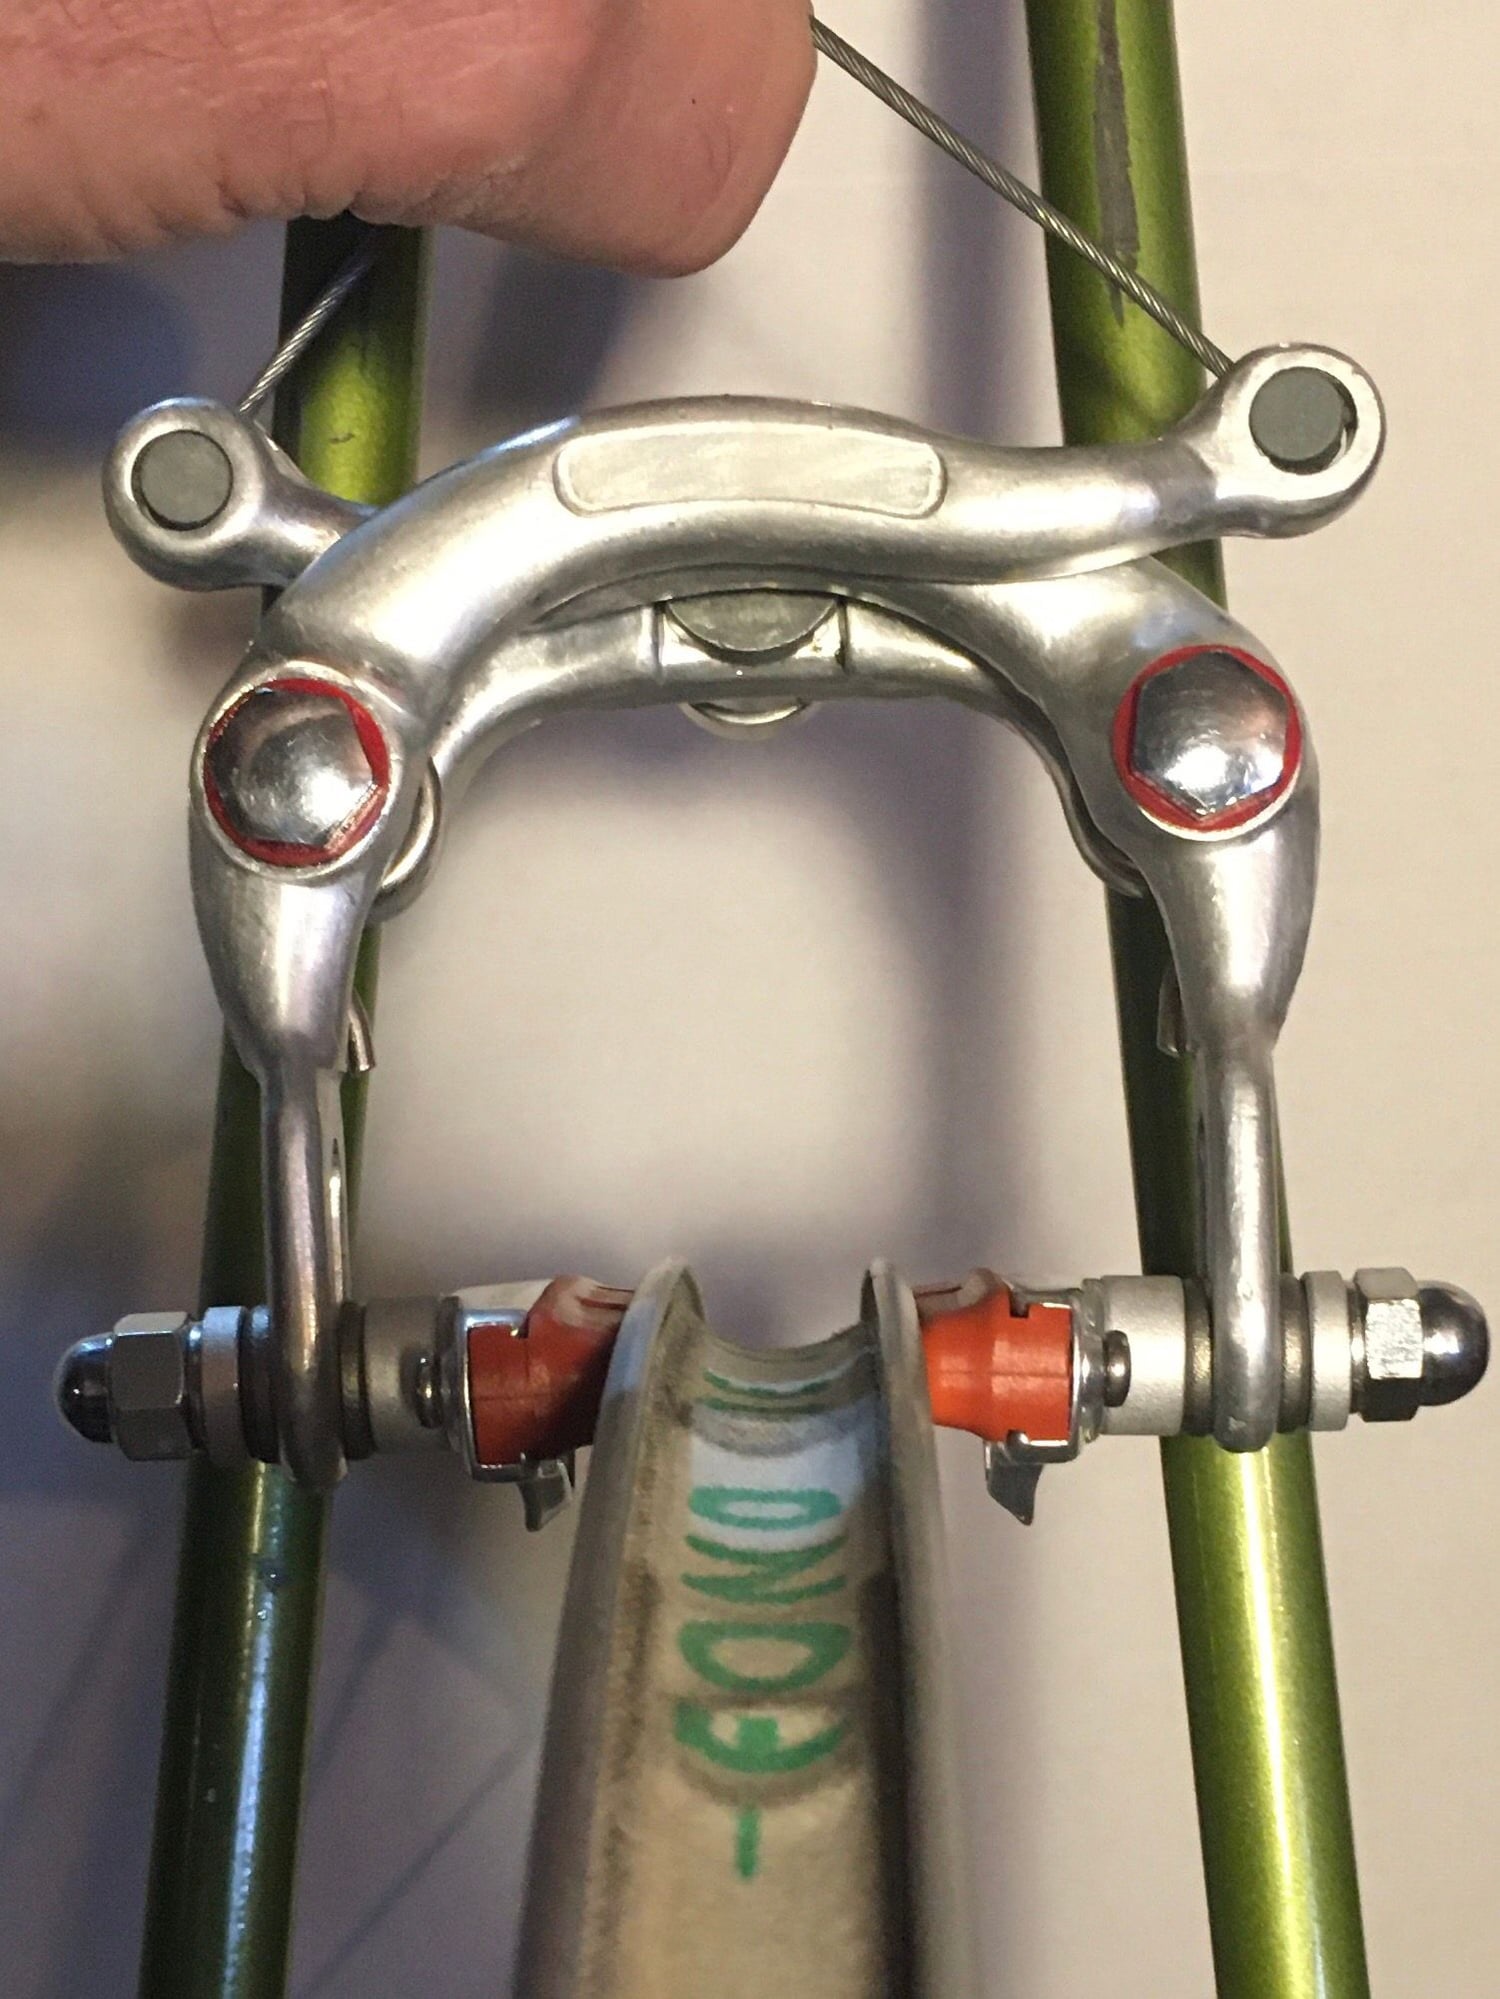
They weren�t cheap, but they sure seem like a nice solution.
These are the sunlight pads. Nope!
These are the originals. Nope!
Jagwire cross holders. Nice!
They weren�t cheap, but they sure seem like a nice solution.
02-08-20, 12:25 PM
#73
Senior Member
Join Date: Jun 2019
Location: Portland Oregon
Posts: 996
Mentioned: 7 Post(s)
Tagged: 0 Thread(s)
Quoted: 457 Post(s)
Liked 462 Times
in
270 Posts
Modern pads don't work too well with the weinmann 750 brakes, the brake bridge being so high on this era Raleigh certainly makes things worse. My alignment issues on my 72' Super Course are not as bad as yours, but I do wish the pads were a 1/4" thicker to keep the arms of the brake parallel when the brake is not engaged. The Jagwire holders make the brake geometry look correct!
 02-08-20, 01:29 PM
#74
Senior Member
Join Date: Jun 2006
Posts: 20,305
Mentioned: 130 Post(s)
Tagged: 0 Thread(s)
Quoted: 3464 Post(s)
Liked 2,831 Times
in
1,997 Posts
Finally, I’m in the last stages of re-assembly! I picked up some new brake pads, along with cables, etc, forgetting that I was going to have to fuss with a 700c wheel swap. I found the bike with two fronts, but no rear wheel, so I’m using a set from craigslist with the correct hubs, but Open Pro rims. I’m sure lots of folks have been through this process, but I eventually ended up using a set of cyclocross canti pad holders that take road size pads and have a big set of avid style shims. I took some pics with cardboard in the background so you could see the alignment.
These are the sunlight pads. Nope!
These are the originals. Nope!
Jagwire cross holders. Nice!
They weren’t cheap, but they sure seem like a nice solution.
These are the sunlight pads. Nope!
These are the originals. Nope!
Jagwire cross holders. Nice!
They weren’t cheap, but they sure seem like a nice solution.
Of course the caliper will look better when the pads are in contact with the rim.
The pads in the first image with black pads are upside down.
02-08-20, 01:32 PM
#75
Senior Member
Join Date: Jun 2019
Location: Portland Oregon
Posts: 996
Mentioned: 7 Post(s)
Tagged: 0 Thread(s)
Quoted: 457 Post(s)
Liked 462 Times
in
270 Posts
Thats the point, the geometry of the Weinmann brakes was designed with much thicker brake pads in mind that is typical today, so adding more dimension to the brake pads makes the brakes look better because they were designed with that extra dimension in mind.
Likes For jackbombay: