


How do I make a seatpost opening larger?
 02-29-24, 07:19 PM
#1

Junior Member
Thread Starter
How do I make a seatpost opening larger?
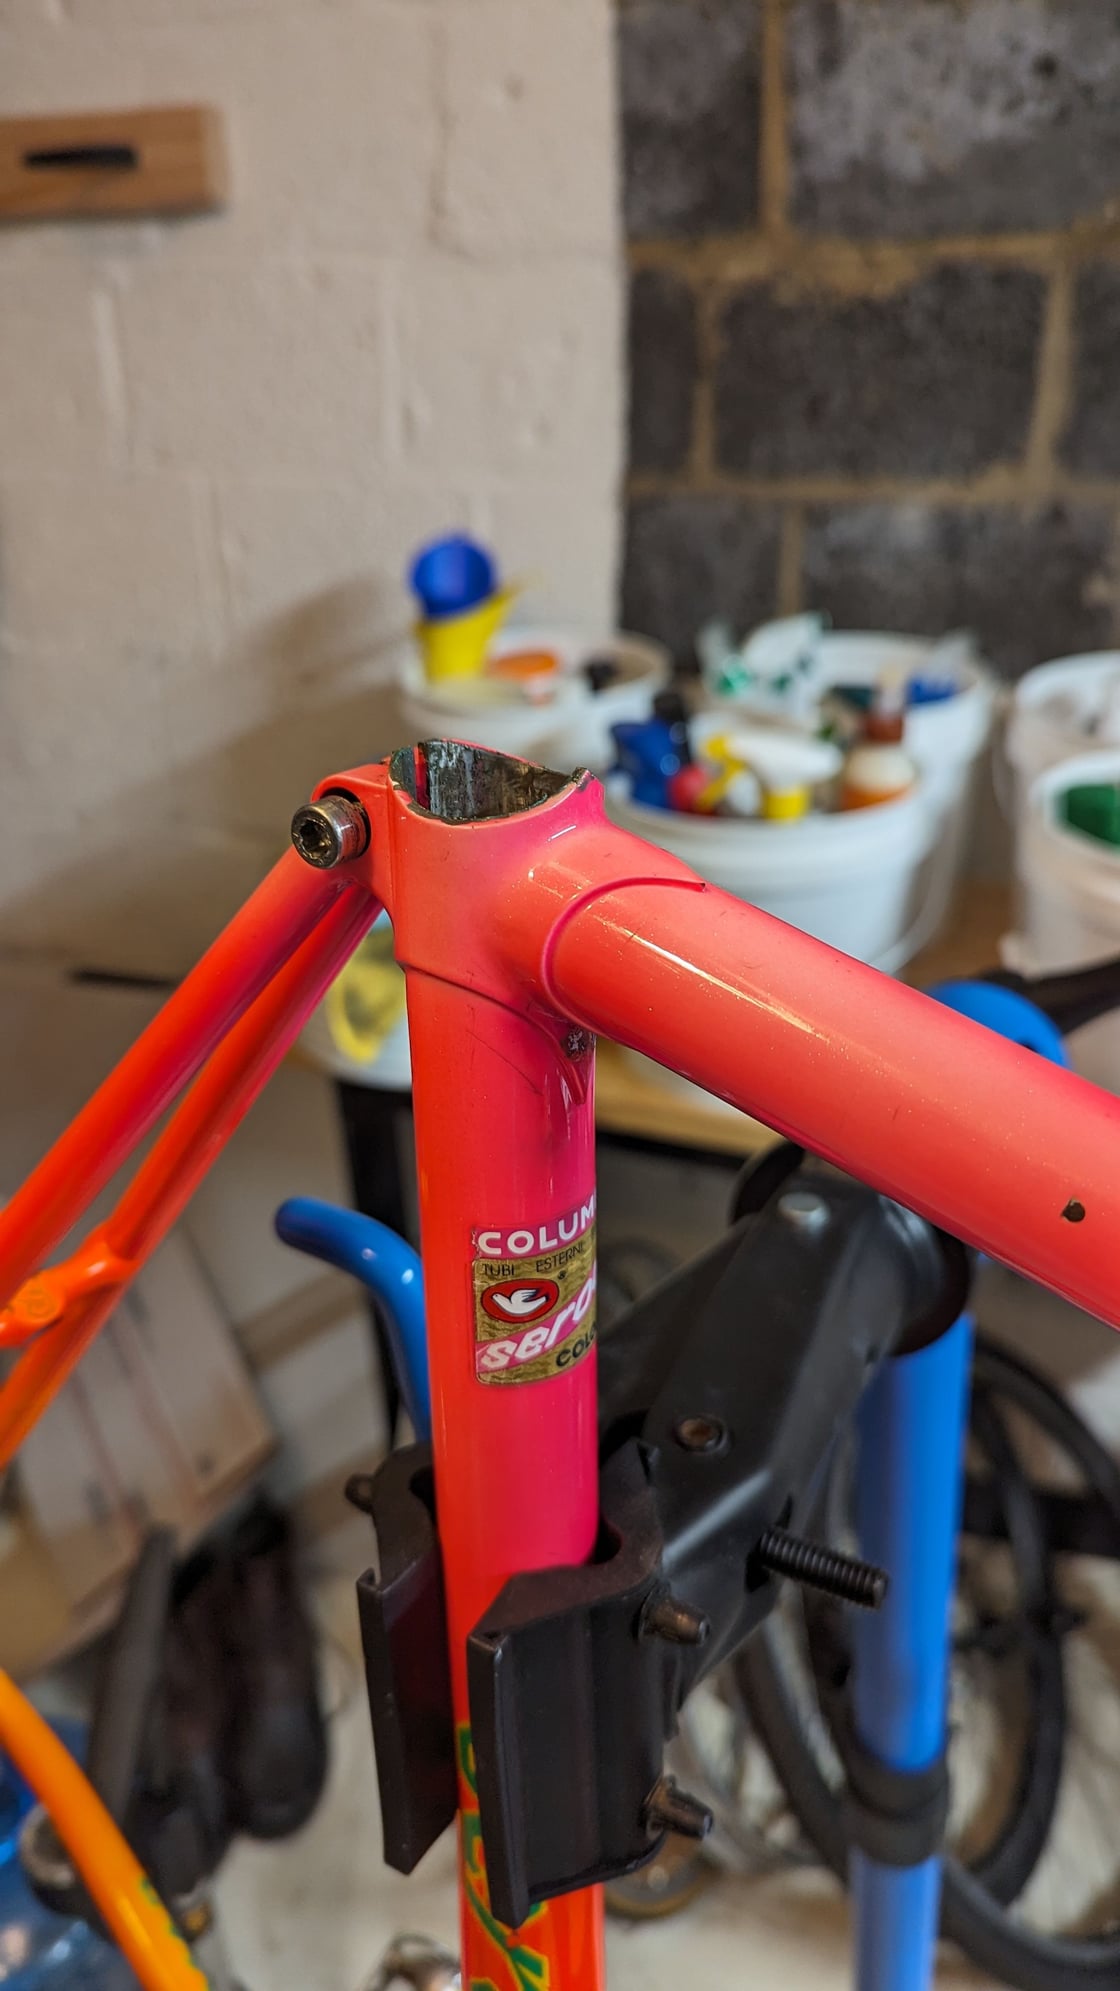
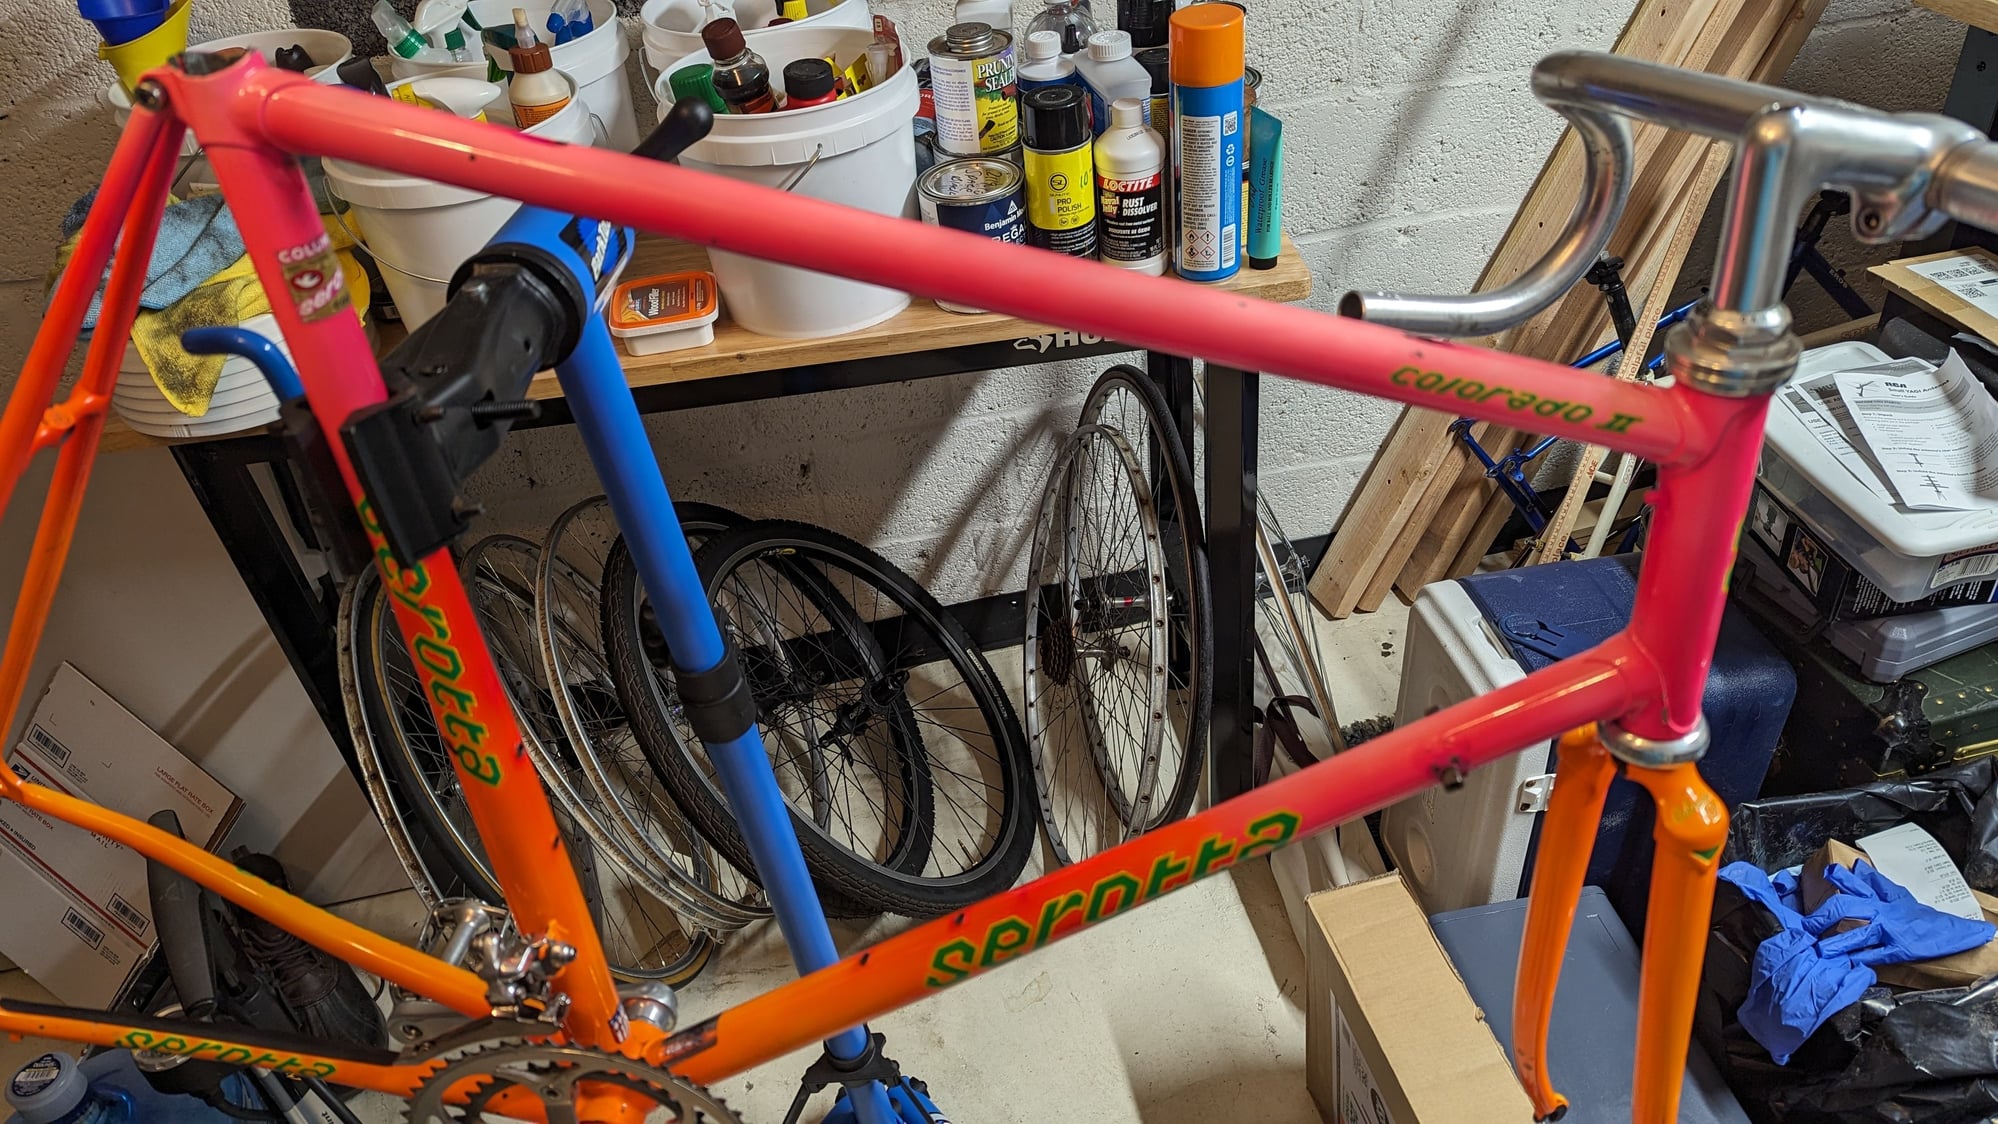
Hi all, my research indicates my serotta Colorado ii bike should have a 27.2mm seatpost, but my seat tube opening is measuring 26.0-26.8mm. It's hard to tell if the variance is due to my tool or the tube being ovalized. The binder bolt is loosened. This frame is new to me and I do not know it's history.
Does this mean someone overtightened the seatpost collar at some point? If so, is there a trick to getting it back to 27.2?
Edit: forgive the mess. I'm in the midst of re-organizing the garage. I promise that's not how I store my good wheels lol.
Does this mean someone overtightened the seatpost collar at some point? If so, is there a trick to getting it back to 27.2?
Edit: forgive the mess. I'm in the midst of re-organizing the garage. I promise that's not how I store my good wheels lol.
Last edited by J_Climacus; 02-29-24 at 07:30 PM.
 02-29-24, 07:28 PM
#2
Sr Member on Sr bikes

Just a comment about the measuring tool you�re using�if you�re getting a variation of more than � of an inch, I think you need to use a more reliable tool.
Dan
Dan
Likes For _ForceD_:
02-29-24, 07:30 PM
#3
Junior Member
Thread Starter
02-29-24, 08:17 PM
#4
Senior Member
Join Date: Mar 2021
Location: SoCal
Posts: 2,930
Bikes: Cuevas Custom, Cimmaron, 1988 "Pinalized Rockma", 1984 Trek 510, Moulton custom touring, Raleigh Competition GS, Bridgestone Mb-2 & 3, 1980's Peugeot - US, City, & Canyon Express (6)
Liked 4,865 Times
in
2,275 Posts
??? - bit of a mystery
Sorry for the dumb question, did you double check the calipers were zeroed? I ask because even though I know better, I have made that mistake before
Sorry for the dumb question, did you double check the calipers were zeroed? I ask because even though I know better, I have made that mistake before

Likes For SoCaled:
02-29-24, 08:29 PM
#5
Senior Member
Join Date: Oct 2014
Location: Portland, OR
Posts: 13,333
Bikes: (2) ti TiCycles, 2007 w/ triple and 2011 fixed, 1979 Peter Mooney, ~1983 Trek 420 now fixed and ~1973 Raleigh Carlton Competition gravel grinder
Liked 4,336 Times
in
2,790 Posts
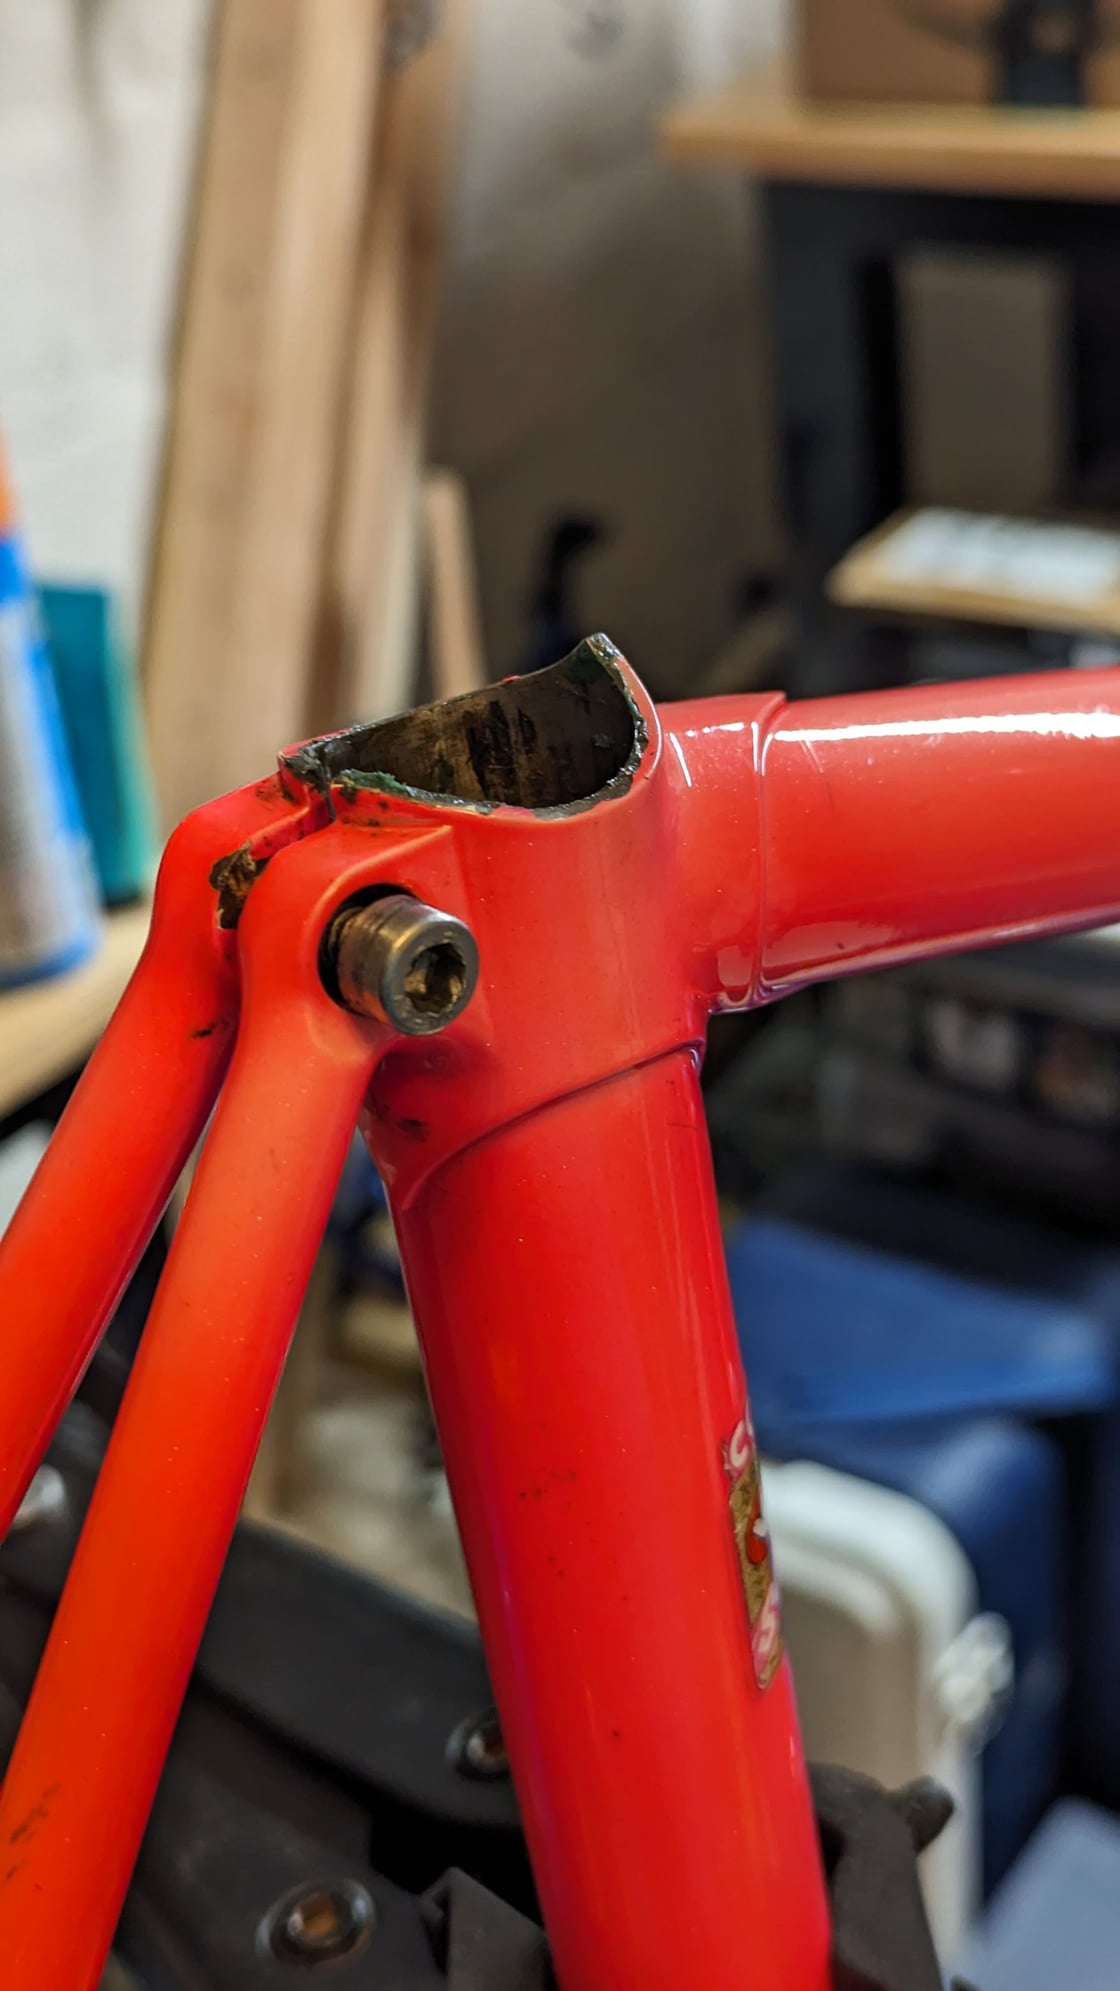
It looks to me like the pin go tightened until the ears hit and chipped the paint. Shouldn't happen. That may well have been done in an attempt to secure a too small post, closing up the whole lug in the process.
Nice bike. I'd take this to a frame builder and let him make the call.
Nice bike. I'd take this to a frame builder and let him make the call.
Likes For 79pmooney:
02-29-24, 08:36 PM
#6
Senior Member
Join Date: Jul 2007
Location: South shore, L.I., NY
Posts: 7,327
Bikes: Flyxii FR322, Cannondale Topstone, Miyata City Liner, Specialized Chisel, Specialized Epic Evo
Liked 2,403 Times
in
1,358 Posts
Research says it should be 27.2 but your measuring tool says 26. I would be questioning the measuring tool and getting a digital caliper. You do not want to force a too large seatpost. FWIW, Sheldon’s site lists every Serotta using a 27.2, so possibly a prior owner used too small a seatpost and forced the tubes together.
Likes For Steve B.:
02-29-24, 09:38 PM
#7
se�or miembro

Join Date: Dec 2018
Location: Pac NW
Posts: 6,735
Bikes: '70s - '80s Campagnolo
Liked 6,994 Times
in
3,447 Posts
Do you not have a seatpost you can try?
The seatpost lug looks fine. I would try a couple different sizes of seatpost (26.8, 27.0 and 27.2) and simply use what fits the most snug.
The seatpost lug looks fine. I would try a couple different sizes of seatpost (26.8, 27.0 and 27.2) and simply use what fits the most snug.
Likes For SurferRosa:
02-29-24, 10:20 PM
#8
Junior Member
Thread Starter
I tried a 27.2 post and it did not fit. I figured it was probably better to try to fix the collar rather than just put a smaller post in.
Likes For J_Climacus:
02-29-24, 10:44 PM
#9
Senior Member

Join Date: Jul 2006
Location: San Jose (Willow Glen) Ca
Posts: 10,380
Bikes: Kirk Custom JK Special, '84 Team Miyata,(dura ace old school) 80?? SR Semi-Pro 600 Arabesque
Liked 3,485 Times
in
1,823 Posts
I would measure both seatpost and seat tube interior
you could take a train to Philadelphia and have Bilenky cycleworks take a look https://www.bilenky.com/
__________________
Life is too short not to ride the best bike you have, as much as you can.
Life is too short not to ride the best bike you have, as much as you can.
Last edited by squirtdad; 03-01-24 at 11:48 AM.
02-29-24, 11:59 PM
#10
Senior Member

Join Date: May 2010
Location: Bastrop Texas
Posts: 4,771
Bikes: Univega, Peu P6, Peu PR-10, Ted Williams, Peu UO-8, Peu UO-18 Mixte, Peu Dolomites
Liked 1,846 Times
in
1,183 Posts
Simple:
1 - Clean out the seat post. Do it right. Take out the bottom bracket and clean and even sand it out.
2 - Check its round. Very important, at the midway point and its top. The top of the seat post is likely messed up.
3 - Take a pipe and wrap tape tape around it till it fits snugly in the seat post mid way to the top.
4 - Measure the diameter of the tape and thats what ya need.
Don't be surprised if the diameter does not meet the expected specifications. That happens allot. Also note that this is not, The Way but just, A Way of doing it. I always shoot for a seat post diameter well below the top of the seat post.
__________________
 No matter where you're at... There you are... Δf:=f(1/2)-f(-1/2)
No matter where you're at... There you are... Δf:=f(1/2)-f(-1/2)
Likes For zandoval:
03-01-24, 02:17 AM
#11
se�or miembro
Join Date: Dec 2018
Location: Pac NW
Posts: 6,735
Bikes: '70s - '80s Campagnolo
Liked 6,994 Times
in
3,447 Posts
Likes For SurferRosa:
03-01-24, 02:27 AM
#12
Senior Member
I think he means taking a measurement at a point a way down the tube to make sure the post will actually drop in.
Likes For choddo:
03-01-24, 03:54 AM
#13
Don't remove any metal on the inside of the seat tube/lug, to make it larger, that will weaken the area.
Resizing something like that, in my opinion, would require either a) "ball resizer", that is how we swaged the interior of precision tube in industry, or b) a "tube expander", like they use with automotive exhaust systems. There will be "springback", this takes skill.
Dial calipers are not the best tool to measure the inside tube diameter. A machinist will use "telescoping gages", a T-shaped tool (different ones for different ranges), that has plungers on each side 90 degrees to the handle, you put inside the tube at an angle, tighten *very slightly*, cock the handle over past parallel to the tube, the plungers will stay in at actual measurement, then you *very carefully* measure the gage with a micrometer, that'll measure within 0.0001 inch. Then you check the hole all around, from different angles, to see which way it is ovalized, and that will help a skilled framebuilder or metalworker, expand the hole properly to get back to original size.
Telescoping gages can also measure much deeper down inside the tube, to verify the actual tube size before squeezed too far smaller.
Last edited by Duragrouch; 03-01-24 at 03:59 AM.
Likes For Duragrouch:
03-01-24, 07:51 AM
#14
Mad bike riding scientist

Join Date: Nov 2004
Location: Denver, CO
Posts: 27,700
Bikes: Some silver ones, a red one, a black and orange one, and a few titanium ones
Liked 4,537 Times
in
2,522 Posts
Don't remove any metal on the inside of the seat tube/lug, to make it larger, that will weaken the area.
Resizing something like that, in my opinion, would require either a) "ball resizer", that is how we swaged the interior of precision tube in industry, or b) a "tube expander", like they use with automotive exhaust systems. There will be "springback", this takes skill.
Dial calipers are not the best tool to measure the inside tube diameter. A machinist will use "telescoping gages", a T-shaped tool (different ones for different ranges), that has plungers on each side 90 degrees to the handle, you put inside the tube at an angle, tighten *very slightly*, cock the handle over past parallel to the tube, the plungers will stay in at actual measurement, then you *very carefully* measure the gage with a micrometer, that'll measure within 0.0001 inch. Then you check the hole all around, from different angles, to see which way it is ovalized, and that will help a skilled framebuilder or metalworker, expand the hole properly to get back to original size.
Telescoping gages can also measure much deeper down inside the tube, to verify the actual tube size before squeezed too far smaller.
Resizing something like that, in my opinion, would require either a) "ball resizer", that is how we swaged the interior of precision tube in industry, or b) a "tube expander", like they use with automotive exhaust systems. There will be "springback", this takes skill.
Dial calipers are not the best tool to measure the inside tube diameter. A machinist will use "telescoping gages", a T-shaped tool (different ones for different ranges), that has plungers on each side 90 degrees to the handle, you put inside the tube at an angle, tighten *very slightly*, cock the handle over past parallel to the tube, the plungers will stay in at actual measurement, then you *very carefully* measure the gage with a micrometer, that'll measure within 0.0001 inch. Then you check the hole all around, from different angles, to see which way it is ovalized, and that will help a skilled framebuilder or metalworker, expand the hole properly to get back to original size.
Telescoping gages can also measure much deeper down inside the tube, to verify the actual tube size before squeezed too far smaller.
__________________
Stuart Black
Plan Epsilon Around Lake Michigan in the era of Covid
Old School�When It Wasn�t Ancient bikepacking
Gold Fever Three days of dirt in Colorado
Pokin' around the Poconos A cold ride around Lake Erie
Dinosaurs in Colorado A mountain bike guide to the Purgatory Canyon dinosaur trackway
Solo Without Pie. The search for pie in the Midwest.
Picking the Scablands. Washington and Oregon, 2005. Pie and spiders on the Columbia River!
03-01-24, 08:07 AM
#15
I would also treat this like it is a good frame, because it is.
Something you could try, as long as you take your time, is pull the seat binder bolt out, thread it in from the left side and slip a penny or dime in the slot so the bolt pushes on it as the bolt is tightened. It shouldn't take a lot of this to push the ears apart until the proper 27.2 greased post will fit. If it does, you can decide to deal with it like that, or take it somewhere competent to get fixed. If it doesn't, definitely take it to somewhere competent like Bilenky.
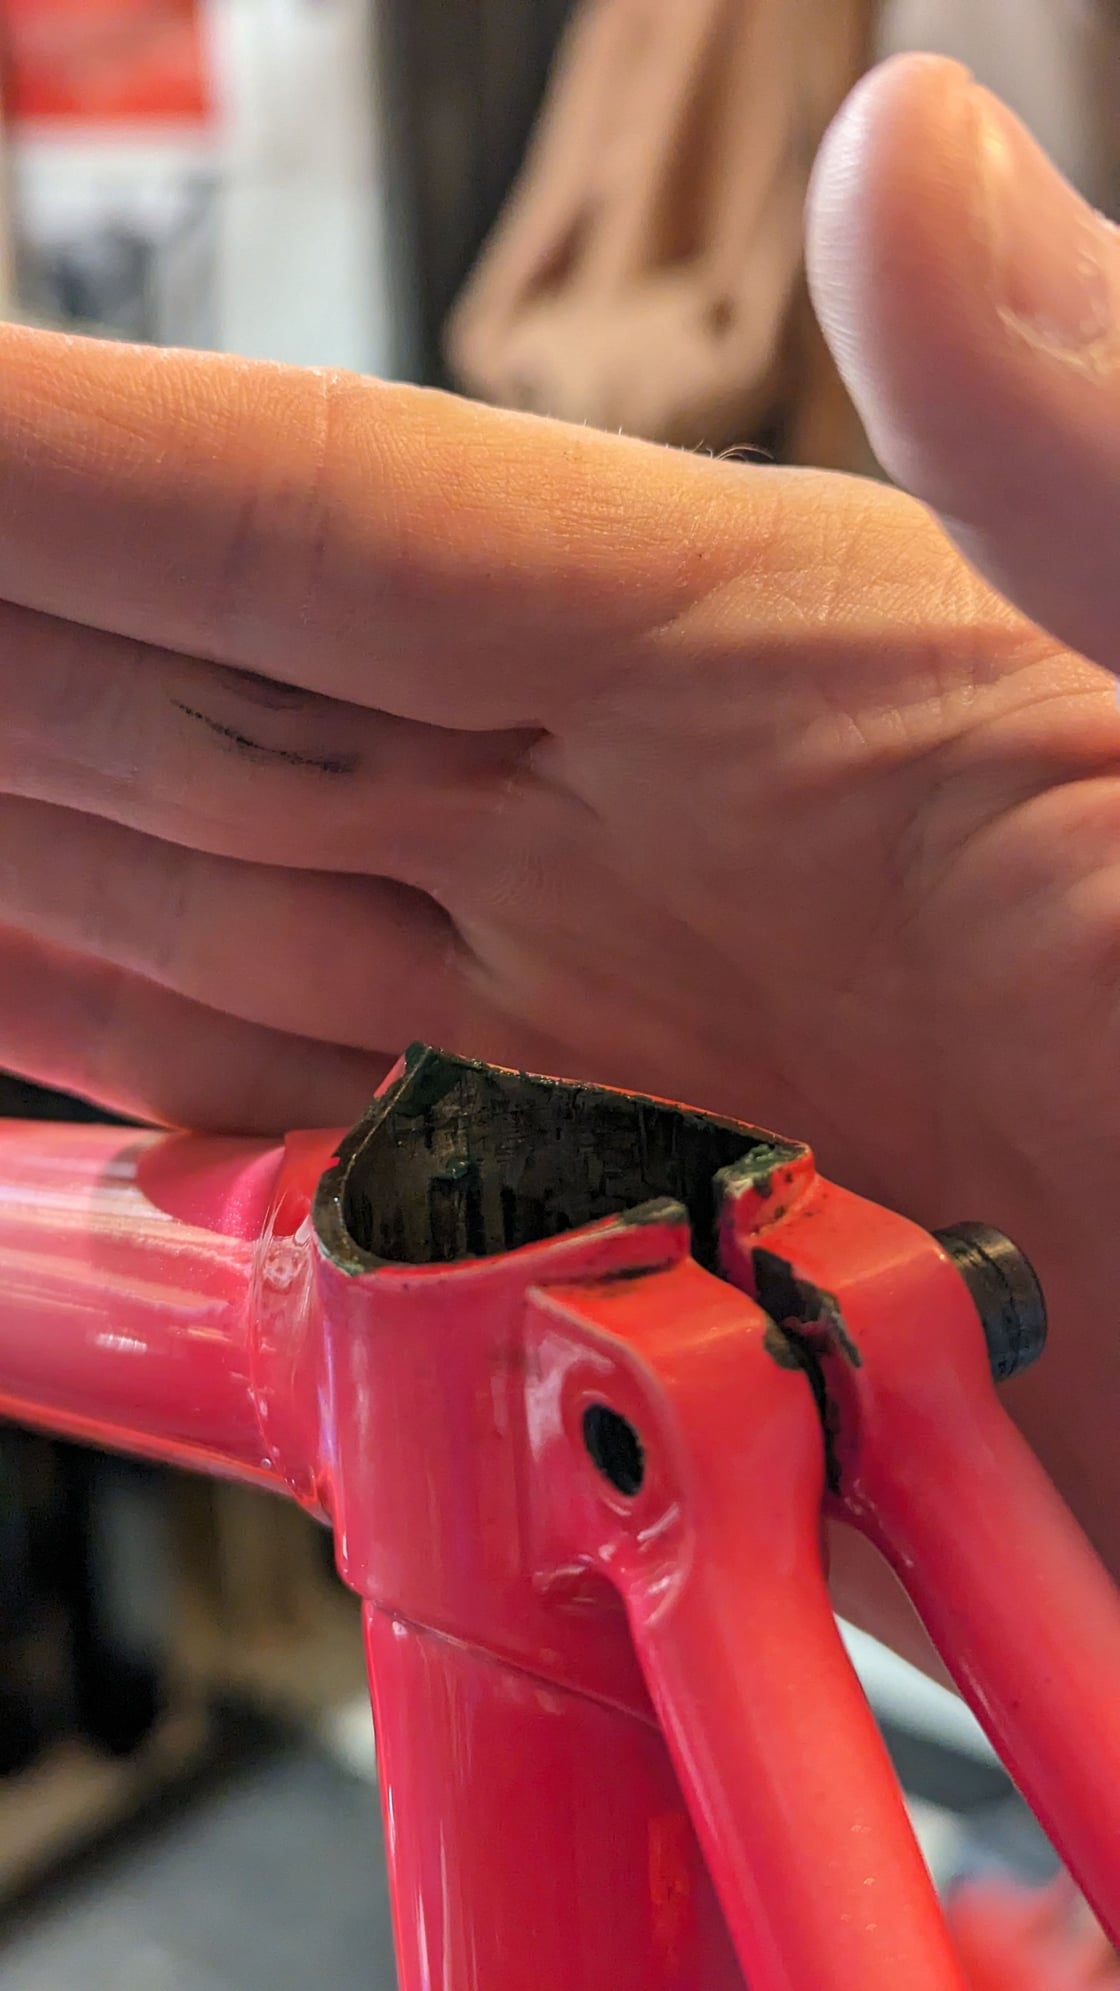
When this kind of thing happens, it doesn't generally make the diameter smaller - it just pinches the opening into a teardrop shape. So whoever fixes it is primarily bending those two ears back out to where they belong.
Something you could try, as long as you take your time, is pull the seat binder bolt out, thread it in from the left side and slip a penny or dime in the slot so the bolt pushes on it as the bolt is tightened. It shouldn't take a lot of this to push the ears apart until the proper 27.2 greased post will fit. If it does, you can decide to deal with it like that, or take it somewhere competent to get fixed. If it doesn't, definitely take it to somewhere competent like Bilenky.
When this kind of thing happens, it doesn't generally make the diameter smaller - it just pinches the opening into a teardrop shape. So whoever fixes it is primarily bending those two ears back out to where they belong.
Likes For Kontact:
03-01-24, 08:35 AM
#16
Senior Member
Join Date: Apr 2009
Location: New Rochelle, NY
Posts: 39,648
Bikes: too many bikes from 1967 10s (5x2)Frejus to a Sumitomo Ti/Chorus aluminum 10s (10x2), plus one non-susp mtn bike I use as my commuter
Liked 3,487 Times
in
1,913 Posts
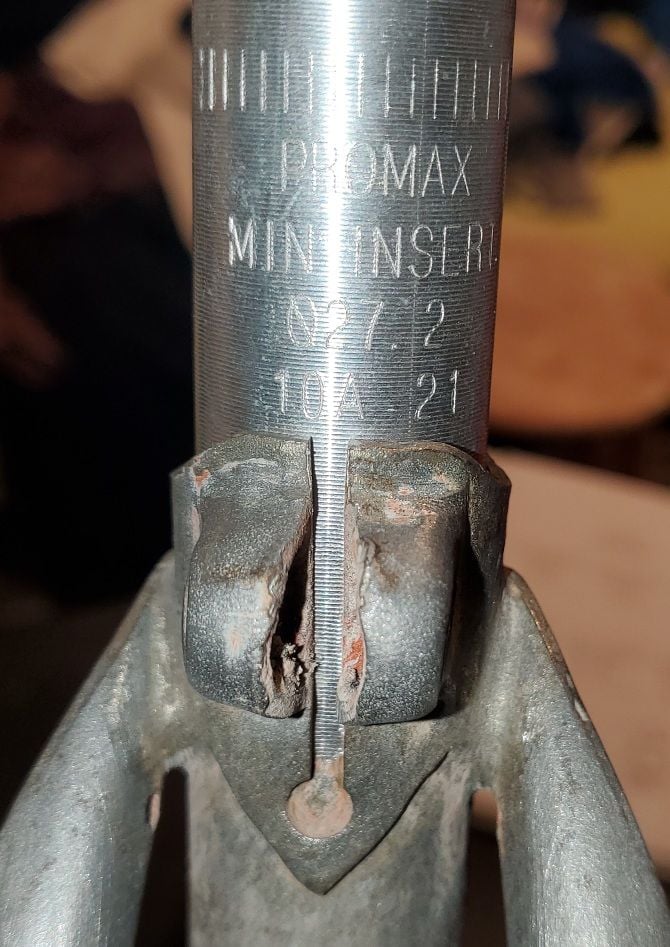
The first step is to stand behind the bike and eyeball the slot. These are cut with a saw of fixed width, so should be the same width top to bottom. If not, the top was pinched closed.
You can reopen the top by careful prying. Being steel, the frame is maleable enough to allow spreading back to size without harm. So your only worry is cosmetic.
You can reopen the top by careful prying. Being steel, the frame is maleable enough to allow spreading back to size without harm. So your only worry is cosmetic.
__________________
FB
Chain-L site
An ounce of diagnosis is worth a pound of cure.
Just because I'm tired of arguing, doesn't mean you're right.
�One accurate measurement is worth a thousand expert opinions� - Adm Grace Murray Hopper - USN
WARNING, I'm from New York. Thin skinned people should maintain safe distance.
FB
Chain-L site
An ounce of diagnosis is worth a pound of cure.
Just because I'm tired of arguing, doesn't mean you're right.
�One accurate measurement is worth a thousand expert opinions� - Adm Grace Murray Hopper - USN
WARNING, I'm from New York. Thin skinned people should maintain safe distance.
Likes For FBinNY:
03-01-24, 08:35 AM
#17
Senior Member
Join Date: Feb 2012
Location: Rochester, NY
Posts: 18,341
Bikes: Stewart S&S coupled sport tourer, Stewart Sunday light, Stewart Commuting, Stewart Touring, Co Motion Tandem, Stewart 3-Spd, Stewart Track, Fuji Finest, Mongoose Tomac ATB, GT Bravado ATB, JCP Folder, Stewart 650B ATB
Liked 4,188 Times
in
2,471 Posts
Yes, terms matter and the "seat post" is really the frame's "seat tube".
I see chips on the seat lug's ears right where one might place the tip od a screwdriver to try to pry out/bigger the seat post fit. IME this suggests a too small post was once used and the lug closed up some and someone tried to "fix" it. Or perhaps the post had just started to seize in the seat tube and the prying was an attempt to free up the post.
What most have said is good advice. The safest solution with the least "non reversable" result is to use a small enough post. Next up is doing mechanical working (blacksmithy with slightly small posts or pipes) on the lug area to open up the fit at that point. Running a hone down the seat tube top portion to remove burrs is a good idea regardless of what path is taken, honing doesn't remove hardly any bulk but is great at small high points. Last would be running a reamer, which is designed to remove bulk, in the tube and a honing follow up.
But when reaming it can be tricky to track what is actually being removed, one wants to avoid tube wall removal below the lug's lower edge (as that's only the tube wall below). Having said that often the critical area of heat deformation is right where the two different wall thicknesses meet (wall 1 being the tube and above that wall 2 is the lug/tube combo with braze filler between). I have seen more than a few frames where the seat tube was heat bulged significantly just below the lug, How far the resulting "correction" can be done can be limited by the frame's condition.
A commit on the OP's assumptions- One metaphor I like to use in talking about post fit is one of choosing a pair of shoes. One picks a "size" that fits the feet, regardless of what a shoe sales person thinks they have measured (such a word, filled with so much presumed fact) you feet as. Or at least we hope the actual fit is the final guidline and not the suggestion of having foot surgery to have your foot be able to fit in a shoe. Of course there are situations where foot surgery is the right choice (I have two TI plates in my toes...) but I think we can agree that we should do our homework before cutting skin.
I also question the OP's measuring methods, tools, results. There have been a few seat post fitting threads here recently and my advice here is the same as with the others. The only measurement that really counts is how the post fits and is secured. Very small amounts of diameter "drift" result in 22/7 (3.1415) huge amounts of circumference increase. And the sear lug has to clamp around the post's circumference. Given the OP's challenges with basic tool/measuring challenges I suggest they get someone who is more experienced to help out. Perhaps even show the OP some tool tips. Andy
__________________
AndrewRStewart
AndrewRStewart
03-01-24, 09:14 AM
#18
Senior Member
I feel like someone should market "seat tube repair mandrels" - long steel rods that are seat post widths and ever so slightly conical.
03-01-24, 09:22 AM
#19
Senior Member
Join Date: Apr 2009
Location: New Rochelle, NY
Posts: 39,648
Bikes: too many bikes from 1967 10s (5x2)Frejus to a Sumitomo Ti/Chorus aluminum 10s (10x2), plus one non-susp mtn bike I use as my commuter
Liked 3,487 Times
in
1,913 Posts
In any case, the slot tells the story. Multiply the difference in slot width, top and bottom, by 3 and you have the difference between top size and true size.
I spread frames that were closed by clamping to undersized posts using a pair of wedges I made from 2 old cone wrenches, using a belt sander.
Solving the OPs problem.is a 5 second job.
Last edited by FBinNY; 03-01-24 at 09:26 AM.
03-01-24, 09:22 AM
#20
...
Join Date: Oct 2021
Location: Whitestone and Rensselaerville, New York
Posts: 1,730
Bikes: Bicycles? Yup.
Liked 2,059 Times
in
871 Posts
Or just get ahold of a seatpost sizing gauge.
I'm un-ovalizing a seat tube today, and will post pics later...assuming everything goes to plan.
03-01-24, 11:22 AM
#21
Mad bike riding scientist
Join Date: Nov 2004
Location: Denver, CO
Posts: 27,700
Bikes: Some silver ones, a red one, a black and orange one, and a few titanium ones
Liked 4,537 Times
in
2,522 Posts
Why wouldn�t it work? I used a seatpost gauge on hundreds of different frames as part of my work at the local co-op and never found a frame the gauge wouldn�t work on. Seatpost get stolen regularly and we have to find new ones. The gauge makes it simple.
__________________
Stuart Black
Plan Epsilon Around Lake Michigan in the era of Covid
Old School�When It Wasn�t Ancient bikepacking
Gold Fever Three days of dirt in Colorado
Pokin' around the Poconos A cold ride around Lake Erie
Dinosaurs in Colorado A mountain bike guide to the Purgatory Canyon dinosaur trackway
Solo Without Pie. The search for pie in the Midwest.
Picking the Scablands. Washington and Oregon, 2005. Pie and spiders on the Columbia River!
Likes For cyccommute:
03-01-24, 12:05 PM
#22
Junior Member
Thread Starter
Hi all, thanks for the responses so far. Responding to a few specific points below.
My hesitation with using the closest fitting post is that I may run into post slip down the road. If it's ovalized, which I suspect, I do not have confidence that the clamping force will make it all the way around the post, leading to the post slipping or turning. It seemed like a better option to return it to factory spec, if possible.
I know that no offense was intended in this comment, or in some of the other comments questioning my ability to use a caliper, and no offense was taken, but I have to stand up for myself at least a little bit lol. I recognize that my initial post was probably a bit too vague. But my measuring tools and ability to use them are fine - I'm using a digital caliper from harbor freight. It has crappy, soft plastic jaws, but it works. The reason I am unsure of the source of the measuring variance I've experienced is that the ends of the calipers are plastic, and burrs/imperfections/dirt in a tube can impact sizing by margins that we're talking about (tenths of a millimeter). It's possible for me to hold the calipers in certain ways in even non-damaged seat tubes and get different measurements, depending on the angle I'm holding, if a spec of hard grime gets in the way, etc etc. Go try to get different measurements on the inside of a tube an old, non-pristine bike - I'd be willing to bet if your digital calipers have plastic ends, you will be able to get slight variance. Using a caliper on the outside of a tube is simple. Using it on the inside of a tube, at least in my experience, creates room for error. My assumption is that my tube is ovalized, resulting in the variance, but because the variance is minimal enough to be invisible to the naked eye, I didn't want to claim to be certain.
I thought about getting or making this. A conical seat tube measuring post should work, but most of them are aluminum, and this would need to be hard steel. And I would worry that the same springback effect of a cold set would apply - To get it back to 27.2mm, I would actually need to stretch it beyond 27.2 to compensate for any springback. So just having a conical tube would not be as simple as it might seem (or at least I was assuming). I also would not want to DIY one myself by sanding down a larger tube - I do not have confidence that I could sand it to be perfectly spherical, which this tool should be.
While it's a decent/above average frame, I just want to put it on my indoor trainer. I am not trying to keep this as a show bike or anything. But in my opinion, trying to get it back to 27.2 instead of just sizing the post down is treating it like a good frame. If it was a trash frame, I probably would just put a smaller post in.
As to your method, with the dime/penny, it's actually the first idea I had, and is still my first option for an "easy" fix. My concern is twofold: This would stretch the tube out, but if it's ovalized, I don't know if it will regain its circularity with this method. It could theoretically get ovalized worse, and just happen to have a measurable point that gets to 27.2. My second concern is the binder and binder bolt threads. This method would put a decent amount of force on those threads. If, in doing this, I deform or break a thread, I will have a much larger problem on my hands than a slightly mis-sized seat tube.
What most have said is good advice. The safest solution with the least "non reversable" result is to use a small enough post. Next up is doing mechanical working (blacksmithy with slightly small posts or pipes) on the lug area to open up the fit at that point. Running a hone down the seat tube top portion to remove burrs is a good idea regardless of what path is taken, honing doesn't remove hardly any bulk but is great at small high points. Last would be running a reamer, which is designed to remove bulk, in the tube and a honing follow up.
But when reaming it can be tricky to track what is actually being removed, one wants to avoid tube wall removal below the lug's lower edge (as that's only the tube wall below). Having said that often the critical area of heat deformation is right where the two different wall thicknesses meet (wall 1 being the tube and above that wall 2 is the lug/tube combo with braze filler between). I have seen more than a few frames where the seat tube was heat bulged significantly just below the lug, How far the resulting "correction" can be done can be limited by the frame's condition.
A commit on the OP's assumptions- One metaphor I like to use in talking about post fit is one of choosing a pair of shoes. One picks a "size" that fits the feet, regardless of what a shoe sales person thinks they have measured (such a word, filled with so much presumed fact) you feet as. Or at least we hope the actual fit is the final guidline and not the suggestion of having foot surgery to have your foot be able to fit in a shoe. Of course there are situations where foot surgery is the right choice (I have two TI plates in my toes...) but I think we can agree that we should do our homework before cutting skin.
I also question the OP's measuring methods, tools, results. There have been a few seat post fitting threads here recently and my advice here is the same as with the others. The only measurement that really counts is how the post fits and is secured. Very small amounts of diameter "drift" result in 22/7 (3.1415) huge amounts of circumference increase. And the sear lug has to clamp around the post's circumference. Given the OP's challenges with basic tool/measuring challenges I suggest they get someone who is more experienced to help out. Perhaps even show the OP some tool tips. Andy
I know that no offense was intended in this comment, or in some of the other comments questioning my ability to use a caliper, and no offense was taken, but I have to stand up for myself at least a little bit lol. I recognize that my initial post was probably a bit too vague. But my measuring tools and ability to use them are fine - I'm using a digital caliper from harbor freight. It has crappy, soft plastic jaws, but it works. The reason I am unsure of the source of the measuring variance I've experienced is that the ends of the calipers are plastic, and burrs/imperfections/dirt in a tube can impact sizing by margins that we're talking about (tenths of a millimeter). It's possible for me to hold the calipers in certain ways in even non-damaged seat tubes and get different measurements, depending on the angle I'm holding, if a spec of hard grime gets in the way, etc etc. Go try to get different measurements on the inside of a tube an old, non-pristine bike - I'd be willing to bet if your digital calipers have plastic ends, you will be able to get slight variance. Using a caliper on the outside of a tube is simple. Using it on the inside of a tube, at least in my experience, creates room for error. My assumption is that my tube is ovalized, resulting in the variance, but because the variance is minimal enough to be invisible to the naked eye, I didn't want to claim to be certain.
I would also treat this like it is a good frame, because it is.
Something you could try, as long as you take your time, is pull the seat binder bolt out, thread it in from the left side and slip a penny or dime in the slot so the bolt pushes on it as the bolt is tightened. It shouldn't take a lot of this to push the ears apart until the proper 27.2 greased post will fit. If it does, you can decide to deal with it like that, or take it somewhere competent to get fixed. If it doesn't, definitely take it to somewhere competent like Bilenky.
When this kind of thing happens, it doesn't generally make the diameter smaller - it just pinches the opening into a teardrop shape. So whoever fixes it is primarily bending those two ears back out to where they belong.
As to your method, with the dime/penny, it's actually the first idea I had, and is still my first option for an "easy" fix. My concern is twofold: This would stretch the tube out, but if it's ovalized, I don't know if it will regain its circularity with this method. It could theoretically get ovalized worse, and just happen to have a measurable point that gets to 27.2. My second concern is the binder and binder bolt threads. This method would put a decent amount of force on those threads. If, in doing this, I deform or break a thread, I will have a much larger problem on my hands than a slightly mis-sized seat tube.
Last edited by J_Climacus; 03-01-24 at 12:16 PM.
03-01-24, 12:15 PM
#23
Senior Member
Join Date: Feb 2012
Location: Rochester, NY
Posts: 18,341
Bikes: Stewart S&S coupled sport tourer, Stewart Sunday light, Stewart Commuting, Stewart Touring, Co Motion Tandem, Stewart 3-Spd, Stewart Track, Fuji Finest, Mongoose Tomac ATB, GT Bravado ATB, JCP Folder, Stewart 650B ATB
Liked 4,188 Times
in
2,471 Posts
I look forward to reading of the progress and results. Andy
__________________
AndrewRStewart
AndrewRStewart
Likes For Andrew R Stewart:
03-01-24, 12:20 PM
#24
...
Join Date: Oct 2021
Location: Whitestone and Rensselaerville, New York
Posts: 1,730
Bikes: Bicycles? Yup.
Liked 2,059 Times
in
871 Posts
My seat tube diameters at the top were 26.3 mm to the ears and 27.2 mm across the frame.
Tools; the cut aluminum pipe is key, the bore calipers are not.
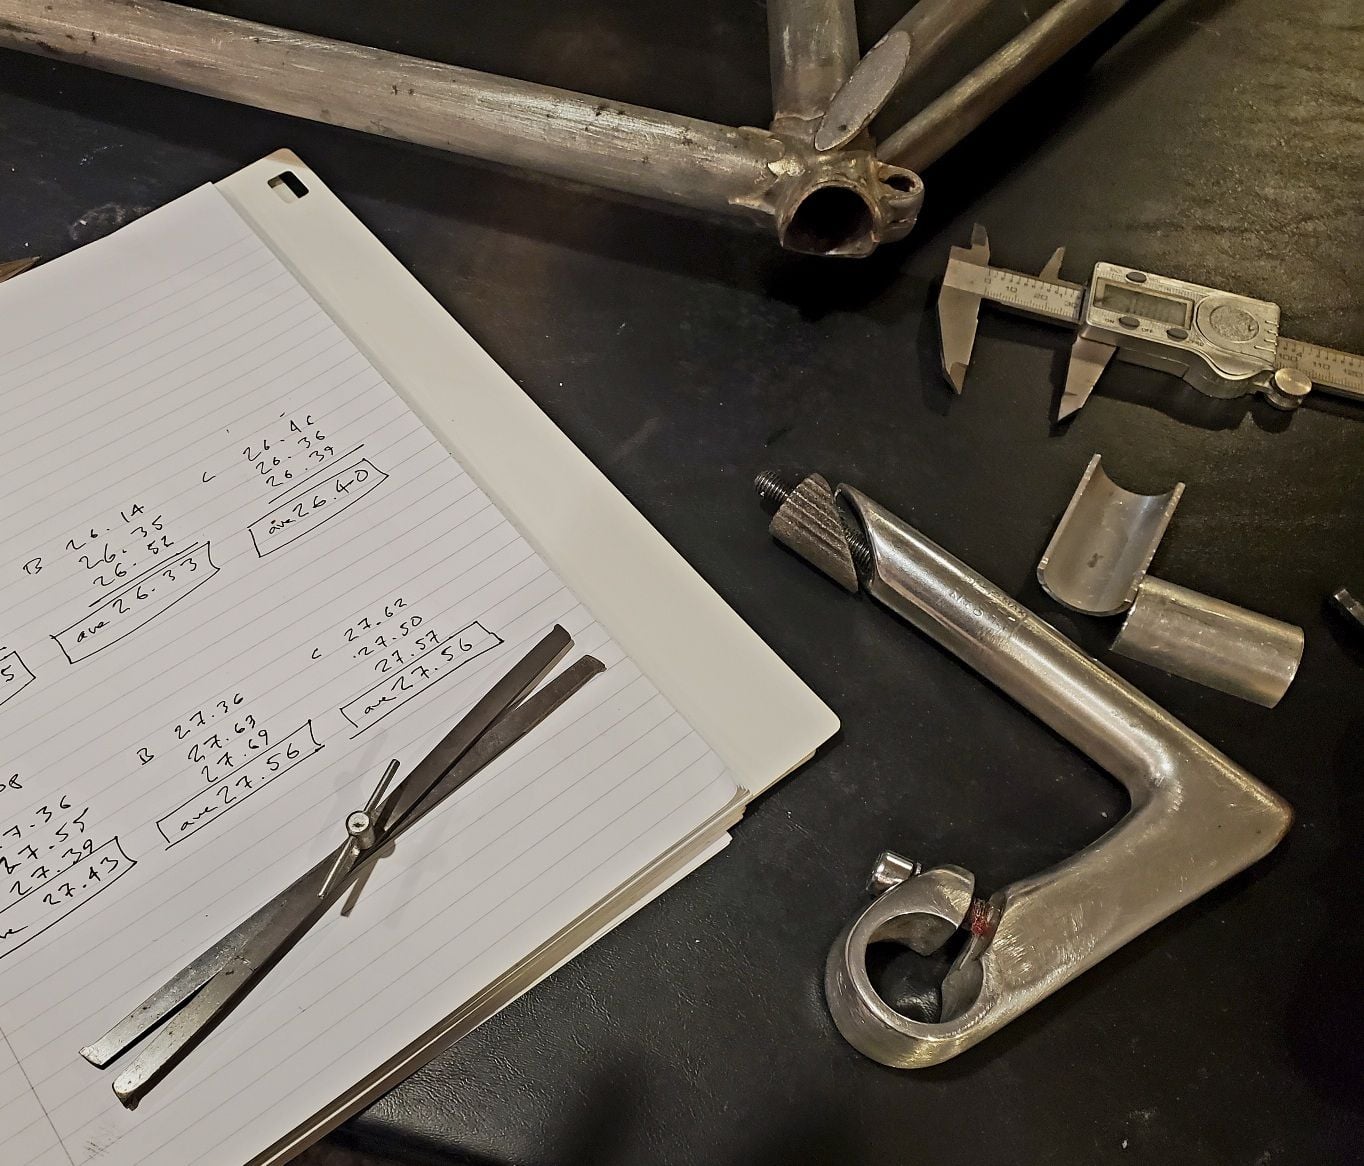
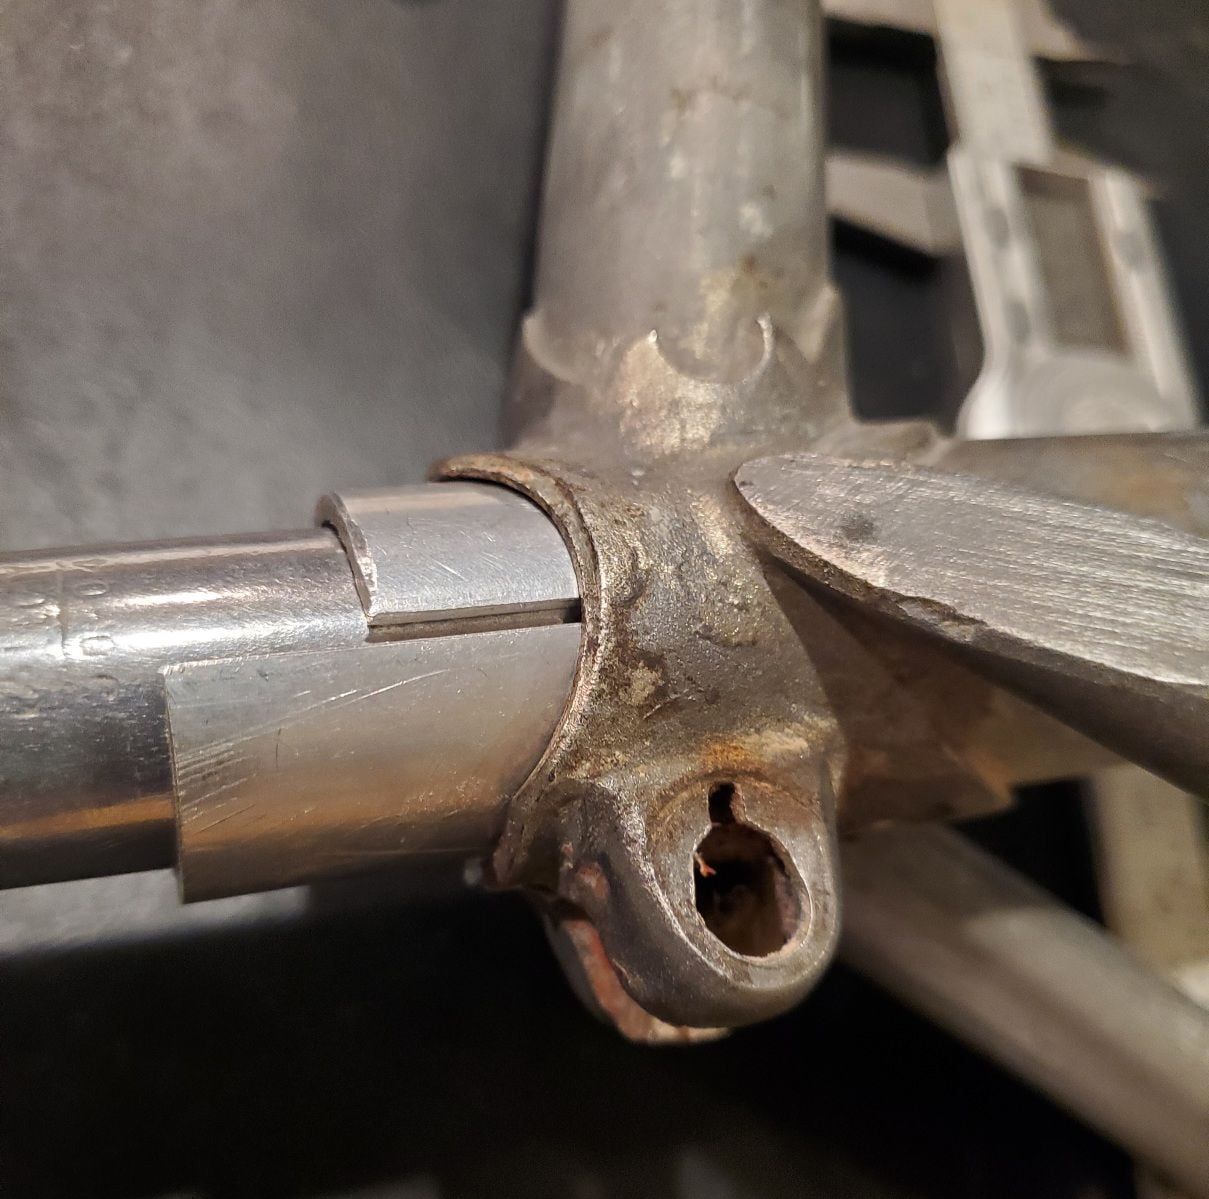
When the ear slots were parallel, the seat tube was very close to 27.2 mm round. I stretched and measured 3 times to get it round.
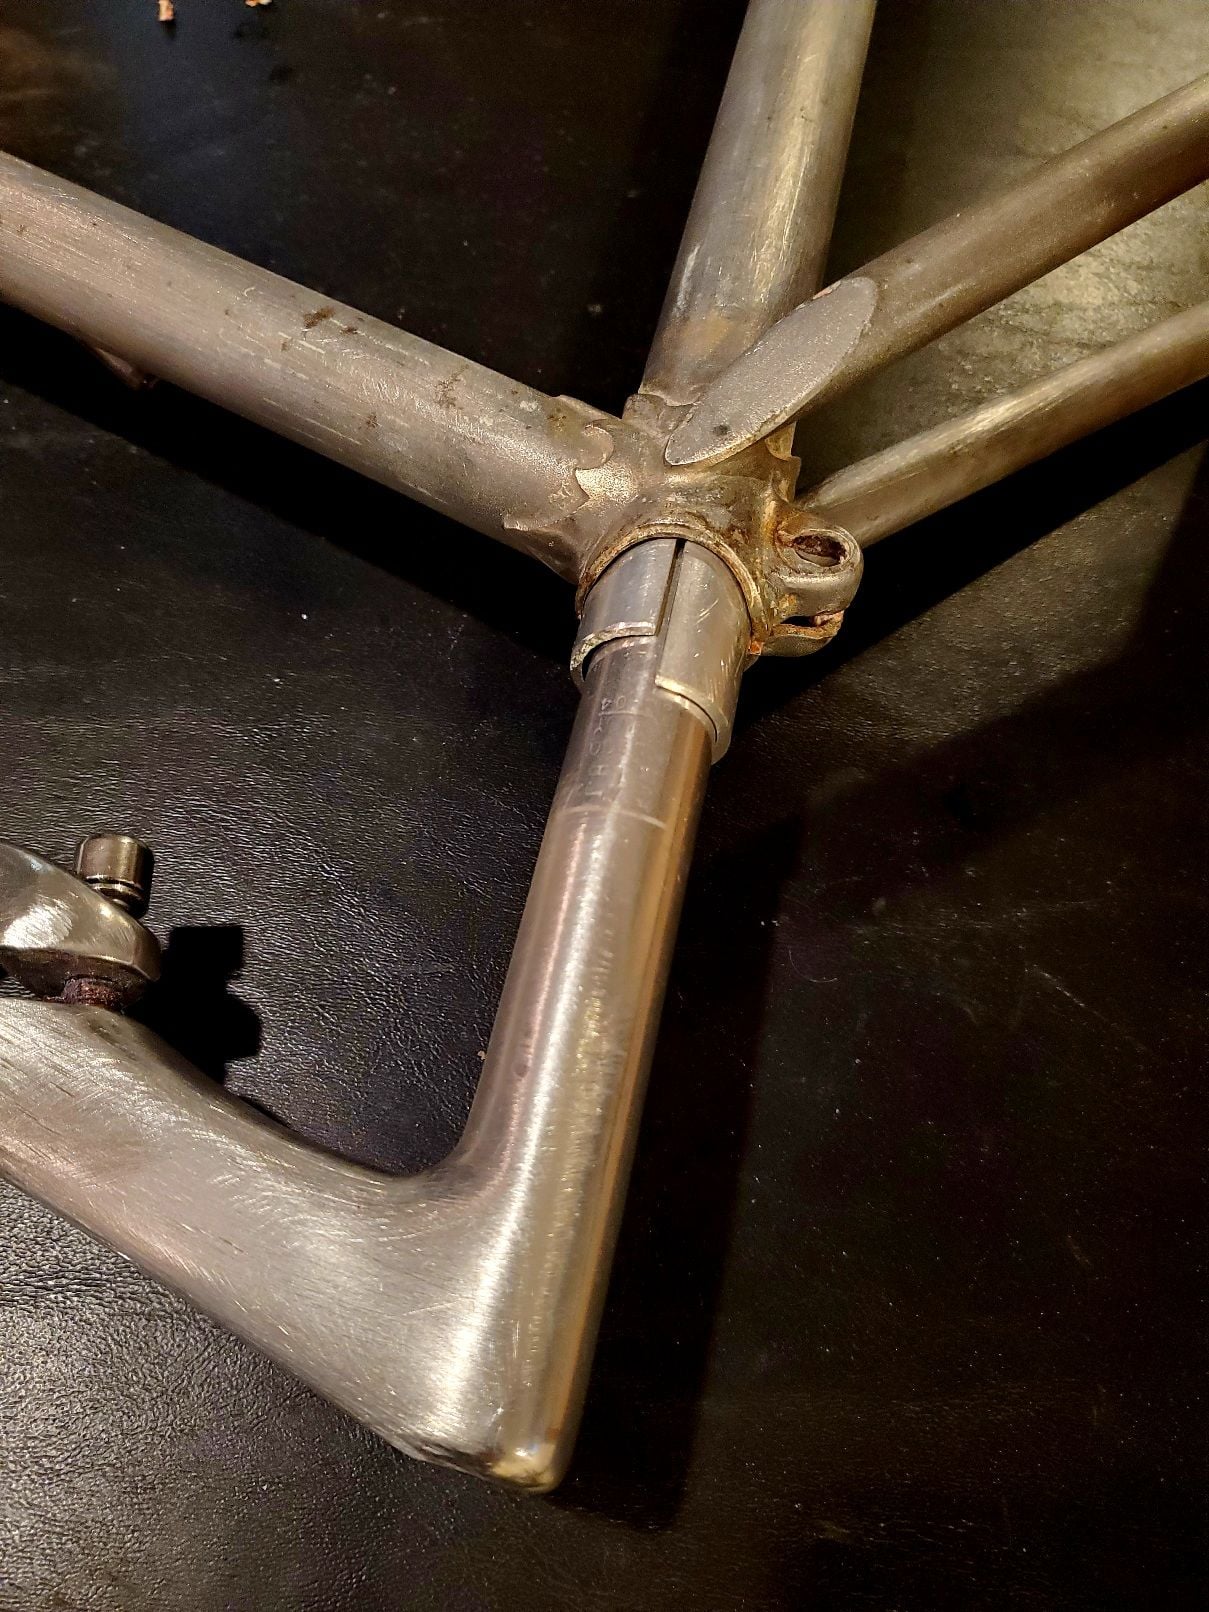
The aluminum pipe on the ears side is about 2 mm above the beginning of the slot.
Just because I have them, I estimated the ID of this Vitus 971 to be 27.5 mm using the bore calipers.
27.2 it is and onto the next bit of surgery.
Tools; the cut aluminum pipe is key, the bore calipers are not.
When the ear slots were parallel, the seat tube was very close to 27.2 mm round. I stretched and measured 3 times to get it round.
The aluminum pipe on the ears side is about 2 mm above the beginning of the slot.
Just because I have them, I estimated the ID of this Vitus 971 to be 27.5 mm using the bore calipers.
27.2 it is and onto the next bit of surgery.
Last edited by BTinNYC; 03-01-24 at 12:49 PM.
03-01-24, 12:31 PM
#25
Senior Member
Join Date: Feb 2012
Location: Rochester, NY
Posts: 18,341
Bikes: Stewart S&S coupled sport tourer, Stewart Sunday light, Stewart Commuting, Stewart Touring, Co Motion Tandem, Stewart 3-Spd, Stewart Track, Fuji Finest, Mongoose Tomac ATB, GT Bravado ATB, JCP Folder, Stewart 650B ATB
Liked 4,188 Times
in
2,471 Posts
"I know that no offense was intended in this comment, or in some of the other comments questioning my ability to use a caliper, and no offense was taken, but I have to stand up for myself at least a little bit lol. I recognize that my initial post was probably a bit too vague. But my measuring tools and ability to use them are fine - I'm using a digital caliper from harbor freight. It has crappy, soft plastic jaws, but it works. The reason I am unsure of the source of the measuring variance I've experienced is that the ends of the calipers are plastic, and burrs/imperfections/dirt in a tube can impact sizing by margins that we're talking about (tenths of a millimeter). It's possible for me to hold the calipers in certain ways in even non-damaged seat tubes and get different measurements, depending on the angle I'm holding, if a spec of hard grime gets in the way, etc etc. Go try to get different measurements on the inside of a tube an old, non-pristine bike - I'd be willing to bet if your digital calipers have plastic ends, you will be able to get slight variance. Using a caliper on the outside of a tube is simple. Using it on the inside of a tube, at least in my experience, creates room for error. My assumption is that my tube is ovalized, resulting in the variance, but because the variance is minimal enough to be invisible to the naked eye, I didn't want to claim to be certain."
I hope I didn't sound too condescending about caliper use. Given the state of a brazed and slotted tube end even a "best" caliper won't give you more than a good starting point. The 0.8mm (about 0.031") first referenced was a huge range, well past what I have seen for seat tube diameter ovalization. Well past what poor caliper construction or stiffness usually results in. I know of a few machinists that consider a caliper to really be an adjustable go/no go gage
The above statements you write I feel just prove my assertion why using a caliper to size a post with isn't always the final word.
As to making seat post insertion sizing pry bars- They already are out there, although not tapered. They are readily available long seat posts in a slightly smaller diameter then what currently fits. Cheap and long ATB ones (often only $10-$15 new, free if from tossed out stuff) have thick walls and the 350mm usual length is more than long enough to rework the top couple of inches of seat tube. Andy (who does own a set of lug and BB shell socket bending bars, made by Oasis Cycles)
__________________
AndrewRStewart
AndrewRStewart

