


Dahon rejuvenation
 05-09-24, 09:46 PM
#51
(above) Gosh, your pic, a bit fuzzy, but looks like a black snap ring on the bottom, but I see none in the rebuild kit shot. Is that long pin in a blind hole, or is there a hole on the opposite side to drive out the pin? In the parts shot, again, fuzzy so hard to see, but it looks like the pin is stepped or threaded on the end?
 06-03-24, 09:07 PM
#52
BeastMaster
Thread Starter

(above) Gosh, your pic, a bit fuzzy, but looks like a black snap ring on the bottom, but I see none in the rebuild kit shot. Is that long pin in a blind hole, or is there a hole on the opposite side to drive out the pin? In the parts shot, again, fuzzy so hard to see, but it looks like the pin is stepped or threaded on the end?
.
06-03-24, 09:25 PM
#53
Took the frame to a machine shop and finally my LBS. The pin is internally threaded and further internet research found a YouTube video that showed how to extract the pin. The LBS (who was awaiting response from Dahon on pin removal) got the hinge disassembled and now, the frame members are heading to the paint shop for prepping & powder coating.
.
.
Thanks.
06-03-24, 10:31 PM
#54
BeastMaster
Thread Starter
Sounds great! If you can, please post a link to the youtube video. I'm hoping there is a related video for the steel Dahon frame which has a lateral setscrew below the pin to hold it in place, but the pin is therefore blocked so I can't see if it also has internal threads..
Likes For Need41speed:
06-03-24, 11:42 PM
#55
(above) Thanks, but no sound on video, here or on youtube. Says "Better with audio" on screen, tried clicking there, nothing. Commercial at beginning has sound, so not my settings.
Last edited by Duragrouch; 06-03-24 at 11:46 PM.
Likes For Duragrouch:
06-04-24, 12:06 AM
#56
Senior Member

Join Date: Jun 2022
Location: The Ring of Fire
Posts: 1,651
Bikes: Several, all affordably priced, none exalted cult artifacts
Liked 841 Times
in
554 Posts
Excellent job. You have the patience of a saint. My only nit-pick is the length of that cabling in front of the handlebar. If you install a rack or bag on the front block, it's gonna interfere. Plus don't forget the capstan equation. Only the coefficient of friction and total change in direction matter.
Good to see another unique 305er.
Good to see another unique 305er.
Last edited by Ron Damon; 06-04-24 at 12:33 AM.
06-04-24, 04:31 AM
#57
Excellent job. You have the patience of a saint. My only nit-pick is the length of that cabling in front of the handlebar. If you install a rack or bag on the front block, it's gonna interfere. Plus don't forget the capstan equation. Only the coefficient of friction and total change in direction matter.
Good to see another unique 305er.
Good to see another unique 305er.
07-02-24, 03:51 PM
#58
BeastMaster
Thread Starter
Frame back fm powder coating

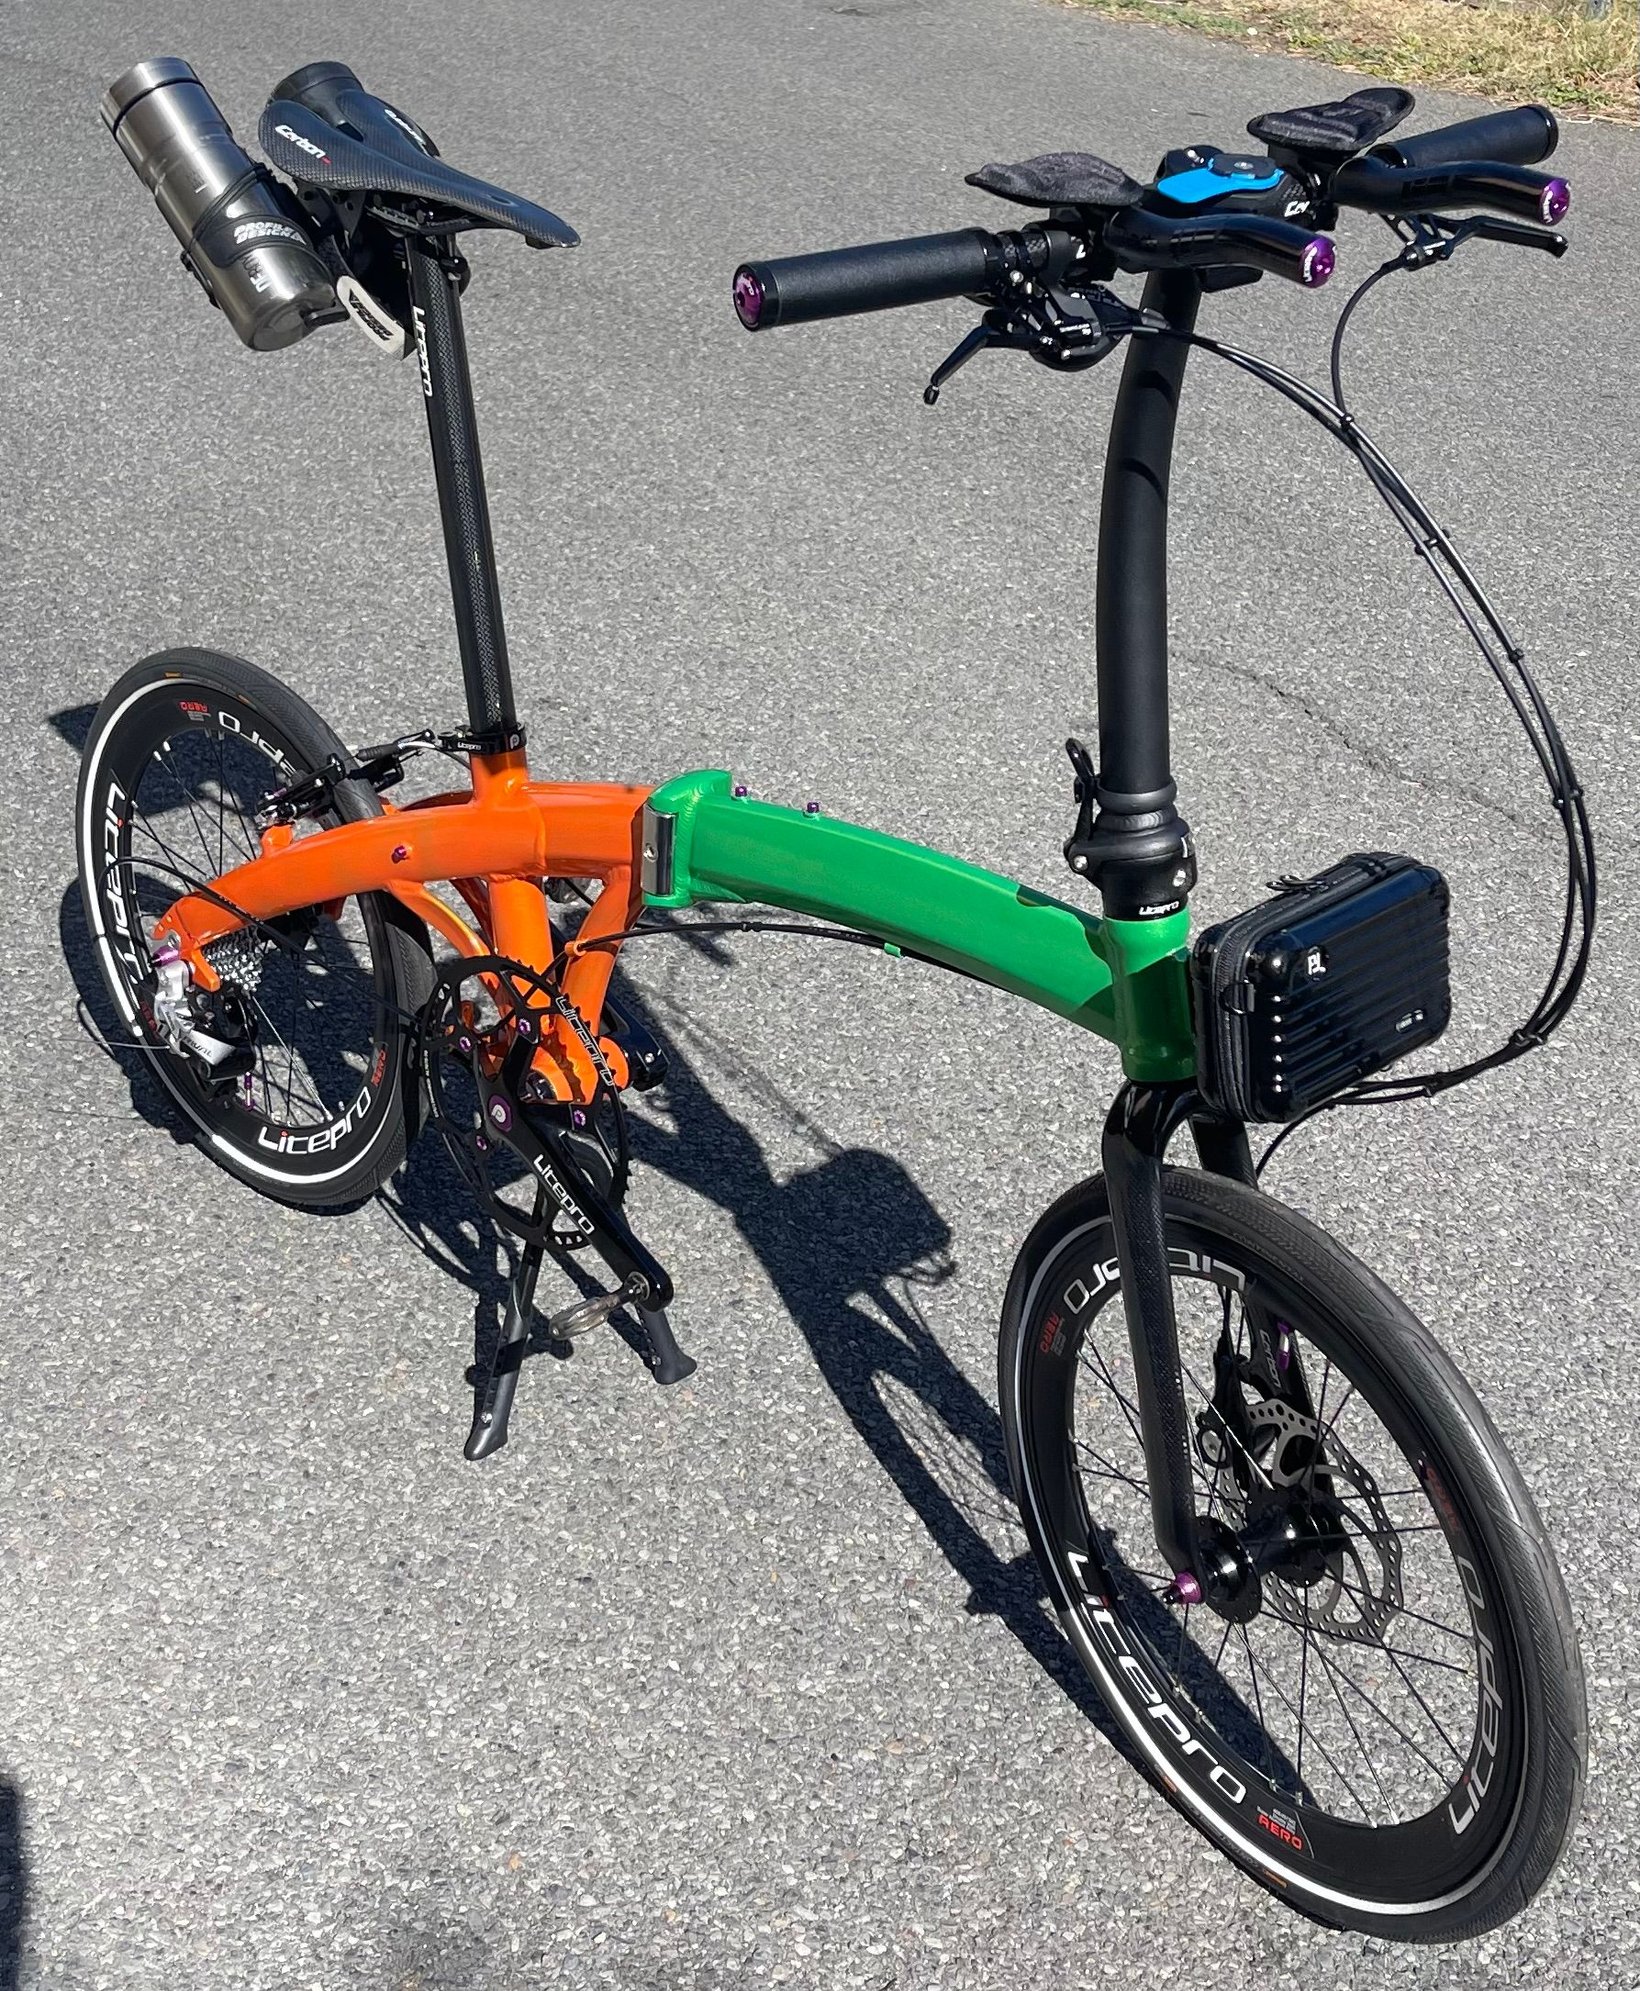
Local powder coater did an excellent job with the frame. My “Jenny” is ready for assembly.
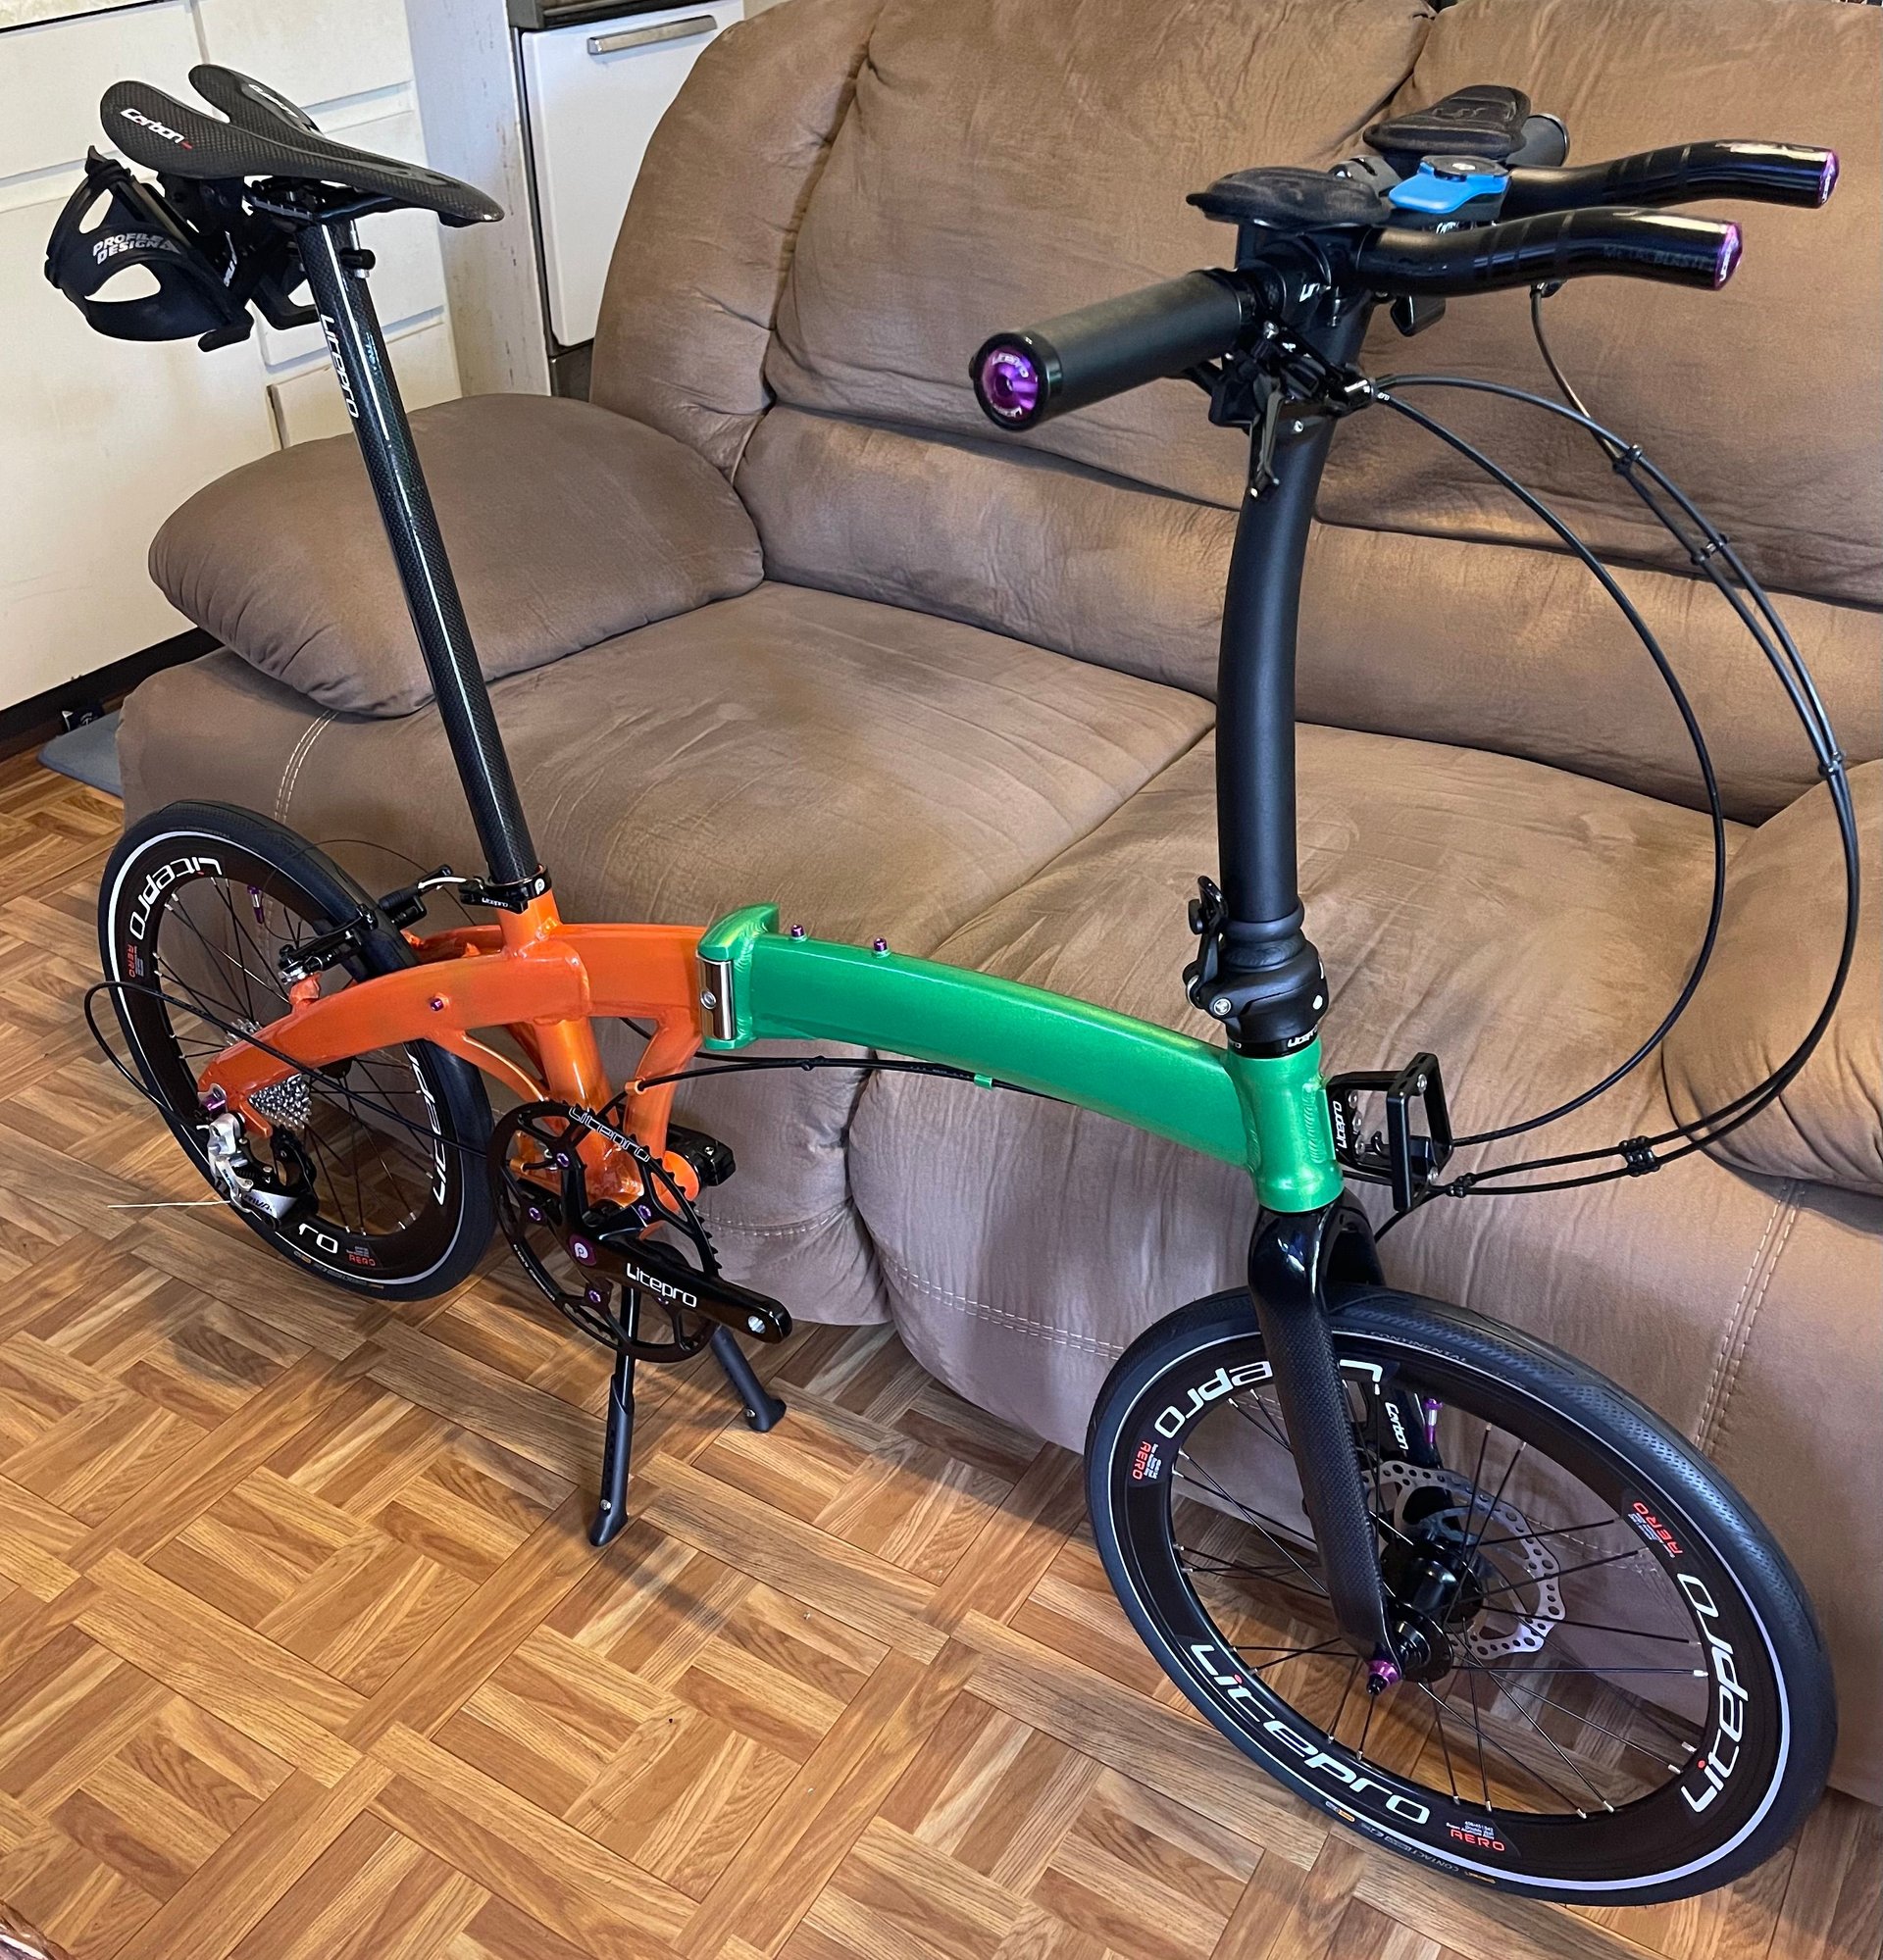
LitePro & SRAM adorned. Rear derailleur & cable adjustments remain. Almost ready for test ride.
Likes For Need41speed:
07-02-24, 08:08 PM
#60
BeastMaster
Thread Starter
I’m waiting for a proper cable cutter to finish the cable mounting. The excess cabling has not been trimmed (2nd loop of rear brake cable). The cable housing will also be trimmed. May also be considering internal routing in the future.
07-02-24, 08:30 PM
#61
Senior Member
Join Date: Jun 2022
Location: The Ring of Fire
Posts: 1,651
Bikes: Several, all affordably priced, none exalted cult artifacts
Liked 841 Times
in
554 Posts
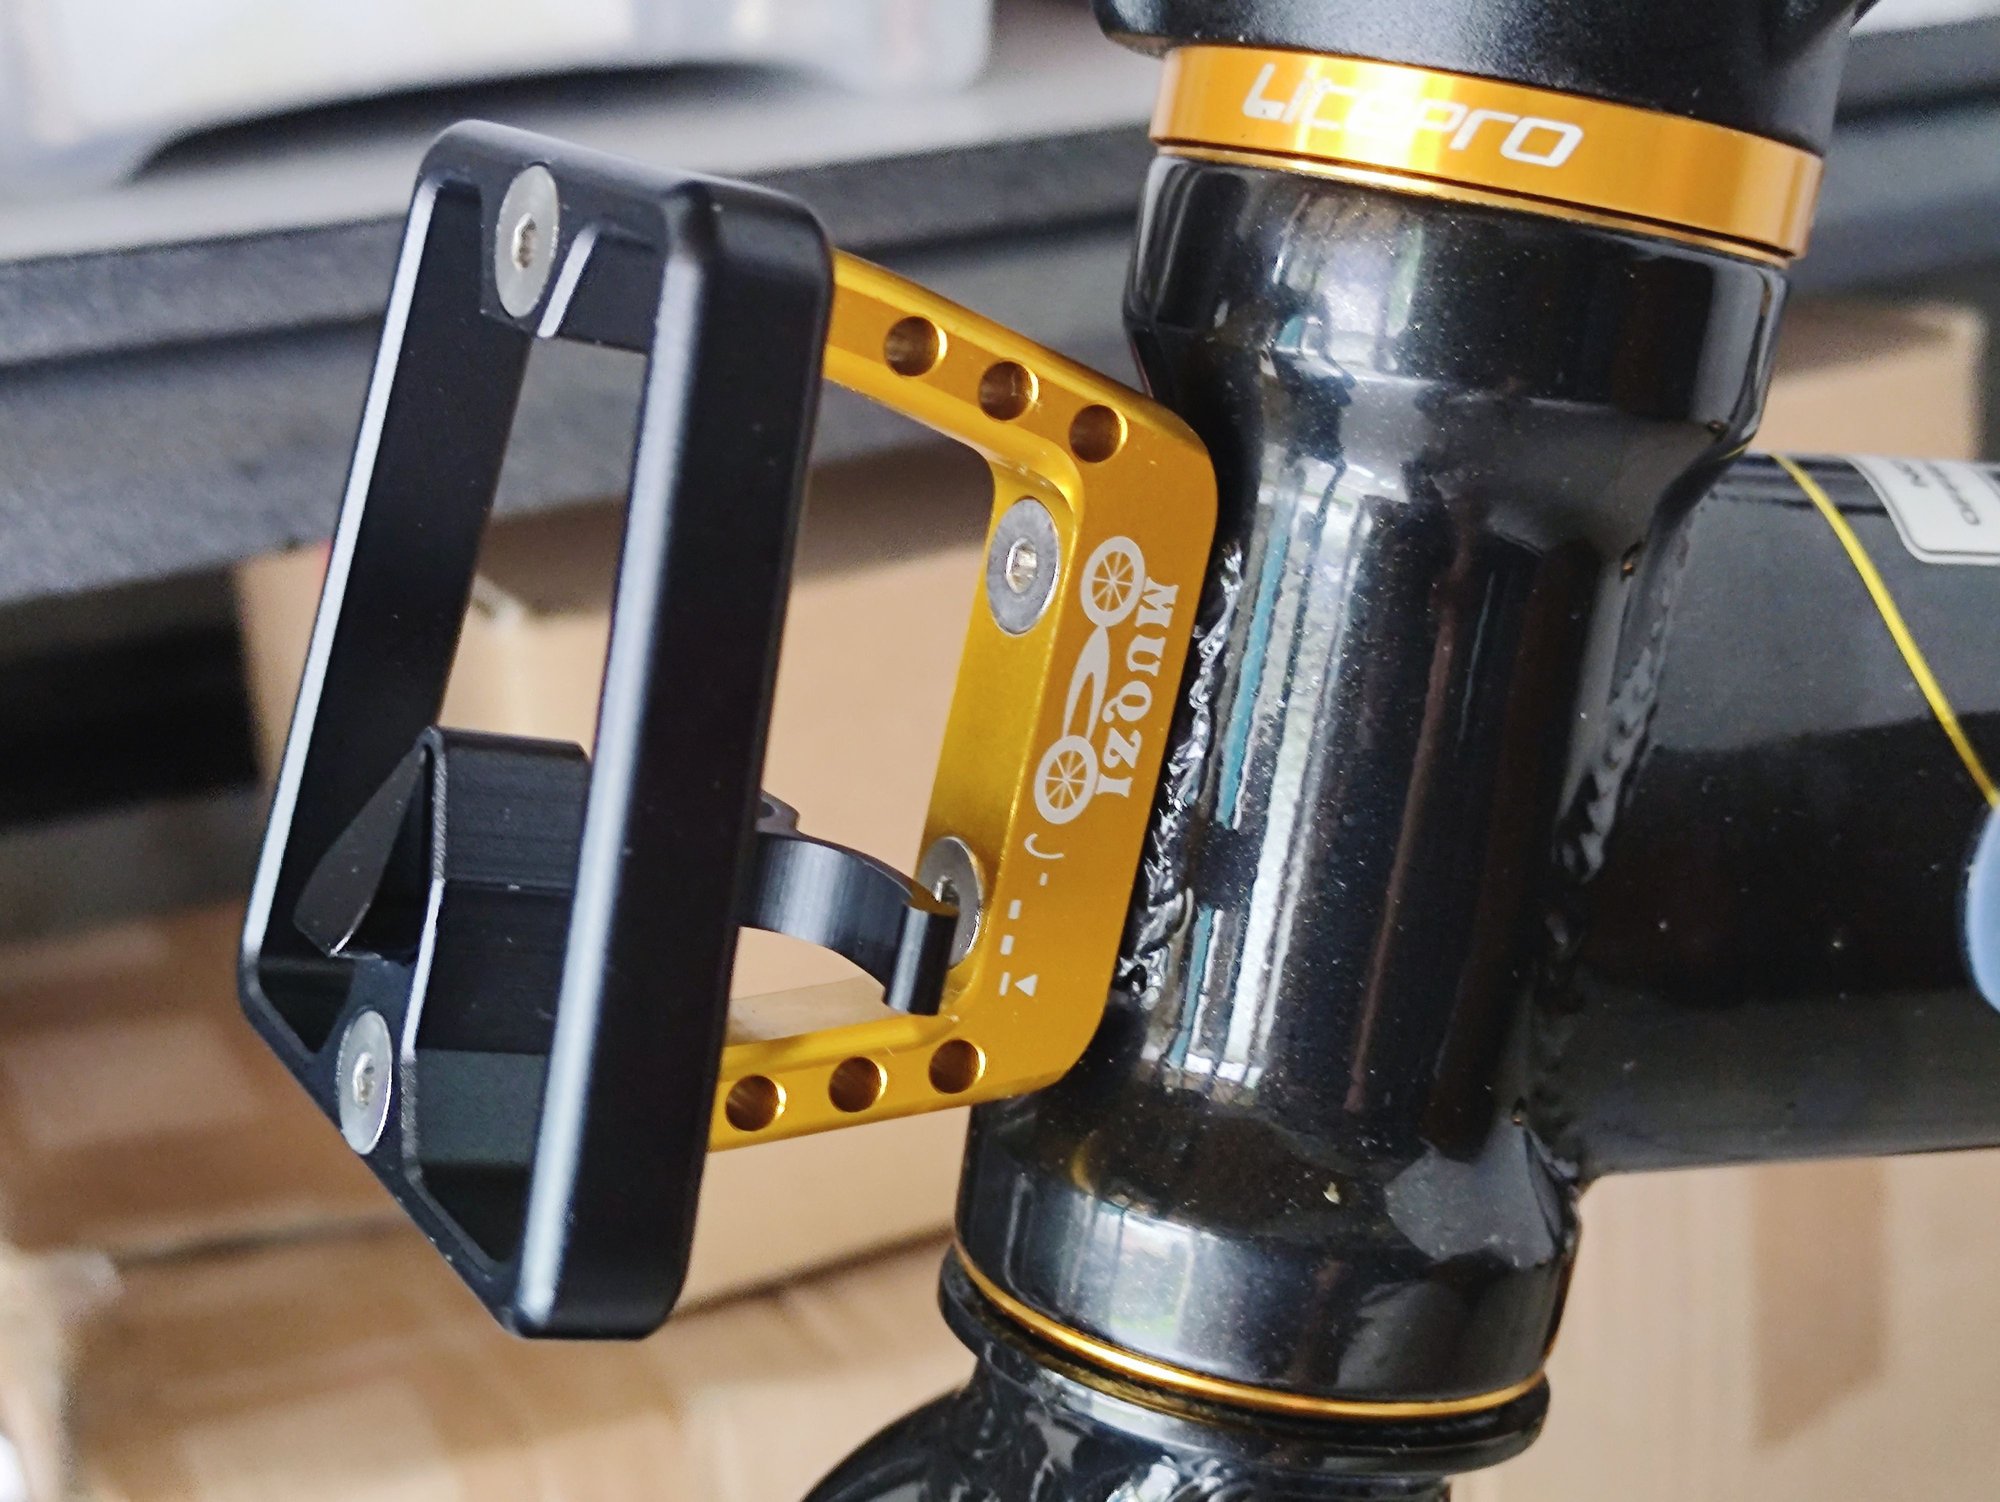
The pignose is a three hole bracket that utilizes the mount that was part of the original Mu frame. I think Bromptons come with a 2 hole mount? Reviewing the online LitePro site, They offer a strap on bracket for bikes without a mount. Is that what you’re thinking about for Dahon-type?
...
...
This is what a Brompton-type block and carrier look like.
Steel frame
Steel frame
Last edited by Ron Damon; 07-08-24 at 05:05 PM.
07-02-24, 08:31 PM
#62
Newbie
be careful with over clamping the seatpost
I broke my litepro carbon seatpost that way
clamped it too hard, and when I pushed my body weight forward hard, the seatpost snapped
with how long it is, the seatpost is an entire lever after all
I broke my litepro carbon seatpost that way
clamped it too hard, and when I pushed my body weight forward hard, the seatpost snapped
with how long it is, the seatpost is an entire lever after all
07-02-24, 08:47 PM
#63
Nice looking! Just your own choices of colors, or is that combo a motif from somewhere?
The untrimmed brake wire in back... black... never seen that before, is that teflon coated?
I like the aero bars, a great addition to flat bars, I just need to find a way to space mine up further than the flat bars, so I can be on the aero bars to take pressure off my hands without being in that tight of a tuck.
07-02-24, 10:05 PM
#64
BeastMaster
Thread Starter
To be truthful, I didn’t know what those three capped holes were for until earlier this year & I’ve had the bike for over 10 years! Apparently this is a feature that was offered back in 2012 for the U.S. market. The waterproof mini box will house the electric air pump & the battery for my iPhone.
07-02-24, 10:15 PM
#65
BeastMaster
Thread Starter
Thanks for the heads up. I use a carbon fiber gripping paste on the seatpost & the handlebars so I don’t over tighten & still have a secure fit.
07-02-24, 10:26 PM
#66
BeastMaster
Thread Starter
Nice looking! Just your own choices of colors, or is that combo a motif from somewhere?
The untrimmed brake wire in back... black... never seen that before, is that teflon coated?
I like the aero bars, a great addition to flat bars, I just need to find a way to space mine up further than the flat bars, so I can be on the aero bars to take pressure off my hands without being in that tight of a tuck.
The untrimmed brake wire in back... black... never seen that before, is that teflon coated?
I like the aero bars, a great addition to flat bars, I just need to find a way to space mine up further than the flat bars, so I can be on the aero bars to take pressure off my hands without being in that tight of a tuck.
The Deda handlebar extensions came with a narrow bridge but I didn’t use them and spaced the bars to my comfort. I go into my “tuck” for strong headwinds & long straight stretches.
07-02-24, 11:05 PM
#67
Senior Member
Join Date: Jun 2022
Location: The Ring of Fire
Posts: 1,651
Bikes: Several, all affordably priced, none exalted cult artifacts
Liked 841 Times
in
554 Posts
Surprised DG hasn't offered to run the numbers. He's hasn't seen a cantilevered structure he didn't dislike. 😂
Last edited by Ron Damon; 07-02-24 at 11:25 PM.
07-02-24, 11:36 PM
#68
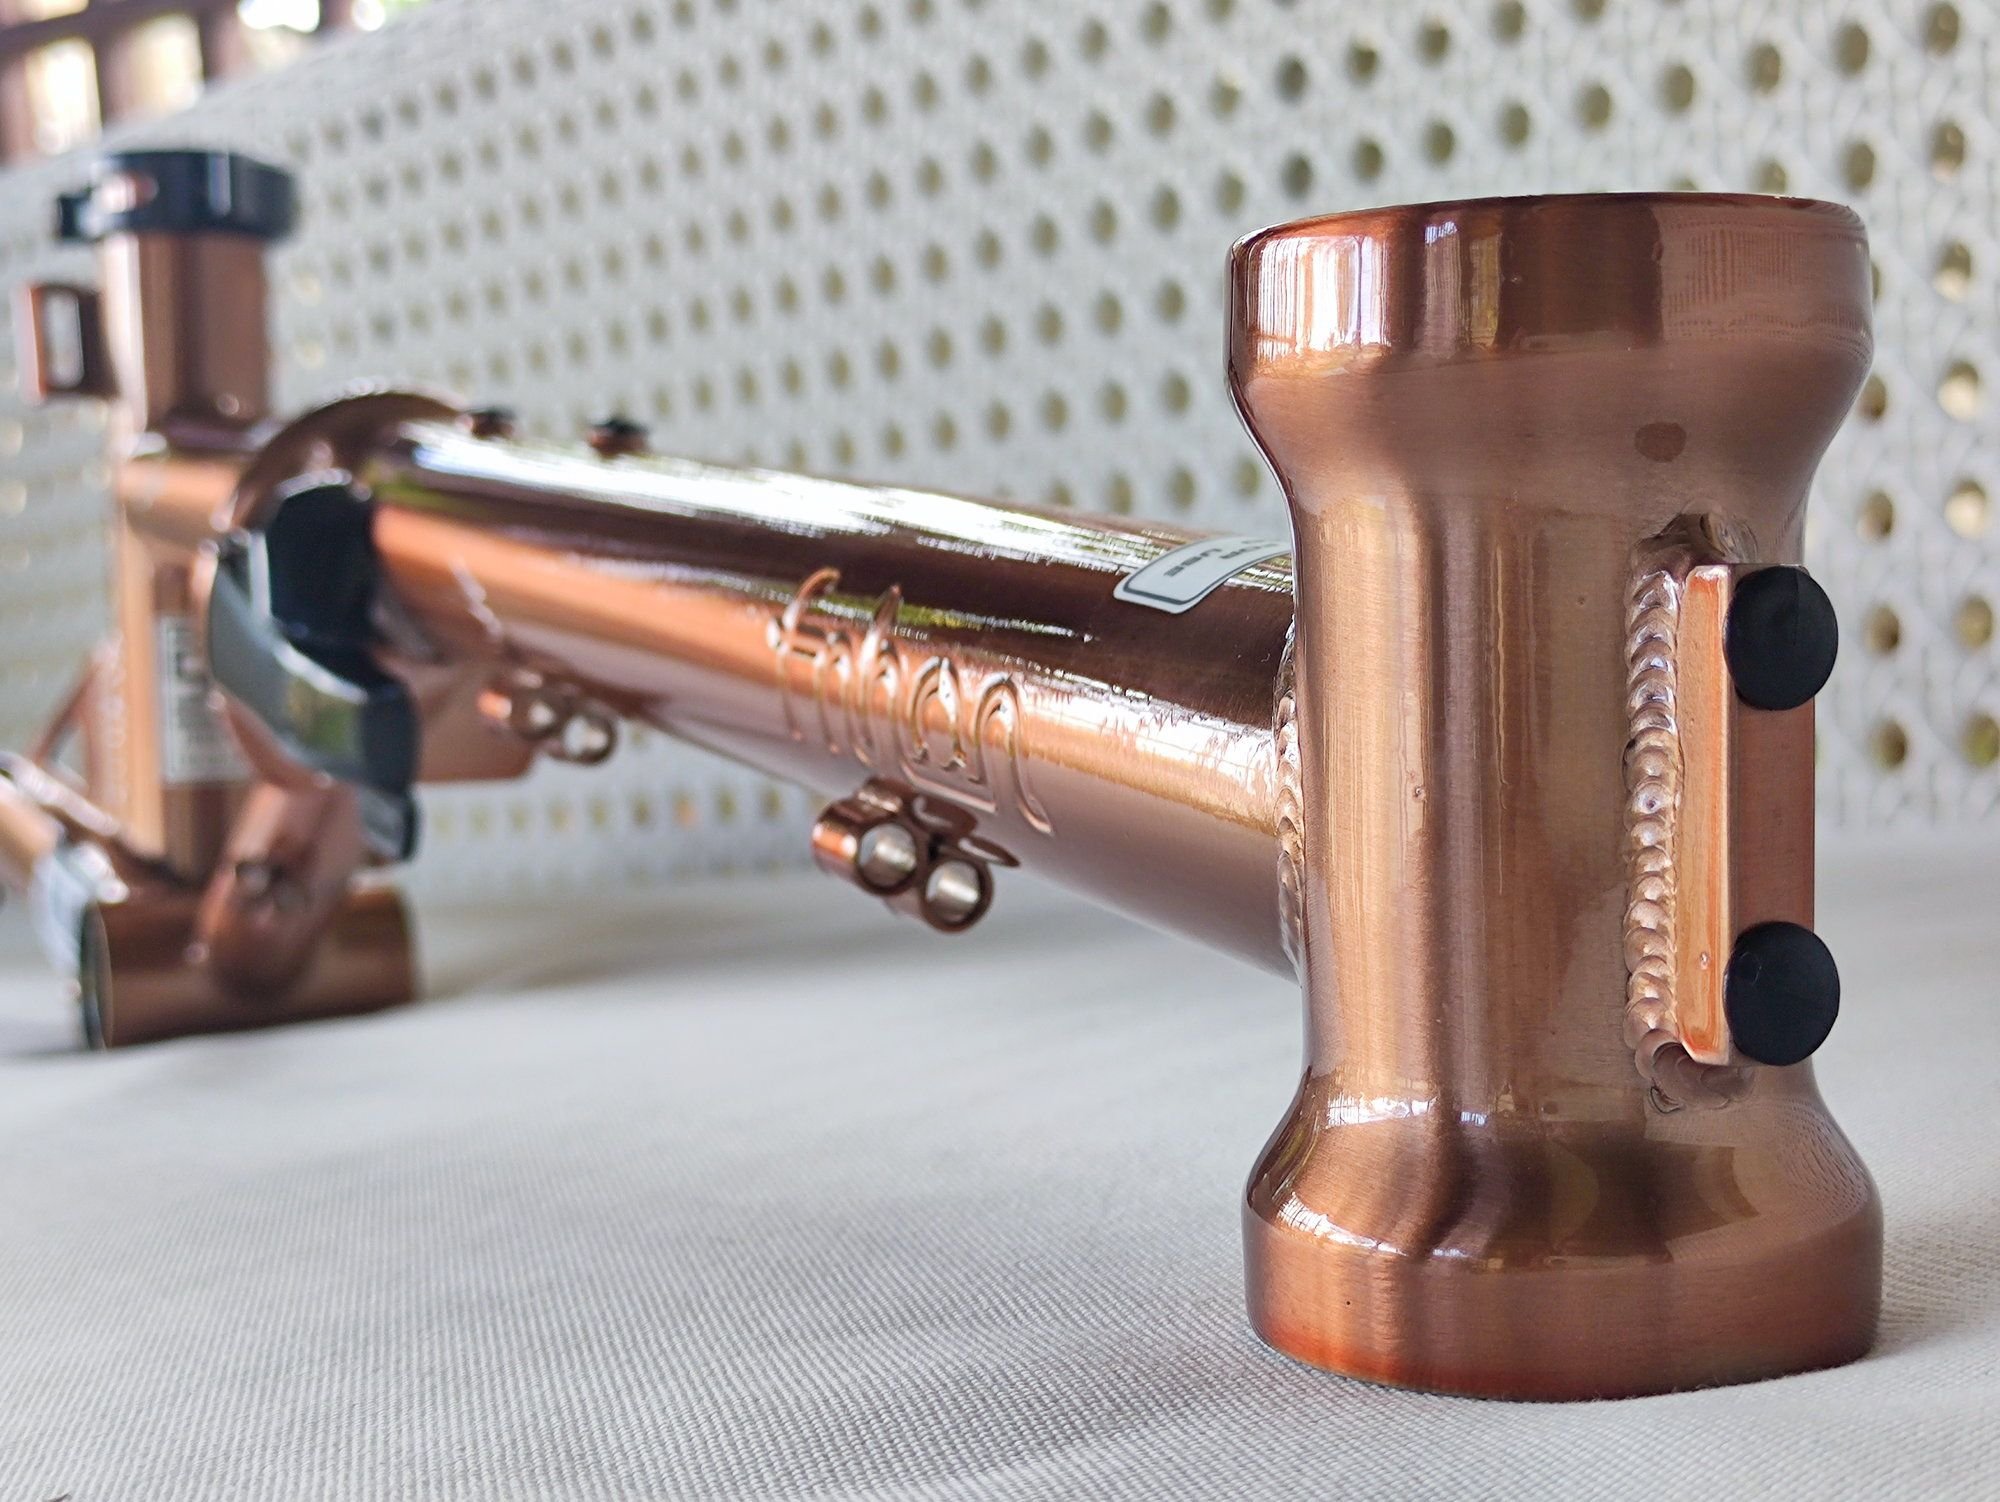
This looks like a spectacular build, the finish quality is fantastic, I must say. I had not known you could get metalflake in a powder coat. Lovely.
07-02-24, 11:43 PM
#69
The color scheme is just two of my favored colors. The break cables from LitePro are Teflon coated.
The Deda handlebar extensions came with a narrow bridge but I didn’t use them and spaced the bars to my comfort. I go into my “tuck” for strong headwinds & long straight stretches.
The Deda handlebar extensions came with a narrow bridge but I didn’t use them and spaced the bars to my comfort. I go into my “tuck” for strong headwinds & long straight stretches.
Likes For Duragrouch:
Likes For Need41speed:
07-05-24, 10:04 PM
#71
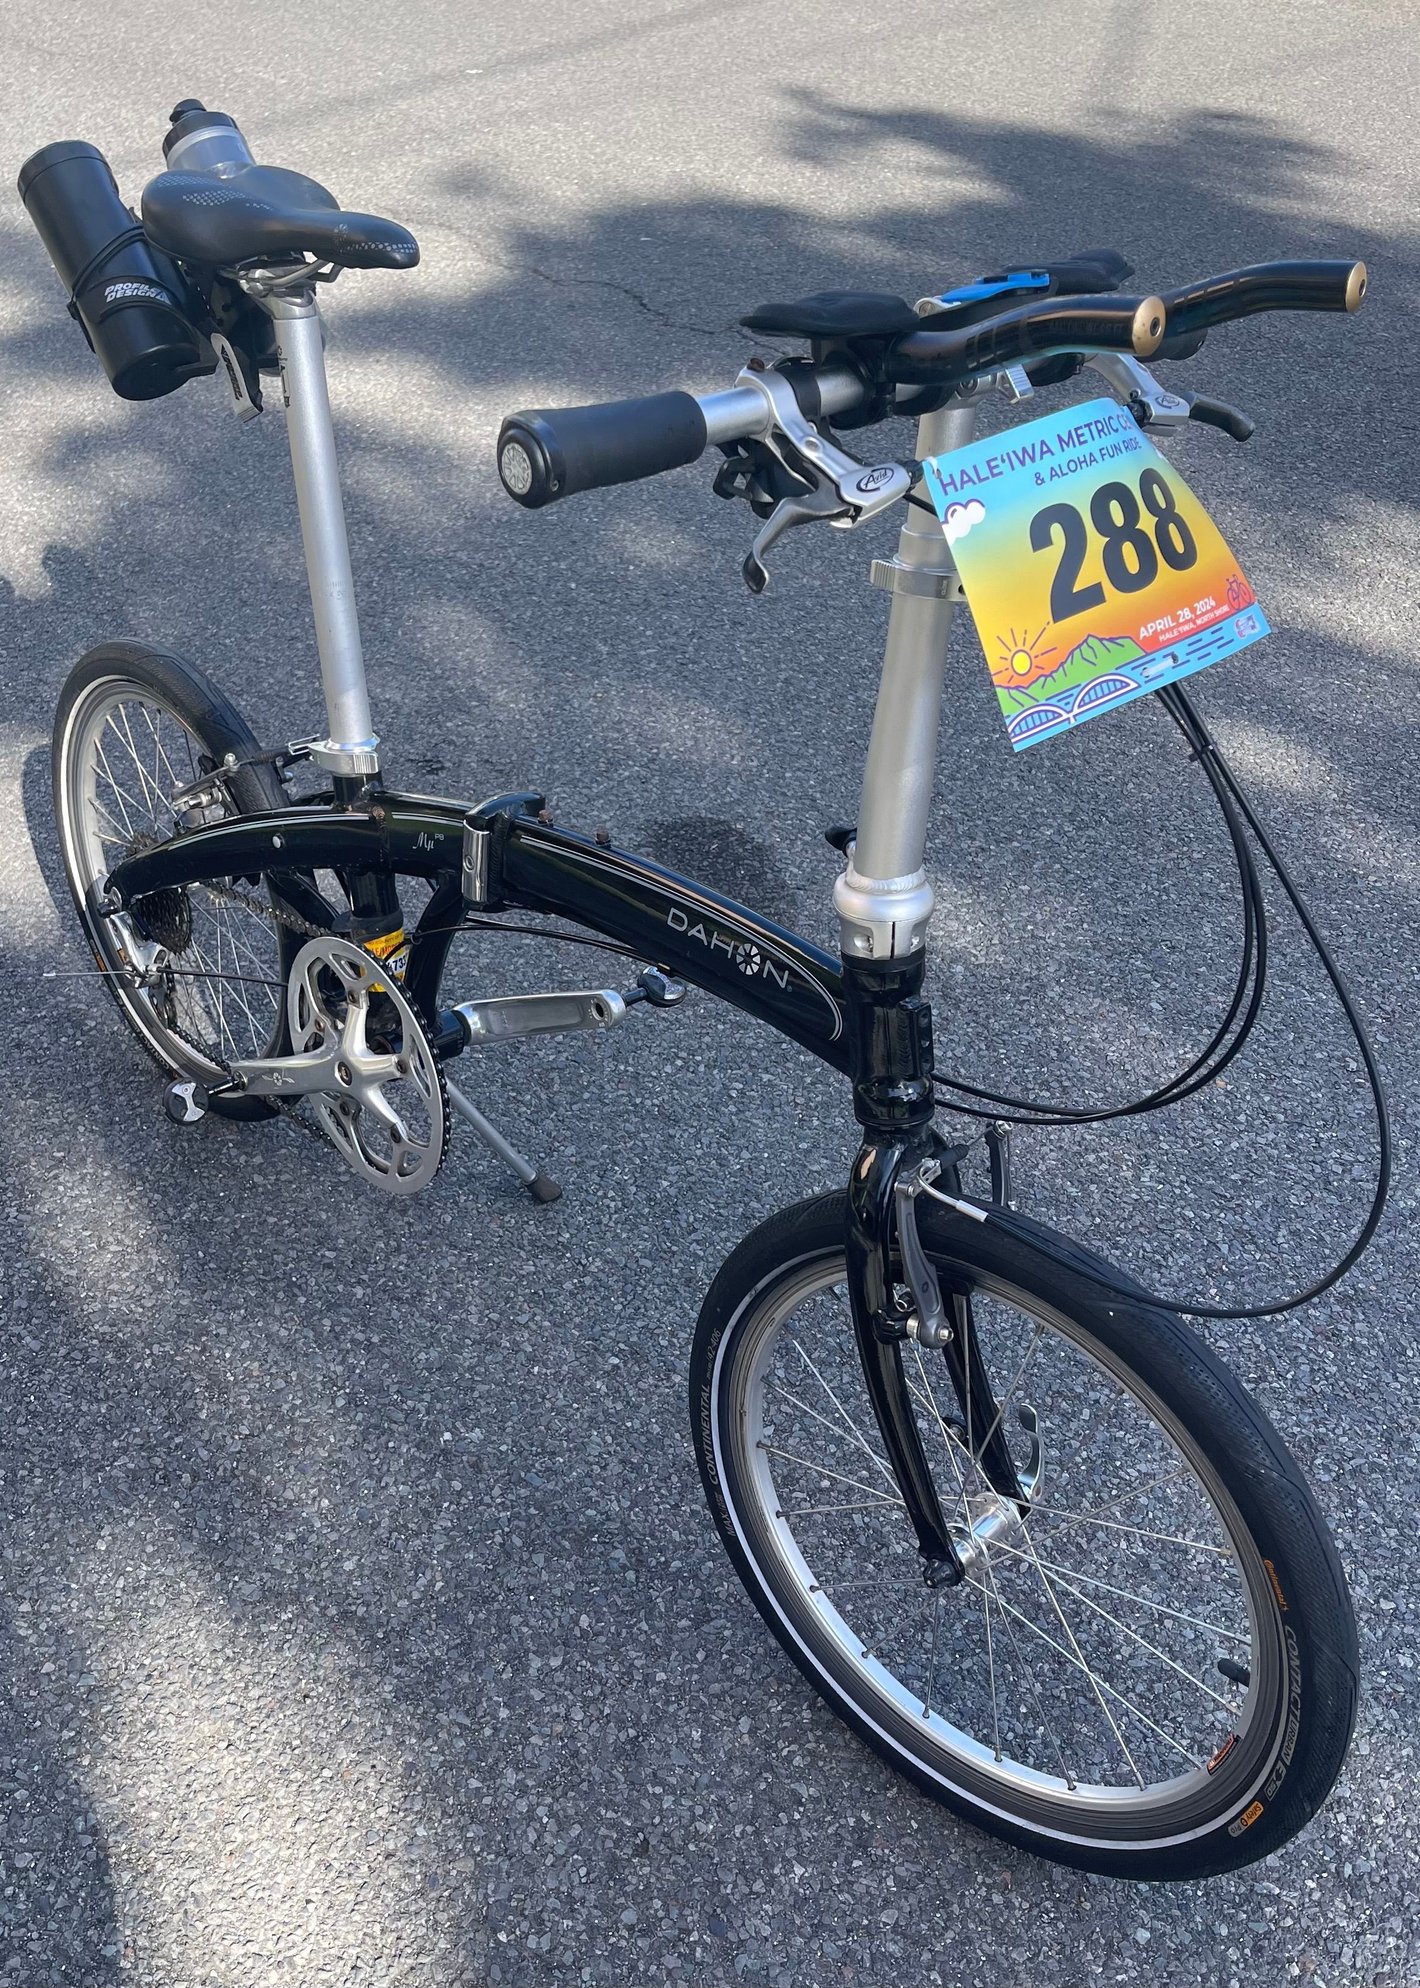
I thought maybe that pic was 20 years ago until zooming in on the placard date. Huh, that's pretty nice looking. I'm conflating your project with a different Mu restoration I think I saw in a different thread, where it was really deteriorated.
Looks like you have enough spare parts to put together another bike on a cheaper frame.
Oh, you switched to disc brake in front only, with new fork. Nice for long downhills.
Looks like you have enough spare parts to put together another bike on a cheaper frame.
Oh, you switched to disc brake in front only, with new fork. Nice for long downhills.
Last edited by Duragrouch; 07-05-24 at 10:07 PM.
Likes For Duragrouch:
07-06-24, 01:19 PM
#72
BeastMaster
Thread Starter
This is my 1st attempt @ disc brakes & always wanted to try.
With regards to handlebar extensions, the stem now folds to the outside (right side) so the extensions don’t interfere with the fold! Only down side is new contact points when folded. Got it covered though with clear adhesive bumpers.
Last thing to do is visit my LBS to properly mount the rear derailleur (retap threading) and add the chain. Can’t wait for maiden ride!
07-07-24, 02:05 AM
#73
My local bike club is having a cycle swap meet tomorrow so…
This is my 1st attempt @ disc brakes & always wanted to try.
With regards to handlebar extensions, the stem now folds to the outside (right side) so the extensions don’t interfere with the fold! Only down side is new contact points when folded. Got it covered though with clear adhesive bumpers.
Last thing to do is visit my LBS to properly mount the rear derailleur (retap threading) and add the chain. Can’t wait for maiden ride!
07-08-24, 07:15 AM
#74
07-08-24, 03:29 PM
#75
BeastMaster
Thread Starter
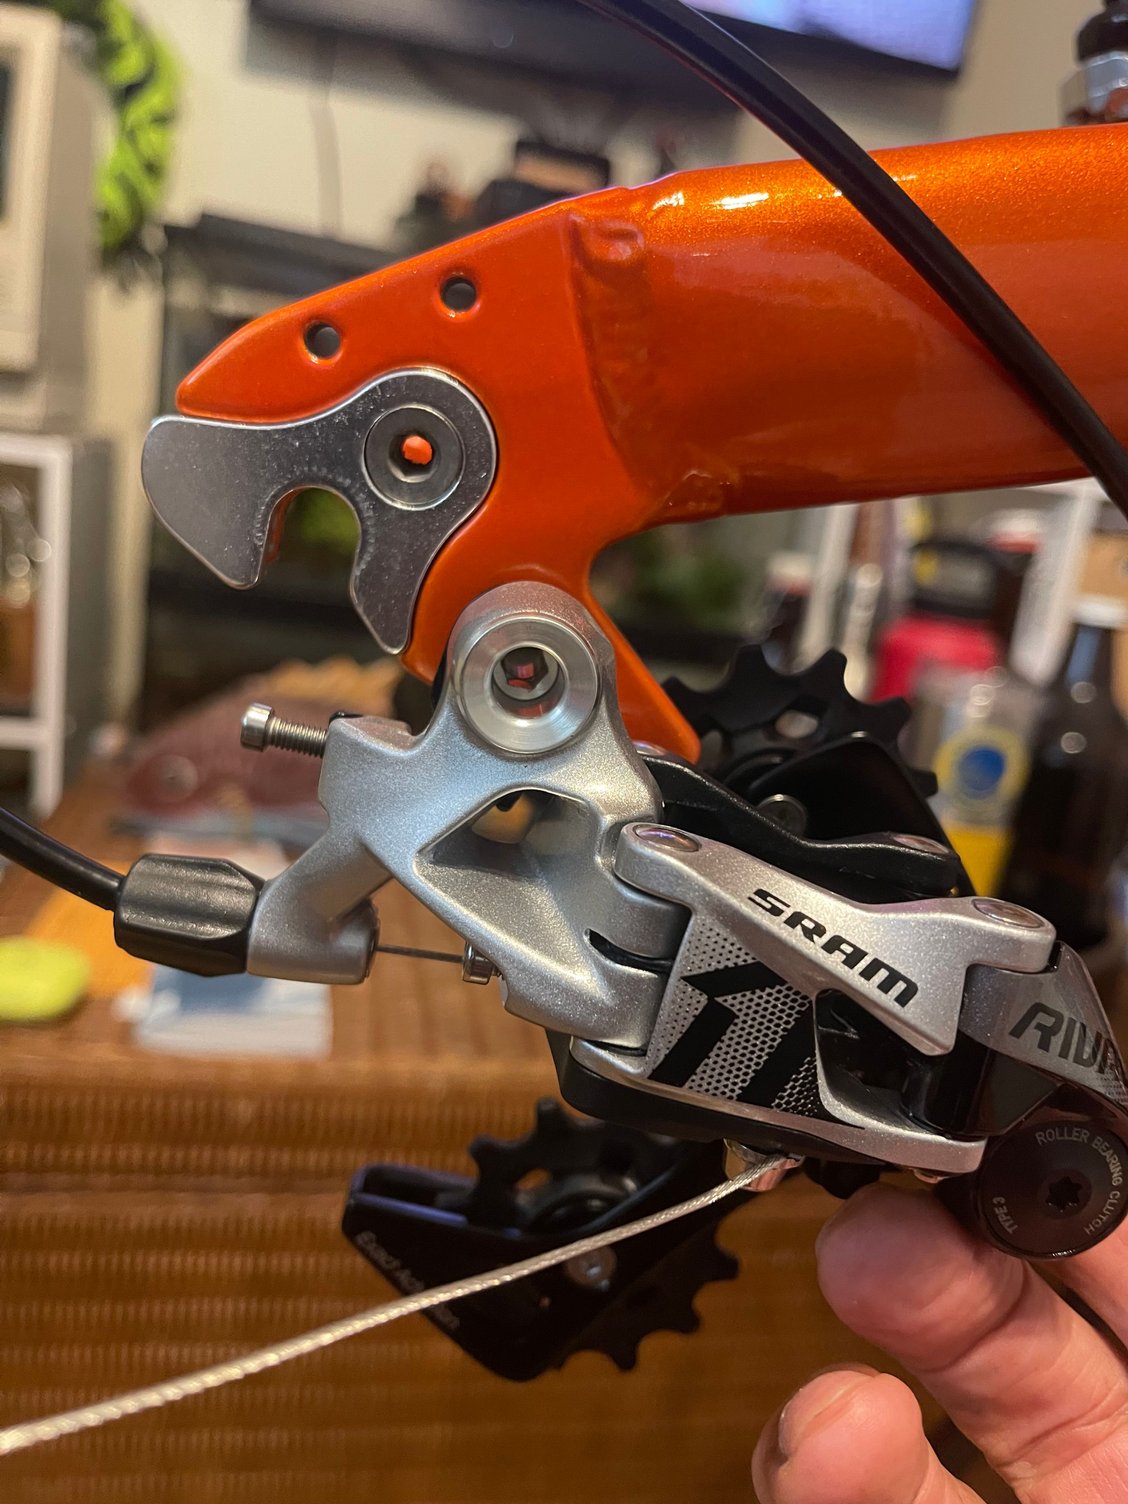
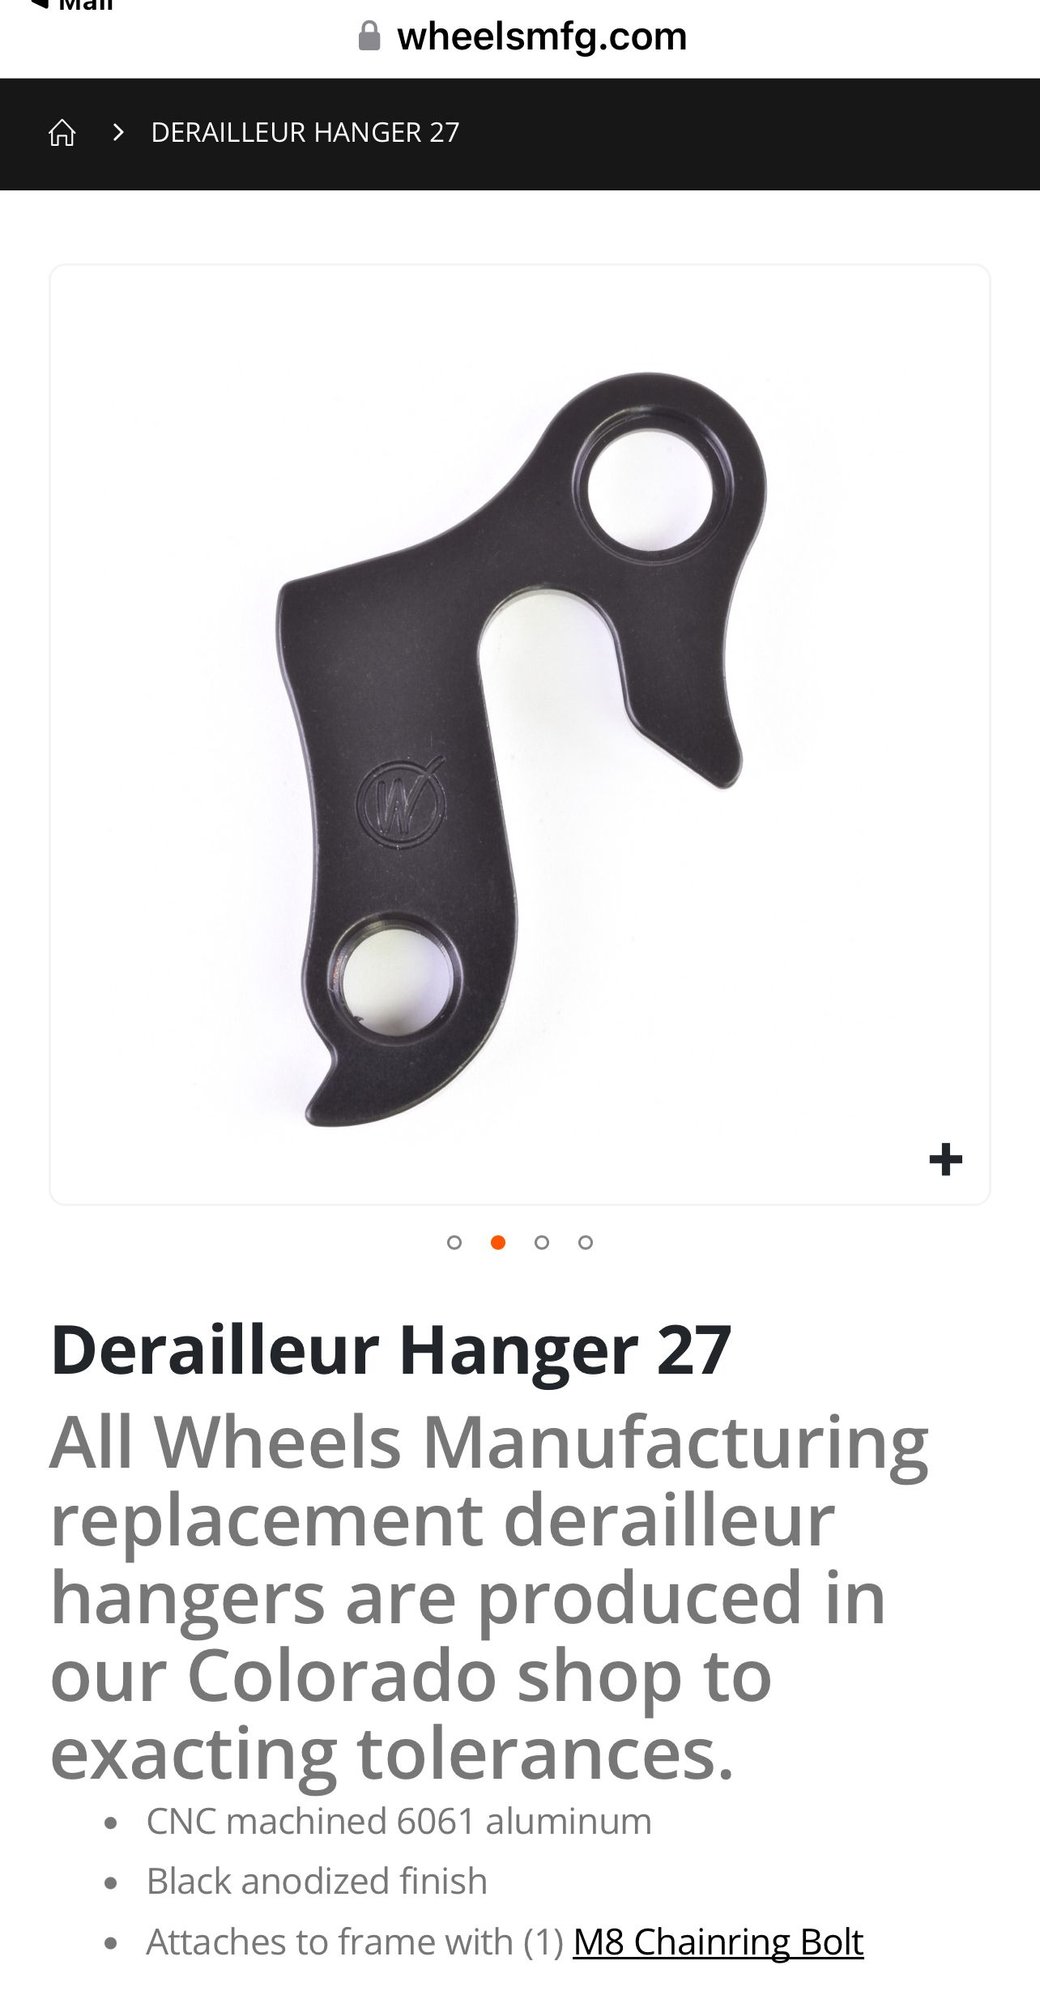
Took to LBS to have derailleur mount retapped. Hole can now accommodate derailleur but the B adjustment screw & stop have extremely tight clearances. Ordered a different hanger to position the derailleur behind the wheel axle. Maiden test ride on hold.
Last edited by Need41speed; 07-08-24 at 05:43 PM.