


Starting a Columbus Air road bike frame build ...this could take a while!
 06-29-14, 08:54 PM
#1
Junior Member
Thread Starter
Join Date: Jun 2014
Posts: 21
Mentioned: 0 Post(s)
Tagged: 0 Thread(s)
Quoted: 0 Post(s)
Likes: 0
Liked 1 Time
in
1 Post
Starting a Columbus Air road bike frame build ...this could take a while!
I've been trying to track down a Columbus Air frame for quite a while, and it seems like whenever one pops up there are troubles, like... it is the wrong size / I get outbid by a bajillion dollars / it is far far away where shipping is difficult.
Recently, I decided that my odds might be better if I tried to track down all of the bits and pieces of tubing and braze-ons and either do the framebuilding myself or find someone to do the framebuilding for me (I'd prefer the former!)
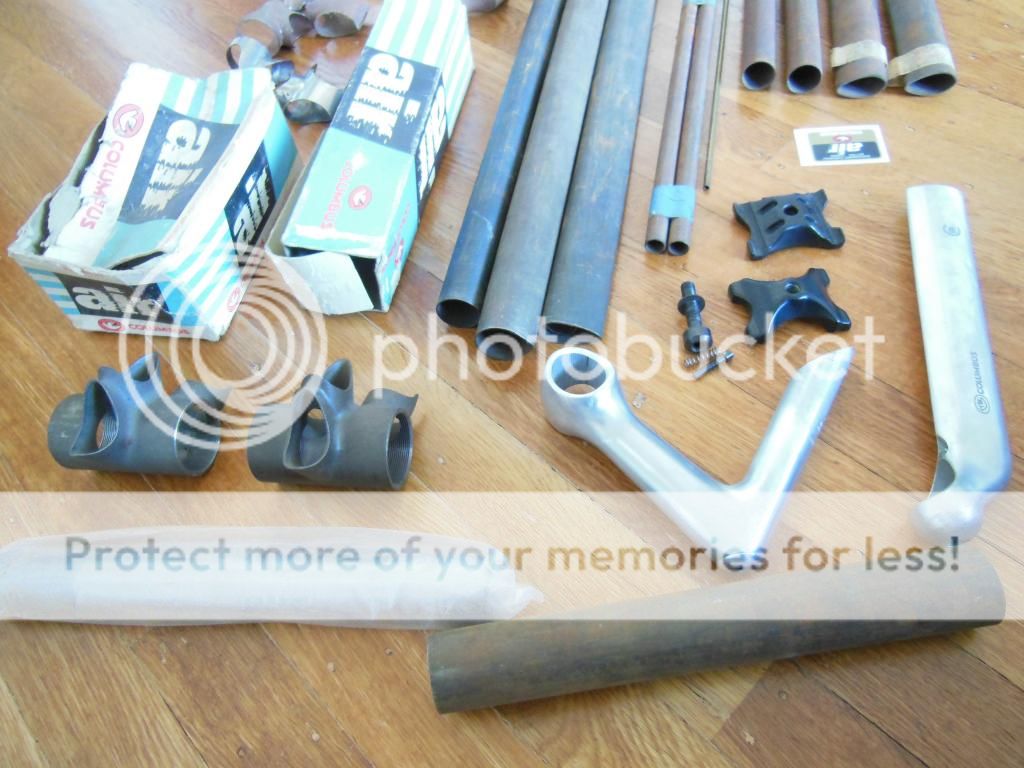
Anyway, the search has gone better than expected. I had some good luck contacting framebuilders who had posted about having extra Air stuff ...even though some of the posts were super old - one recently-retired framebuilder sold me a whole bunch of his remaining Air stuff, and even included some bits that I thought might be very tricky to find, like an Art Stump aero shifter boss and an aero rear brake bridge. The only things that he didn't have on hand were the Air fork blades, top tube and seat tube - though he included a very attractive Tange Aero fork crown and blades, and a SL top tube and MS down tube.
He even showed me some of his Air frames (including a bike which had Air tubes except for an upside-down MS down tube bilaminate-brazed in place - pretty classy.)
Anyway, I figured that I would start posting here to keep track of progress, and if anyone out there has a spare Air seat tube, top tube or fork blades, please let me know!)
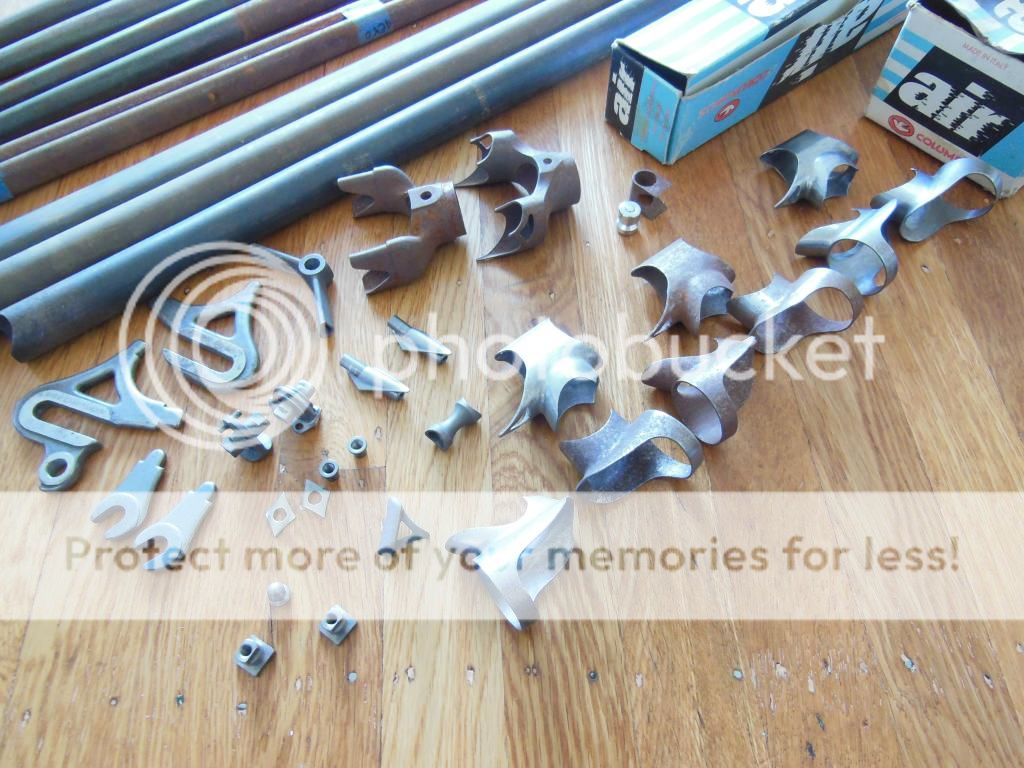
Parts-heap thus far:

Recently, I decided that my odds might be better if I tried to track down all of the bits and pieces of tubing and braze-ons and either do the framebuilding myself or find someone to do the framebuilding for me (I'd prefer the former!)
Anyway, the search has gone better than expected. I had some good luck contacting framebuilders who had posted about having extra Air stuff ...even though some of the posts were super old - one recently-retired framebuilder sold me a whole bunch of his remaining Air stuff, and even included some bits that I thought might be very tricky to find, like an Art Stump aero shifter boss and an aero rear brake bridge. The only things that he didn't have on hand were the Air fork blades, top tube and seat tube - though he included a very attractive Tange Aero fork crown and blades, and a SL top tube and MS down tube.
He even showed me some of his Air frames (including a bike which had Air tubes except for an upside-down MS down tube bilaminate-brazed in place - pretty classy.)
Anyway, I figured that I would start posting here to keep track of progress, and if anyone out there has a spare Air seat tube, top tube or fork blades, please let me know!)
Parts-heap thus far:


Likes For bodge:
06-30-14, 08:42 AM
#2


Randomhead
Join Date: Aug 2008
Location: Happy Valley, Pennsylvania
Posts: 24,411
Mentioned: 0 Post(s)
Tagged: 0 Thread(s)
Quoted: 4 Post(s)
Liked 3,714 Times
in
2,532 Posts
That's really neat. Keep us posted
06-30-14, 11:51 AM
#3

framebuilder
A 3[SUP]rd[/SUP] option would be to make your frame in a framebuilding class! That would ensure you end up with a well made frame that fits you properly. All the right equipment would be available and the teacher(s) can make up any difference between your beginning abilities and doing it right so you will get outstanding results. The cost of a class ($2000 for a 2 week class or $2500 for a 3 week class) may not be more or much more than the cost of collecting the equipment to do it yourself.
Most students that take one of my framebuilding classes use the opportunity to learn foundational skills for future use. However, from time to time someone takes the class just to make a nice custom frame instead of buying one. In my 3 week class you also have the opportunity to be part of the painting process.
I don't have any Columbus Air tubing in inventory but I do still have a set of Tange Champion aero tubing from when Shimano went through it aero parts stage in the early 80's. My 2nd set went to my framebuilding buddy Rich Gangl when he was building frames to exhibit at NAHBS.
By the way I don't think you would prefer using old Campy 1010A dropouts unless you were making a fixie (which they are perfect for).
Last edited by Doug Fattic; 06-30-14 at 09:34 PM.
06-30-14, 12:05 PM
#4
Junior Member
Thread Starter
Join Date: Jun 2014
Posts: 21
Mentioned: 0 Post(s)
Tagged: 0 Thread(s)
Quoted: 0 Post(s)
Likes: 0
Liked 1 Time
in
1 Post
A 3[SUP]rd[/SUP] option would be to make your frame in a framebuilding class! That would ensure you end up with a well made frame that fits you properly. All the right equipment would be available and the teacher(s) can make up any difference between your beginning abilities and doing it right so you will get outstanding results. The cost of a class ($2000 for a 2 week class or $2500 for a 3 week class) may not be more or much more than the cost of collecting the equipment to do it yourself.
Most students that take one of my framebuilding classes use the opportunity to learn foundational skills for future use. However, from time to time someone just takes the class just to make a nice custom frame instead of buying one. In my 3 week class you also have the opportunity to be part of the painting process.
I don't have any Columbus Air tubing in inventory but I do still have a set of Tange Champion aero tubing from when Shimano went through it aero parts stage in the early 80's. My 2nd set went to my framebuilding buddy Rich Gangl when he was building frames to exhibit at NAHBS.
By the way I don't think you would prefer using old Campy 1010A dropouts unless you were making a fixie (which they are perfect for).
I kinda like the 1010A dropouts - I know that they might look anachronistic on an Air frame, but I do like the amount of tinkering and adjustment that they allow. (I like tinkering - that's what got me into this mess!) Is there a different sort of dropout that you think would be a better match?
I like the old Trek dropouts that include a stop for an internal rear derailleur cable - I'm hoping to geek out on internal cable routing for this frame.
06-30-14, 01:19 PM
#5
Member

Join Date: Dec 2007
Location: Berkeley, CA
Posts: 35
Mentioned: 0 Post(s)
Tagged: 0 Thread(s)
Quoted: 0 Post(s)
Likes: 0
Liked 1 Time
in
1 Post
I don't know how valuable this stuff is or how hard it is to replace (sounds not so easy), so I'd suggest that if you do decide to tackle building it yourself (w/o a course like Doug offers), you might instead buy a low-end kit from Nova and see how it turns out. Wrecking a fork blade when bending it or ****ering up a crown or lug is a lot less painful when they're easily replaced. It's easy to screw things up when you only build a bike or two per year, never mind your first time at it. Good luck however you decide to get it done.
-Ryan
-Ryan
Likes For Smudgemo:
06-30-14, 02:26 PM
#6
framebuilder
I’m going to make the same suggestion that Ryan made. Do a simple frame with regular parts 1[SUP]st[/SUP] to figure out a system and get some practice. Your chances of screwing it up on a 1[SUP]st[/SUP] try are pretty high. You will learn a lot and be better prepared when using the good stuff. I’m very familiar with how average people do in the beginning even with clear instructions and demonstrations. Many struggle. It is easy to get frustrated and quit when things start to go south and it is not obvious what is wrong. In every class I teach I’m always impressed how easy it is for a student to get off track without constant supervision and wonder what would happen if they were on their own.
There is nothing wrong with 1010A dropouts except they were made for an age when one started the season using a fixed gear (and needed the long slot to tighten the chain) and switched to gears after getting some miles in their legs. After WWII guys didn’t have money for multiple bicycles so whatever they rode had to meet all needs. Somewhere in the mid to late 70’s Campy came out with a much shorter 1010B version. Aero tubing isn’t going to be used on a multi use bicycle so those old 1010A seem a bit out of place. However a great advantage of making something yourself is that you can do it any way you please.
I’m also going to suggest that you stay away from internal routing – which requires more than beginner skills – on a 1[SUP]st[/SUP] frame.
Likes For Doug Fattic:
06-30-14, 04:03 PM
#7
Banned
Still using the Aelle straight gage frame I built in '75,
friends trying 531 DB as their 1st , burned thru the seat tubes where they were thinnest, Up Top.
friends trying 531 DB as their 1st , burned thru the seat tubes where they were thinnest, Up Top.
06-30-14, 08:20 PM
#8
Senior Member
Join Date: Apr 2011
Posts: 73
Mentioned: 0 Post(s)
Tagged: 0 Thread(s)
Quoted: 0 Post(s)
Likes: 0
Liked 2 Times
in
1 Post
One time a long time ago I did some engine work on my car. It was all new and I had no experience beyond basic mechanic stuff. I bought the parts and set in to it. I finished the job and it turns out I had used the wrong gasket material for my water pump. I never saw it coming because I had no prior experience. I took someone's advise for the wrong stuff. I limped it to a mechanic who knew what the **** he was doing.
__________________
cforestryan.com
cforestryan.com
06-30-14, 11:00 PM
#9
Senior Member
Noting some Columbus Life Air tubes as well as some Columbus Zona shaped tubes at the Nova website (suppliers thread) that might fill a niche or a gap in someone's aero tube set.
07-01-14, 05:28 PM
#10
Junior Member
Thread Starter
Join Date: Jun 2014
Posts: 21
Mentioned: 0 Post(s)
Tagged: 0 Thread(s)
Quoted: 0 Post(s)
Likes: 0
Liked 1 Time
in
1 Post
...yeah, I'm planning on making something with regular 'ol round tubing before I saw up the Air stuff.
I saw those Zona Air tubes on the Nova site - they look like they could be worked to match up with Air, especially the down tube - but I think that a round tube might be easier to form into the ellipse shape of the Air top tube. The Zona top tube has a shape more like a teardrop.
I couldn't find any pictures of frames made out of Zona Air - can it be used along with brazing?
07-01-14, 09:52 PM
#11
Old fart
Join Date: Nov 2004
Location: Appleton WI
Posts: 24,814
Bikes: Several, mostly not name brands.
Mentioned: 153 Post(s)
Tagged: 0 Thread(s)
Quoted: 3598 Post(s)
Liked 3,423 Times
in
1,947 Posts
It's been more than a few years but my recollection of the Columbus "Air" tubes and frame fittings was that tubes were not a particularly good fit to the supplied bottom bracket, lugs, etc. Tange's "Aero" system was much more precise. Not to say that it won't work, but be prepared to put some effort into it.
07-02-14, 12:02 AM
#12
Junior Member
Thread Starter
Join Date: Jun 2014
Posts: 21
Mentioned: 0 Post(s)
Tagged: 0 Thread(s)
Quoted: 0 Post(s)
Likes: 0
Liked 1 Time
in
1 Post
It's been more than a few years but my recollection of the Columbus "Air" tubes and frame fittings was that tubes were not a particularly good fit to the supplied bottom bracket, lugs, etc. Tange's "Aero" system was much more precise. Not to say that it won't work, but be prepared to put some effort into it.
The bottom brackets I found look well-crafted and the tubing seems to match up quite well - though the other lugs are rather crude looking stamped steel bits.
I agree on Tange's aero set - it's too bad that so many of the frames that used Tange Aero in the 80's were put together without very much care (the Lotus Aero frames seem to be an exception - very nice!)
08-22-14, 05:17 PM
#13
Junior Member
Thread Starter
Join Date: Jun 2014
Posts: 21
Mentioned: 0 Post(s)
Tagged: 0 Thread(s)
Quoted: 0 Post(s)
Likes: 0
Liked 1 Time
in
1 Post
The project is plugging along - Dale Saso offered to show me the ropes of how to braze, plan, & build a bicycle at his workshop in San Jose for a very reasonable price - my first try at fillet brazing wasn't the disaster I feared it might be!
Also, I found a Columbus Air seat tube, so I've gathered just about everything I'll need.
I'm going to build a frame with the same dimensions as what I have planned for the Air tubing, to make sure that the sizing I have in mind will work for me. After searching for this tubing, I really don't want to have any issues with hindsight once this is all sawn and brazed together (I need a commuter frame anyways - I've been riding a Schwinn World Sport for too long!)
08-22-14, 07:27 PM
#14
Senior Member
Join Date: Feb 2012
Location: Rochester, NY
Posts: 18,113
Bikes: Stewart S&S coupled sport tourer, Stewart Sunday light, Stewart Commuting, Stewart Touring, Co Motion Tandem, Stewart 3-Spd, Stewart Track, Fuji Finest, Mongoose Tomac ATB, GT Bravado ATB, JCP Folder, Stewart 650B ATB
Mentioned: 0 Post(s)
Tagged: 0 Thread(s)
Quoted: 4222 Post(s)
Liked 3,908 Times
in
2,331 Posts
Good choice to build a conventional tubed frame first. Andy.
08-31-14, 03:09 PM
#15
Junior Member
Thread Starter
Join Date: Jun 2014
Posts: 21
Mentioned: 0 Post(s)
Tagged: 0 Thread(s)
Quoted: 0 Post(s)
Likes: 0
Liked 1 Time
in
1 Post
I stopped by Dale Saso's shop in San Jose again yesterday. Last time, I tried ovalising a round tube so that it would fit into the top tube lugs - using two pieces of 2x4 lumber and a very large vise. I went slowly and kept on checking it against the lugs and a set of calipers - it worked pretty well, though the sides ended up a bit too flat for my tastes - I'll use this one on the practice frame!:
For the next try, I went with a trick that I think I read in an ancient copy of Popular Mechanix - clamping a fence to a table saw at an angle, and then making a bunch of very tiny passes to cut a curved groove into the wood. This time I went with 4x4 lumber so that it would flex less:
I moved the fence a few times to create different curves that might come in handy:
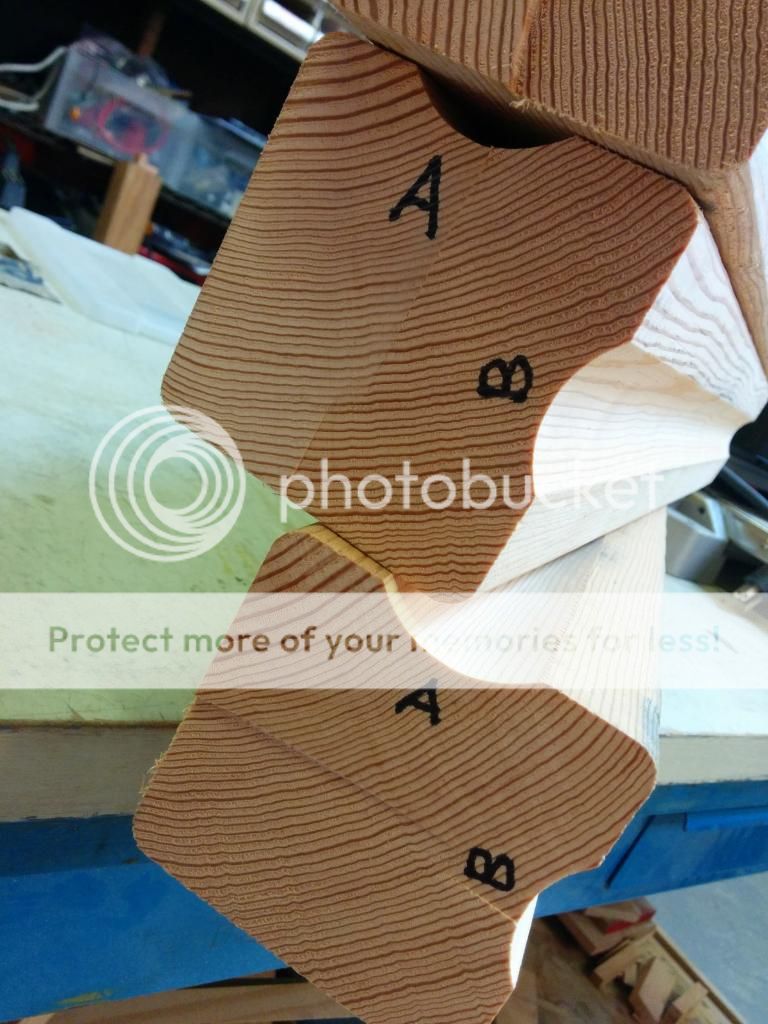
The results turned out better this time, with a smooth curve to the side of the tube - though it did take a few tries to make everything nice and straight - the butted tubing meant that it deformed at different rates. This technique might work very well with straight-gauge tubing.
After some more lessons in brazing, I got practice in by doing some repairs on a Mercier "Formule 1" frame I picked up a while ago... It has the potential to be a really nice frame, and I can try out some ideas about brake & shift cable routing too.
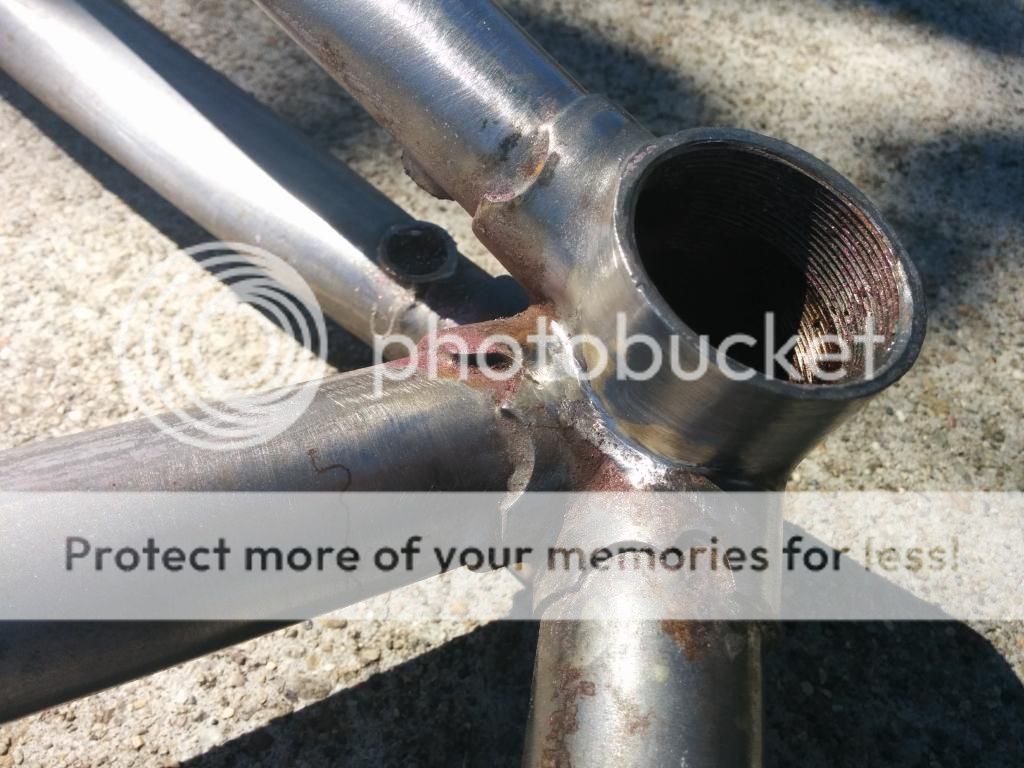
Luckily/unluckily the bike's shoddy craftsmanship gave me lots of opportunities for repairs:
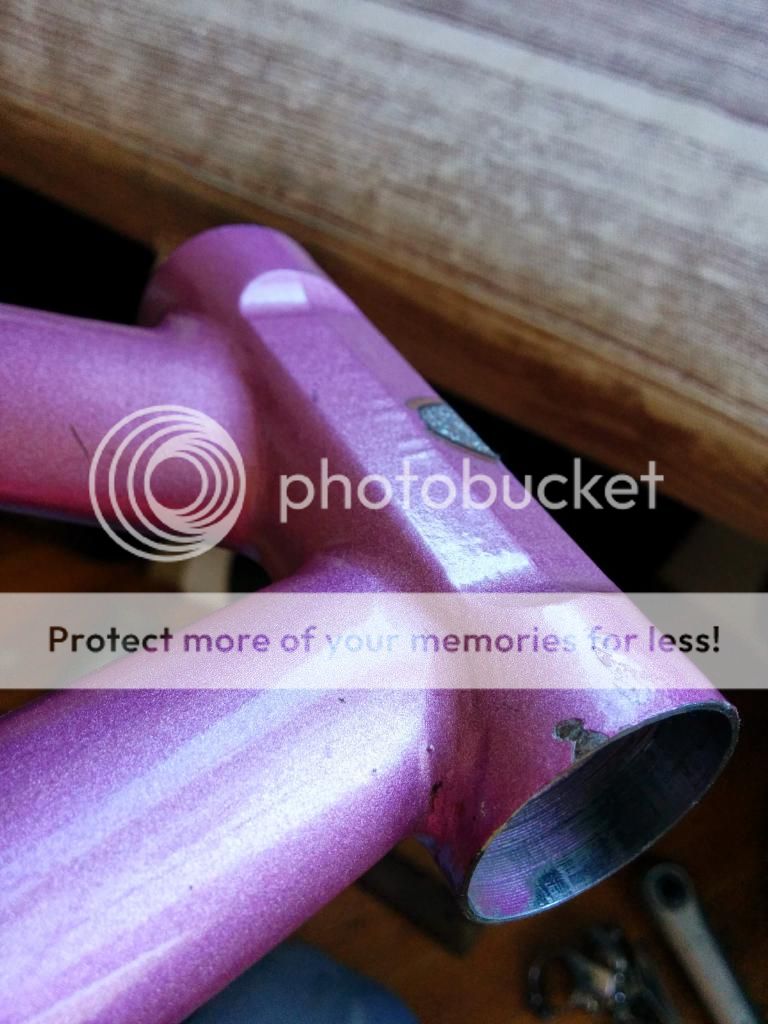
Shifter bosses mounted crooked so that they hit the top tube.
Too much filing around the shifter bosses led to a small crack.
Chainstay bridge mounted off-center.
Fillet brazing is too thin, with sloppy filing (a few of the fillets had cracked!)
Cable guide spacing is totally random.
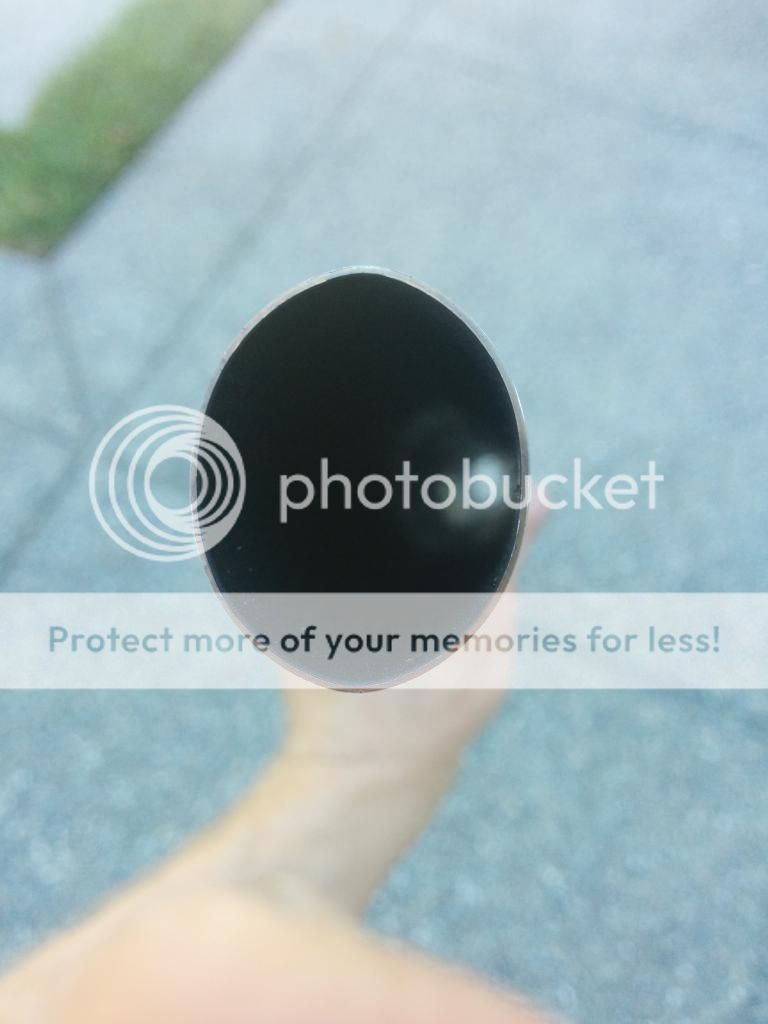
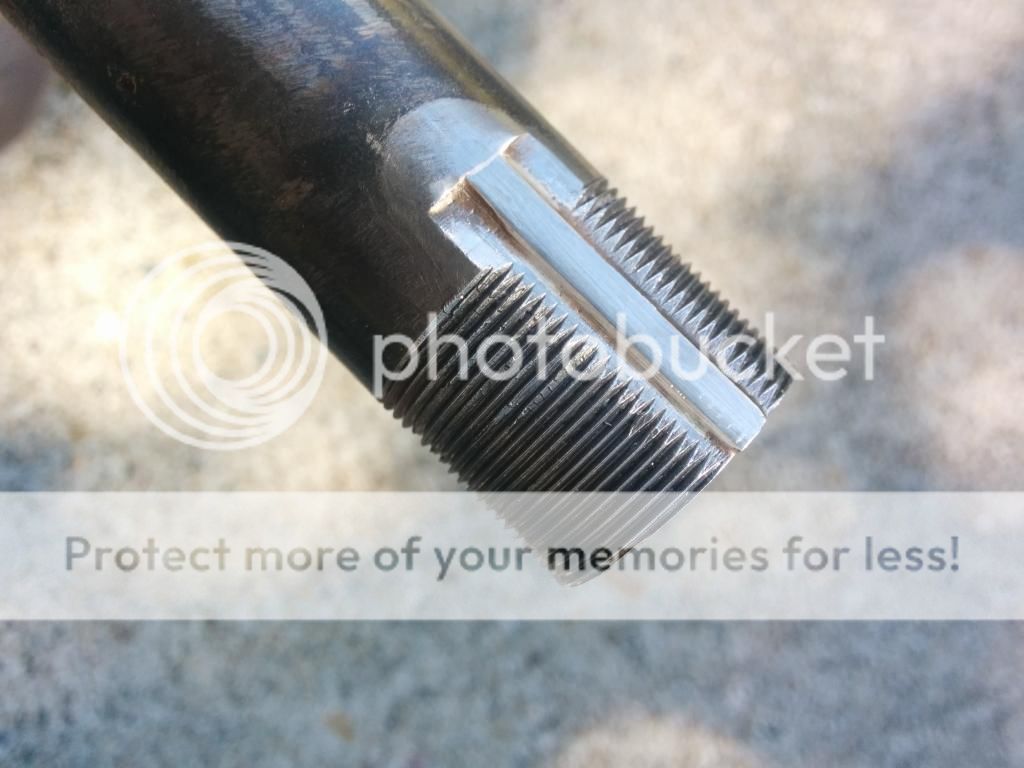
Steerer tube cracked near the threads.
The machined head tube is pretty nifty, though the cups are tricky to remove! And here's those tiny cracking fillets:

For the next try, I went with a trick that I think I read in an ancient copy of Popular Mechanix - clamping a fence to a table saw at an angle, and then making a bunch of very tiny passes to cut a curved groove into the wood. This time I went with 4x4 lumber so that it would flex less:

I moved the fence a few times to create different curves that might come in handy:


The results turned out better this time, with a smooth curve to the side of the tube - though it did take a few tries to make everything nice and straight - the butted tubing meant that it deformed at different rates. This technique might work very well with straight-gauge tubing.

After some more lessons in brazing, I got practice in by doing some repairs on a Mercier "Formule 1" frame I picked up a while ago... It has the potential to be a really nice frame, and I can try out some ideas about brake & shift cable routing too.
Luckily/unluckily the bike's shoddy craftsmanship gave me lots of opportunities for repairs:
Shifter bosses mounted crooked so that they hit the top tube.
Too much filing around the shifter bosses led to a small crack.
Chainstay bridge mounted off-center.
Fillet brazing is too thin, with sloppy filing (a few of the fillets had cracked!)
Cable guide spacing is totally random.
Steerer tube cracked near the threads.
The machined head tube is pretty nifty, though the cups are tricky to remove! And here's those tiny cracking fillets:

 08-31-14, 03:12 PM
#16
Junior Member
Thread Starter
Join Date: Jun 2014
Posts: 21
Mentioned: 0 Post(s)
Tagged: 0 Thread(s)
Quoted: 0 Post(s)
Likes: 0
Liked 1 Time
in
1 Post
Here's the re-brazed shifter bosses and patch plate (which will give me a location to drill into for cable holes
...and some fillets for me to file. Fillet brazing is turning out to be quite fun... a lot more forgiving than the electrical soldering or TIG/MIG welding that I've done in the past.
I know it makes sense to have the above-the-bottom-bracket cable routing for Shimano AX derailleurs, but something seems wrong about having all of that exposed cabling on an aero bike. I removed the old guides, and I'll be trying some internal routing:
Also, Dale made a really tidy patch for the crack in the flattened part of the steerer tube:
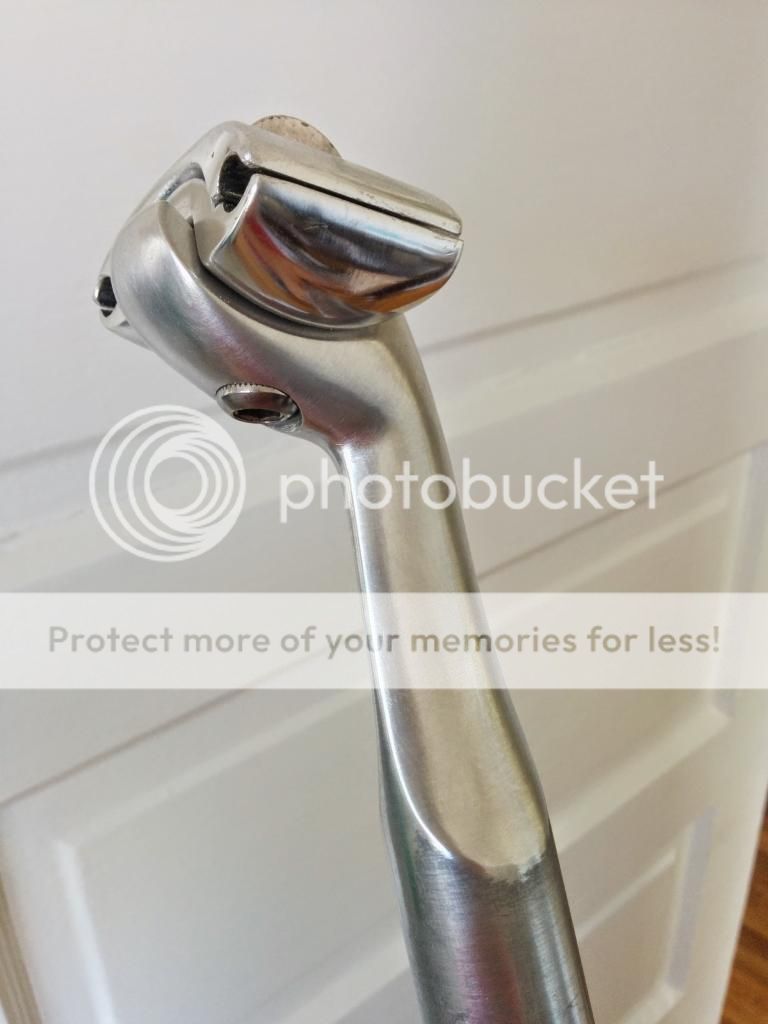
...and in other news, I spent some tine with a file to blend out the blocky curves on a Kalloy aero seatpost:
This week I'll be sketching out some full-size drawings now that all of the tubing has arrived - hopefully I'll get another chance to stop by Dale's shop soon to do some more work.
If anyone out there has some design/construction tips, I'd be interested to hear them. I know that the internal routing for the shifter cables is going to be difficult.

...and some fillets for me to file. Fillet brazing is turning out to be quite fun... a lot more forgiving than the electrical soldering or TIG/MIG welding that I've done in the past.


I know it makes sense to have the above-the-bottom-bracket cable routing for Shimano AX derailleurs, but something seems wrong about having all of that exposed cabling on an aero bike. I removed the old guides, and I'll be trying some internal routing:

Also, Dale made a really tidy patch for the crack in the flattened part of the steerer tube:

...and in other news, I spent some tine with a file to blend out the blocky curves on a Kalloy aero seatpost:

This week I'll be sketching out some full-size drawings now that all of the tubing has arrived - hopefully I'll get another chance to stop by Dale's shop soon to do some more work.
If anyone out there has some design/construction tips, I'd be interested to hear them. I know that the internal routing for the shifter cables is going to be difficult.
09-02-14, 09:29 AM
#17
Senior Member
Thanks for showing the pics. The ovalisation looks great. I'm curious to hear what happened with the butted tubing. Cool project.
09-02-14, 09:58 AM
#18
Senior Member

Join Date: Jun 2008
Location: Louisville, KY
Posts: 13,456
Mentioned: 33 Post(s)
Tagged: 0 Thread(s)
Quoted: 4247 Post(s)
Liked 2,957 Times
in
1,815 Posts
I'll be curious to see how it all turns out.
__________________
Bikes: 1996 Eddy Merckx Titanium EX, 1989/90 Colnago Super(issimo?) Piu(?),1990 Concorde Aquila(hit by car while riding), others in build queue "when I get the time"
Bikes: 1996 Eddy Merckx Titanium EX, 1989/90 Colnago Super(issimo?) Piu(?),
09-02-14, 10:27 AM
#19
Junior Member
Thread Starter
Join Date: Jun 2014
Posts: 21
Mentioned: 0 Post(s)
Tagged: 0 Thread(s)
Quoted: 0 Post(s)
Likes: 0
Liked 1 Time
in
1 Post
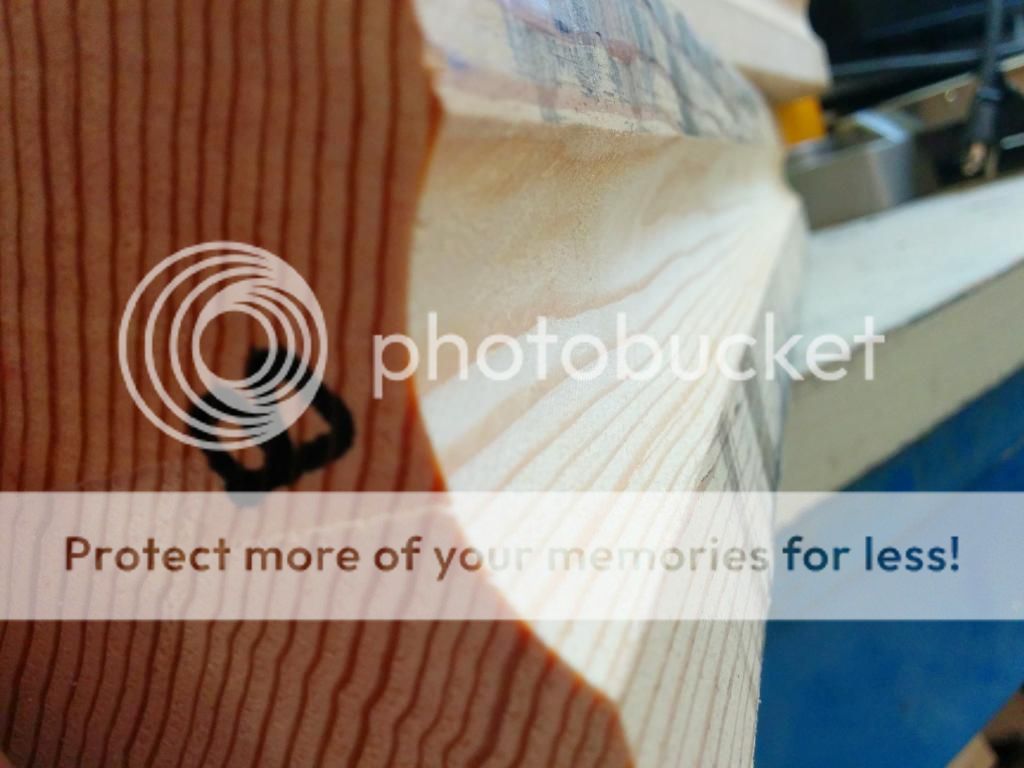
The second attempt, using thicker wood with an arc cut into it really helped to keep the tubing oriented in the blocks. also, since the wood flexed less, I was able to measure the center of the 4x4s and start compressing with the vise's jaws directly in the middle. the boards kept almost straight, but the middle compressed a bit more than the ends, especially since the ends are thicker steel.
I moved the blocks in the jaws of the vise to compress either end of the tubing (checking with calipers along the way - and keeping in mind that the tubing will spring back a bit!) and the profile is quite consistent, though I will probably spend some time with calipers and a set of blocks cut-down to about 5 or 6 inches to get the profile totally consistent. I'm guessing that any variations will show up a lot more once there is a coat of paint on the steel!
 12-30-14, 11:54 PM
#22
Junior Member
Thread Starter
Join Date: Jun 2014
Posts: 21
Mentioned: 0 Post(s)
Tagged: 0 Thread(s)
Quoted: 0 Post(s)
Likes: 0
Liked 1 Time
in
1 Post
I've done a lot of work on the Mercier - new brake bridge, chainstay bridge, internal rear brake cable routing, filing the lugs and fillets. It's been a learning experience trying to get an old frame back in order. I'll take some pictures tomorrow and post them.
12-31-14, 12:03 AM
#23
Junior Member
Thread Starter
Join Date: Jun 2014
Posts: 21
Mentioned: 0 Post(s)
Tagged: 0 Thread(s)
Quoted: 0 Post(s)
Likes: 0
Liked 1 Time
in
1 Post
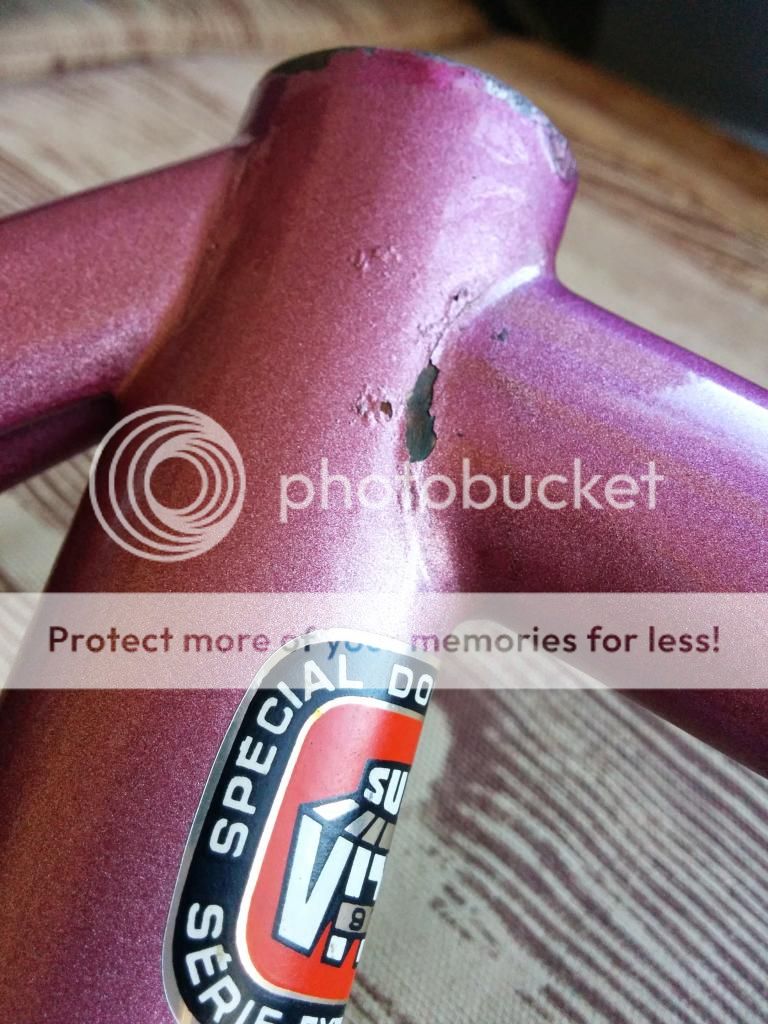
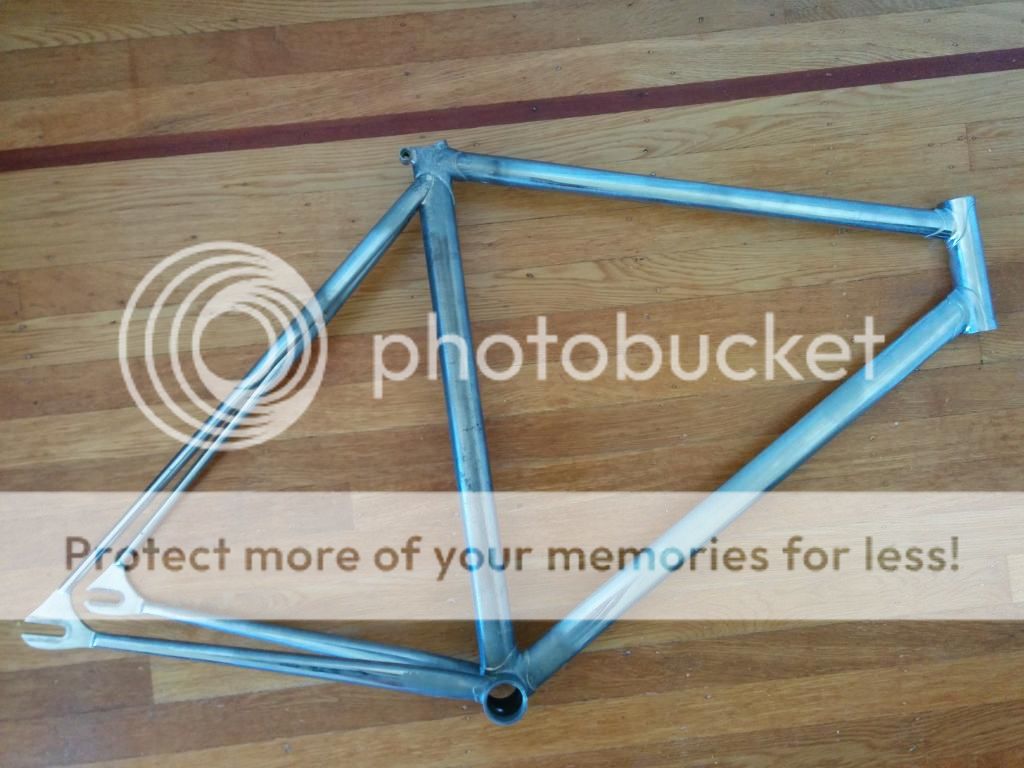
...also, I picked up another project. It was for sale near where I live, and it's my size - a Cuevas Track frame.
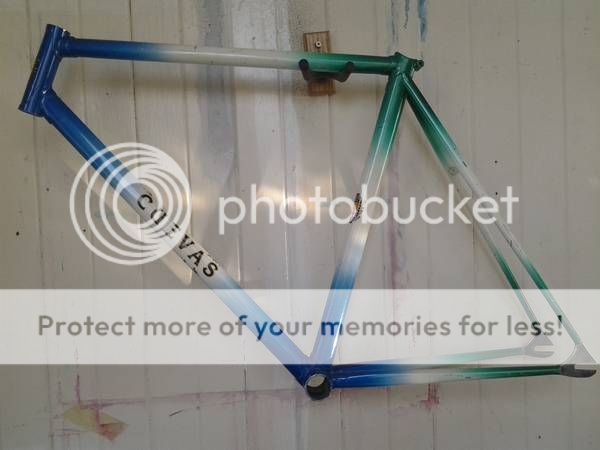
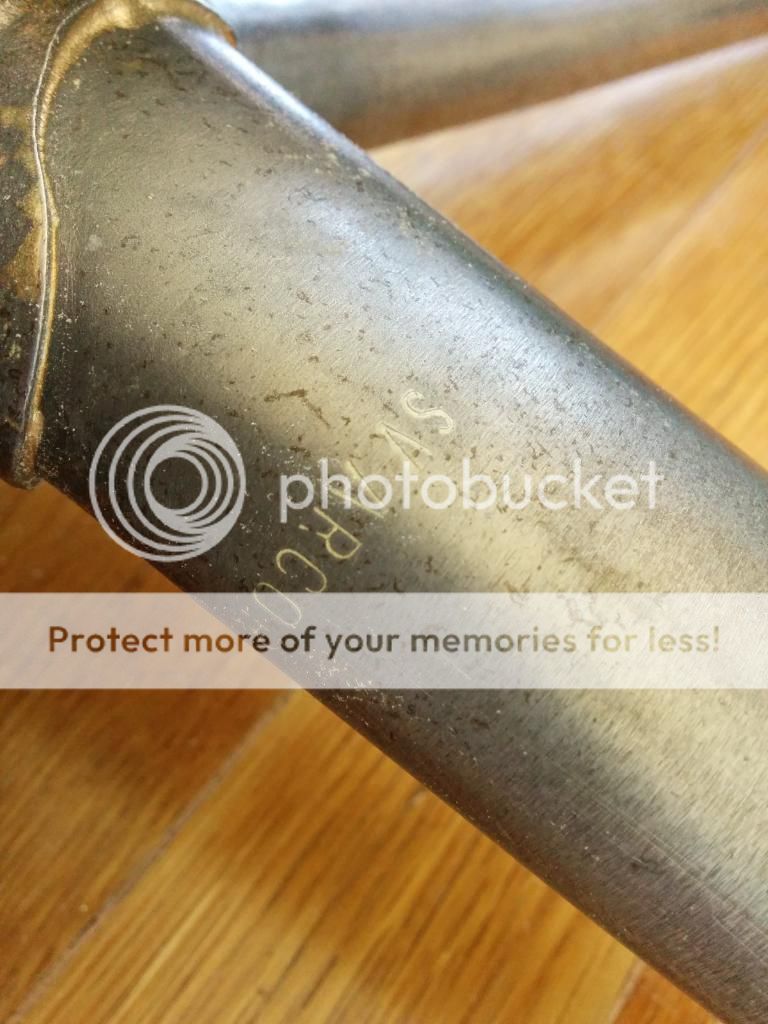
The tubing is very similar to Columbus Air, except the seat tube is quite a bit larger. The lugs other than the bottom bracket look identical to Columbus Air, but the BB shell looks a little different. It's English-threaded and is pantographed with the tubing type - "Super Vitus Arcor."
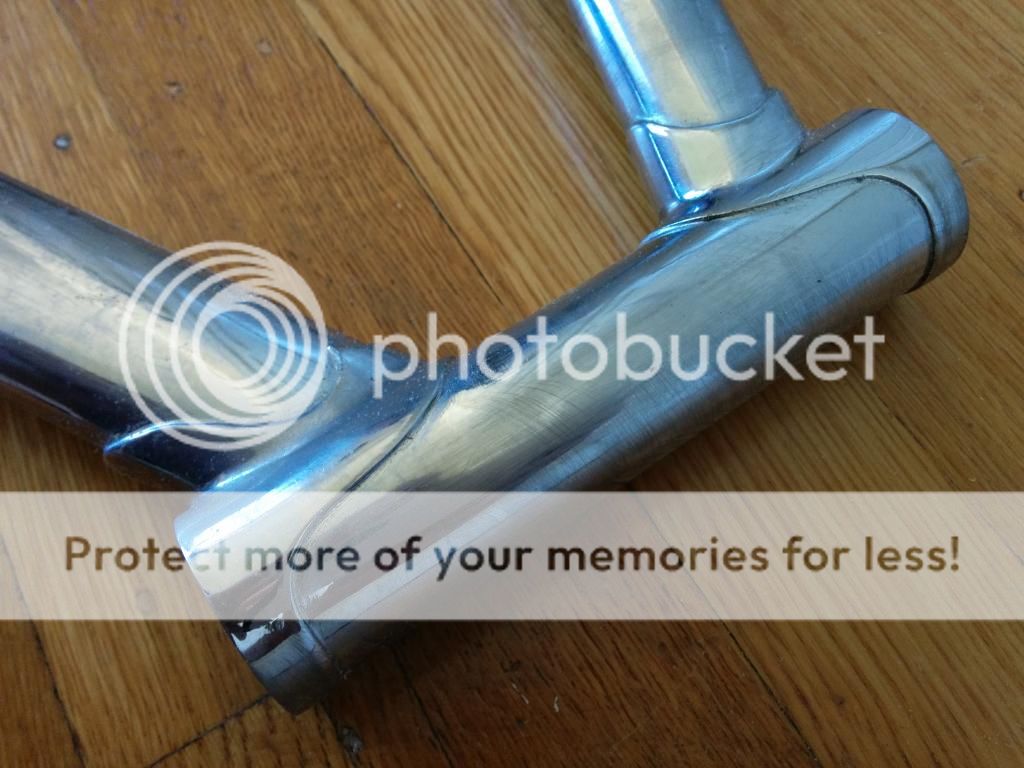
It'll need a little bit of work to get it back on the road (I did some online searches for Cuevas track frames, and it looks like this thing has been kicking around disassembled since at least 2008.) The frame was repainted at one time, and it will need a few small braze repairs, a seat post, and then a new coat of paint. Under the repaint, the rear triangle and head tube lugs were chromed, but the chrome is pretty worn.

The tubing is very similar to Columbus Air, except the seat tube is quite a bit larger. The lugs other than the bottom bracket look identical to Columbus Air, but the BB shell looks a little different. It's English-threaded and is pantographed with the tubing type - "Super Vitus Arcor."
It'll need a little bit of work to get it back on the road (I did some online searches for Cuevas track frames, and it looks like this thing has been kicking around disassembled since at least 2008.) The frame was repainted at one time, and it will need a few small braze repairs, a seat post, and then a new coat of paint. Under the repaint, the rear triangle and head tube lugs were chromed, but the chrome is pretty worn.
12-31-14, 04:08 PM
#24
Junior Member
Thread Starter
Join Date: Jun 2014
Posts: 21
Mentioned: 0 Post(s)
Tagged: 0 Thread(s)
Quoted: 0 Post(s)
Likes: 0
Liked 1 Time
in
1 Post
I scraped off some old paint so that I wouldn't need to spend as much time with paint stripper:

Vitus seems to mark their tubes on the outside - perhaps not the prettiest choice, but it does make identification a lot easier:
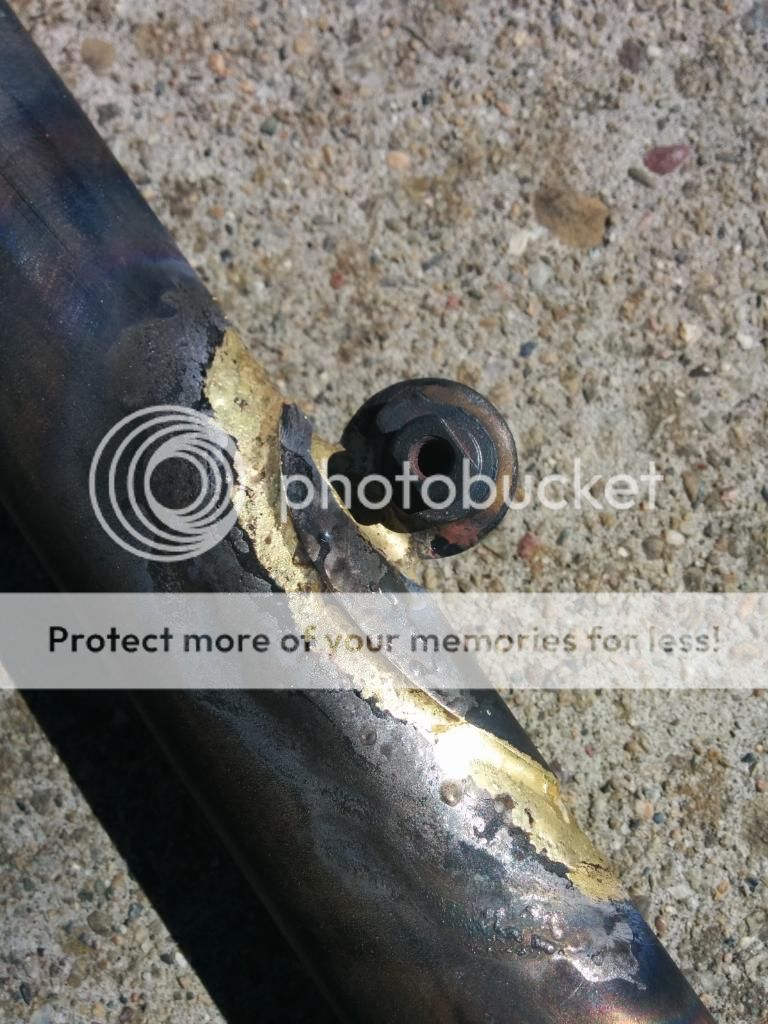
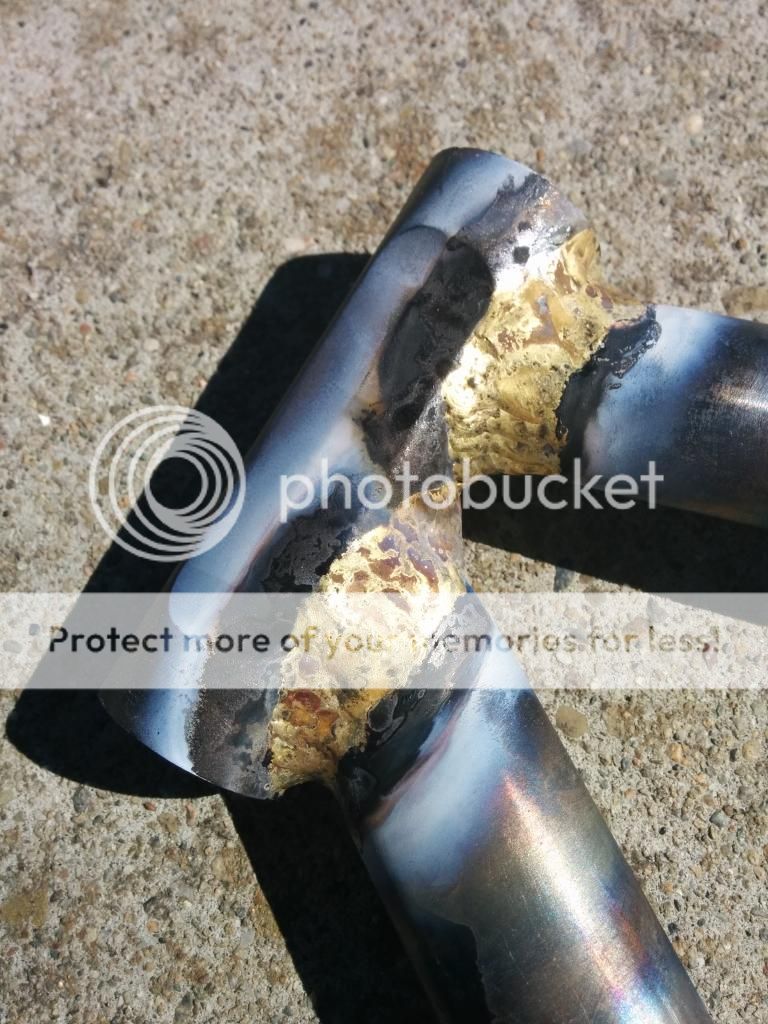
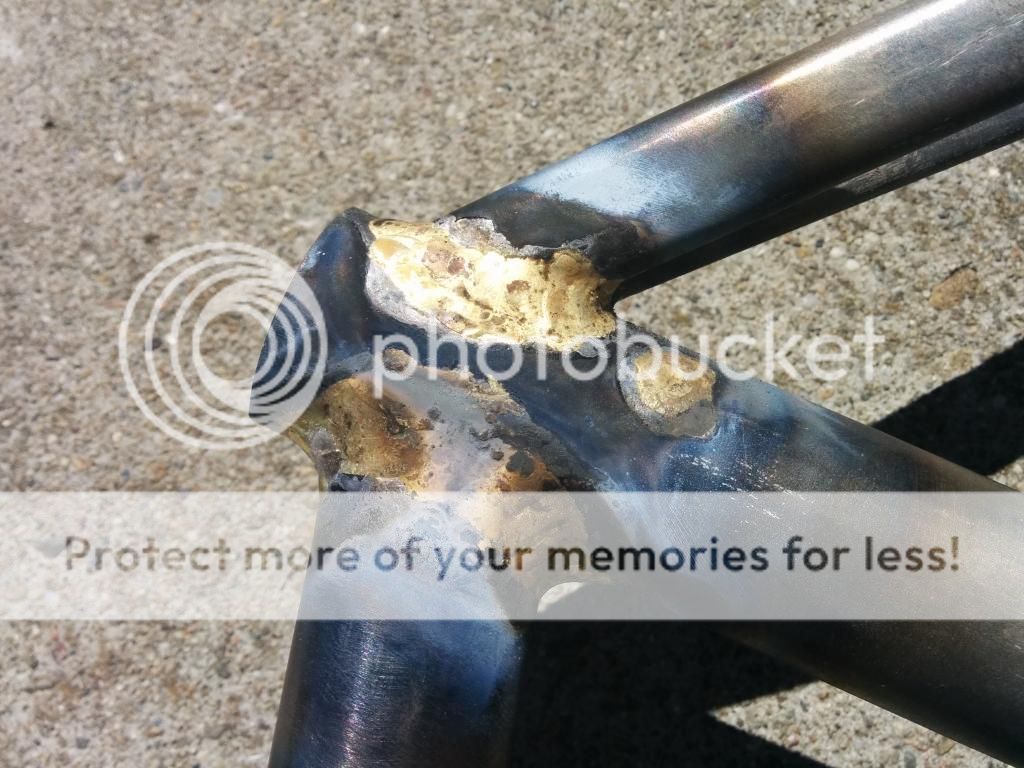
I'll need to patch up a few tiny dings and tidy up a few spots, but there weren't too many surprises under the paint - I'd read that the Cuevas frames were likely to have some gaps in the brazing, and indeed there were a few spots that will need a bit more brass.
Too bad the chrome was sanded before the last repaint!

Vitus seems to mark their tubes on the outside - perhaps not the prettiest choice, but it does make identification a lot easier:

I'll need to patch up a few tiny dings and tidy up a few spots, but there weren't too many surprises under the paint - I'd read that the Cuevas frames were likely to have some gaps in the brazing, and indeed there were a few spots that will need a bit more brass.

Too bad the chrome was sanded before the last repaint!


