


moving a Sturmey Archer 3-speed Dynohub from one 26" rim to another...
 05-20-16, 08:16 PM
#1
Junior Member
Thread Starter

Join Date: Jun 2014
Posts: 20
Bikes: Raleigh Bomber, Raleigh Super Bomber
Mentioned: 0 Post(s)
Tagged: 0 Thread(s)
Quoted: 0 Post(s)
Likes: 0
Liked 0 Times
in
0 Posts
moving a Sturmey Archer 3-speed Dynohub from one 26" rim to another...
Hi folks.
I'm about to embark on a project which I expect to be difficult. Perhaps some of you may have tackled this before...
My bicycle is an early 80's Raleigh Bomber with Sturmey Archer AW hub which is great but I fancy putting in a 3-speed Dynohub.
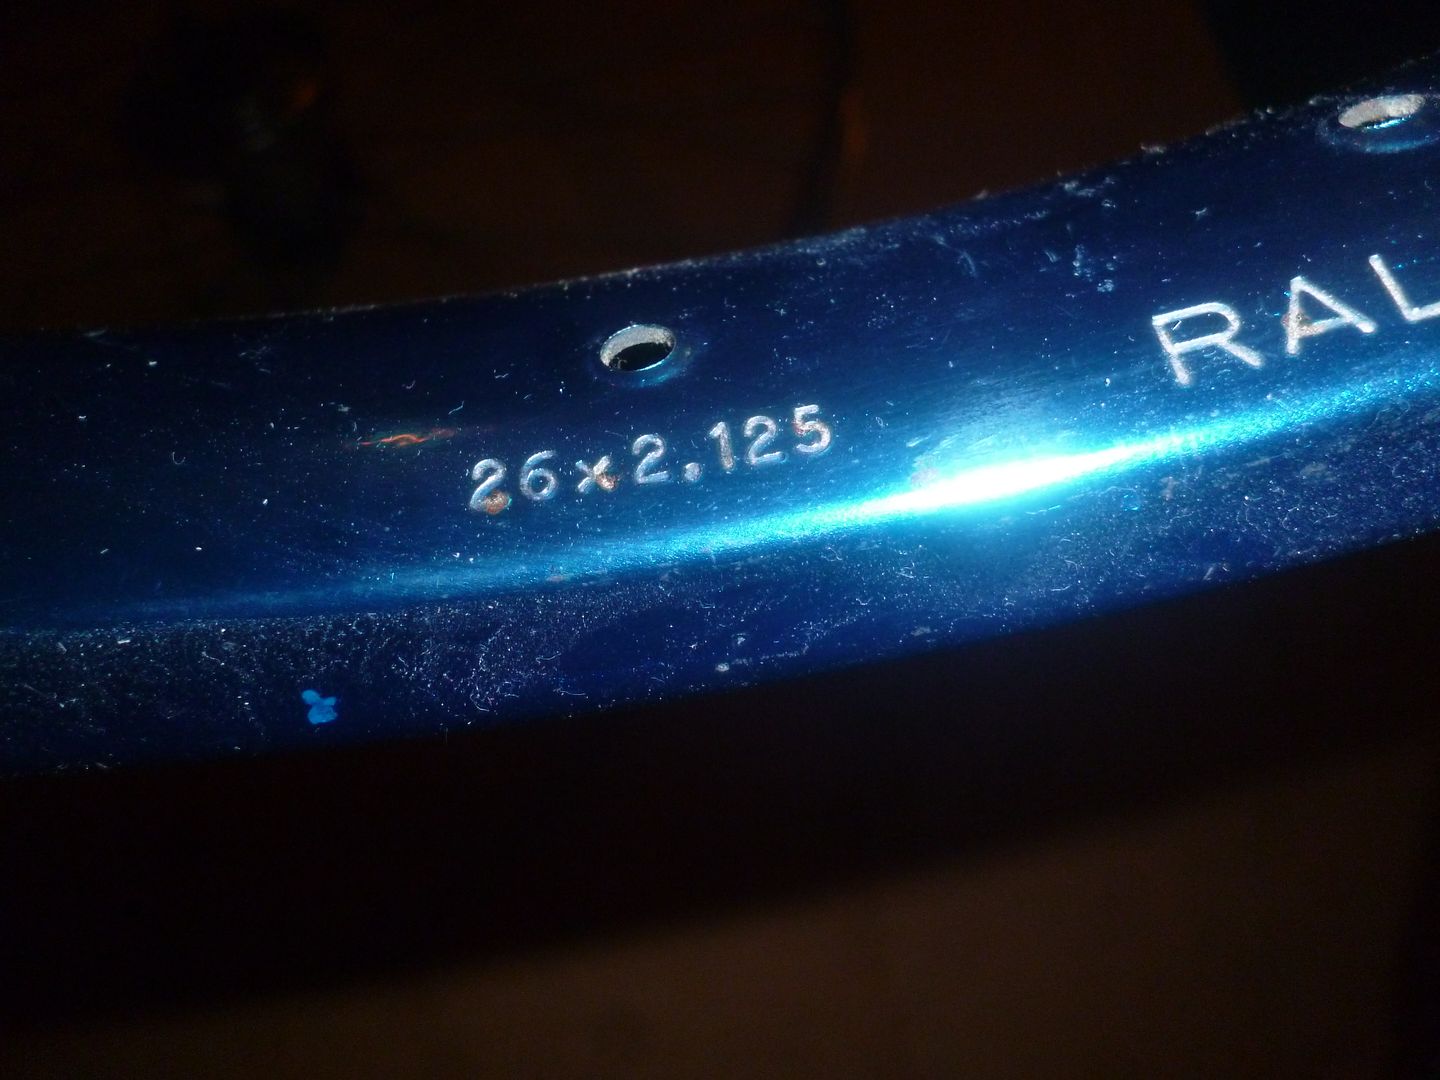
I have one in a 26 x 1 3/8 rim and want to move it into my 26 x 2.125 rim.
First thing that's apparent is that my rim is smaller than the donor wheel's rim so I'll need different spokes.
I'm aware there are spoke-length calculators but I've never had much luck with them as my components don't appear on the drop-downs.
You can however establish the correct spoke lengths by taking accurate measurements of the hub and rim so that's what I aim to do.
I've taken some very rough measurements and can see that although the hub-flanges are very different sizes there is only a 4mm difference in spoke length. This is because the larger flange is offset further from the rim than the small one.
I expected the spokes to be much shorter on the Dyno side but as it sticks out more they need more length than if the flanges were not offset.
In practise the offset on the Dyno side is matched on the other side by the extra width of the drive sprocket.
Another point is that both sides are spoked in the same pattern. Afaik it's called 3-cross as each spoke crosses 3 others.

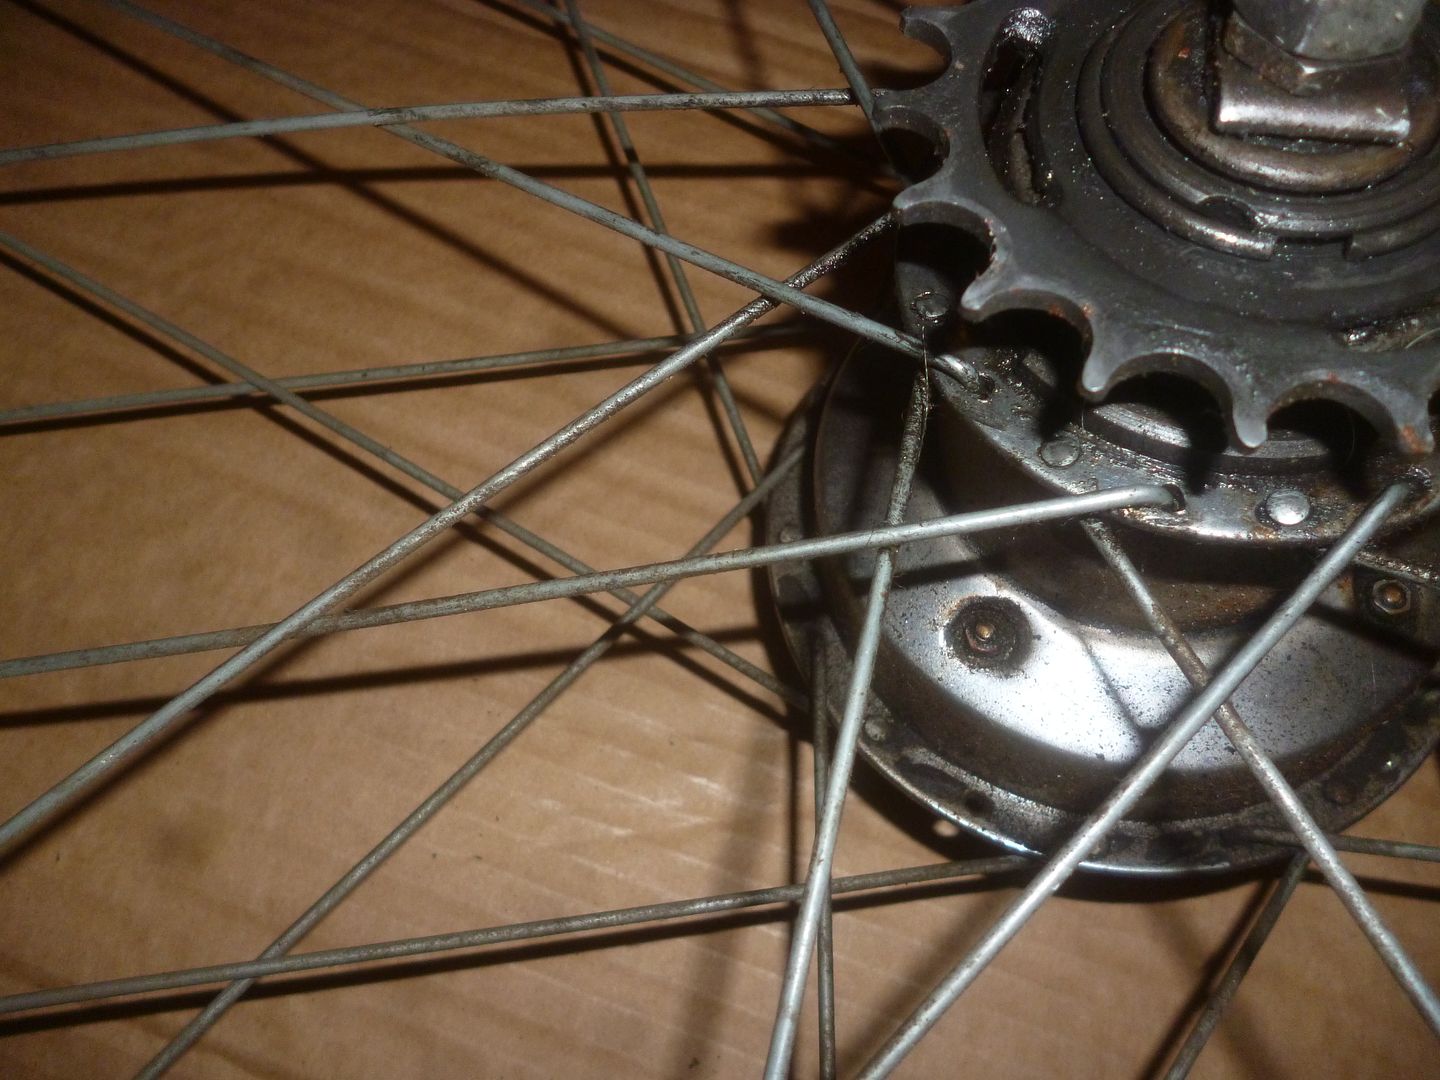
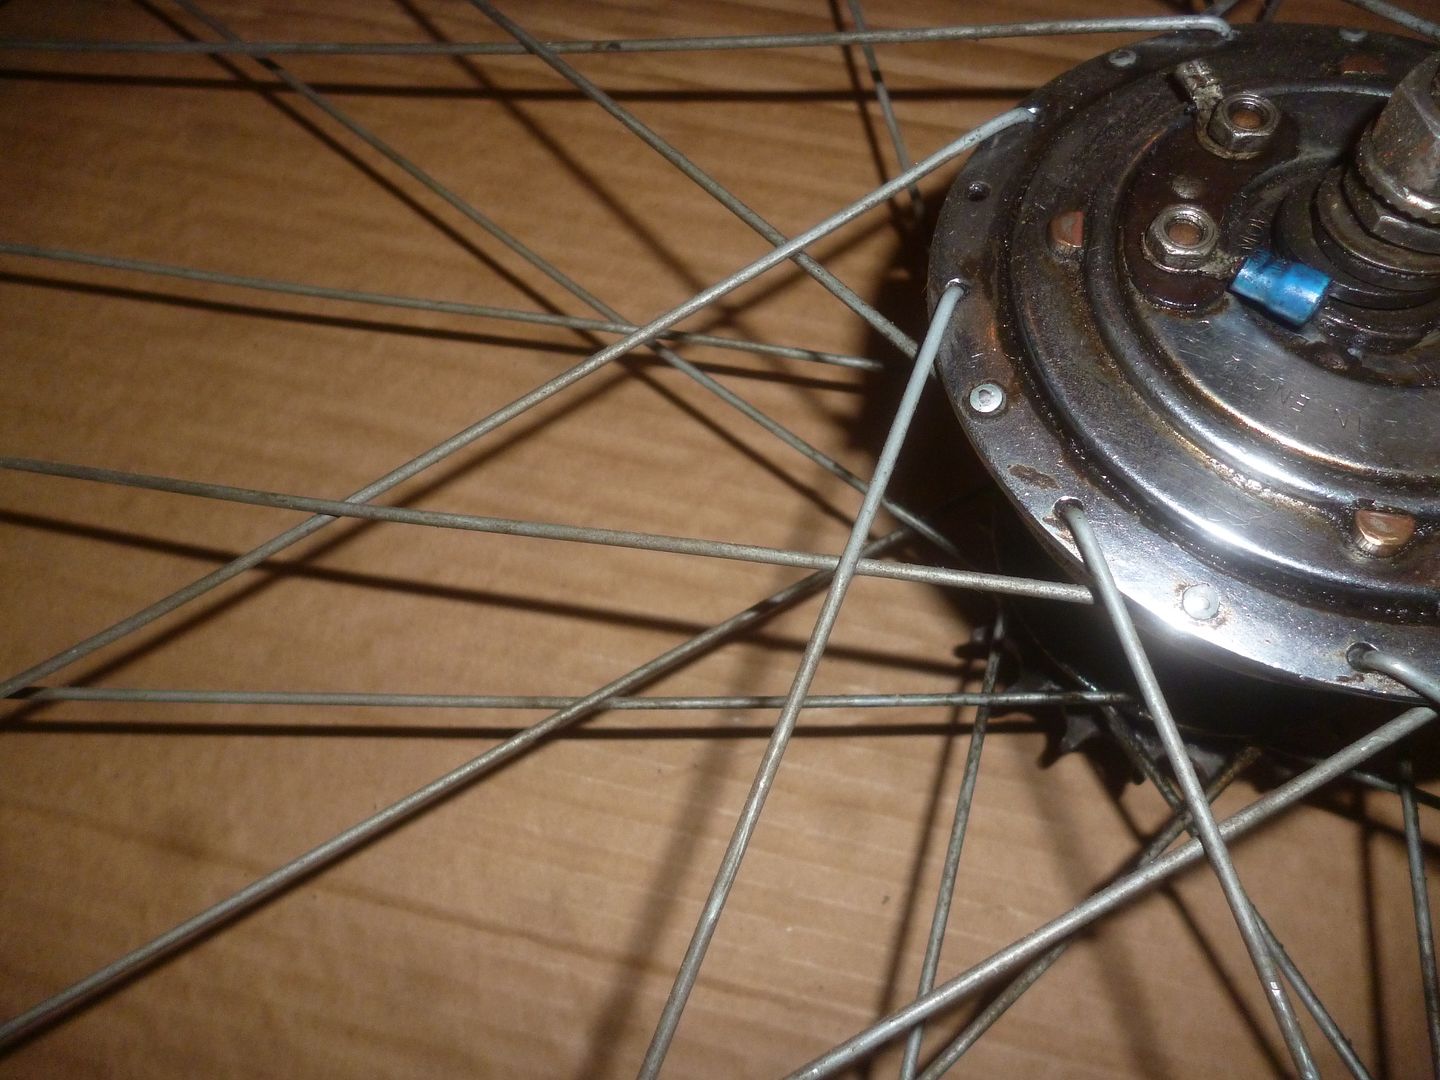
Ebay purchased donor-wheel with Dynohub
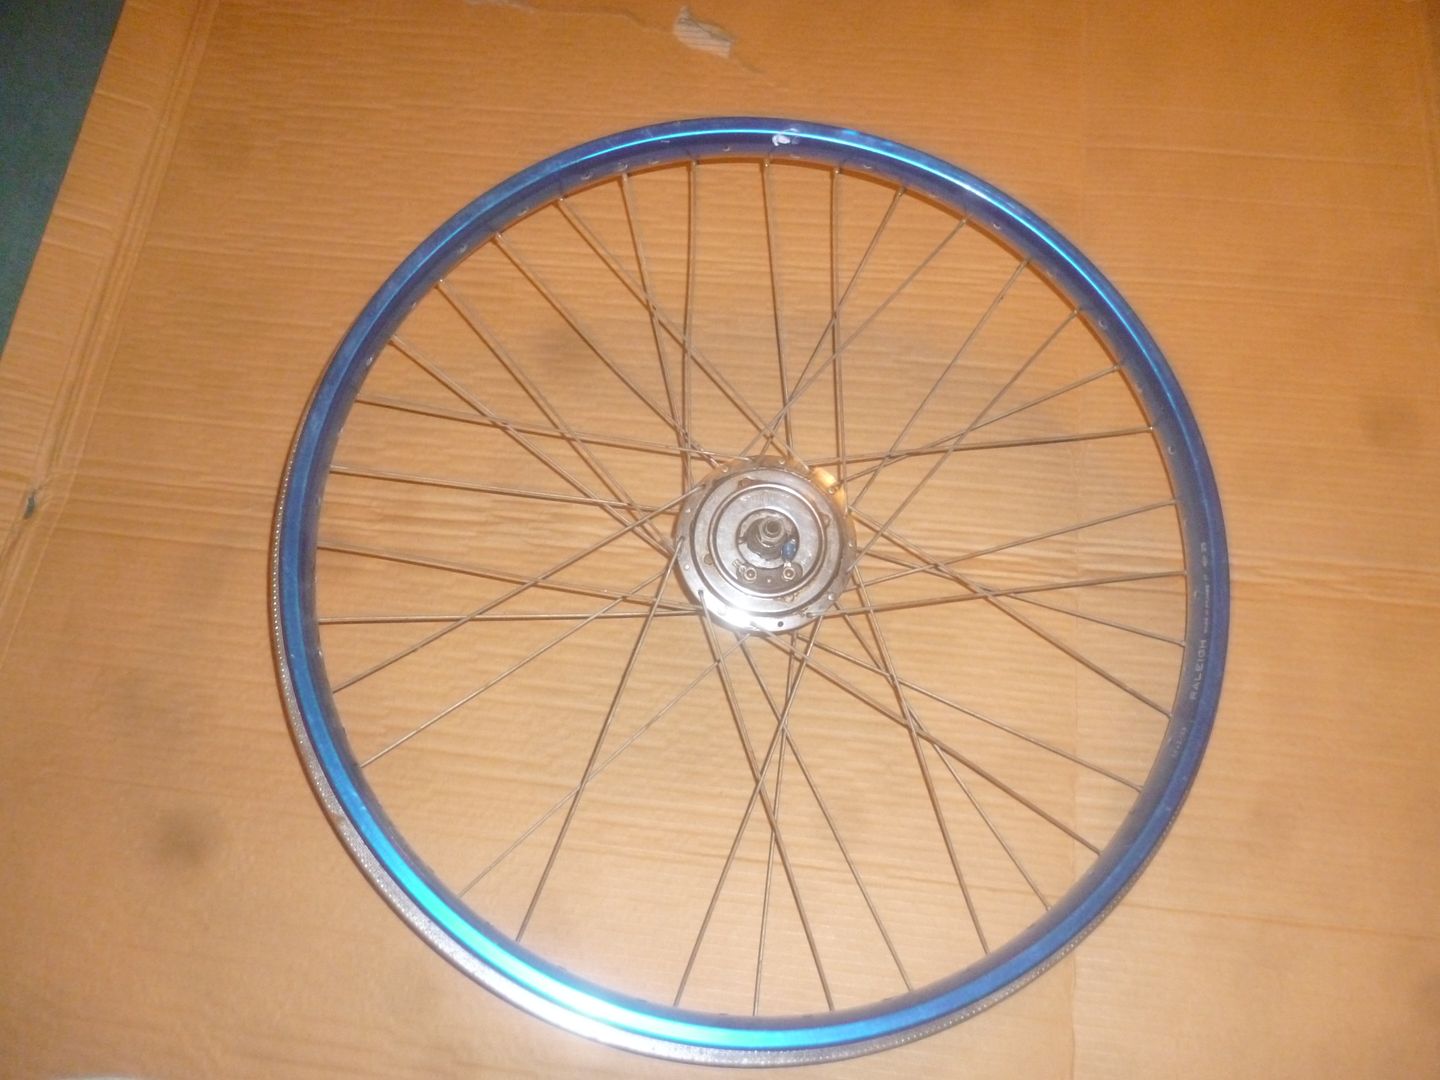
hope to move Dynohub to Raleigh Super Bomber rim which is different size...
...despite both rims being 26"
spoking on both sides is 3-cross
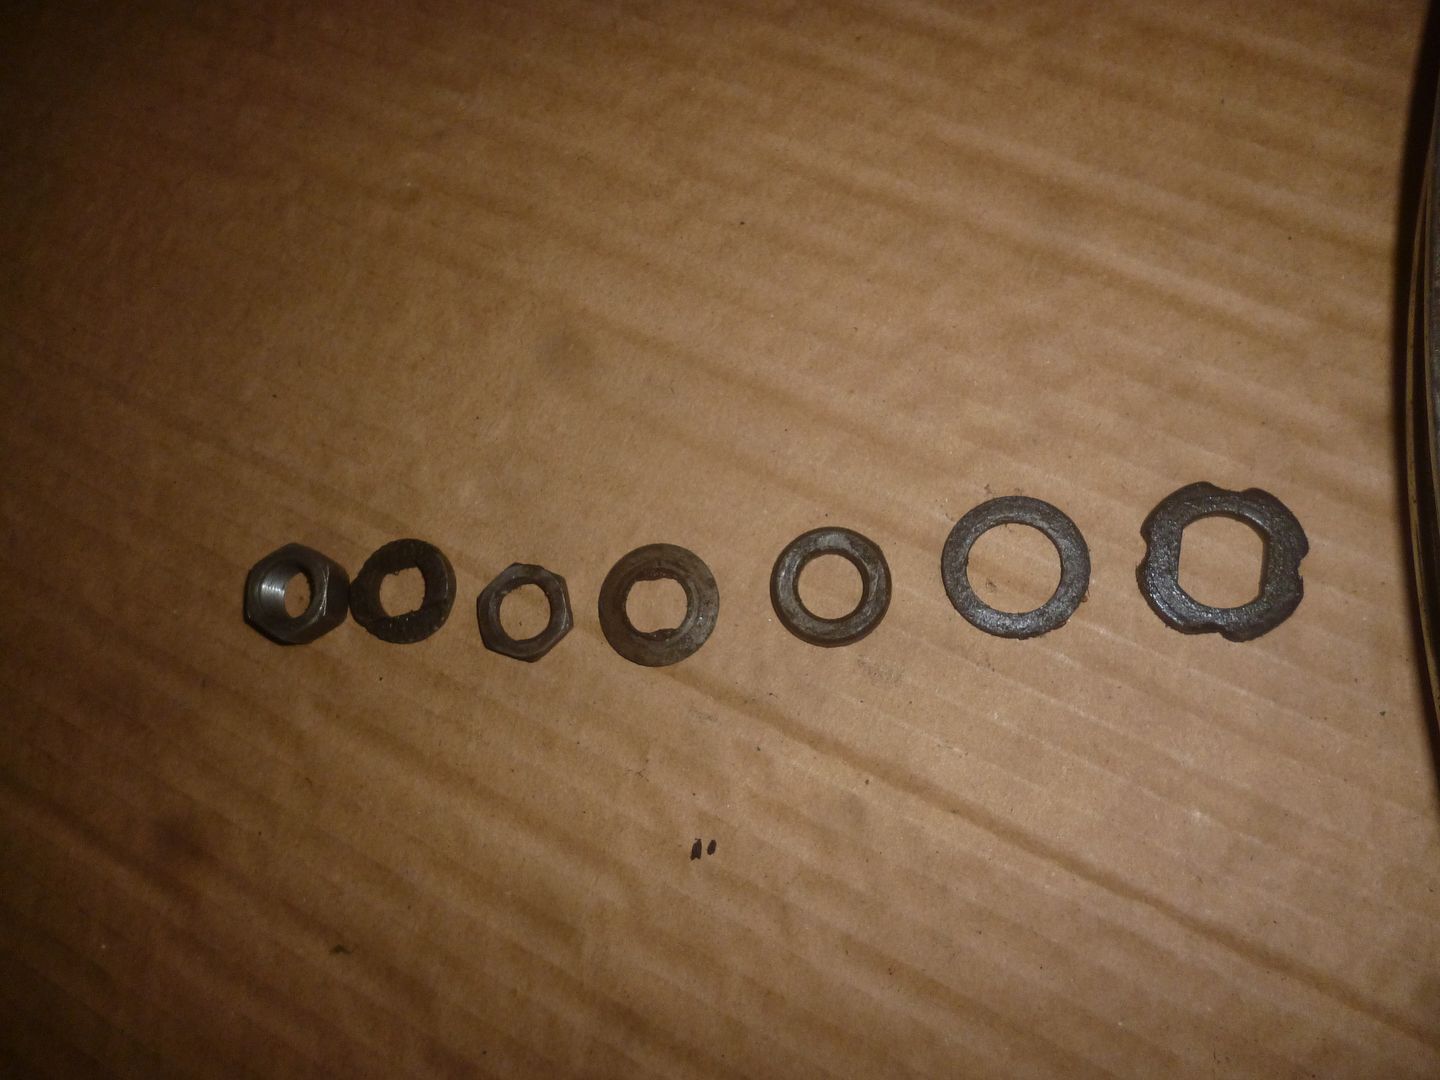
old wheels always seem to have lots of nuts/spacers/washers. which are original?
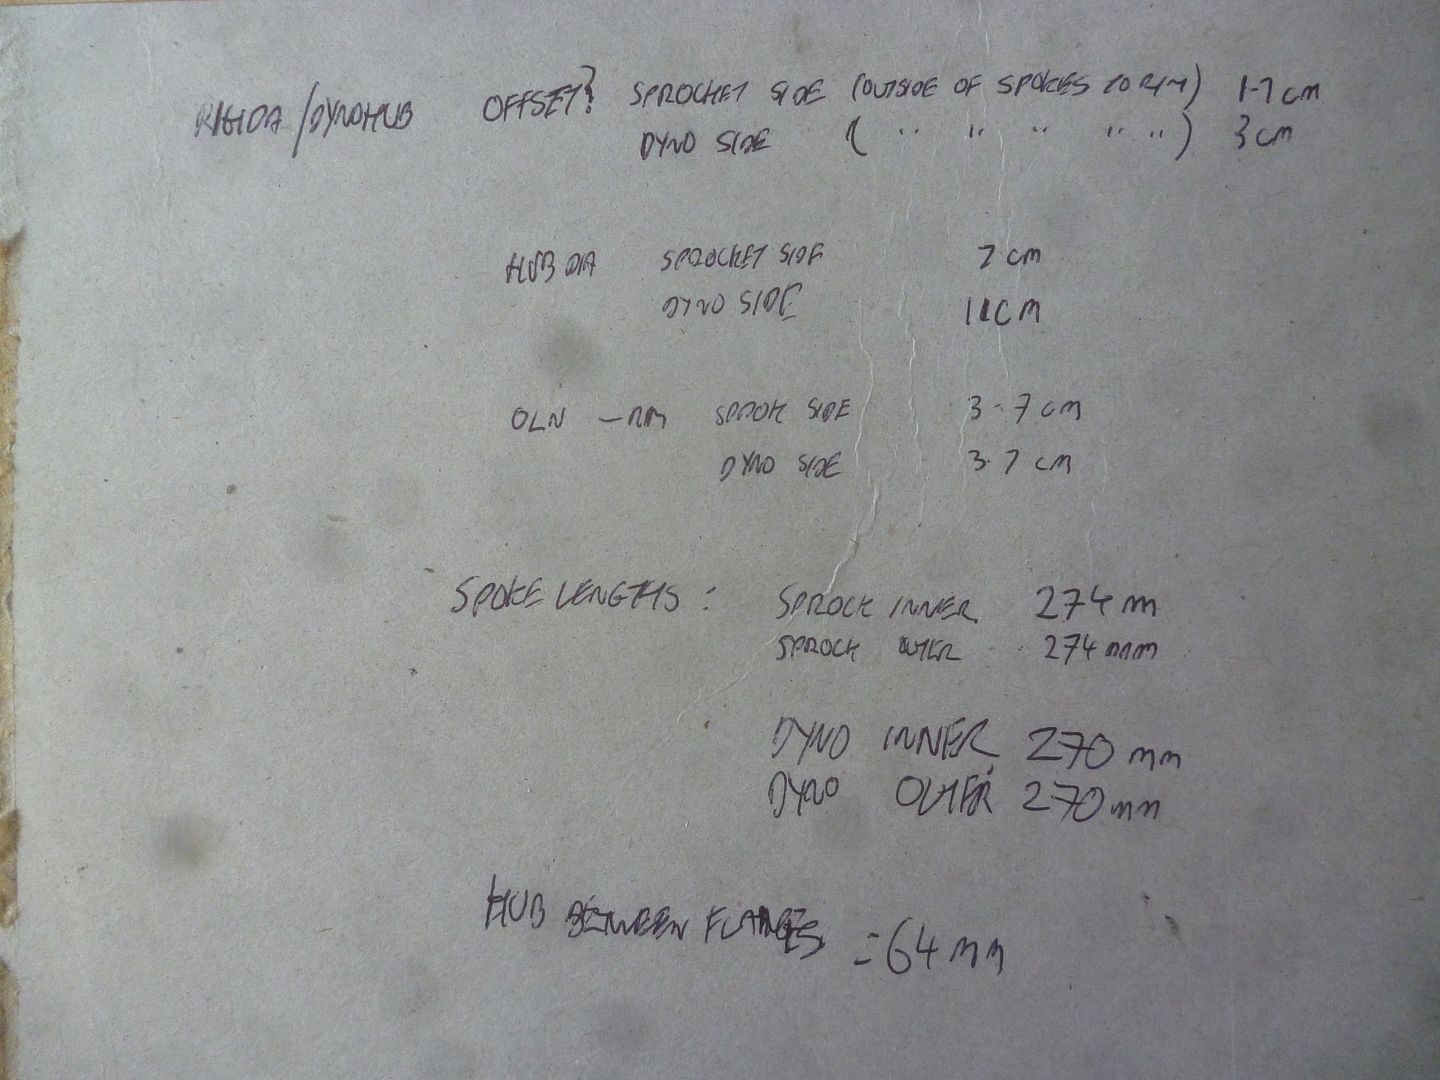
my 'back of cigarette-packet' measurements
I'm about to embark on a project which I expect to be difficult. Perhaps some of you may have tackled this before...
My bicycle is an early 80's Raleigh Bomber with Sturmey Archer AW hub which is great but I fancy putting in a 3-speed Dynohub.
I have one in a 26 x 1 3/8 rim and want to move it into my 26 x 2.125 rim.
First thing that's apparent is that my rim is smaller than the donor wheel's rim so I'll need different spokes.
I'm aware there are spoke-length calculators but I've never had much luck with them as my components don't appear on the drop-downs.
You can however establish the correct spoke lengths by taking accurate measurements of the hub and rim so that's what I aim to do.
I've taken some very rough measurements and can see that although the hub-flanges are very different sizes there is only a 4mm difference in spoke length. This is because the larger flange is offset further from the rim than the small one.
I expected the spokes to be much shorter on the Dyno side but as it sticks out more they need more length than if the flanges were not offset.
In practise the offset on the Dyno side is matched on the other side by the extra width of the drive sprocket.
Another point is that both sides are spoked in the same pattern. Afaik it's called 3-cross as each spoke crosses 3 others.

Ebay purchased donor-wheel with Dynohub


hope to move Dynohub to Raleigh Super Bomber rim which is different size...


...despite both rims being 26"


spoking on both sides is 3-cross

old wheels always seem to have lots of nuts/spacers/washers. which are original?

my 'back of cigarette-packet' measurements
Last edited by ffoxy99; 05-21-16 at 05:00 AM. Reason: usa/english translation
 05-20-16, 08:26 PM
#2

Friendship is Magic

Join Date: Nov 2010
Location: Sacramento, CA
Posts: 22,985
Bikes: old ones
Mentioned: 304 Post(s)
Tagged: 0 Thread(s)
Quoted: 26427 Post(s)
Liked 10,383 Times
in
7,211 Posts
.
...borrow or buy a vernier or dial caliper for your measurements. The plastic one they sell at Harpor Freight for 4 bucks will work fine.
Use this spoke calculator for your length calculations. Spoke length calculator for wheel building You should print out your results sheets, and put them on a clipboard while building the wheels.
I assume that you are already aware that a decimal 26" rim, being smaller than the 26 x 1 3/8 original, will change the brake reach required for rim contact. If using rim caliper brakes, you'll need to get some longer reach brakes somewhere along the line.
Here is a Raleigh 3 speed conversion using 26" decimal mountain bike rims:

Sorry, I can't help you on your washer question.
...borrow or buy a vernier or dial caliper for your measurements. The plastic one they sell at Harpor Freight for 4 bucks will work fine.
Use this spoke calculator for your length calculations. Spoke length calculator for wheel building You should print out your results sheets, and put them on a clipboard while building the wheels.
I assume that you are already aware that a decimal 26" rim, being smaller than the 26 x 1 3/8 original, will change the brake reach required for rim contact. If using rim caliper brakes, you'll need to get some longer reach brakes somewhere along the line.
Here is a Raleigh 3 speed conversion using 26" decimal mountain bike rims:
Sorry, I can't help you on your washer question.
__________________
05-21-16, 03:49 AM
#3
Junior Member
Thread Starter
Join Date: Jun 2014
Posts: 20
Bikes: Raleigh Bomber, Raleigh Super Bomber
Mentioned: 0 Post(s)
Tagged: 0 Thread(s)
Quoted: 0 Post(s)
Likes: 0
Liked 0 Times
in
0 Posts
.
...borrow or buy a vernier or dial caliper for your measurements. The plastic one they sell at Harpor Freight for 4 bucks will work fine.
Use this spoke calculator for your length calculations. Spoke length calculator for wheel building You should print out your results sheets, and put them on a clipboard while building the wheels.
I assume that you are already aware that a decimal 26" rim, being smaller than the 26 x 1 3/8 original, will change the brake reach required for rim contact. If using rim caliper brakes, you'll need to get some longer reach brakes somewhere along the line.
Here is a Raleigh 3 speed conversion using 26" decimal mountain bike rims:
Sorry, I can't help you on your washer question.
05-21-16, 05:21 AM
#4
Phyllo-buster

Join Date: Jan 2010
Location: Nova Scotia
Posts: 8,847
Bikes: roadsters, club bikes, fixed and classic
Mentioned: 133 Post(s)
Tagged: 0 Thread(s)
Quoted: 2298 Post(s)
Liked 2,055 Times
in
1,255 Posts
Here's a great way to measure rim diameter.
https://www.bikeforums.net/bicycle-me...ml#post6364862
https://www.bikeforums.net/bicycle-me...ml#post6364862
05-21-16, 06:40 AM
#5

multimodal commuter
Join Date: Nov 2006
Location: NJ, NYC, LI
Posts: 19,808
Bikes: 1940s Fothergill, 1959 Allegro Special, 1963? Claud Butler Olympic Sprint, Lambert 'Clubman', 1974 Fuji "the Ace", 1976 Holdsworth 650b conversion rando bike, 1983 Trek 720 tourer, 1984 Counterpoint Opus II, 1993 Basso Gap, 2010 Downtube 8h, and...
Mentioned: 584 Post(s)
Tagged: 0 Thread(s)
Quoted: 1908 Post(s)
Liked 574 Times
in
339 Posts
The spokes are nearly the same size not because of the offset, but because they are laced as tangents to the hub rather than in a radial pattern.
Before you start building up the hub, place it in the bike frame and put the chain on the chain wheel and hub sprocket. See how the chain aligns. Do what it takes to get the chain line straight, flip the cog, move its spacers, whatever. Use some of those washers if necessary. When you have the chain line right, then you know where to put the washers. Build your wheel around that configuration, making sure to center the rim over the axle ends in that configuration.
Lacing the wheel up will be a lot of fun. Take your time. The rear dynohubs are a lot easier than the front ones!
__________________
www.rhmsaddles.com.
www.rhmsaddles.com.
05-21-16, 09:37 AM
#6
Old fart

Join Date: Nov 2004
Location: Appleton WI
Posts: 24,792
Bikes: Several, mostly not name brands.
Mentioned: 153 Post(s)
Tagged: 0 Thread(s)
Quoted: 3591 Post(s)
Liked 3,401 Times
in
1,935 Posts
 05-21-16, 12:28 PM
#8
Friendship is Magic
Join Date: Nov 2010
Location: Sacramento, CA
Posts: 22,985
Bikes: old ones
Mentioned: 304 Post(s)
Tagged: 0 Thread(s)
Quoted: 26427 Post(s)
Liked 10,383 Times
in
7,211 Posts
Many thanks for your reply c/w link. I wasn't aware of the braking issue that you raised but I don't think it will be a problem in my case as the rim is correct to the frame I will be using it on (both Raleigh Bomber) so the rim should end up in the same place relative to the brake blocks even with a different hub fitted.
It occurred to me to mention that one of the reasons you find such a wild assortment of washers and spacers on many older hubs is that, in use, they've been adapted to variously spaced frames. The important thing is to have whatever you need on the hub to fit well in your chosen frame, then proceed to build and center your wheel rim....you probably already know this.
There are some various online exploded parts diagrams for some of the SA hubs, which show up on a google image search. I don't know that yours is one of them, but if you can find one, all the original washers, spacers, and nuts will show up on it.
__________________
05-21-16, 05:02 PM
#9
Junior Member
Thread Starter
Join Date: Jun 2014
Posts: 20
Bikes: Raleigh Bomber, Raleigh Super Bomber
Mentioned: 0 Post(s)
Tagged: 0 Thread(s)
Quoted: 0 Post(s)
Likes: 0
Liked 0 Times
in
0 Posts
The spokes are nearly the same size not because of the offset, but because they are laced as tangents to the hub rather than in a radial pattern.
Before you start building up the hub, place it in the bike frame and put the chain on the chain wheel and hub sprocket. See how the chain aligns. Do what it takes to get the chain line straight, flip the cog, move its spacers, whatever. Use some of those washers if necessary. When you have the chain line right, then you know where to put the washers. Build your wheel around that configuration, making sure to center the rim over the axle ends in that configuration.
Lacing the wheel up will be a lot of fun. Take your time. The rear dynohubs are a lot easier than the front ones!
Before you start building up the hub, place it in the bike frame and put the chain on the chain wheel and hub sprocket. See how the chain aligns. Do what it takes to get the chain line straight, flip the cog, move its spacers, whatever. Use some of those washers if necessary. When you have the chain line right, then you know where to put the washers. Build your wheel around that configuration, making sure to center the rim over the axle ends in that configuration.
Lacing the wheel up will be a lot of fun. Take your time. The rear dynohubs are a lot easier than the front ones!
Thanks for the advice. I really should do this as I planned to lace the wheel up exactly like the donor one and just hope it worked. Better to be sure.
NB I also have a front Dynohub and a single speed rear with drum brake which has the same double-spoke holes as a front Dyno
05-21-16, 05:05 PM
#10
Junior Member
Thread Starter
Join Date: Jun 2014
Posts: 20
Bikes: Raleigh Bomber, Raleigh Super Bomber
Mentioned: 0 Post(s)
Tagged: 0 Thread(s)
Quoted: 0 Post(s)
Likes: 0
Liked 0 Times
in
0 Posts
 05-21-16, 05:06 PM
#11
Junior Member
Thread Starter
Join Date: Jun 2014
Posts: 20
Bikes: Raleigh Bomber, Raleigh Super Bomber
Mentioned: 0 Post(s)
Tagged: 0 Thread(s)
Quoted: 0 Post(s)
Likes: 0
Liked 0 Times
in
0 Posts
...I reread what you are doing. I misunderstood the first go 'round, thus my remark about brake reach. Sorry
It occurred to me to mention that one of the reasons you find such a wild assortment of washers and spacers on many older hubs is that, in use, they've been adapted to variously spaced frames. The important thing is to have whatever you need on the hub to fit well in your chosen frame, then proceed to build and center your wheel rim....you probably already know this.
There are some various online exploded parts diagrams for some of the SA hubs, which show up on a google image search. I don't know that yours is one of them, but if you can find one, all the original washers, spacers, and nuts will show up on it.
 05-21-16, 05:47 PM
#12
Junior Member
Thread Starter
Join Date: Jun 2014
Posts: 20
Bikes: Raleigh Bomber, Raleigh Super Bomber
Mentioned: 0 Post(s)
Tagged: 0 Thread(s)
Quoted: 0 Post(s)
Likes: 0
Liked 0 Times
in
0 Posts
Thanks for the input guys. Very helpful.
Anyway I made some progress today. In fact I think I got things bang-on and am concerned that it can't be this easy")
I measured the hub & rims per the instructions on the link provided by 3alarmer with a steel tape and a straight edge. Not ideal but all I could do without vernier or similar.
These measurements over-rode the 'cigarette packet' ones in various ways. IE the distance between the flanges isn't needed and the diameter of the flanges is not needed. It's the diameter between the spoke hole centres that you need.
Anyway I punched in the data from the built-up wheel to see if it came up with the same length spokes as already fitted and it gave me 273.9mm & 268.6mm for the 274mm & 270mm that I measured on the spokes themselves. Pretty close
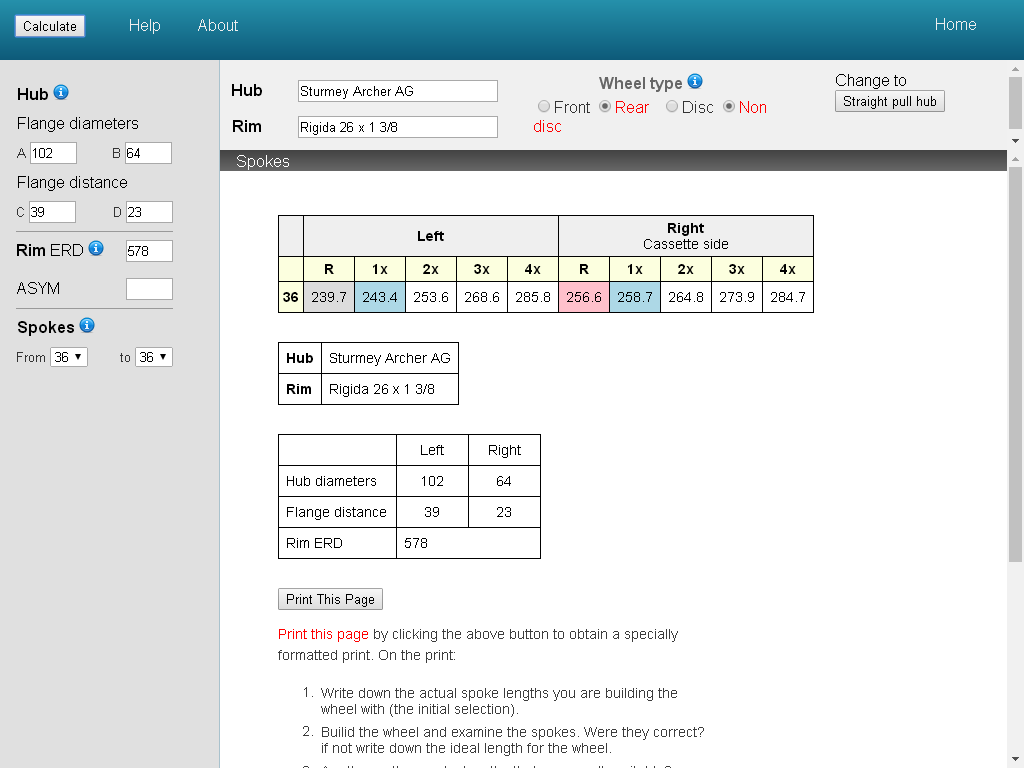
crude measurements from donor wheel input in calculator tell me spokes should be this length (3x column). They pretty much are
Bouyed by this apparent success I then changed the rim data to 542mm which I measred my blue rim ERD to be and it tells me I need to hunt for spokes 251mm & 256mm long. I wonder if the calculator accepts Imperial measurements as I see the older spokes are often listed in Imperial length rather than metric
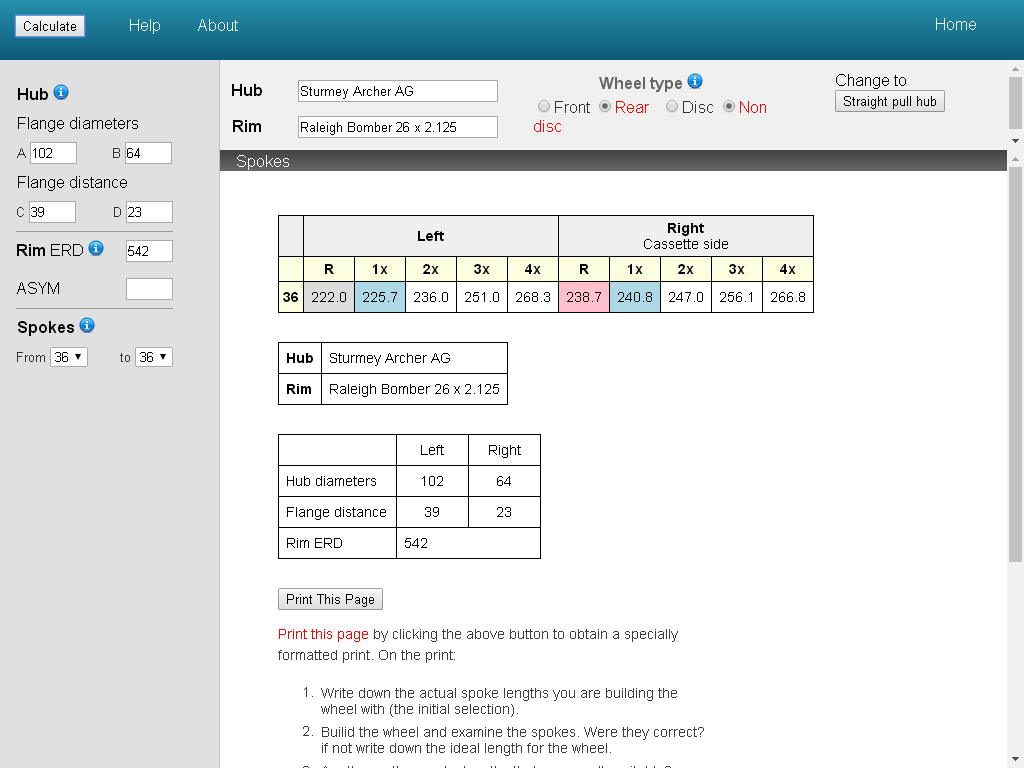
I'll measure again with proper instruments before buying spokes but looks like I need 251mm & 256mm for the blue rim
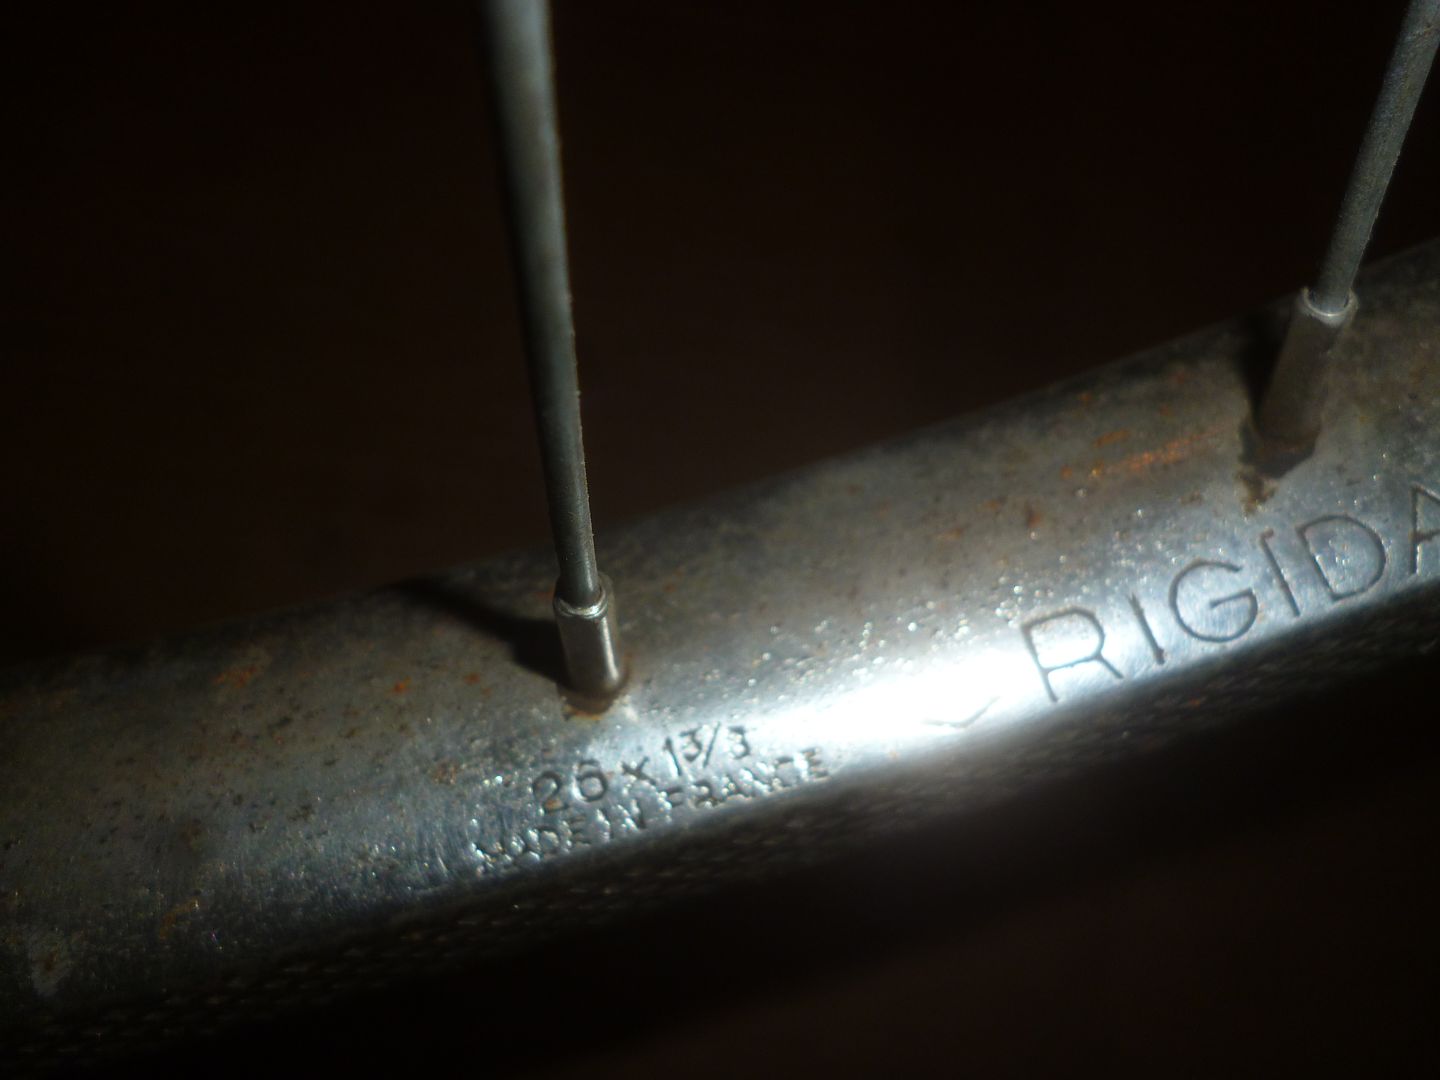
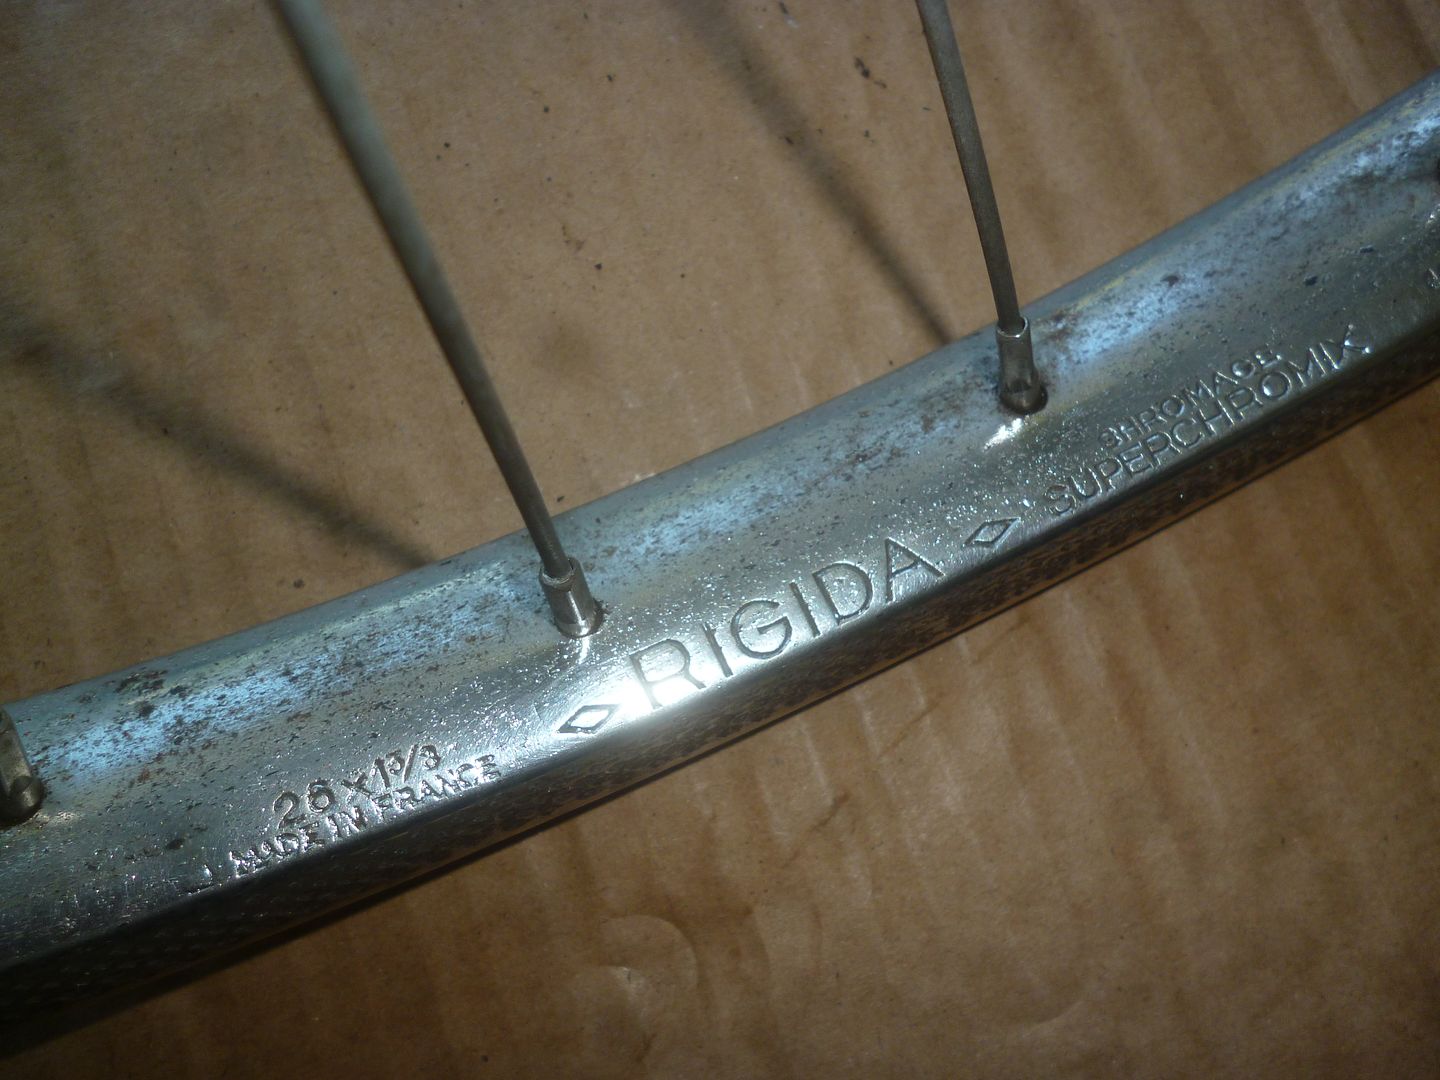
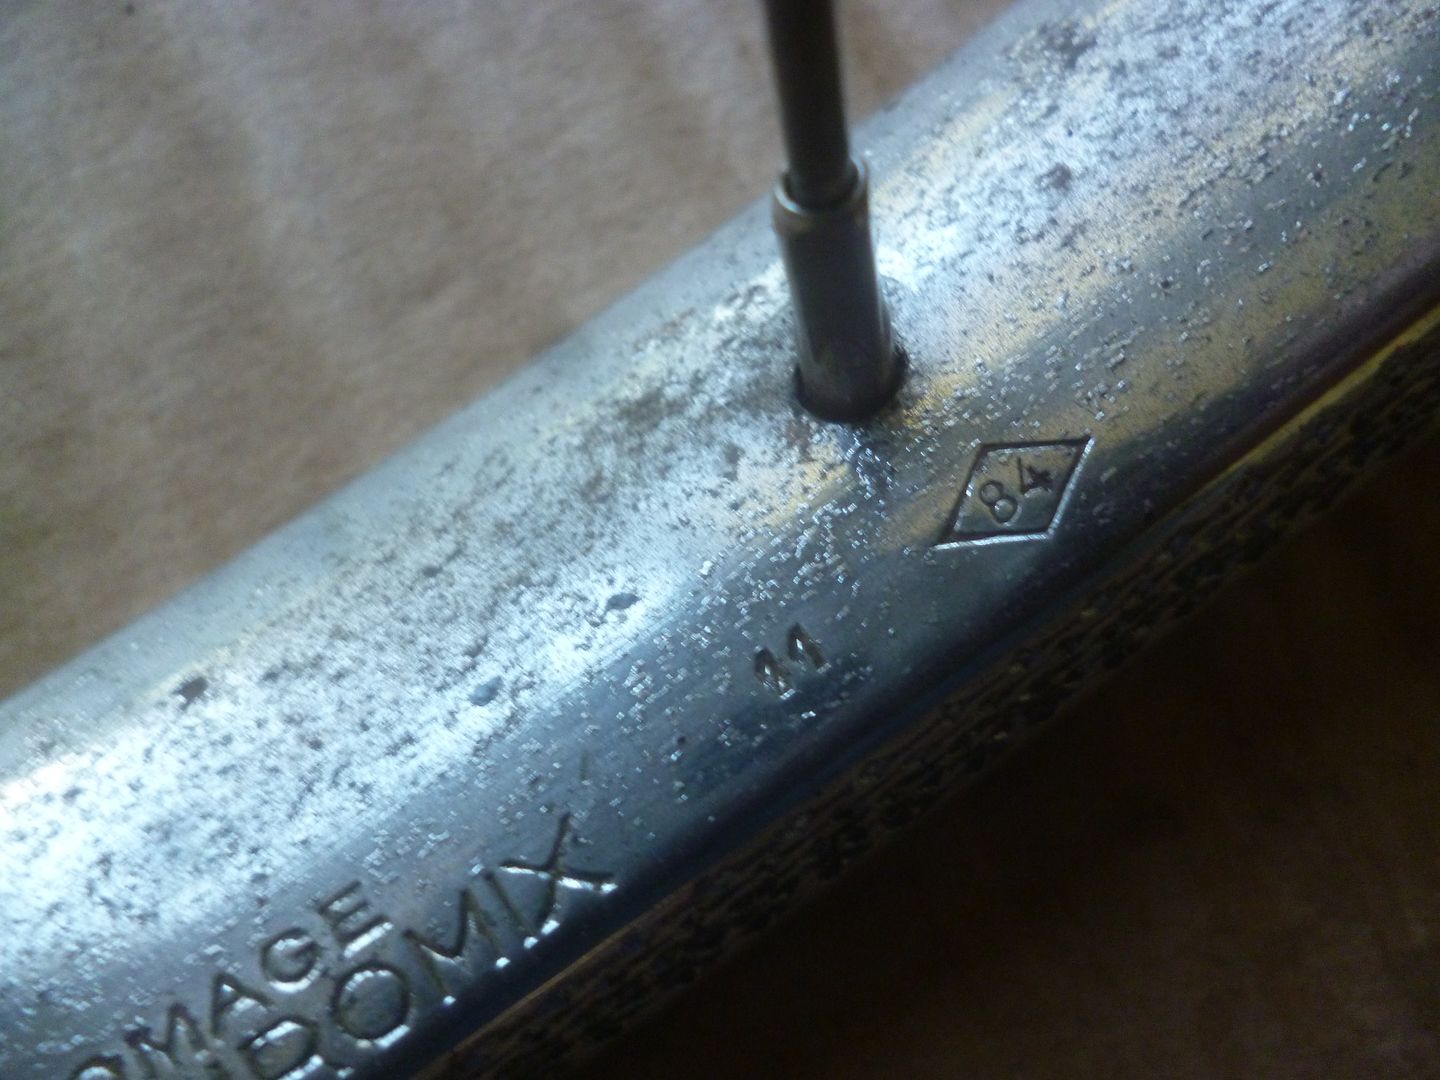
On the subject of the donor wheel and my assumption that it is correctly spoked. This may not be the case as it looks like it was built long after the hub was made. The AG hub shows 4 76 but the Rigida Superchromix rim appears to be from 11 84. That's not to say it's been laced up incorrectly but it does suggest it's not 'factory'
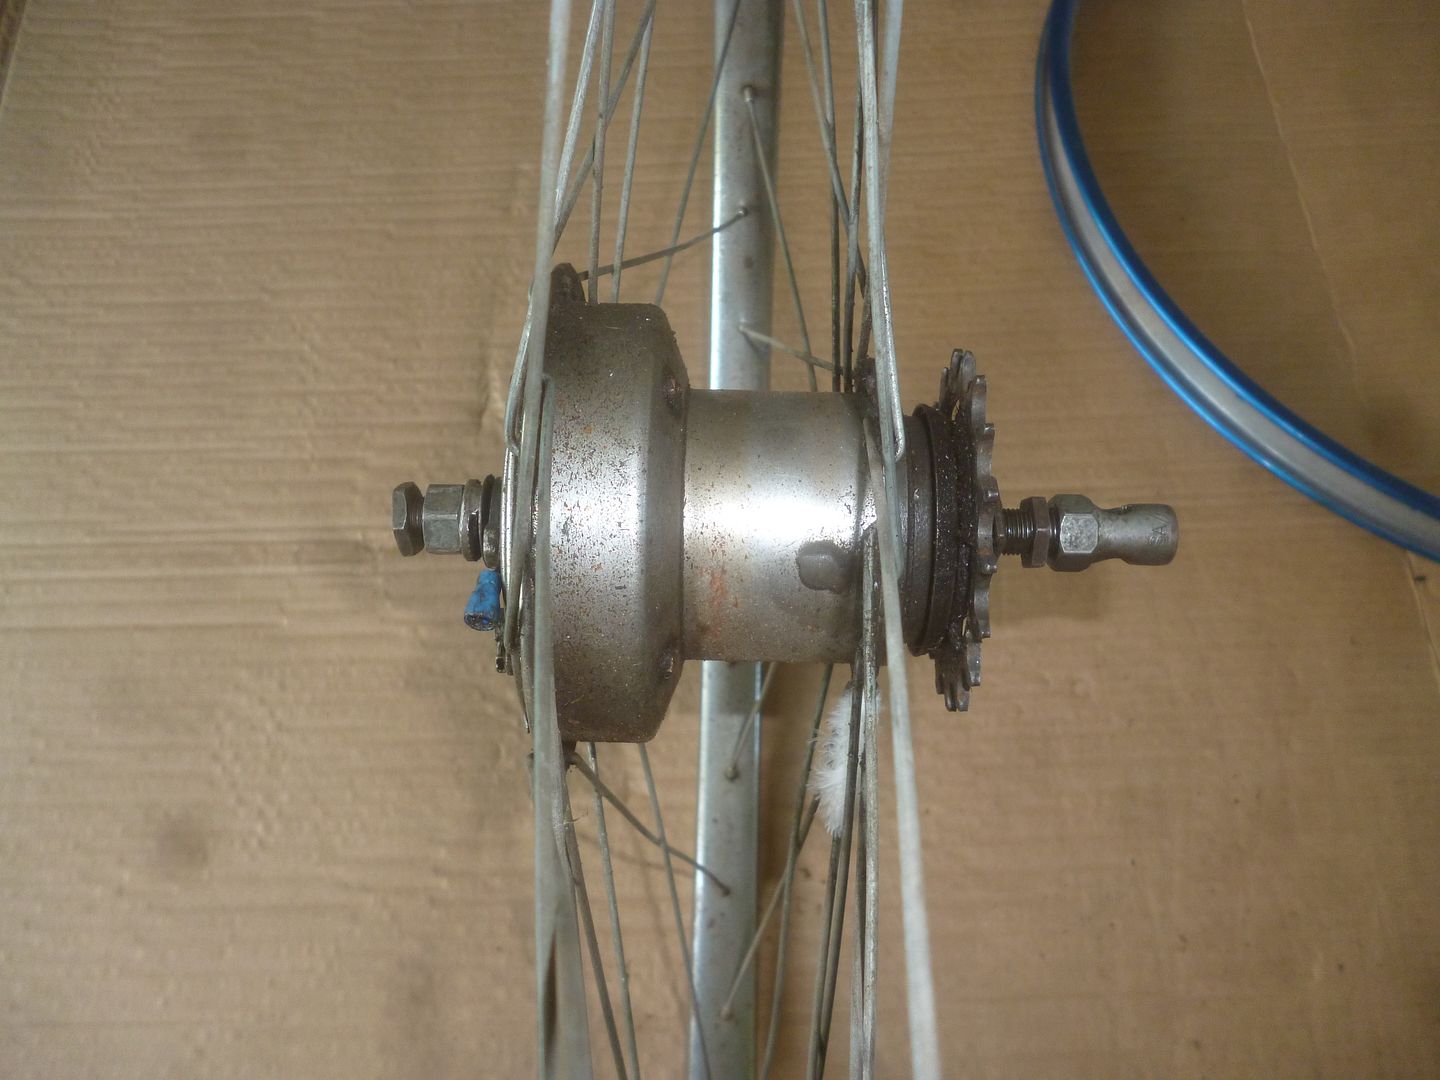
picture taken from centre of wheel shows Dyno-side flange offset further than drive-side
rim from donor wheel appears to be from November 1984
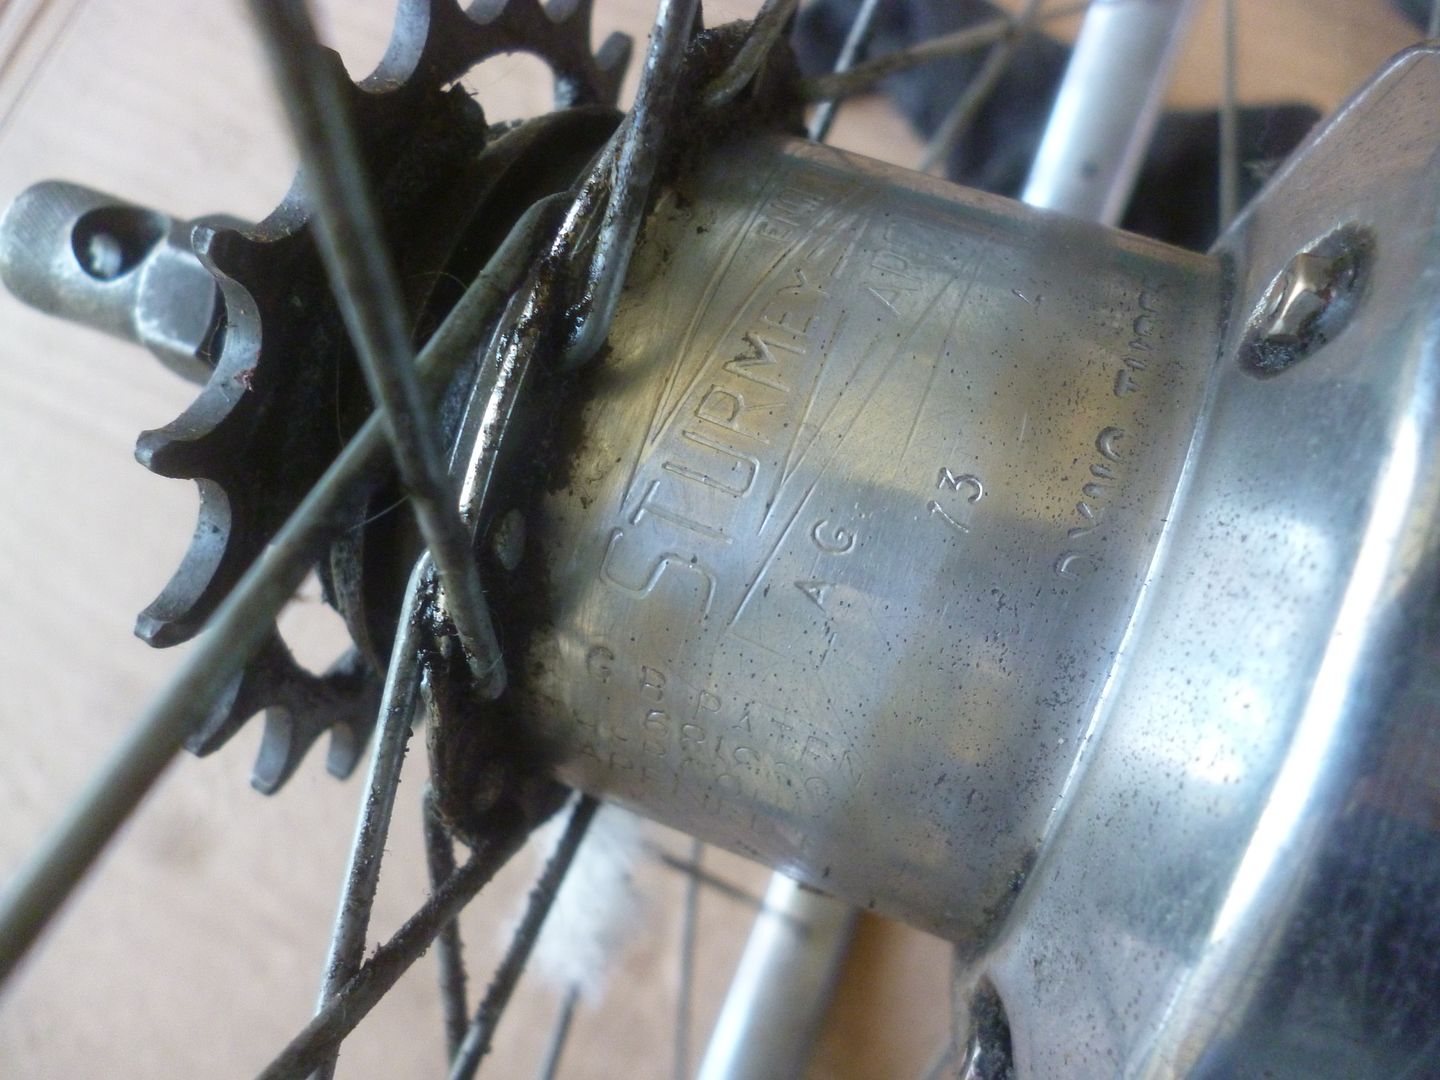
built around hub from April 1976
Anyway I made some progress today. In fact I think I got things bang-on and am concerned that it can't be this easy
I measured the hub & rims per the instructions on the link provided by 3alarmer with a steel tape and a straight edge. Not ideal but all I could do without vernier or similar.
These measurements over-rode the 'cigarette packet' ones in various ways. IE the distance between the flanges isn't needed and the diameter of the flanges is not needed. It's the diameter between the spoke hole centres that you need.
Anyway I punched in the data from the built-up wheel to see if it came up with the same length spokes as already fitted and it gave me 273.9mm & 268.6mm for the 274mm & 270mm that I measured on the spokes themselves. Pretty close

crude measurements from donor wheel input in calculator tell me spokes should be this length (3x column). They pretty much are
Bouyed by this apparent success I then changed the rim data to 542mm which I measred my blue rim ERD to be and it tells me I need to hunt for spokes 251mm & 256mm long. I wonder if the calculator accepts Imperial measurements as I see the older spokes are often listed in Imperial length rather than metric

I'll measure again with proper instruments before buying spokes but looks like I need 251mm & 256mm for the blue rim
On the subject of the donor wheel and my assumption that it is correctly spoked. This may not be the case as it looks like it was built long after the hub was made. The AG hub shows 4 76 but the Rigida Superchromix rim appears to be from 11 84. That's not to say it's been laced up incorrectly but it does suggest it's not 'factory'

picture taken from centre of wheel shows Dyno-side flange offset further than drive-side


rim from donor wheel appears to be from November 1984

built around hub from April 1976
Last edited by ffoxy99; 05-21-16 at 05:58 PM.
05-21-16, 06:37 PM
#13
Junior Member
Thread Starter
Join Date: Jun 2014
Posts: 20
Bikes: Raleigh Bomber, Raleigh Super Bomber
Mentioned: 0 Post(s)
Tagged: 0 Thread(s)
Quoted: 0 Post(s)
Likes: 0
Liked 0 Times
in
0 Posts
Here's a great way to measure rim diameter.
https://www.bikeforums.net/bicycle-me...ml#post6364862
https://www.bikeforums.net/bicycle-me...ml#post6364862
05-21-16, 06:59 PM
#14
Senior Member

Join Date: Mar 2008
Location: Rhode Island (an obscure suburb of Connecticut)
Posts: 5,630
Bikes: one of each
Mentioned: 5 Post(s)
Tagged: 0 Thread(s)
Quoted: 8 Post(s)
Likes: 0
Liked 12 Times
in
12 Posts
You probably already know this but don't take the Dynohub apart without reading the instructions cause you can damage the magnets or something like that.
05-21-16, 08:11 PM
#15
Old fart
Join Date: Nov 2004
Location: Appleton WI
Posts: 24,792
Bikes: Several, mostly not name brands.
Mentioned: 153 Post(s)
Tagged: 0 Thread(s)
Quoted: 3591 Post(s)
Liked 3,401 Times
in
1,935 Posts
It doesn't necessitate the use of spoke washers, but the washers do make it less likely for a spoke to break at the bend. That said, the Dynohub wheel on my commuter was built without spoke washers on the small flange side and has held up fine for years now.
05-22-16, 02:58 AM
#16
Junior Member
Thread Starter
Join Date: Jun 2014
Posts: 20
Bikes: Raleigh Bomber, Raleigh Super Bomber
Mentioned: 0 Post(s)
Tagged: 0 Thread(s)
Quoted: 0 Post(s)
Likes: 0
Liked 0 Times
in
0 Posts
05-22-16, 03:07 AM
#17
Junior Member
Thread Starter
Join Date: Jun 2014
Posts: 20
Bikes: Raleigh Bomber, Raleigh Super Bomber
Mentioned: 0 Post(s)
Tagged: 0 Thread(s)
Quoted: 0 Post(s)
Likes: 0
Liked 0 Times
in
0 Posts
What I've read is that If you use more modern spokes, designed for use with thicker-flanged alloy hubs, on an older steel hub you need spoke washers to pack out the extra length on the bends.
05-22-16, 03:58 AM
#18
Junior Member
Thread Starter
Join Date: Jun 2014
Posts: 20
Bikes: Raleigh Bomber, Raleigh Super Bomber
Mentioned: 0 Post(s)
Tagged: 0 Thread(s)
Quoted: 0 Post(s)
Likes: 0
Liked 0 Times
in
0 Posts
After the success in measuring my AG hub I had a go at my Sturmey Archer SBR. Am not sure how they arrived at the designations for the various hubs but I'm guessing Small Brake Rear. Mine has the 2 3/4" (70mm) brake but there was another similar model BR/C with a 3 1/2" (90mm) brake. Both these types accept a freewheel/cassette and have no internal gears.
This hub has the small flange with slotted spoke holes that you would find on a front Dynohub (GH6).
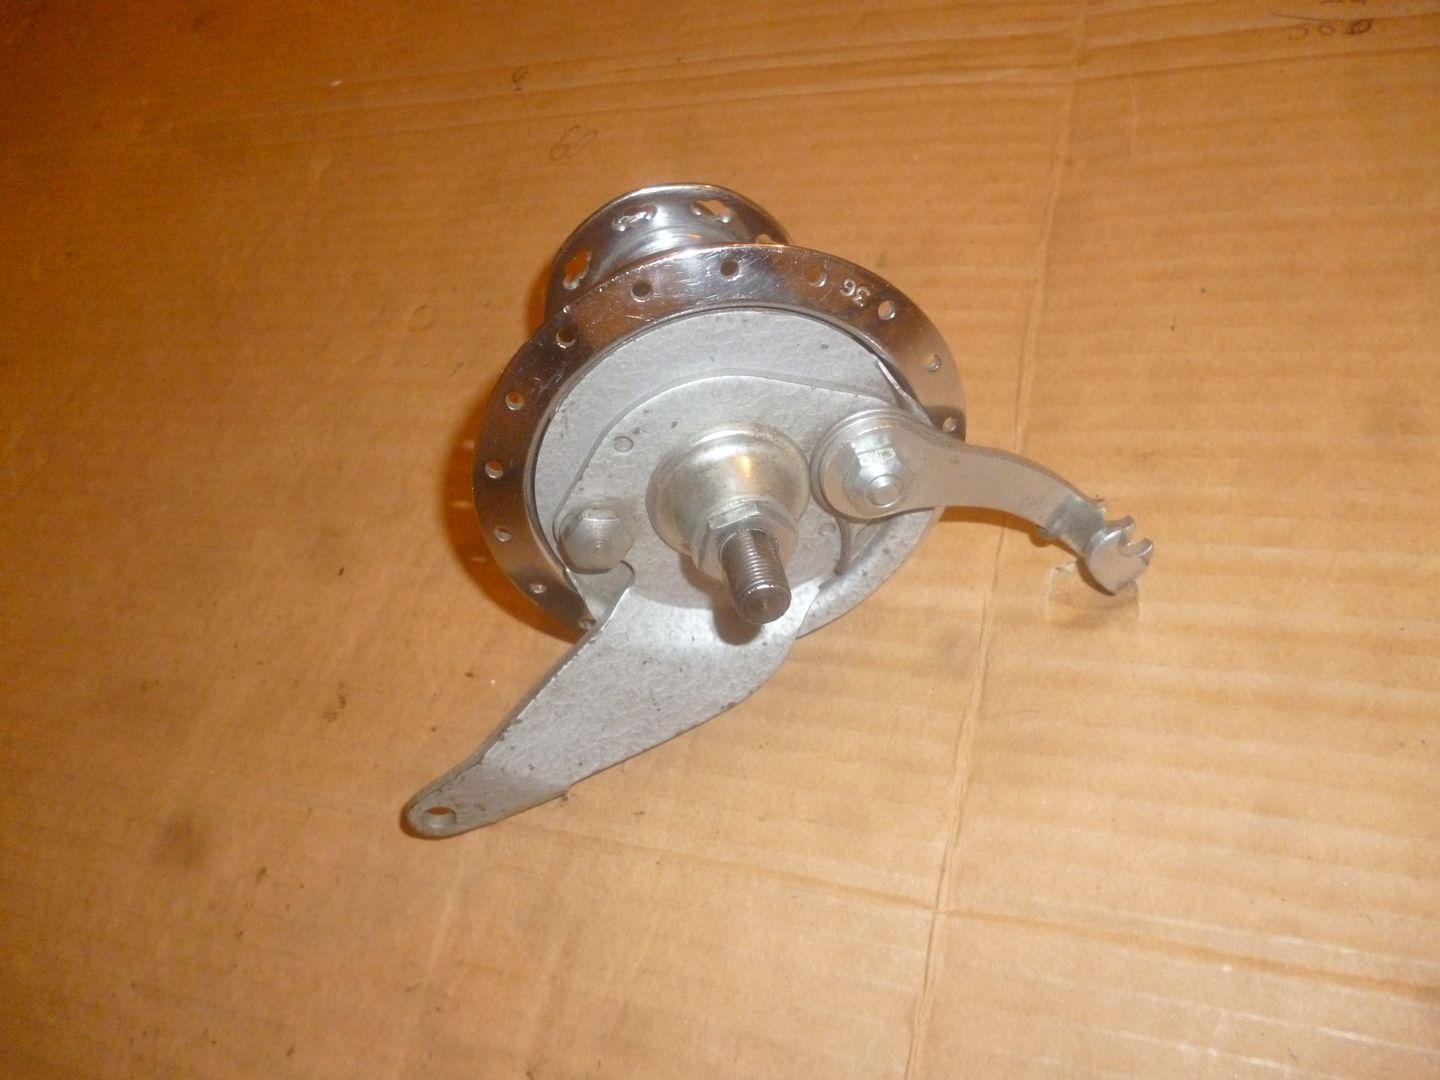
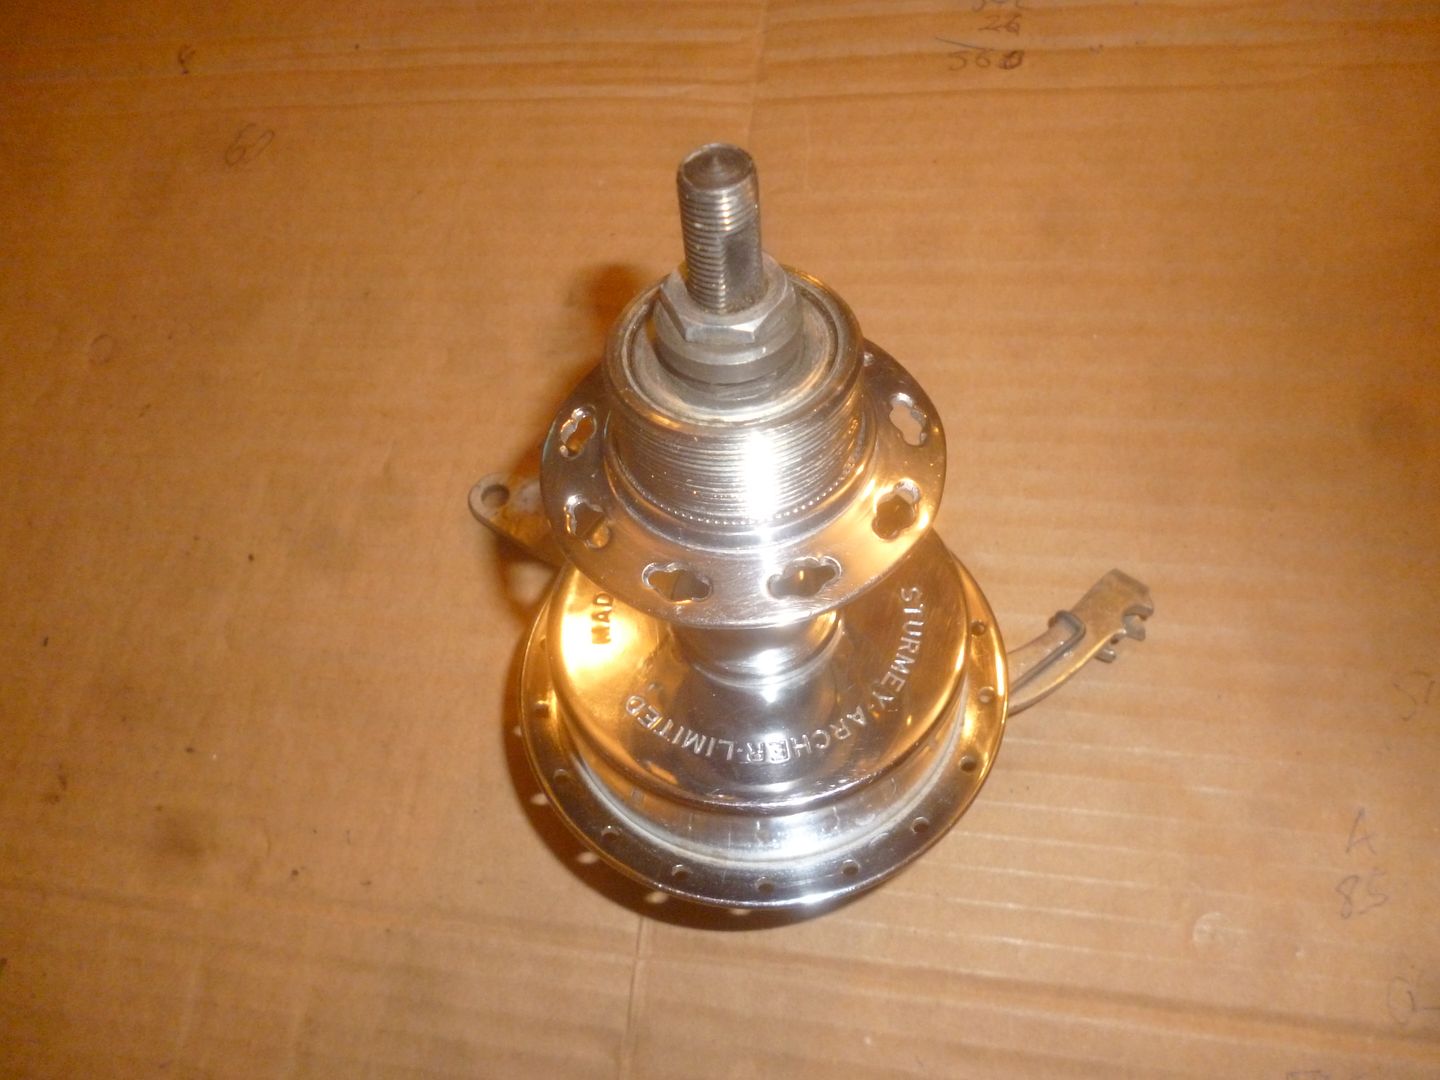
another Sturmey Archer hub I could put in my rim. This time a drum braked hub for use with a freewheel or derailleur
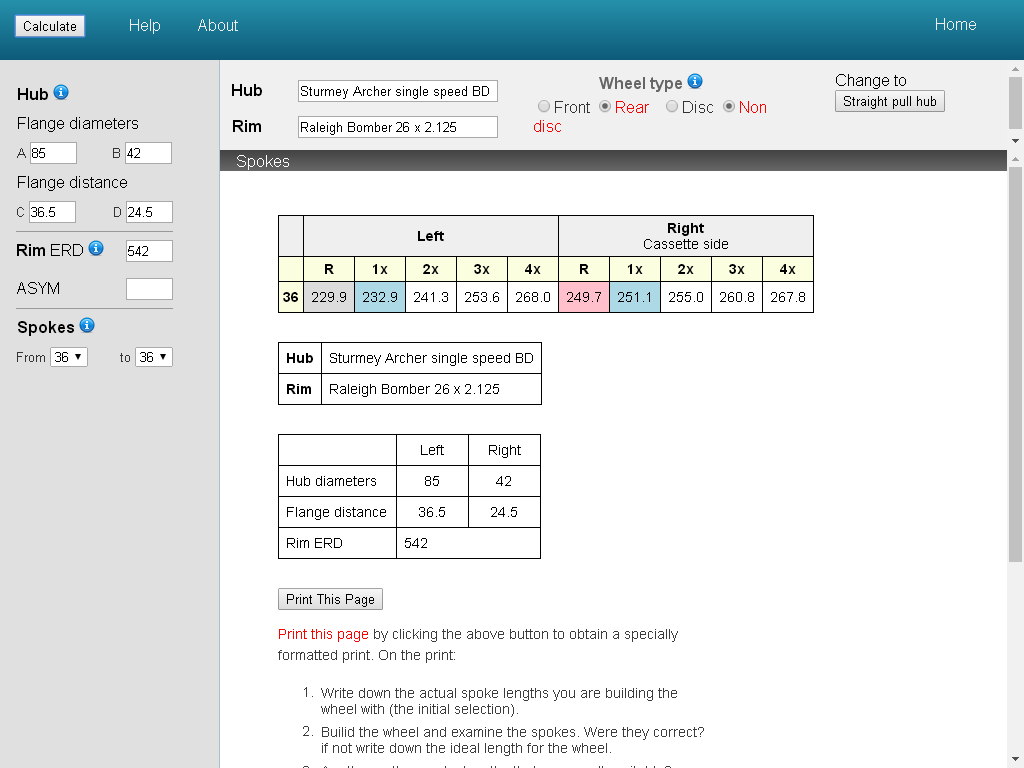
spoke length calculation (prepared prior to finding out it's an SBR)
This hub has the small flange with slotted spoke holes that you would find on a front Dynohub (GH6).


another Sturmey Archer hub I could put in my rim. This time a drum braked hub for use with a freewheel or derailleur

spoke length calculation (prepared prior to finding out it's an SBR)
05-22-16, 07:03 AM
#19
Old fart
Join Date: Nov 2004
Location: Appleton WI
Posts: 24,792
Bikes: Several, mostly not name brands.
Mentioned: 153 Post(s)
Tagged: 0 Thread(s)
Quoted: 3591 Post(s)
Liked 3,401 Times
in
1,935 Posts
Yes, if the original spokes are intact you can re-use them with a rim of the same ERD and spoke drilling. Fortunately, the Sun CR-18 rim is available in the 650A size (590mm ERD) and 32, 36, and 40 hole drillings, making it a drop-in replacement for the original rims on most British 3-speeds.
05-23-16, 03:26 PM
#20
Junior Member
Thread Starter
Join Date: Jun 2014
Posts: 20
Bikes: Raleigh Bomber, Raleigh Super Bomber
Mentioned: 0 Post(s)
Tagged: 0 Thread(s)
Quoted: 0 Post(s)
Likes: 0
Liked 0 Times
in
0 Posts
So I've bought a 2nd-hand vernier (Mitutoyo) from Ebay for just under �10 (I'm in the UK incidentally) so will wait till that arrives and measure accurately before I commit to buying some spokes.
I see lots of Sturmey Archer ones on Ebay so I'm going to go for that type in the hope that they are of pre alloy-flange era.
I've also been thinking about the whole 'offset hub' thing and it seems to me that the hub is never really offset in relation to the rim. For example this AG hub is offset (as you can see in my pic above) but once installed in the frame the rim is still central. It seems to me that a hub is only offset (when being laced up) to make the wheel sit centrally in the frame. Or, put another way, the hub is offset to compensate for the difference in the components on each side. Most obvious would be the drive sprocket. If the hub was laced with no offset you'd need a spacer on the non-drive side equal to the extra width the sprocket creates.
Also been thinking about the C & D hub measurements required for the spoke-length calculator. If you had to describe to someone what you are trying to establish I'd say you are getting the mid-point of the OLN distance then measuring how far the flanges left (C) and right (D) are from that point.

