


Switchback Replacement Fork Blades
 07-25-23, 08:21 PM
#1

Senior Member
Thread Starter
Join Date: Feb 2012
Location: Rochester, NY
Posts: 18,098
Bikes: Stewart S&S coupled sport tourer, Stewart Sunday light, Stewart Commuting, Stewart Touring, Co Motion Tandem, Stewart 3-Spd, Stewart Track, Fuji Finest, Mongoose Tomac ATB, GT Bravado ATB, JCP Folder, Stewart 650B ATB
Mentioned: 0 Post(s)
Tagged: 0 Thread(s)
Quoted: 4211 Post(s)
Liked 3,881 Times
in
2,316 Posts
Switchback Replacement Fork Blades
In early Feb this year Smokinapancake (Jody) posted a want for replacement fork blades for his NOS Tange Switchback fork crown/steerer. Here's that thread Fork blades needed/fabricated. Who can and will? - Bike Forums Like a proud newbie I replied that the project shouldn't be too hard or involved to do. Soon this led to my agreeing to doing it. What was supposed to be a quick turnaround ended up taking nearly 5 months to get done. Here's the story.
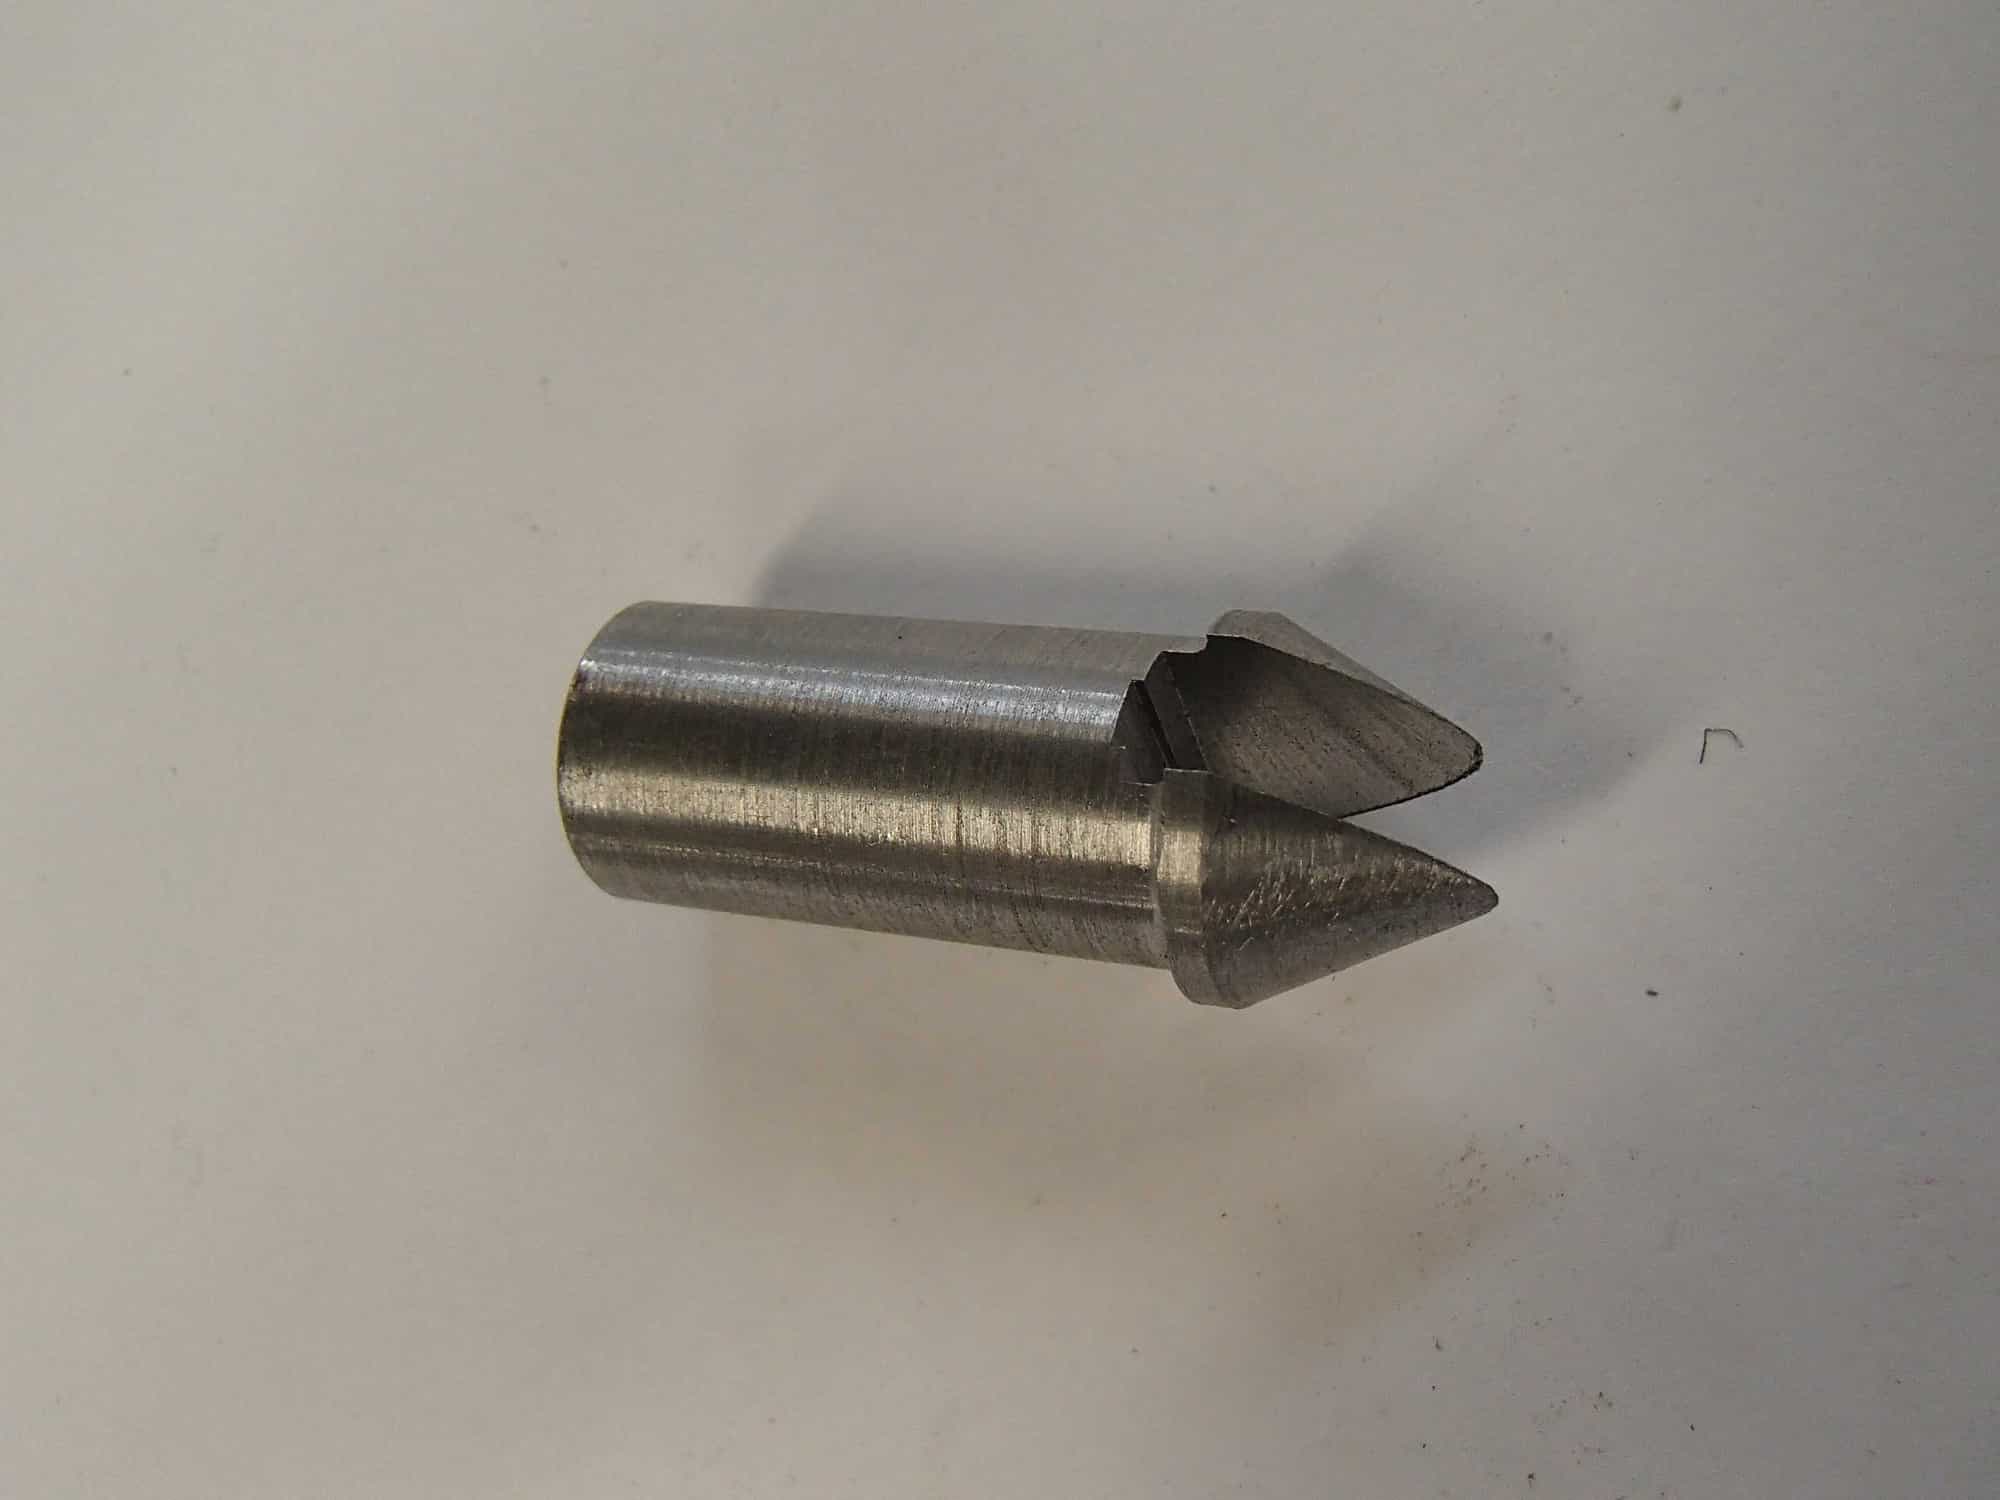
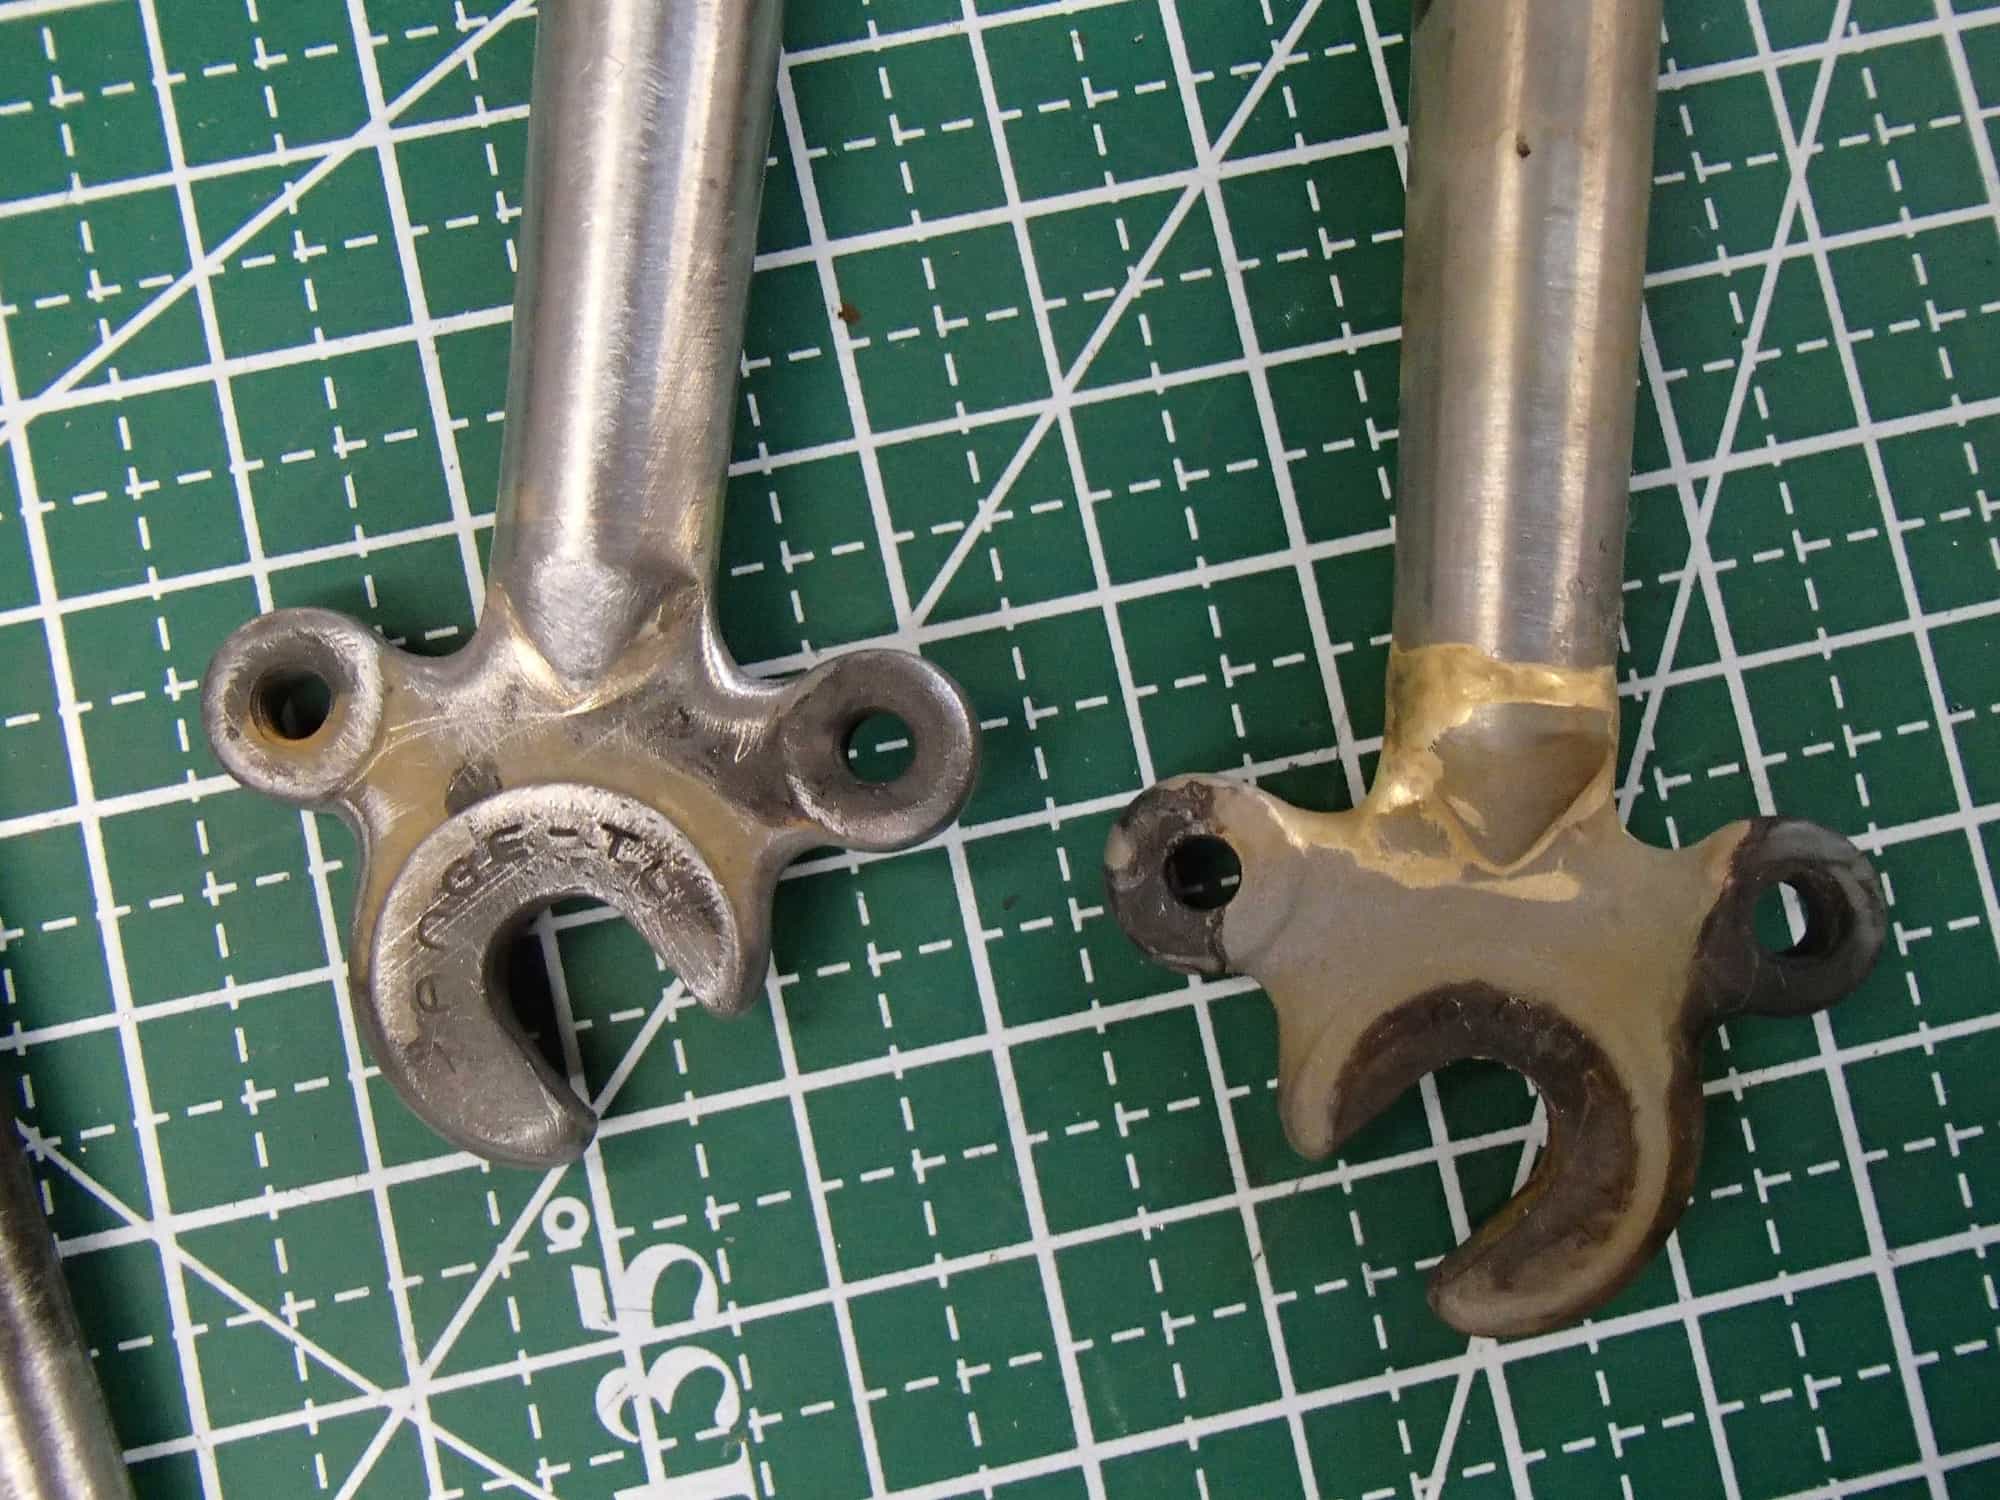
In mid Feb Jody sent me the steerer/crown, the 24mm round blades and a pair of sleeves/shims (that a machinist friend made) to fit the blades into the crown's 1" blade holes. We traded a few emails of various details before I realized the sleeves were of Stainless Steel and my brazing skills weren't up to that much flowing of silver with a SS material. So the sleeves went back and in time he sent me a pair of "common" steel ones. In between I tried to turn my own sleeves but as you can see they were not anywhere near as nice as the machinist made ones. I also used this time to make a pair of blade ends that both filled the blade ends and mimicked the stay end treatment that the frame's read end used.
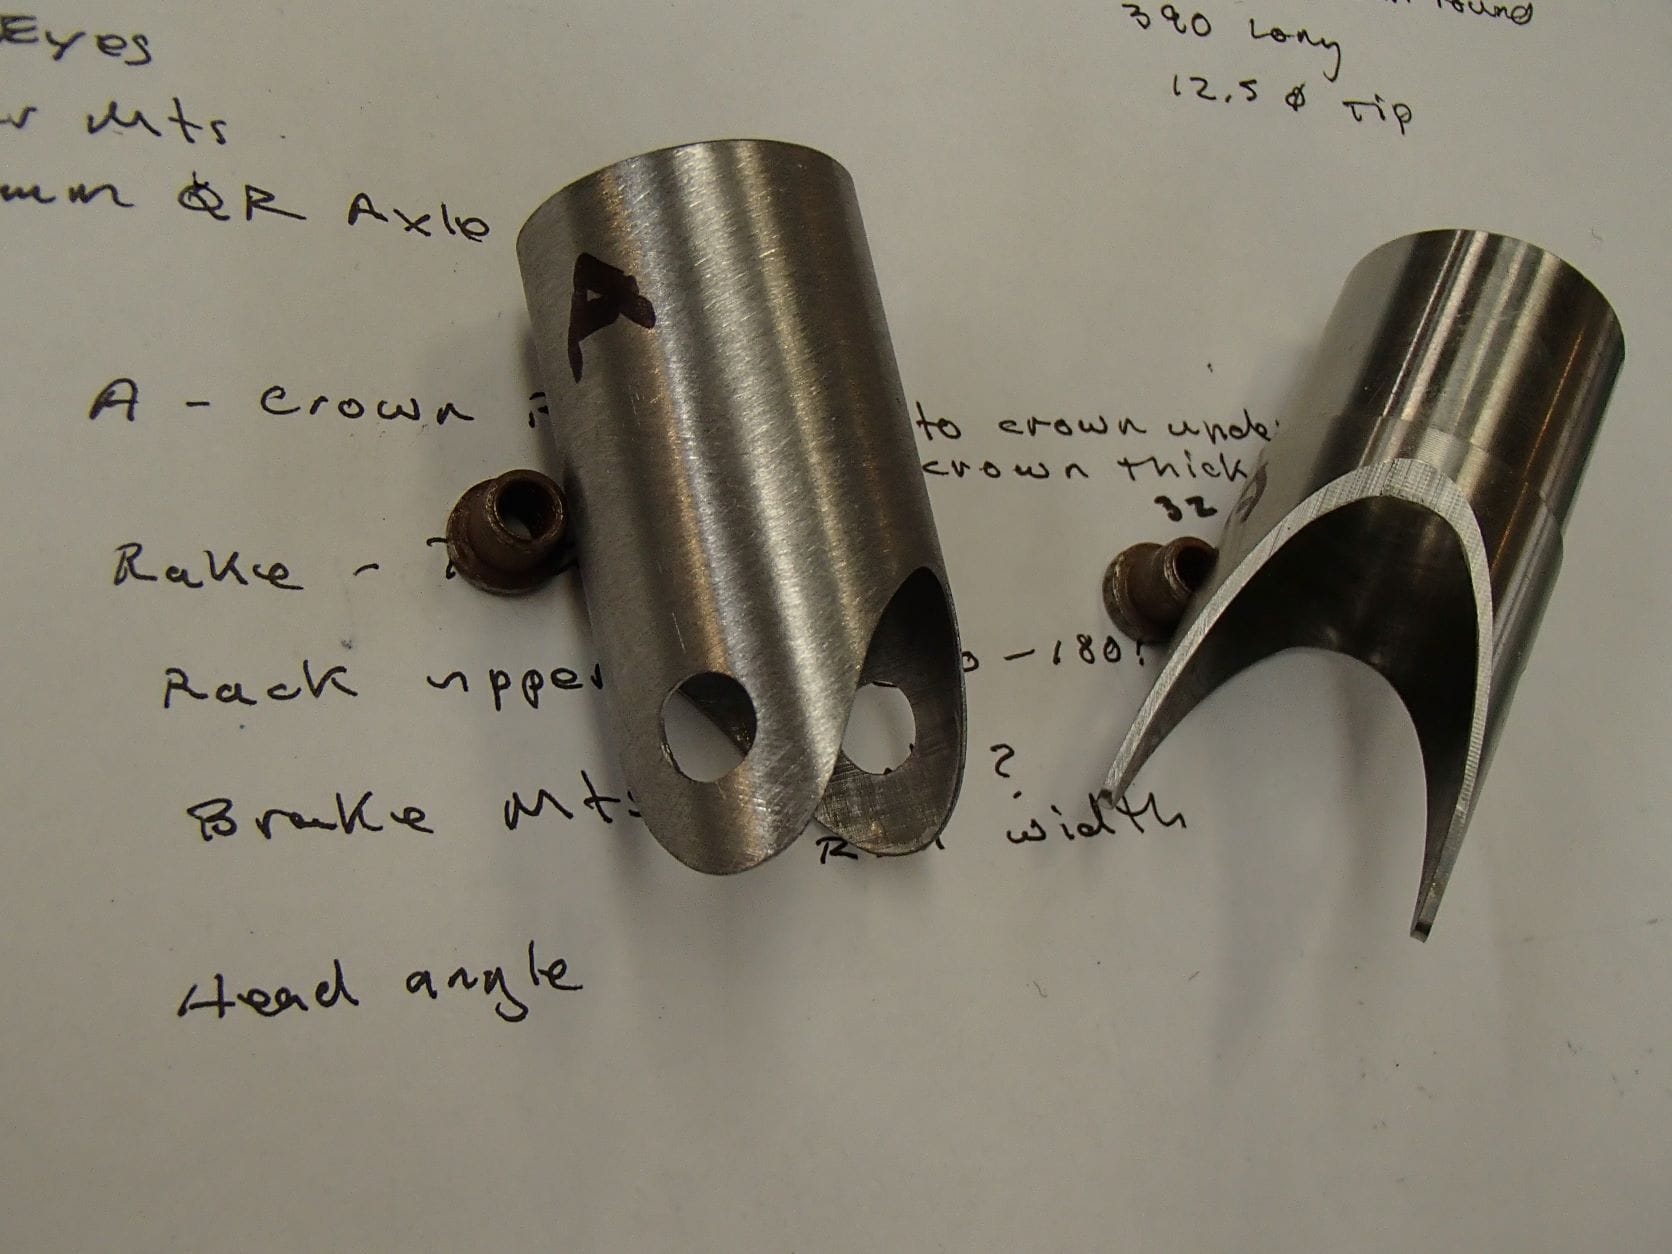
One detail was to refile the supplied sleeves' shorelines to be more square with the blade surface. One is done the other waits.
The dropouts and fabbed plugs were brazed together and cleaned up next. The male plug is left long for now.

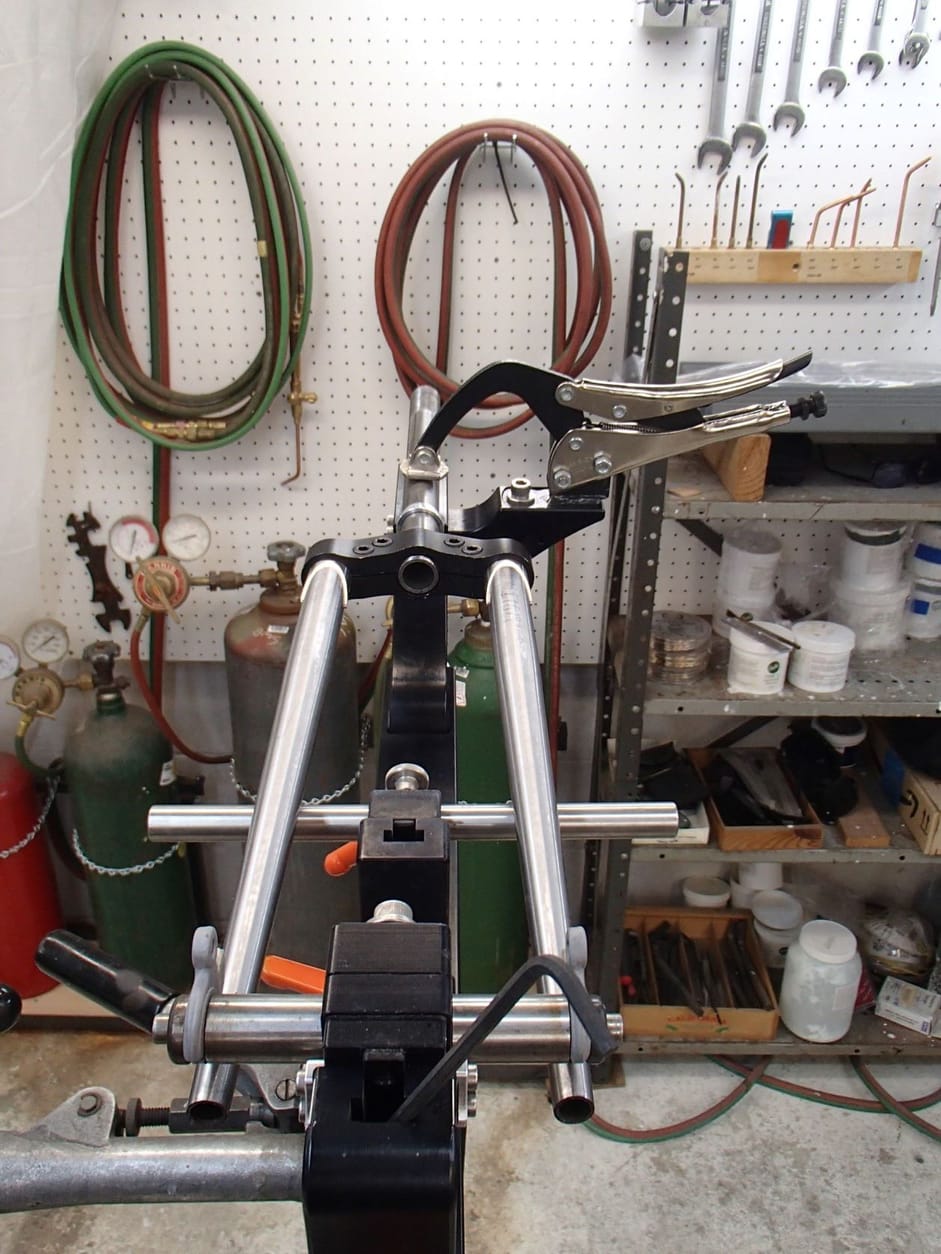
Initial fitting to determine the placement of the sleeves. I took a lot of time here and went back and reviewed many times, braze once... measure many times
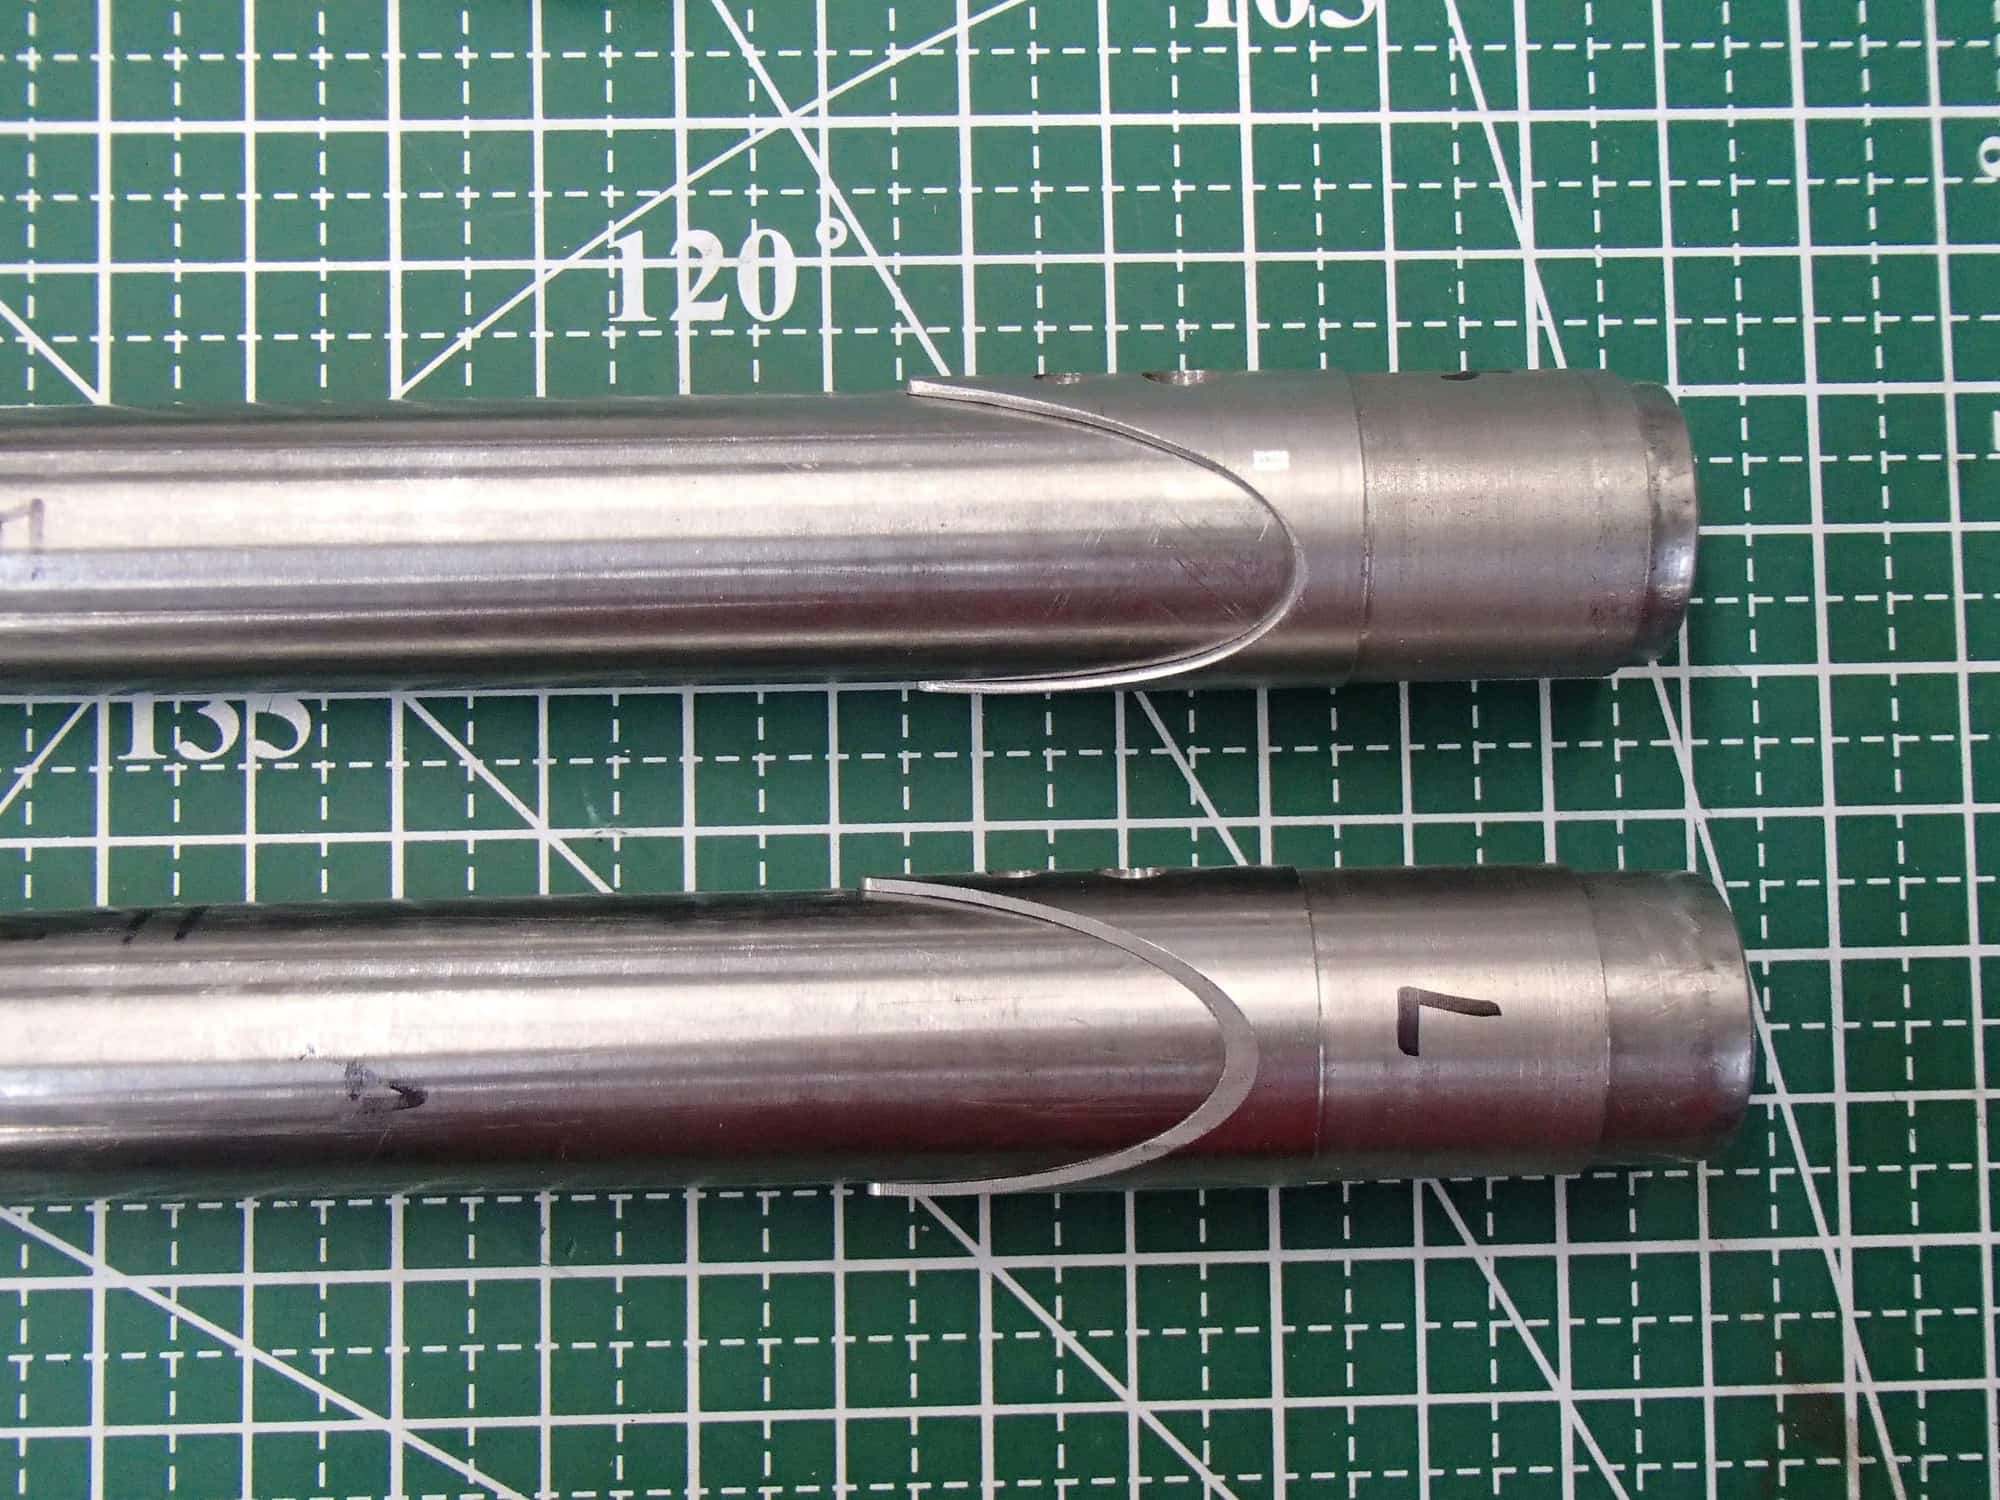
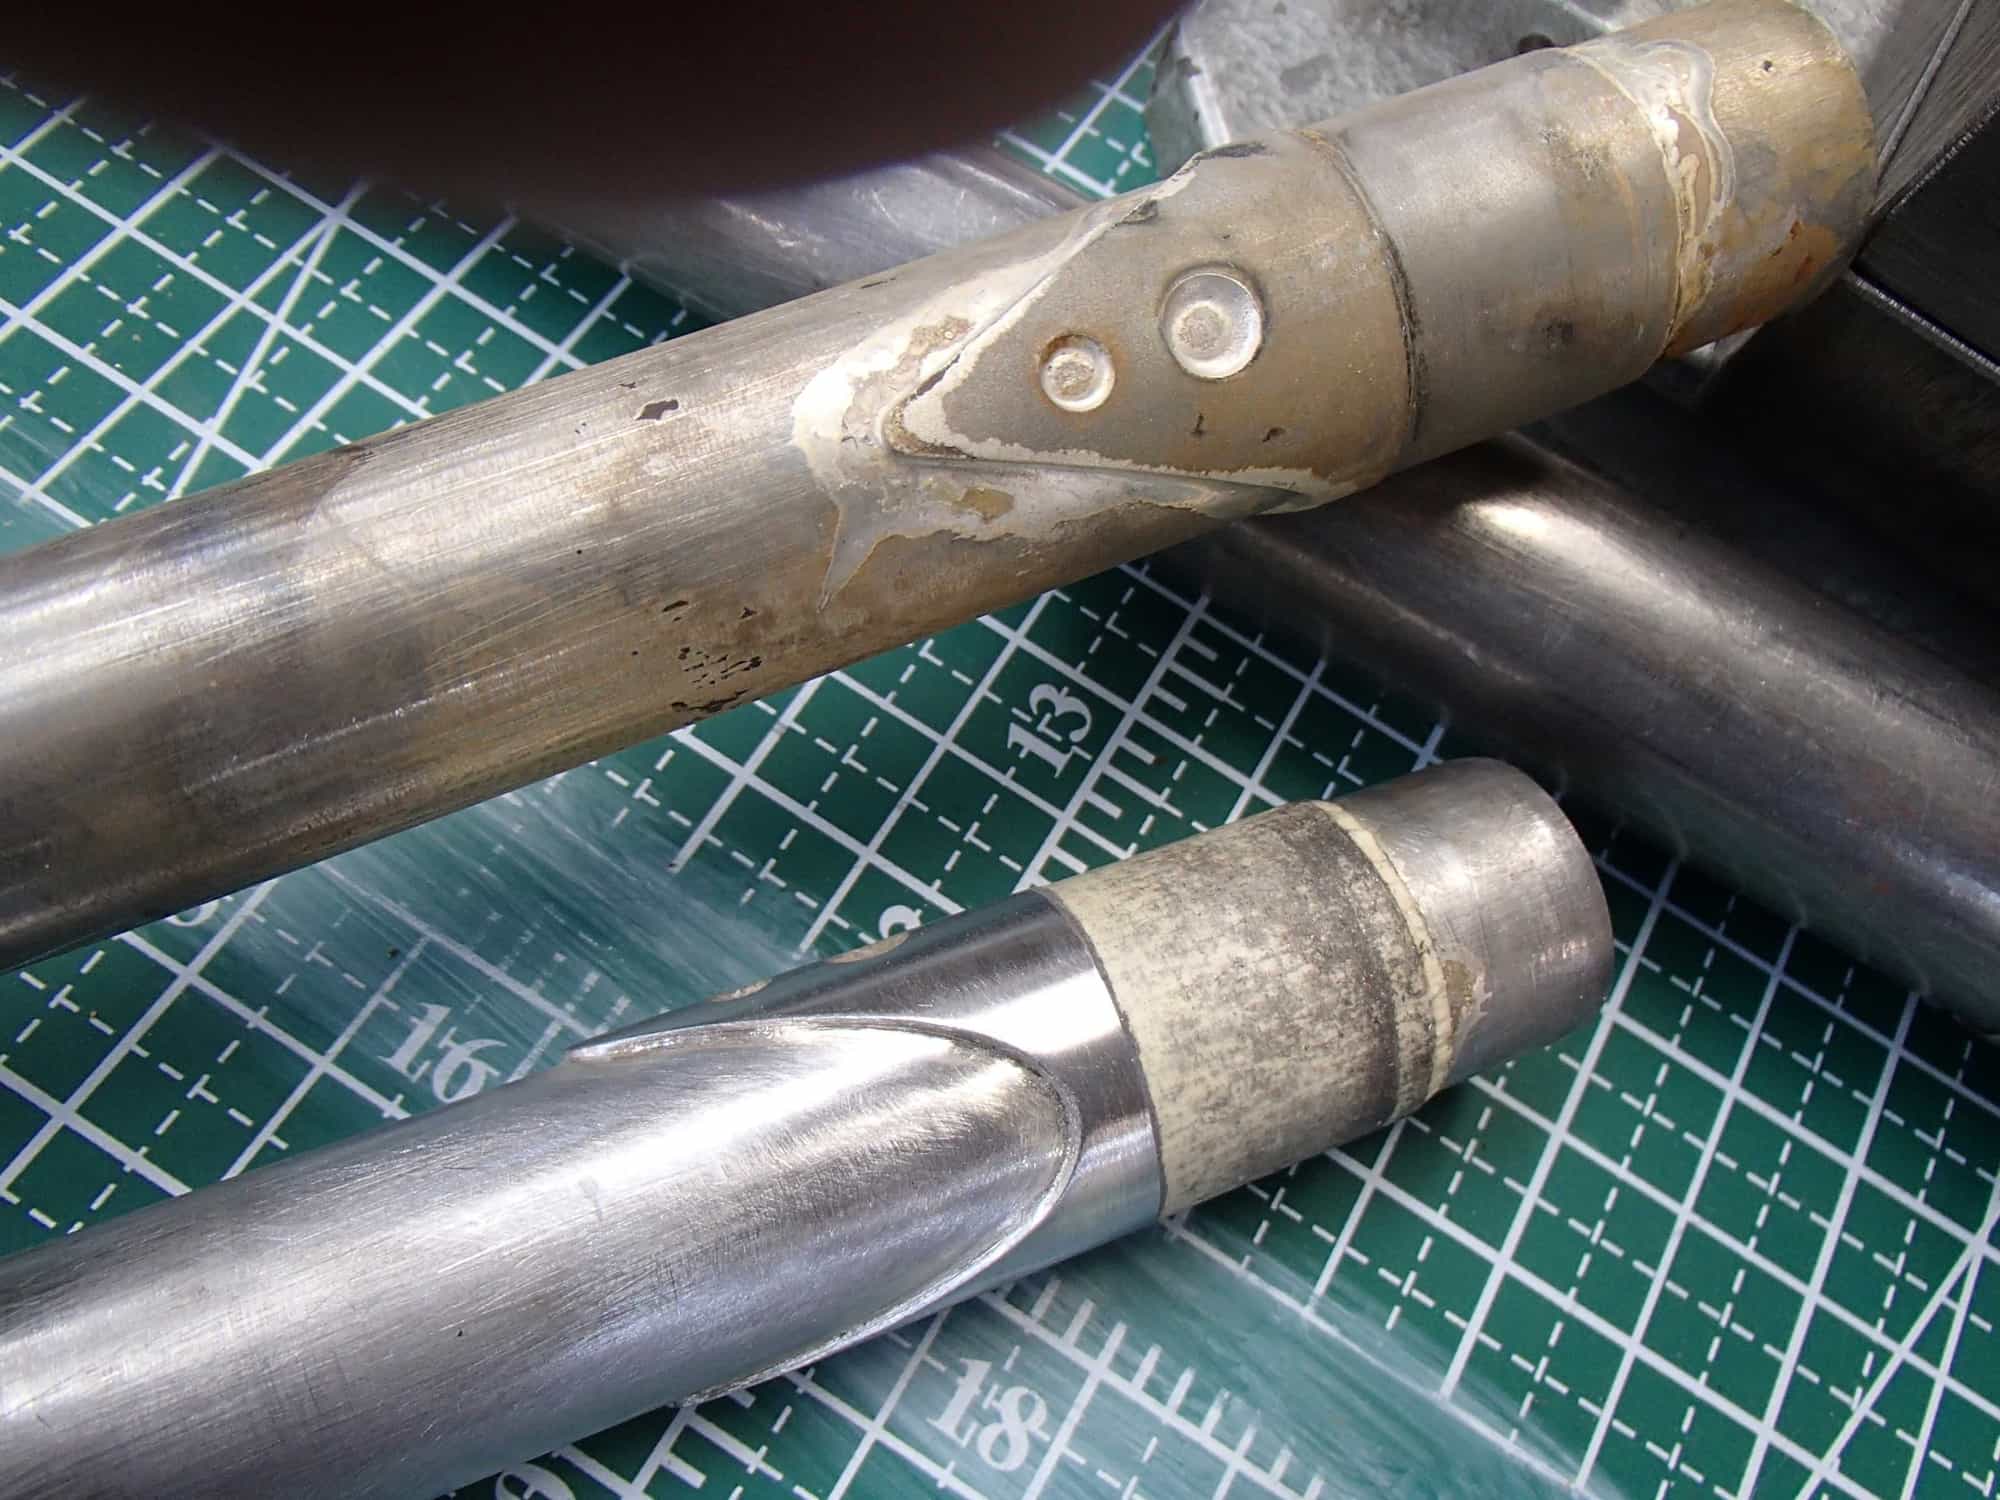
Decided on blade length and brazed the dropouts to the blades. Bronze rod was curled into a "charge", loaded in the blade and sweated out.
Then I brazed the sleeves onto the blades.
The final two details were the Low Rider rack bosses (bottle mounts) and the canti bosses. Again I took some time with the brake mounts. The very wide spread between the blades (nearly 100mm c-c) at the top required a set of bosses with a large offset. Thankfully I have bought a few odd bits over the years including Shimano made canti bosses which resulted in a nearly 81mm boss c-c. The bosses were tacked and double checked for placement before fully brazing them.

There were a few challenges throughout the project. The dropout plugs were not hard to make but did take some time and I have a spare one that is almost but not quite right... With a blade clamped in the crown the whole alignment thing was a bit variable. During the initial fit up I found that when rotating the blades within the crown it changed how the ends lined up with the dropouts (blades are not perfectly straight). Getting the blade to be reinstalled in the crown during the various steps in exactly the same rotational and lengthwise placement was not as straightforward as I had assumed it would be. I took much efforts to try to maintain the alignment and used pins on the sleeve/blade fit to trap the rotational aspect. After the blades were finally brazed and files/sanded the crown's not having a bottom surface that was square to the blades became obvious (that 7" slant of the clamping holes was the reason.) I avoided as much of filing/sanding of the sleeves' crown contact surfaces as possible to maintain their fit and clamping ability, only a light filing of silver flash and sand blasting dusting was done there, the original machining marks are still present. Jody will deal with the steerer's crown race seating as well as any threading issues. he will also handle the finish painting.
For me this was an unusual project that mushroomed larger than I had anticipated, presented some issues I had not before been faced with and turned out fairly well. No way would I suggest others doing this and I can understand why other builders shied away. Way too many hours and months on this one. Andy
In mid Feb Jody sent me the steerer/crown, the 24mm round blades and a pair of sleeves/shims (that a machinist friend made) to fit the blades into the crown's 1" blade holes. We traded a few emails of various details before I realized the sleeves were of Stainless Steel and my brazing skills weren't up to that much flowing of silver with a SS material. So the sleeves went back and in time he sent me a pair of "common" steel ones. In between I tried to turn my own sleeves but as you can see they were not anywhere near as nice as the machinist made ones. I also used this time to make a pair of blade ends that both filled the blade ends and mimicked the stay end treatment that the frame's read end used.
One detail was to refile the supplied sleeves' shorelines to be more square with the blade surface. One is done the other waits.
The dropouts and fabbed plugs were brazed together and cleaned up next. The male plug is left long for now.
Initial fitting to determine the placement of the sleeves. I took a lot of time here and went back and reviewed many times, braze once... measure many times
Decided on blade length and brazed the dropouts to the blades. Bronze rod was curled into a "charge", loaded in the blade and sweated out.
Then I brazed the sleeves onto the blades.
The final two details were the Low Rider rack bosses (bottle mounts) and the canti bosses. Again I took some time with the brake mounts. The very wide spread between the blades (nearly 100mm c-c) at the top required a set of bosses with a large offset. Thankfully I have bought a few odd bits over the years including Shimano made canti bosses which resulted in a nearly 81mm boss c-c. The bosses were tacked and double checked for placement before fully brazing them.
There were a few challenges throughout the project. The dropout plugs were not hard to make but did take some time and I have a spare one that is almost but not quite right... With a blade clamped in the crown the whole alignment thing was a bit variable. During the initial fit up I found that when rotating the blades within the crown it changed how the ends lined up with the dropouts (blades are not perfectly straight). Getting the blade to be reinstalled in the crown during the various steps in exactly the same rotational and lengthwise placement was not as straightforward as I had assumed it would be. I took much efforts to try to maintain the alignment and used pins on the sleeve/blade fit to trap the rotational aspect. After the blades were finally brazed and files/sanded the crown's not having a bottom surface that was square to the blades became obvious (that 7" slant of the clamping holes was the reason.) I avoided as much of filing/sanding of the sleeves' crown contact surfaces as possible to maintain their fit and clamping ability, only a light filing of silver flash and sand blasting dusting was done there, the original machining marks are still present. Jody will deal with the steerer's crown race seating as well as any threading issues. he will also handle the finish painting.
For me this was an unusual project that mushroomed larger than I had anticipated, presented some issues I had not before been faced with and turned out fairly well. No way would I suggest others doing this and I can understand why other builders shied away. Way too many hours and months on this one. Andy
__________________
AndrewRStewart
AndrewRStewart

Likes For Andrew R Stewart:
08-08-23, 10:06 AM
#2
Senior Member
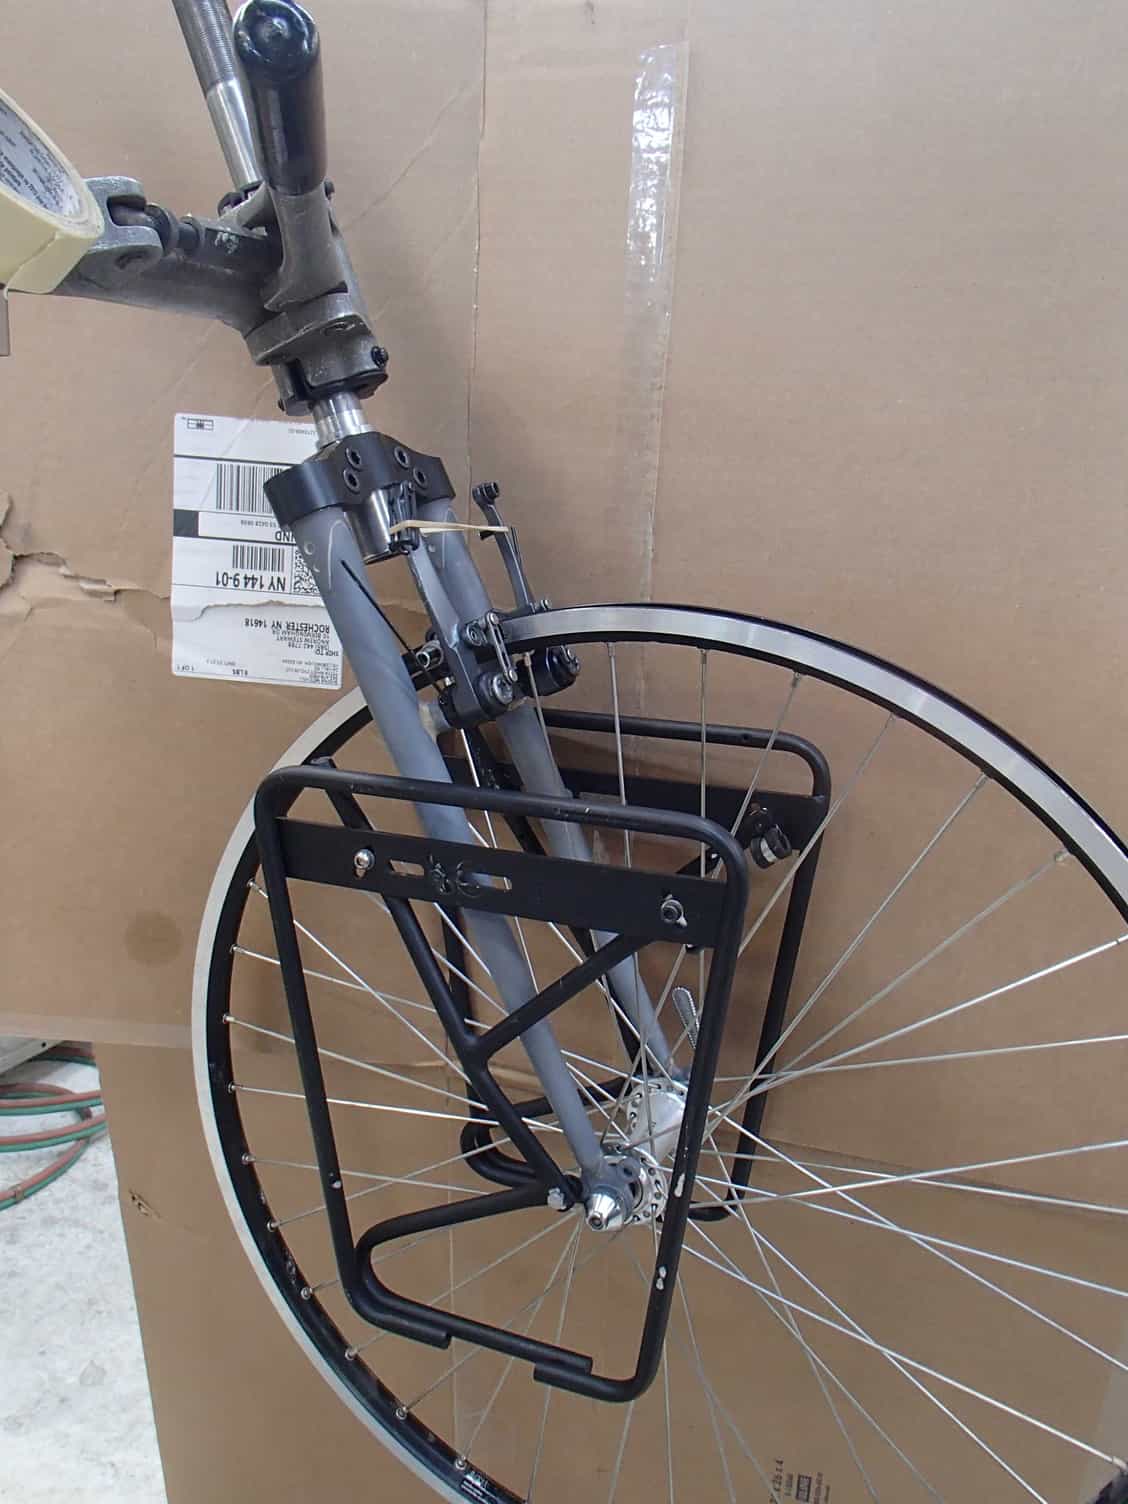
I'm sorry Andy for all the uncertainties of this project. I thought it would be a relatively straightforward deal. Thanks again for your patience and expertise in this. I have not installed the forks yet; too many summer projects to get done. But I will say they are absolutely lovely and are everything I'd hoped they would be. The fork tips are fantastic and will match the rear stay ends of the Fat City Wicked Fat Chance they are destined for ever so nicely.
I'll attach some pics later as I'm currently at work.
I'll attach some pics later as I'm currently at work.
