


Mercian Vincitore - stoked but there's work to do!
 06-09-23, 04:20 PM
#1

Senior Member
Thread Starter

Join Date: Aug 2016
Location: Visalia, CA
Posts: 2,249
Mentioned: 45 Post(s)
Tagged: 0 Thread(s)
Quoted: 981 Post(s)
Liked 1,844 Times
in
609 Posts
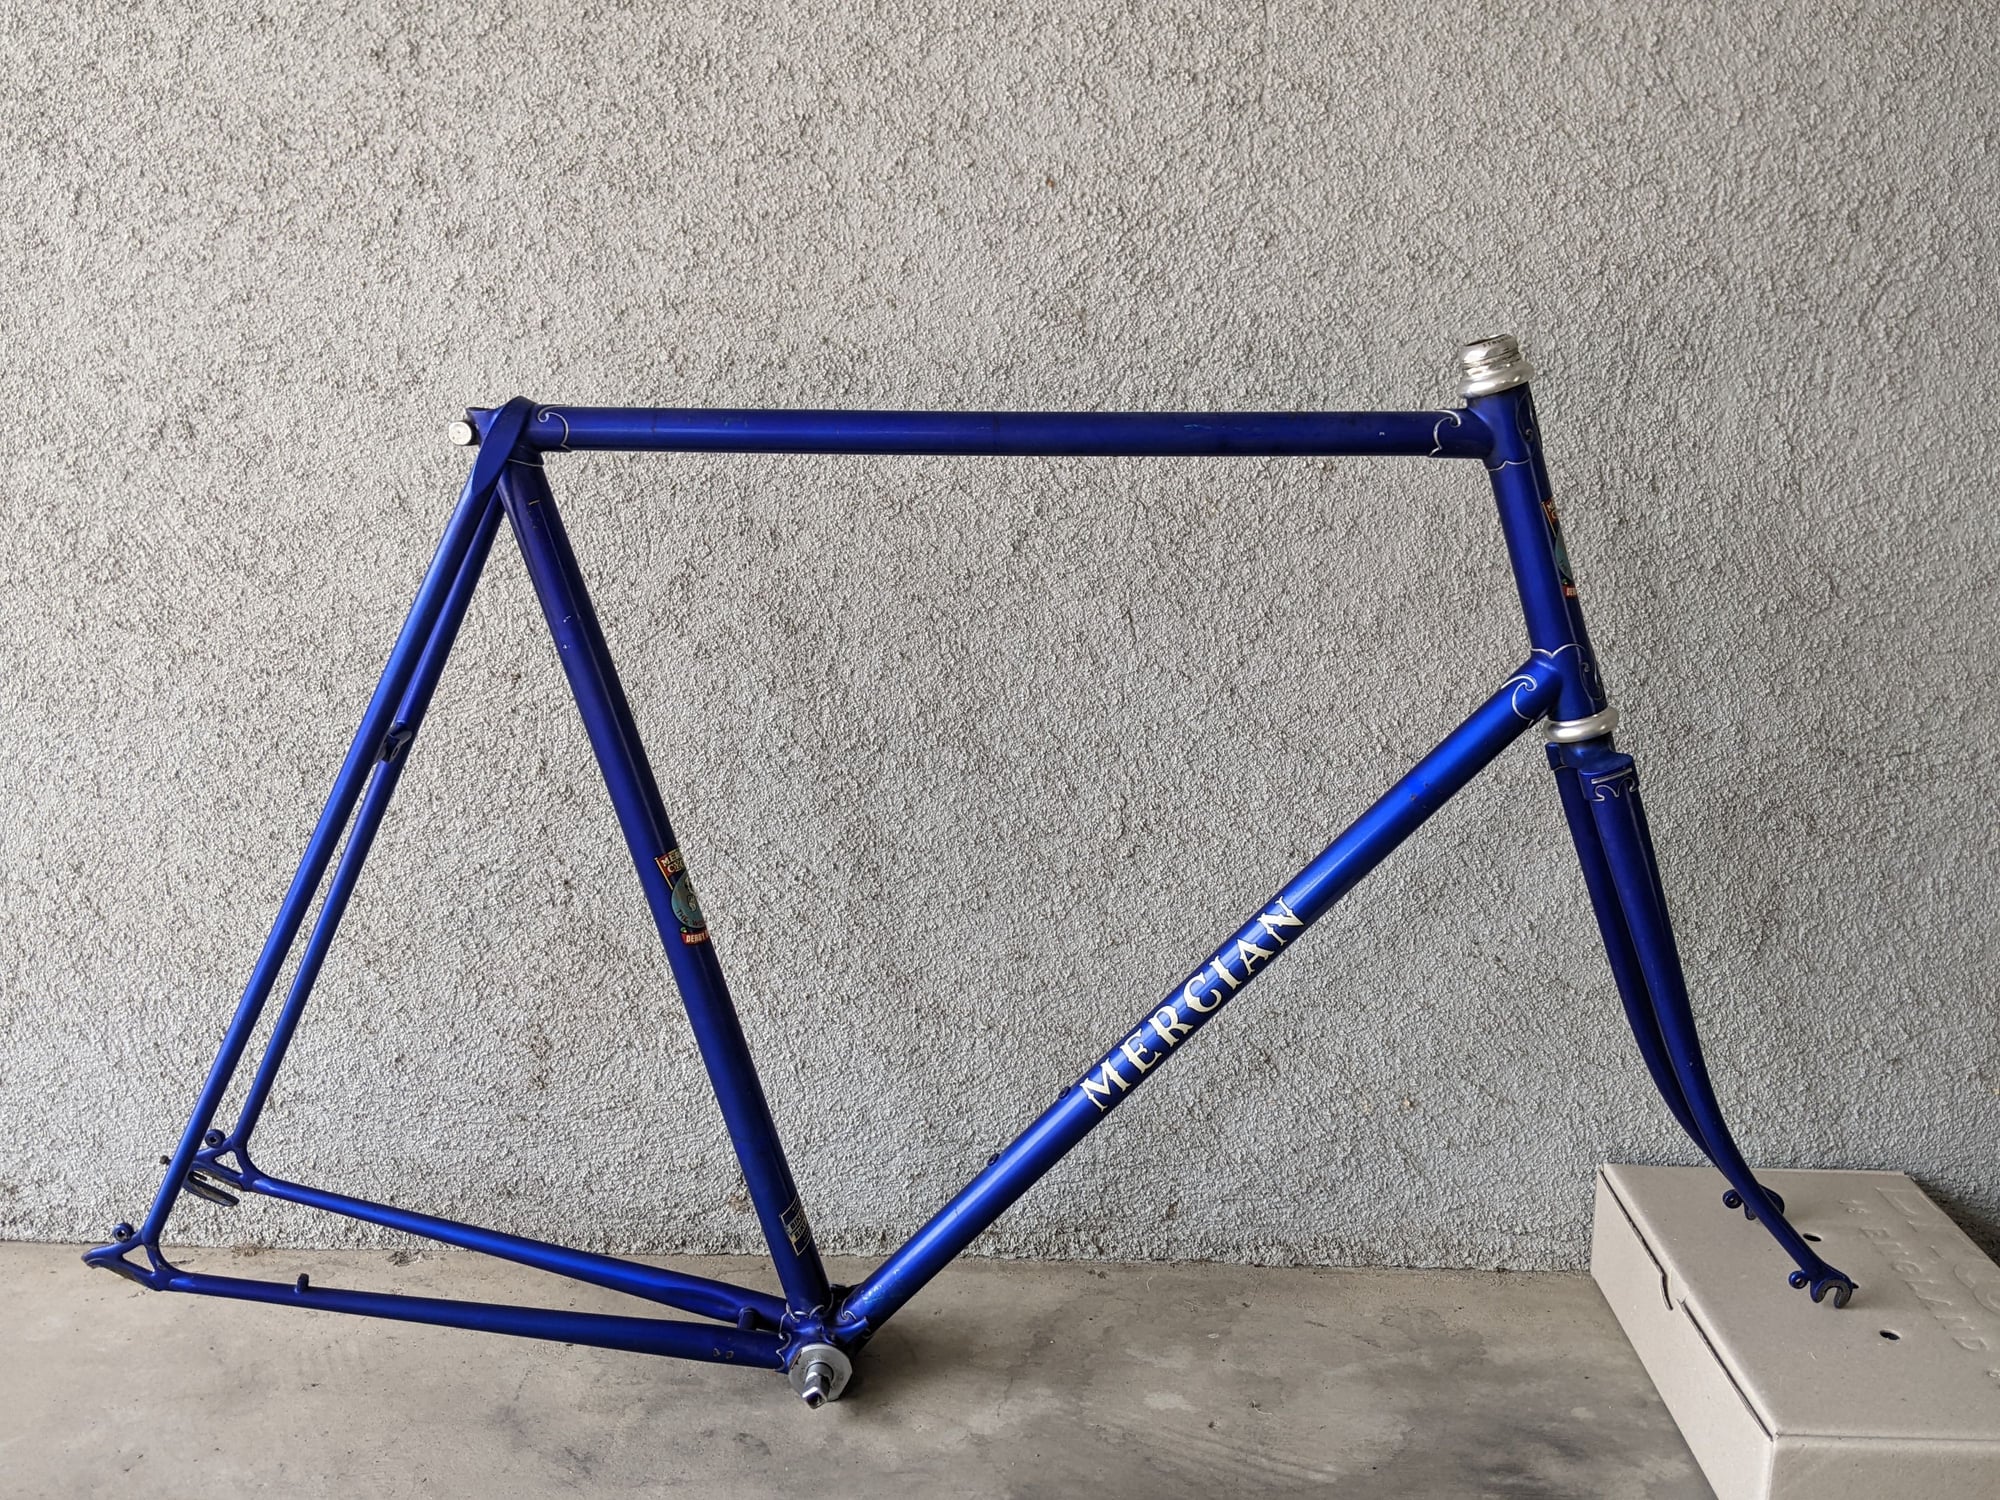
Mercian Vincitore - stoked but there's work to do!
Howdy folks,
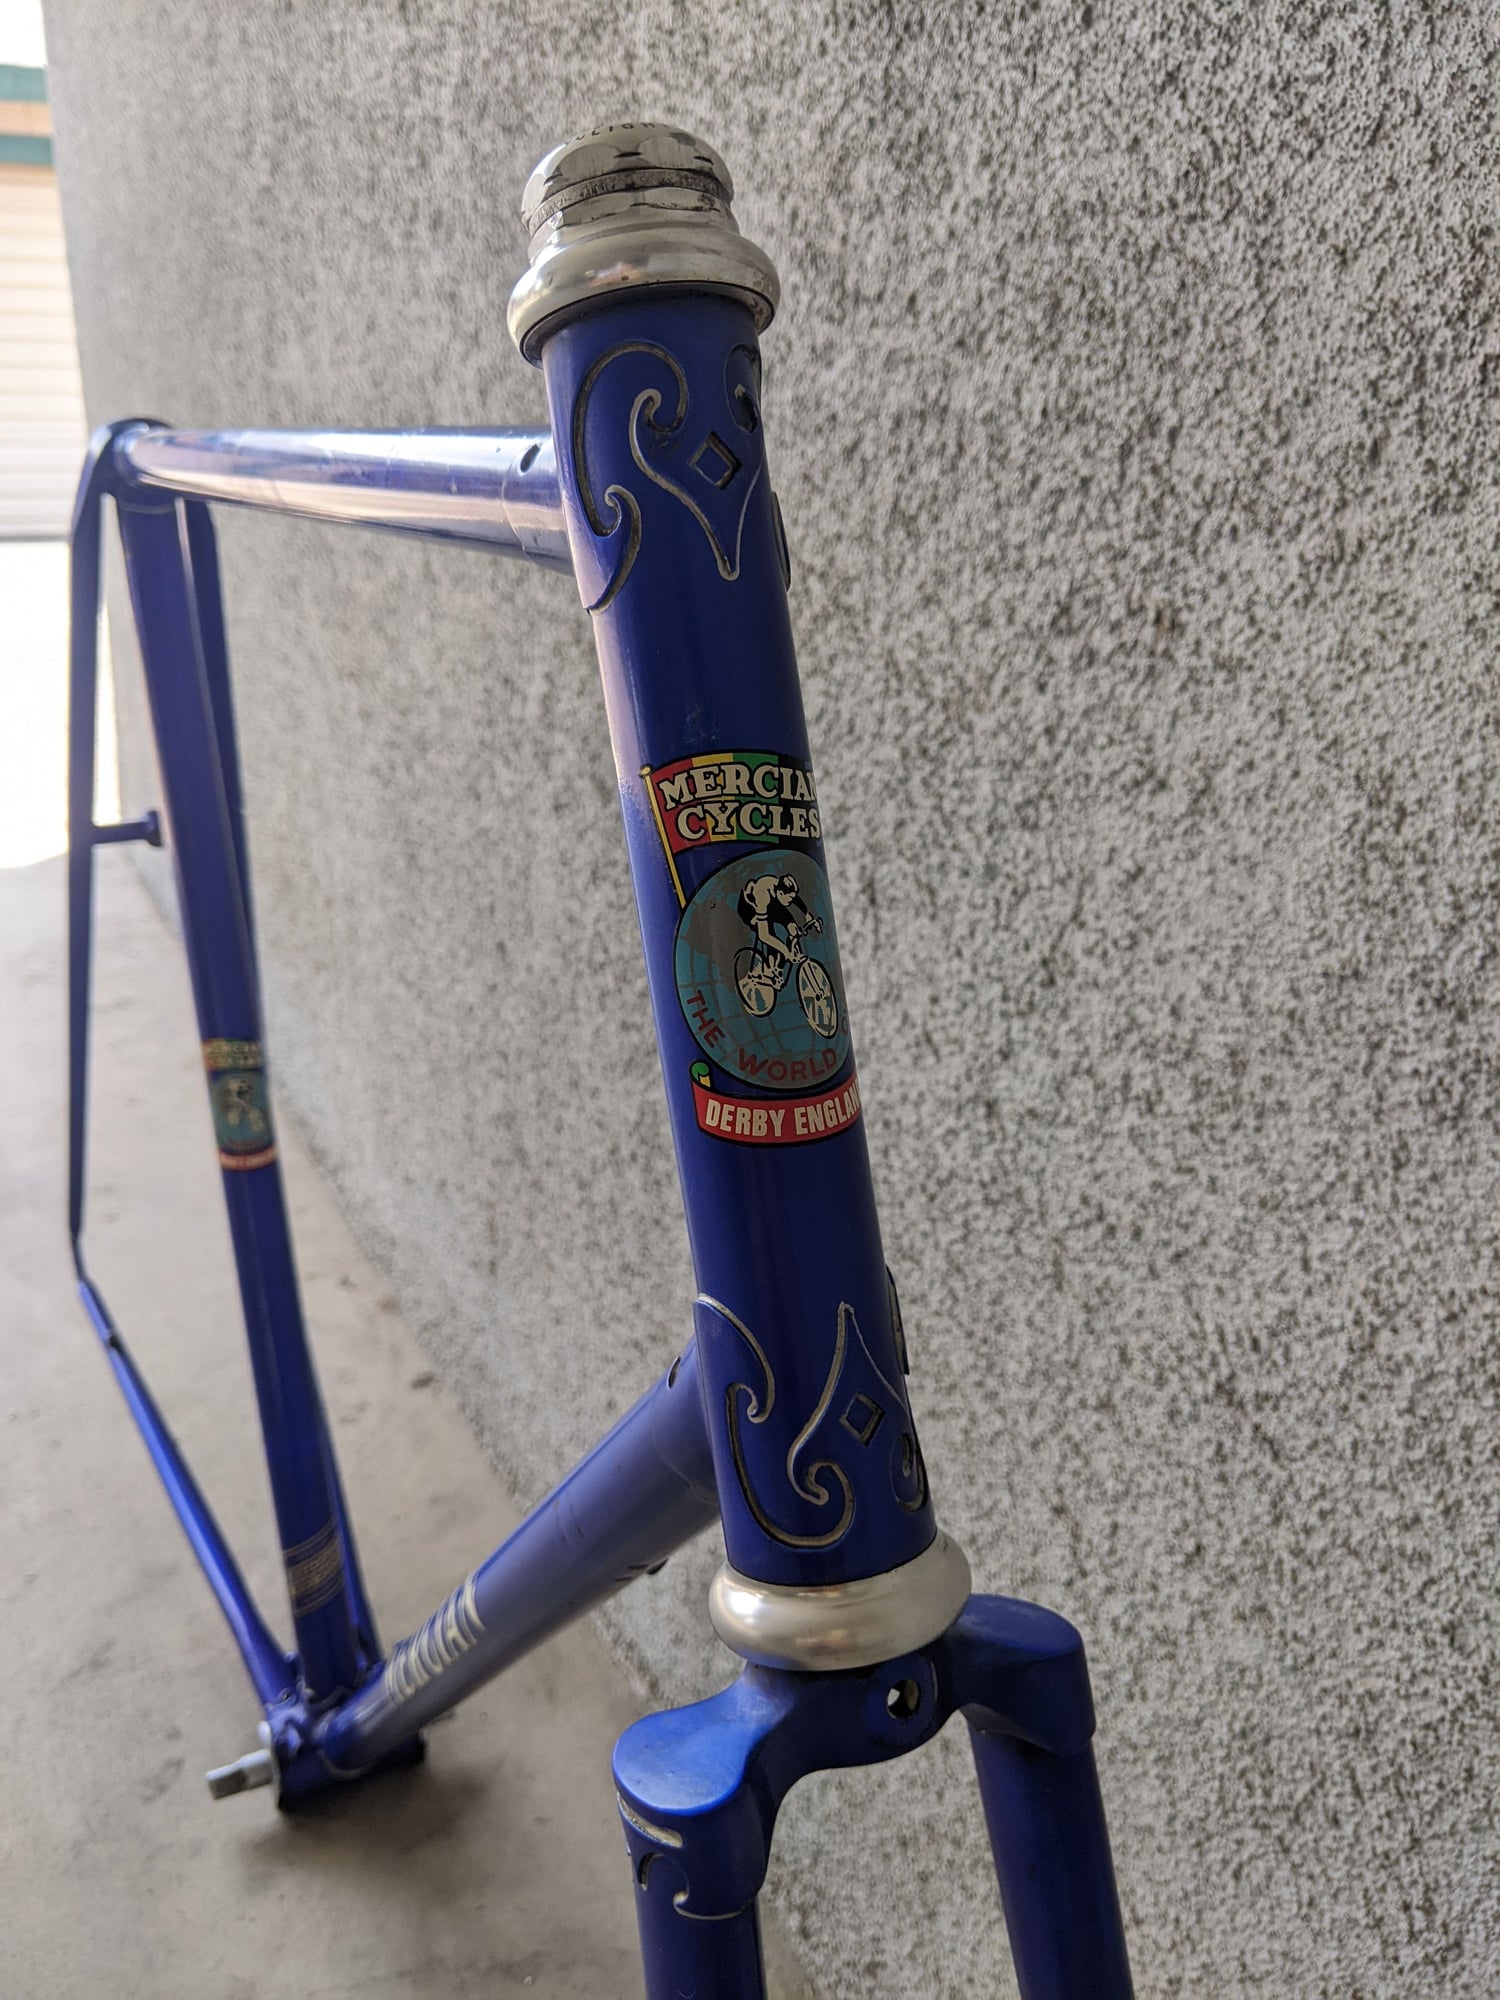
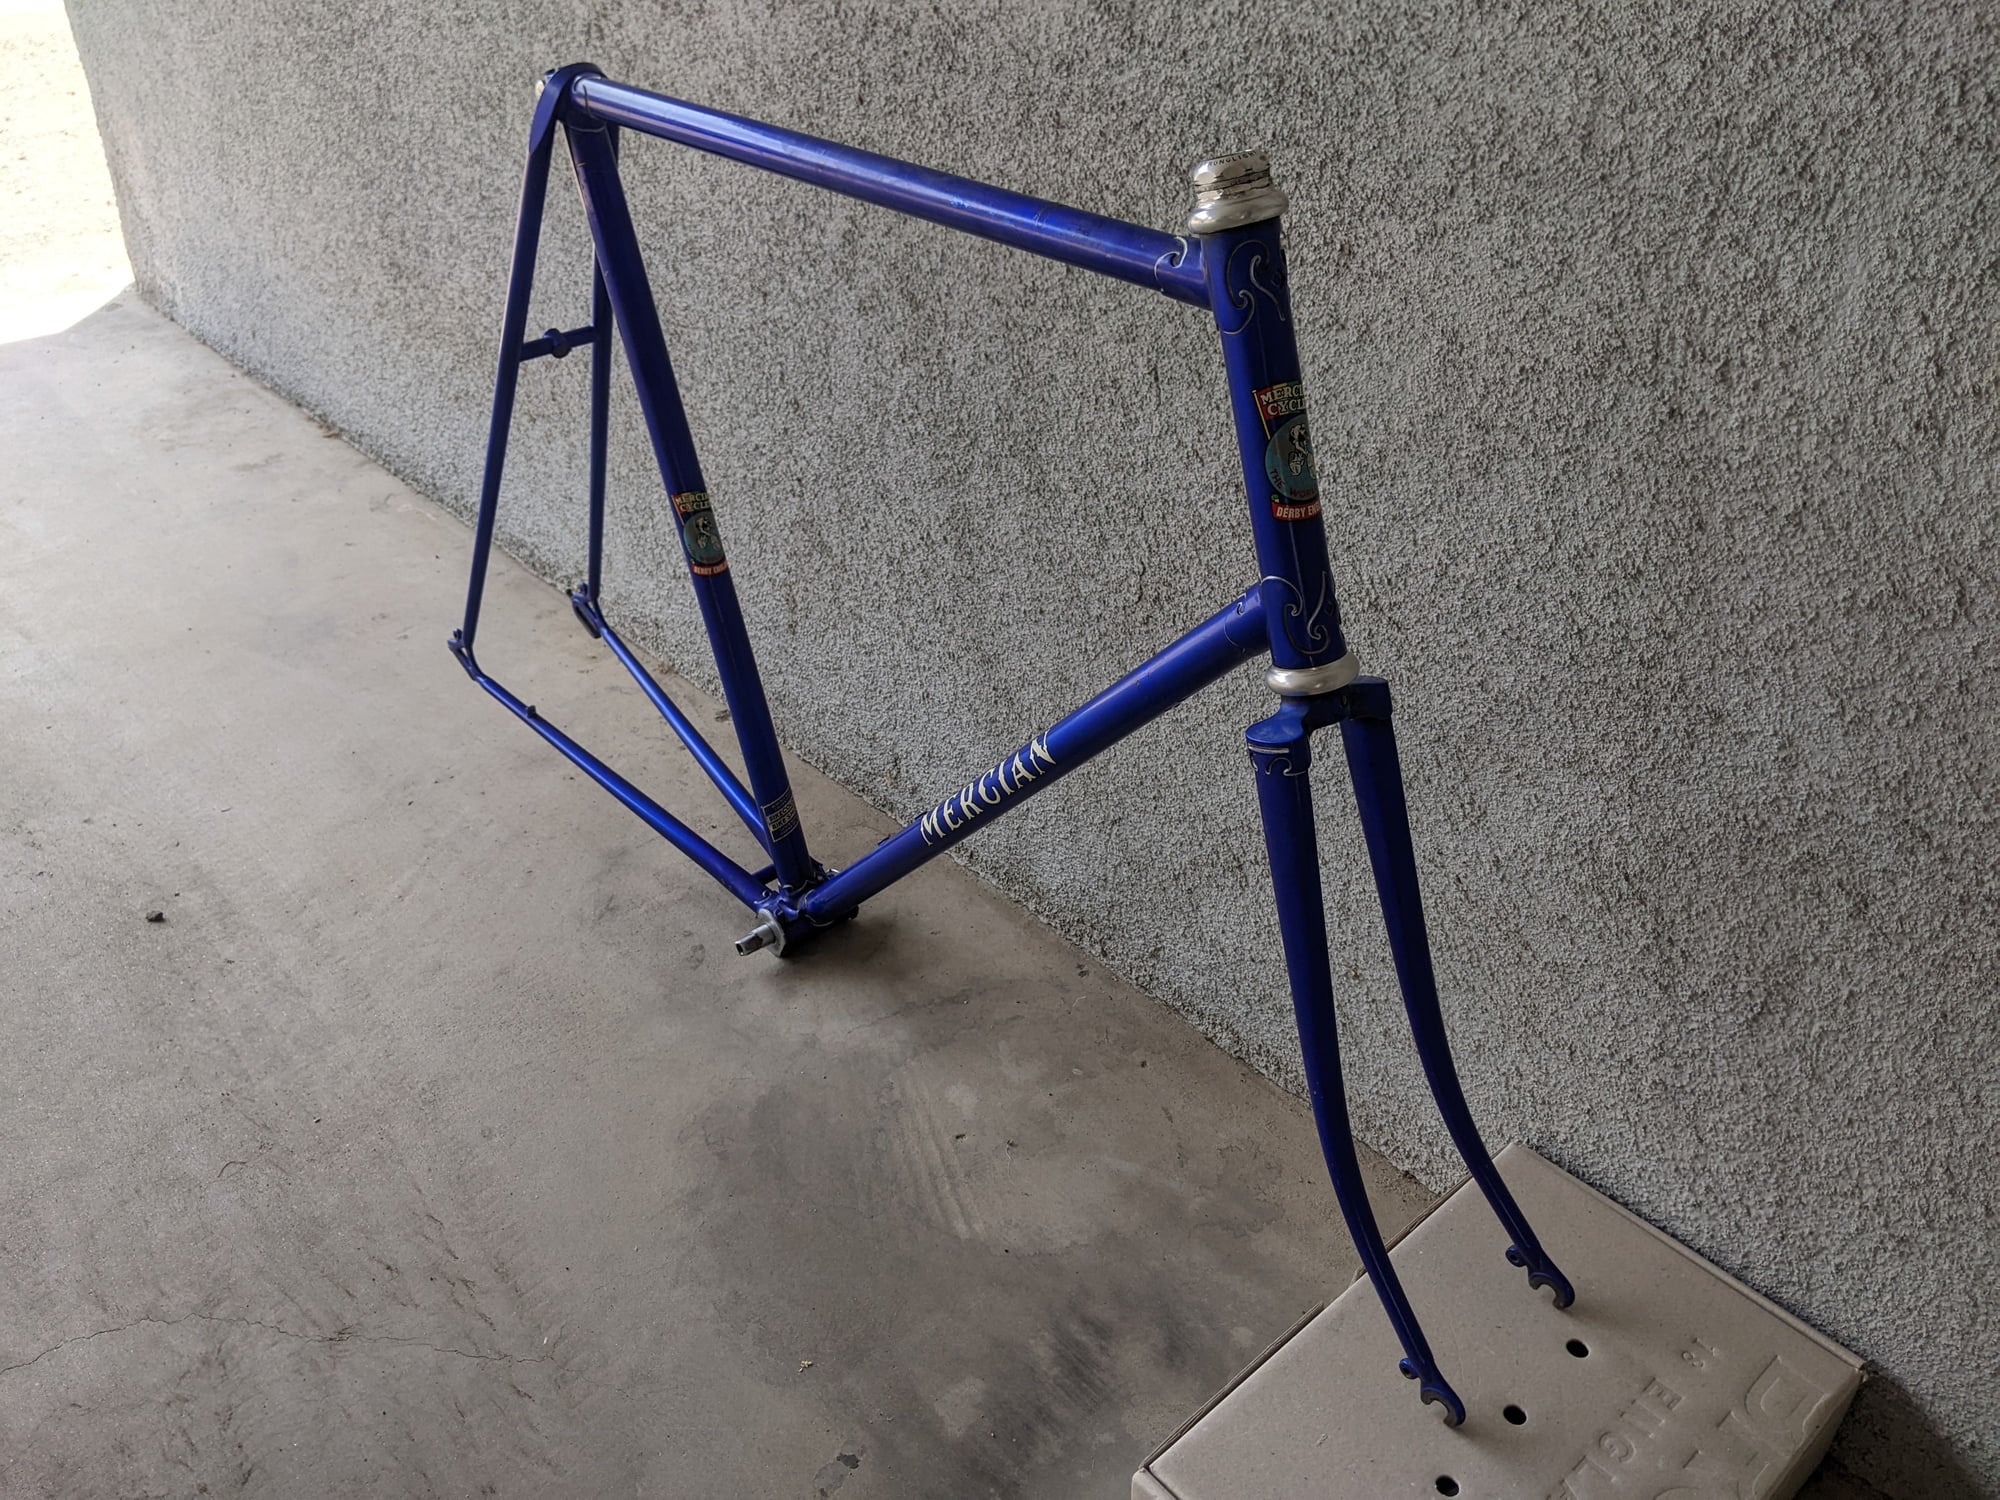
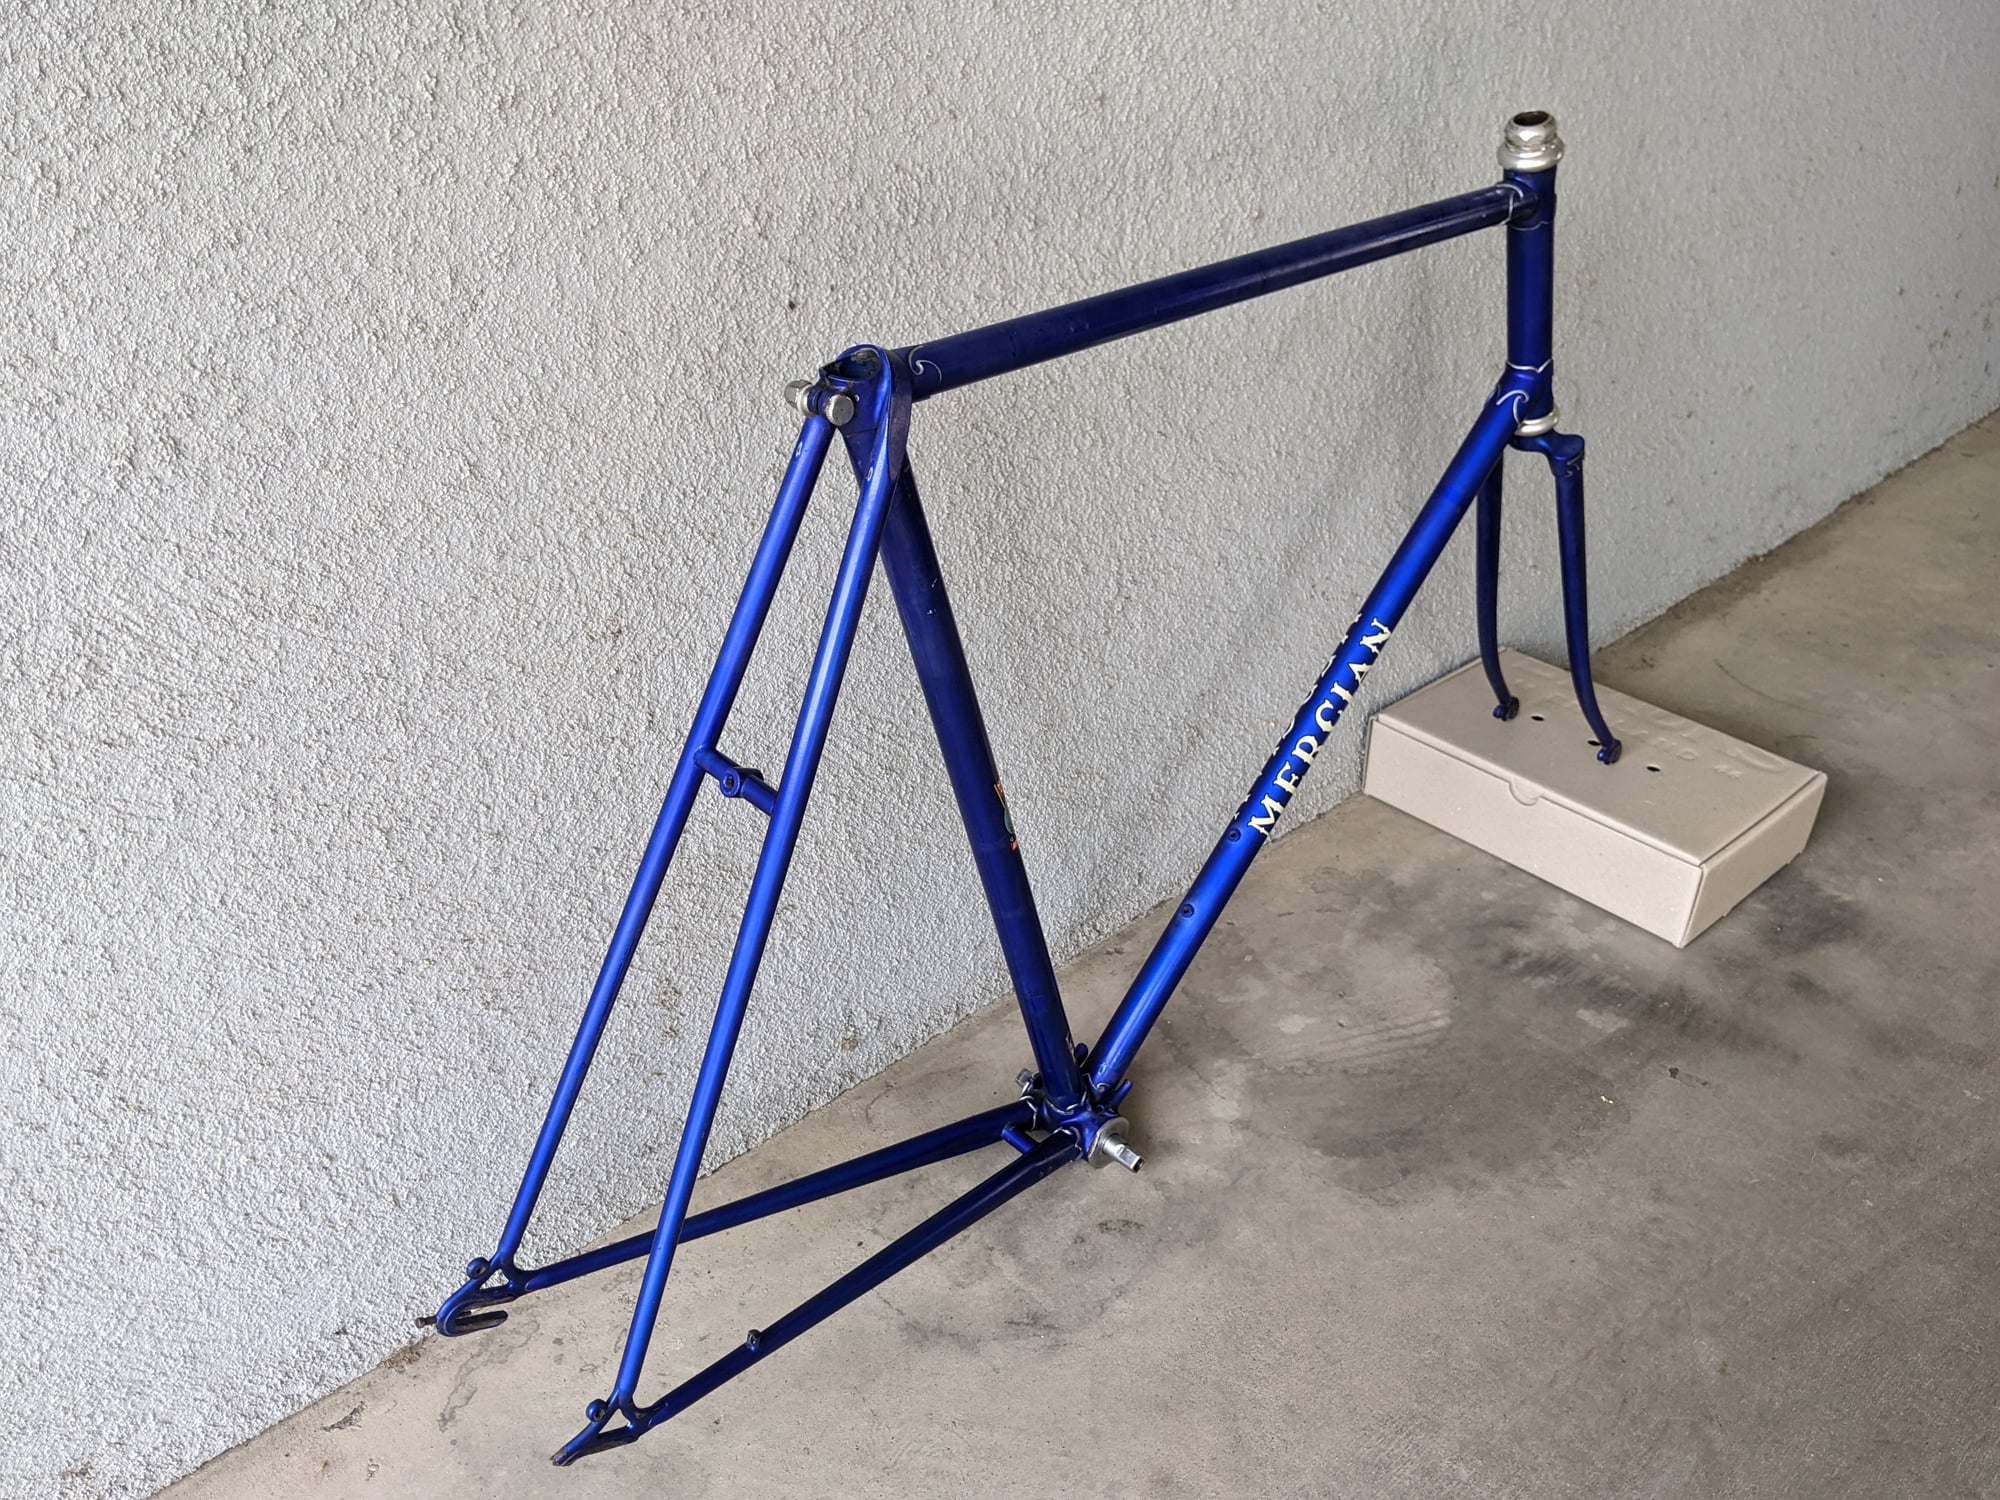
I don't go into the local bike shops very often. When I do it's typically for a little accessory or a quick job that I don't have the tool for, such as during a recent visit to Visalia Cyclery... The freewheel on an Avocet hub I needed to replace the sealed bearings on was jammed tight so I took it in. While talking to the owner, who also enjoys vintage bicycles, I mentioned the wheel was from my Mercian. He said "oh, I've got a Mercian frame. It's really big." He's a short guy and I'm a tall guy, so I asked which model it was. He said "The fancy one, the Vincitore!"
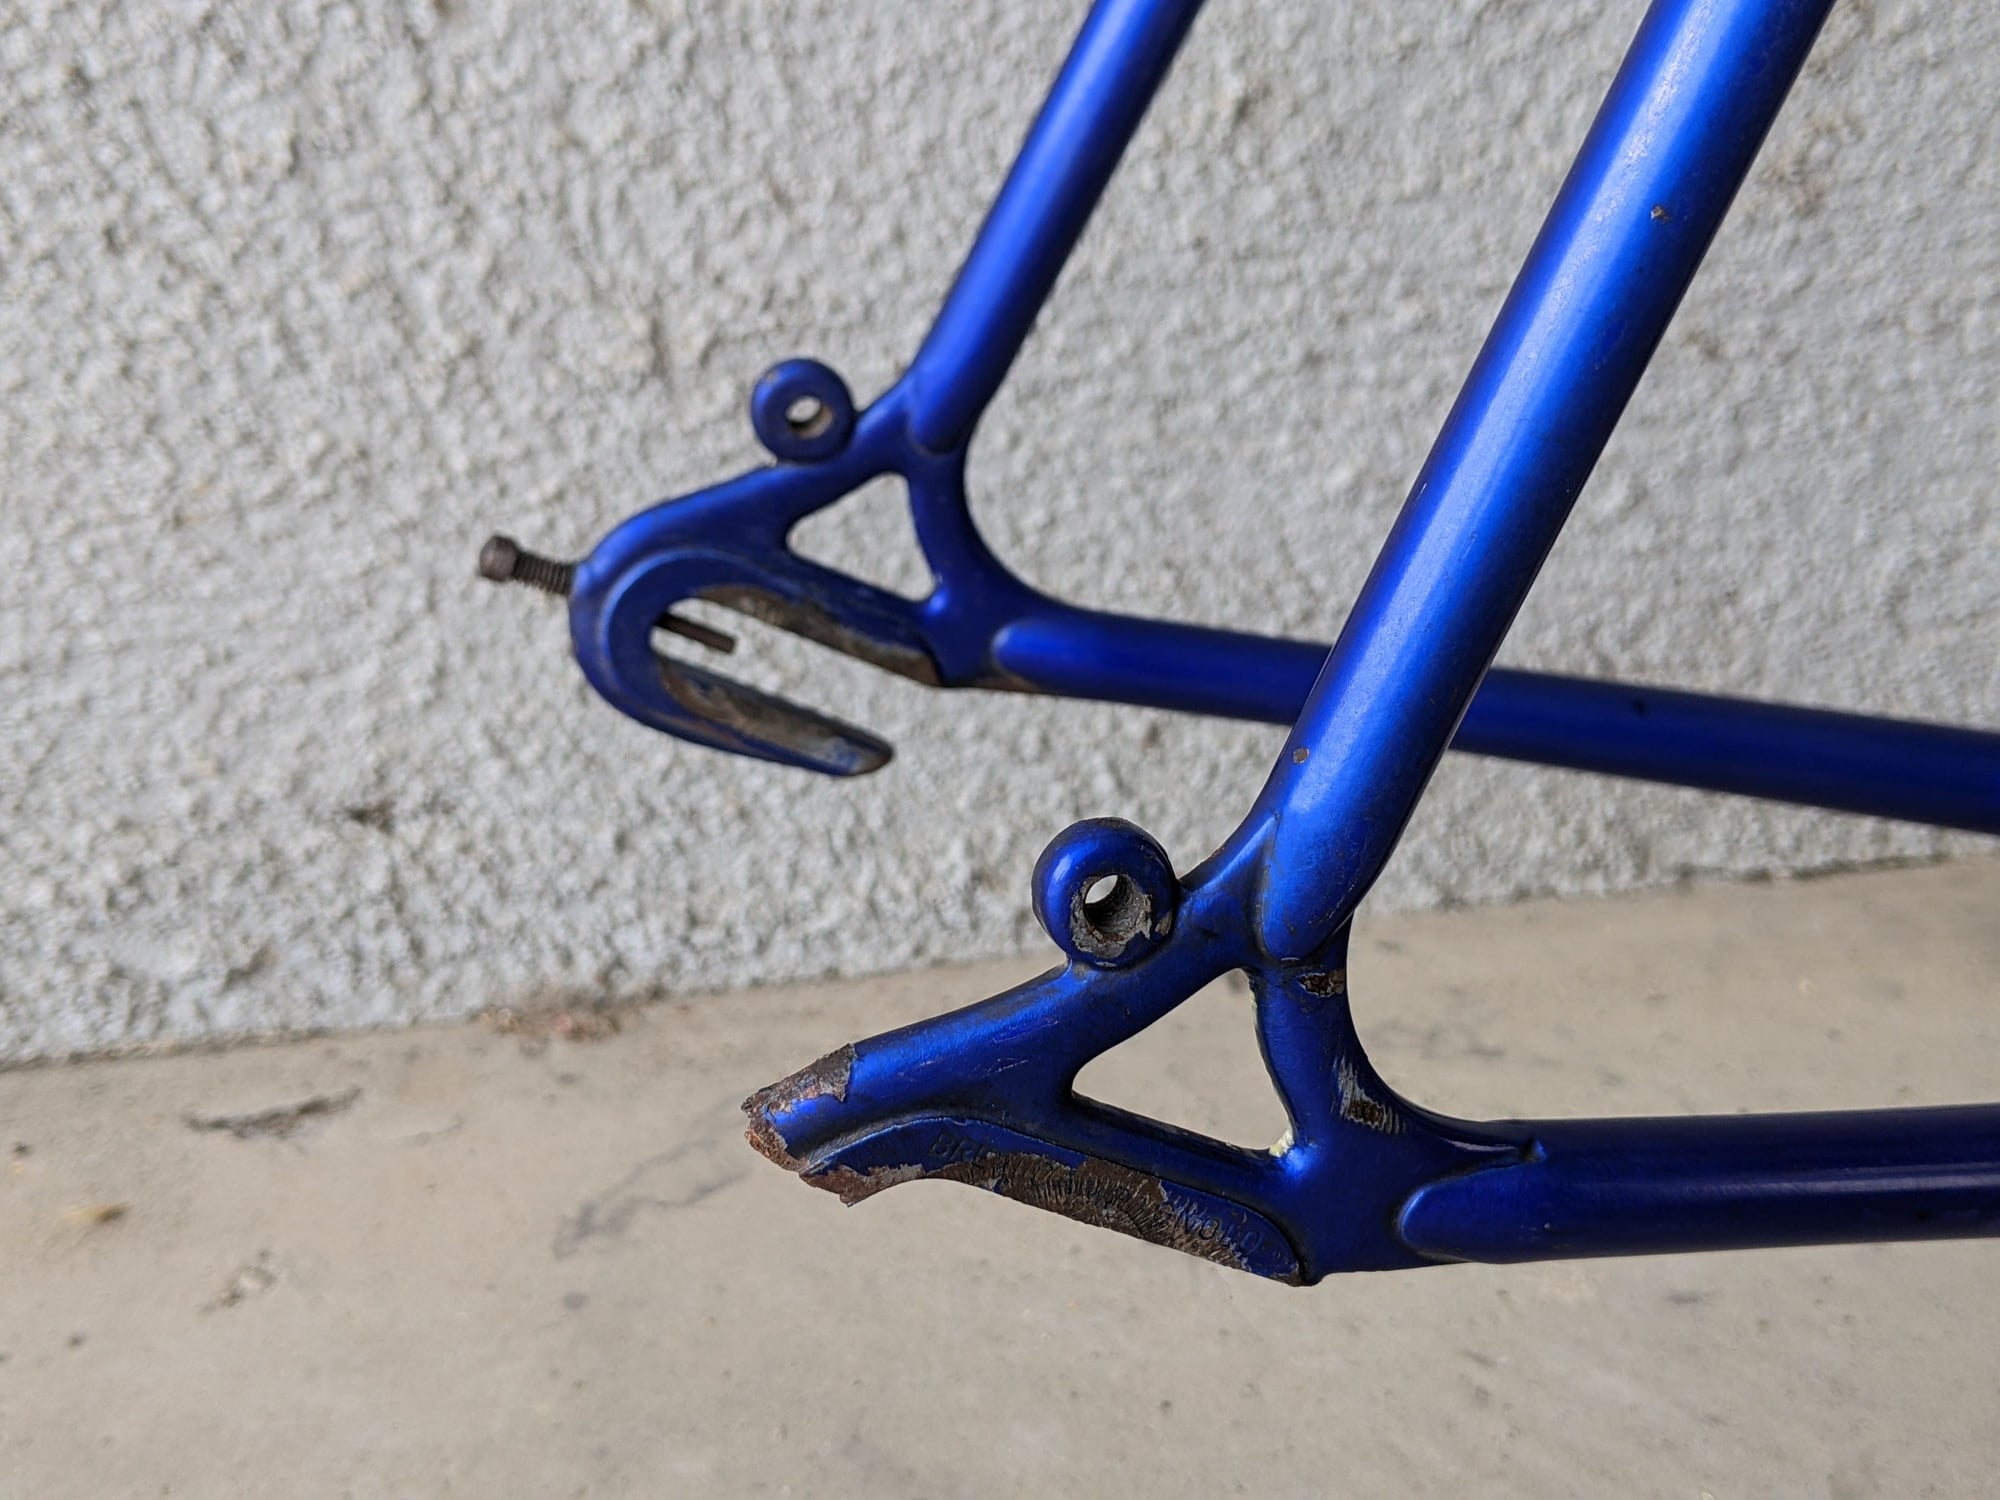
But there was a catch - the drive side rear dropout was damaged. This led me to think "well, maybe he just wants to get rid of it!" That was a good hunch.
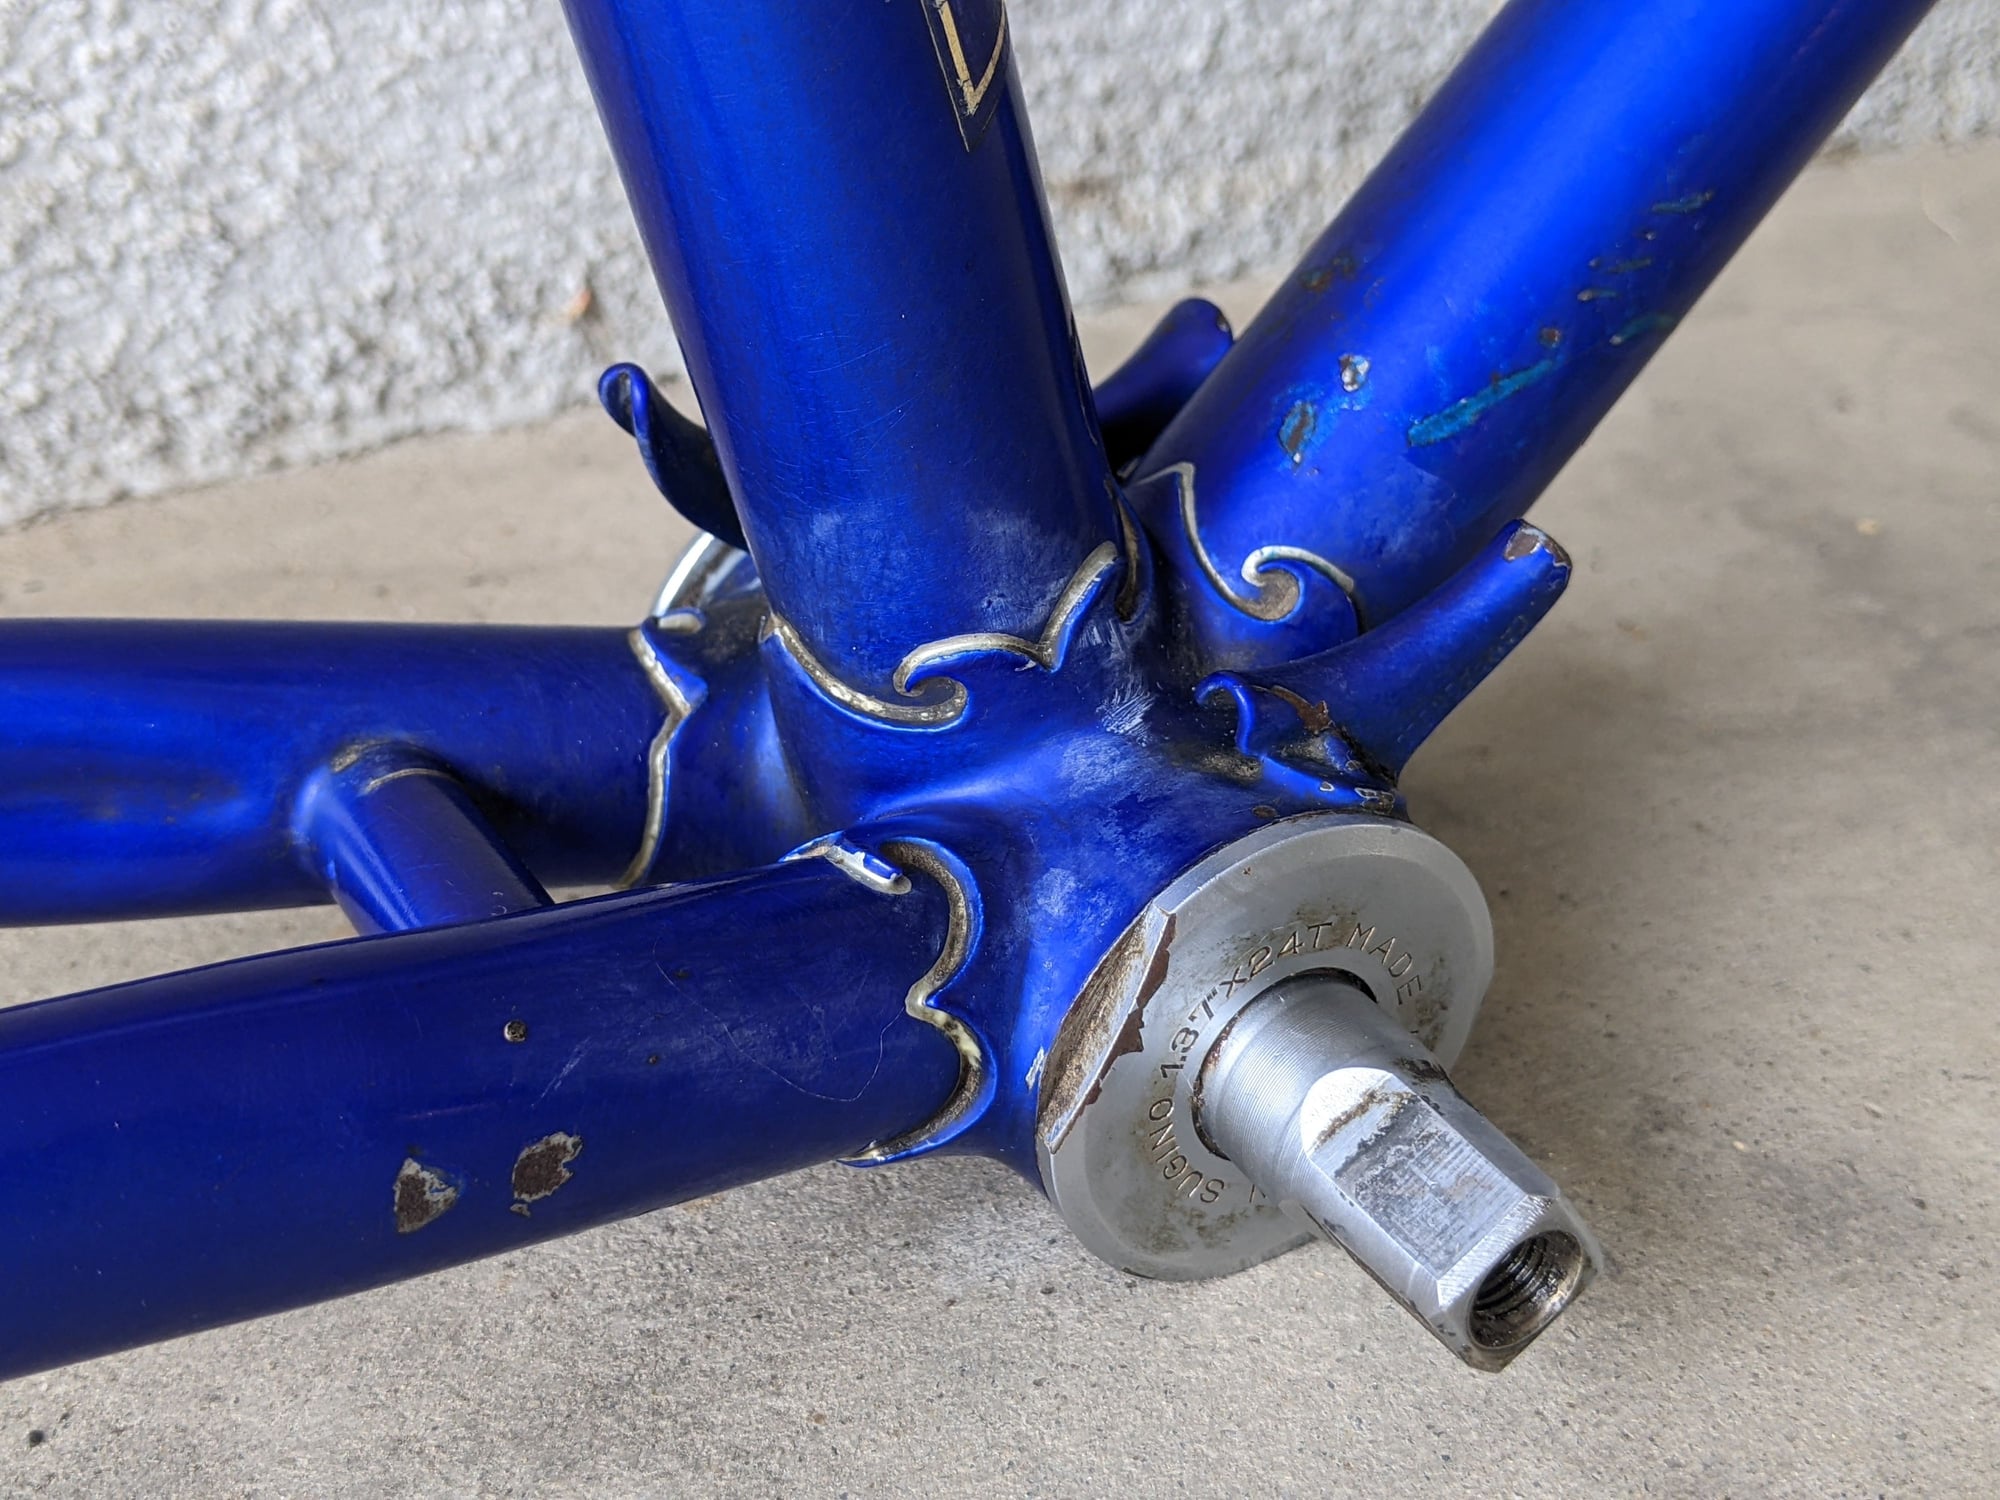
A couple of weeks went by, and I mentioned my continued interest but didn't push him to pull it out of storage. Yesterday he sent me a text message out of the blue stating that it was precisely my size - 24.5" c-t with a 23" top tube. Obviously, it was also out of storage so today we met before his lunch break, and I handed him a reasonably small pile of cash considering the damage. We rubbed some dirt off the bottom bracket shell revealing the year of manufacture to be 1978. I came home and cleaned up the frame, purchased the matching Campagnolo rear dropout on eBay, and that's where things stand! I hope to have the repair done on the dropout sometime this summer but there are a couple of builds in the queue, so we'll see how it goes... The frame will definitely get a new coat of paint after the repair and perhaps the addition of some top tube cable guides.
Overall, it feels like a very fortuitous experience, and I can only hope my wife will agree when she gets home from work in an hour!
-Gregory
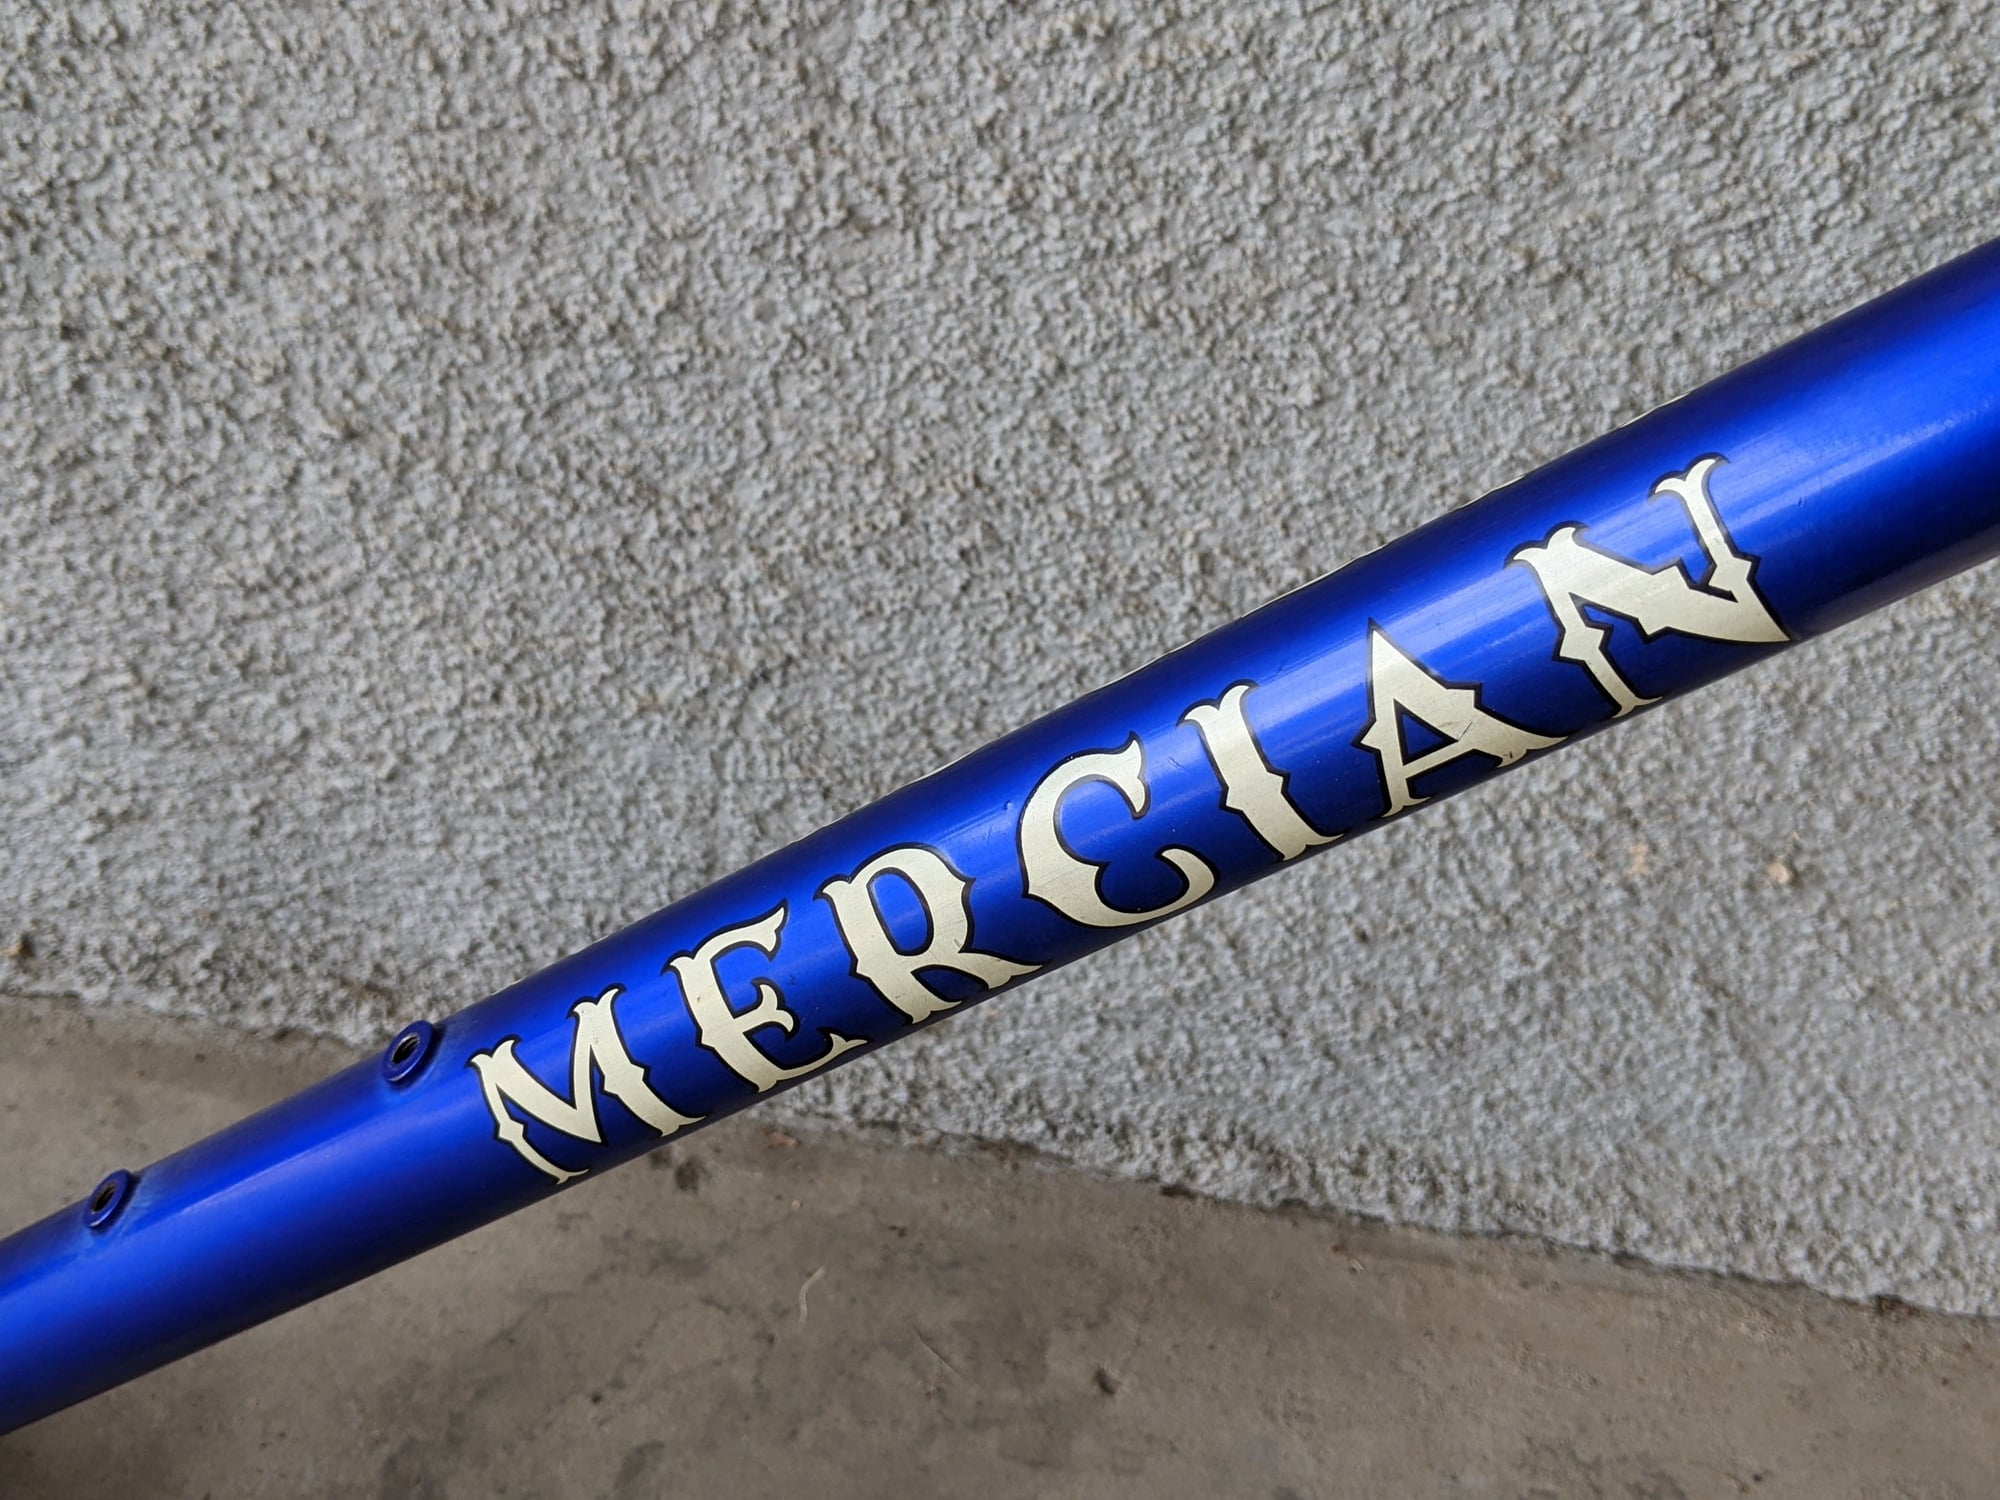
I don't go into the local bike shops very often. When I do it's typically for a little accessory or a quick job that I don't have the tool for, such as during a recent visit to Visalia Cyclery... The freewheel on an Avocet hub I needed to replace the sealed bearings on was jammed tight so I took it in. While talking to the owner, who also enjoys vintage bicycles, I mentioned the wheel was from my Mercian. He said "oh, I've got a Mercian frame. It's really big." He's a short guy and I'm a tall guy, so I asked which model it was. He said "The fancy one, the Vincitore!"
But there was a catch - the drive side rear dropout was damaged. This led me to think "well, maybe he just wants to get rid of it!" That was a good hunch.
A couple of weeks went by, and I mentioned my continued interest but didn't push him to pull it out of storage. Yesterday he sent me a text message out of the blue stating that it was precisely my size - 24.5" c-t with a 23" top tube. Obviously, it was also out of storage so today we met before his lunch break, and I handed him a reasonably small pile of cash considering the damage. We rubbed some dirt off the bottom bracket shell revealing the year of manufacture to be 1978. I came home and cleaned up the frame, purchased the matching Campagnolo rear dropout on eBay, and that's where things stand! I hope to have the repair done on the dropout sometime this summer but there are a couple of builds in the queue, so we'll see how it goes... The frame will definitely get a new coat of paint after the repair and perhaps the addition of some top tube cable guides.
Overall, it feels like a very fortuitous experience, and I can only hope my wife will agree when she gets home from work in an hour!
-Gregory

Likes For Kilroy1988:
06-09-23, 04:32 PM
#2
Senior Member
Join Date: Aug 2020
Location: Saratoga, CA
Posts: 831
Bikes: 1981 Bianchi Specialissima, 1971 Bob Jackson. 2012 Kestrel 4000. 2012 Willier. 2016 Fuji Cross 1.1, 1950 Hetchins, 194X James Fothergill, 1971 Paramount P15, 1973 Paramount P12, 1963 Legnano
Mentioned: 25 Post(s)
Tagged: 0 Thread(s)
Quoted: 279 Post(s)
Liked 955 Times
in
391 Posts
Great find. Congratulations!
06-09-23, 04:57 PM
#3
Senior Member
Join Date: Jan 2008
Location: Beaverton, OR
Posts: 14,744
Bikes: Yes
Mentioned: 525 Post(s)
Tagged: 0 Thread(s)
Quoted: 3230 Post(s)
Liked 3,868 Times
in
1,439 Posts
Very nice! I have a '71 Vincitore that's my current project, and yours is exactly the color I want for mine.
I looked at the pictures first, and before I saw the dropout I thought mine needed more work than yours. It's a shame about the dropout, but I guess it made the frame much cheaper. I remember @scarlson had a thread about fixing a dropout that was broken in that way, but it sounds like you're thinking you'll just have the entire dropout replaced?
Since my Vincitore needed to be repainted, I dropped it off with @gugie for a mild amount of Gugificazione. I hope I won't be hijacking your thread by sharing what I had him do.
Like you, I wanted brazed on cable guides.

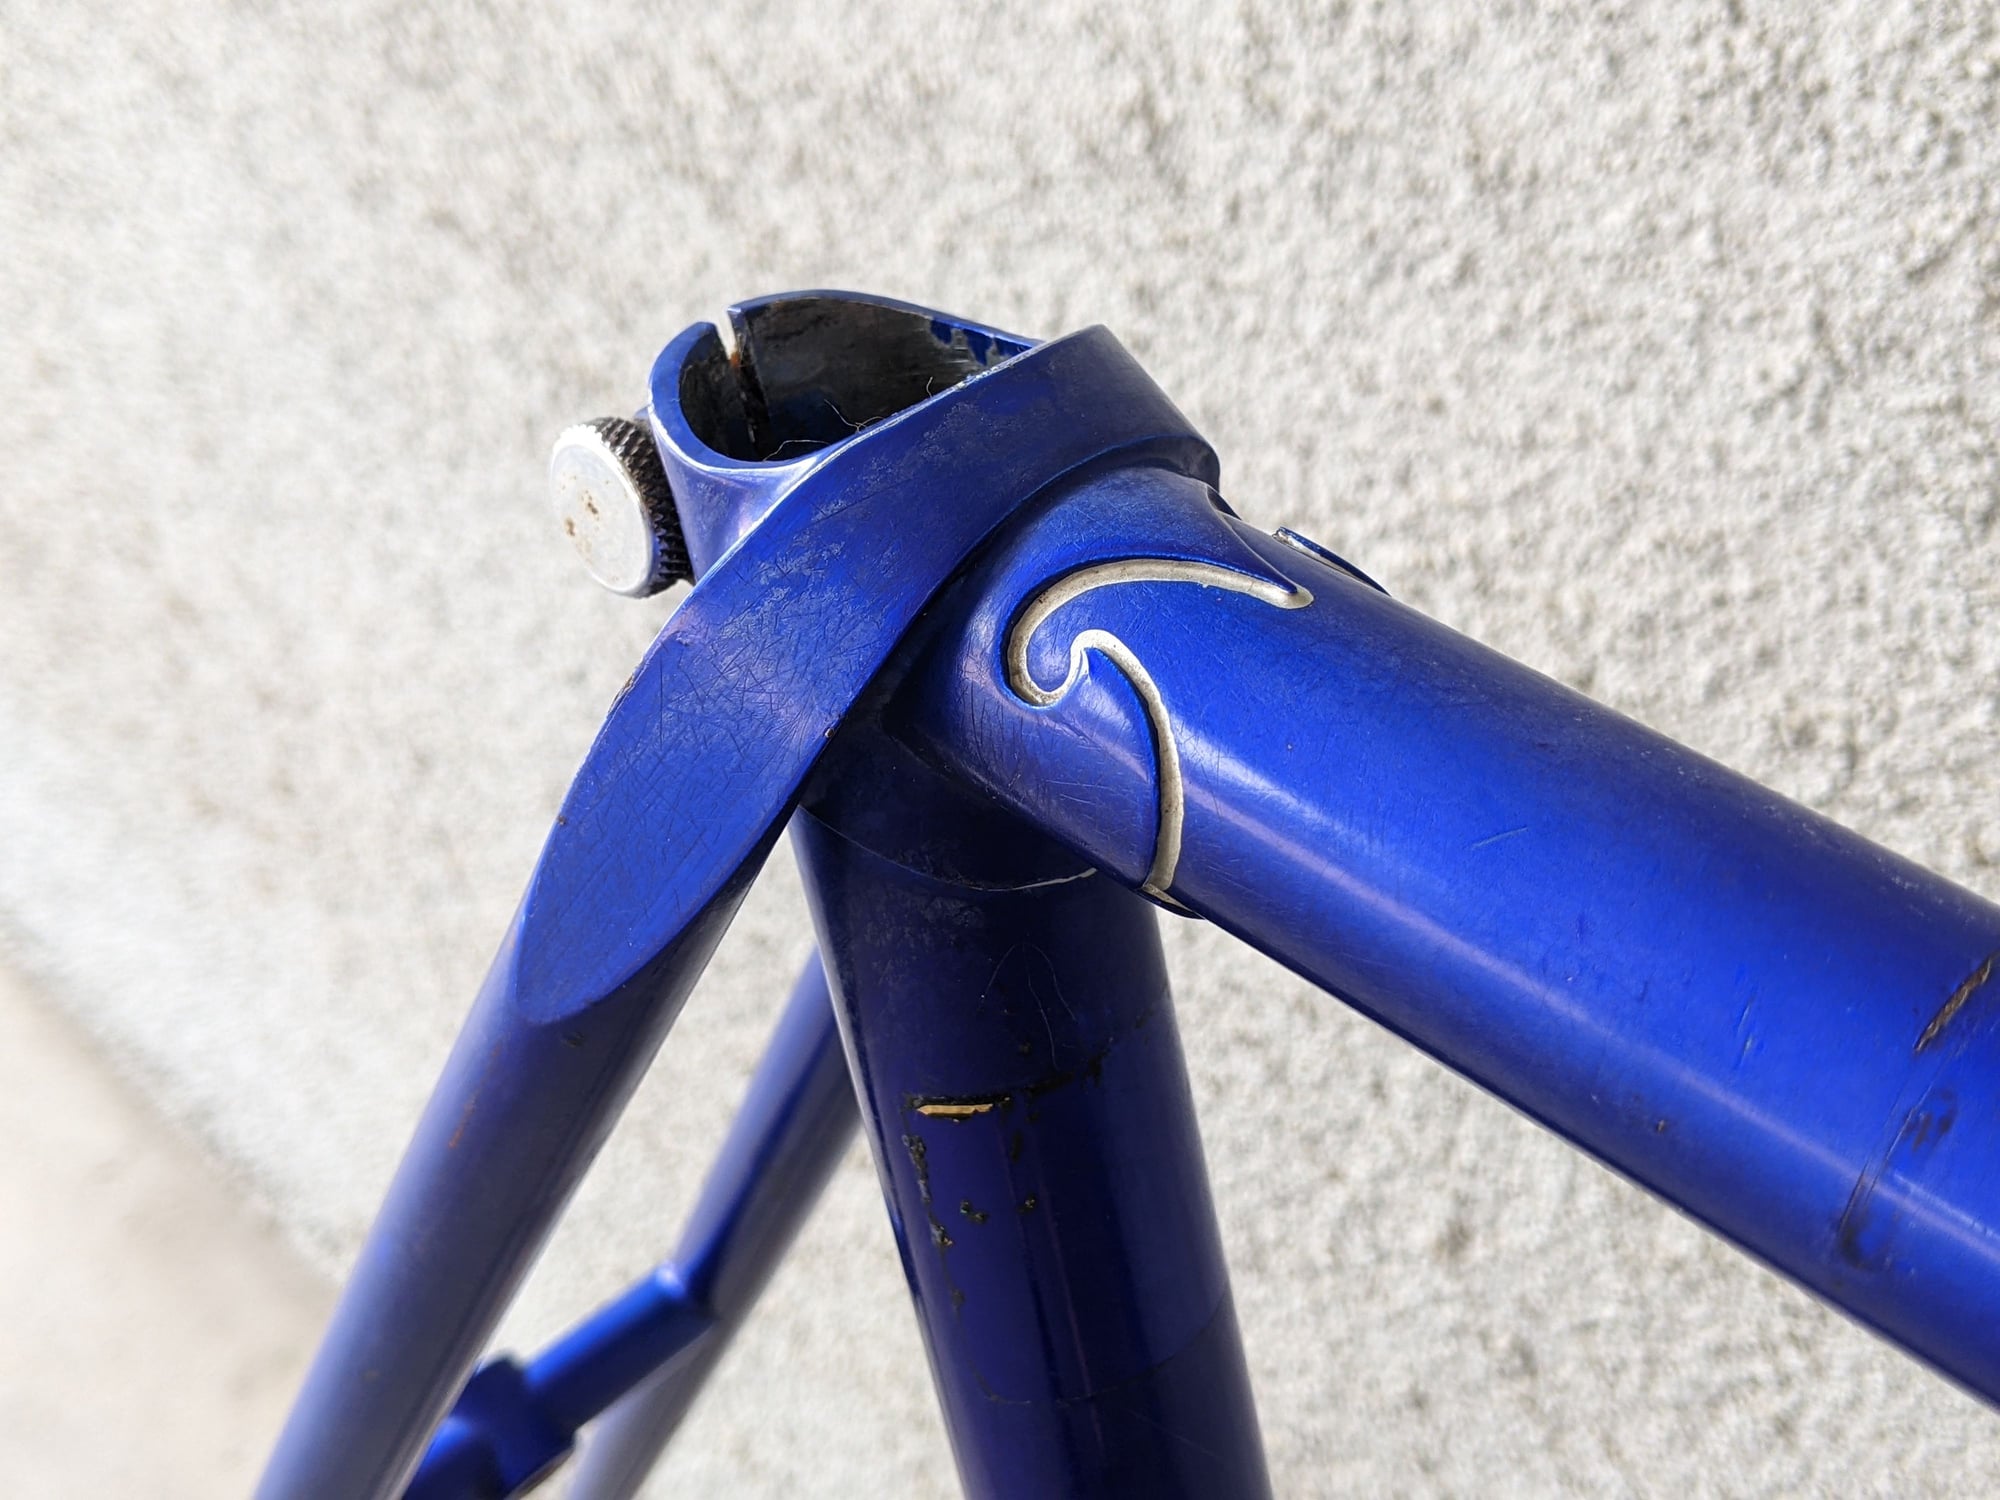
And, of course, any time I have a frame going under the torch I want water bottle bosses on the down tube and seat tube (mine had neither). Although I don't know if the "reinforcements" are really in any way functional, I thought they'd complement the Vincitore lugs.

Mine had a nub on the downtube to hold clamp-on shifters. I kept the nub for posterity but made it superfluous by adding shifter bosses.

My '71 had a braze-on cable stop to work with a front derailleur with an integrated cable stop. Since I won't be using that, I had Gugie remove it and put on a guide to match the other side.

Finally, I had him remove that cursed English chainstay cable stop, which I can never find a ferrule to satisfactorily match, and replace it with a more standard diver's helmet.

As you can see from these pictures, I've still got a bit of clean up to do, especially around the bottom bracket, before painting, but it's 99.9% stripped down and ready for me to undertake the Herculean task of masking those lugs.

Making this more relevant to your thread, if you're looking for someone to fix the dropout and make some other modifications, I know a guy.
I looked at the pictures first, and before I saw the dropout I thought mine needed more work than yours. It's a shame about the dropout, but I guess it made the frame much cheaper. I remember @scarlson had a thread about fixing a dropout that was broken in that way, but it sounds like you're thinking you'll just have the entire dropout replaced?
Since my Vincitore needed to be repainted, I dropped it off with @gugie for a mild amount of Gugificazione.
I hope I won't be hijacking your thread by sharing what I had him do.Like you, I wanted brazed on cable guides.
And, of course, any time I have a frame going under the torch I want water bottle bosses on the down tube and seat tube (mine had neither). Although I don't know if the "reinforcements" are really in any way functional, I thought they'd complement the Vincitore lugs.
Mine had a nub on the downtube to hold clamp-on shifters. I kept the nub for posterity but made it superfluous by adding shifter bosses.
My '71 had a braze-on cable stop to work with a front derailleur with an integrated cable stop. Since I won't be using that, I had Gugie remove it and put on a guide to match the other side.
Finally, I had him remove that cursed English chainstay cable stop, which I can never find a ferrule to satisfactorily match, and replace it with a more standard diver's helmet.
As you can see from these pictures, I've still got a bit of clean up to do, especially around the bottom bracket, before painting, but it's 99.9% stripped down and ready for me to undertake the Herculean task of masking those lugs.
Making this more relevant to your thread, if you're looking for someone to fix the dropout and make some other modifications, I know a guy.
__________________
My Bikes
My Bikes
Likes For Andy_K:
06-09-23, 05:12 PM
#4
Crawlin' up, flyin' down

Join Date: Jan 2006
Location: Democratic Peoples' Republic of Berkeley
Posts: 5,658
Bikes: 1967 Paramount; 1982-ish Ron Cooper; 1978 Eisentraut "A"; two mid-1960s Cinelli Speciale Corsas; and others in various stages of non-rideability.
Mentioned: 40 Post(s)
Tagged: 0 Thread(s)
Quoted: 1027 Post(s)
Liked 2,531 Times
in
1,059 Posts
Ah, that rear drop out will buff right out . . . .
Nice catch. It's always good to hear that a steed that's been on the shelf for years is going to be ridden again.
Nice catch. It's always good to hear that a steed that's been on the shelf for years is going to be ridden again.
__________________
"I'm in shape -- round is a shape." Andy Rooney
"I'm in shape -- round is a shape." Andy Rooney
06-09-23, 05:28 PM
#5
Senior Member

Join Date: May 2012
Location: Point Reyes Station, California
Posts: 4,528
Bikes: Indeed!
Mentioned: 92 Post(s)
Tagged: 0 Thread(s)
Quoted: 1507 Post(s)
Liked 3,478 Times
in
1,132 Posts
Very nice!
If, by chance, the shop owner has the broken-off piece a skilled tig welder could fix that for you with a lot less paint damage than replacing the dropout.
Brent
If, by chance, the shop owner has the broken-off piece a skilled tig welder could fix that for you with a lot less paint damage than replacing the dropout.
Brent
__________________
"I have a tendency to meander sometimes." B.G.
"I have a tendency to meander sometimes." B.G.
06-09-23, 05:38 PM
#6
Senior Member

Join Date: Jun 2010
Location: Medford MA
Posts: 2,089
Bikes: Ron Cooper touring, 1959 Jack Taylor 650b ladyback touring tandem, Vitus 979, Joe Bell painted Claud Butler Dalesman, Colin Laing curved tube tandem, heavily-Dilberted 1982 Trek 6xx, Ren� Herse tandem
Mentioned: 80 Post(s)
Tagged: 0 Thread(s)
Quoted: 964 Post(s)
Liked 1,451 Times
in
723 Posts
Very nice! I have a '71 Vincitore that's my current project, and yours is exactly the color I want for mine.
I looked at the pictures first, and before I saw the dropout I thought mine needed more work than yours. It's a shame about the dropout, but I guess it made the frame much cheaper. I remember @scarlson had a thread about fixing a dropout that was broken in that way, but it sounds like you're thinking you'll just have the entire dropout replaced?
I looked at the pictures first, and before I saw the dropout I thought mine needed more work than yours. It's a shame about the dropout, but I guess it made the frame much cheaper. I remember @scarlson had a thread about fixing a dropout that was broken in that way, but it sounds like you're thinking you'll just have the entire dropout replaced?
Anyway, here are some mig welding repairs I've done on dropouts.
This thread is the repair I did most similar to yours.
This is a bit different.
I prefer mig over tig because it is fast and un-fussy. This allows me to make passes quickly without burning up the paint, and then clean it up with a grinder. I use a pipeline welder technique, making a V groove, then laying a root pass to tie things together, with other passes over the top, usually clamping the dropout to a copper block as a backing and to keep things aligned and sink the heat.
__________________
Owner & co-founder, Cycles Ren� Hubris. Unfortunately attaching questionable braze-ons to perfectly good frames since about 2015. With style.
Owner & co-founder, Cycles Ren� Hubris. Unfortunately attaching questionable braze-ons to perfectly good frames since about 2015. With style.
Likes For scarlson:
06-09-23, 06:06 PM
#7
Senior Member
Thread Starter
Join Date: Aug 2016
Location: Visalia, CA
Posts: 2,249
Mentioned: 45 Post(s)
Tagged: 0 Thread(s)
Quoted: 981 Post(s)
Liked 1,844 Times
in
609 Posts
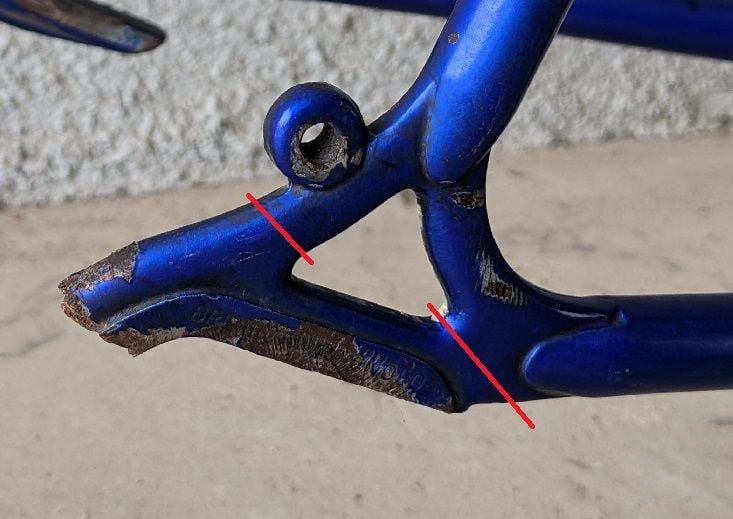
Thanks for the thoughts so far, folks. I spent an hour or so yesterday browsing the threads by scarlson and numerous other online conversations about folks repairing dropouts like this. My father is a professional welder and machinist and has been at it for fifty years. The initial plan is to cut the broken one as shown below and match up the new one to it and tig weld it. This would be far easier than removing and re-brazing an entirely new one into place, and perhaps wind up being just as strong. Importantly (I think) the weight being distributed across the dropout at the axle will be in the same plane as the welded joints.
This route will also allow me to retain the adjuster screw.
I found the replacement dropout as a single for $20 so I don't feel bad cutting it up for this job.
Any thoughts here?
-Gregory
This route will also allow me to retain the adjuster screw.
I found the replacement dropout as a single for $20 so I don't feel bad cutting it up for this job.
Any thoughts here?
-Gregory
06-09-23, 06:26 PM
#8
Senior Member
Join Date: Jun 2010
Location: Medford MA
Posts: 2,089
Bikes: Ron Cooper touring, 1959 Jack Taylor 650b ladyback touring tandem, Vitus 979, Joe Bell painted Claud Butler Dalesman, Colin Laing curved tube tandem, heavily-Dilberted 1982 Trek 6xx, Ren� Herse tandem
Mentioned: 80 Post(s)
Tagged: 0 Thread(s)
Quoted: 964 Post(s)
Liked 1,451 Times
in
723 Posts
If you have your heart set on welding it, I have three reasons not to do it the way you are suggesting.
1) I recommend not doing more welding than necessary if you can avoid it. You have one break. Why not one weld?
2) You may burn the paint off a significant portion of the thing, the closer you come to the frame. Those two red lines in your photo are close to the brazing and the paint on the tubes will more easily burn off because they have less thermal mass.
3) The finish work will be harder, welding and filing around and through that "window" in the dropout.
4) Your weight is borne by the top of the dropout, not the bottom. Right now the top is intact. Welding will risk making the top less fatigue resistant than the original forging, even if it's done perfectly. Whereas even with mediocre welds, the bottom could just be tacked onto the dropout as it stands and it would likely be ok. Welding above the axle, you will need to have a lot of confidence in the welds to hold weight and flex and all that.
Why not cut it a bit above the screw hole, and weld it there? That way you aren't cutting and welding above the dropout where the welds will have to bear your weight and probably flex with the frame. And you will retain the original screw hole in the replacement dropout. It's just less risky all around.
And why are you set on TIG? MIG is faster, so less heat gets into the frame, meaning less paint is burnt off. Are you planning a respray? The original paint, lug lining, and decals are beautiful, and it's only original once. Admittedly, I am also biased toward MIG because I know I can do a better job with it because I've had better training on MIG. If your father is best with TIG, have him do TIG. And I'm biased toward original paint because I don't like the current situation I have around here for painters and powdercoaters. It's hard to get work done affordably, so I rarely get things painted. Your situation may be different.
And again, if you are doing a respray, and you've got the spare dropout, even I, the inveterate MIG welder, would probably fire up the torch and rebraze. It should be "tab A into slot B" and bob's your uncle. Hold the new dropout in alignment with a threaded rod. Bob Jackson's your uncle? Might have to grind out the old dropout, but that's easy enough.
1) I recommend not doing more welding than necessary if you can avoid it. You have one break. Why not one weld?
2) You may burn the paint off a significant portion of the thing, the closer you come to the frame. Those two red lines in your photo are close to the brazing and the paint on the tubes will more easily burn off because they have less thermal mass.
3) The finish work will be harder, welding and filing around and through that "window" in the dropout.
4) Your weight is borne by the top of the dropout, not the bottom. Right now the top is intact. Welding will risk making the top less fatigue resistant than the original forging, even if it's done perfectly. Whereas even with mediocre welds, the bottom could just be tacked onto the dropout as it stands and it would likely be ok. Welding above the axle, you will need to have a lot of confidence in the welds to hold weight and flex and all that.
Why not cut it a bit above the screw hole, and weld it there? That way you aren't cutting and welding above the dropout where the welds will have to bear your weight and probably flex with the frame. And you will retain the original screw hole in the replacement dropout. It's just less risky all around.
And why are you set on TIG? MIG is faster, so less heat gets into the frame, meaning less paint is burnt off. Are you planning a respray? The original paint, lug lining, and decals are beautiful, and it's only original once. Admittedly, I am also biased toward MIG because I know I can do a better job with it because I've had better training on MIG. If your father is best with TIG, have him do TIG. And I'm biased toward original paint because I don't like the current situation I have around here for painters and powdercoaters. It's hard to get work done affordably, so I rarely get things painted. Your situation may be different.
And again, if you are doing a respray, and you've got the spare dropout, even I, the inveterate MIG welder, would probably fire up the torch and rebraze. It should be "tab A into slot B" and bob's your uncle. Hold the new dropout in alignment with a threaded rod. Bob Jackson's your uncle?
Might have to grind out the old dropout, but that's easy enough.
__________________
Owner & co-founder, Cycles Ren� Hubris. Unfortunately attaching questionable braze-ons to perfectly good frames since about 2015. With style.
Owner & co-founder, Cycles Ren� Hubris. Unfortunately attaching questionable braze-ons to perfectly good frames since about 2015. With style.
Likes For scarlson:
06-09-23, 06:32 PM
#9
Senior Member

Join Date: Feb 2008
Location: Peoria, IL
Posts: 4,476
Mentioned: 86 Post(s)
Tagged: 0 Thread(s)
Quoted: 1829 Post(s)
Liked 3,376 Times
in
1,580 Posts
24 1/2" from center to top? Just like my favorite Raleighs?? No... there's no reason that I mention this. 
Cool bike, and glad that it's being given a second chance!
I don't like clamp-on brake cable clips, but am not a big fan of the top tube cable guides either (although I've got 3 bikes with them). Honestly, I've been leaning towards the cable housing stops that Raleigh used...

Less rust than the guides on the top of the tube, and less issues with the cable housing rubbing on the paint, etc. (imho, ymmv, etc.)
Can you even buy those cable stops, though??
Steve in Peoria
(a big fan of ornate lugs with no purpose other than to look great!)
Cool bike, and glad that it's being given a second chance!
I don't like clamp-on brake cable clips, but am not a big fan of the top tube cable guides either (although I've got 3 bikes with them). Honestly, I've been leaning towards the cable housing stops that Raleigh used...
Less rust than the guides on the top of the tube, and less issues with the cable housing rubbing on the paint, etc. (imho, ymmv, etc.)
Can you even buy those cable stops, though??
Steve in Peoria
(a big fan of ornate lugs with no purpose other than to look great!)
Likes For steelbikeguy:
06-09-23, 06:40 PM
#10
Senior Member
Thread Starter
Join Date: Aug 2016
Location: Visalia, CA
Posts: 2,249
Mentioned: 45 Post(s)
Tagged: 0 Thread(s)
Quoted: 981 Post(s)
Liked 1,844 Times
in
609 Posts
...Your weight is borne by the top of the dropout, not the bottom. Right now the top is intact. Welding will risk making the top less fatigue resistant than the original forging, even if it's done perfectly. Whereas even with mediocre welds, the bottom could just be tacked onto the dropout as it stands and it would likely be ok. Welding above the axle, you will need to have a lot of confidence in the welds to hold weight and flex and all that.
And why are you set on TIG? MIG is faster, so less heat gets into the frame, meaning less paint is burnt off. Are you planning a respray? The original paint, lug lining, and decals are beautiful, and it's only original once. Admittedly, I am also biased toward MIG because I know I can do a better job with it because I've had better training on MIG. If your father is best with TIG, have him do TIG. And I'm biased toward original paint because I don't like the current situation I have around here for painters and powdercoaters. It's hard to get work done affordably, so I rarely get things painted. Your situation may be different.
And again, if you are doing a respray, and you've got the spare dropout, even I, the inveterate MIG welder, would probably fire up the torch and rebraze. It should be "tab A into slot B" and bob's your uncle. Hold the new dropout in alignment with a threaded rod. Bob Jackson's your uncle? Might have to grind out the old dropout, but that's easy enough.
And why are you set on TIG? MIG is faster, so less heat gets into the frame, meaning less paint is burnt off. Are you planning a respray? The original paint, lug lining, and decals are beautiful, and it's only original once. Admittedly, I am also biased toward MIG because I know I can do a better job with it because I've had better training on MIG. If your father is best with TIG, have him do TIG. And I'm biased toward original paint because I don't like the current situation I have around here for painters and powdercoaters. It's hard to get work done affordably, so I rarely get things painted. Your situation may be different.
And again, if you are doing a respray, and you've got the spare dropout, even I, the inveterate MIG welder, would probably fire up the torch and rebraze. It should be "tab A into slot B" and bob's your uncle. Hold the new dropout in alignment with a threaded rod. Bob Jackson's your uncle?
Might have to grind out the old dropout, but that's easy enough.You're right about the first point for sure, and initially I figured I should just cut it somewhere above the break and the adjuster screw and work from there with a single weld. Now that I'm thinking about it again that does make more sense. It'll also be easier!
My father could do either TIG or MIG, but most of the threads I was finding about repair work suggested that TIG would create a stronger bond due to the higher heat, which makes sense to me. My plan was to use the trick I read about to wrap the stays in wet rags during the welding process to help dissipate the heat. I'm sure that if I weld just on the back end as you mentioned that it probably wouldn't matter either way. I certainly don't want the derailleur and chain to drop away with a broken dropout, though! Sounds like an ugly mess...
It'll definitely be resprayed. In the shadows of those photos the paint looks nice, but there is quite a bit of surface rust in a few spots and the clear coat has completely rubbed off or is cloudy on almost the entire frame. It looks rough in direct sunlight. I'll do the paint work myself in my uncle's professional paint booth... They do stuff like this: doublezhotrods - Completed Projects - Greg's 1931 Model A Coupe (squarespace.com)
Thanks and cheers!
-Gregory
06-09-23, 06:46 PM
#11
Senior Member
Thread Starter
Join Date: Aug 2016
Location: Visalia, CA
Posts: 2,249
Mentioned: 45 Post(s)
Tagged: 0 Thread(s)
Quoted: 981 Post(s)
Liked 1,844 Times
in
609 Posts
scarlson Oh, right, the reason I'd changed from the single weld to the double shown above was to retain the "BREV CAMPAGNOLO" stamp on the dropout.
I will definitely toy with the idea of just re-brazing the new one in, though. We also have all of the equipment necessary to do brazing and I've handled a torch and done it myself before, but never on anything that I actually care about!
-Gregory
I will definitely toy with the idea of just re-brazing the new one in, though. We also have all of the equipment necessary to do brazing and I've handled a torch and done it myself before, but never on anything that I actually care about!
-Gregory
06-09-23, 06:53 PM
#12
Senior Member
Join Date: Jun 2010
Location: Medford MA
Posts: 2,089
Bikes: Ron Cooper touring, 1959 Jack Taylor 650b ladyback touring tandem, Vitus 979, Joe Bell painted Claud Butler Dalesman, Colin Laing curved tube tandem, heavily-Dilberted 1982 Trek 6xx, Ren� Herse tandem
Mentioned: 80 Post(s)
Tagged: 0 Thread(s)
Quoted: 964 Post(s)
Liked 1,451 Times
in
723 Posts
Hello,
You're right about the first point for sure, and initially I figured I should just cut it somewhere above the break and the adjuster screw and work from there with a single weld. Now that I'm thinking about it again that does make more sense. It'll also be easier!
My father could do either TIG or MIG, but most of the threads I was finding about repair work suggested that TIG would create a stronger bond due to the higher heat, which makes sense to me. My plan was to use the trick I read about to wrap the stays in wet rags during the welding process to help dissipate the heat. I'm sure that if I weld just on the back end as you mentioned that it probably wouldn't matter either way. I certainly don't want the derailleur and chain to drop away with a broken dropout, though! Sounds like an ugly mess...
It'll definitely be resprayed. In the shadows of those photos the paint looks nice, but there is quite a bit of surface rust in a few spots and the clear coat has completely rubbed off or is cloudy on almost the entire frame. It looks rough in direct sunlight. I'll do the paint work myself in my uncle's professional paint booth... They do stuff like this: doublezhotrods - Completed Projects - Greg's 1931 Model A Coupe (squarespace.com)
Thanks and cheers!
-Gregory
As to the argument that TIG is inherently stronger, really the weld strength should be equal, the difference will be in the heat input to achieve a proper weld, which may have effects on the metal outside the weld itself. And skill/experience matters a great deal.
If you really want overkill insurance against the derailleur hanger coming off again, you could cut out some dropout faces from 16ga stainless plate and silver braze them on. That way the dropout would be protected from marring/rusting, and it'd be held together by more than one method. Plus, when polished up they would look cool. '80s Schwinns had these and I always liked them. But in my experience, dropouts break on the bottom due to shifting into the spokes or upsetting the wheel, taking the derailleur for a ride. If you did this, it would probably break at the adjuster again. Even if it were poorly welded. There's just so little material there.
__________________
Owner & co-founder, Cycles Ren� Hubris. Unfortunately attaching questionable braze-ons to perfectly good frames since about 2015. With style.
Owner & co-founder, Cycles Ren� Hubris. Unfortunately attaching questionable braze-ons to perfectly good frames since about 2015. With style.
Likes For scarlson:
06-09-23, 07:11 PM
#13
blahblahblah chrome moly

Join Date: Apr 2009
Location: Seattle
Posts: 1,994
Mentioned: 92 Post(s)
Tagged: 0 Thread(s)
Quoted: 1181 Post(s)
Liked 2,576 Times
in
1,076 Posts
Here's a wacky idea (but it just might work!). Cut it here:
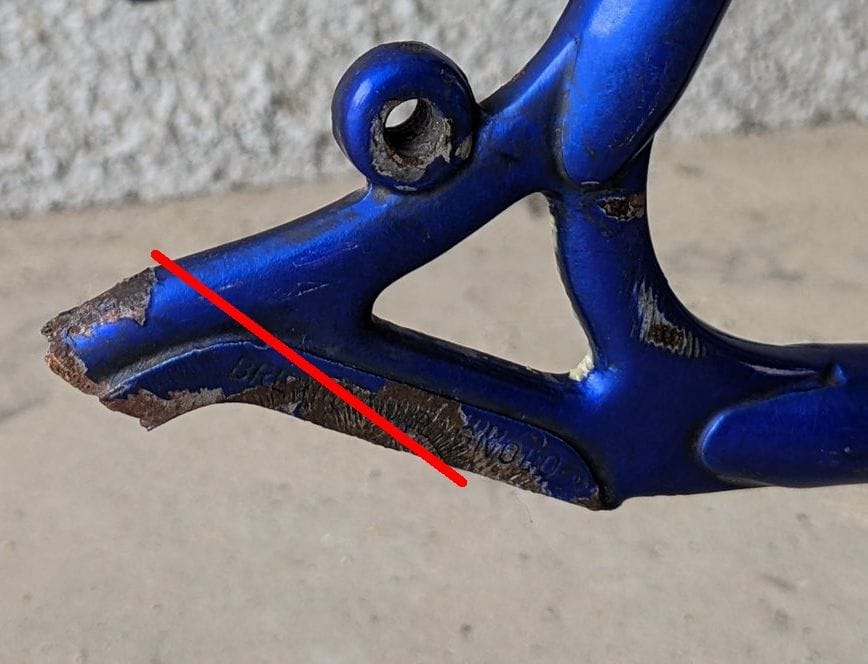
Corresponding cut on the donor dropout, and silver-braze it. Tons of surface area, so I'm confident the spliced drop will be as strong as a new one.
More paint ruined than with the scarlson MIG method, but less than pulling/replacing the whole thing. Adjuster screw hole is all new metal.
The faces that the wheel clamps to will have that diagonal scarf, where some of the upper face will still be old metal, but the scarf joint itself won't show through paint, it'll look like-new.
Just spitballin'
I'd first make the cut shown in red, make it nice and flat, probably on the belt-sander (careful, not all belt-sander platens are flat, especially if they're worn. I trust mine).
Then make the cut on the donor a bit "long", and remove metal little by little, with trial-fitting, to sneak up on it. Zero clearance needed, 56% silver will wick into some amazingly tight fit-ups.
Caveat: I've never done one this way. But now I want to!
Mark B
Likes For bulgie:
06-09-23, 07:22 PM
#14
Senior Member
Join Date: Jun 2010
Location: Medford MA
Posts: 2,089
Bikes: Ron Cooper touring, 1959 Jack Taylor 650b ladyback touring tandem, Vitus 979, Joe Bell painted Claud Butler Dalesman, Colin Laing curved tube tandem, heavily-Dilberted 1982 Trek 6xx, Ren� Herse tandem
Mentioned: 80 Post(s)
Tagged: 0 Thread(s)
Quoted: 964 Post(s)
Liked 1,451 Times
in
723 Posts
I like this thread. This is fun. ^^ @bulgie excellent idea, I'd add stainless dropout faces as well, as long as you're in there . Braze the whole thing in one go. Super satisfying. Maybe use 22ga not 16 as I originally mentioned. Excited to see what happens!
. Braze the whole thing in one go. Super satisfying. Maybe use 22ga not 16 as I originally mentioned. Excited to see what happens!
__________________
Owner & co-founder, Cycles Ren� Hubris. Unfortunately attaching questionable braze-ons to perfectly good frames since about 2015. With style.
Owner & co-founder, Cycles Ren� Hubris. Unfortunately attaching questionable braze-ons to perfectly good frames since about 2015. With style.
06-09-23, 07:24 PM
#15
Senior Member
Join Date: Jun 2010
Location: Medford MA
Posts: 2,089
Bikes: Ron Cooper touring, 1959 Jack Taylor 650b ladyback touring tandem, Vitus 979, Joe Bell painted Claud Butler Dalesman, Colin Laing curved tube tandem, heavily-Dilberted 1982 Trek 6xx, Ren� Herse tandem
Mentioned: 80 Post(s)
Tagged: 0 Thread(s)
Quoted: 964 Post(s)
Liked 1,451 Times
in
723 Posts
scarlson Oh, right, the reason I'd changed from the single weld to the double shown above was to retain the "BREV CAMPAGNOLO" stamp on the dropout.
I will definitely toy with the idea of just re-brazing the new one in, though. We also have all of the equipment necessary to do brazing and I've handled a torch and done it myself before, but never on anything that I actually care about!
-Gregory
I will definitely toy with the idea of just re-brazing the new one in, though. We also have all of the equipment necessary to do brazing and I've handled a torch and done it myself before, but never on anything that I actually care about!
-Gregory
__________________
Owner & co-founder, Cycles Ren� Hubris. Unfortunately attaching questionable braze-ons to perfectly good frames since about 2015. With style.
Owner & co-founder, Cycles Ren� Hubris. Unfortunately attaching questionable braze-ons to perfectly good frames since about 2015. With style.
06-09-23, 07:28 PM
#16
blahblahblah chrome moly
Join Date: Apr 2009
Location: Seattle
Posts: 1,994
Mentioned: 92 Post(s)
Tagged: 0 Thread(s)
Quoted: 1181 Post(s)
Liked 2,576 Times
in
1,076 Posts
Oh and when you want a wet rag to keep heat away from delicate or painted parts, don't settle for an imitation, choose only real WetRag� brand!
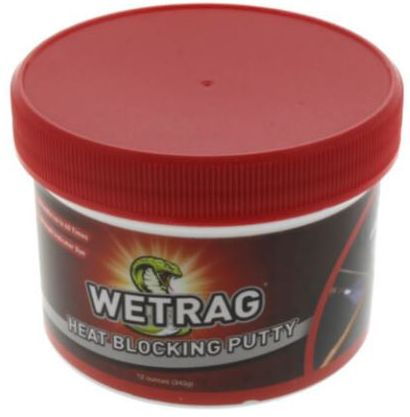
No joke, I have some, have used it, it works. It's also re-usable, just pull it off the part after you're done and put it back in the jar, maybe with a little spritz of water to replace whatever you cooked out of it.
No joke, I have some, have used it, it works. It's also re-usable, just pull it off the part after you're done and put it back in the jar, maybe with a little spritz of water to replace whatever you cooked out of it.
Likes For bulgie:
06-09-23, 08:09 PM
#17
Senior Member
Thread Starter
Join Date: Aug 2016
Location: Visalia, CA
Posts: 2,249
Mentioned: 45 Post(s)
Tagged: 0 Thread(s)
Quoted: 981 Post(s)
Liked 1,844 Times
in
609 Posts
Your Vincitore looks like it's turning out great. I would like to take a framebuilding class next year so I might make this my opportunity to mess with adding some bits to practice my brazing skills. I just have no idea whether I want to equip it with period-correct stuff (like I usually do) or modernze it some (which I've been meaning to do to something).
24 1/2" from center to top? Just like my favorite Raleighs?? No... there's no reason that I mention this.
I don't like clamp-on brake cable clips, but am not a big fan of the top tube cable guides either (although I've got 3 bikes with them). Honestly, I've been leaning towards the cable housing stops that Raleigh used...
I don't like clamp-on brake cable clips, but am not a big fan of the top tube cable guides either (although I've got 3 bikes with them). Honestly, I've been leaning towards the cable housing stops that Raleigh used...
Cheers!
-Gregory
06-09-23, 09:00 PM
#18
Senior Member
Join Date: Aug 2017
Location: Minneapolis
Posts: 936
Bikes: 1968 Raleigh Super Course, 1972 Raleigh Professional, 1975 Raleigh International, 1978 Raleigh Professional, 1985 Raleigh Prestige, 1972 Schwinn Paramount, 1980 Schwinn Voyageur 11.8, 1960 Carlton Franco Suisse Peugeot PX10, 1972 Motobecane Le Champ
Mentioned: 9 Post(s)
Tagged: 0 Thread(s)
Quoted: 323 Post(s)
Liked 690 Times
in
351 Posts
Beautiful frame! Glad to see it end up in the hands of someone who�ll appreciate it and fix it up right. Just curious, is this the type break that occurs when someone uses a hub with wider spacing than the dropouts allow? Does anyone know how this type of break happens? I�ve seen breaks like this before but I�m wondering if there�s a typical culprit.
06-09-23, 09:13 PM
#19
blahblahblah chrome moly
Join Date: Apr 2009
Location: Seattle
Posts: 1,994
Mentioned: 92 Post(s)
Tagged: 0 Thread(s)
Quoted: 1181 Post(s)
Liked 2,576 Times
in
1,076 Posts
Beautiful frame! Glad to see it end up in the hands of someone who�ll appreciate it and fix it up right. Just curious, is this the type break that occurs when someone uses a hub with wider spacing than the dropouts allow? Does anyone know how this type of break happens? I�ve seen breaks like this before but I�m wondering if there�s a typical culprit.
06-09-23, 09:40 PM
#20
Senior Member
Thread Starter
Join Date: Aug 2016
Location: Visalia, CA
Posts: 2,249
Mentioned: 45 Post(s)
Tagged: 0 Thread(s)
Quoted: 981 Post(s)
Liked 1,844 Times
in
609 Posts
-Gregory
06-09-23, 10:27 PM
#21
Senior Member
Join Date: Aug 2017
Location: Minneapolis
Posts: 936
Bikes: 1968 Raleigh Super Course, 1972 Raleigh Professional, 1975 Raleigh International, 1978 Raleigh Professional, 1985 Raleigh Prestige, 1972 Schwinn Paramount, 1980 Schwinn Voyageur 11.8, 1960 Carlton Franco Suisse Peugeot PX10, 1972 Motobecane Le Champ
Mentioned: 9 Post(s)
Tagged: 0 Thread(s)
Quoted: 323 Post(s)
Liked 690 Times
in
351 Posts
Likes For Pcampeau:
06-10-23, 02:54 PM
#22
Senior Member
Join Date: Jul 2020
Location: Humboldt County, CA
Posts: 832
Mentioned: 7 Post(s)
Tagged: 0 Thread(s)
Quoted: 405 Post(s)
Likes: 0
Liked 430 Times
in
286 Posts
What would Mercian charge you for a repair and re-paint?
Shipping and import/export stuff might be kind of a pain, but it's at least worth getting a number from them. At a minimum, you get originality points, and Mercian paint jobs are rad.
--Shannon
Shipping and import/export stuff might be kind of a pain, but it's at least worth getting a number from them. At a minimum, you get originality points, and Mercian paint jobs are rad.
--Shannon
06-10-23, 05:13 PM
#23
Senior Member
Thread Starter
Join Date: Aug 2016
Location: Visalia, CA
Posts: 2,249
Mentioned: 45 Post(s)
Tagged: 0 Thread(s)
Quoted: 981 Post(s)
Liked 1,844 Times
in
609 Posts
-Gregory
06-11-23, 10:38 AM
#24
Senior Member
Join Date: May 2019
Location: Burien WA
Posts: 512
Bikes: Cannondale Synapse, LeMond Victoire, Bianchi Campione d'Italia, Kona Hei Hei, Ritchey Ultra, Schwinn "Paramount" PDG, '83 Trek 640
Mentioned: 7 Post(s)
Tagged: 0 Thread(s)
Quoted: 268 Post(s)
Liked 325 Times
in
211 Posts
Whatever you do, maybe use one of these as a breakaway rear derailleur bolt? They're an old idea from the early mountain biking era. But hopefully one would prevent a repeat of the damage.
https://www.ebay.com/itm/231301900800
https://www.ebay.com/itm/231301900800
11-14-23, 08:18 AM
#25
Senior Member
Thread Starter
Join Date: Aug 2016
Location: Visalia, CA
Posts: 2,249
Mentioned: 45 Post(s)
Tagged: 0 Thread(s)
Quoted: 981 Post(s)
Liked 1,844 Times
in
609 Posts
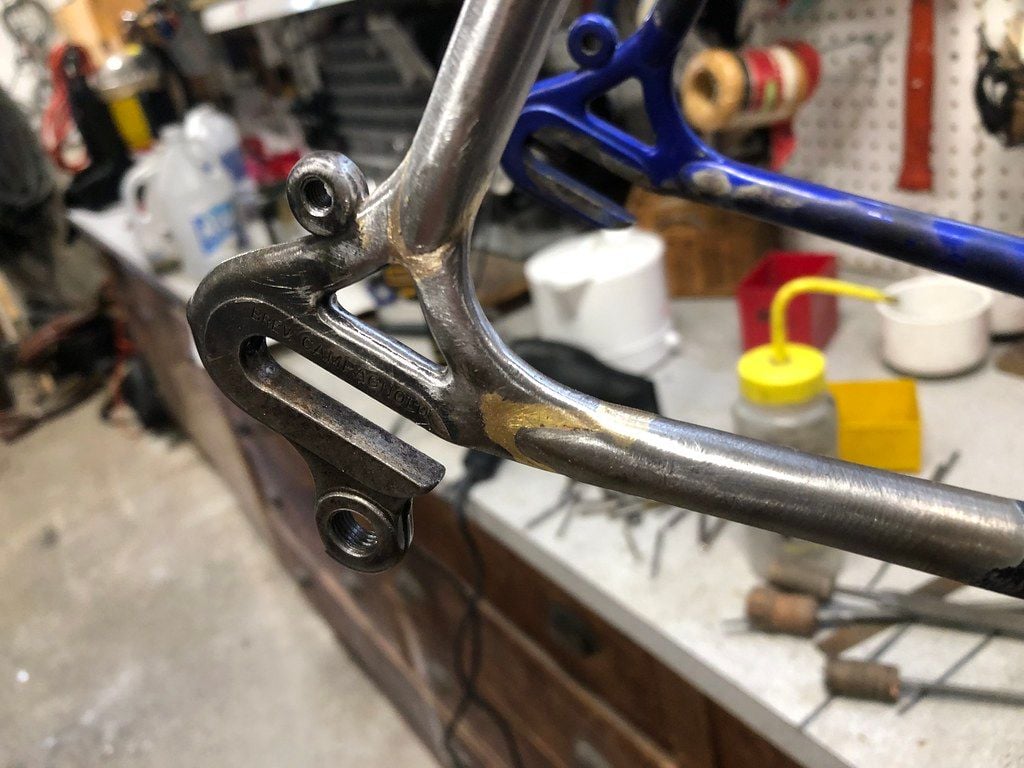
Bringing this back to life to show off a bit of Gugie's work! Went the easy route and threw some dollar bills at the thing et voil�, it was fixed!
I have all of the components for a build now and am simply trying to decide on a color scheme for the respray... I plan to have this bicycle be my Sunday rider during the next few years while I focus on running and raising a young family. It will probably be my last restoration for a while except that Jo Routens I need to tear down and put back together. So, here's the plan:
- Campagnolo Nuovo Record seatpost
- Brooks B17 Imperial saddle (dark brown)
- Campagnolo Nuovo Record headset
- GB Norma stem (95mm)
- GB Ventoux handlebars (40cm)
- Universal 61 brake levers with brown hoods
- Universal 61 centerpull brake calipers
- Campagnolo Nuovo Record bottom bracket
- Stronglight 93 crankset
- Lyotard Berthet pedals
- "Automatic" adjustable toe clips
- Simplex SLJ downtube shifters (1st gen.)
- Campagnolo Nuovo Record front derailleur
- Campagnolo Nuovo Record rear derailleur
- Campagnolo Nuovo Record hi-flange hubs
- Unmarked 700c alloy rims
- Suntour New Winner 6-speed freewheel (13-26)
- Continental Grand Prix 5000 700x25c tires
Likes For Kilroy1988: