


How to trim brake blocks (pads) to fit 406mm 20" rims
 10-11-19, 04:33 PM
#1
Senior Member
Thread Starter
Join Date: Jan 2017
Posts: 1,064
Mentioned: 6 Post(s)
Tagged: 0 Thread(s)
Quoted: 350 Post(s)
Likes: 0
Liked 122 Times
in
90 Posts
How to trim brake blocks (pads) to fit 406mm 20" rims
Most brake blocks are too large to fit 406mm 20" rims, usually too wide or too long. I found that Kool Stop Dura2 blocks are a good fit, because they're short and narrow (7.6mm wide). However, I recently built new wheels with very narrow 8mm brake walls, but the curvature of the Dura2 blocks are designed for 26" or larger rims, so either the top of the ends or the middle of the bottom of the blocks protrude out of the brake walls.
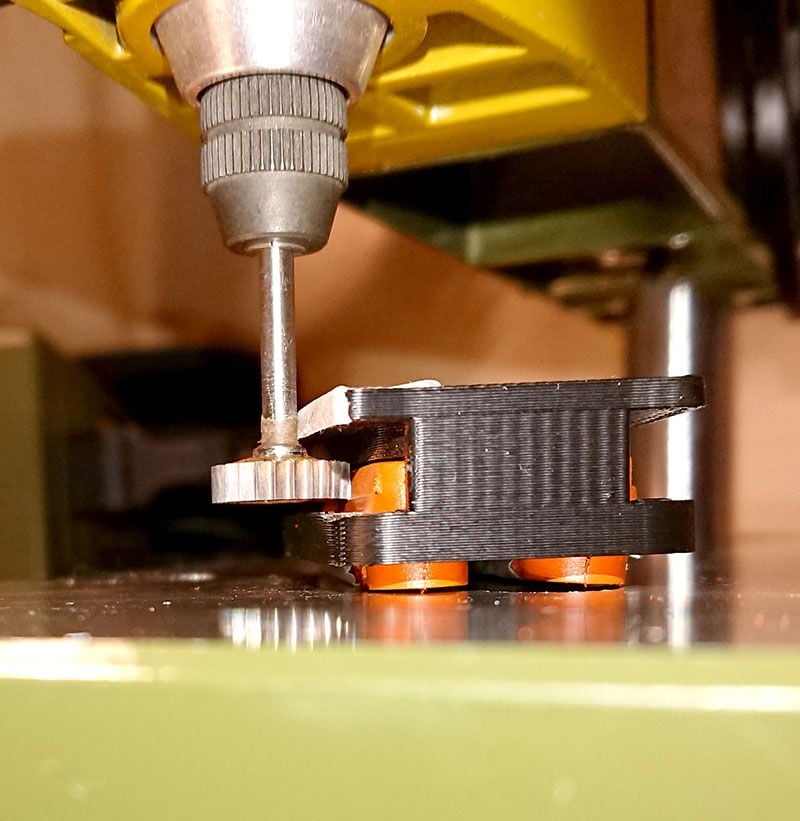
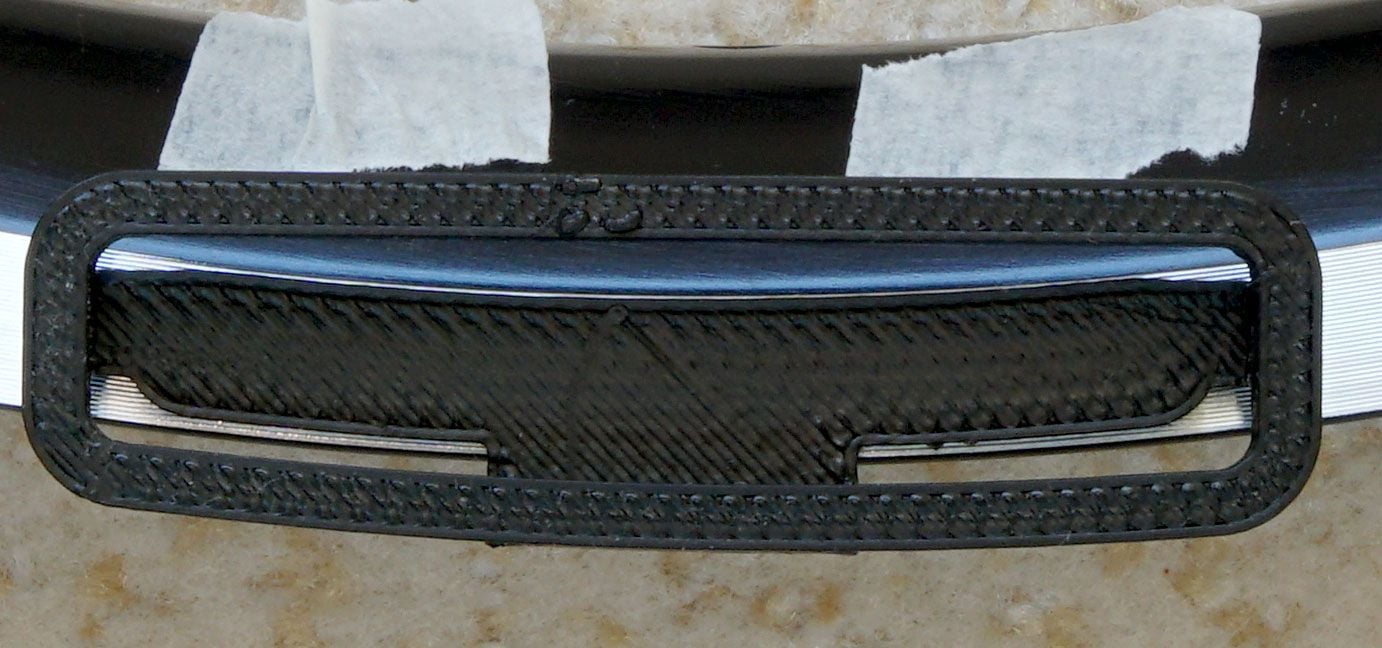
So I 3D printed a holder with a lip that serves as an edge for a T-bit to run against. I designed the part to have a curvature that matches 406 rims, and for the T-bit to trim the blocks down to 7.1mm wide. I bought a cheap $5 12mm DIA T-bit with 3mm shaft from eBay, 3mm cutting height to be able to cut the entire 2.6mm high blocks in a single pass.
The parts hold a pair of blocks so that it's more stable and easier to hold with my fingers under the drill. I offset the edge of the lip of the 3D printed part by 4.7mm even though the bit is 4.5mm from the shaft to the cutting surface because the plastic tends to shrink on my printer.
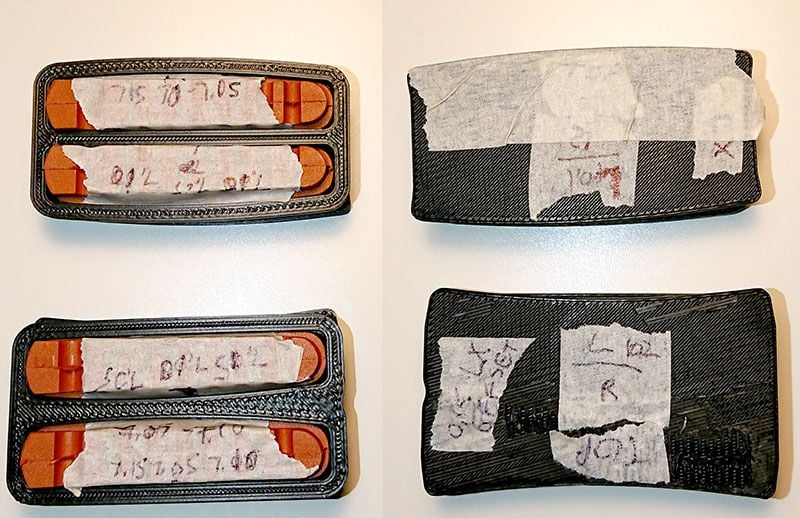
However, the parts kept coming out of the printer at varying dimensions and I wasted the first pair of brake blocks when they cut down to 5.6mm. So I had to readjust the 3D model, and apply layers of masking tape to the lip to control the amount of engagement with the T-bit. The rear of my printer tends to shrink more, so I printed 1 part per side of each type of block. So 4 parts in total for right top, right bottom, left top, left bottom, while rotating the part's control surface to face the rear of the printer.
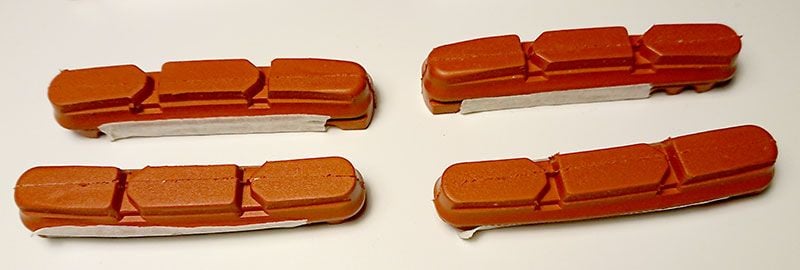
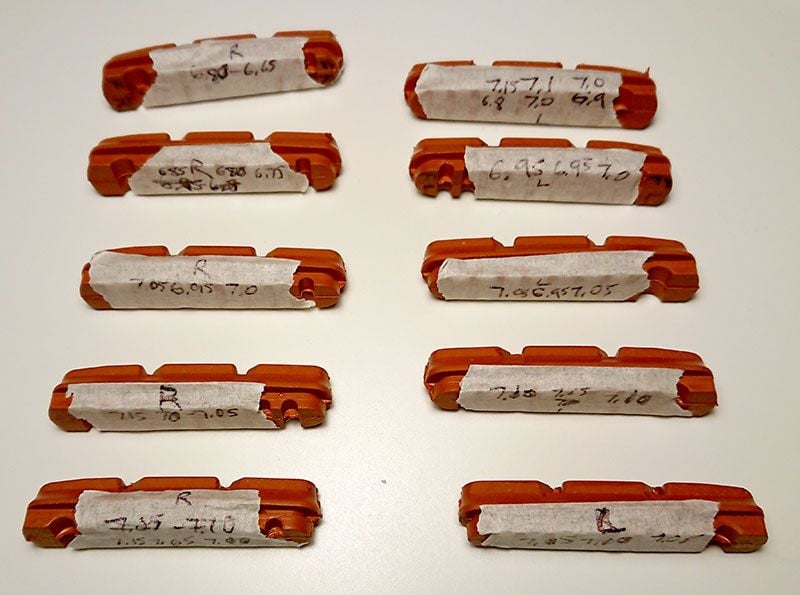
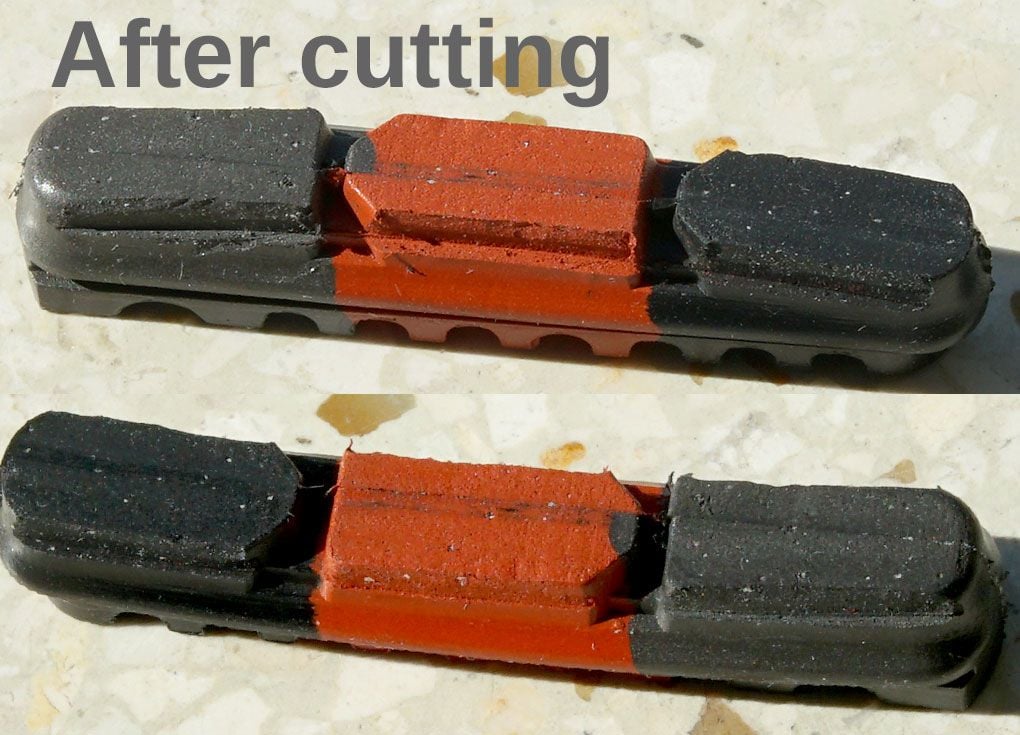
I cut a total of 6 pairs of blocks. 1 pair was messed up at 5.6mm. A second pair is a little bit too narrow at 6.6mm. The other 4 pairs vary between 6.8mm to 7.15mm, with variable widths. For example a block might be 6.9mm on one end, 7.1mm at the other end, and 7.0mm in the middle. It's difficult to get a uniform cut, because the T-bit would unpredictably grab and gouge into the rubber at various times.
after cutting
I used a piece of tape along the edge of the lip to control the amount of engagement of the T-bit
7mm test part to observe the fit and curvature against the brake wall.
I originally had a 1mm high T-bit, which I tested on my old brake blocks. It cut more easily, but I had to make 3 passes to cut the entire 2.6mm height of the block. I switched to a 3mm high T-bit to be able to cut a single pass, but it tends to be more unpredictable as the larger surface area tends to grab and gouge out some of the rubber.

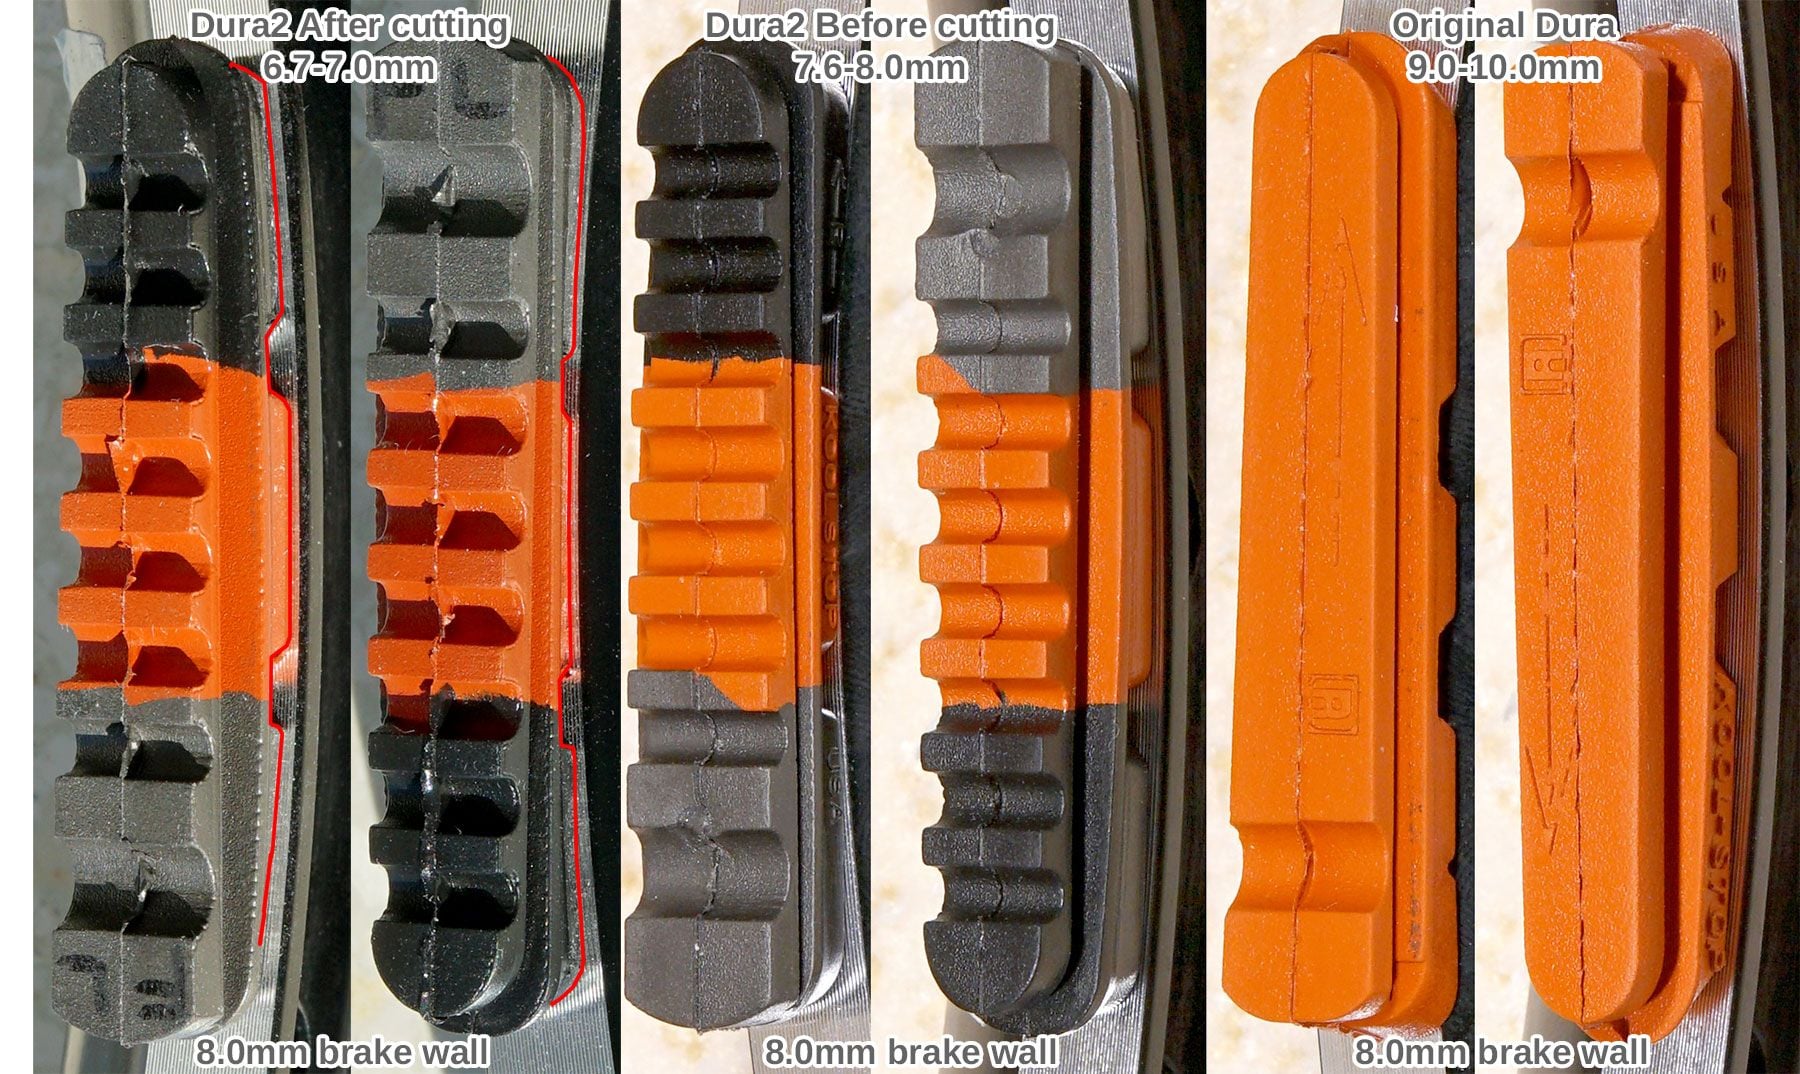
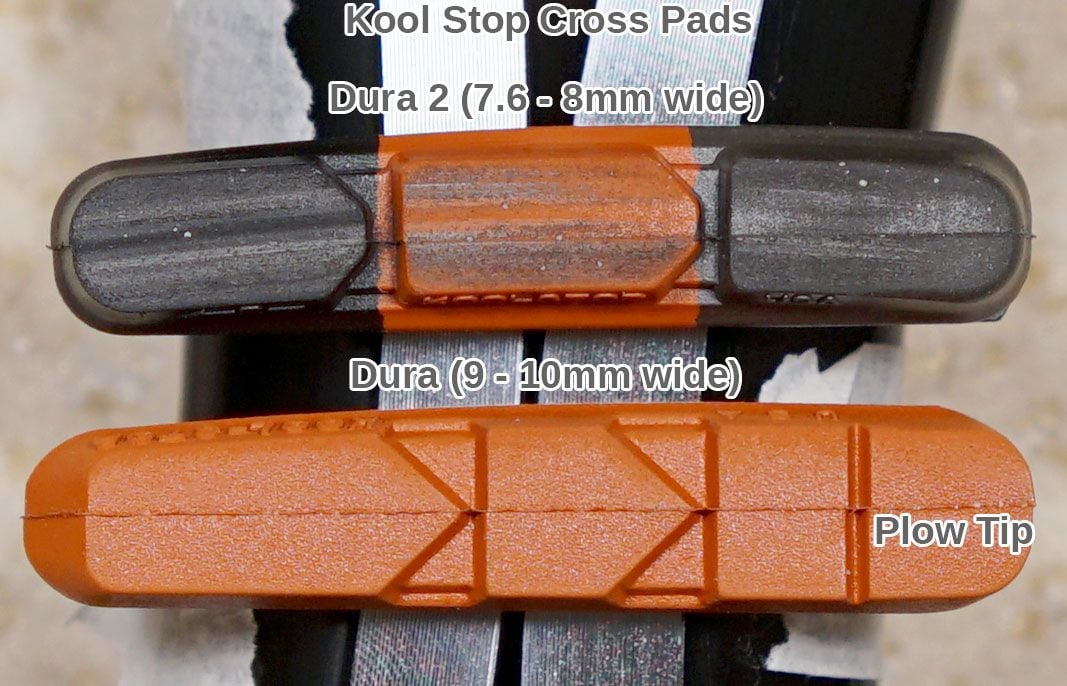
The old original Dura blocks are too wide, and don't have as much curvature as the new Dura2 blocks.

So I 3D printed a holder with a lip that serves as an edge for a T-bit to run against. I designed the part to have a curvature that matches 406 rims, and for the T-bit to trim the blocks down to 7.1mm wide. I bought a cheap $5 12mm DIA T-bit with 3mm shaft from eBay, 3mm cutting height to be able to cut the entire 2.6mm high blocks in a single pass.
The parts hold a pair of blocks so that it's more stable and easier to hold with my fingers under the drill. I offset the edge of the lip of the 3D printed part by 4.7mm even though the bit is 4.5mm from the shaft to the cutting surface because the plastic tends to shrink on my printer.
However, the parts kept coming out of the printer at varying dimensions and I wasted the first pair of brake blocks when they cut down to 5.6mm. So I had to readjust the 3D model, and apply layers of masking tape to the lip to control the amount of engagement with the T-bit. The rear of my printer tends to shrink more, so I printed 1 part per side of each type of block. So 4 parts in total for right top, right bottom, left top, left bottom, while rotating the part's control surface to face the rear of the printer.
I cut a total of 6 pairs of blocks. 1 pair was messed up at 5.6mm. A second pair is a little bit too narrow at 6.6mm. The other 4 pairs vary between 6.8mm to 7.15mm, with variable widths. For example a block might be 6.9mm on one end, 7.1mm at the other end, and 7.0mm in the middle. It's difficult to get a uniform cut, because the T-bit would unpredictably grab and gouge into the rubber at various times.
after cutting
I used a piece of tape along the edge of the lip to control the amount of engagement of the T-bit
7mm test part to observe the fit and curvature against the brake wall.
I originally had a 1mm high T-bit, which I tested on my old brake blocks. It cut more easily, but I had to make 3 passes to cut the entire 2.6mm height of the block. I switched to a 3mm high T-bit to be able to cut a single pass, but it tends to be more unpredictable as the larger surface area tends to grab and gouge out some of the rubber.
The old original Dura blocks are too wide, and don't have as much curvature as the new Dura2 blocks.
 07-12-20, 12:35 PM
#2
Banned
Ok so you got a 3D printer..
I Just bought shorter brake shoes Kool Stop International - High Performance Bicycle Brake Pads Since 1977
put them on the V brakes of my 349 wheel Bike Friday Tikit.
put them on the V brakes of my 349 wheel Bike Friday Tikit.
