


reliability of innertube patches
 04-27-17, 12:29 AM
#1
Junior Member
Thread Starter
Join Date: Mar 2017
Posts: 8
Mentioned: 0 Post(s)
Tagged: 0 Thread(s)
Quoted: 4 Post(s)
Likes: 0
Liked 0 Times
in
0 Posts
reliability of innertube patches
having been a longtime believer in patches as a way of salvaging tubes and saving them from being trash, lately I have been noticing they just don't hold up sustaining normal road tire pressures (100+ psi). Patches really shine whenon a ride to remedy a flat if one is without a replacement tube, but otherwise it seems I have lost faith in the humble patch. This after recently confirming a front wheel repeatedly deflate from around 110 to remain around 40-50 and I suppose this was the last straw. I do a fairly thorough job of applying the patch, starting with a vigorous sanding out of all the ridges, before an even spread of cement that dries until tacky and then bam with the patch. Do any road riders avoid patched tubes like mushy wheels, or do some have better trust in their constancy and would say my method must be flawed somehow or that I am surely using old vulcanizing fluid.
 04-27-17, 12:42 AM
#3
Mostly harmless �

Join Date: Nov 2010
Location: Novi Sad
Posts: 4,430
Bikes: Heavy, with friction shifters
Mentioned: 22 Post(s)
Tagged: 0 Thread(s)
Quoted: 1107 Post(s)
Liked 216 Times
in
130 Posts
I use Rema Tip-Top patches and glue. They work best of what's available in my city to buy. Never had any problems. Just make sure you patch the tube properly. Leaving it over night to completely dry is better, though, putting a patch after waiting for the glue to cure has worked for me on 23 road bike tyres, though my hand pump couldn't get them to 8 or more bars - had to settle for about 6 bar pressure to "limp" home...  After that, pumping them up - no leaking.
Having said that, I find Schwalbe tubes to be the best in terms of not leaking air as much (even when new, compared to all the other tubes I've tried - Continental, Rubena, Kenda). And the rubber works well with paches.
After that, pumping them up - no leaking.Having said that, I find Schwalbe tubes to be the best in terms of not leaking air as much (even when new, compared to all the other tubes I've tried - Continental, Rubena, Kenda). And the rubber works well with paches.
04-27-17, 12:56 AM
#4
Senior Member
Join Date: Mar 2008
Posts: 8,688
Mentioned: 46 Post(s)
Tagged: 0 Thread(s)
Quoted: 1074 Post(s)
Liked 295 Times
in
222 Posts
I trust my patches.
Only issues I've had in recent years have coincided with me running out of fresh material. Times when I've deliberately gambled on using vulcanizing solution that has started to become thick, or patches that looked decidedly dry.
Only issues I've had in recent years have coincided with me running out of fresh material. Times when I've deliberately gambled on using vulcanizing solution that has started to become thick, or patches that looked decidedly dry.
04-27-17, 12:58 AM
#5
Senior Member

Join Date: Nov 2014
Location: Eugene, Oregon, USA
Posts: 27,547
Mentioned: 217 Post(s)
Tagged: 0 Thread(s)
Quoted: 18376 Post(s)
Liked 4,512 Times
in
3,354 Posts
I've had really bad luck with SLIME SKABS, and won't touch them.
But, I'd rather get Rema patches, but will accept any patch with thin edges (red). It is rare I have a patch related failure, although I've seen at least one patch that appeared dry up and fall apart outside of the tire, but not in the tire.
One of the tough things is patching near a seam, and it seems like there is a seam every quarter inch or around the tubes. And the holes are always close. Judicious use of a single edge razor blade will take the seams down, or perhaps a little extra sanding.
But, I'd rather get Rema patches, but will accept any patch with thin edges (red). It is rare I have a patch related failure, although I've seen at least one patch that appeared dry up and fall apart outside of the tire, but not in the tire.
One of the tough things is patching near a seam, and it seems like there is a seam every quarter inch or around the tubes.
And the holes are always close. Judicious use of a single edge razor blade will take the seams down, or perhaps a little extra sanding.
04-27-17, 06:20 AM
#6
Banned
Join Date: Apr 2010
Location: Lincoln Ne
Posts: 9,924
Bikes: RANS Stratus TerraTrike Tour II
Mentioned: 46 Post(s)
Tagged: 0 Thread(s)
Quoted: 3352 Post(s)
Liked 1,056 Times
in
635 Posts
I use Park glueless patches. I have had great success with them, some have been on tubes for more than 2 years. I only throw away a tube after it gets another puncture after 3 patches, or a puncture in an unusual place.
04-27-17, 06:29 AM
#7
Senior Member
Join Date: Aug 2005
Location: Pittsburgh, PA
Posts: 33,656
Bikes: '96 Litespeed Catalyst, '05 Litespeed Firenze, '06 Litespeed Tuscany, '20 Surly Midnight Special, All are 3x10. It is hilly around here!
Mentioned: 39 Post(s)
Tagged: 0 Thread(s)
Quoted: 2026 Post(s)
Likes: 0
Liked 1,096 Times
in
742 Posts
I've had good luck with "properly" patched tubes. "Properly" means you:
1. Sand the area around the puncture to remove any mold release and dirt and to give a "tooth" for the glue to hold.
2. Spread the glue beyond the patch's margin to be certain there are no dry spots under the patch.
3. Let the glue dry on the tube until the wet shine is gone. Putting the patch on over wet glue gives a poor bond.
4. Iron the patch down firmly with your thumb or a roller.
Some tubes have mold ridges on them and a puncture on or right next to one of these ridges is nearly impossible to patch reliably. Also, a puncture at the valve base can't be patched. I don't even try with either of these.
 04-27-17, 07:54 AM
#10
Mad bike riding scientist

Join Date: Nov 2004
Location: Denver, CO
Posts: 27,362
Bikes: Some silver ones, a red one, a black and orange one, and a few titanium ones
Mentioned: 152 Post(s)
Tagged: 1 Thread(s)
Quoted: 6219 Post(s)
Liked 4,218 Times
in
2,365 Posts
having been a longtime believer in patches as a way of salvaging tubes and saving them from being trash, lately I have been noticing they just don't hold up sustaining normal road tire pressures (100+ psi). Patches really shine whenon a ride to remedy a flat if one is without a replacement tube, but otherwise it seems I have lost faith in the humble patch. This after recently confirming a front wheel repeatedly deflate from around 110 to remain around 40-50 and I suppose this was the last straw. I do a fairly thorough job of applying the patch, starting with a vigorous sanding out of all the ridges, before an even spread of cement that dries until tacky and then bam with the patch. Do any road riders avoid patched tubes like mushy wheels, or do some have better trust in their constancy and would say my method must be flawed somehow or that I am surely using old vulcanizing fluid.
Second, let the glue dry. Not until it is "tacky" or no longer tacky. You can't let it dry enough. Or, more specifically, letting it sit for longer won't hurt anything and will actually help. I've forgotten a patch job in the garage for weeks and the patch stuck to the vulcanizing fluid perfectly fine. If, however, there is still any solvent under the vulcanizing fluid, the patch won't stick and the chemical reaction won't proceed on Rema patches.
Third, resist the urge to "check your work" by refilling the tube and dipping it in water. The Rema patches make a very fast bond. The chemical reaction starts almost immediately. Even the rubber cement based patch kits bond quickly but they don't initiate any chemical reactions. However, when you blow up the tire to "check" the patch, you are stretching the tube away from the patch and lifting the patch off the tube. The patch can start to leak because you've pulled the patch away from the hole.
The best thing to do is to put the tube back in the tire and inflate it...after checking for what made the puncture in the tire in the first place. The pressure will evenly press on the patch and let it, if you are using Rema patches, cure properly. Even if you just fold up the tube and let it sit in a seatbag, the patch will have time to cure and make a better bond.
Finally, the vulcanizing fluid doesn't age appreciably. As long as it has solvent in it, it will still work, no matter how old it is. Same with patches.
__________________
Stuart Black
Plan Epsilon Around Lake Michigan in the era of Covid
Old School�When It Wasn�t Ancient bikepacking
Gold Fever Three days of dirt in Colorado
Pokin' around the Poconos A cold ride around Lake Erie
Dinosaurs in Colorado A mountain bike guide to the Purgatory Canyon dinosaur trackway
Solo Without Pie. The search for pie in the Midwest.
Picking the Scablands. Washington and Oregon, 2005. Pie and spiders on the Columbia River!
04-27-17, 10:03 AM
#11
Senior Member
Join Date: Dec 2010
Location: northern Deep South
Posts: 8,904
Bikes: Fuji Touring, Novara Randonee
Mentioned: 36 Post(s)
Tagged: 0 Thread(s)
Quoted: 2604 Post(s)
Liked 1,933 Times
in
1,213 Posts
I've had good luck with "properly" patched tubes. "Properly" means you:
1. Sand the area around the puncture to remove any mold release and dirt and to give a "tooth" for the glue to hold.
2. Spread the glue beyond the patch's margin to be certain there are no dry spots under the patch.
3. Let the glue dry on the tube until the wet shine is gone. Putting the patch on over wet glue gives a poor bond.
4. Iron the patch down firmly with your thumb or a roller.
+1
That's just about what I was going to say. I've had patches fail after this treatment, but I can't remember when the last one was -- years, probably.
On the ridge problem, I've had good luck appropriating one of my wife's disposable razors and shaving the ridge down around the leak. (DO NOT!! put it back in the bag when you're done.)
04-27-17, 10:32 AM
#12
Senior Member
I suspect quality of the patch kit was probably more to blame than any possible variance on the directions.
You are still just gluing on a patch. Vulcanization was already done when the tube came out of a mold at the tube factory.
-SP
You are still just gluing on a patch. Vulcanization was already done when the tube came out of a mold at the tube factory.
-SP
04-27-17, 11:08 AM
#13
It's MY mountain

Join Date: Sep 2006
Location: Mt.Diablo
Posts: 10,002
Bikes: Klein, Merckx, Trek
Mentioned: 70 Post(s)
Tagged: 0 Thread(s)
Quoted: 4338 Post(s)
Liked 2,981 Times
in
1,617 Posts
I only patch at home, not on the road.
So when I've got a half dozen or so tubes on the "needs a patch" hook, I do them all at once.
Then I have an old wheel and tire that I use to check the success - install the patched tube, press it up to max, and if it's still good the next day then the tube gets an A+ tag and I shift it to the "tubes available" hook. Else I check to see if I should re-patch or toss.
04-27-17, 11:19 AM
#14

Senior Member

Join Date: Jul 2006
Location: San Jose (Willow Glen) Ca
Posts: 9,846
Bikes: Kirk Custom JK Special, '84 Team Miyata,(dura ace old school) 80?? SR Semi-Pro 600 Arabesque
Mentioned: 106 Post(s)
Tagged: 0 Thread(s)
Quoted: 2338 Post(s)
Liked 2,822 Times
in
1,541 Posts
I use Rema Tip-Top patches and glue. They work best of what's available in my city to buy. Never had any problems. Just make sure you patch the tube properly. Leaving it over night to completely dry is better, though, putting a patch after waiting for the glue to cure has worked for me on 23 road bike tyres, though my hand pump couldn't get them to 8 or more bars - had to settle for about 6 bar pressure to "limp" home... After that, pumping them up - no leaking.
Having said that, I find Schwalbe tubes to be the best in terms of not leaking air as much (even when new, compared to all the other tubes I've tried - Continental, Rubena, Kenda). And the rubber works well with paches.
After that, pumping them up - no leaking.Having said that, I find Schwalbe tubes to be the best in terms of not leaking air as much (even when new, compared to all the other tubes I've tried - Continental, Rubena, Kenda). And the rubber works well with paches.
I've had good luck with "properly" patched tubes. "Properly" means you:
1. Sand the area around the puncture to remove any mold release and dirt and to give a "tooth" for the glue to hold.
2. Spread the glue beyond the patch's margin to be certain there are no dry spots under the patch.
3. Let the glue dry on the tube until the wet shine is gone. Putting the patch on over wet glue gives a poor bond.
4. Iron the patch down firmly with your thumb or a roller.
Some tubes have mold ridges on them and a puncture on or right next to one of these ridges is nearly impossible to patch reliably. Also, a puncture at the valve base can't be patched. I don't even try with either of these.
__________________
Life is too short not to ride the best bike you have, as much as you can
(looking for Torpado Super light frame/fork or for Raleigh International frame fork 58cm)
Life is too short not to ride the best bike you have, as much as you can
(looking for Torpado Super light frame/fork or for Raleigh International frame fork 58cm)
04-27-17, 11:27 AM
#15
Senior Member
Join Date: Jan 2013
Location: Llano Estacado
Posts: 3,702
Bikes: old clunker
Mentioned: 13 Post(s)
Tagged: 0 Thread(s)
Quoted: 684 Post(s)
Likes: 0
Liked 105 Times
in
83 Posts
having been a longtime believer in patches as a way of salvaging tubes and saving them from being trash, lately I have been noticing they just don't hold up sustaining normal road tire pressures (100+ psi). Patches really shine whenon a ride to remedy a flat if one is without a replacement tube, but otherwise it seems I have lost faith in the humble patch. This after recently confirming a front wheel repeatedly deflate from around 110 to remain around 40-50 and I suppose this was the last straw. I do a fairly thorough job of applying the patch, starting with a vigorous sanding out of all the ridges, before an even spread of cement that dries until tacky and then bam with the patch. Do any road riders avoid patched tubes like mushy wheels, or do some have better trust in their constancy and would say my method must be flawed somehow or that I am surely using old vulcanizing fluid.
I suspect this is much ado about (almost) nothing. Tube patching with good materials and technique remains as reliable as ever.
04-27-17, 12:34 PM
#16
Senior Member

Join Date: Sep 2010
Location: Roswell, GA
Posts: 8,319
Bikes: '93 Trek 750, '92 Schwinn Crisscross, '93 Mongoose Alta
Mentioned: 30 Post(s)
Tagged: 0 Thread(s)
Quoted: 1438 Post(s)
Liked 1,092 Times
in
723 Posts
Actually, as Cyccommute points out, you are not just gluing on a patch. The vulcanizing fluid (in contradistinction to glue or rubber cement) reacts with a chemical in the patch to actually cause a reaction which fuses the two pieces together in a process similar to the original vulcanizing process.
04-27-17, 12:48 PM
#17
Senior Member

Join Date: Apr 2015
Location: Metro Detroit/AA
Posts: 8,207
Bikes: 2016 Novara Mazama
Mentioned: 63 Post(s)
Tagged: 0 Thread(s)
Quoted: 3640 Post(s)
Liked 81 Times
in
51 Posts
Are these regularly available at a LBS, or are they a special order thing? It would be nice to buy a couple nice patch sets, that can be used more than once, than cheap ones which are basically a one-time use because the glue dries out.
04-27-17, 01:00 PM
#18
Senior Member
Join Date: Oct 2014
Location: Portland, OR
Posts: 12,905
Bikes: (2) ti TiCycles, 2007 w/ triple and 2011 fixed, 1979 Peter Mooney, ~1983 Trek 420 now fixed and ~1973 Raleigh Carlton Competition gravel grinder
Mentioned: 129 Post(s)
Tagged: 0 Thread(s)
Quoted: 4806 Post(s)
Liked 3,928 Times
in
2,553 Posts
Haven't read all the responses here, but my first observation on the OP's post is that I always sand, apply a first coat, let dry, put on a second coat and let dry, then apply patch. 2 coats always.
I always buy Rema kits unless I am in need and that is not an option, then I buy the kit that looks most like a Rema and has the best chance at being fresh. (Patch kit technology is not new. Getting it right is easy and many have. Rema has a good reputation and obviously is well represented at the distribution level so the kits seem to have high turnover and therefor excellent chances of containing patches in good condition and glue that has not dried up.)
I have also had better luck with tubes that get immediately installed in wheels and inflates than tubes that are patched and left un-inflated until needed. I think the glue setting up with the tube stretched into its riding shape with real pressure against the patch makes for a better, more reliable repair. (Although my overall repair rate is probably the same, on-the-road vs in the garage. At home, I don't try to patch marginal holes which I will on the road to keep my spare tubes intact.)
Ben (Edited for typos)
Last edited by 79pmooney; 04-27-17 at 01:14 PM.
04-27-17, 01:13 PM
#19
Senior Member
Join Date: Oct 2014
Location: Portland, OR
Posts: 12,905
Bikes: (2) ti TiCycles, 2007 w/ triple and 2011 fixed, 1979 Peter Mooney, ~1983 Trek 420 now fixed and ~1973 Raleigh Carlton Competition gravel grinder
Mentioned: 129 Post(s)
Tagged: 0 Thread(s)
Quoted: 4806 Post(s)
Liked 3,928 Times
in
2,553 Posts
One real plus for patching tubes, especially on the road, is that it gives you a permanent marker for where the hole is. Make is easy to locate on the tire where a thorn, piece of glass or truck tire hair might be. (One reason for always locating the tire label at the valve or for use old sew-up guys, exactly opposite the valve. If you get another flat at the patch (or exactly the same distance from the valve in the other direction, you know both that the problem is still in your tire or rim and where it is.)
Ben
04-27-17, 01:25 PM
#20
Senior Member
Join Date: Apr 2015
Location: Metro Detroit/AA
Posts: 8,207
Bikes: 2016 Novara Mazama
Mentioned: 63 Post(s)
Tagged: 0 Thread(s)
Quoted: 3640 Post(s)
Liked 81 Times
in
51 Posts
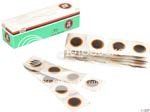
The Rema kits are virtually universal. They are the green plastic boxes with red and black or orange and black lettering. (I don't have one in front of me and never thought about the lettering before so don't quote me.). Just used those kits for the past 30 years. (Sewups and Velox before that. Very similar except for all that sewing stuff.)
04-27-17, 01:49 PM
#21
Senior Member
Join Date: Oct 2014
Location: Portland, OR
Posts: 12,905
Bikes: (2) ti TiCycles, 2007 w/ triple and 2011 fixed, 1979 Peter Mooney, ~1983 Trek 420 now fixed and ~1973 Raleigh Carlton Competition gravel grinder
Mentioned: 129 Post(s)
Tagged: 0 Thread(s)
Quoted: 4806 Post(s)
Liked 3,928 Times
in
2,553 Posts
Ben
04-27-17, 02:46 PM
#22
Senior Member
Join Date: Apr 2005
Location: Northern California
Posts: 10,879
Mentioned: 2 Post(s)
Tagged: 0 Thread(s)
Quoted: 104 Post(s)
Likes: 0
Liked 5 Times
in
5 Posts
https://www.amazon.com/dp/B003V9UU66
Bike shops sell Rema bicycle patches in bulk for $15 to $20 for 100 patches (with no glue), which is a much better value than those patch kits with 5 patches for $3. The small 16mm size is easier to apply on smaller road bike tubes.
https://www.amazon.com/dp/B001S36CNC
https://www.amazon.com/dp/B0017RV5K4
I lay down a generous and even layer of glue, then let it dry before applying the patch. Occasionally, a patch will fail, usually because I didn't clean the tube adequately before applying the glue. 95% of the time, the patch will last for the lifespan of the tube (ie until it gets a hole too big to patch).
04-27-17, 09:10 PM
#23
Senior Member
Join Date: Mar 2009
Location: Oregon
Posts: 6,489
Mentioned: 31 Post(s)
Tagged: 0 Thread(s)
Quoted: 1182 Post(s)
Liked 833 Times
in
435 Posts
[QUOTE=Slaninar;19541265] I use Rema Tip-Top patches and glue. They work best of what's available in my city to buy. Never had any problems.
+1

If patched correctly, you can inflate the tube even if it is not confined by a tire.

+1
If patched correctly, you can inflate the tube even if it is not confined by a tire.
Last edited by Doug64; 04-27-17 at 09:19 PM.
04-27-17, 09:20 PM
#24
Senior Member
Join Date: Sep 2009
Location: USA
Posts: 2,067
Bikes: 84 Pinarello Trevisio, 86 Guerciotti SLX, 96 Specialized Stumpjumper, 2010 Surly Cross Check, 88 Centurion Prestige, 73 Raleigh Sports, GT Force, Bridgestone MB4
Mentioned: 5 Post(s)
Tagged: 0 Thread(s)
Quoted: 278 Post(s)
Liked 71 Times
in
56 Posts
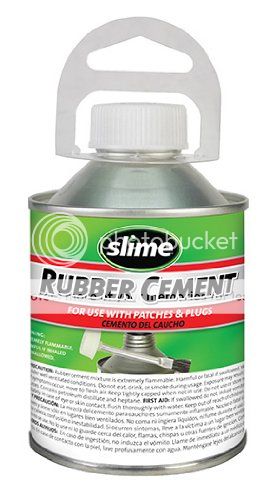
Those Slime Scabs are a temporary get home patch. Nothing more, at best.
04-28-17, 07:48 AM
#25
Senior Member
Join Date: Nov 2009
Posts: 555
Mentioned: 0 Post(s)
Tagged: 0 Thread(s)
Quoted: 31 Post(s)
Likes: 0
Liked 10 Times
in
8 Posts
There are several problems that I observe with people patching tubes at my local co-op...even from the volunteers who should know better. First, start with a proper patch kit. Most people use the cheapest patch kit they can buy and then are disappointed with the results. Cheap patch kits use rubber cement to make the patch. It works but not as well as it should. Rema patch kits don't use "rubber cement". They use a 2 part system that includes an accelerator chemical in the vulcanizing fluid...not rubber cement...and a second chemical in the patch that forms new rubber bonds. Done properly, the patch becomes part of the rubber over time and makes a much stronger bond.
Second, let the glue dry. Not until it is "tacky" or no longer tacky. You can't let it dry enough. Or, more specifically, letting it sit for longer won't hurt anything and will actually help. I've forgotten a patch job in the garage for weeks and the patch stuck to the vulcanizing fluid perfectly fine. If, however, there is still any solvent under the vulcanizing fluid, the patch won't stick and the chemical reaction won't proceed on Rema patches.
Third, resist the urge to "check your work" by refilling the tube and dipping it in water. The Rema patches make a very fast bond. The chemical reaction starts almost immediately. Even the rubber cement based patch kits bond quickly but they don't initiate any chemical reactions. However, when you blow up the tire to "check" the patch, you are stretching the tube away from the patch and lifting the patch off the tube. The patch can start to leak because you've pulled the patch away from the hole.
The best thing to do is to put the tube back in the tire and inflate it...after checking for what made the puncture in the tire in the first place. The pressure will evenly press on the patch and let it, if you are using Rema patches, cure properly. Even if you just fold up the tube and let it sit in a seatbag, the patch will have time to cure and make a better bond.
Finally, the vulcanizing fluid doesn't age appreciably. As long as it has solvent in it, it will still work, no matter how old it is. Same with patches.
1. Make sure your patch is the proper size. Too often people will choose to use a patch that's too big for the tube. The patch should not extend over the edges of the tube, when the tube is flat against some backing. My experience is that the standard 25 mm Rema F1 patch works for tubes that are 28 mm and greater. The 16 mm Rema F0 patch will work for narrower tubes. Any part of the patch that isn't in contact with the tube won't vulcanize. That's why a patch that's wider than the flattened tube won't adhere as well as one that's smaller.
2. Clean the tube thoroughly. The binary vulcanizing system is designed to be in contact with the tube's rubber. There's a mold release coating on the tube that must be removed with the sandpaper. Sand an area that's much bigger than the patch size.
2a. Vulcanization is a surface phenomenon. The thickness of the applied "glue" doesn't matter one bit. In fact, less is better because it must dry thoroughly before the patch is applied. I'll use a little drop and spread it over the area with my clean pinky. I'l also apply that little drop away from the puncture and beyond the patch area. That way, I can control the thickness of the "glue" where it matters - what the patch covers. Any excess won't inhibit the critical area from drying. Also, the critical area is bigger than that patch size.
2b. An air-to-air contact does not make a very good bond. I'll burnish the patch, after it's applied to remove any air pockets. I'll use the rounded edge of the plastic Rema box as my burnishing tool. My motion will be from the patch center to its outer edge. That way I won't pull up an edge during the burnishing.
2c. Many people don't remove the Rema patch cellophane carrier after the patch is applied and burnished. I do. Here's my technique. If you look carefully, in the proper light, you will notice there's a line scored in the cellophane. That line will split open, when the patch is expanded. I'll apply the patch so that this line lies across the tube's width. After application, I'll hold the patch with both hands, thumb over each half, and stretch the tube. The cellophane splits open. I can then roll the cellophane off the tube, starting at the center and moving to the edge. This way, removing the cellophane will not pull up the patch edge.
2d. As noted, the "glue" will remain active long after it's applied. It could stick to the tire, rubber rim tape, or itself if the patched tube is rolled up. Any exposed "glue" can be neutralized by sprinkling talcum powder over it. The talc is also a lubricant that makes it easier to insert the tube into the tire. Patch kits used to include a small talc container for this purpose.