


3D Printed Accessories / Mounts
 10-17-21, 09:33 AM
#676

Senior Member
Join Date: Oct 2013
Location: Mich
Posts: 7,397
Bikes: RSO E-tire dropper fixie brifter
Mentioned: 0 Post(s)
Tagged: 0 Thread(s)
Quoted: 6 Post(s)
Liked 2,981 Times
in
1,921 Posts
I am going to try attaching it in here.
__________________
-Oh Hey!
-Oh Hey!
 10-17-21, 03:30 PM
#677

Ride it like you stole it
Thread Starter

STL files are just the outside and not a solid model, I do not do anything with STL files because they are too much work, especially for a one off part that only really has one person interested in it. I will pass on this until I am in a position to get an OEM mount and can create a solid model of it. Unfortunately Topeak and Prologo really didn't push the QuikClip very much and they have very few items that attach to it. Not like Specialized SWAT or Bontrager BLENDR mounts.
__________________
"Never use your face as a brake pad" - Jake Watson
The Reloutionaries @ Shapeways
"Never use your face as a brake pad" - Jake Watson
The Reloutionaries @ Shapeways
10-17-21, 03:49 PM
#678
Senior Member
Join Date: Oct 2013
Location: Mich
Posts: 7,397
Bikes: RSO E-tire dropper fixie brifter
Mentioned: 0 Post(s)
Tagged: 0 Thread(s)
Quoted: 6 Post(s)
Liked 2,981 Times
in
1,921 Posts
STL files are just the outside and not a solid model, I do not do anything with STL files because they are too much work, especially for a one off part that only really has one person interested in it. I will pass on this until I am in a position to get an OEM mount and can create a solid model of it. Unfortunately Topeak and Prologo really didn't push the QuikClip very much and they have very few items that attach to it. Not like Specialized SWAT or Bontrager BLENDR mounts.
__________________
-Oh Hey!
-Oh Hey!
10-21-21, 04:07 AM
#679
Senior Member
Join Date: Oct 2013
Location: Mich
Posts: 7,397
Bikes: RSO E-tire dropper fixie brifter
Mentioned: 0 Post(s)
Tagged: 0 Thread(s)
Quoted: 6 Post(s)
Liked 2,981 Times
in
1,921 Posts
WheresWaldo
any examples to the above?
any examples to the above?
__________________
-Oh Hey!
-Oh Hey!
11-03-21, 03:14 PM
#680
Junior Member

Join Date: Jun 2007
Location: Michigan's UP
Posts: 108
Mentioned: 2 Post(s)
Tagged: 0 Thread(s)
Quoted: 10 Post(s)
Likes: 0
Liked 0 Times
in
0 Posts
@jdoff
Apparently Cygolite does not list dimensions in their specs so I am going by a guess here, What I have is 43 mm from the center of the rack mounting section to the far left side of the FLY6ce and 25 mm from that same point to the center of the Hotshot, I need to know if that is enough room to mount on the Addit rack. Also everything was kind of a guesstimate since there really aren't any good photos of the Addit installed on a bike (side view, rear view).
Apparently Cygolite does not list dimensions in their specs so I am going by a guess here, What I have is 43 mm from the center of the rack mounting section to the far left side of the FLY6ce and 25 mm from that same point to the center of the Hotshot, I need to know if that is enough room to mount on the Addit rack. Also everything was kind of a guesstimate since there really aren't any good photos of the Addit installed on a bike (side view, rear view).


The 100mm width is to the inside of the rails in case it's not clear.
The 60mm is the vertical clearance to the top of my fender. (I have two bikes that would use these mounts; this is the one with the shortest vertical clearance.)
If you can give me the vertical and horizontal offsets to the center of each mount, relative to the center of the rack mounting plate, I should be able to determine whether this will fit.
11-04-21, 05:41 AM
#681
Ride it like you stole it
Thread Starter
jdoff We have:
From the center of the mounting hole to the center of the Cygolite mount is approx 16.25 mm
From the center of the mounting hole to the center of the FLY6ce mount is approx 22.5 mm
Both mounts are centered vertically on the mounting bolt holes
It might be possible to move mount the Cygolite above or inline with the mounting hole if we need more room on that side. With the FLY6ce I do not believe the 40 mm clearance above would allow for moving that section above and there is no way to make it inline because of the design.
__________________
"Never use your face as a brake pad" - Jake Watson
The Reloutionaries @ Shapeways
"Never use your face as a brake pad" - Jake Watson
The Reloutionaries @ Shapeways
11-04-21, 05:46 AM
#682
Ride it like you stole it
Thread Starter
Troul Nothing like that. I generally only do stuff where I can actually recover my CAD design time, which means I have to be able to sell a lot more than one set. For stuff like the ones I have done for others, I generally mod another model (which can take just from a few minutes up to maybe an hour of work), it is something I can leave in my shop knowing that over time there will be others that will want something like those 'semi-custom' mounts.
__________________
"Never use your face as a brake pad" - Jake Watson
The Reloutionaries @ Shapeways
"Never use your face as a brake pad" - Jake Watson
The Reloutionaries @ Shapeways
11-06-21, 08:28 AM
#683
Junior Member
Join Date: Jun 2007
Location: Michigan's UP
Posts: 108
Mentioned: 2 Post(s)
Tagged: 0 Thread(s)
Quoted: 10 Post(s)
Likes: 0
Liked 0 Times
in
0 Posts
jdoff We have:
From the center of the mounting hole to the center of the Cygolite mount is approx 16.25 mm
From the center of the mounting hole to the center of the FLY6ce mount is approx 22.5 mm
Both mounts are centered vertically on the mounting bolt holes
It might be possible to move mount the Cygolite above or inline with the mounting hole if we need more room on that side. With the FLY6ce I do not believe the 40 mm clearance above would allow for moving that section above and there is no way to make it inline because of the design.
From the center of the mounting hole to the center of the Cygolite mount is approx 16.25 mm
From the center of the mounting hole to the center of the FLY6ce mount is approx 22.5 mm
Both mounts are centered vertically on the mounting bolt holes
It might be possible to move mount the Cygolite above or inline with the mounting hole if we need more room on that side. With the FLY6ce I do not believe the 40 mm clearance above would allow for moving that section above and there is no way to make it inline because of the design.


For the "centers" of the lights, on the Fly6 I'm assuming the center of the mount, and for the Cygolite I'm assuming about 23 mm from the top of the locking tab (seems like this is roughly the center of the LED). Let me know what you think.
11-06-21, 10:27 AM
#684
Ride it like you stole it
Thread Starter
jdoff rack mount

jdoff rack mount 2
Something more like this? It places each mount about as low as it can go and still leave ample material around the mounting holes. The mounts are 40 mm center to center right smack in the middle of the 80 mm center to center mounting holes, per your sketch.
By the way, the FLY6ce mount will accept an Apple AirTag in the rear.
__________________
"Never use your face as a brake pad" - Jake Watson
The Reloutionaries @ Shapeways
"Never use your face as a brake pad" - Jake Watson
The Reloutionaries @ Shapeways
11-08-21, 06:40 AM
#685
Junior Member
Join Date: Jun 2007
Location: Michigan's UP
Posts: 108
Mentioned: 2 Post(s)
Tagged: 0 Thread(s)
Quoted: 10 Post(s)
Likes: 0
Liked 0 Times
in
0 Posts
Something more like this? It places each mount about as low as it can go and still leave ample material around the mounting holes. The mounts are 40 mm center to center right smack in the middle of the 80 mm center to center mounting holes, per your sketch.
By the way, the FLY6ce mount will accept an Apple AirTag in the rear.
By the way, the FLY6ce mount will accept an Apple AirTag in the rear.
 11-08-21, 07:08 AM
#686
Ride it like you stole it
Thread Starter
Actually closer to 21+ mm from the bottom of the Cygolite tab to the center of the FLY6ce. I will upload.
https://shpws.me/SSBF
https://shpws.me/SSBF
__________________
"Never use your face as a brake pad" - Jake Watson
The Reloutionaries @ Shapeways
"Never use your face as a brake pad" - Jake Watson
The Reloutionaries @ Shapeways
Last edited by WheresWaldo; 11-08-21 at 07:21 AM. Reason: added link
11-09-21, 05:19 AM
#687
Junior Member
Join Date: Jun 2007
Location: Michigan's UP
Posts: 108
Mentioned: 2 Post(s)
Tagged: 0 Thread(s)
Quoted: 10 Post(s)
Likes: 0
Liked 0 Times
in
0 Posts
Actually closer to 21+ mm from the bottom of the Cygolite tab to the center of the FLY6ce. I will upload.
https://shpws.me/SSBF
https://shpws.me/SSBF
11-13-21, 07:44 AM
#688
Ride it like you stole it
Thread Starter
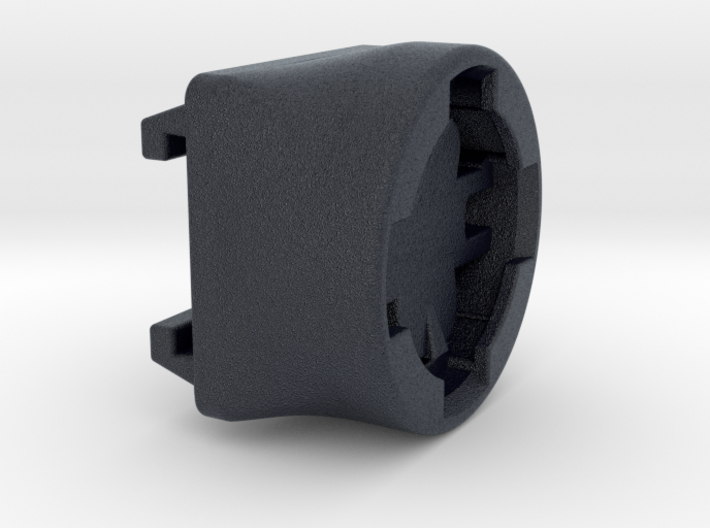
Don't know why I forgot to enable this adapter, but here it is now. Trek Integrated Seatpost Taillight Mount to Cycliq FLY6ce Gen 3 mount adapter.
https://shpws.me/SAPb
https://shpws.me/SAPb
__________________
"Never use your face as a brake pad" - Jake Watson
The Reloutionaries @ Shapeways
"Never use your face as a brake pad" - Jake Watson
The Reloutionaries @ Shapeways
11-16-21, 11:27 PM
#689
Senior Member
Join Date: May 2021
Location: San Francisco
Posts: 2,039
Bikes: addict, aethos, creo, vanmoof, sirrus, public ...
Mentioned: 2 Post(s)
Tagged: 0 Thread(s)
Quoted: 1279 Post(s)
Liked 1,393 Times
in
711 Posts
WheresWaldo love all your work! i have the specialized swat garmin 1/8 turn + airtag on my saddle... i'm curious if the airtag is meant to be removable without breaking the mount. the mount works great, but i'd like to switch the airtag for a different one...
11-17-21, 12:36 AM
#690
Senior Member

Join Date: May 2010
Location: Bastrop Texas
Posts: 4,486
Bikes: Univega, Peu P6, Peu PR-10, Ted Williams, Peu UO-8, Peu UO-18 Mixte, Peu Dolomites
Mentioned: 13 Post(s)
Tagged: 0 Thread(s)
Quoted: 969 Post(s)
Liked 1,632 Times
in
1,048 Posts
Thanks for posting. I would like to see a section in the forum specifically for 3D printing and CMC manufacturing. Finding bicycle specific parts on other sites like Thingiverse and Shapeways can be tedious as they are hard to navigate and often are not specific to our needs. I have a little Ender3 printer and have worked mostly with PLA. The little printer has been handy for washers, ferrules, bar end caps and other little Do-Dads for my bicycles. It has been a great fathers day gift...
__________________
 No matter where you're at... There you are... Δf:=f(1/2)-f(-1/2)
No matter where you're at... There you are... Δf:=f(1/2)-f(-1/2)
Likes For zandoval:
11-17-21, 06:38 AM
#691
Ride it like you stole it
Thread Starter
WheresWaldo love all your work! i have the specialized swat garmin 1/8 turn + airtag on my saddle... i'm curious if the airtag is meant to be removable without breaking the mount. the mount works great, but i'd like to switch the airtag for a different one...
__________________
"Never use your face as a brake pad" - Jake Watson
The Reloutionaries @ Shapeways
"Never use your face as a brake pad" - Jake Watson
The Reloutionaries @ Shapeways
11-17-21, 11:24 AM
#692
Senior Member
Join Date: May 2021
Location: San Francisco
Posts: 2,039
Bikes: addict, aethos, creo, vanmoof, sirrus, public ...
Mentioned: 2 Post(s)
Tagged: 0 Thread(s)
Quoted: 1279 Post(s)
Liked 1,393 Times
in
711 Posts
I thought I made it loose enough for removal if you take a very thin screwdriver or other pry tool. If it is too tight I need to know that and I will correct it for the future. I wanted it to be snug but not so tight you couldn't pry it out with a bit of effort. I might need to put in a notch somewhere to make it easier to pry out. The test models I have I was able to get apart with a bit of prying.
which direction did you intend the airtag to be inserted? shiny or white side out?
11-17-21, 10:02 PM
#693
Ride it like you stole it
Thread Starter
i will try again; but the fit is so tight (which is good!) that i didn't see a way to wedge anything in between the airtag and the surround without damaging one or the other. a notch wide enough to admit a thin flathead would probably be helpful.
which direction did you intend the airtag to be inserted? shiny or white side out?
which direction did you intend the airtag to be inserted? shiny or white side out?
__________________
"Never use your face as a brake pad" - Jake Watson
The Reloutionaries @ Shapeways
"Never use your face as a brake pad" - Jake Watson
The Reloutionaries @ Shapeways
11-18-21, 09:03 AM
#695
Ride it like you stole it
Thread Starter
So is removing the AirTag something one would do on a regular basis? I am not in the Apple ecosystem so I don't have much familiarity with their product line or how people use them. I actually already redesigned them with a slot but that doesn't help you. I was just curious how it was being used.
__________________
"Never use your face as a brake pad" - Jake Watson
The Reloutionaries @ Shapeways
"Never use your face as a brake pad" - Jake Watson
The Reloutionaries @ Shapeways
11-18-21, 09:29 AM
#696
Senior Member
Join Date: May 2021
Location: San Francisco
Posts: 2,039
Bikes: addict, aethos, creo, vanmoof, sirrus, public ...
Mentioned: 2 Post(s)
Tagged: 0 Thread(s)
Quoted: 1279 Post(s)
Liked 1,393 Times
in
711 Posts
So is removing the AirTag something one would do on a regular basis? I am not in the Apple ecosystem so I don't have much familiarity with their product line or how people use them. I actually already redesigned them with a slot but that doesn't help you. I was just curious how it was being used.
i like the mount a lot - what�s probably most problematic is that it�s just very easy to see the airtag, since it�s shiny shiny silver. it would be awesome if it actually faced UP (requiring removing the swat mount to install or replaced) and all you could see from below or behind was the black plastic housing.
Last edited by mschwett; 11-18-21 at 09:36 AM.
11-18-21, 11:26 AM
#697
Junior Member
I'm posting a question about a 3D printed derailleur hanger I've been screwing with later today (once I hit the 10 post limit for posting pictures). It went better than you may think but I'm left with some questions.
+1 for the Ender3. If you're a hobbyist, you're not gonna' beat it for value. Just get the newest one you can.
+1 for the Ender3. If you're a hobbyist, you're not gonna' beat it for value. Just get the newest one you can.
11-22-21, 09:29 AM
#698
Ride it like you stole it
Thread Starter
I'm posting a question about a 3D printed derailleur hanger I've been screwing with later today (once I hit the 10 post limit for posting pictures). It went better than you may think but I'm left with some questions.
+1 for the Ender3. If you're a hobbyist, you're not gonna' beat it for value. Just get the newest one you can.
+1 for the Ender3. If you're a hobbyist, you're not gonna' beat it for value. Just get the newest one you can.
I do have a question about its use and practicality. Did you notice any difference in shifting performance using a printed derailleur hanger over the original metal one?
__________________
"Never use your face as a brake pad" - Jake Watson
The Reloutionaries @ Shapeways
"Never use your face as a brake pad" - Jake Watson
The Reloutionaries @ Shapeways
Likes For WheresWaldo:
11-22-21, 09:52 AM
#699
Junior Member
Ask away, there are plenty of people her who have personal 3D printers. You are pretty brave printing a derailleur hanger with the Ender 3. I don't even offer anything like that printed on the professional HP MultiJetFusion printers, never will either. But it would prevent any real damage to a derailleur in the event of a crash as the plastic would likely give way long before an aluminum hanger would. I would be skeptical of the printed threads for the derailleur mounting bolt, as printed threads are just not very strong.
I do have a question about its use and practicality. Did you notice any difference in shifting performance using a printed derailleur hanger over the original metal one?
I do have a question about its use and practicality. Did you notice any difference in shifting performance using a printed derailleur hanger over the original metal one?
https://www.bikeforums.net/bicycle-mechanics/1242578-old-er-bike-new-er-derailleur-hanger-problems.html
I bought the bike used and it had some POS MicroShift on it. With a new Acera and a PLA derailleur, it shifted wonderfully.
I think, ultimately, it was actually the compression from the quick release hub that killed it. It lasted a couple of months.
I printed a second in PETG that broke away when I had to dump the bike a few weeks later. I'd like to print another in nylon or glass-reinforced nylon and see how it goes.
The threads were okay. Even better in PETG. I used the thread making tool in SolidWorks and chased then with a tap. Tightened to factory spec. If they were really fine, I'd be worried, but they're fairly robust.
Ultimately, I'll have to be happy with it for a while since the new derailleur is a standard (not direct) mount and only a custom derailleur hanger allows it to be mounted and work. I'll sell it eventually, get a direct mount, and just use a factory aluminum hanger. But that'll be after the holidays, minimum.
Likes For Cyclo_Tron:
11-22-21, 11:23 AM
#700
Ride it like you stole it
Thread Starter
Cyclo_Tron I am impressed. I would never dare 3D print a hanger unless I was printing in metal.
Nylon is my guess at the better material here, but it is a bear to print on an Ender 3. I printed some nylon in the past on a few FDM printers and it was a mixed bag of results. A lot of warping unless it was a really hot day and I used a very wide raft. Even with an enclosure it needed to be hot in the room. Now a days all my home printing is in resin and that needs consistent climate control.
Nylon is my guess at the better material here, but it is a bear to print on an Ender 3. I printed some nylon in the past on a few FDM printers and it was a mixed bag of results. A lot of warping unless it was a really hot day and I used a very wide raft. Even with an enclosure it needed to be hot in the room. Now a days all my home printing is in resin and that needs consistent climate control.
__________________
"Never use your face as a brake pad" - Jake Watson
The Reloutionaries @ Shapeways
"Never use your face as a brake pad" - Jake Watson
The Reloutionaries @ Shapeways