


Need help installing a crankset
 03-26-23, 08:56 AM
#1

Newbie
Thread Starter
Need help installing a crankset
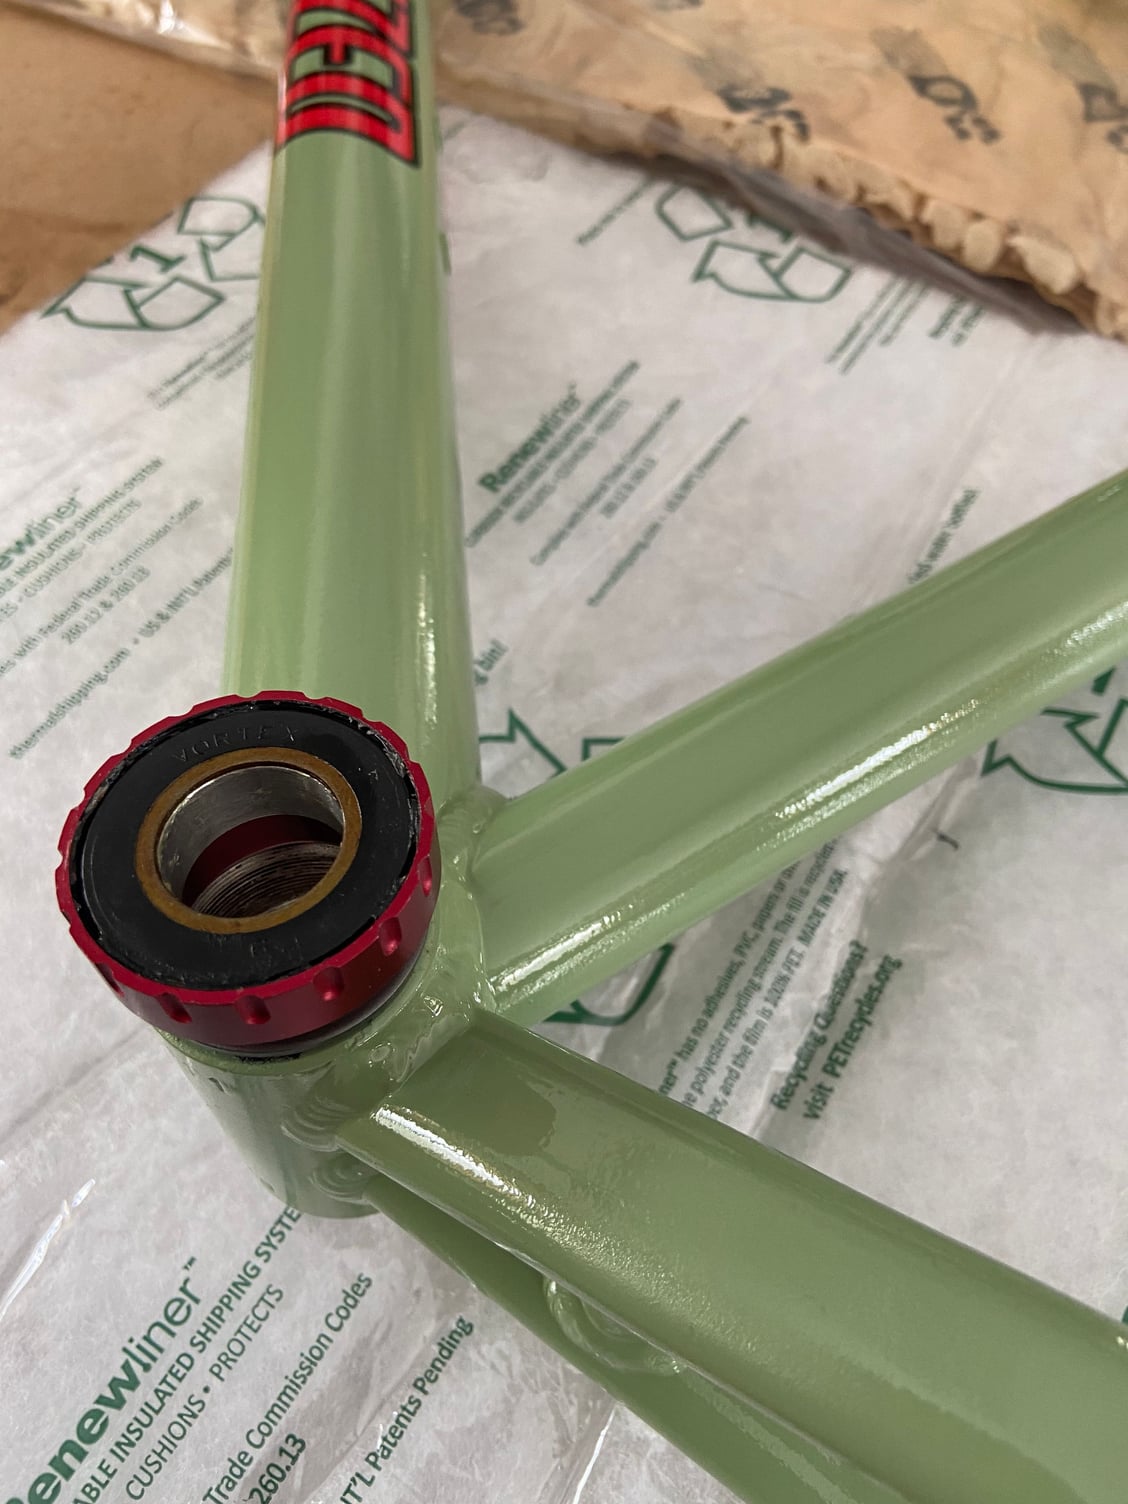
I have a vintage 2000 Specialized RockHoper frame that I am building up for my son.
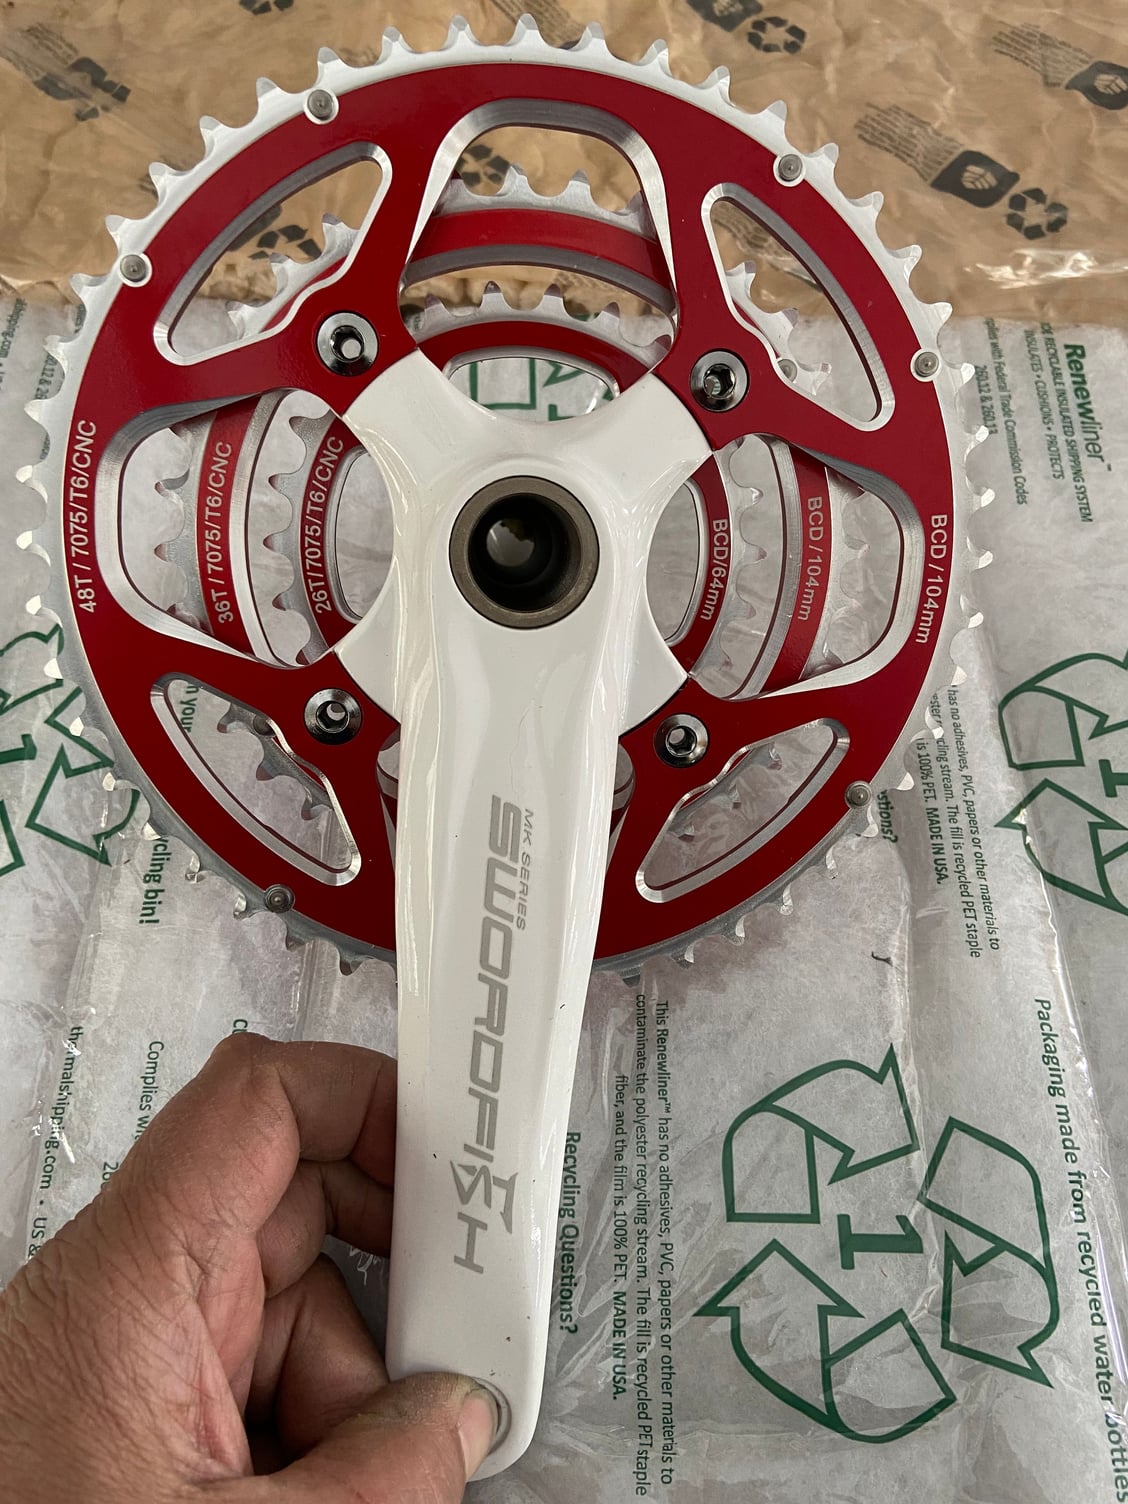
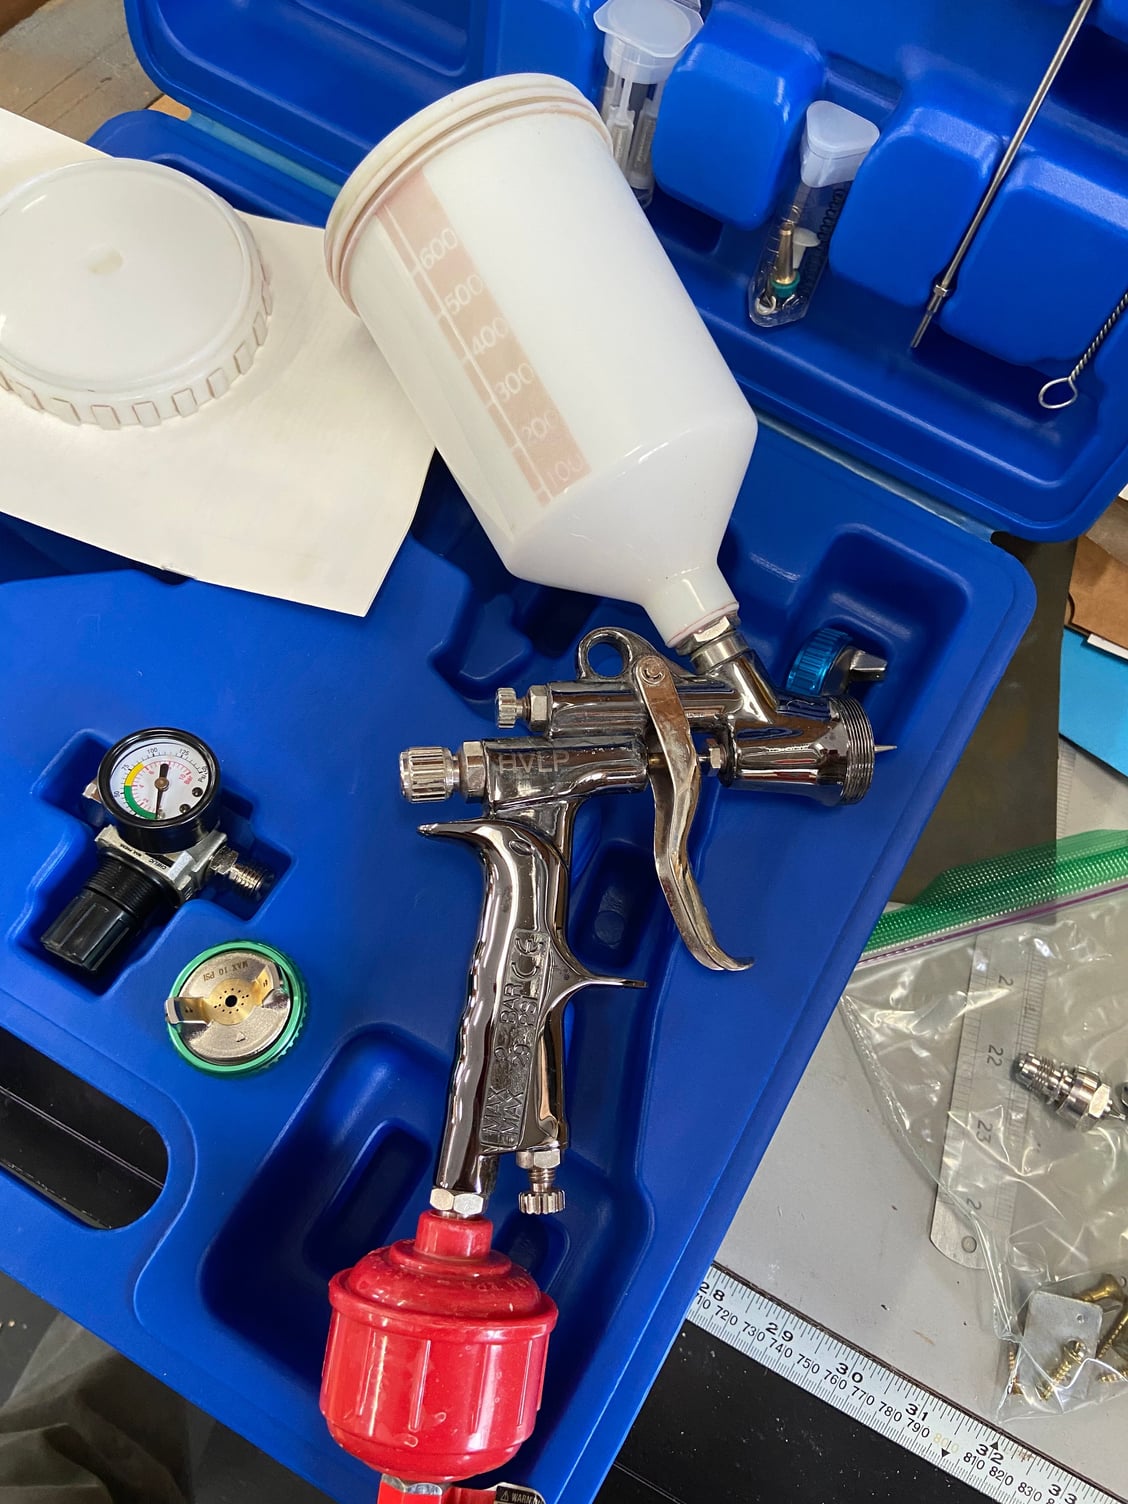
I have a sealed bearing crankset in my parts bin I want to install (see pictures) that I purchased a few years ago but never used.
1. I’m not familiar with Specialized threading. However this crank BB has BSA threads. Before I install can someone tell me if Specialized used British Standard threads?
2. I’m assuming I need a compatible or proprietary? bottom bracket wrench for this crank. ??
3. Is this a standard BB wrench that I can purchase online?
4. Do I need to pull the drive crank arm/spider to torque the BB down or, can I just remove the chainrings to tighten?
your help is greatly appreciated. Thank you in advance. -tom
Last edited by Saddle Tripper; 03-26-23 at 09:04 AM.
 03-26-23, 09:21 AM
#2
Senior Member
Join Date: Apr 2011
Posts: 7,066
Mentioned: 41 Post(s)
Tagged: 0 Thread(s)
Quoted: 4408 Post(s)
Liked 1,562 Times
in
1,025 Posts
1. Specialized of that era is going to be BSA, but probably the MTB 73mm wide BB shell rather than the old standard/road 68mm BB shell. This BB should be for a 73, but you might want to slip it together and measure - then consult the manufacturer's installation manual online.
2. You probably need the original Shimano external cup wrench. like the Park BBT-19. But count the notches and measure before you buy. Or go into a bike shop that stocks them with one of your cups to try them out. https://www.parktool.com/en-us/categ...bottom-bracket
3. Yup.
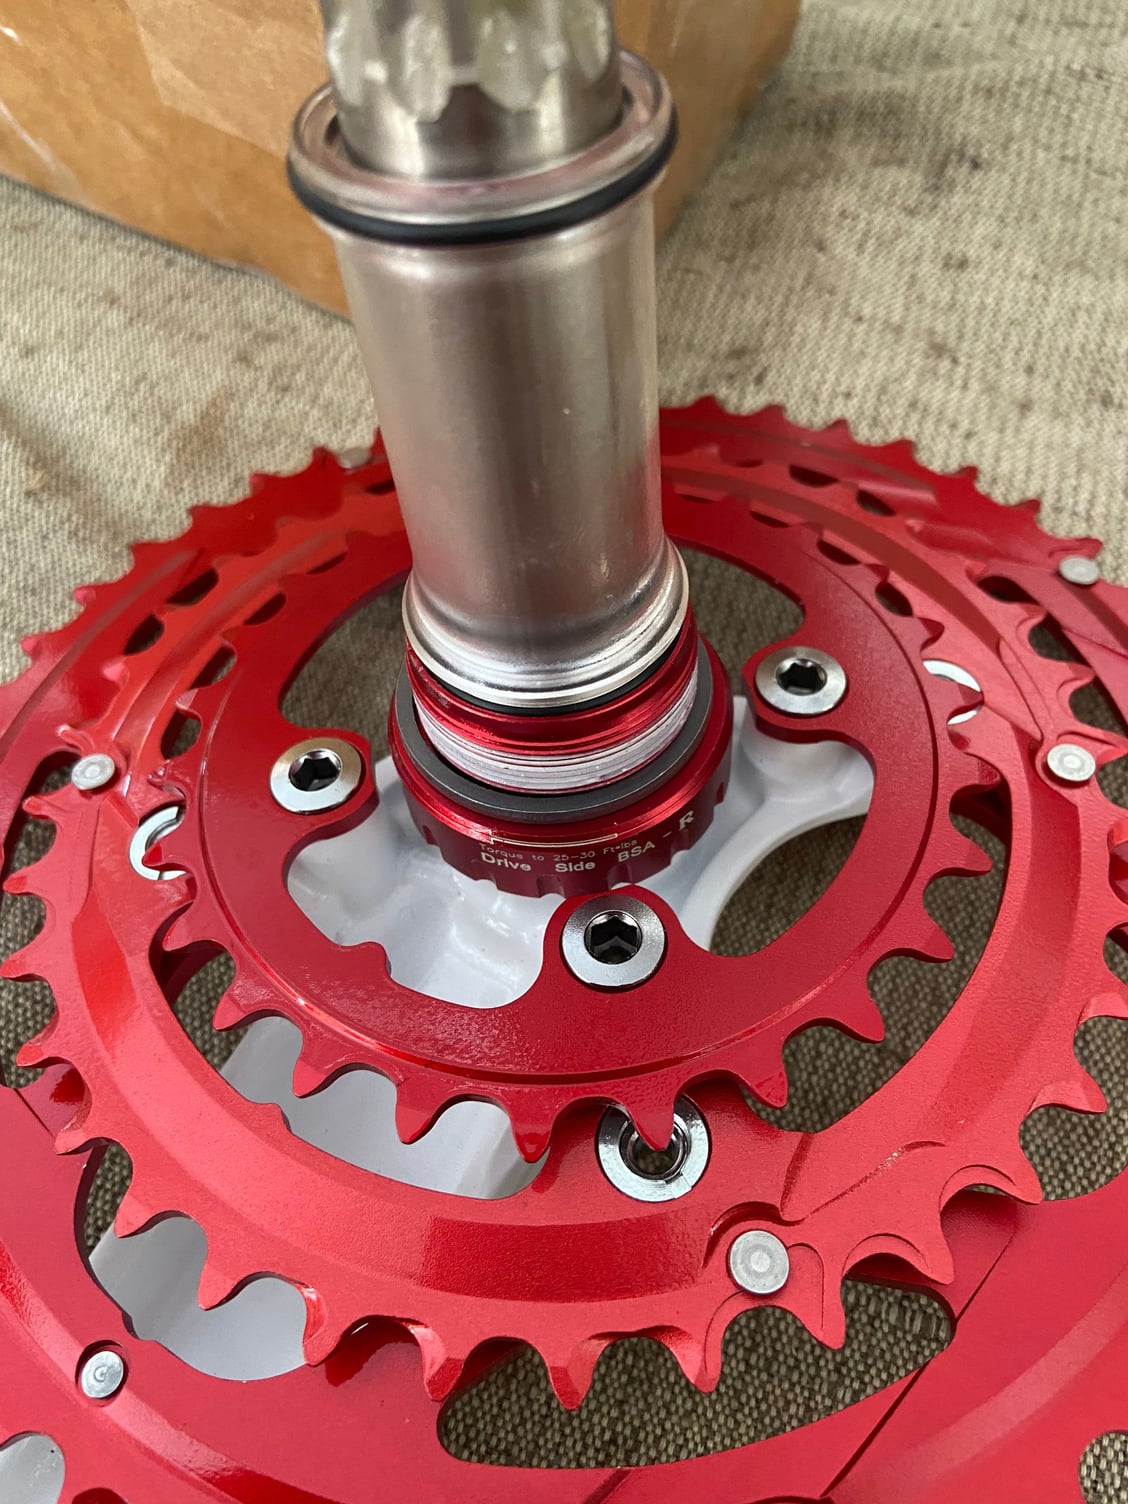
4. You don't remove anything on the drive side. The spindle is a permanent part of the DS arm. You slide the BB body off the spindle, install to proper torque, then install the NDS cup. Lube the spindle and slide it through, then follow the installation instructions to mount the NDS arm, adjust the bearing preload and tighten.
You have done an excellent job of keep it secret what kind of crank you have, so you'll need to look up the specifics as we cannot guess. But this crank appears to install much like many Shimano Hollowgram cranks and BBs.
2. You probably need the original Shimano external cup wrench. like the Park BBT-19. But count the notches and measure before you buy. Or go into a bike shop that stocks them with one of your cups to try them out. https://www.parktool.com/en-us/categ...bottom-bracket
3. Yup.
4. You don't remove anything on the drive side. The spindle is a permanent part of the DS arm. You slide the BB body off the spindle, install to proper torque, then install the NDS cup. Lube the spindle and slide it through, then follow the installation instructions to mount the NDS arm, adjust the bearing preload and tighten.
You have done an excellent job of keep it secret what kind of crank you have, so you'll need to look up the specifics as we cannot guess. But this crank appears to install much like many Shimano Hollowgram cranks and BBs.
Likes For Kontact:
03-26-23, 10:26 AM
#3
Newbie
Thread Starter
Thanks. I appreciate it. My memory is g
03-26-23, 10:27 AM
#4
Newbie
Thread Starter
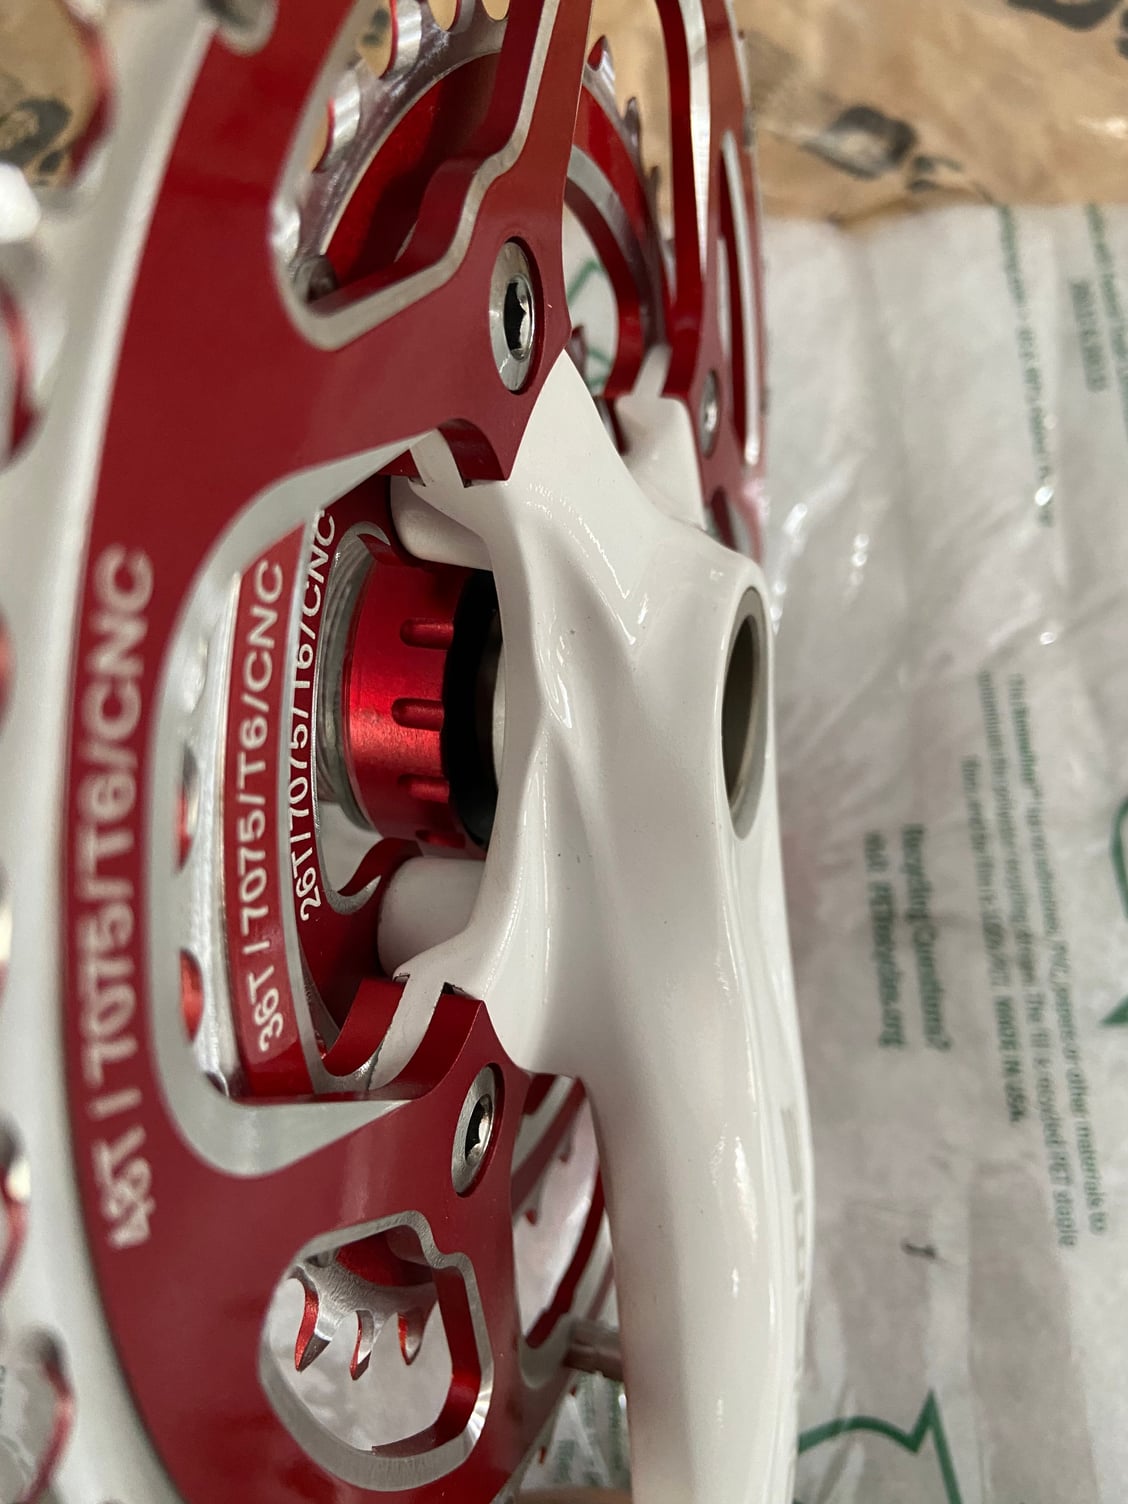
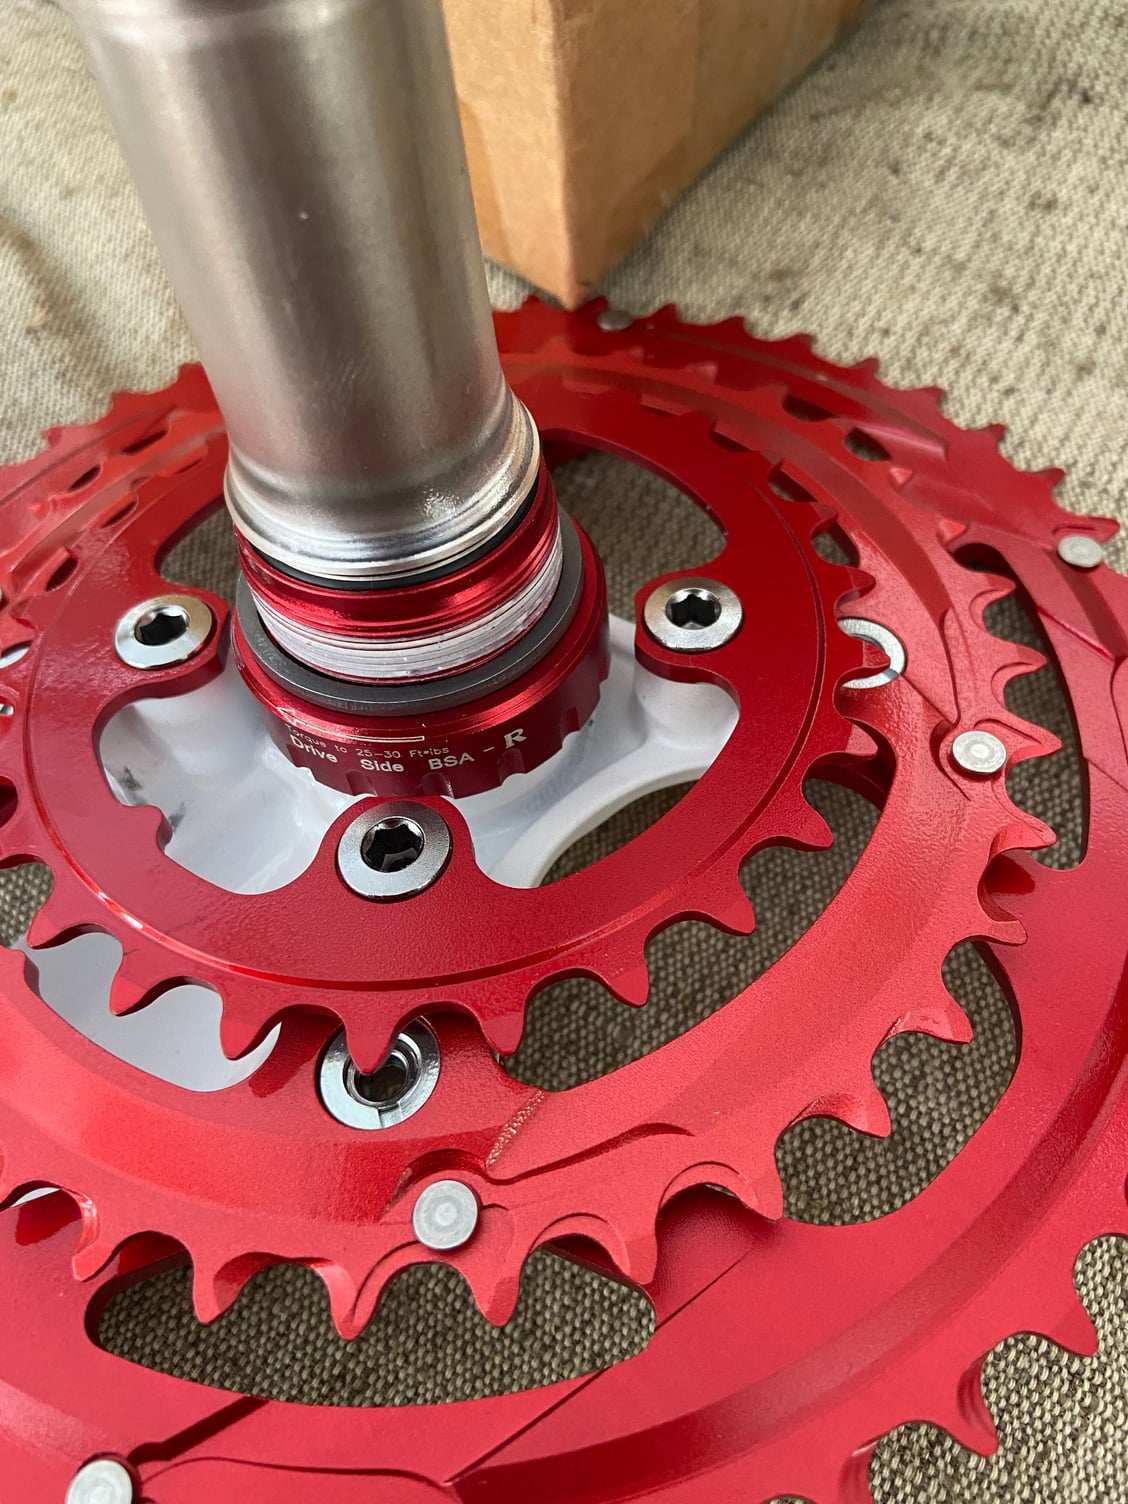
Thanks. I appreciate it. My memory is good, but often very short . I could not remember the brand name of the Crank when I wrote the note. The brand is Swordfish. I don’t know if they are still around or were quietly bought out. 73mm.
looks like 16 splines or notches. I’ll look into the Park tool. Appreciate your experience.
looks like 16 splines or notches. I’ll look into the Park tool. Appreciate your experience.
03-26-23, 10:31 AM
#5
Senior Member
Join Date: Apr 2011
Posts: 7,066
Mentioned: 41 Post(s)
Tagged: 0 Thread(s)
Quoted: 4408 Post(s)
Liked 1,562 Times
in
1,025 Posts
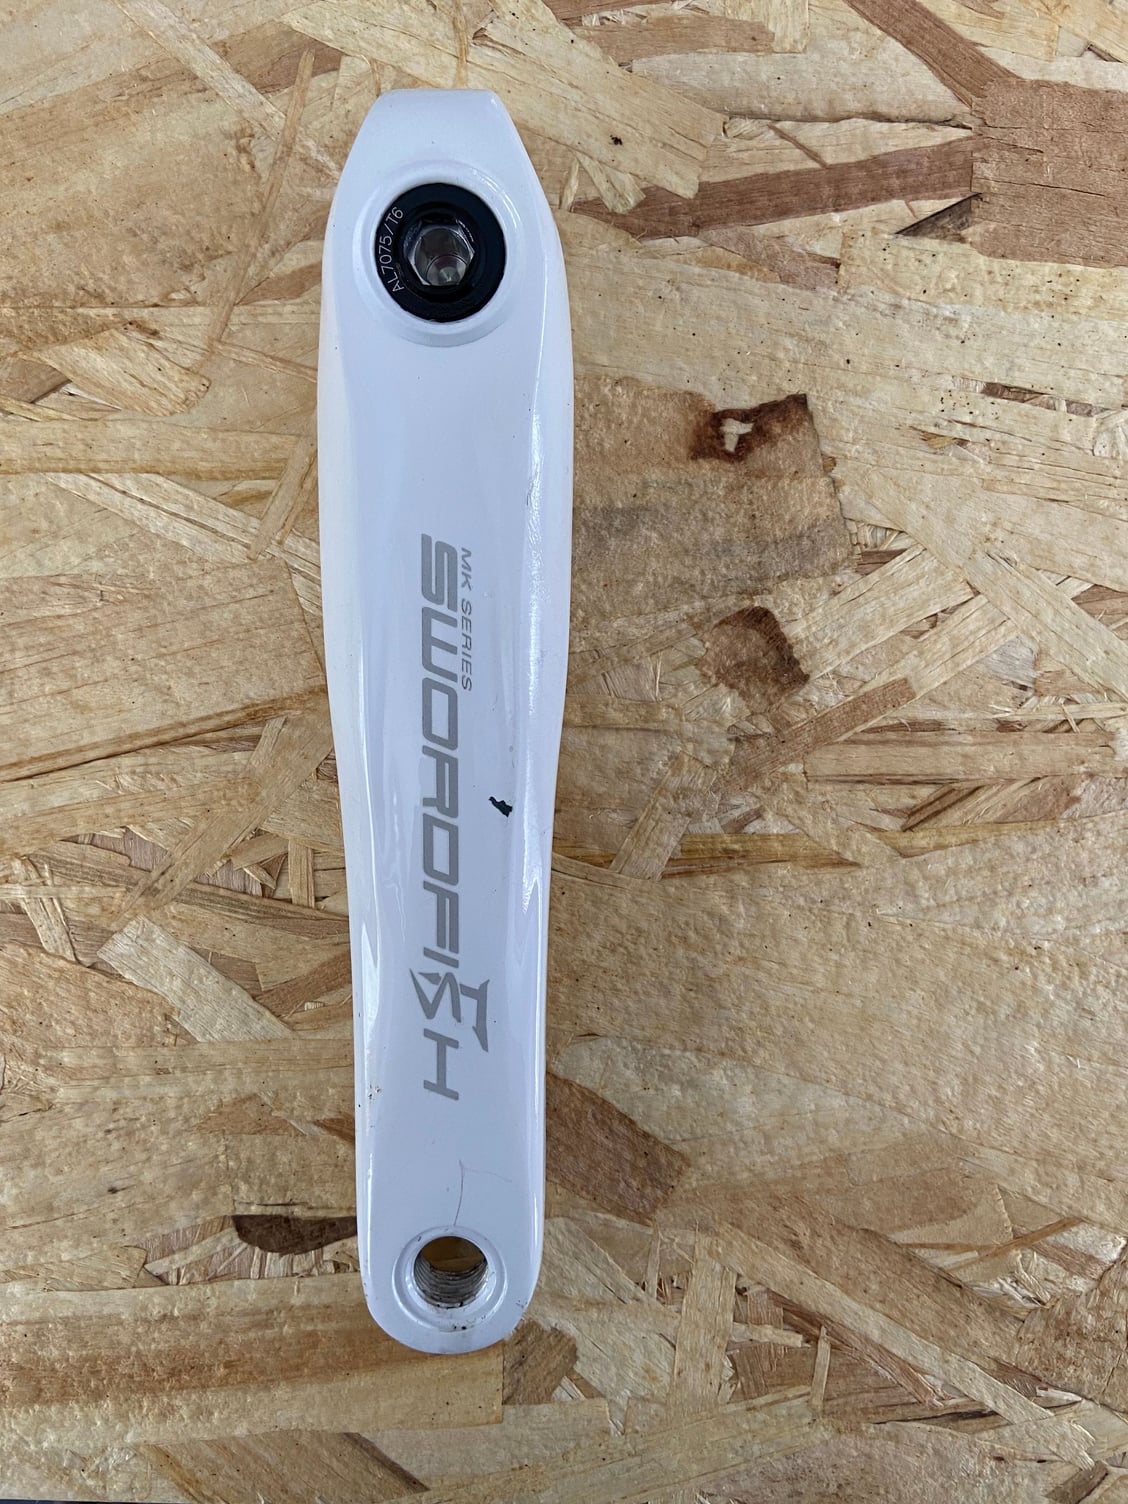
I don't see any information under that name. Post some pictures of the NDS arm and end cap if you want help figuring out installation.
03-26-23, 10:57 AM
#6
Clark W. Griswold
Join Date: Mar 2014
Location: ,location, location
Posts: 13,525
Bikes: Foundry Chilkoot Ti W/Ultegra Di2, Salsa Timberjack Ti, Cinelli Mash Work RandoCross Fun Time Machine, 1x9 XT Parts Hybrid, Co-Motion Cascadia, Specialized Langster, Phil Wood Apple VeloXS Frame (w/DA 7400), R+M Supercharger2 Rohloff, Habanero Ti 26
Mentioned: 54 Post(s)
Tagged: 0 Thread(s)
Quoted: 4357 Post(s)
Liked 3,994 Times
in
2,665 Posts
Human memory is not needed for anything, just memory on a camera or a phone. Pictures are worth a thousand words.
In terms of the frame more than likely BSA threaded so shouldn't have issues with the correct tool installing the correct bottom bracket for that crank. You shouldn't need to remove any chainrings or anything like that but follow the instructions with the crankset if it is not a HollowTech II style crank and if it is (which from what we have it looks like one) just install like a normal HTII style crank.
In terms of the frame more than likely BSA threaded so shouldn't have issues with the correct tool installing the correct bottom bracket for that crank. You shouldn't need to remove any chainrings or anything like that but follow the instructions with the crankset if it is not a HollowTech II style crank and if it is (which from what we have it looks like one) just install like a normal HTII style crank.
03-26-23, 11:33 AM
#7
Newbie
Thread Starter
Here are some pictures. I ordered a 16 notch 44mm OD wrench. I like my digital calipers! The instruction sheet? Probably where I set them 9 years ago.

Last edited by Saddle Tripper; 03-26-23 at 11:41 AM.
03-26-23, 11:48 AM
#8
Senior Member
Join Date: Apr 2011
Posts: 7,066
Mentioned: 41 Post(s)
Tagged: 0 Thread(s)
Quoted: 4408 Post(s)
Liked 1,562 Times
in
1,025 Posts
03-26-23, 11:52 AM
#9
Newbie
Thread Starter

 03-26-23, 02:07 PM
#11
Senior Member
Join Date: Apr 2011
Posts: 7,066
Mentioned: 41 Post(s)
Tagged: 0 Thread(s)
Quoted: 4408 Post(s)
Liked 1,562 Times
in
1,025 Posts
Okay, there are two allen bolts nested in the end. You will install and remove the crank arm with the inner one. The outer is for removing the extractor. You assemble the crank in the BB, mount this arm and tighten it down until you hit probably 40nM.
This system does not set preload or spacing for the bearings. You accomplish that with spacers and a single wave washer on the left side. So either you have the spacers or you'll need to go and get them. Assembling without spacers will allow you to estimate what you'll need. Put a roughly equal thickness on both sides.
This system does not set preload or spacing for the bearings. You accomplish that with spacers and a single wave washer on the left side. So either you have the spacers or you'll need to go and get them. Assembling without spacers will allow you to estimate what you'll need. Put a roughly equal thickness on both sides.
03-26-23, 02:07 PM
#12
Newbie
Thread Starter
03-26-23, 02:26 PM
#13
Newbie
Thread Starter
Okay, there are two allen bolts nested in the end. You will install and remove the crank arm with the inner one. The outer is for removing the extractor. You assemble the crank in the BB, mount this arm and tighten it down until you hit probably 40nM.
This system does not set preload or spacing for the bearings. You accomplish that with spacers and a single wave washer on the left side. So either you have the spacers or you'll need to go and get them. Assembling without spacers will allow you to estimate what you'll need. Put a roughly equal thickness on both sides.
This system does not set preload or spacing for the bearings. You accomplish that with spacers and a single wave washer on the left side. So either you have the spacers or you'll need to go and get them. Assembling without spacers will allow you to estimate what you'll need. Put a roughly equal thickness on both sides.
got it. I’ll preassemble and determine if the spacers are for each side - or one side and two spacers. Will be a few days til I get to it.
looks like I need a small torque wrench.
thank you!
03-26-23, 02:39 PM
#14
Senior Member
Join Date: Apr 2011
Posts: 7,066
Mentioned: 41 Post(s)
Tagged: 0 Thread(s)
Quoted: 4408 Post(s)
Liked 1,562 Times
in
1,025 Posts
this crank came with two spacers. I assumed it was a washer for each side…. But perhaps not.
got it. I’ll preassemble and determine if the spacers are for each side - or one side and two spacers. Will be a few days til I get to it.
looks like I need a small torque wrench.
thank you!
got it. I’ll preassemble and determine if the spacers are for each side - or one side and two spacers. Will be a few days til I get to it.
looks like I need a small torque wrench.
thank you!
You don't have to use a torque wrench. 40nM is pretty darn firm - like the torque you'd put on a square taper crank bolt. You would have a hard time going way too height.
03-26-23, 02:58 PM
#15
Senior Member

Join Date: Jul 2015
Location: NW Oregon
Posts: 2,975
Bikes: !982 Trek 930R Custom, Diamondback ascent with SERIOUS updates, Fuji Team Pro CF and a '09 Comencal Meta 5.5
Mentioned: 15 Post(s)
Tagged: 1 Thread(s)
Quoted: 1299 Post(s)
Liked 739 Times
in
534 Posts
Human memory is not needed for anything, just memory on a camera or a phone. Pictures are worth a thousand words.
In terms of the frame more than likely BSA threaded so shouldn't have issues with the correct tool installing the correct bottom bracket for that crank. You shouldn't need to remove any chainrings or anything like that but follow the instructions with the crankset if it is not a HollowTech II style crank and if it is (which from what we have it looks like one) just install like a normal HTII style crank.
In terms of the frame more than likely BSA threaded so shouldn't have issues with the correct tool installing the correct bottom bracket for that crank. You shouldn't need to remove any chainrings or anything like that but follow the instructions with the crankset if it is not a HollowTech II style crank and if it is (which from what we have it looks like one) just install like a normal HTII style crank.

Likes For maddog34:
03-26-23, 03:08 PM
#16
Senior Member

Join Date: Oct 2015
Location: San Diego, California
Posts: 4,077
Bikes: Velo Orange Piolet
Mentioned: 28 Post(s)
Tagged: 0 Thread(s)
Quoted: 2228 Post(s)
Liked 2,011 Times
in
972 Posts
this crank came with two spacers. I assumed it was a washer for each side…. But perhaps not.
got it. I’ll preassemble and determine if the spacers are for each side - or one side and two spacers. Will be a few days til I get to it.
looks like I need a small torque wrench.
thank you!
got it. I’ll preassemble and determine if the spacers are for each side - or one side and two spacers. Will be a few days til I get to it.
looks like I need a small torque wrench.
thank you!
03-26-23, 04:03 PM
#17
Senior Member
Join Date: Apr 2011
Posts: 7,066
Mentioned: 41 Post(s)
Tagged: 0 Thread(s)
Quoted: 4408 Post(s)
Liked 1,562 Times
in
1,025 Posts
03-26-23, 04:32 PM
#18
Newbie
Thread Starter
understood.
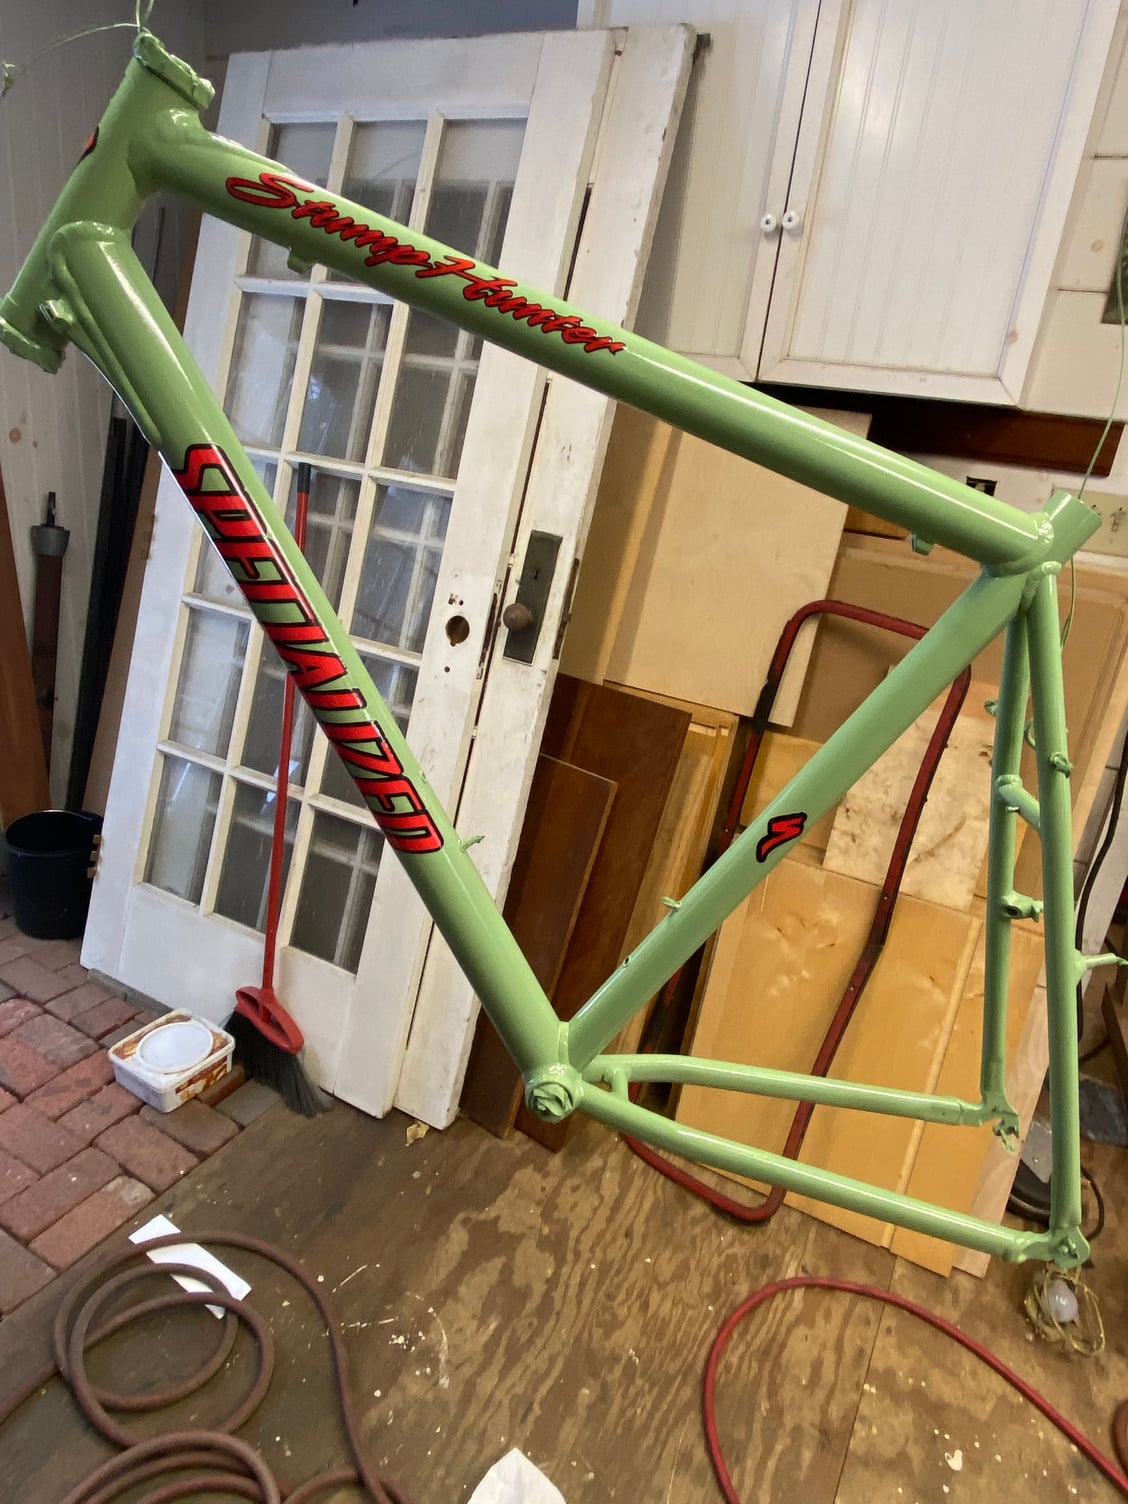
here are a couple pictures of my project. My son’s name is Hunter. It will be his bike. Didn’t have one that he could call his own growing up. Got the hand-me-down bicycle. So, I am making one for him with his name on it. It’s not new off the floor, but his Dad is building it for him.
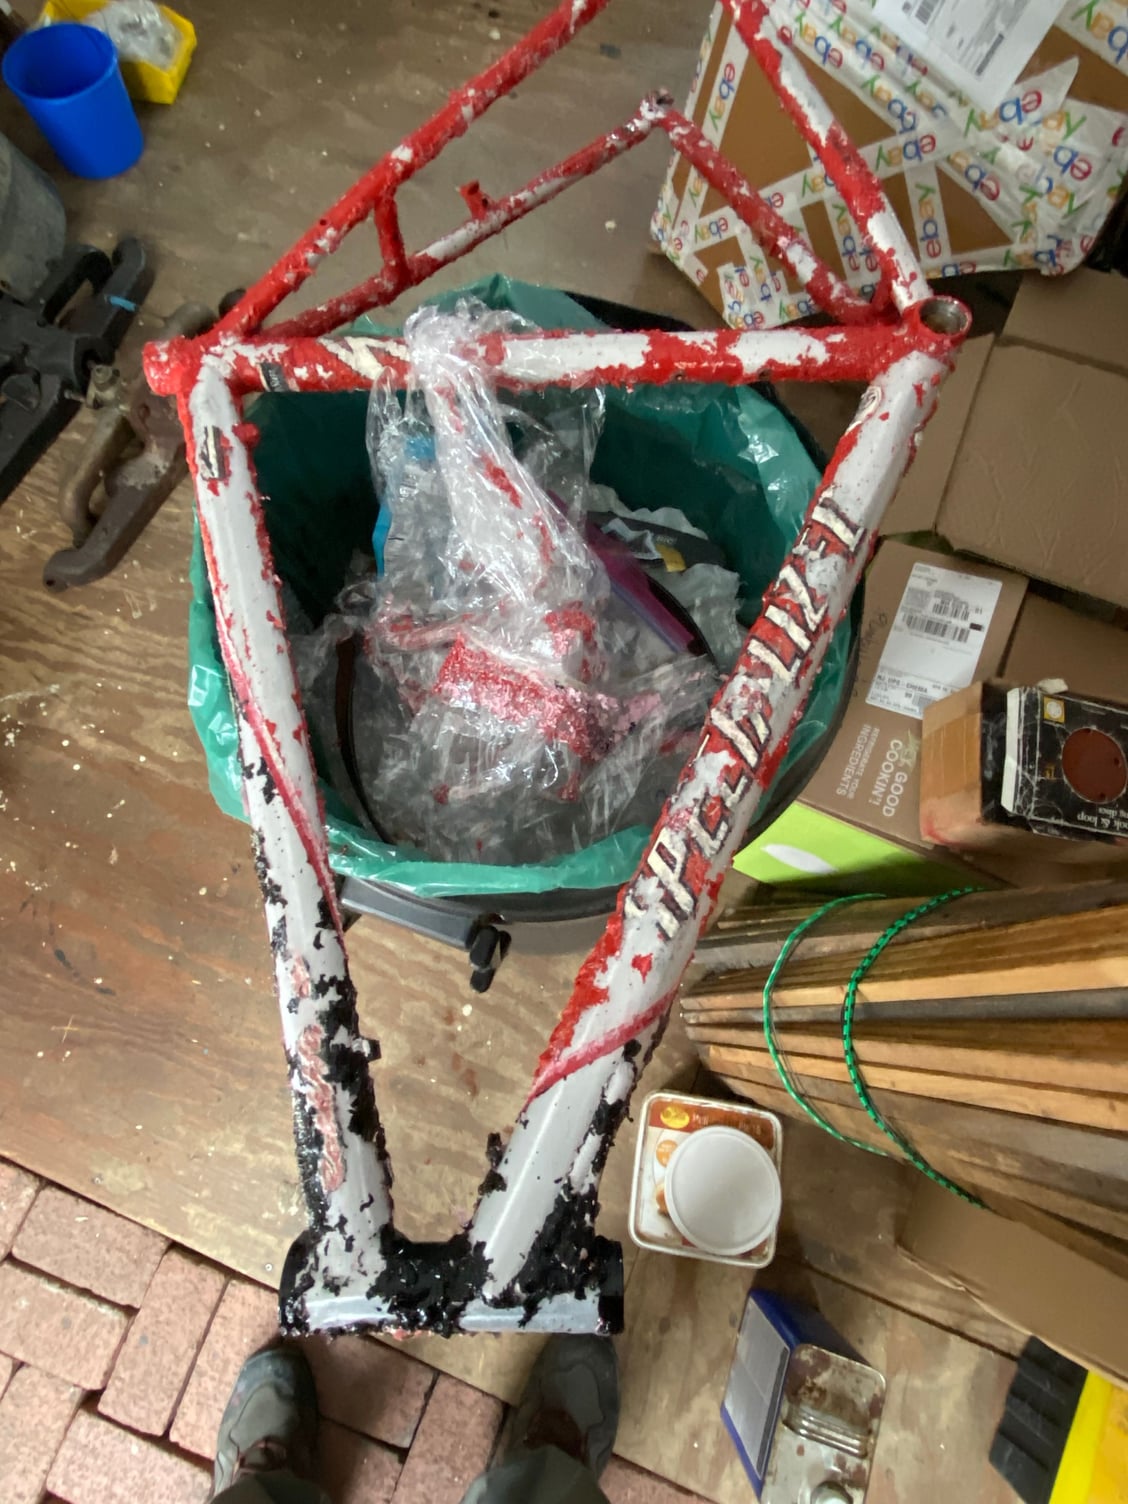
2000 RickHopper A1 Pro. 23”

Plastic Saran Wrap helps keep the vapors in place and wet. Off the shelf strippers are not as strong as they were.
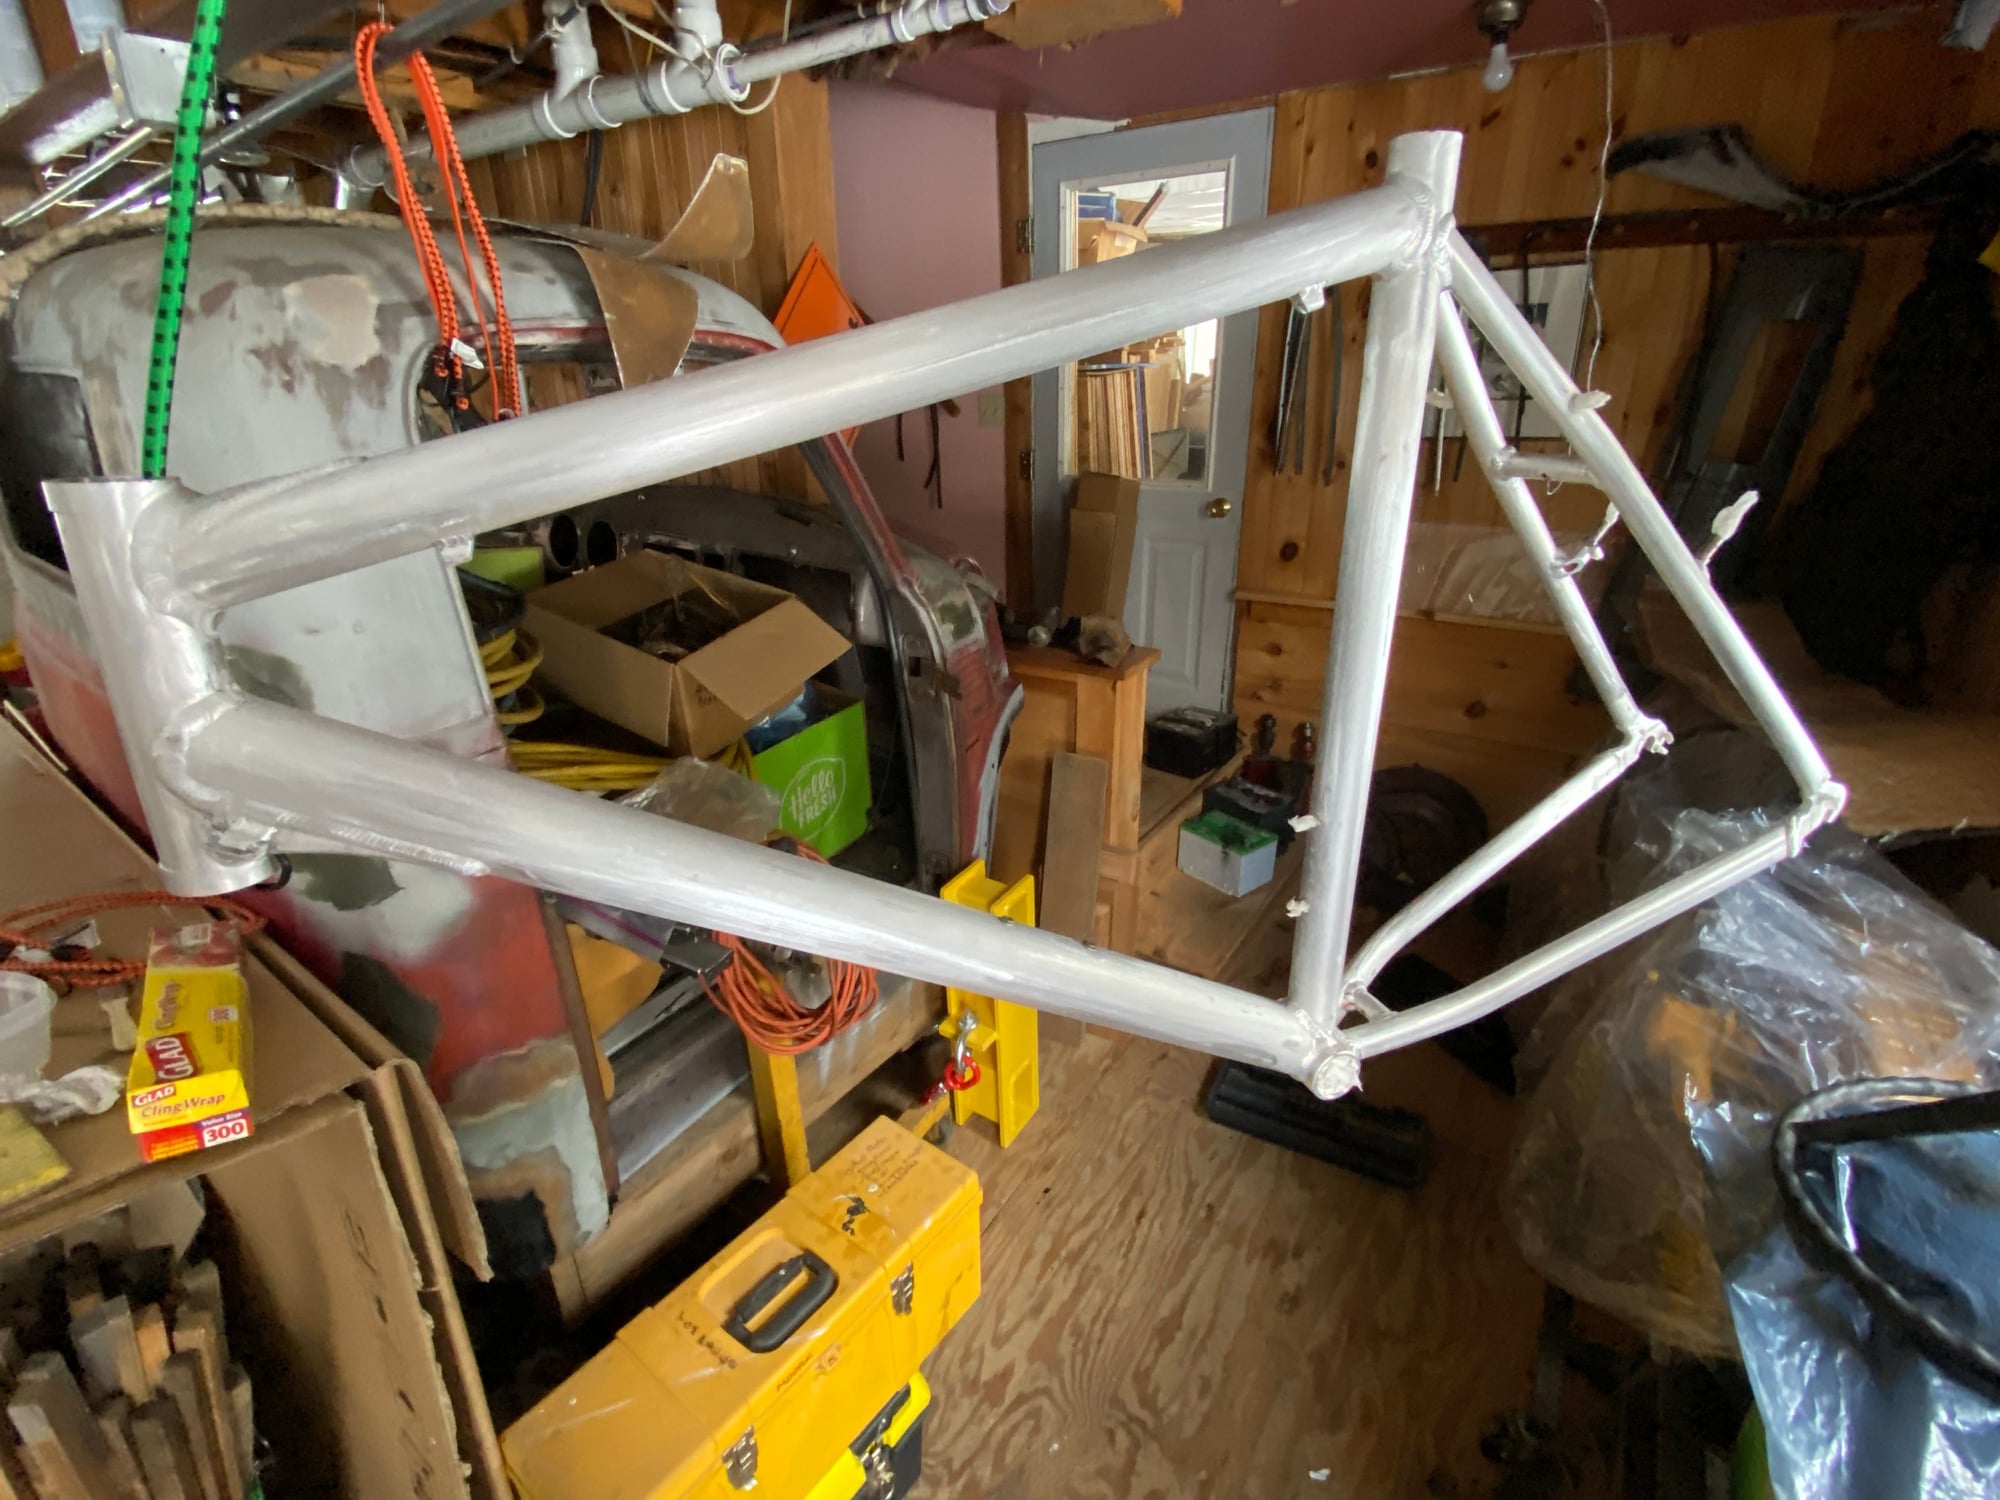
Cleaned with lacquer thinner to remove the stripper wax. Wiped with Eastwood Pre- prep before priming.
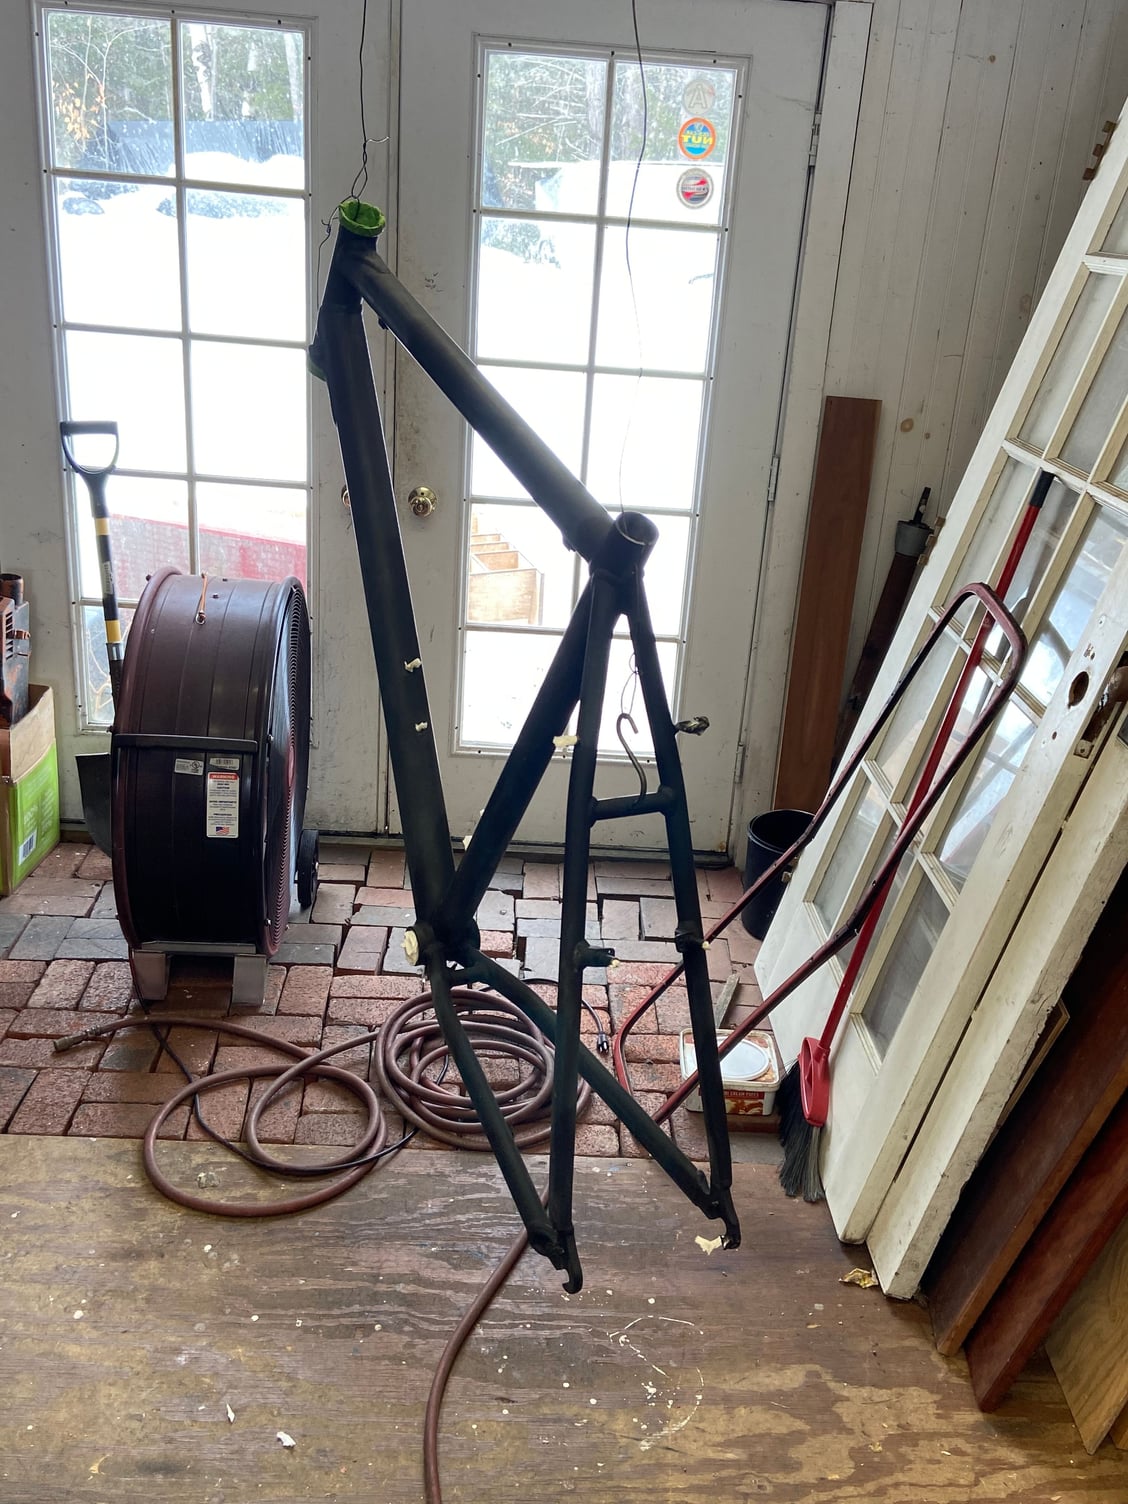
Epoxy primed
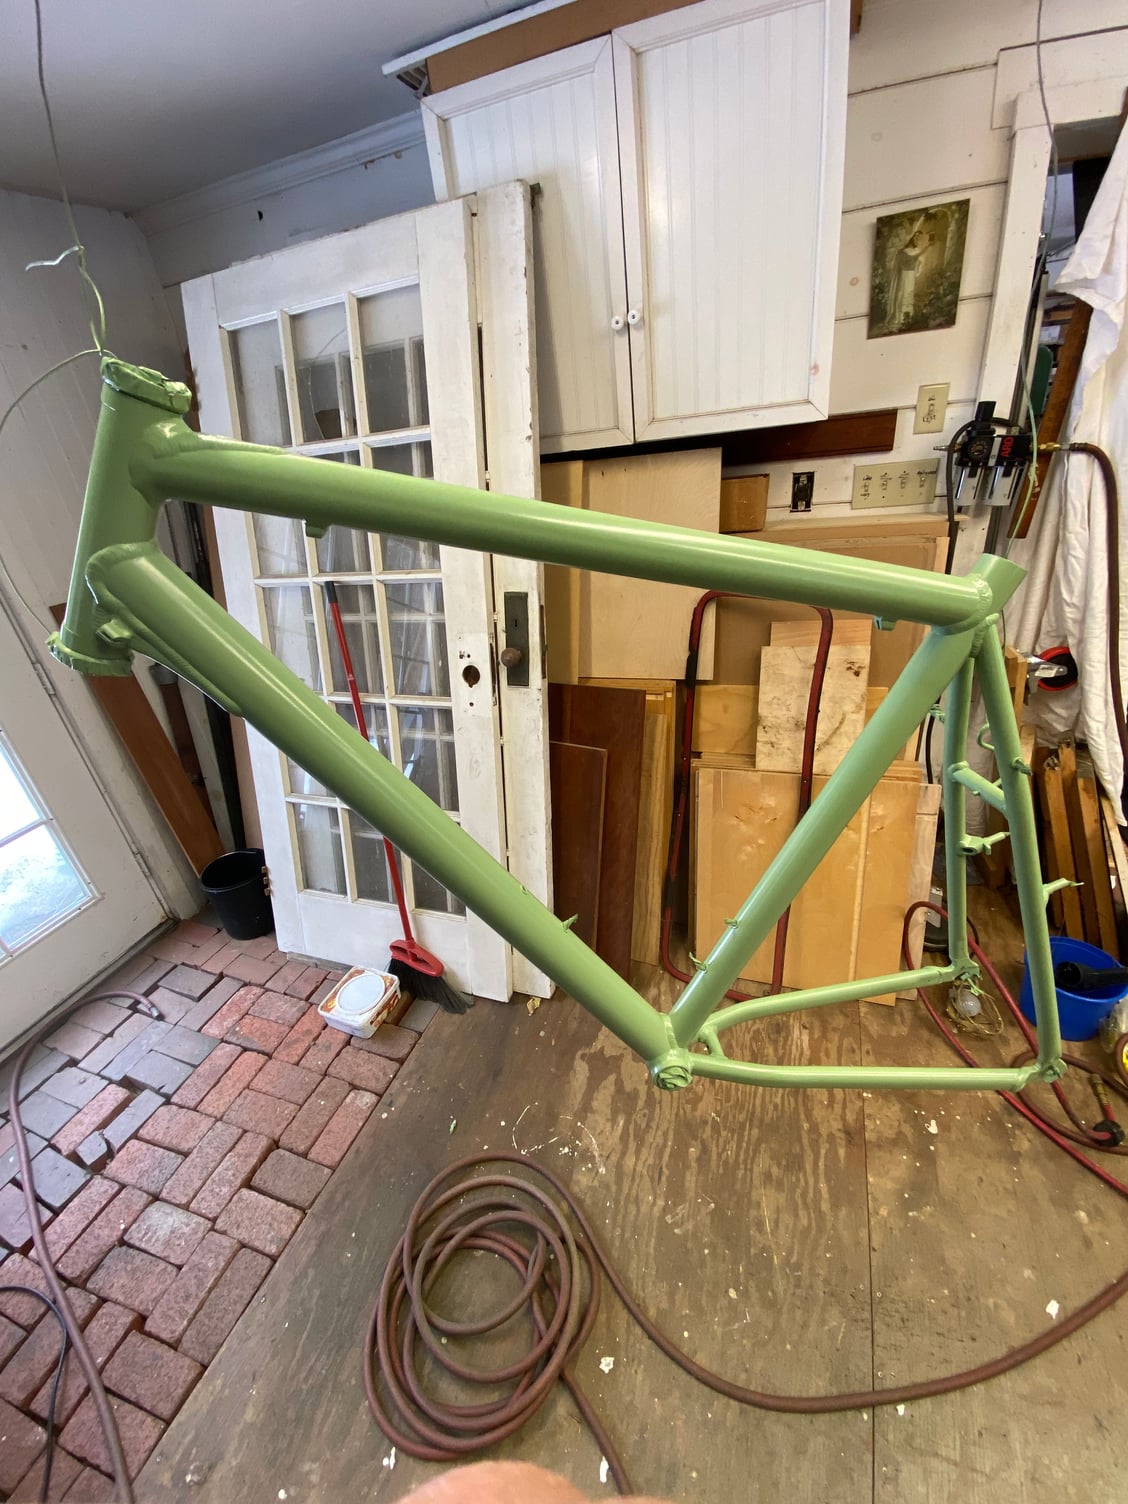
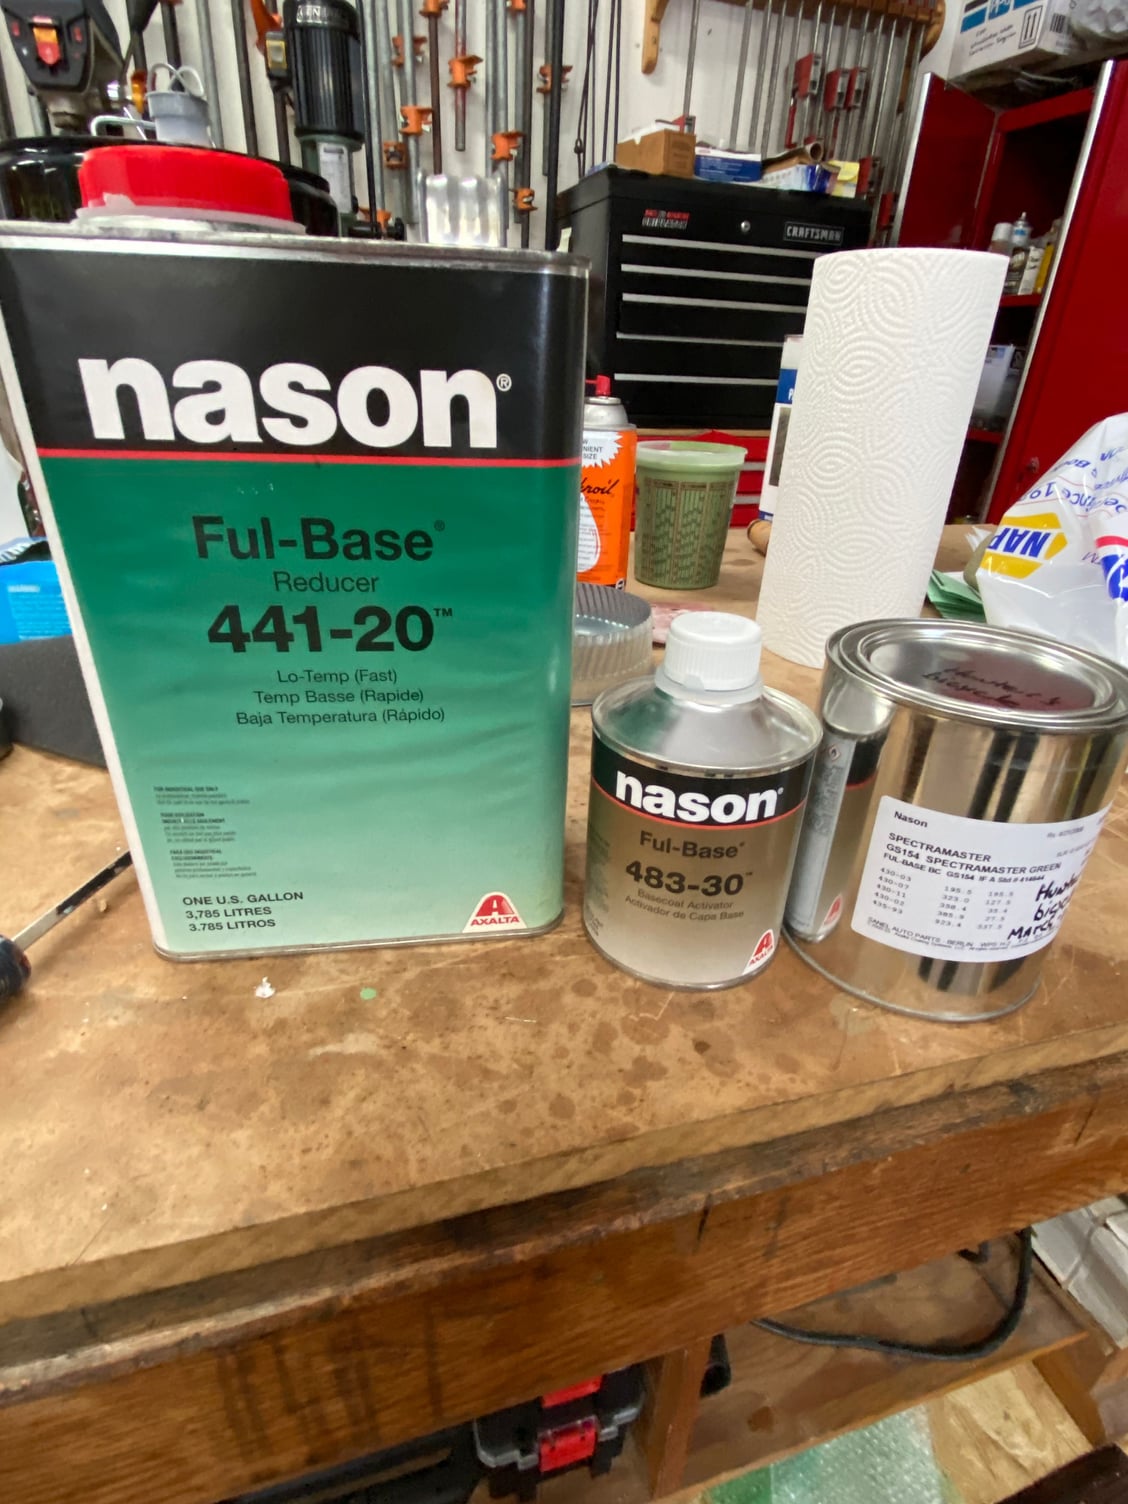
Base coat
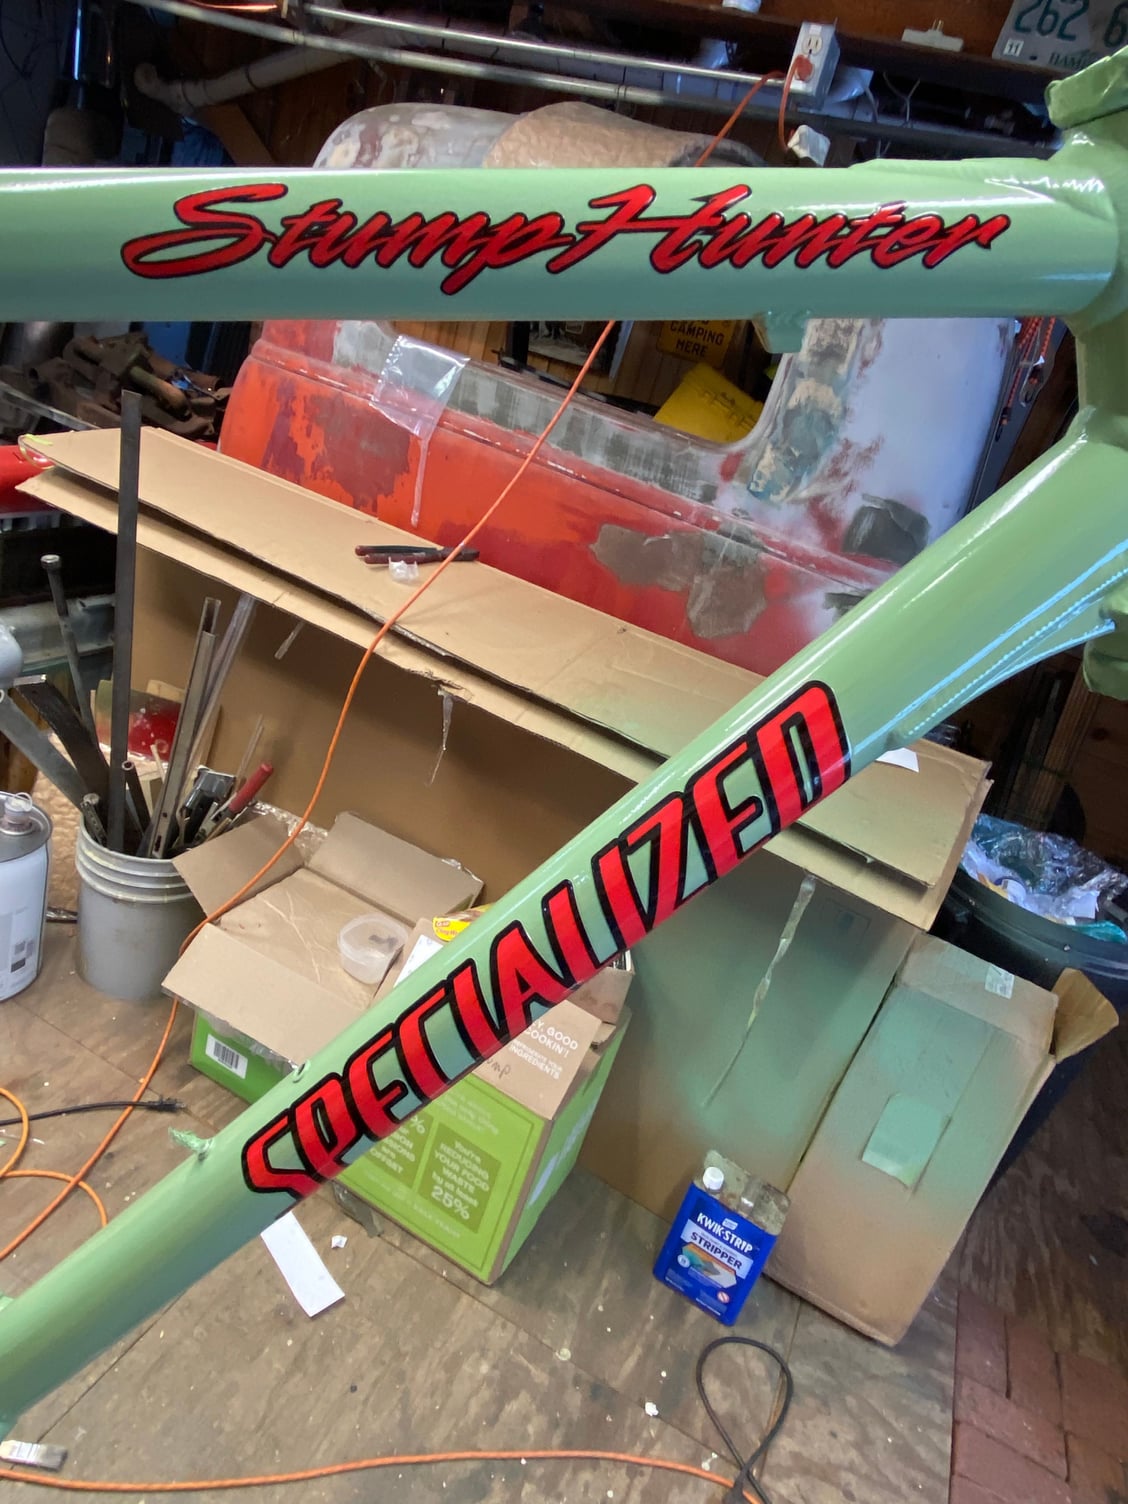
Clear coated
here are a couple pictures of my project. My son’s name is Hunter. It will be his bike. Didn’t have one that he could call his own growing up. Got the hand-me-down bicycle. So, I am making one for him with his name on it. It’s not new off the floor, but his Dad is building it for him.
2000 RickHopper A1 Pro. 23”
Plastic Saran Wrap helps keep the vapors in place and wet. Off the shelf strippers are not as strong as they were.
Cleaned with lacquer thinner to remove the stripper wax. Wiped with Eastwood Pre- prep before priming.
Epoxy primed
Base coat
Clear coated
Last edited by Saddle Tripper; 03-26-23 at 08:14 PM.
