


Stuck seatpost
 10-07-20, 09:46 AM
#1
Senior Member
Thread Starter
Stuck seatpost
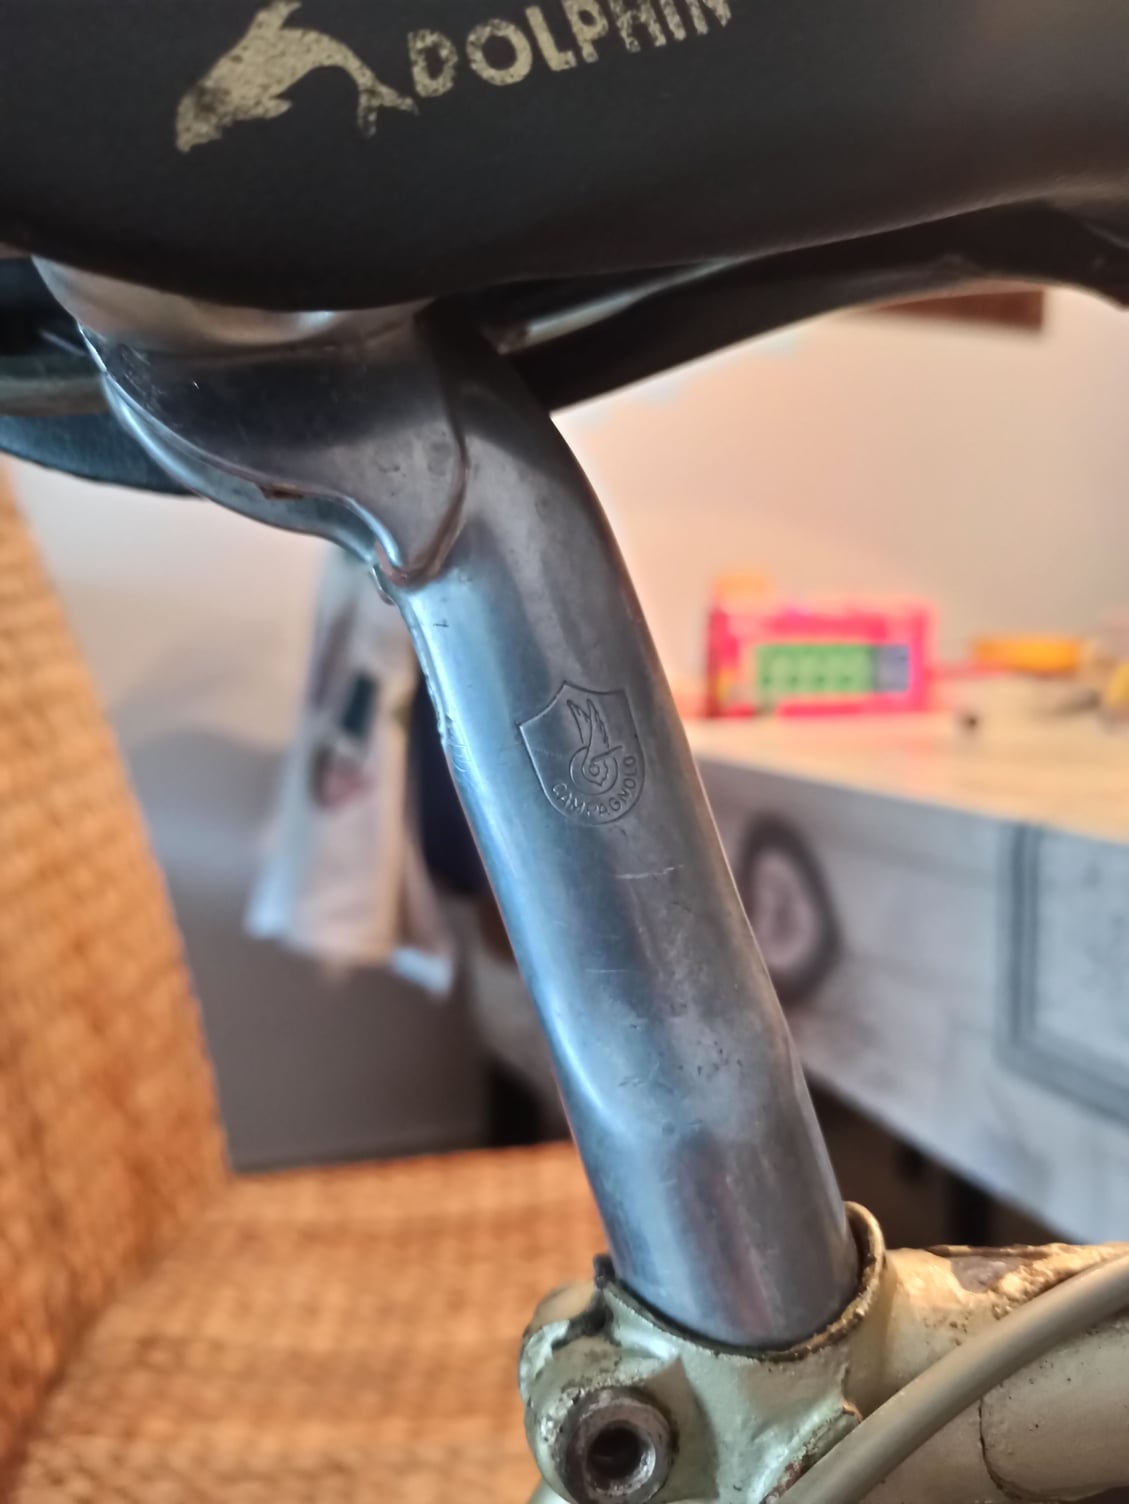
I have this bike that I want to paint as explained on another thread. First issue is that the seatpost is extremely stuck, I presume, from galvanic corrosion between the alu seatpost and the steel frame.
I'd like to save both, the frame and the post if possible. If not possible, I'm willing to sacrifice the post.
The post, as you can see has a flat surface on top, ideal for holding it into a vise. I was thinking about putting it in a vise and using the frame as leverage. However, I'd like to know if someone with more experience feels like this is viable or I could damage the frame doing this.
Thanks!
 10-07-20, 10:00 AM
#2
Guest
Join Date: Sep 2020
Posts: 2,888
Mentioned: 13 Post(s)
Tagged: 0 Thread(s)
Quoted: 1346 Post(s)
Liked 3,270 Times
in
1,439 Posts
That can certainly be done, and is often what it comes down to. But see if using generous amounts of PB Blaster, allowing the frame to sit for a day or two between doses, will do the trick. I've also seen people lop off the seatpost above the frame and then use a hacksaw blade to saw vertically through the embedded section of seatpost until they hit the inside of the seat tube, and then crush or roll the seatpost to make it skinny, but it's a process I wouldn't want to do myself. The toughest case of a stuck post I've encountered was conquered by PB Blaster and a vice. It took soaking the post for a week prior to the vice, and the saddle was sacrificed in the process. I don't know if the flat section of that seatpost will hold it securely in the vice under the kind of torque that may be required to twist the frame.
Last edited by Rolla; 10-07-20 at 10:03 AM.
10-07-20, 12:10 PM
#3

Senior Member

Join Date: Mar 2014
Location: City of Angels
Posts: 4,870
Bikes: A few too many
Mentioned: 42 Post(s)
Tagged: 1 Thread(s)
Quoted: 1364 Post(s)
Liked 2,181 Times
in
1,183 Posts
Google "Stuck Seatpost" BikeForums...there has been a lot of discussion on this topic.
PB Blaster is a great way to soak the post and frame "before" trying to "wrench" it of with the help of a vise.
Others use a mixture of ATF with acetone....best to use the least intrusive measures before resorting to brute force....be patient.
GL, Ben
PB Blaster is a great way to soak the post and frame "before" trying to "wrench" it of with the help of a vise.
Others use a mixture of ATF with acetone....best to use the least intrusive measures before resorting to brute force....be patient.
GL, Ben
10-07-20, 12:25 PM
#4
I'm good to go!
Join Date: Jul 2017
Location: Mississippi
Posts: 14,987
Bikes: Tarmac Disc Comp Di2 - 2020
Mentioned: 51 Post(s)
Tagged: 0 Thread(s)
Quoted: 6193 Post(s)
Liked 4,810 Times
in
3,318 Posts
Have any additional mounts been added to the seat tube that might have put a screw through the seat post?
Take the saddle off and you might figure out something better to attach some thing to give you more leverage to twist with and avoid scratching the post.
Also take that bolt out of the seat tube completely and get something in between there to wedge it open more. If you get a gap opening there around the seat tube and post, then more penetrating oil will penetrate (duh). I suggest Kroil. But others work too.
Likes For Iride01:
10-07-20, 12:39 PM
#5
Senior Member
Thread Starter
Thanks everybody. On my other thread about painting the frame someone suggested a good idea.
Since I'm going to repaint the bike, I can afford to ruin the paint job, so I can also use a torch to get it loose.
I'll try with penetrating oil before anyway as its easier and I have lots of time to let it soak.
Will it be better to put the oil from the top of the seatpost? Or from the bottom through the bottom bracket?
10-07-20, 12:44 PM
#6
se�or miembro

Join Date: Dec 2018
Location: Pac NW
Posts: 6,626
Bikes: '70s - '80s Campagnolo
Mentioned: 92 Post(s)
Tagged: 0 Thread(s)
Quoted: 3888 Post(s)
Liked 6,485 Times
in
3,209 Posts
I'd use a shot glass full of equal parts ATF and acetone. And let it sit a week. Try freeing it, then do it all over again. Patience and penetrant usually win.
10-07-20, 01:51 PM
#7
Senior Member
Thread Starter
10-07-20, 01:57 PM
#8
Senior Member
Join Date: May 2003
Location: Mountain Brook. AL
Posts: 4,002
Mentioned: 14 Post(s)
Tagged: 0 Thread(s)
Quoted: 303 Post(s)
Likes: 0
Liked 136 Times
in
104 Posts
Since only a few ml of penetrant is needed for the top, any more runs down the outside, do that daily for 3-5 days.
If not loose then invert frame and pour from BB, again letting each bolus sit for a day or two an ounce or two. This way you get
penetrant a good ways into the interface.
If not loose then invert frame and pour from BB, again letting each bolus sit for a day or two an ounce or two. This way you get
penetrant a good ways into the interface.
10-07-20, 02:21 PM
#9
se�or miembro
Join Date: Dec 2018
Location: Pac NW
Posts: 6,626
Bikes: '70s - '80s Campagnolo
Mentioned: 92 Post(s)
Tagged: 0 Thread(s)
Quoted: 3888 Post(s)
Liked 6,485 Times
in
3,209 Posts
10-07-20, 02:37 PM
#10
Senior Member
Join Date: Feb 2012
Location: Golden, CO and Tucson, AZ
Posts: 2,837
Bikes: 2016 Fuji Tread, 1983 Trek 520
Mentioned: 13 Post(s)
Tagged: 0 Thread(s)
Quoted: 676 Post(s)
Liked 741 Times
in
430 Posts
Don't bother with heat. Aluminum expands more than steel.
I recently removed a tough one by deforming the post and vising it.
In recent experience, an excellent penetrant is DOT-3 brake fluid. It'll ruin your paint, but that's not a concern here.
First, though, try impact and torque on a sacrificial saddle. Hit the nose of the saddle with a mallet (safely). If the saddle trick doesn't work, try a large (14 or 18") pipe wrench. Lay the frame flat and stand on the wrench (safely). If you can get it to move at all, it'll eventually come out.
10-07-20, 02:41 PM
#11
Senior Member
Join Date: May 2019
Location: Bloomington, IN
Posts: 2,949
Bikes: Paramount, Faggin, Ochsner, Ciocc, Basso
Mentioned: 117 Post(s)
Tagged: 0 Thread(s)
Quoted: 1303 Post(s)
Liked 1,911 Times
in
1,141 Posts
Like Surfer I use the atf- acetone mix from the bottom side. I use about four ounces so it fills the inside of the post and covers the section so it has plenty of room to fill the space between the post and seat tube. I use a four foot steel 1' X1' tube with two clamps to hold my 14" adjustable wrench over the post flats for purchase. Then pry the top tube and four foot bar apart. be sure to do this above a small bucket to catch the mix that will pour out of the tube when they split. I work them apart with the seat post just inside the bucket. Smiles, MH
Last edited by Mad Honk; 10-08-20 at 05:00 PM.
10-07-20, 02:44 PM
#12
Junior Member
Long interesting read here with nuclear option ideas
HackBlog: The Seatpost and the Damage Done
HackBlog: The Seatpost and the Damage Done
10-07-20, 09:08 PM
#13
Senior Member
Join Date: Apr 2005
Location: Northern CA
Posts: 743
Bikes: Cannondale tandems: '92 Road, '97 Mtn. Mongoose 10.9 Ti, Kelly Deluxe, Tommaso Chorus, Cdale MT2000, Schwinn Deluxe Cruiser, Torker Unicycle, among others.
Mentioned: 5 Post(s)
Tagged: 0 Thread(s)
Quoted: 279 Post(s)
Liked 207 Times
in
129 Posts
That's a beautiful post and it would great to save. But saving it will most certainly not be possible. All depends.
Freeze-thaw cycle would be a good idea. It would be nice if you could allow an acid to work its way down through the corrosion to remove it. Since the corrosion is all oxides, it should be much more vulnerable to the effects of acid than the underlying metals. But getting it in there is the challenge.
If you could force a plug (cork, etc.) just to the bottom of the seat post to seal it and THEN introduce solvents/acids, etc from the bottom bracket with the frame upside-down, this would better encourage these compounds to work their way down between the post & seat tube.
That said, it's the seat post that's usually sacrificed in the removal process. Usually, the saddle and seat clamp are removed so you can clamp the top of the post in a large, fixed vise. Clamp the crap out of it and go to town! You have a pivot point around which to turn the frame, with lots of leverage on the head tube.
One thing to add is this: If you CANNOT break it lose through application of various penetrants, heat, cold and force, there is the option of sawing off the top of the seat post, allowing you to hacksaw down the seat post and seat tube into the wall of the seat post. Ideally, you cut through the wall of the post, stop at the steel seat tube, and now have a slit in the post that will hopefully break it free. And if not, cut another slit 180 degrees away and now you have two separate pieces that can be removed. This would be the last-case scenario step I'd take before tossing the project into the dumpster.
Good luck! Let us know how things turn out.
PS After reading the bike mechanic hack's account, I'd suggest another approach in the leverage attack. A seat post isn't that strong or effective at resisting high, localized clamping forces. In other words, a pipe wrench would quickly crush a seat post under high leverage and/or torque. It would make sense to me to press-fit a plug into the top of the seat post before applying any high clamping forces. (this assumes, of course, you don't have a nice square/flat surface to grab under the seat clamp. Some posts have a nice flat to grab with a vise. Others do not.
Last edited by LV2TNDM; 10-07-20 at 09:34 PM.
10-07-20, 09:14 PM
#14
Senior Member
Join Date: Sep 2004
Location: Chicago area
Posts: 2,551
Bikes: Airborne "Carpe Diem", Motobecane "Mirage", Trek 6000, Strida 2, Dahon "Helios XL", Dahon "Mu XL", Tern "Verge S11i"
Mentioned: 23 Post(s)
Tagged: 0 Thread(s)
Quoted: 980 Post(s)
Liked 582 Times
in
399 Posts
10-07-20, 09:31 PM
#15
Senior Member
Join Date: Apr 2005
Location: Northern CA
Posts: 743
Bikes: Cannondale tandems: '92 Road, '97 Mtn. Mongoose 10.9 Ti, Kelly Deluxe, Tommaso Chorus, Cdale MT2000, Schwinn Deluxe Cruiser, Torker Unicycle, among others.
Mentioned: 5 Post(s)
Tagged: 0 Thread(s)
Quoted: 279 Post(s)
Liked 207 Times
in
129 Posts
Plug the bottom of the seatpost and pour in liquid nitrogen while simultaneous heating of the seat tube with torches on both sides. You'd think you'd get enough differential expansion & contraction to break it free. But again, no guarantee.
10-07-20, 11:37 PM
#16
Senior Member
Thread Starter
Don't bother with heat. Aluminum expands more than steel.
I recently removed a tough one by deforming the post and vising it.
In recent experience, an excellent penetrant is DOT-3 brake fluid. It'll ruin your paint, but that's not a concern here.
First, though, try impact and torque on a sacrificial saddle. Hit the nose of the saddle with a mallet (safely). If the saddle trick doesn't work, try a large (14 or 18") pipe wrench. Lay the frame flat and stand on the wrench (safely). If you can get it to move at all, it'll eventually come out.
I recently removed a tough one by deforming the post and vising it.
In recent experience, an excellent penetrant is DOT-3 brake fluid. It'll ruin your paint, but that's not a concern here.
First, though, try impact and torque on a sacrificial saddle. Hit the nose of the saddle with a mallet (safely). If the saddle trick doesn't work, try a large (14 or 18") pipe wrench. Lay the frame flat and stand on the wrench (safely). If you can get it to move at all, it'll eventually come out.
I have a can full of DOT 5.1 brake fluid that I use to bleed my (modern) road bike brakes. Will it work like DOT 3? it seems like a good idea.
10-08-20, 06:02 AM
#17
Senior Member
Join Date: Feb 2012
Location: Golden, CO and Tucson, AZ
Posts: 2,837
Bikes: 2016 Fuji Tread, 1983 Trek 520
Mentioned: 13 Post(s)
Tagged: 0 Thread(s)
Quoted: 676 Post(s)
Liked 741 Times
in
430 Posts
I've never tried it on a seat post, mainly because of the paint issue. I've never had luck with any penetrants (or with thermal expansion) on a stuck seat post, only with torque and impact. But DOT 3 worked on a stuck auto suspension nut the other day, when nothing else did after hours of attempts.
10-11-20, 04:01 PM
#18
Senior Member
Thread Starter
So far I've not had good luck with the seatpost. It's stuck and refusing to move. I have not tried putting penetrating oil from the bottom bracket as I've been unable to remove the cranks because my socket doesn't fit.
I'm waiting for a new socket and hoping that attacking the problem from the other side works better.
To make matters worse, I disassembled most of the bike components and found that the 3ttt Record stem has a crack around the bolt that holds the handlebar clamp. So I now need a new stem.
Fortunately, the rest of the components are OK except for some rust. I'm not positive on the BB though, but I won't know until I can remove the cranks.
10-12-20, 12:09 PM
#20
Full Member
Join Date: Apr 2019
Location: Northern NJ
Posts: 419
Bikes: 1987 Pinarello Montello, 1996 Litespeed Classic, 1996 Colnago Master Light, 1997 Litespeed Ultimate, 2006 Opera Leonardo FP, 2006 Pinarello Paris FP, 1984 Pinarello Record, 89-ish Cornelo Profilo
Mentioned: 5 Post(s)
Tagged: 0 Thread(s)
Quoted: 148 Post(s)
Liked 119 Times
in
73 Posts
Aluminum post and steel frame, there's always the lye option. Be careful - read up on what the risks are (to you - it's harmless to the bike).
 10-13-20, 09:33 AM
#22
Senior Member
Thread Starter
I'm leaving destructive options as a last resort in case nothing else works. I'd like to save the seatpost if possible, and I'm not in a hurry to remove it. I'm already bummed that I have to find a new stem...
10-13-20, 09:53 AM
#23
Senior Member
Join Date: Mar 2007
Location: SF Bay Area, East bay
Posts: 7,659
Bikes: Miyata 618 GT, Marinoni, Kestral 200 2002 Trek 5200, KHS Flite, Koga Miyata, Schwinn Spitfire 5, Mondia Special, Univega Alpina, Miyata team Ti, Santa Cruz Highball
Mentioned: 53 Post(s)
Tagged: 0 Thread(s)
Quoted: 1609 Post(s)
Liked 2,590 Times
in
1,224 Posts
I'm guessing you are trying the upside down soak? Maybe try adding some vibration to it, like an orbital sander. I've gotten them out with a guy holding the frame down and another turning with two pipe wrenches while hitting them with a hammer. You may also want to run a hanger down the seat tube to see how much post is in there. If it's pretty deep, that lye my be your only option.
10-13-20, 02:00 PM
#24
Senior Member
Thread Starter
I'm guessing you are trying the upside down soak? Maybe try adding some vibration to it, like an orbital sander. I've gotten them out with a guy holding the frame down and another turning with two pipe wrenches while hitting them with a hammer. You may also want to run a hanger down the seat tube to see how much post is in there. If it's pretty deep, that lye my be your only option.
I also had an idea. Since there are a couple of holes in the bottom bracket, maybe I can fit something there and hit it with a hammer hoping that it pushes the seatpost out.
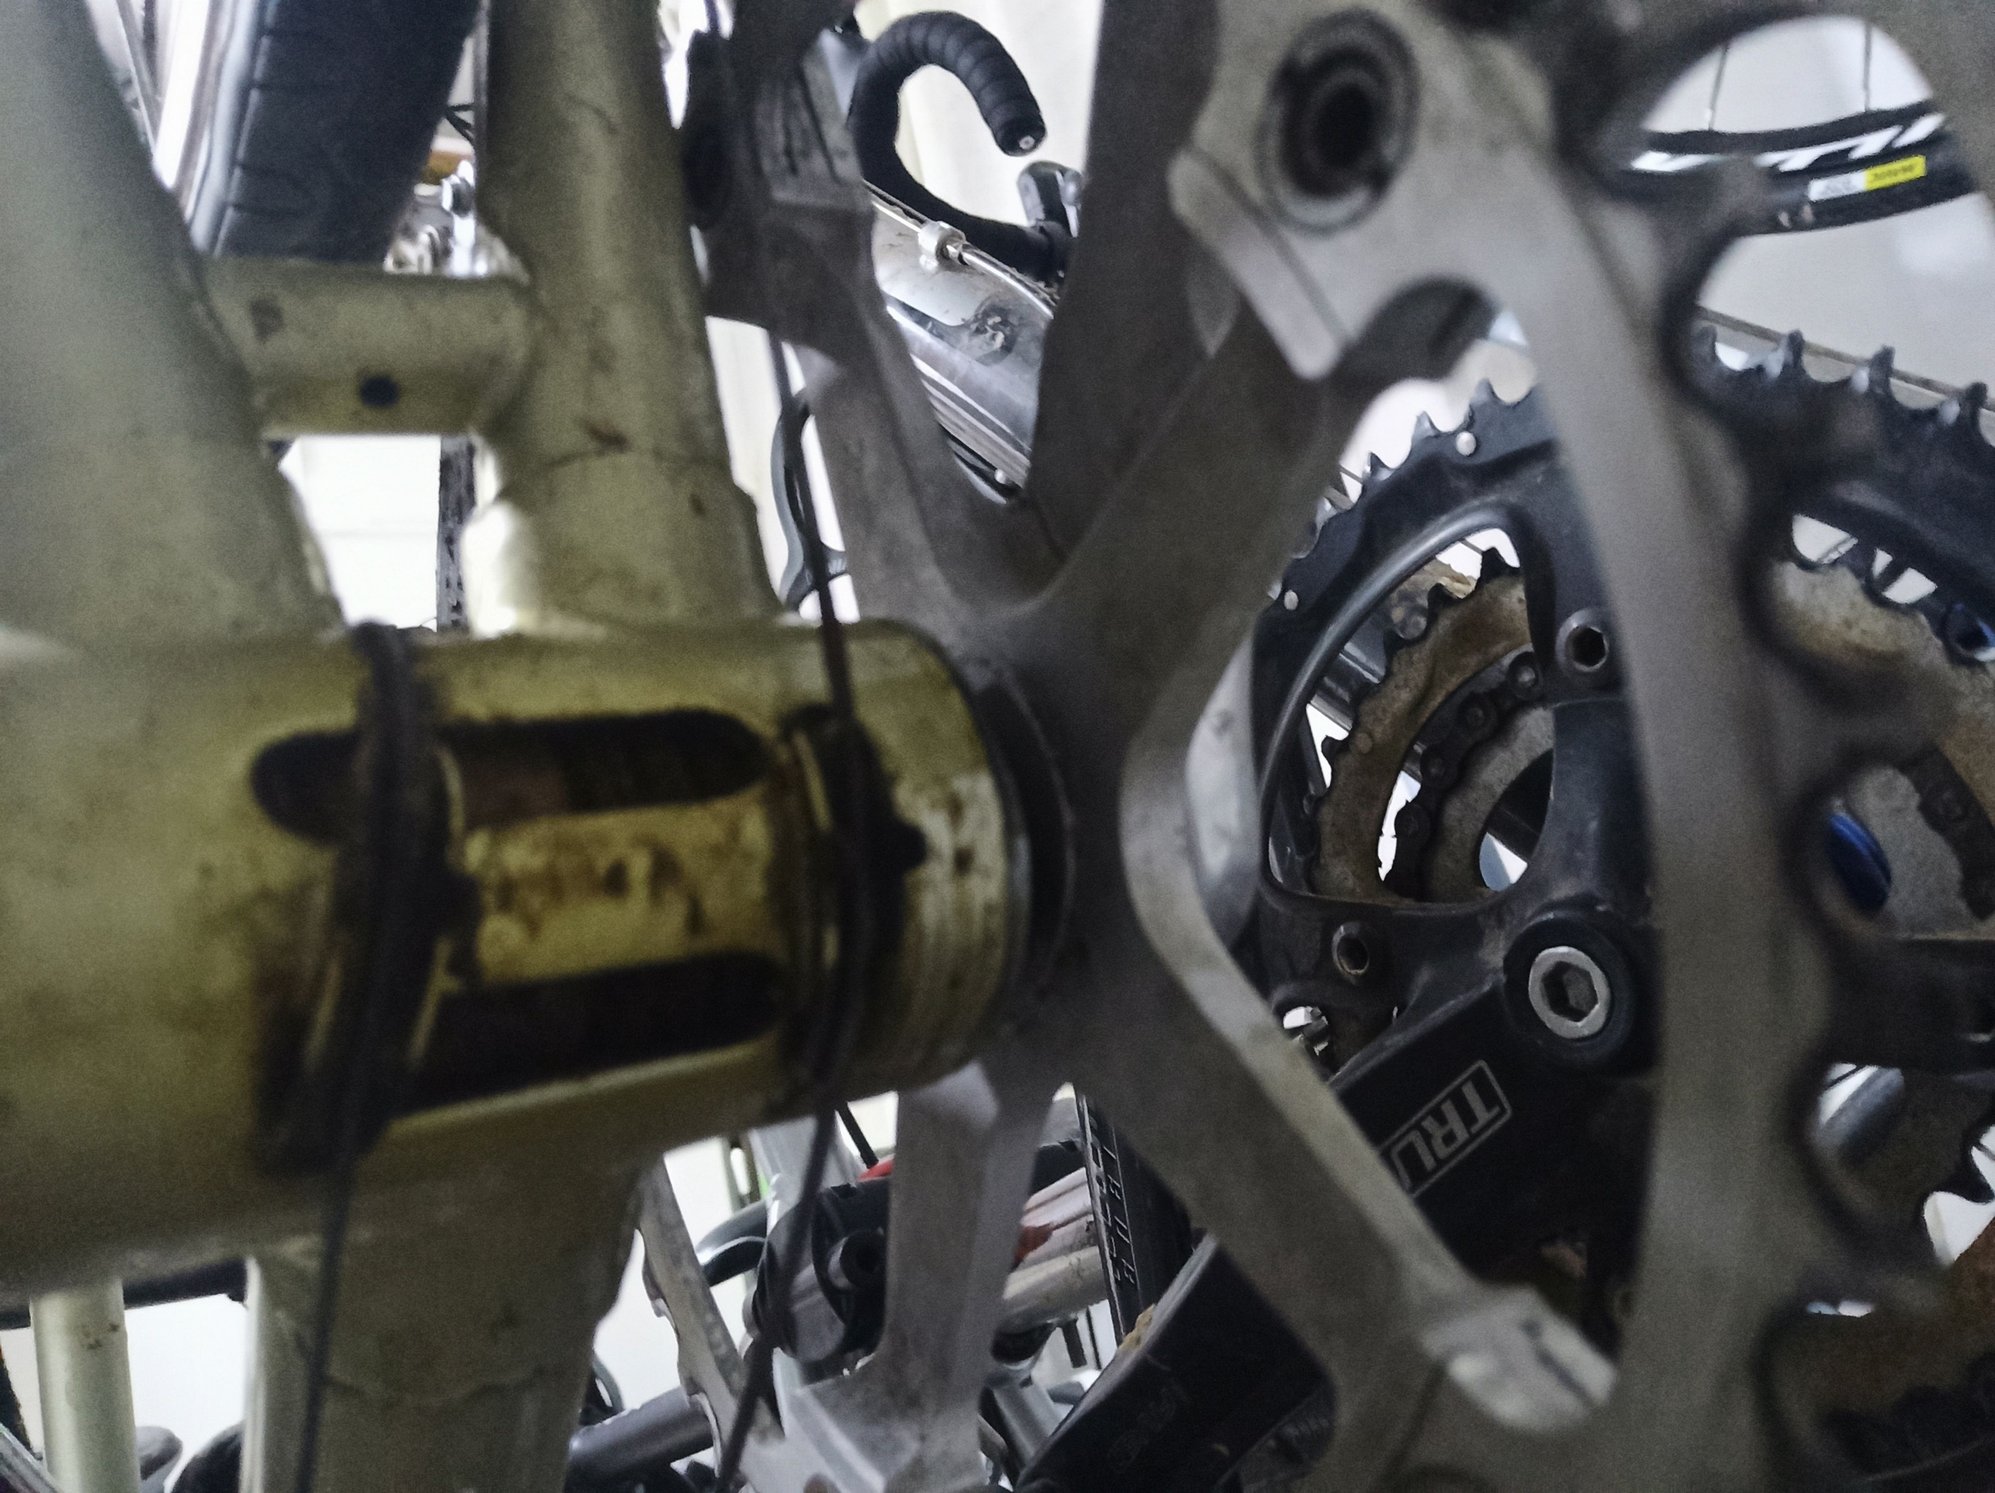
I'm not sure if I will be able to fit something that is rigid enough though.
10-13-20, 03:17 PM
#25
Friendship is Magic

Join Date: Nov 2010
Location: Sacramento, CA
Posts: 22,984
Bikes: old ones
Mentioned: 304 Post(s)
Tagged: 0 Thread(s)
Quoted: 26419 Post(s)
Liked 10,380 Times
in
7,208 Posts
...which is exactly how the process works for removal. The different expansion coefficients work to break the bonds that have formed through galvanic corrosion. Thus the recommendation to go through 2 or 3 heating and cooling cycles. It doesn't matter whether the aluminum is interior to the steel surface or exterior to it. The general idea is to get them to expand nd contract at different rates.
I often puzzle over comments I see here made by people who have not actually done something in practice. It seems like a good way to go astray.
I often puzzle over comments I see here made by people who have not actually done something in practice. It seems like a good way to go astray.