


Re-sizing seatpost
 02-04-22, 12:38 PM
#26

Junior Member
Thread Starter
All I can say is wow, huge thanks to all of you. This has been exactly the conversation I was hoping for.
You have certainly all given me a lot to think about.
1. Yes the seat post tube is anodized nicely and I would miss that finish
2. Given how common 27.2 is and that this is Tange 2 tubing (I.e., not paper thin) having it reamed is becoming more appealing... I really want to have the rear cantilever studs moved someday anyway to accommodate 700c, so maybe I should just have a builder do both at once
3. As is, the 27.2 post will insert maybe 1 inch into the 27mm seat tube but no further, both parts are exceptionally clean, so a ream or seatpost mod is definitely necessary to make these work together
4. Wonderful, wonderful suggestions on grits and methods. Exactly what I was hoping for
This forum is such an awesome resource. I'm going to think on it for a while before attempting anything... I'll keep you all posted on what route I take
 02-04-22, 01:06 PM
#27
Senior Member
Join Date: Jul 2017
Posts: 248
Mentioned: 1 Post(s)
Tagged: 0 Thread(s)
Quoted: 143 Post(s)
Likes: 0
Liked 90 Times
in
64 Posts
Reamer used in the top of the seat tube can easily catch on the slot in the back of the seat tube
You may want to consider using a hone ....this will take longer, but can be powered with a hand drill
We are talking about increasing .008" on the I.D. of the seat tube here
You may want to consider using a hone ....this will take longer, but can be powered with a hand drill
We are talking about increasing .008" on the I.D. of the seat tube here
02-04-22, 01:46 PM
#28
Senior Member
Join Date: May 2005
Location: SFBay
Posts: 2,334
Bikes: n, I would like n+1
Mentioned: 0 Post(s)
Tagged: 0 Thread(s)
Quoted: 127 Post(s)
Likes: 0
Liked 133 Times
in
108 Posts
I second that. Having used reamers and hones in seat tubes on frames (though not many times), a ball hone in a drill definitely takes less skill, and more importantly is an easier tool to go slowly with. That might be something to consider letting a shop or as you said framebuilder do too, depending on availability and cost.
The other option if you really want a hands on project would be to buy a $5 cheap used 27.2 seat post to practice on.
The other option if you really want a hands on project would be to buy a $5 cheap used 27.2 seat post to practice on.
Last edited by jccaclimber; 02-05-22 at 01:12 AM.
02-04-22, 04:27 PM
#29
Junior Member
Thread Starter
Thanks guys. Excellent replies.
I have a number of junk seatposts so I think practicing is a good idea, to get a feel for the best grits and for polishing practice.
Plus it gives me time to think about modifying the nice post and to consider having the frame reamed. I really want to have those canti studs moved, maybe this will convince me to bite the bullet and have both things done
Last edited by cstar; 02-04-22 at 04:31 PM.
02-04-22, 08:52 PM
#30
Friendship is Magic

Join Date: Nov 2010
Location: Sacramento, CA
Posts: 22,984
Bikes: old ones
Mentioned: 304 Post(s)
Tagged: 0 Thread(s)
Quoted: 26421 Post(s)
Liked 10,380 Times
in
7,208 Posts
A cylinder hone won't fix that, no matter how you use it.
So sometimes that turns out to be the explanation for why you find a 27.0 post in a frame that might have been originally made with a 27.2 post fitted to it. But not always, there are lots of reasons when a bike frame has a history, and most of it is mysterious to you.
__________________

Likes For 3alarmer:
02-05-22, 01:19 AM
#31
Senior Member
Join Date: May 2005
Location: SFBay
Posts: 2,334
Bikes: n, I would like n+1
Mentioned: 0 Post(s)
Tagged: 0 Thread(s)
Quoted: 127 Post(s)
Likes: 0
Liked 133 Times
in
108 Posts
Pointing to a few different posts here.
1. I�m not sure what stripping the anodize off before sanding does. The sandpaper will happily take it off, and lye, common as it is, is not a chemical to be fooled with.
2. If you try on a seat post, you might sand down just the first inch or so. Then, while being careful not to get it stuck in the frame, see how far it goes. Your description of being able to get the larger post in an inch leaves me to think that if anything the area around the clamp is oversized rather than undersized relative to the rest of the tube, but both have been known to happen. If the top has just been pinched in them the slight lead in taper will help you get a post started. Of course done wrong it�s a way to get a post jammed in as well.
02-05-22, 08:24 AM
#32
Old fart

Join Date: Nov 2004
Location: Appleton WI
Posts: 24,786
Bikes: Several, mostly not name brands.
Mentioned: 153 Post(s)
Tagged: 0 Thread(s)
Quoted: 3588 Post(s)
Liked 3,400 Times
in
1,934 Posts
Given how common 27.2 is and that this is Tange 2 tubing (I.e., not paper thin) having it reamed is becoming more appealing.
As is, the 27.2 post will insert maybe 1 inch into the 27mm seat tube but no further, both parts are exceptionally clean, so a ream or seatpost mod is definitely necessary to make these work together
Likes For JohnDThompson:
02-05-22, 03:16 PM
#33
(rhymes with spook)

Join Date: Aug 2009
Location: Winslow, AR
Posts: 2,788
Bikes: '83 univega gran turismo x2, '85 schwinn super le tour,'89 miyata triple cross, '91 GT tequesta, '90 yokota grizzly peak, '94 GT backwoods, '95'ish scott tampico, '98 bonty privateer, '93 mongoose crossway 625, '98 parkpre ariel, 2k'ish giant fcr3
Mentioned: 26 Post(s)
Tagged: 0 Thread(s)
Quoted: 919 Post(s)
Liked 745 Times
in
546 Posts
27.2 -> 27.0 is only 0.1mm around. We're not talking about removing a lot of metal here.
I've done this a number of times. First start with a deanodized seatpost. If it's anodized, use lye to remove the finish. Then cut a strip of 80 grit paper that fits in your hand. Hold it in one hand under a dripping faucet. With your other hand, rotate the seatpost in a circular fashion, changing your grip after a little while. Use a digital caliper if necessary. Switch to a finer sandpaper (600 grit) to remove the blemishes before arriving at the final size. You might have to switch between two or three different papers a few times to get it right. Finish with Mother's polish. It might take an hour.
I've done this a number of times. First start with a deanodized seatpost. If it's anodized, use lye to remove the finish. Then cut a strip of 80 grit paper that fits in your hand. Hold it in one hand under a dripping faucet. With your other hand, rotate the seatpost in a circular fashion, changing your grip after a little while. Use a digital caliper if necessary. Switch to a finer sandpaper (600 grit) to remove the blemishes before arriving at the final size. You might have to switch between two or three different papers a few times to get it right. Finish with Mother's polish. It might take an hour.
so, i second your post. i'd go further to say one doesn't need to wet sand initially though i can see the benefit in doing so. i didn't even do it in one sitting....which, imo....makes it easy to manage the effort...ie. hand soreness. take a few days doing some sanding for 15-20min's here and there with a hot cup of tea. definitely finish out with a wet sand. and, a little drill attachment with the mother's will make quick work of the polishing. if a post is silver anodized to begin with, one can still get a very nice mostly durable finish. mostly because, of course, there's no substitute for anodizing.....which still can get scuffed and show. anyway.....nice vid option for the OP
Likes For thook:
02-05-22, 03:55 PM
#34
Junior Member
Thread Starter
Yes, that's too nice a post to do irreversible damage.
Tange #2 has the same physical dimensions as Columbus SL, so the seat tube should be 27.2mm ID. It likely was distorted slightly during brazing. Reaming should be fine. I'd use an adjustable or helical reamer rather than a hone, as hones will remove material from the entire circumference of the tube, while a reamer will only take off the high spots.
That you can insert the post that far argues strongly for distortion of the tube; reaming is the proper fix.
John, interestingly enough the Centurion ProTour came with a 27mm seatpost according to the original sales catalog. So I do believe the 27mm post is original
That said, this bike has clearly seen a LOT of miles if going by appearance alone and I wouldn't doubt if the seat tube is lightly deformed at the top section near the binder bolt, and I'm seeing more and more benefit to having it reamed professionally. More common post size, knowing the seat tube is now as true as possible, likely achieving a better seat post fit than it has stock, not modifying this lovely post...
OTOH it sounds like modifying the post isn't that crazy, less risk than damaging the frame (though I trust a frame builder to ream it correctly), that video made the clean up work look pretty easy
The right ream seems to be $140, I also wouldn't mind investing and practicing, I have tons of junk steel frames I could practice on...
I'm going to keep thinking on which route I'll take and update as things happen.
02-05-22, 04:16 PM
#35
Friendship is Magic
Join Date: Nov 2010
Location: Sacramento, CA
Posts: 22,984
Bikes: old ones
Mentioned: 304 Post(s)
Tagged: 0 Thread(s)
Quoted: 26421 Post(s)
Liked 10,380 Times
in
7,208 Posts
Reamer on Amazon
I think this handle is large enough to fit the shank on it.
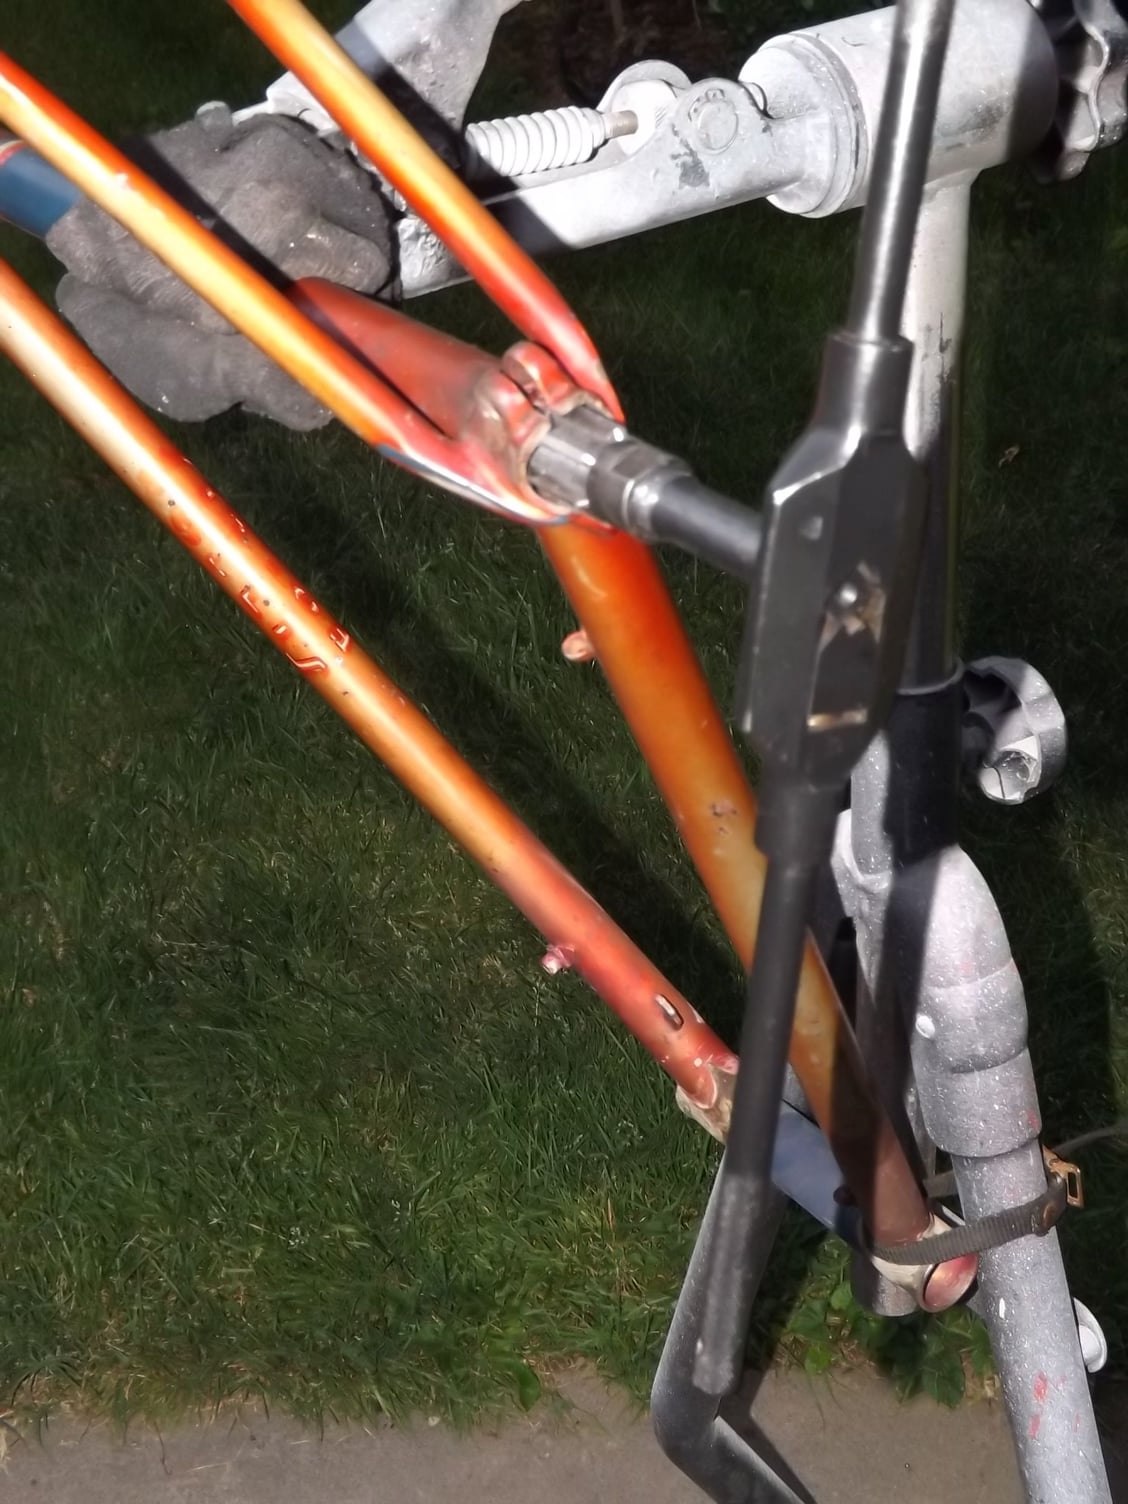
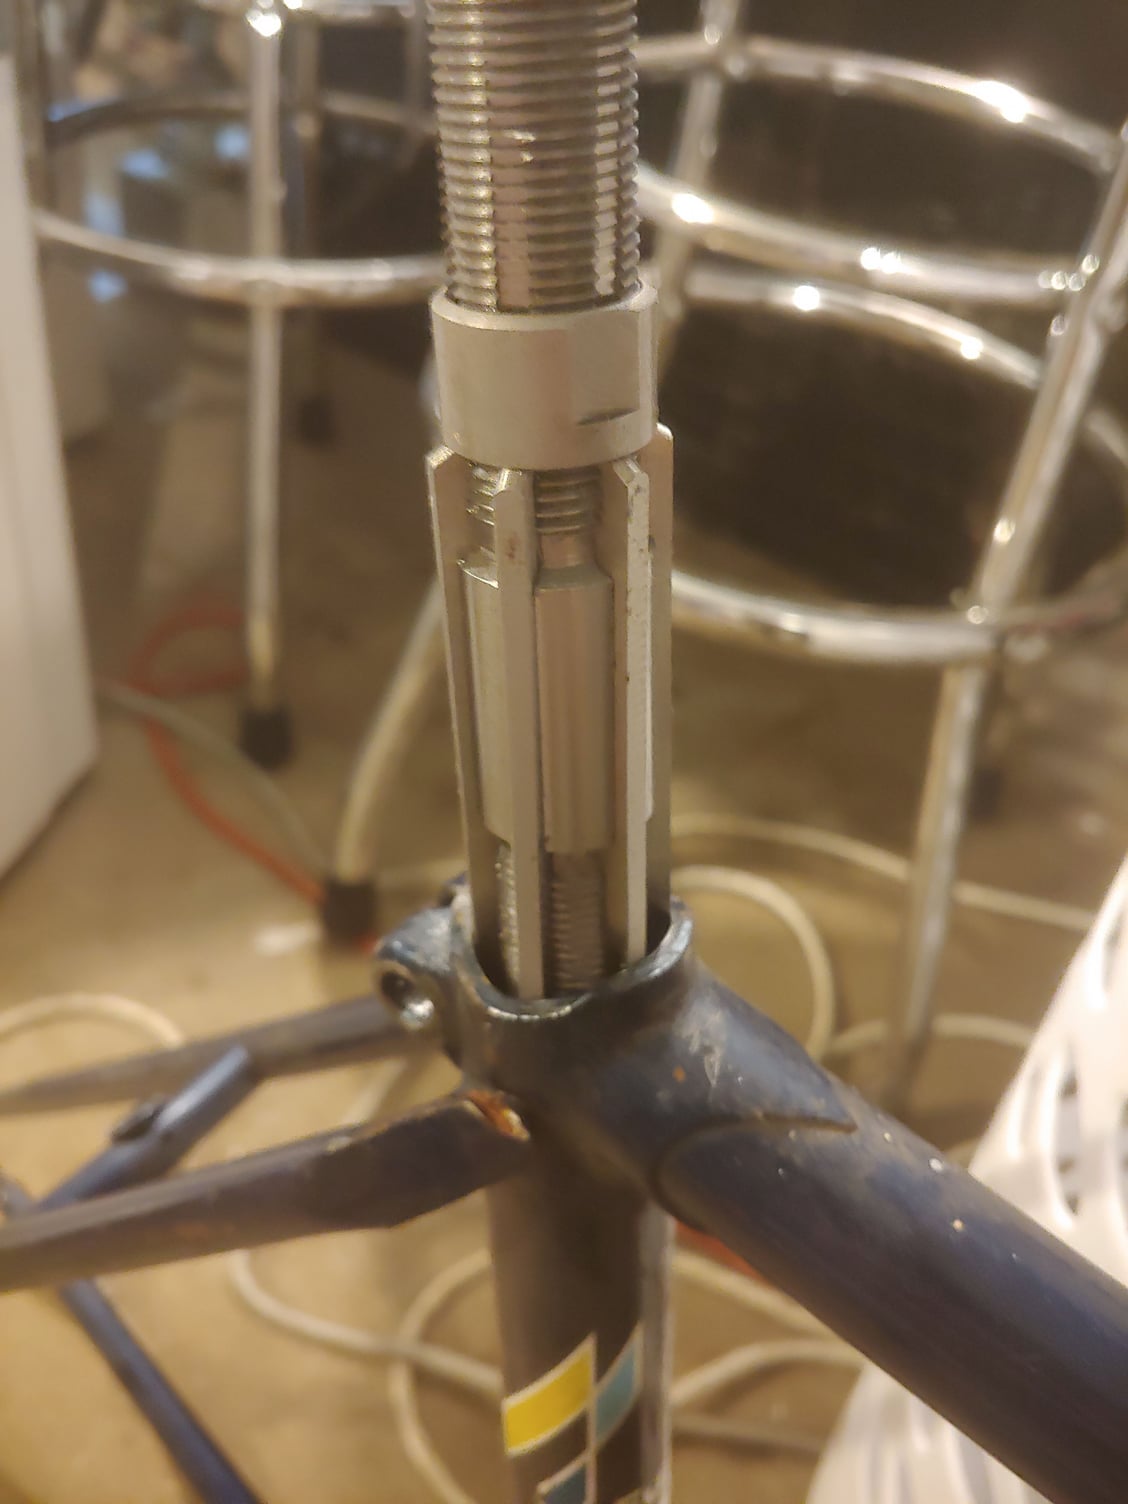
It's not a huge job, but you want to take your time, and measure the diameter you set the reamer at a couple of times, in the measure twice, cut once tradition. Here is how I set up to do it last time I did one, but there are many setups that will work.
__________________
03-02-22, 03:59 PM
#36
Junior Member
Thread Starter
Well guys, I have decided to ream the seat tube, for a number of reasons. I suspect it isn't a great ream from the factory... My head tube was slightly over reamed... And given that the ream is probably too large as is for my 27mm post, there are way more 27.2mm posts around than 27, and my tubing is not uber thin; I think it just makes sense to go this route
I got a killer deal today on a used-once (for the same purpose) no. 28 Chadwick Trefethen angle blade reamer.
I have watched a bunch of videos, will buy some other tools and supplies and have a go of it sometime this summer.
I'll keep everyone posted! Very nervous but also very excited to do this.
I got a killer deal today on a used-once (for the same purpose) no. 28 Chadwick Trefethen angle blade reamer.
I have watched a bunch of videos, will buy some other tools and supplies and have a go of it sometime this summer.
I'll keep everyone posted! Very nervous but also very excited to do this.
Likes For cstar:
03-02-22, 04:00 PM
#37
Junior Member
Thread Starter
....for occasional home use, a mere mortal can buy a tapered adjustable reamer that will work for this for about 40 bucks, more or less. That doesn't include an attachable handle, which you ought to have to do this job easily. Look on Amazon or e-bay. The ones we poor home mechanics can afford to buy are all from China or India. They are a little more fussy to set up, initially. But they work fine for this.
Reamer on Amazon
I think this handle is large enough to fit the shank on it.
It's not a huge job, but you want to take your time, and measure the diameter you set the reamer at a couple of times, in the measure twice, cut once tradition. Here is how I set up to do it last time I did one, but there are many setups that will work.
03-04-22, 01:34 PM
#38
Senior Member

Join Date: Feb 2022
Location: GMT-5
Posts: 939
Mentioned: 1 Post(s)
Tagged: 0 Thread(s)
Quoted: 540 Post(s)
Liked 416 Times
in
274 Posts
So you decided to physically hack the bike permanently just to salvage the purchase costs of a wrong seatpost?
(scratches head)
(scratches head)
03-04-22, 01:55 PM
#39
Junior Member
Thread Starter
I know not everyone would make the same choice but its not objectively a bad choice. -C
03-04-22, 02:56 PM
#40
Friendship is Magic
Join Date: Nov 2010
Location: Sacramento, CA
Posts: 22,984
Bikes: old ones
Mentioned: 304 Post(s)
Tagged: 0 Thread(s)
Quoted: 26421 Post(s)
Liked 10,380 Times
in
7,208 Posts
 06-13-22, 03:14 PM
#41
Junior Member
Thread Starter
Well, I was successful. I reamed the seat tube to fit the 27.2 post. The whole experience went marvelously. For anyone considering doing this, I don't think it's nearly as scary a project as it seems. But obviously, I wasn't taking off much material so definitely use good judgement in that department before proceeding.
To whomever suggested the tubing might have been distorted and that 27.2 would be the proper post for this tubeset- I'm thinking you're onto something. I removed the 27mm post, gently spread the binder bolt tabs, and boy did that 27.2 post want to go, but it was just too tight past the first inch to continue. Oddly enough the Centurion ProTour catalogue specifies a 27mm post... Maybe they just used a 27mm to compensate for distortion, burrs and to avoid cleanup. Idk, I'm not a frame builder.
But anyway. Here's my methodology. First I practiced on a damaged/junk chromoly Fuji frame. I started by filing the inside of the binder bolt keyway slot with a sharp triangular file. I beveled the edges of the slot to discourage the reamer from catching. Then, rather than using calipers to guide me, I just set the oiled up reamer to just barely slide in the seat tube with a little resistance. I took off the tiniest bit of material until that the reamer would spin freely. I removed it, re set it to just barely fit in again, and so on and so forth. After removing quite a bit from the junk frame seat tube, I felt comfortable trying it on my Centurion. So I did it the same way, occasionally cleaning the chips off the ream as well. I tried the seatpost after every pass until it felt just right in the tube. Took maybe 3 super light passes. I then hit it with an oiled 220 grit ball hone in the drill. I wiped it out with solvent soaked paper towels repeatedly to clean it up. The original ream of the seat tube had not been cleaned up well at all, you could see cut marks and burrs. It was far more nicely finished when I was done with it.
I now have a much better seatpost fit than stock, and a 27.2mm post. I barely needed to take anything off. I would totally do this again and am glad to have learned a new skill
Likes For cstar:
06-13-22, 10:09 PM
#42
Senior Member
Join Date: Apr 2010
Location: Elevation 666m Edmonton Canada
Posts: 2,482
Bikes: 2013 Custom SA5w / Rohloff Tourster
Mentioned: 7 Post(s)
Tagged: 0 Thread(s)
Quoted: 1237 Post(s)
Liked 321 Times
in
248 Posts
Nice, but I just don't see how those fluted posts don't let in a sack of dirt or rain. Likely way harder to sand evenly too.
Myself, I have made 3 good steel stems and 4 bad ones. LOL. I did everything but the welding and nickel plating. My latest, I was short on the thinning again, 1 or 2 thou.
I used a wrench and pieces of paper to judge diameter, and a hundred tries along the way. Mostly used 150 grit, both with emery cloth and bits of folded sheets.
Also some with 120. 80 grit would be ridiculous. Alu is very soft.
Last edited by GamblerGORD53; 06-13-22 at 10:13 PM.
