


How to remove stuck dropout screw?
 09-27-18, 07:38 PM
#26

verktyg

Join Date: Jul 2006
Location: SF Bay Area
Posts: 4,030
Bikes: Current favorites: 1988 Peugeot Birraritz, 1984 Gitane Super Corsa, 1980s DeRosa, 1981 Bianchi Campione Del Mondo, 1992 Paramount OS, 1988 Colnago Technos, 1985 RalieghUSA SBDU Team Pro
Mentioned: 207 Post(s)
Tagged: 0 Thread(s)
Quoted: 1036 Post(s)
Liked 1,238 Times
in
654 Posts
HSS or Cobalt HSS Drills
Those are solid carbide "circuit board" drills. They're designed to be run at ungodly speeds in precision spindles for printed circuit board production (100,000+ rpm)
The trouble is, they're extremely delicate. I've never been able to use any but the largest by hand in a Dremel without snapping them off. You would be much better served using high speed steel (hss) or cobalt drill bits. Much tougher, and more than hard enough for drilling out screws. Try McMaster-Carr for a large selection of drill bits, and fast shipping.
That being said, it's still a very dicey operation, especially if you're not very skilled, and lucky. (I'm a machinist by trade, and I doubt I'd have more than a 50% chance of drilling one out without just making it worse.)
 Those circuit board drills are very brittle and when you break one off you are screwed in the screw.
A 1mm or 1.5mm or 1/16" drill works much better.
verktyg

__________________
Don't believe everything you think! History is written by those who weren't there....
Chas. ;-)
Don't believe everything you think! History is written by those who weren't there....
Chas. ;-)
Last edited by verktyg; 10-03-18 at 03:50 AM.
 09-28-18, 07:32 AM
#27
Newbie
I too recently had this issue on a �72 Witcomb. My efforts with mild heat (worried about surrounding paint) and pb blaster etc were no good.
I tried the needle nose vice grips. No good. After successive failures I ended up with no screw protruding on the outside of the dropout and only maybe 1/4� left showing on the inside.
I went to Moroso Performance Products in Guilford, CT. Famous hi end auto parts manufacturer.
They welded a nut on that exposed thread and it promptly broke off flush when we put a wrench on it.
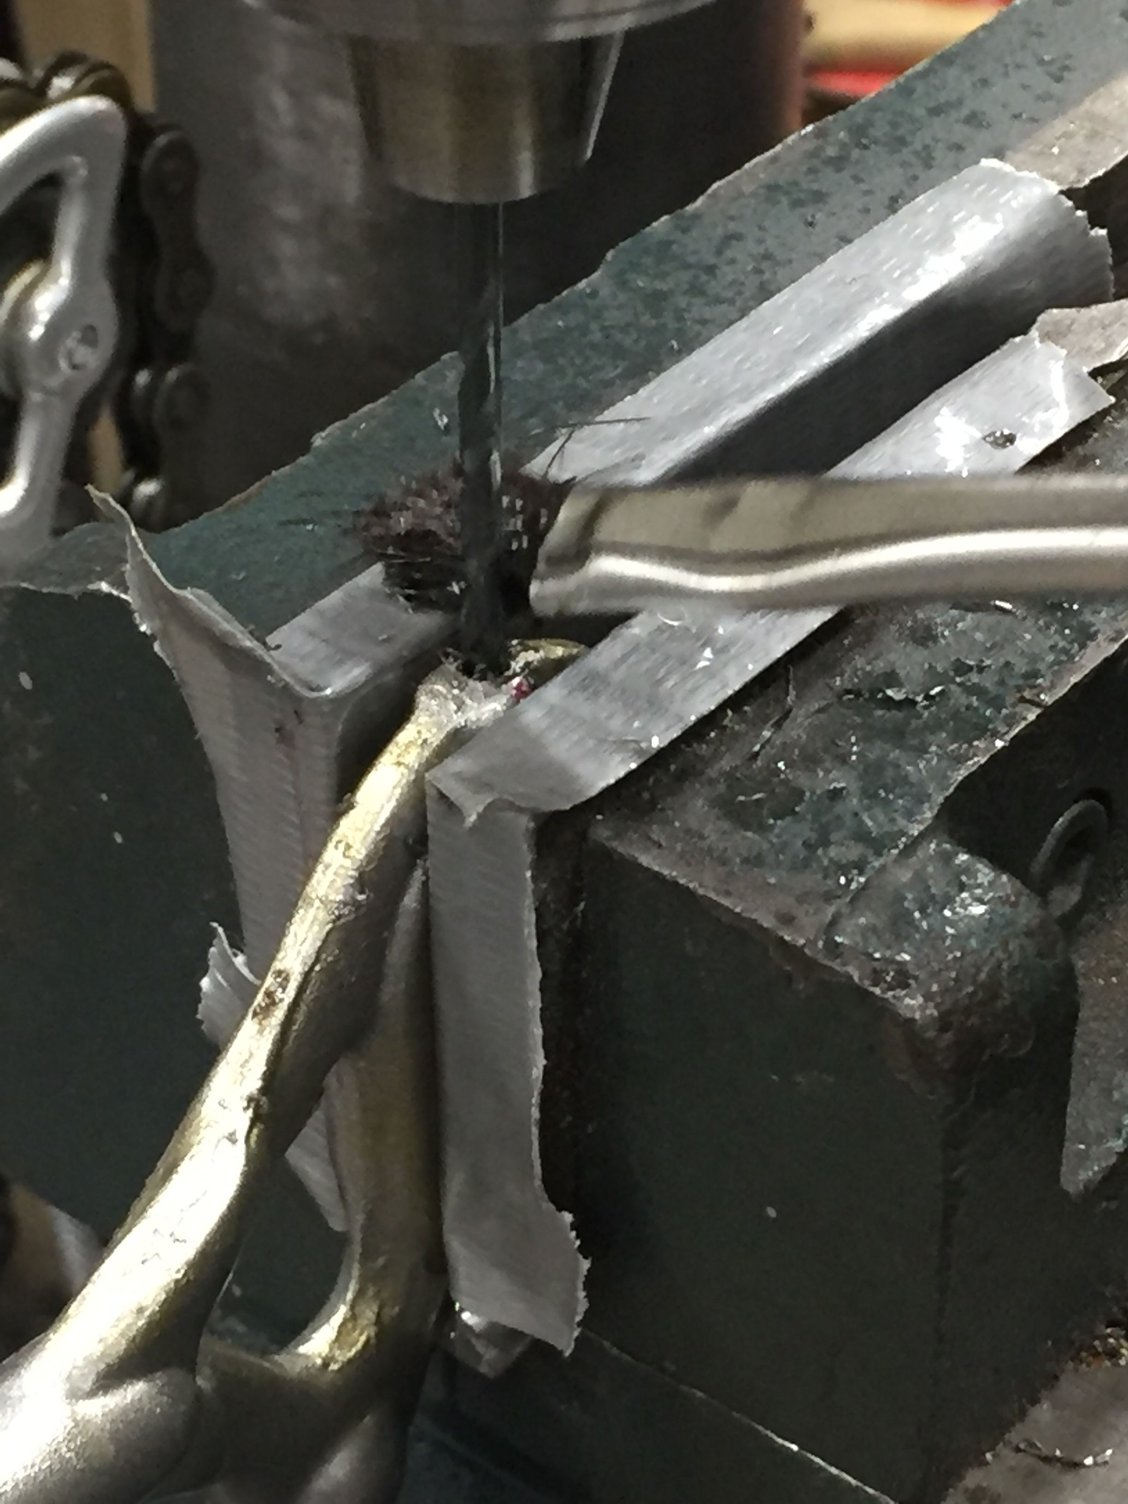
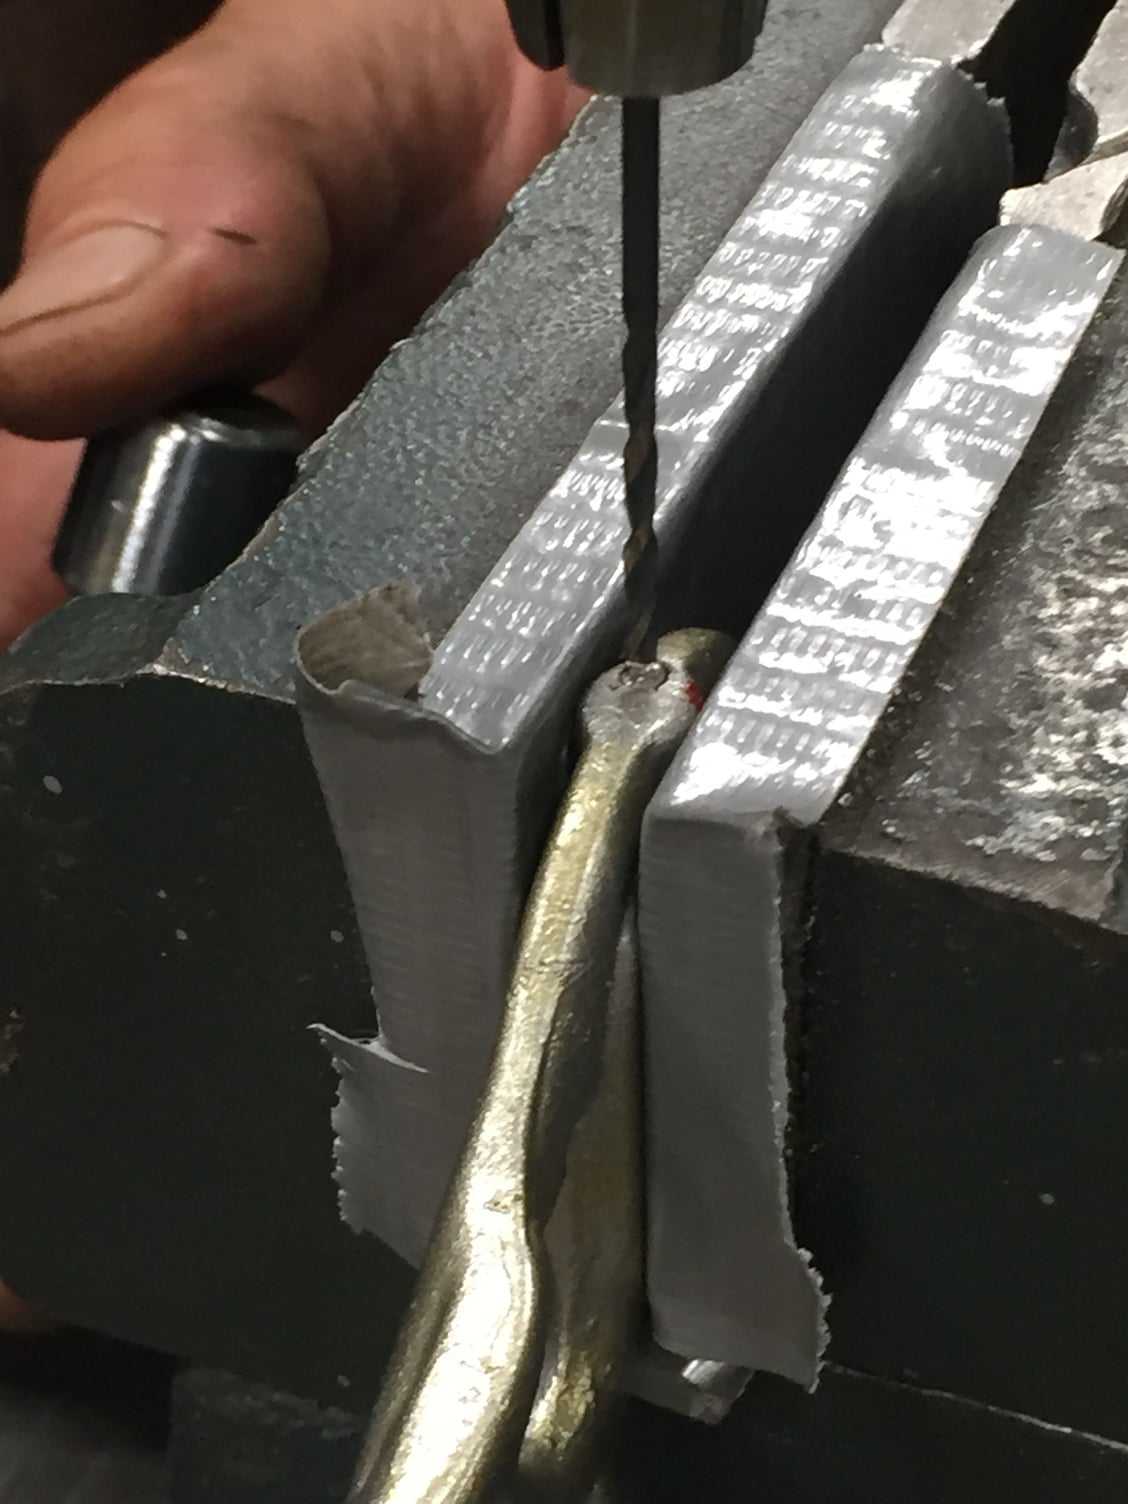
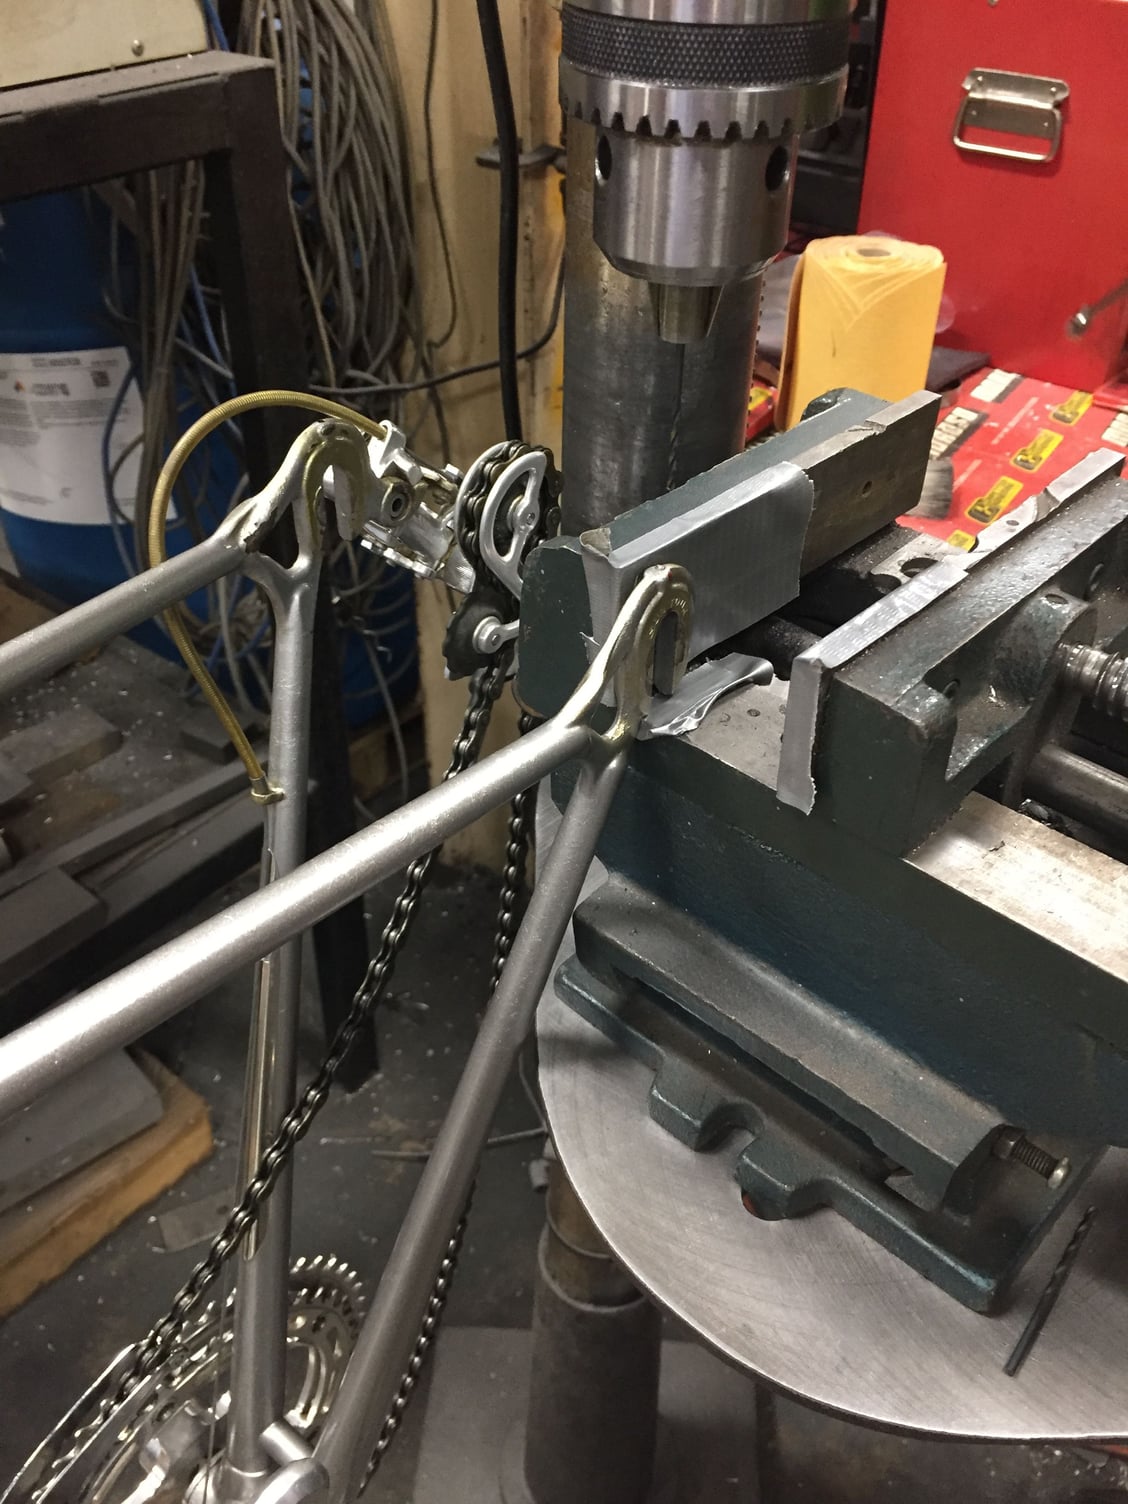
They put the bike upside down in position on a bench drill and began a very deliberate drill process.
They marked the entry and exit holes to get the dropout lined up precisely.
Then, a special starter drill bit. Don�t recall the name but very fine tip on a beefy bit so it won�t wander.
That did a pilot hole.
Next, with cooling fluid, ran a #49 bit thru perfectly and followed with a #38 I believe it was. I think that�s about a 2.5mm bit.
The entry and exit holes were exact.
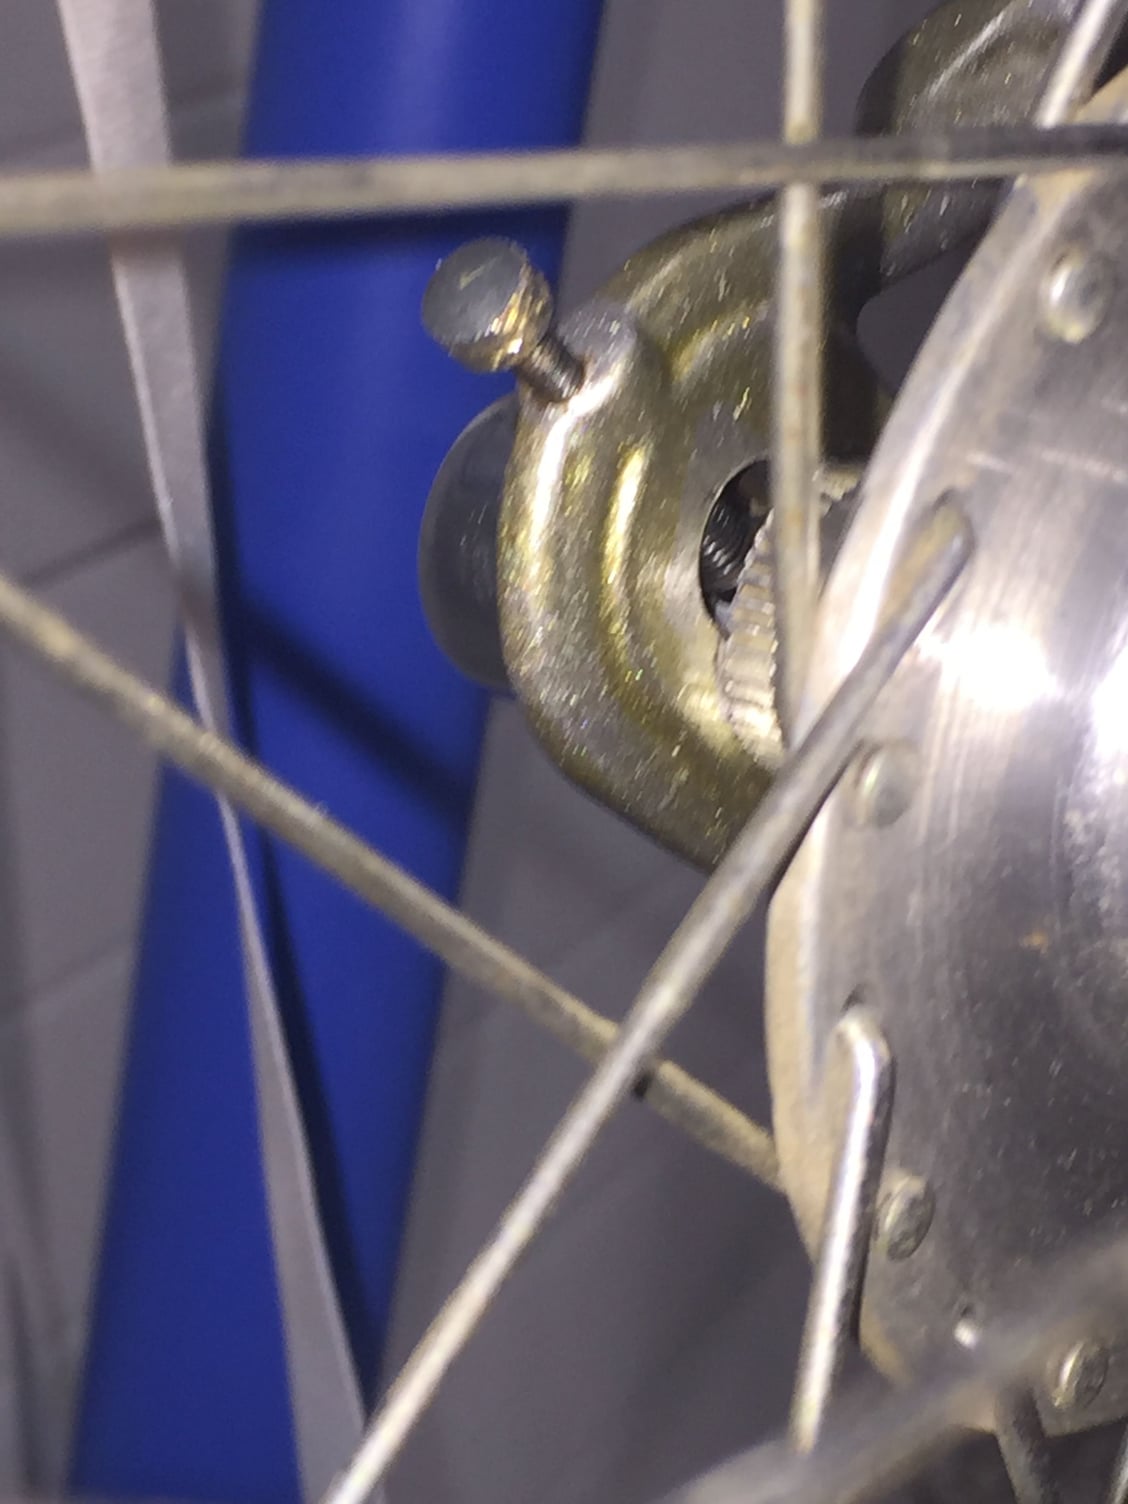
Finally they used the same drill and setup but switched to a 3mm tap. That was carefully worked thru the hole and I had a perfectly repaired bike.
At no time did the original screw come out. Clean metal came out on the initial drilling but then just rusty filings as they got deeper into the lug.
That screw was never coming out without a drill.
Rick Moroso owns the place, Paul Minore did the work. Incredible job! Disclaimer: I know these guys, are friends with them and use their parts etc. that is why I trusted them in the first place. They are meticulous to an insane degree.

I tried the needle nose vice grips. No good. After successive failures I ended up with no screw protruding on the outside of the dropout and only maybe 1/4� left showing on the inside.
I went to Moroso Performance Products in Guilford, CT. Famous hi end auto parts manufacturer.
They welded a nut on that exposed thread and it promptly broke off flush when we put a wrench on it.
They put the bike upside down in position on a bench drill and began a very deliberate drill process.
They marked the entry and exit holes to get the dropout lined up precisely.
Then, a special starter drill bit. Don�t recall the name but very fine tip on a beefy bit so it won�t wander.
That did a pilot hole.
Next, with cooling fluid, ran a #49 bit thru perfectly and followed with a #38 I believe it was. I think that�s about a 2.5mm bit.
The entry and exit holes were exact.
Finally they used the same drill and setup but switched to a 3mm tap. That was carefully worked thru the hole and I had a perfectly repaired bike.
At no time did the original screw come out. Clean metal came out on the initial drilling but then just rusty filings as they got deeper into the lug.
That screw was never coming out without a drill.
Rick Moroso owns the place, Paul Minore did the work. Incredible job! Disclaimer: I know these guys, are friends with them and use their parts etc. that is why I trusted them in the first place. They are meticulous to an insane degree.
09-28-18, 07:45 AM
#28
aka: Dr. Cannondale
Join Date: Jul 2009
Posts: 7,734
Mentioned: 234 Post(s)
Tagged: 0 Thread(s)
Quoted: 2155 Post(s)
Liked 3,404 Times
in
1,205 Posts
Wow.
I need friends like THAT!!!
I need friends like THAT!!!
__________________
Hard at work in the Secret Underground Laboratory...
Hard at work in the Secret Underground Laboratory...
09-28-18, 09:13 AM
#29
Senior Member
Join Date: Jul 2008
Location: 25 miles northwest of Boston
Posts: 29,552
Bikes: Bottecchia Sprint, GT Timberline 29r, Marin Muirwoods 29er, Trek FX Alpha 7.0
Mentioned: 112 Post(s)
Tagged: 0 Thread(s)
Quoted: 5224 Post(s)
Liked 3,582 Times
in
2,343 Posts
congrats!!!
man cudda used a friend like that a cpl years ago when I broke off the nut from a bolt holding my Subaru rear hatch support bracket. took me weeks to get the right parts & do the job by hand. I was eventually able to extract my bolt tho. doing it by hand was hard but I had a little more meat to work with
man cudda used a friend like that a cpl years ago when I broke off the nut from a bolt holding my Subaru rear hatch support bracket. took me weeks to get the right parts & do the job by hand. I was eventually able to extract my bolt tho. doing it by hand was hard but I had a little more meat to work with
09-28-18, 09:22 AM
#30
Senior Member
Join Date: Jan 2004
Location: Madison, WI USA
Posts: 6,157
Mentioned: 50 Post(s)
Tagged: 0 Thread(s)
Quoted: 2363 Post(s)
Liked 1,749 Times
in
1,191 Posts
+1; we all do.
I always thought of Moroso as just another "sticker brand", you see on dudes' windows, and MAYBE their tool boxes. Nice to see there's a real family name, and an old-school craft skill and work/solution ethic behind it. I'll look at those stickers differently now.
I always thought of Moroso as just another "sticker brand", you see on dudes' windows, and MAYBE their tool boxes. Nice to see there's a real family name, and an old-school craft skill and work/solution ethic behind it. I'll look at those stickers differently now.
09-28-18, 10:06 AM
#31
Senior Member

I can assure you removing small stuck screws with an easy out doesn't always go that well, but as you found out, sometimes it does.
Last edited by Salamandrine; 09-28-18 at 11:27 AM.
09-28-18, 11:22 AM
#32
Senior Member
Join Date: Jan 2004
Location: Madison, WI USA
Posts: 6,157
Mentioned: 50 Post(s)
Tagged: 0 Thread(s)
Quoted: 2363 Post(s)
Liked 1,749 Times
in
1,191 Posts
^^^^ "Easy out" - rarely easy, and often NOT out.
Likes For madpogue:
 09-29-18, 10:41 AM
#34
Senior Member
Join Date: Oct 2015
Location: PDX
Posts: 13,045
Bikes: Merz x 5 + Specialized Merz Allez x 2, Strawberry/Newlands/DiNucci/Ti x3, Gordon, Fuso/Moulton x2, Bornstein, Paisley,1958-74 Paramounts x3, 3rensho, 74 Moto TC, 73-78 Raleigh Pro's x5, Marinoni x2, 1960 Cinelli SC, 1980 Bianchi SC, PX-10 X 2
Mentioned: 267 Post(s)
Tagged: 0 Thread(s)
Quoted: 4512 Post(s)
Liked 6,385 Times
in
3,670 Posts
I too recently had this issue on a �72 Witcomb. My efforts with mild heat (worried about surrounding paint) and pb blaster etc were no good.
I tried the needle nose vice grips. No good. After successive failures I ended up with no screw protruding on the outside of the dropout and only maybe 1/4� left showing on the inside.
I went to Moroso Performance Products in Guilford, CT. Famous hi end auto parts manufacturer.
They welded a nut on that exposed thread and it promptly broke off flush when we put a wrench on it.
They put the bike upside down in position on a bench drill and began a very deliberate drill process.
They marked the entry and exit holes to get the dropout lined up precisely.
Then, a special starter drill bit. Don�t recall the name but very fine tip on a beefy bit so it won�t wander.
That did a pilot hole.
Next, with cooling fluid, ran a #49 bit thru perfectly and followed with a #38 I believe it was. I think that�s about a 2.5mm bit.
The entry and exit holes were exact.
Finally they used the same drill and setup but switched to a 3mm tap. That was carefully worked thru the hole and I had a perfectly repaired bike.
At no time did the original screw come out. Clean metal came out on the initial drilling but then just rusty filings as they got deeper into the lug.
That screw was never coming out without a drill.
Rick Moroso owns the place, Paul Minore did the work. Incredible job! Disclaimer: I know these guys, are friends with them and use their parts etc. that is why I trusted them in the first place. They are meticulous to an insane degree.
They can do stuff like this in their sleep, lucky you to have them for help.
 09-29-18, 12:42 PM
#35

Senior Member
Join Date: Jun 2006
Posts: 20,305
Mentioned: 130 Post(s)
Tagged: 0 Thread(s)
Quoted: 3464 Post(s)
Liked 2,830 Times
in
1,996 Posts
Only thing I would have done diff' would be to use a short drill for the first pass. I just worry about bit wander.
Makes me really want to pursue buying a used Bridgeport vertical mill... just so useful.
Makes me really want to pursue buying a used Bridgeport vertical mill... just so useful.
01-30-21, 01:37 PM
#36
Junior Member
Thanks for this thread, saved my expensive vintage frame!
Thanks to everyone who contributed to this thread. You helped me save a very expensive vintage titanium frame.
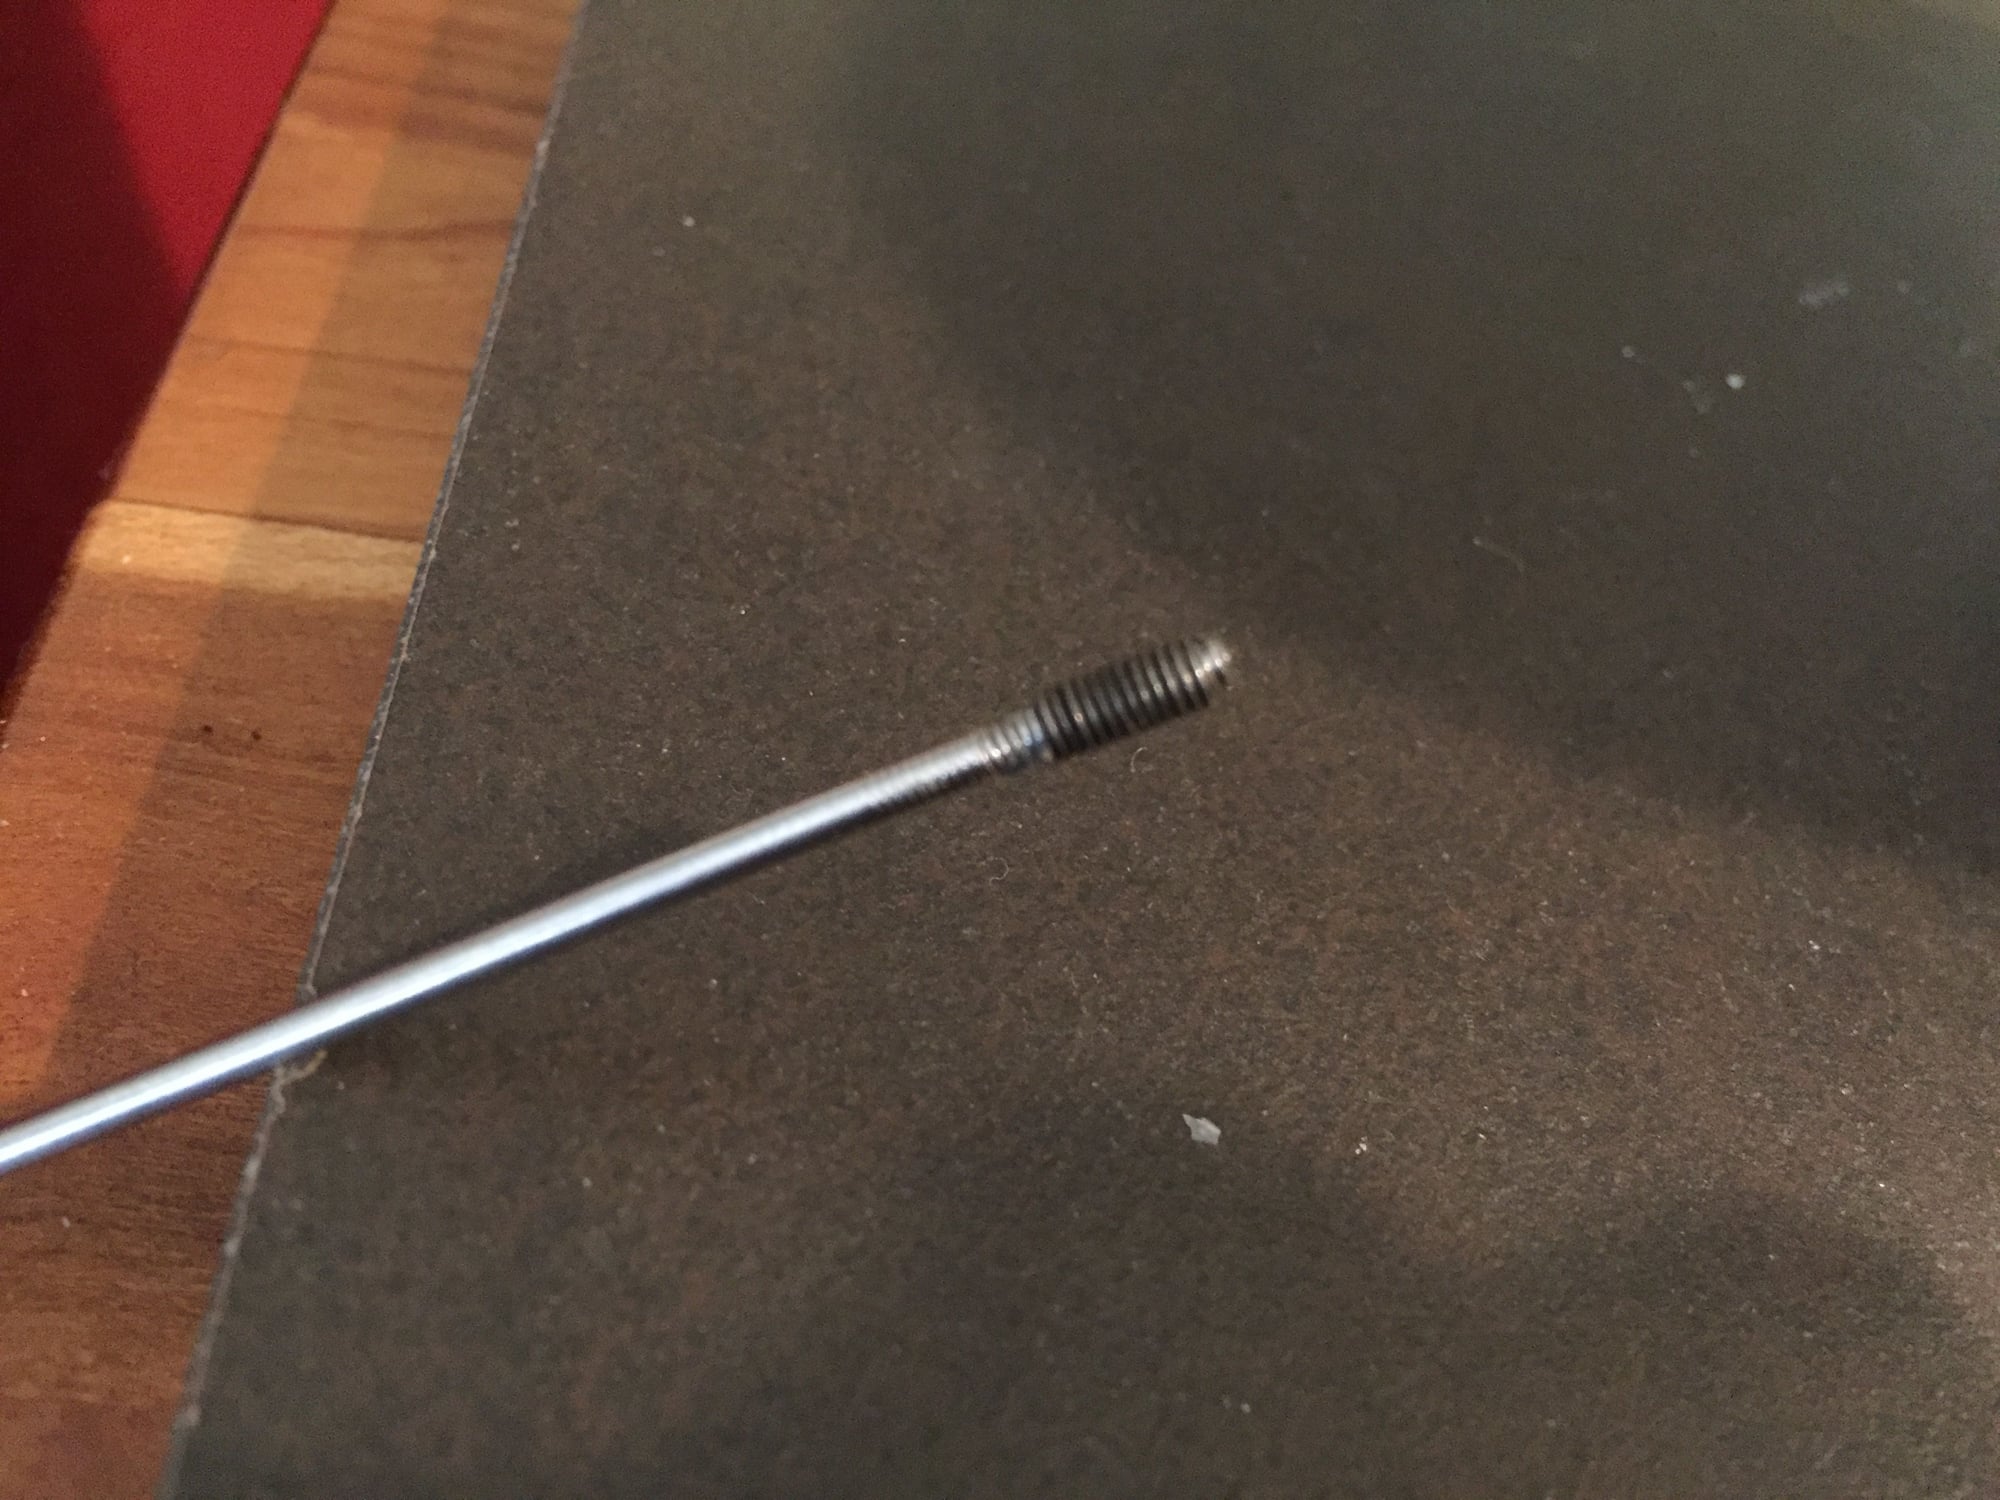
One screw came out easy, but in my impatience and inexperience I rounded out the head of the other. I soaked it in liquid wrench for about 2 days, then heated it in a open oven until it was warm but not hot, quickly cut a new slot with a hacksaw with an old blade, and the screw came out really easy.
Now I can fit the 25c tires I'd been hoping for.
Thanks again, you're awesome!
01-30-21, 02:42 PM
#37
Senior Member
I�ve broken off a couple DO Screws in my 40 yrs of wrenching, but managed to remove them w/o too much trouble.
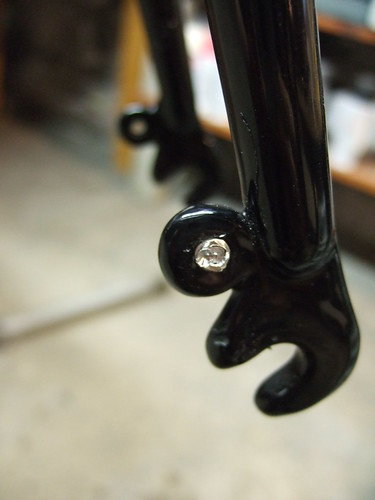
This new frame I got, came w/o any DO Screws, so I wasn�t going to take any chances w/ cheapo screws.
Found these SS one�s from the UK ata reasonable cost. Lubed threm up & they went right in...surprisingly!
https://www.ebay.com/itm/Stainless-S....m46890.l49292
This new frame I got, came w/o any DO Screws, so I wasn�t going to take any chances w/ cheapo screws.
Found these SS one�s from the UK ata reasonable cost. Lubed threm up & they went right in...surprisingly!
https://www.ebay.com/itm/Stainless-S....m46890.l49292
Likes For 1 Lugnut:
01-30-21, 04:35 PM
#39
tantum vehi

Join Date: Jul 2008
Location: Flathead Valley, MT
Posts: 4,440
Bikes: More than I care to admit
Mentioned: 153 Post(s)
Tagged: 0 Thread(s)
Quoted: 1167 Post(s)
Liked 992 Times
in
491 Posts
After buying a frame in your situation and then snapping off a new screw in the gunked-up hole, I now re-tap the hole before attempting to screw in an adjustment bolt. Got to use the cutting a slot and to unscrew it method...
Likes For mountaindave:
01-30-21, 05:43 PM
#40
Senior Member

Join Date: Aug 2015
Posts: 3,302
Mentioned: 39 Post(s)
Tagged: 0 Thread(s)
Quoted: 1143 Post(s)
Liked 1,743 Times
in
962 Posts
I broke a dropout screw installed and successfully extracted it by drilling, with my Milwaukee, a hole through the broken and then epoxied a spoke in the recess and was able to twist it
out.
Was I one happy camper.
out.
Was I one happy camper.
Likes For Mr. 66:
01-30-21, 05:56 PM
#41
Senior Member
Instead, I bought some 3mm machine screws to see if the d/o holes we�re ok to be fitted. With a little tri-flo, they went right without binding up the threads.
They were just temps till the SS srcrews came in the Mail. But thx, worthwhile info for others!
Likes For 1 Lugnut:
01-30-21, 06:13 PM
#42
tantum vehi
Join Date: Jul 2008
Location: Flathead Valley, MT
Posts: 4,440
Bikes: More than I care to admit
Mentioned: 153 Post(s)
Tagged: 0 Thread(s)
Quoted: 1167 Post(s)
Liked 992 Times
in
491 Posts
So many ways to skin a cat!
__________________
1970 Gitane TdF; 1973 Gitane TdF
1979 Trek 710; 1981 Trek 412; 1981 Trek 710
1984 Specialized Stumpjumper Sport; 1985 Specialized Allez SE; 1988 Specialized Sirrus; 1989 Specialized Rock Combo
1984 Ross Mt. Hood
1988 Centurion Ironman Expert
1991 Bridgestone RB-1
1992 Serotta Colorado TG
2015 Elephant NFE
1979 Trek 710; 1981 Trek 412; 1981 Trek 710
1984 Specialized Stumpjumper Sport; 1985 Specialized Allez SE; 1988 Specialized Sirrus; 1989 Specialized Rock Combo
1984 Ross Mt. Hood
1988 Centurion Ironman Expert
1991 Bridgestone RB-1
1992 Serotta Colorado TG
2015 Elephant NFE
Likes For mountaindave:
01-30-21, 07:03 PM
#43
Senior Member
Join Date: Sep 2014
Location: Baton Rouge La
Posts: 1,214
Mentioned: 22 Post(s)
Tagged: 0 Thread(s)
Quoted: 394 Post(s)
Liked 346 Times
in
230 Posts
You can buy left hand drill bits that are used for drilling out broken off screws or bolts. You use them with an electric drill turning counter clockwise. I haven't tried them but it sounds like a good idea.
01-30-21, 07:22 PM
#44
Senior Member

Join Date: Jun 2010
Location: Medford MA
Posts: 2,089
Bikes: Ron Cooper touring, 1959 Jack Taylor 650b ladyback touring tandem, Vitus 979, Joe Bell painted Claud Butler Dalesman, Colin Laing curved tube tandem, heavily-Dilberted 1982 Trek 6xx, Ren� Herse tandem
Mentioned: 80 Post(s)
Tagged: 0 Thread(s)
Quoted: 964 Post(s)
Liked 1,451 Times
in
723 Posts
I have had those left-hand drills work for me! Helps if you get it really centered, usually by going clockwise using a center drill (that's the stubby drill with a fine point that was used at the shop in an earlier post).
I refuse to buy easy-outs. I understand that there's probably a bias on the internet toward stories of frustration (when you win, you celebrate, and when you lose, you complain), but it is hard to believe in a technology when "it doesn't work" is 80% of what you hear.
I do wonder if they'd work if you got them all set up right with a milling machine and a centering cone with a tap handle - but if you have the part a milling machine, why not just use an endmill to cut down through the buggered screw at that point?
__________________
Owner & co-founder, Cycles Ren� Hubris. Unfortunately attaching questionable braze-ons to perfectly good frames since about 2015. With style.
Owner & co-founder, Cycles Ren� Hubris. Unfortunately attaching questionable braze-ons to perfectly good frames since about 2015. With style.
01-31-21, 05:19 PM
#45
Senior Member

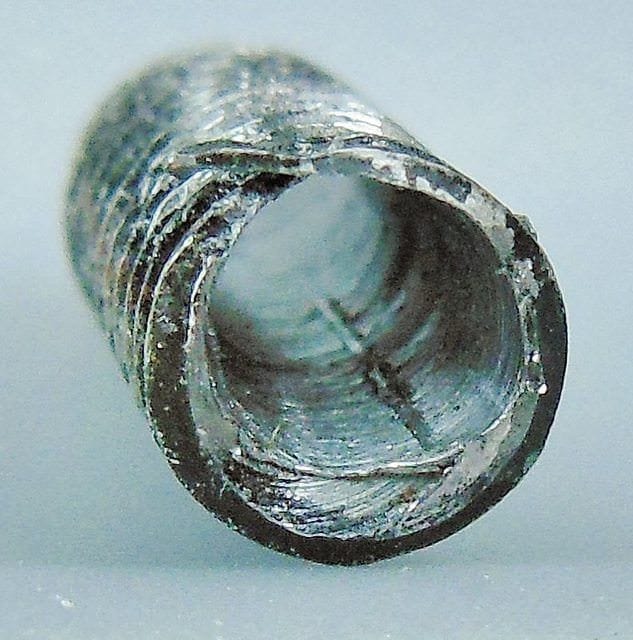
Well done, glad you got it out so easily!! The worst broken bolt I've had to remove from a frame was a stainless bolt I had stupidly tried to torque into a dropout eyelet before chasing it properly after being powder coated. I broke an extractor as well, which got stuck inside the bolt, it wasn't fun. I eventually drilled it out and chased the threads. I then invested in a set of taps and use them religiously when building up any bike!
This is all that remained of the bolt when it finally came out:
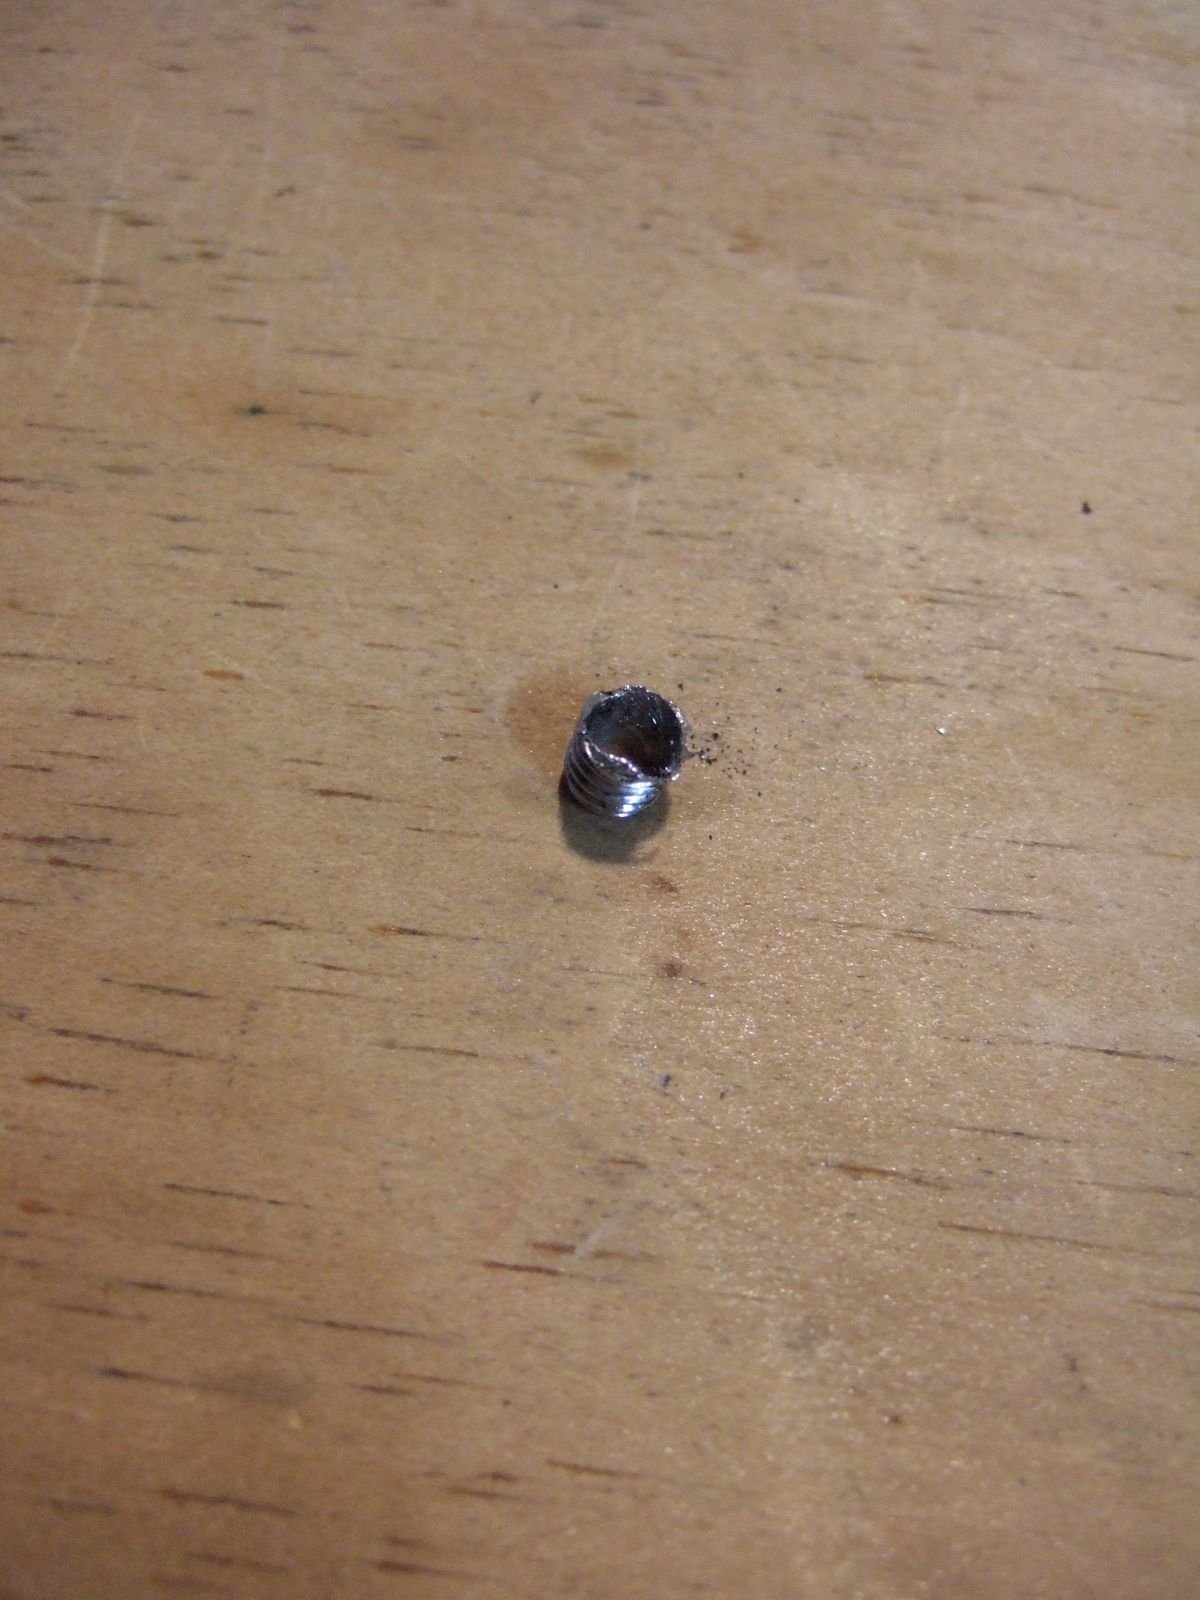
This is all that remained of the bolt when it finally came out:
Likes For southpawboston:
01-31-21, 08:34 PM
#46
Junior Member
I�ve broken off a couple DO Screws in my 40 yrs of wrenching, but managed to remove them w/o too much trouble.
This new frame I got, came w/o any DO Screws, so I wasn�t going to take any chances w/ cheapo screws.
Found these SS one�s from the UK ata reasonable cost. Lubed threm up & they went right in...surprisingly!
https://www.ebay.com/itm/Stainless-S....m46890.l49292
This new frame I got, came w/o any DO Screws, so I wasn�t going to take any chances w/ cheapo screws.
Found these SS one�s from the UK ata reasonable cost. Lubed threm up & they went right in...surprisingly!
https://www.ebay.com/itm/Stainless-S....m46890.l49292
Beautiful bike from what I can see of it!
01-31-21, 08:37 PM
#47
Junior Member
I'd seen people recommend welding a new screw head on, which is beyond my abilities. But the glued on spoke method seems like a great idea if I encounter this again
01-31-21, 08:43 PM
#48
Junior Member
I had one of those ready to go, freshly delivered from Amazon, but it was too short to reach the screw, the drill would bump against the dropout ends, and I don't have any sort of extender. Lucky I had a hacksaw and the wisdom of this forum
01-31-21, 08:45 PM
#49
Junior Member
Well done, glad you got it out so easily!! The worst broken bolt I've had to remove from a frame was a stainless bolt I had stupidly tried to torque into a dropout eyelet before chasing it properly after being powder coated. I broke an extractor as well, which got stuck inside the bolt, it wasn't fun. I eventually drilled it out and chased the threads. I then invested in a set of taps and use them religiously when building up any bike!
This is all that remained of the bolt when it finally came out:
This is all that remained of the bolt when it finally came out:
01-31-21, 09:02 PM
#50
Senior Member
Thx DgDgy,
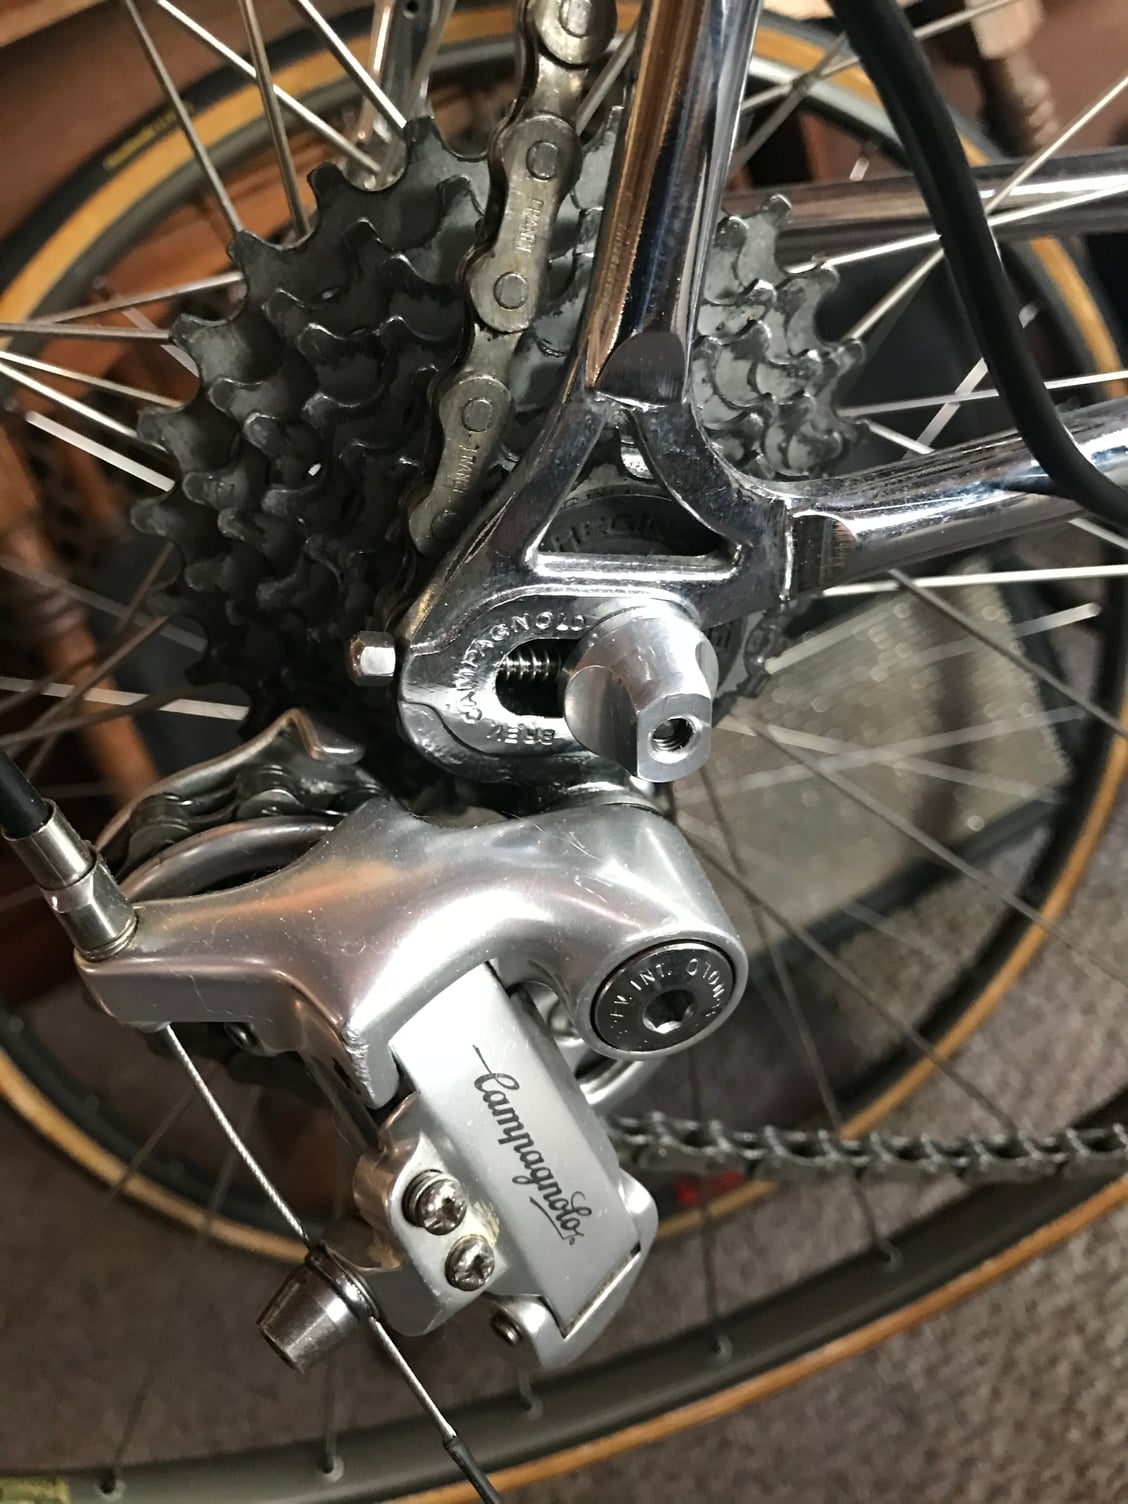
Here�s a little more of it. 👀
I�ve sent the fork out 2B chromed. It�ll be a couple weeks before I can finish the build. In the meantime, I went ahead & polished a few parts to enhance the bling 😎 It�s a Swiss Titan frame, but was made in Italy sometime in the 80�s...

Here�s a little more of it. 👀
I�ve sent the fork out 2B chromed. It�ll be a couple weeks before I can finish the build. In the meantime, I went ahead & polished a few parts to enhance the bling 😎 It�s a Swiss Titan frame, but was made in Italy sometime in the 80�s...
Last edited by 1 Lugnut; 01-31-21 at 09:39 PM.