


How to distinguish a tubular wheel from a clincher
 04-26-23, 10:16 AM
#1
Full Member
Thread Starter
Join Date: Sep 2020
Posts: 210
Mentioned: 0 Post(s)
Tagged: 0 Thread(s)
Quoted: 67 Post(s)
Likes: 0
Liked 49 Times
in
31 Posts
How to distinguish a tubular wheel from a clincher
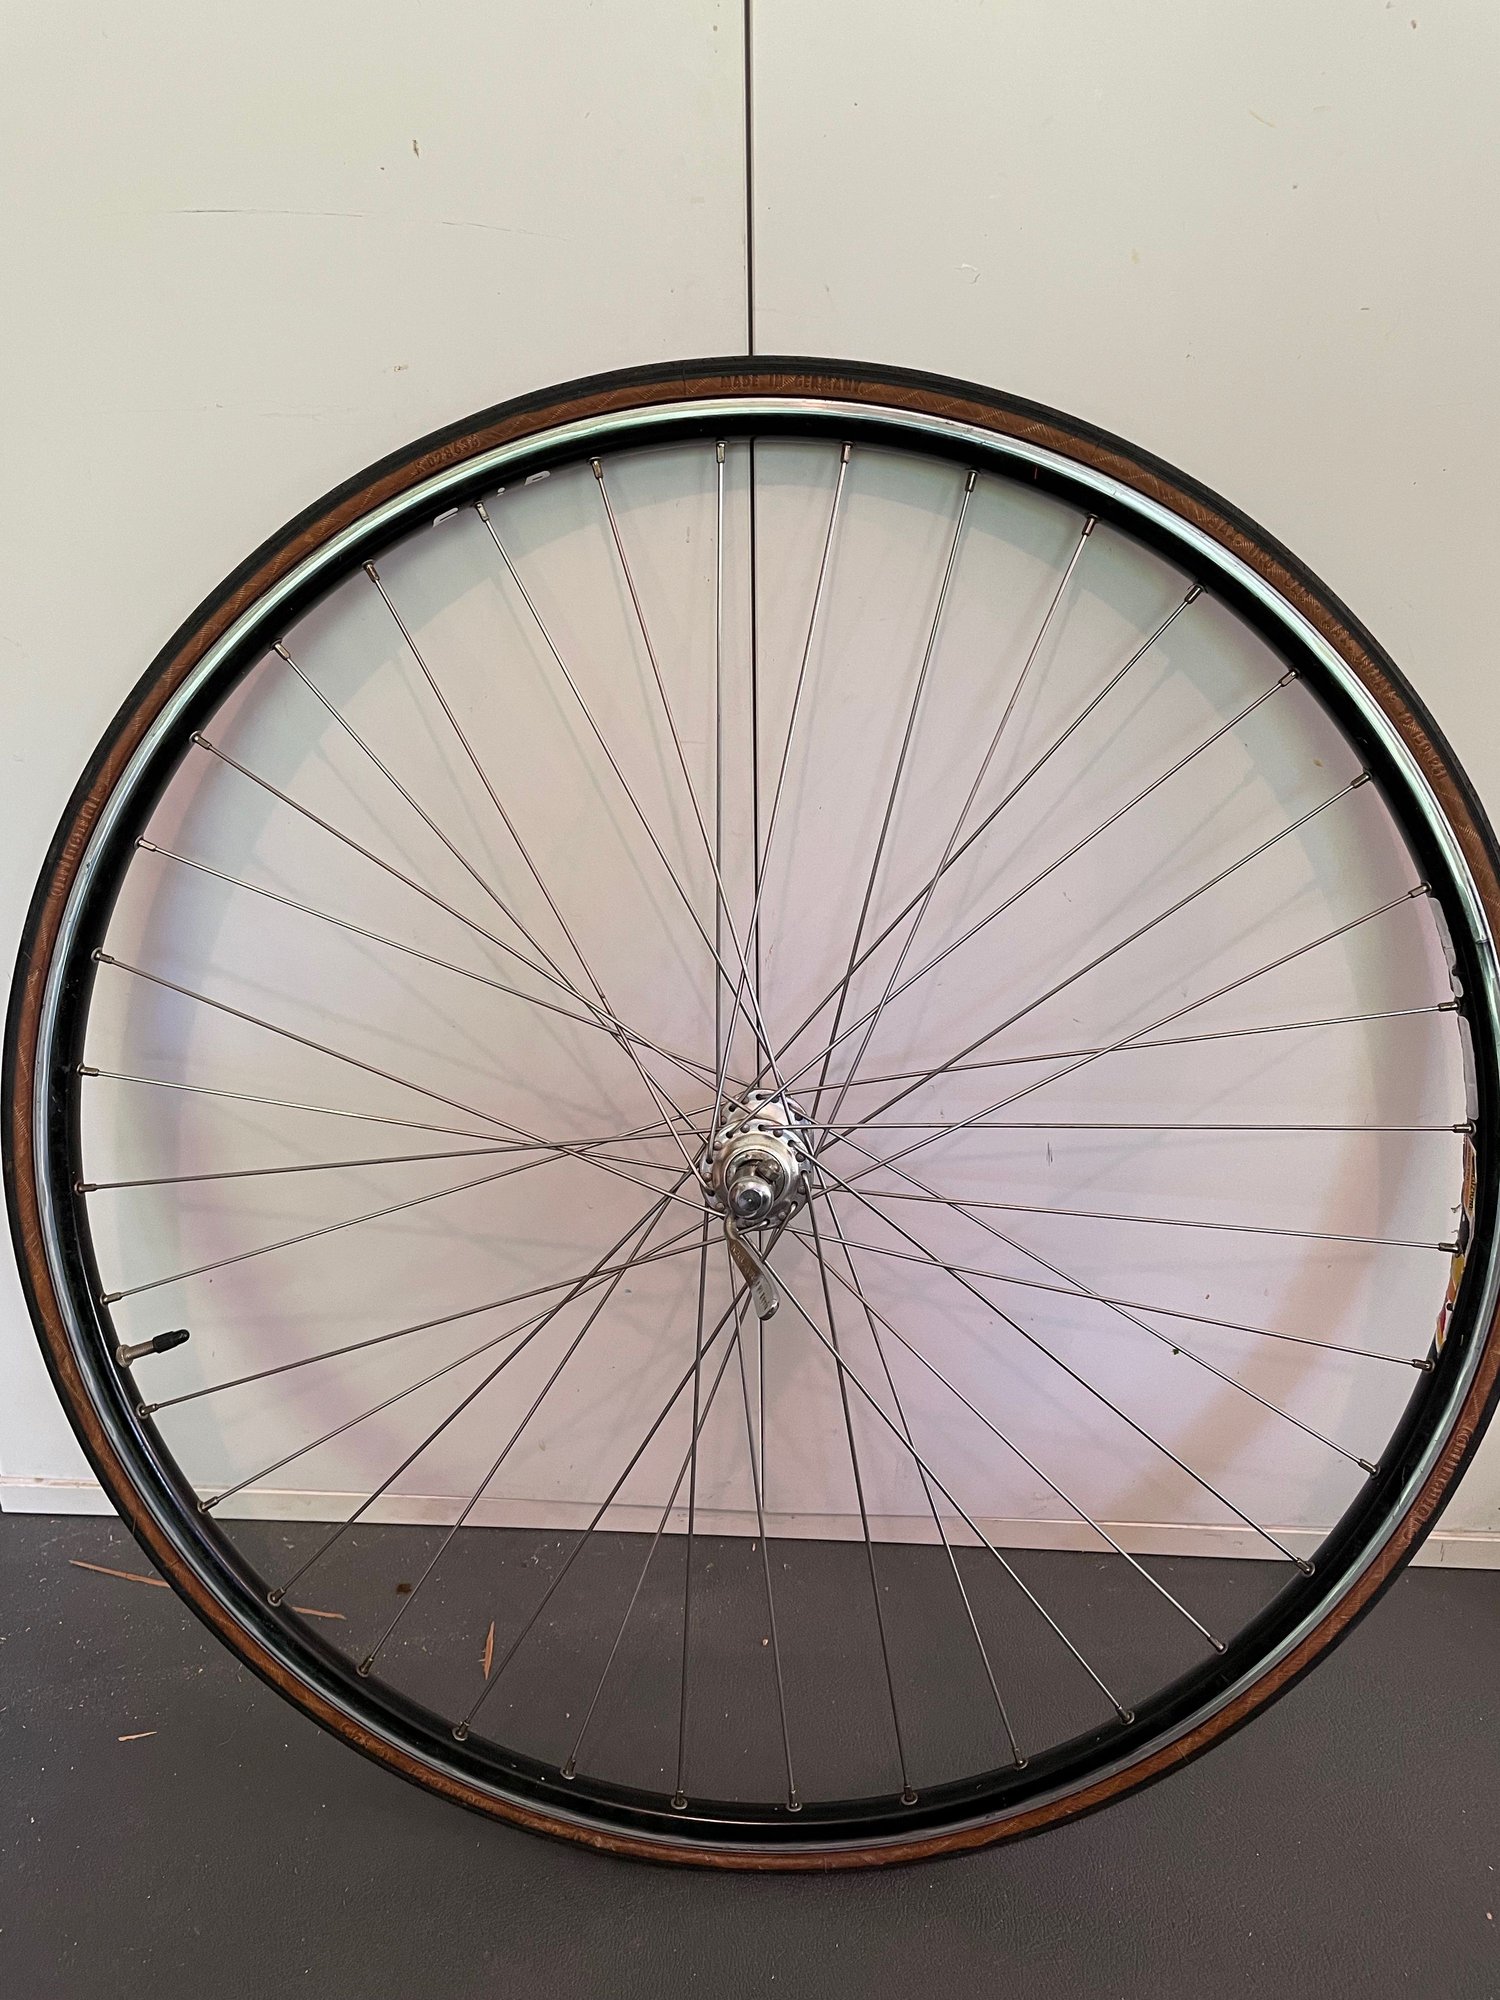
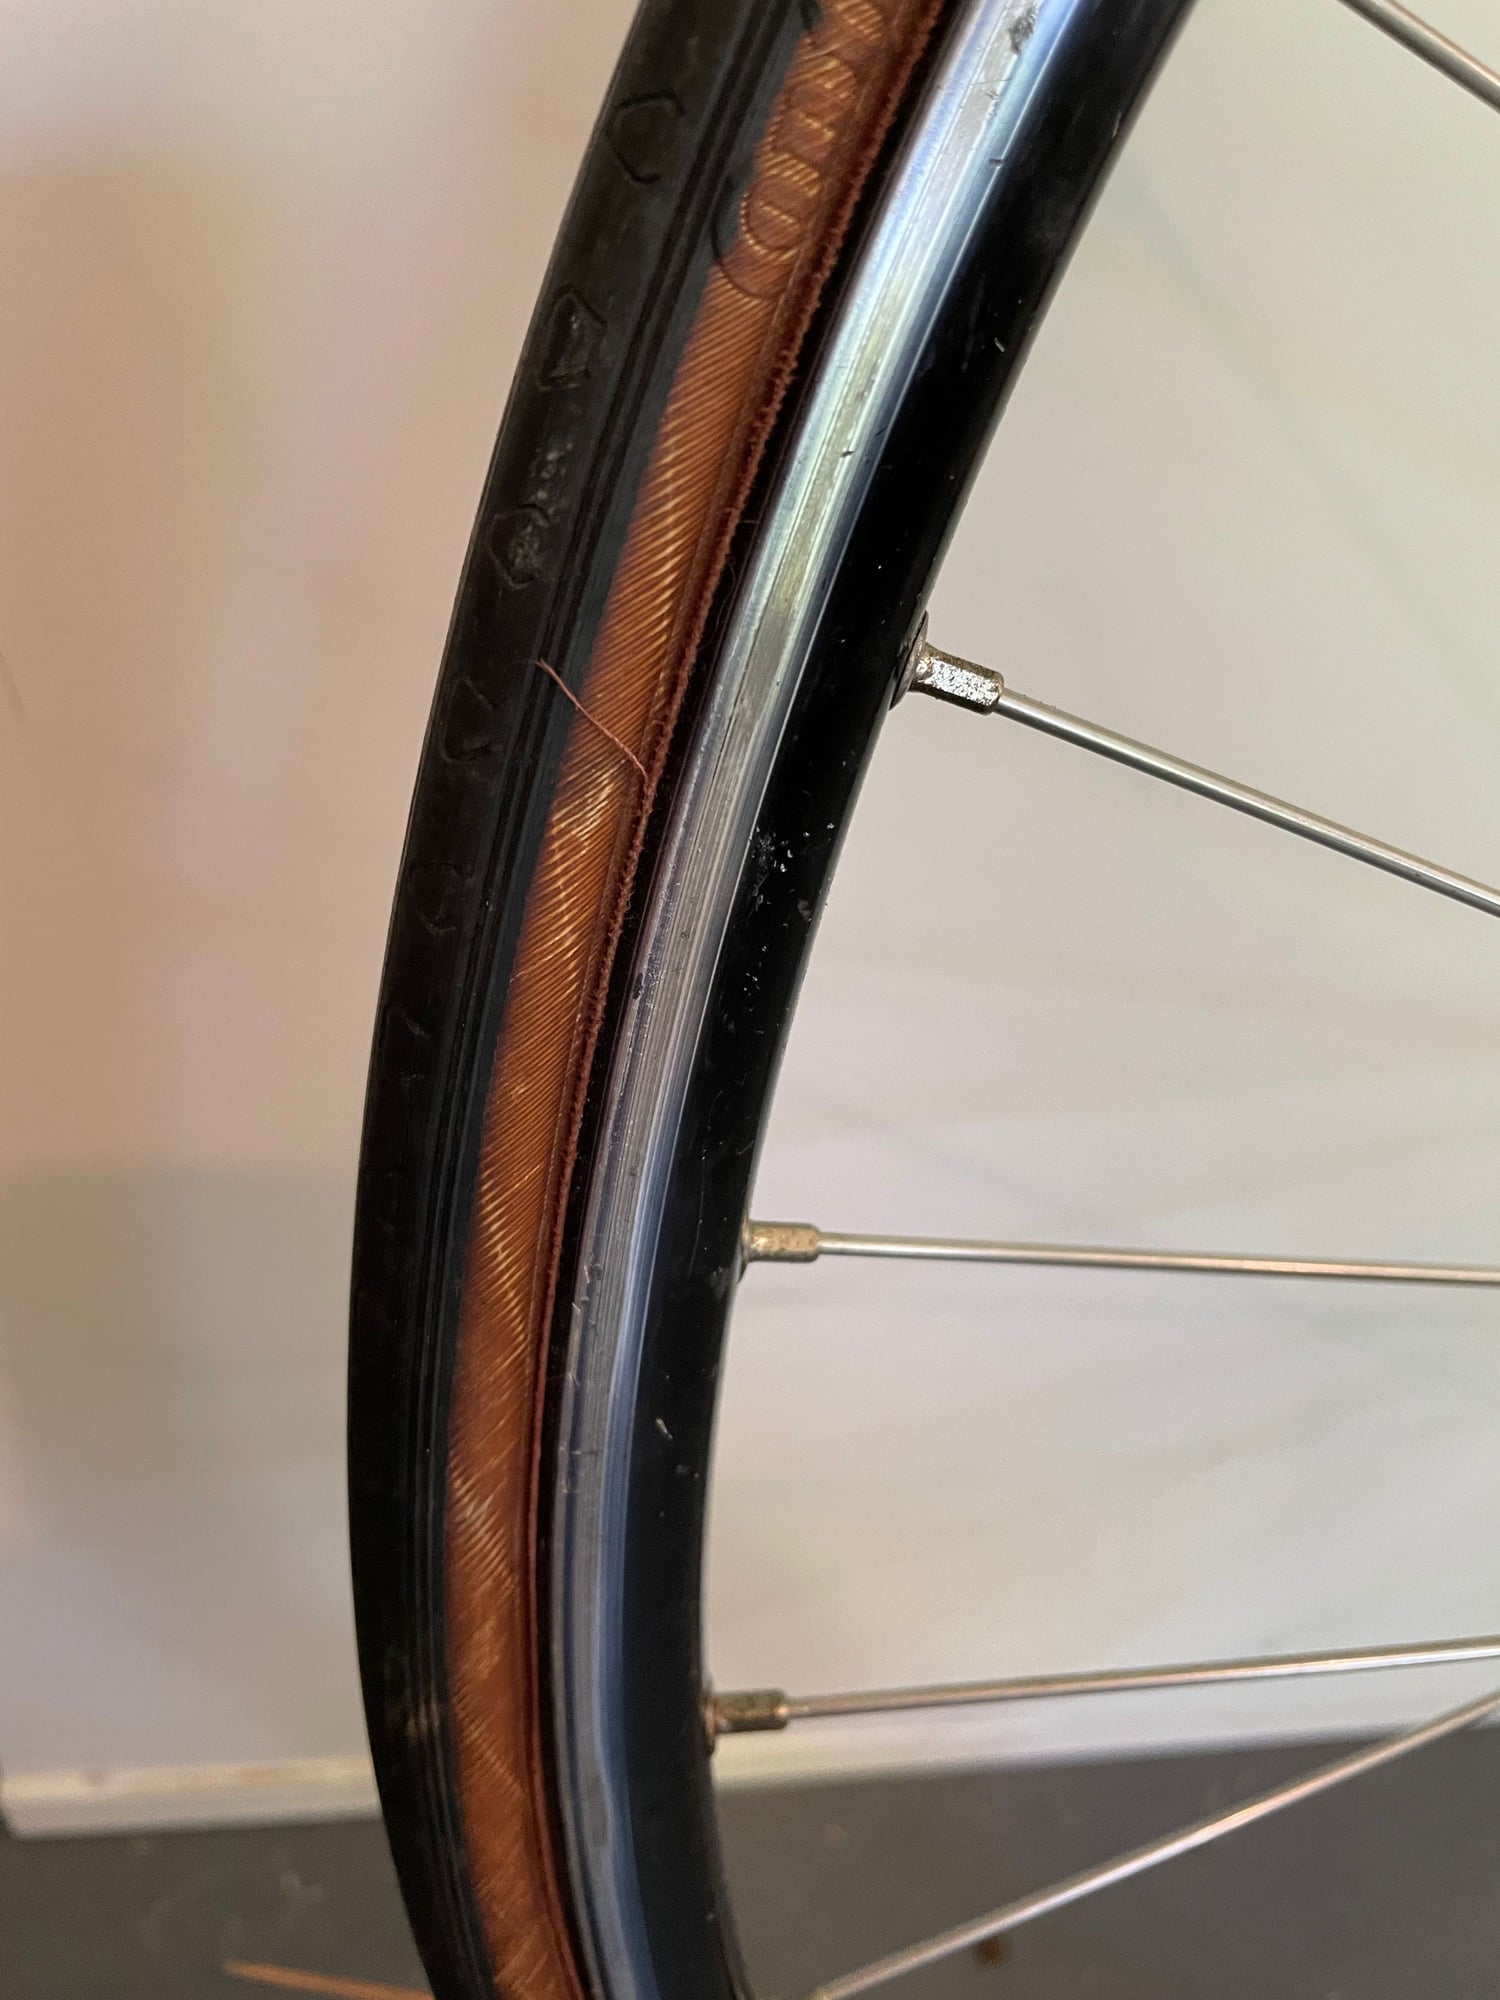
I thought I could distinguish a clicher 700c wheel from a tubular, but I'm not completely sure here. I think I see underlying tape and the tire does not easily come off, but I'm not 100% sure. I've attached pictures. The wheels are FiR, with 700x 20 Continental tires.
Last edited by WT160; 04-26-23 at 10:17 AM. Reason: spelling
 04-26-23, 10:19 AM
#2
Senior Member
It's easier with the tire off. Used tubular rims will show evidence of glue or tape vs. rim tape, and tub rims will pretty clearly show themselves unable to hold onto a tire bead.
04-26-23, 12:52 PM
#4

Old fart
Join Date: Nov 2004
Location: Appleton WI
Posts: 24,790
Bikes: Several, mostly not name brands.
Mentioned: 153 Post(s)
Tagged: 0 Thread(s)
Quoted: 3590 Post(s)
Liked 3,401 Times
in
1,935 Posts
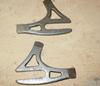
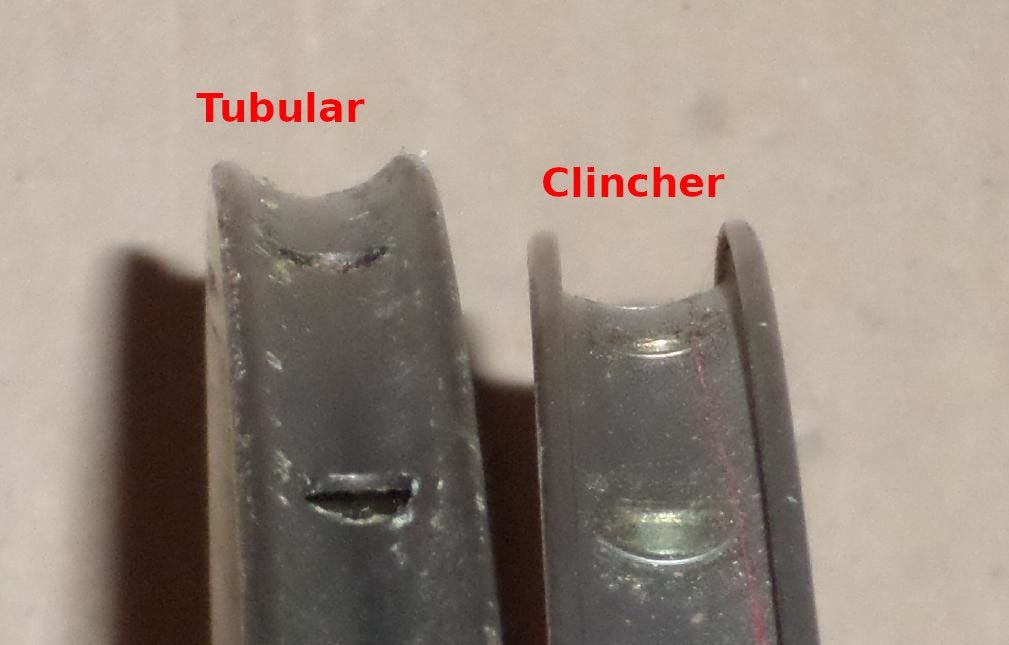
Rims for tubular tires don't have raised sidewalls to hold the tire:
Likes For JohnDThompson:
04-26-23, 12:55 PM
#5
I'm good to go!
Join Date: Jul 2017
Location: Mississippi
Posts: 14,992
Bikes: Tarmac Disc Comp Di2 - 2020
Mentioned: 51 Post(s)
Tagged: 0 Thread(s)
Quoted: 6196 Post(s)
Liked 4,811 Times
in
3,319 Posts
So what model of tire is it?
I can make out that it's a Continental. And I see what looks like a tire part number of 028636 along with the Bar and PSI pressures. So if with the left side of the tire being in such readable shape then what is on the right side of the tire. Which is usually for certain where they put the model and brand as properly bicycles are supposed to be photographed from the drive side or right side.
Looks like the brake track might be about to be worn out on that rim.
04-26-23, 12:59 PM
#6
Old fart
Join Date: Nov 2004
Location: Appleton WI
Posts: 24,790
Bikes: Several, mostly not name brands.
Mentioned: 153 Post(s)
Tagged: 0 Thread(s)
Quoted: 3590 Post(s)
Liked 3,401 Times
in
1,935 Posts
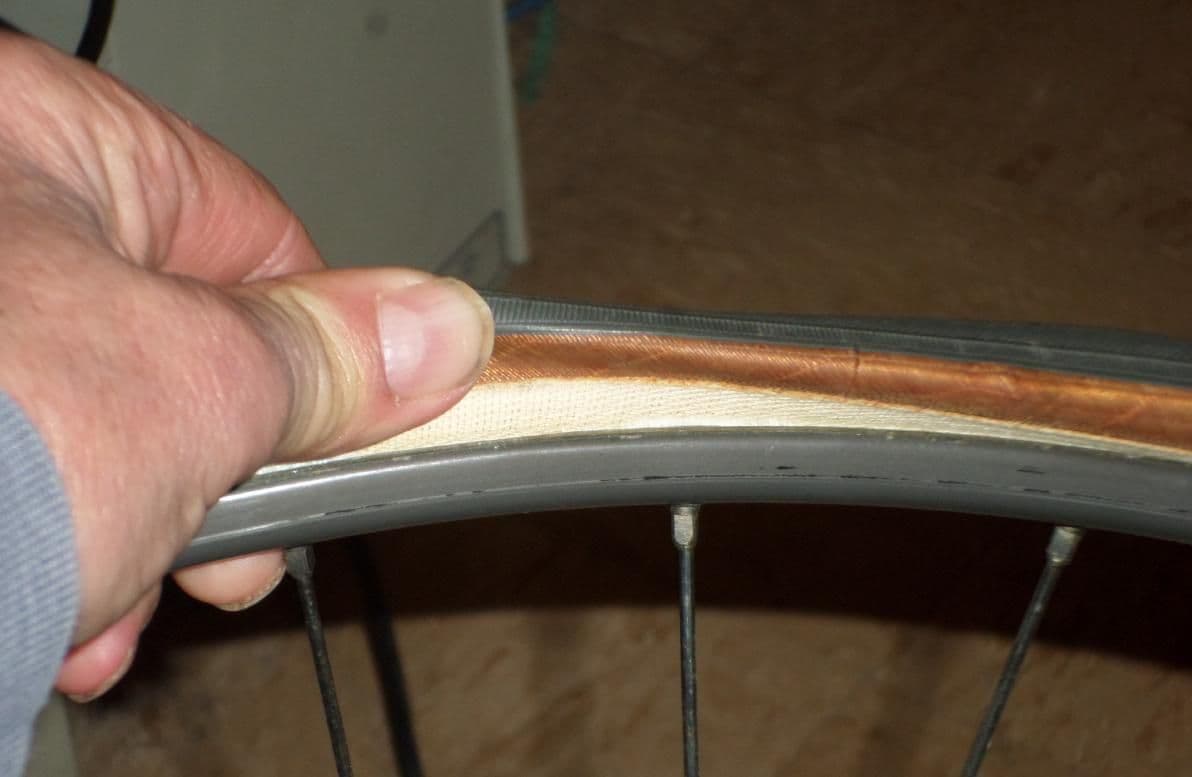
If it's a clincher tire, you will see the raised sidewalls of the rim and the bead on the tire.
Likes For JohnDThompson:
04-26-23, 02:36 PM
#9
Senior Member
Join Date: Feb 2012
Location: Rochester, NY
Posts: 18,096
Bikes: Stewart S&S coupled sport tourer, Stewart Sunday light, Stewart Commuting, Stewart Touring, Co Motion Tandem, Stewart 3-Spd, Stewart Track, Fuji Finest, Mongoose Tomac ATB, GT Bravado ATB, JCP Folder, Stewart 650B ATB
Mentioned: 0 Post(s)
Tagged: 0 Thread(s)
Quoted: 4210 Post(s)
Liked 3,878 Times
in
2,315 Posts
The rim has some brand and/or model decals in it. Perhaps you could have googled that first. Andy
__________________
AndrewRStewart
AndrewRStewart
Likes For Andrew R Stewart:
04-26-23, 04:54 PM
#12
Senior Member
Join Date: Mar 2017
Location: San Clemente
Posts: 664
Bikes: 87 Bianchi X4, 95 Bianchi Ti Mega Tube, 06 Alan Carbon Cross X33, Gold plated Columbus AIR Guerciotti, 74 Galmozzi Super Competizione, 52 Bianchi Paris Roubaix.
Mentioned: 6 Post(s)
Tagged: 0 Thread(s)
Quoted: 259 Post(s)
Liked 540 Times
in
166 Posts
The give away was the nut on the valve stem.
Likes For mackgoo:
04-26-23, 05:46 PM
#13
Full Member
Thread Starter
Join Date: Sep 2020
Posts: 210
Mentioned: 0 Post(s)
Tagged: 0 Thread(s)
Quoted: 67 Post(s)
Likes: 0
Liked 49 Times
in
31 Posts
I recognize that the original question may have seemed a little silly for the experts, but the tire really was stuck on in a way that seemed like the whole thing was glued to the rim. It was like nothing I had ever experienced before. It gave way and opened about an hour later, but there was no way to get a tire lever in at first. The whole thing was monolithic. After I got the tire off, I saw that it was the liner that was causing the trouble. It's some kind of plastic that I guess got sticky and was acting like glue, holding everything together.
04-26-23, 07:02 PM
#14
Senior Member
Join Date: Apr 2011
Posts: 7,071
Mentioned: 41 Post(s)
Tagged: 0 Thread(s)
Quoted: 4412 Post(s)
Liked 1,566 Times
in
1,028 Posts
04-27-23, 07:21 AM
#16
Senior Member
Join Date: Apr 2011
Posts: 7,071
Mentioned: 41 Post(s)
Tagged: 0 Thread(s)
Quoted: 4412 Post(s)
Liked 1,566 Times
in
1,028 Posts
04-27-23, 10:08 PM
#17
Senior Member
Join Date: Feb 2012
Location: Rochester, NY
Posts: 18,096
Bikes: Stewart S&S coupled sport tourer, Stewart Sunday light, Stewart Commuting, Stewart Touring, Co Motion Tandem, Stewart 3-Spd, Stewart Track, Fuji Finest, Mongoose Tomac ATB, GT Bravado ATB, JCP Folder, Stewart 650B ATB
Mentioned: 0 Post(s)
Tagged: 0 Thread(s)
Quoted: 4210 Post(s)
Liked 3,878 Times
in
2,315 Posts
These types of questions, "how much/little is enough" will never have an answer that pertains to every rider. As a rim brake track wears and gets thinner it will begin to flex outwards more until the cracks start. How sensitive to brake feel is the rider and will they feel this widening as a late term heads up? What pressures does the rider run, more PSI is greater side wall widening stress. How abrasive are the pads? How much grit and such are carried up and onto the rims during riding? How much braking force is used during one's rides? How tolerant of a rim's brake track blow out is the rider? Will they sue someone or just accept it as what pushing limits can get you?
Some rim brands do have wear indicators and guidelines for rim wear. I assume the "spec" is somewhat liability driven... Andy
Some rim brands do have wear indicators and guidelines for rim wear. I assume the "spec" is somewhat liability driven... Andy
__________________
AndrewRStewart
AndrewRStewart
04-28-23, 06:28 PM
#18
Full Member
Thread Starter
Join Date: Sep 2020
Posts: 210
Mentioned: 0 Post(s)
Tagged: 0 Thread(s)
Quoted: 67 Post(s)
Likes: 0
Liked 49 Times
in
31 Posts
I took the wheels to my LBS. I was potentially interested in new rims and having them build me new wheels. They said what I have are fine...happy even to see a FiR rims in the flesh. Good shop.
04-28-23, 06:56 PM
#19
Senior Member

Join Date: Nov 2014
Location: Eugene, Oregon, USA
Posts: 27,547
Mentioned: 217 Post(s)
Tagged: 0 Thread(s)
Quoted: 18378 Post(s)
Liked 4,512 Times
in
3,354 Posts
Be very gentle with sanding or filing any really high or rough spots.
I've only had one rim fail years ago. The brake tracks were worn very concave, until one day the lip of the rim just popped off.
I can see a couple of worn spots on your rim, but it is difficult to discern how bad it is overall.
I've only had one rim fail years ago. The brake tracks were worn very concave, until one day the lip of the rim just popped off.
I can see a couple of worn spots on your rim, but it is difficult to discern how bad it is overall.
04-30-23, 01:04 AM
#20
se�or miembro

Join Date: Dec 2018
Location: Pac NW
Posts: 6,627
Bikes: '70s - '80s Campagnolo
Mentioned: 92 Post(s)
Tagged: 0 Thread(s)
Quoted: 3890 Post(s)
Liked 6,490 Times
in
3,213 Posts
https://www.sheldonbrown.com/wheelbuild.html
05-01-23, 09:38 AM
#21
Senior Member
Join Date: Nov 2013
Location: Big Apple
Posts: 1,428
Bikes: yes
Mentioned: 17 Post(s)
Tagged: 0 Thread(s)
Quoted: 512 Post(s)
Likes: 0
Liked 409 Times
in
176 Posts
The appearance of the sidewalls make the tires seem to be shot anyway. In such cases, where the tires are hard to come off, I just cut through the tire and peel it off like a banana skin.
05-01-23, 12:51 PM
#22
Senior Member
Join Date: Feb 2011
Location: NW Peloponnese, Greece
Posts: 548
Mentioned: 1 Post(s)
Tagged: 0 Thread(s)
Quoted: 112 Post(s)
Likes: 0
Liked 25 Times
in
22 Posts
I had a pair of Shimano Ultegra wheels purchased in 2004. The hubs ran smoothly with no play. I checked the trueness occasionally, but they needed minimum adjustment.
In 2020 the rear wheel's braking surface showed a minor vertical crack so I decided to measure the thickness of the braking surface with a special tool.
I found that both sides on the braking surface of the rear wheel measured 0.7 to 0.9 mm. The front wheel was slightly better. Most of my riding is done in dry conditions.
I decided to replace these wheels.
