


DIY Trackie Stuff (Do It Yourself)
 07-20-17, 05:52 AM
#26


Elitist
Thread Starter

Join Date: Jul 2005
Location: Atlanta, GA
Posts: 15,965
Mentioned: 88 Post(s)
Tagged: 0 Thread(s)
Quoted: 1386 Post(s)
Liked 92 Times
in
77 Posts
The timer will start and the event begins when the countdown clock is at zero. The rider can sit in the starting gate and not move and the timer will continue to count up with elapsed time. Basically, the timer starts whether the rider is ready or not.
This is why practicing the start is emphasized in order to leave the millisecond the countdown clock hits zero and the timer starts. Every 1/100th of a second the rider is behind the countdown timer finishing is wasted time.
This is why practicing the start is emphasized in order to leave the millisecond the countdown clock hits zero and the timer starts. Every 1/100th of a second the rider is behind the countdown timer finishing is wasted time.
 07-20-17, 06:30 AM
#27
Senior Member
Join Date: Jul 2007
Posts: 7,570
Mentioned: 54 Post(s)
Tagged: 0 Thread(s)
Quoted: 1851 Post(s)
Liked 679 Times
in
430 Posts
I know a guy who had a welder build a tow-hitch based wheel slot that he can set his bike in, clip in, then do starts from. I'm told it works best when on a slight hill, so that gravity helps keep the bike in the slot.
I've never actually seen this. I've only heard about it.
I've never actually seen this. I've only heard about it.
07-20-17, 08:00 AM
#28
Senior Member
Join Date: Nov 2013
Location: Marin County CA, USA
Posts: 68
Bikes: Venge, Koichi San II, Crux Sngl Spd, EVO, Stumpy
Mentioned: 0 Post(s)
Tagged: 0 Thread(s)
Quoted: 32 Post(s)
Likes: 0
Liked 0 Times
in
0 Posts
Fun fact: The timing can be off with such systems and the release mechanism may be milliseconds late in releasing. So, the countdown clock may read "0" and the go tone will have sounded, and the rider is launching out with a powerful full-gas start, but the machine is still holding the rear wheel.
...
The purpose of holding the wheel is to prevent early starts.
So... if the release happens in around 0.1secs I guess all is good?!
Interesting to see that the wheel is held at the very rear. Guess you have to be good at staying balanced as to not damage your rim (I always feel like I'm fighting the person holding me up!)
07-20-17, 03:10 PM
#29
Senior Member
Note the section on the starting gate sticking forward at seatpost height. This is adjusted to hold the seatpost with the bike in the gate. Bike is rock solid once placed there...
07-20-17, 09:43 PM
#30
Lapped 3x
07-20-17, 10:22 PM
#31
Senior Member
Join Date: Oct 2014
Location: Portland, OR
Posts: 12,906
Bikes: (2) ti TiCycles, 2007 w/ triple and 2011 fixed, 1979 Peter Mooney, ~1983 Trek 420 now fixed and ~1973 Raleigh Carlton Competition gravel grinder
Mentioned: 129 Post(s)
Tagged: 0 Thread(s)
Quoted: 4806 Post(s)
Liked 3,931 Times
in
2,556 Posts
I"m just poking around here. I am hard core fix gear rider, but strictly road and haven't raced for 40 years (and won't; TBI and too many mild concussions). I do hang out at Alpenrose, 2 miles from my house.
I've done two of these DIYs, converting straps to laces and a chainwhip. The shoes (2 so far but more will happen) because straps, my 60+ yo feet and long fix gear hills make for chronic foot issues leading to infections and the antibiotic routine. I did my first with the small aluminum eyelets but went a size up to brass. Far better! And what a difference! My cheap Lakes which have lasts that work really well for my feet are now some of my all-time favorite shoes.
The chainwhip was made to stow on my top tube so I could ride Cycle Oregon and use three cogs per day. It is 20" long with a rubber (inner tube) handle (so a skinny hillclimber who has climbed a mountain can get any cog off) and weighs less than a pound. From 1/4" 6061 plate. Best chain whip I have ever used. (It took a LOT of work.) Makes roadside cog changes child's play. Works on 12 to 24 tooth cogs (and certainly larger but I have yet to hear of them).
I'll be checking back to see what other ideas you guys have.
Ben
 07-21-17, 07:24 AM
#32
Elitist
Thread Starter
Join Date: Jul 2005
Location: Atlanta, GA
Posts: 15,965
Mentioned: 88 Post(s)
Tagged: 0 Thread(s)
Quoted: 1386 Post(s)
Liked 92 Times
in
77 Posts
Thanks for the suggestion to use brass eyelets! I'm going to have my 1st generation Fizik R1s converted to lace-ups and I'll use brass this time.
What tool did you use to punch the holes? I bought a hole punch from the hobby shop years ago and it was difficult to use. Mine was something like this:

It was arduous.
I'm considering using the Makita this time (seriously)
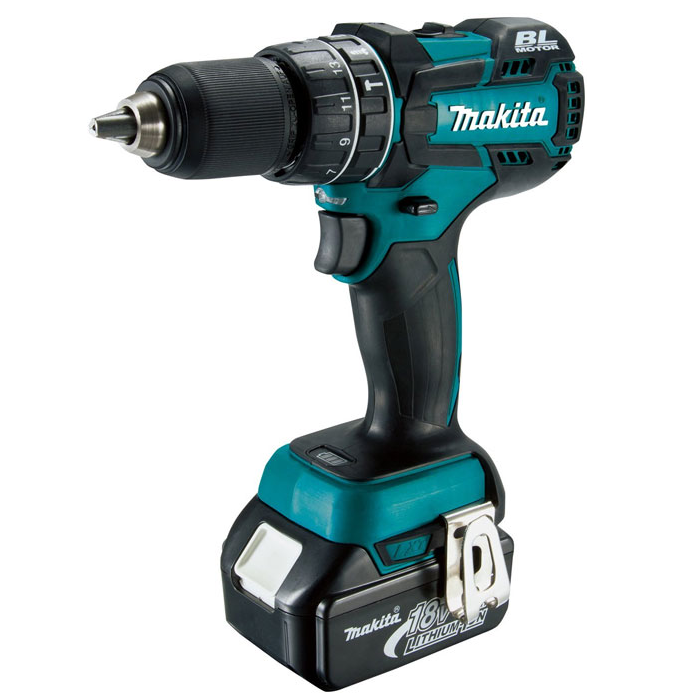
What tool did you use to punch the holes? I bought a hole punch from the hobby shop years ago and it was difficult to use. Mine was something like this:
It was arduous.
I'm considering using the Makita this time (seriously)
07-21-17, 12:55 PM
#33
Lapped 3x
Thanks for the suggestion to use brass eyelets! I'm going to have my 1st generation Fizik R1s converted to lace-ups and I'll use brass this time.
What tool did you use to punch the holes? I bought a hole punch from the hobby shop years ago and it was difficult to use. Mine was something like this:
It was arduous.
I'm considering using the Makita this time (seriously)
What tool did you use to punch the holes? I bought a hole punch from the hobby shop years ago and it was difficult to use. Mine was something like this:
It was arduous.
I'm considering using the Makita this time (seriously)
This is what you want - https://www.harborfreight.com/9-piec...-set-3838.html

Or if you really want to use the Makita, there are these ones that will slice a round hole through the leather -- https://www.harborfreight.com/6-piec...set-67030.html

Last edited by taras0000; 07-21-17 at 09:08 PM.
07-22-17, 02:10 AM
#34
Great at turning left

Join Date: Jun 2014
Location: Australia
Posts: 82
Bikes: BT Stealth
Mentioned: 0 Post(s)
Tagged: 0 Thread(s)
Quoted: 27 Post(s)
Likes: 0
Liked 1 Time
in
1 Post
if you use a rotary hole punch make sure you have a second layer of something between the brass backing plate and whatever you are trying to make a hole in
09-10-17, 04:12 PM
#35
Elitist
Thread Starter
Join Date: Jul 2005
Location: Atlanta, GA
Posts: 15,965
Mentioned: 88 Post(s)
Tagged: 0 Thread(s)
Quoted: 1386 Post(s)
Liked 92 Times
in
77 Posts
It's been a while, but I took the advice of @taras0000 and used punches. This was a MUCH better tool for the job.
I removed the velcro straps from my 2011 Fizik R1 (kangaroo leather) shoes and made them lace-ups. The velcro straps were on their last leg as they were very fatigued from years of use, so It was a good excuse for me to modify the $400 shoes
All in all, this took less than about 2 hours over 2 sessions.
Removed the straps and metal hardware for them:

Marked using a paint pen:

Punching (used a wood block):

Pressing the optional brass eyelets in place:

The upside of having a sneaker problem...lots of extra laces around:

Fit and feels good:

Compared to the Giro Empire SLX:

I removed the velcro straps from my 2011 Fizik R1 (kangaroo leather) shoes and made them lace-ups. The velcro straps were on their last leg as they were very fatigued from years of use, so It was a good excuse for me to modify the $400 shoes
All in all, this took less than about 2 hours over 2 sessions.
Removed the straps and metal hardware for them:
Marked using a paint pen:
Punching (used a wood block):
Pressing the optional brass eyelets in place:
The upside of having a sneaker problem...lots of extra laces around:
Fit and feels good:
Compared to the Giro Empire SLX:
09-10-17, 06:03 PM
#37
Senior Member
Join Date: Jul 2007
Posts: 7,570
Mentioned: 54 Post(s)
Tagged: 0 Thread(s)
Quoted: 1851 Post(s)
Liked 679 Times
in
430 Posts
I paid a shoe repair place recently to put holes and rivets in an older pair of Specialized shoes. It's great how well I can tighten the shoes down, but I remember why I ultimately replaced them. They're just not that comfortable.
09-10-17, 10:21 PM
#38
Elitist
Thread Starter
Join Date: Jul 2005
Location: Atlanta, GA
Posts: 15,965
Mentioned: 88 Post(s)
Tagged: 0 Thread(s)
Quoted: 1386 Post(s)
Liked 92 Times
in
77 Posts
The next set were the Fizik R3s from earlier in this thread. I paid someone to do those for me in 2012.
09-12-17, 06:48 PM
#39
Senior Member
.................................
The chainwhip was made to stow on my top tube so I could ride Cycle Oregon and use three cogs per day. It is 20" long with a rubber (inner tube) handle (so a skinny hillclimber who has climbed a mountain can get any cog off) and weighs less than a pound. From 1/4" 6061 plate. Best chain whip I have ever used. (It took a LOT of work.) Makes roadside cog changes child's play. Works on 12 to 24 tooth cogs (and certainly larger but I have yet to hear of them).
...............
09-12-17, 06:57 PM
#40
Senior Member
Join Date: May 2015
Location: Delaware, USA
Posts: 607
Bikes: Serotta steel track bike, Specialized MTB
Mentioned: 2 Post(s)
Tagged: 0 Thread(s)
Quoted: 99 Post(s)
Likes: 0
Liked 4 Times
in
3 Posts
https://imgur.com/a/zPYLM
I wanted to use my 3d printer to print something related to my bike, but I had nothing in mind.
So i made a steer spacer that has aeroshape as a joke.
And I did this project few weeks ago but I am too busy to finish this project.
Because of the shim and handlebar material, I always felt that the handlebar wasn't stiff enough. So I combined Nitto B125 AL with S-Work adjustable stem and added carbon fiber for extra stiffness.
Of course I added fiberglass between carbon fiber and aluminum to prevent corrosion.
For next project, I might work on custom track shoes using my ripped old Exustar shoes
09-12-17, 07:57 PM
#41
Senior Member
Join Date: Oct 2014
Location: Portland, OR
Posts: 12,906
Bikes: (2) ti TiCycles, 2007 w/ triple and 2011 fixed, 1979 Peter Mooney, ~1983 Trek 420 now fixed and ~1973 Raleigh Carlton Competition gravel grinder
Mentioned: 129 Post(s)
Tagged: 0 Thread(s)
Quoted: 4806 Post(s)
Liked 3,931 Times
in
2,556 Posts
I have however taken the 3-speed concept a step further than my chainwhip approach. My Peter Mooney now sports a triple crankset, a fix-fix flip-flop with a "dingle" on one side and a small downhill cog on the other. Each cog is set up to line up with its respective chainring. Right now it is 38-21, 44-17 and 46-14. 46", 70" and 89".
This is very DIY. All 1/8". I had a local framebuilder braze a 17t cog to the 21t (flipped around so the flat side sits against the spokes) to form the "dingle". Built up the crankset from a Sugino GT with the 38 and 44 in the usual double positions, then added the 46t spaced to the outside on custom sleeved SS 8mm bolts and hex nuts. I used a narrow PW BB (so I could dial in the chainline to the most inboard possible). The 38t almost scraped the chainstay paint. Chainlines aren't perfect, but easily within anyone's spec. Except for the obvious gear ratio, I cannot tell riding the bike which combo I am in, nor that the bike was never designed to do that. (Well, the chain does hit the adjacent chainrings. Except for the disfiguring of the rings and making a little noise, that matters zero.)
This project was a blast to do. I drew up the BB, stays and dropouts in AutoCAD plus one of my flip-flops. Mounted my new GT crankset on the Shimano BB on the bike, measured everything up and transferred it to the drawing. Drew up what was needed for the cogs and chainring bolts for TiCycles. Ordered the BB from Phil Wood. It all worked from the beginning. Designed to ride to, up to, around Crater Lake and back down. Completely up to the job.
This wasn't really all DIY. I paid others real money. But the concept and design were 100% mine. (The dingle idea, no. But I never actually looked at a Surly dingle and still don't know how they are made.) Likewise the BB. I thought I would need a custom but it turned out PW had a stock BB on the shelf that met my needs perfectly.
I had heard of the concept that I will call constant cog-ring, ie keeping the sum of the teeth of the cog and chainring constant to keep the axle in the same place in the dropout. But I have never heard of anyone doing that with 3 chainrings and cogs. Nor have I heard the term "triple chainline" except out of my mouth.
This isn't my first crazy fix gear project. My ti fix gear has rear dropouts I invented in 2011. Last summer I saw a Bay Area fix gear with a steel version of those dropouts made years before I designed mine. Apparently a run of them was made. Portland's fix gear boss told me when I sketched up what I was having built that they had also been made early last century. Horizontal dropouts that open to the front, then down in an "L", allowing bolting the wheel anywhere along the slot and allowing big cogs to be used so the tire is right up against the seattube and you can still get the wheel out easily.) Those with a chain peg (the peg is on both bikes) make roadside gear changes fast and hand stay clean.
Doing something original on bikes is hard!
Ben
09-17-17, 05:32 PM
#43
Senior Member
Join Date: Oct 2014
Location: Portland, OR
Posts: 12,906
Bikes: (2) ti TiCycles, 2007 w/ triple and 2011 fixed, 1979 Peter Mooney, ~1983 Trek 420 now fixed and ~1973 Raleigh Carlton Competition gravel grinder
Mentioned: 129 Post(s)
Tagged: 0 Thread(s)
Quoted: 4806 Post(s)
Liked 3,931 Times
in
2,556 Posts
@79pmooney, do you have any pictures of your setup you could post? Sounds interesting but I'm having trouble visualizing how it would work.
Ben

Thread
Thread Starter
Forum
Replies
Last Post
xengravity
Track Cycling: Velodrome Racing and Training Area
7
06-24-13 12:17 AM
