


Something Wicked this way comes!
 07-17-21, 12:24 PM
#1
Senior Member
Thread Starter
Something Wicked this way comes!
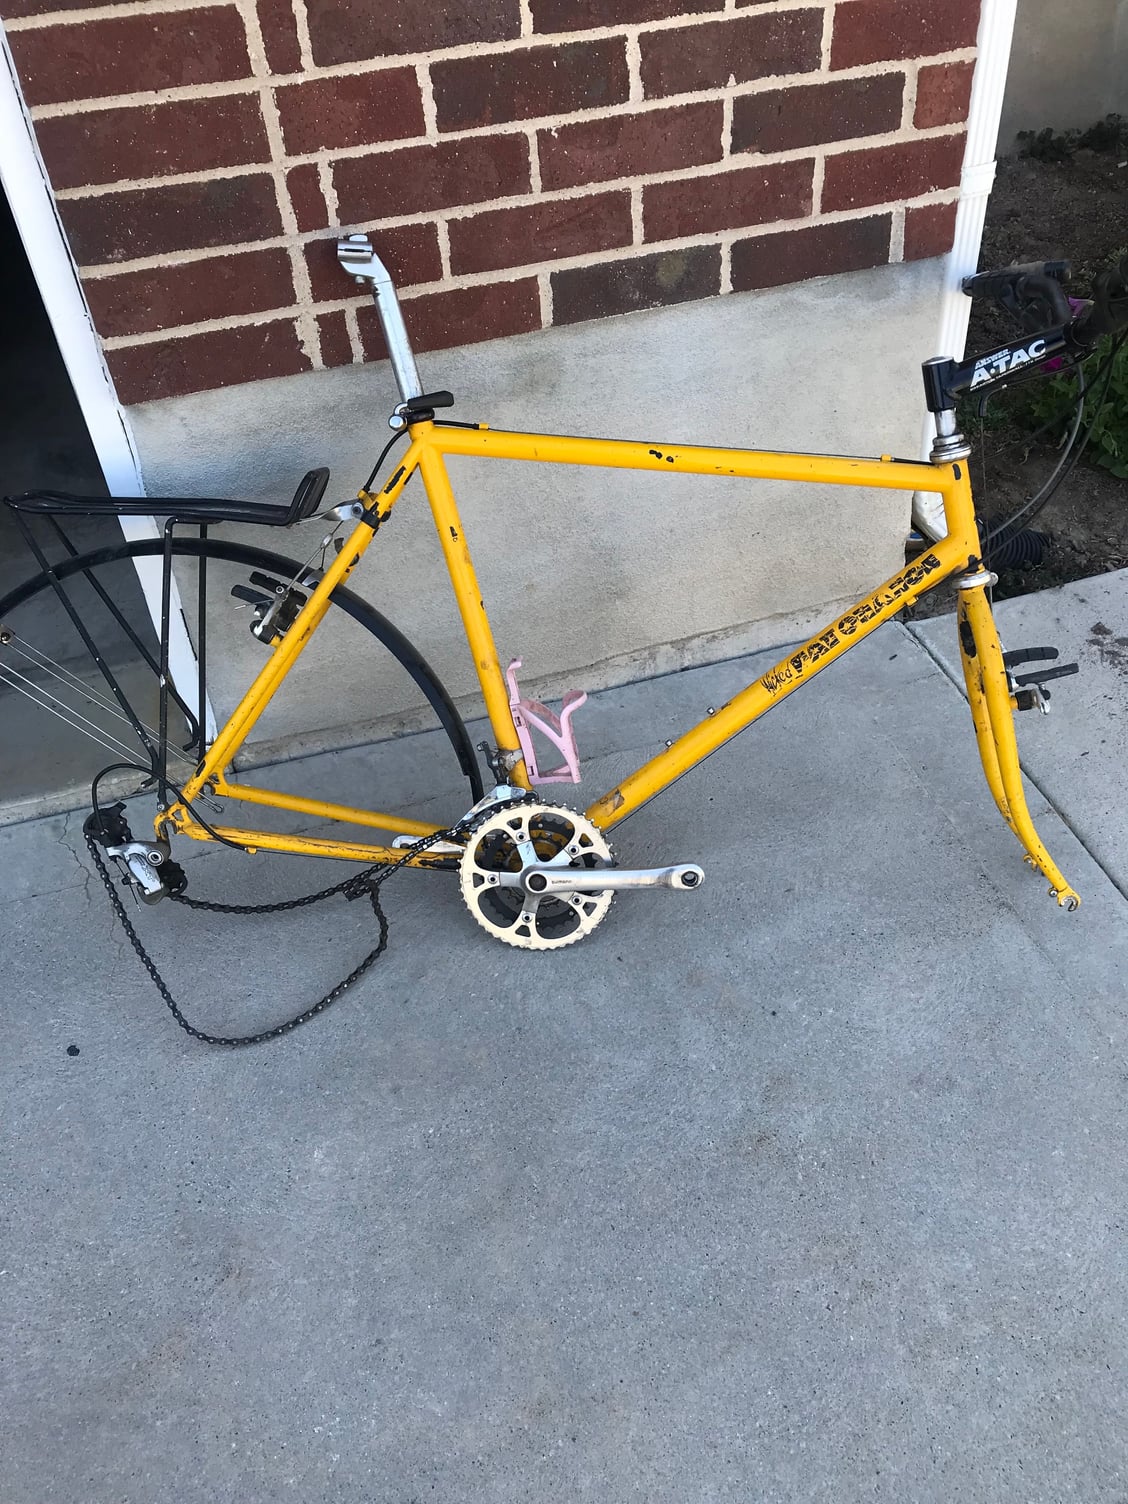
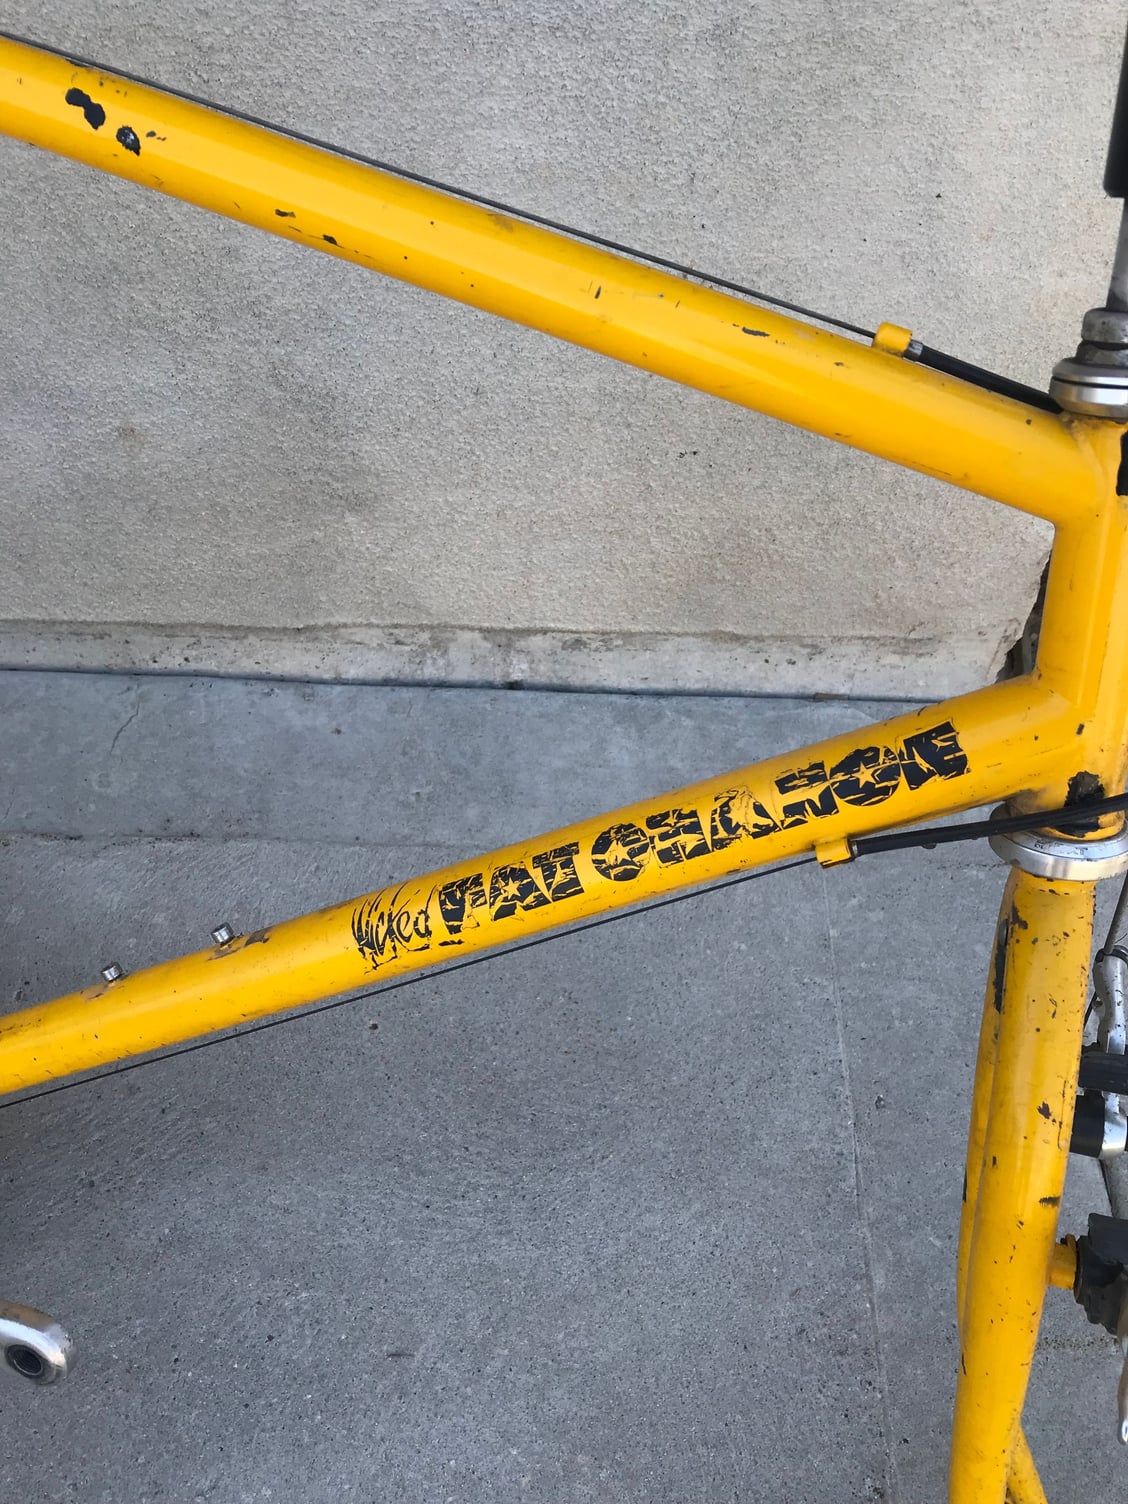
So I was at my bike collective yesterday yapping with my guy JP about old bikes and asked if he might have anything interesting in the back room. He said “I might have something you’d be interested in” and directed my gaze to this ugly, beat up old school bus yellow MTB.
I mean, what a piece of junk, right? Missing wheels and a seatpost/ seat, it couldn’t be worth more than $20, right?
When I sent that picture to my wife she asked if it was my size. I knew then I was in the clear, a deal was struck, and after an 18 year hiatus, I am now a two time owner of a Fat City Cycles Wicked Fat Chance! The first Wicked I found was at a Salvation Army thrift; paid $40 for it but it was too small for me so I sold it on the bay of E for a 10X profit. I paid more this time but it is my size and I don’t see it going on the auction block any time soon.
Pics anyone?
As found - pretty rough
Seatstay web
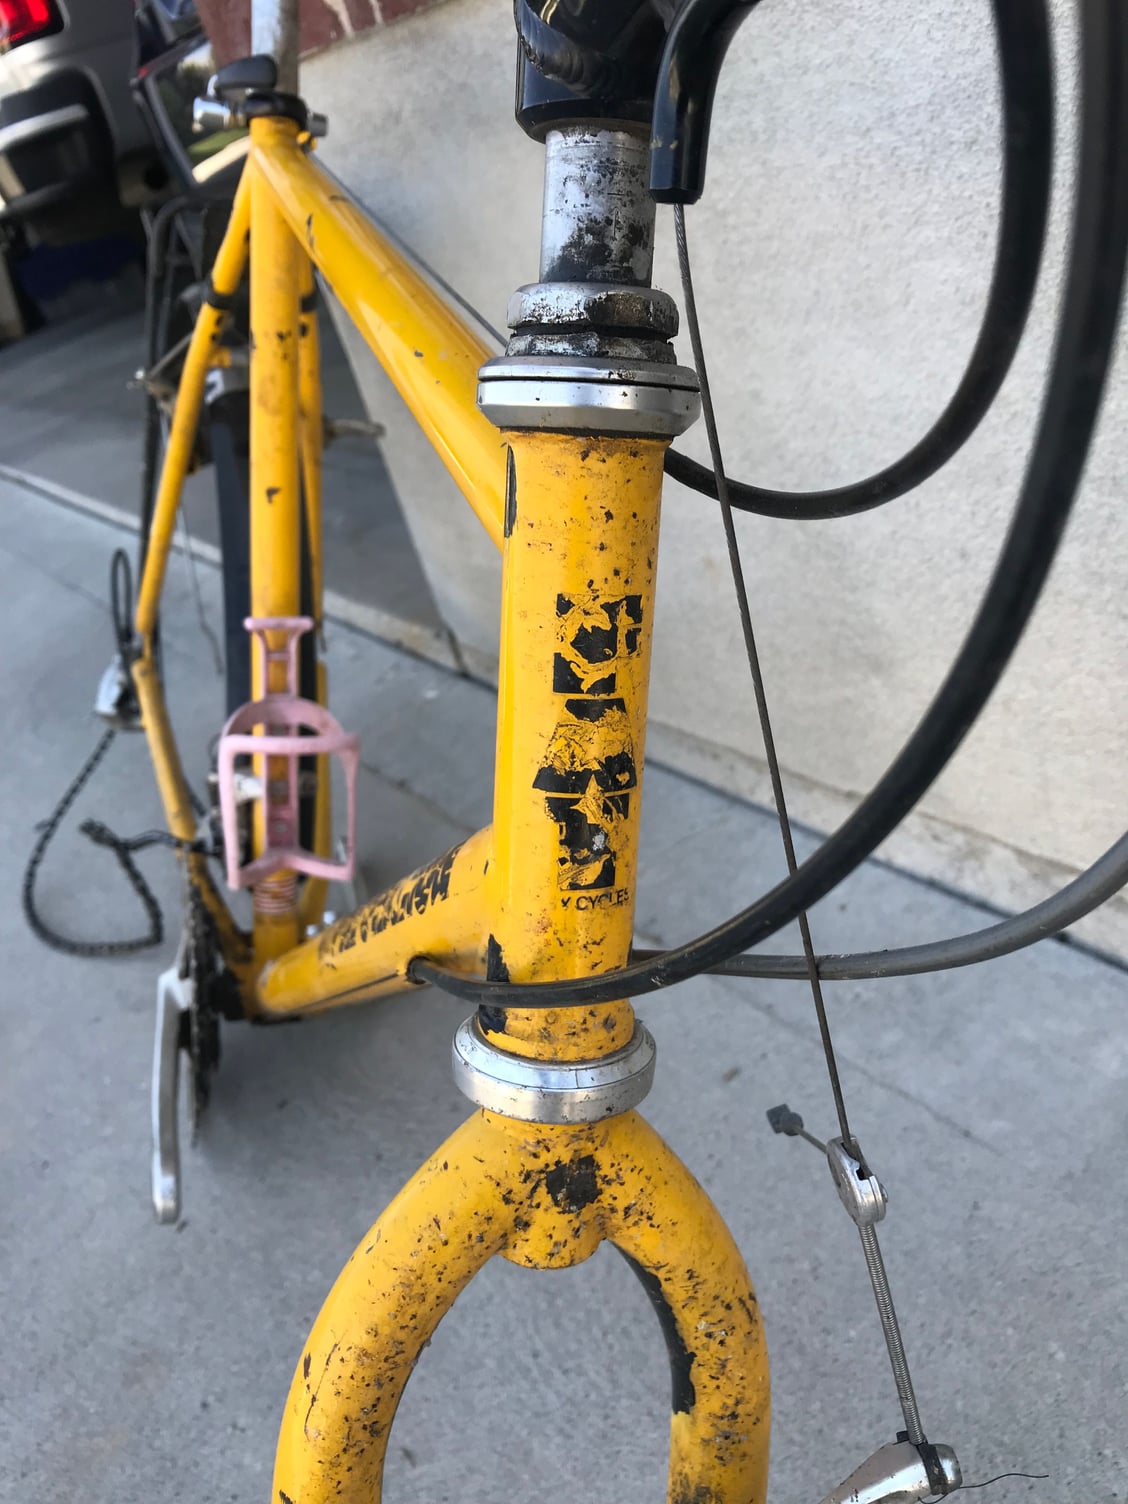

Bullet shaped tube ends
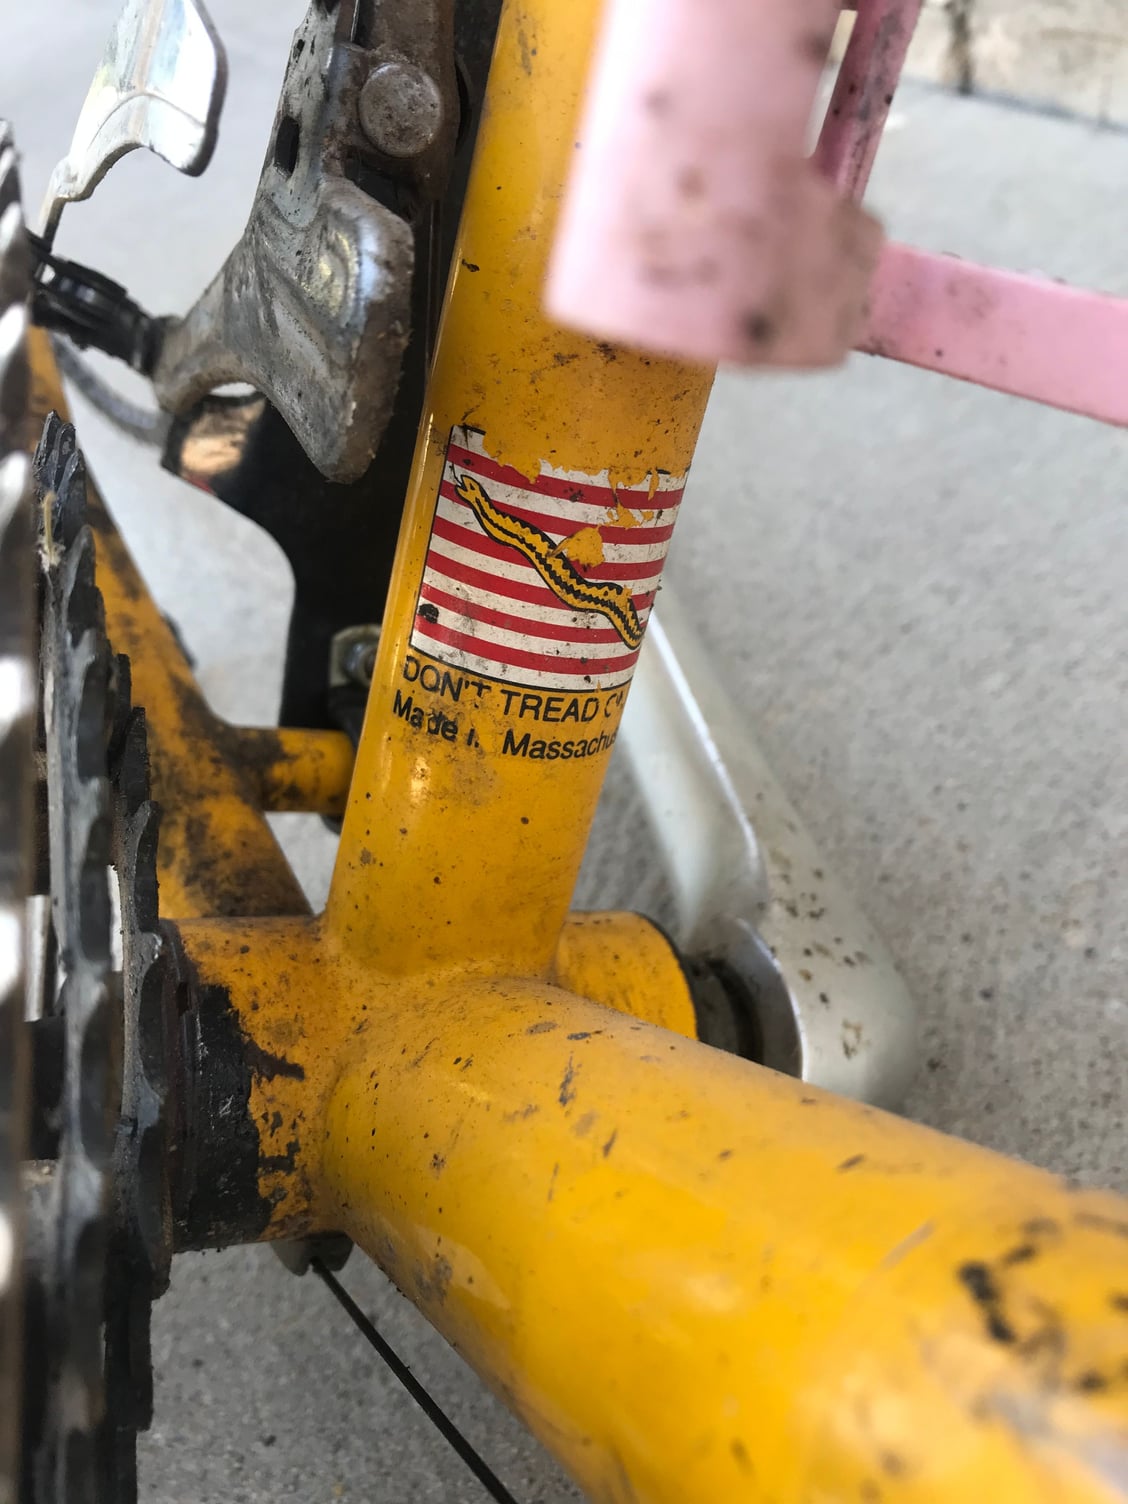
Somerville MA manufacture
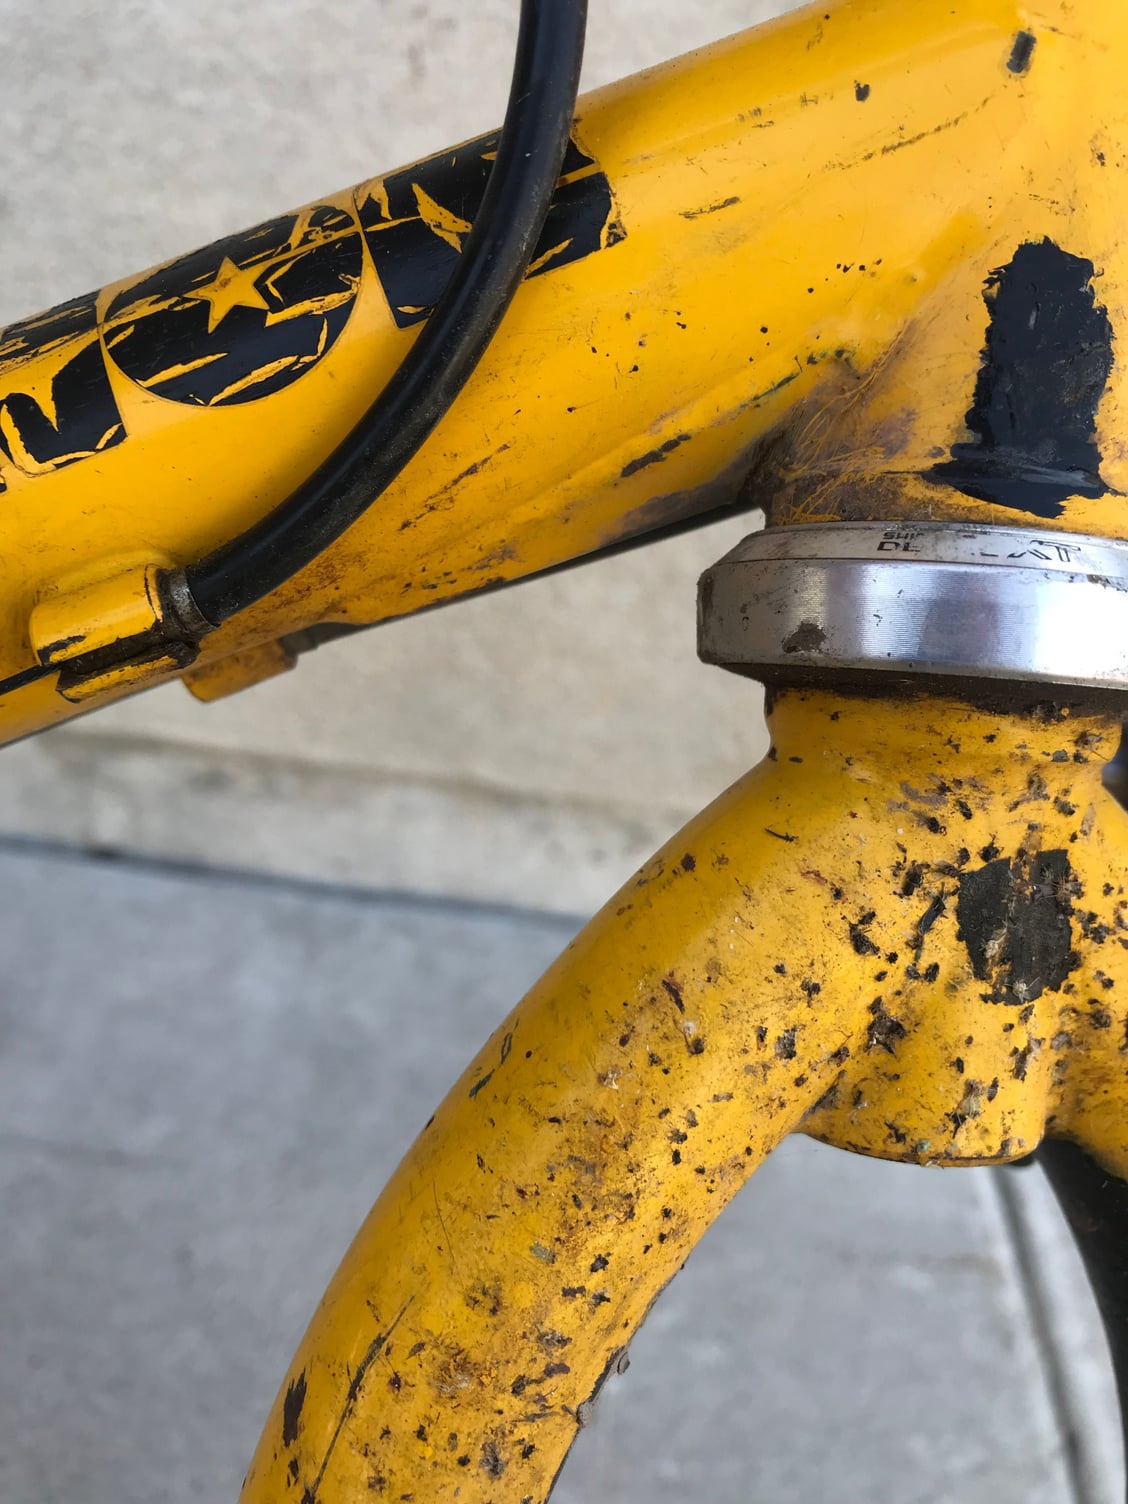
Down tube gusset
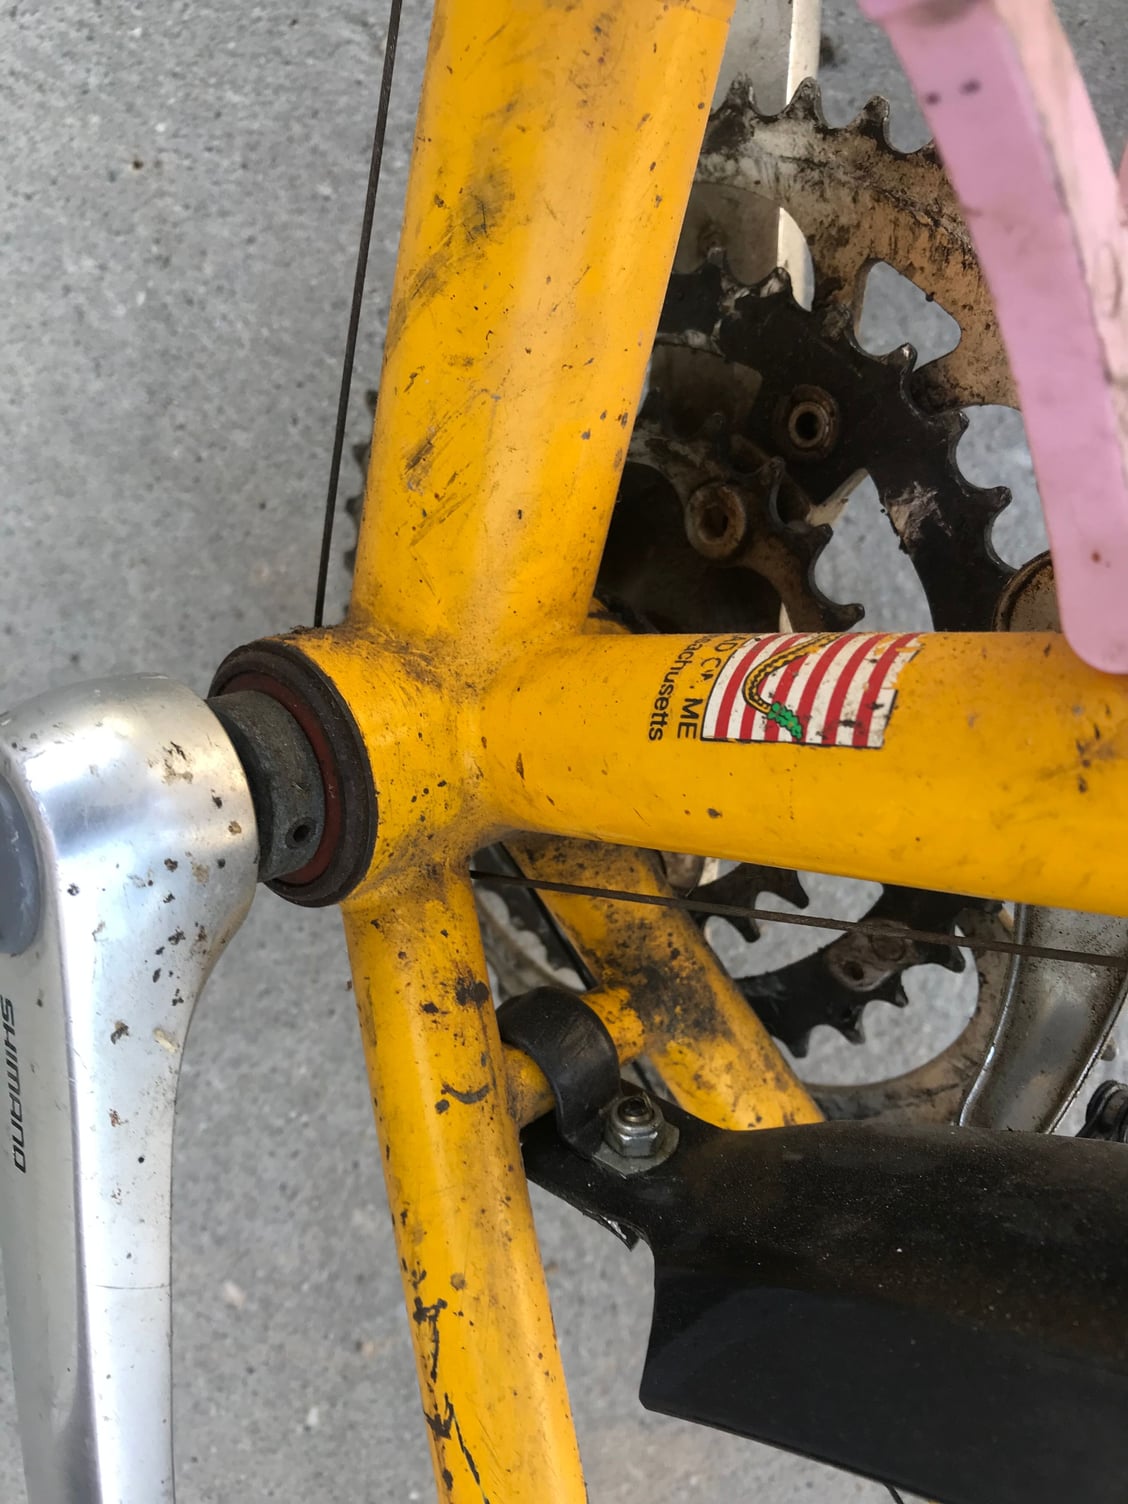
Press fit BB
Press fit BB
The collective was kind enough to throw in a seatpost, matching yellow seat, and what I thought at the time was a more appropriate stem than the Answer ATac stem that’s on it now. I love my bike collective!
I’ll use this thread to document my progress…
stay tuned for more!
I mean, what a piece of junk, right? Missing wheels and a seatpost/ seat, it couldn’t be worth more than $20, right?
When I sent that picture to my wife she asked if it was my size. I knew then I was in the clear, a deal was struck, and after an 18 year hiatus, I am now a two time owner of a Fat City Cycles Wicked Fat Chance! The first Wicked I found was at a Salvation Army thrift; paid $40 for it but it was too small for me so I sold it on the bay of E for a 10X profit. I paid more this time but it is my size and I don’t see it going on the auction block any time soon.
Pics anyone?
As found - pretty rough
Seatstay web
Bullet shaped tube ends
Somerville MA manufacture
Down tube gusset
Press fit BB
Press fit BB
The collective was kind enough to throw in a seatpost, matching yellow seat, and what I thought at the time was a more appropriate stem than the Answer ATac stem that’s on it now. I love my bike collective!
I’ll use this thread to document my progress…
stay tuned for more!

Likes For Smokinapankake:
07-17-21, 01:31 PM
#2

Bianchi Goddess

Join Date: Apr 2009
Location: Shady Pines Retirement Fort Wayne, In
Posts: 27,858
Bikes: Too many to list here check my signature.
Mentioned: 192 Post(s)
Tagged: 2 Thread(s)
Quoted: 2930 Post(s)
Liked 2,923 Times
in
1,491 Posts
Cool score!
Great but odd creepy movie
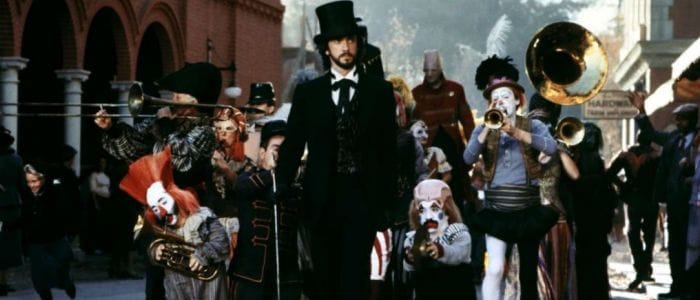
Great but odd creepy movie
__________________
“One morning you wake up, the girl is gone, the bikes are gone, all that's left behind is a pair of old tires and a tube of tubular glue, all squeezed out"
Sugar "Kane" Kowalczyk
“One morning you wake up, the girl is gone, the bikes are gone, all that's left behind is a pair of old tires and a tube of tubular glue, all squeezed out"
Sugar "Kane" Kowalczyk
07-17-21, 01:52 PM
#3
seńor miembro

Join Date: Dec 2018
Location: Pac NW
Posts: 6,626
Bikes: '70s - '80s Campagnolo
Mentioned: 92 Post(s)
Tagged: 0 Thread(s)
Quoted: 3888 Post(s)
Liked 6,484 Times
in
3,208 Posts
Looks treaded on.
Likes For SurferRosa:
 07-17-21, 03:10 PM
#5
Phyllo-buster
Join Date: Jan 2010
Location: Nova Scotia
Posts: 8,847
Bikes: roadsters, club bikes, fixed and classic
Mentioned: 133 Post(s)
Tagged: 0 Thread(s)
Quoted: 2298 Post(s)
Liked 2,054 Times
in
1,254 Posts
Likes For clubman:
07-17-21, 05:48 PM
#6
Senior Member
Join Date: Jan 2004
Location: Madison, WI USA
Posts: 6,154
Mentioned: 50 Post(s)
Tagged: 0 Thread(s)
Quoted: 2363 Post(s)
Liked 1,749 Times
in
1,191 Posts
^^^^ A young-ish Jonathan Pryce (it was just 2 years before Brazil). Also with Jason Robards Jr and Diane Ladd.
Likes For madpogue:
07-17-21, 05:52 PM
#7
Senior Member
Thread Starter
So I couldn’t wait to get into it but a little research beforehand was in order. Off to the internet I went in search of enlightenment. Fortunately, there are a few people here and there who know a thing or two about these crappy old bikes. From the fatcogs.com website I found this helpful in decoding my serial number:
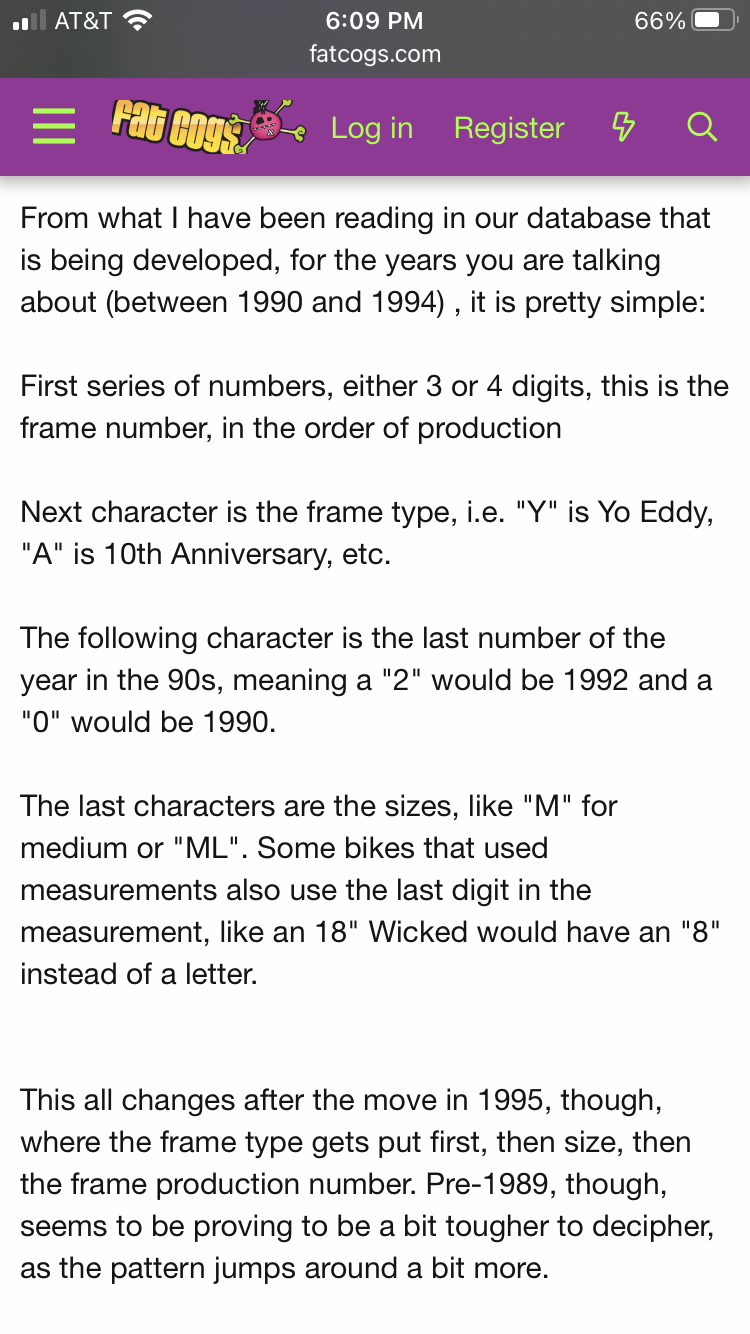
So my SN is 359W11, making my bike frame #359, Wicked, 1991, 21” . A 1991 Wicked - made in Somerville, MA, before the move to Serotta. My measurement of the seat tube CTT comes out at 21”, so I think I can reliably say it’s all true.
Hard to see but it is definitely 359W11
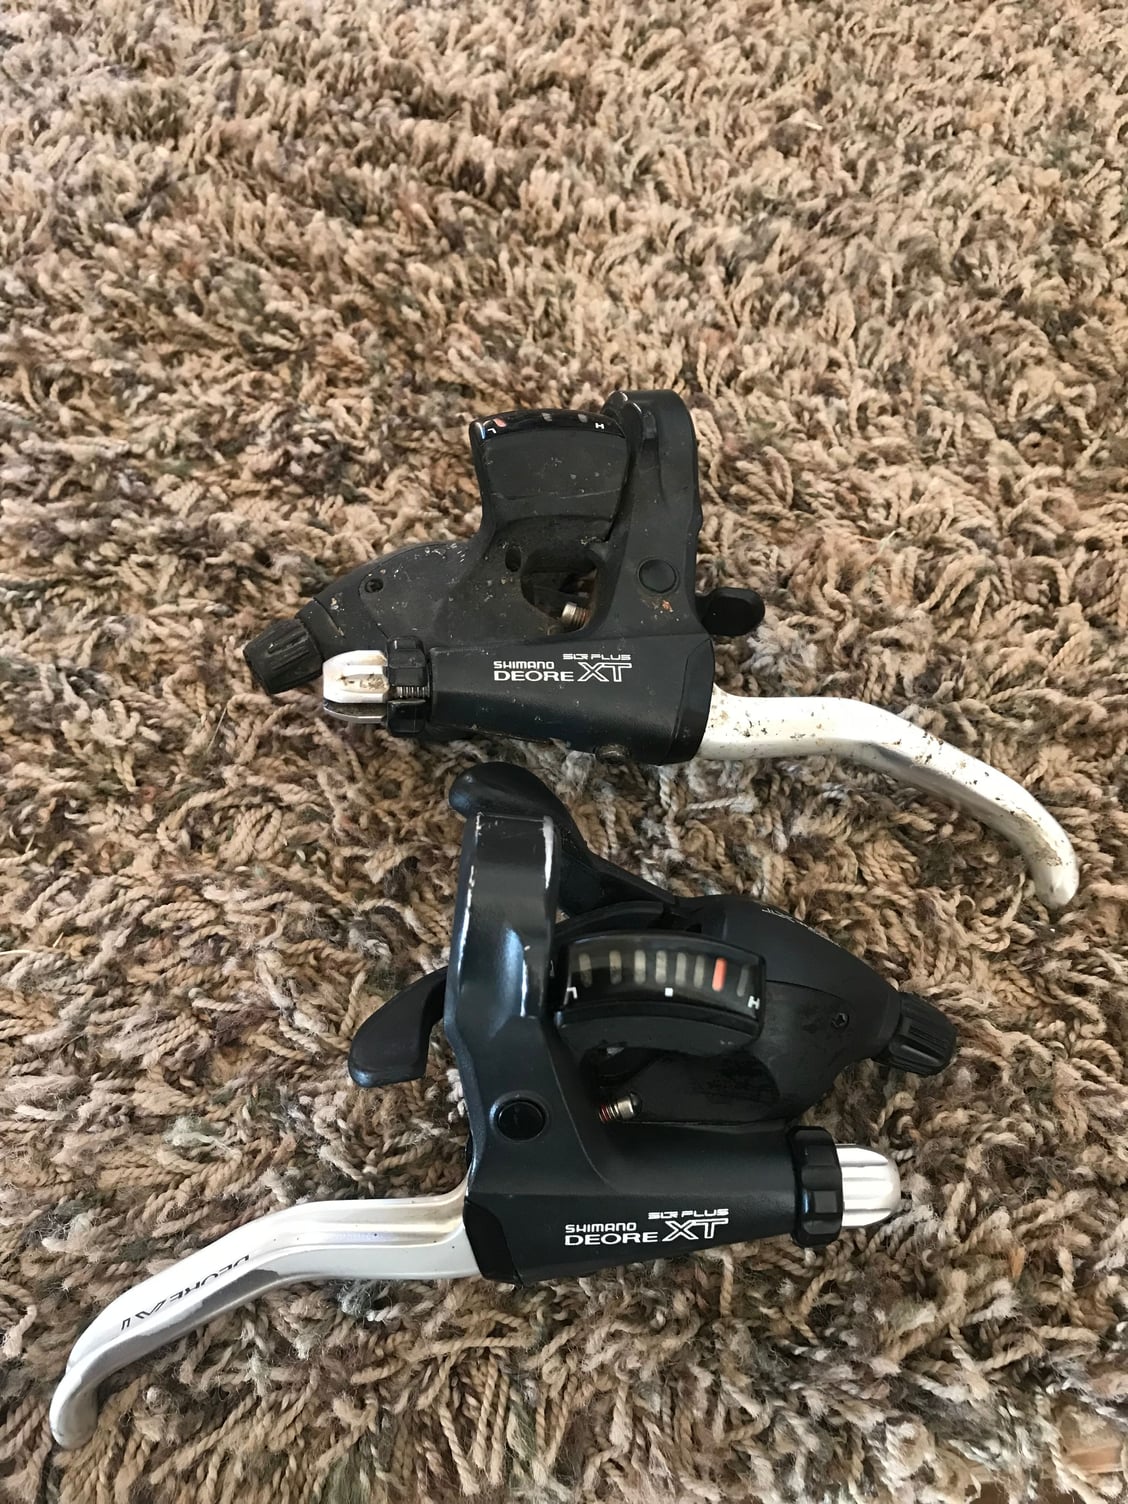
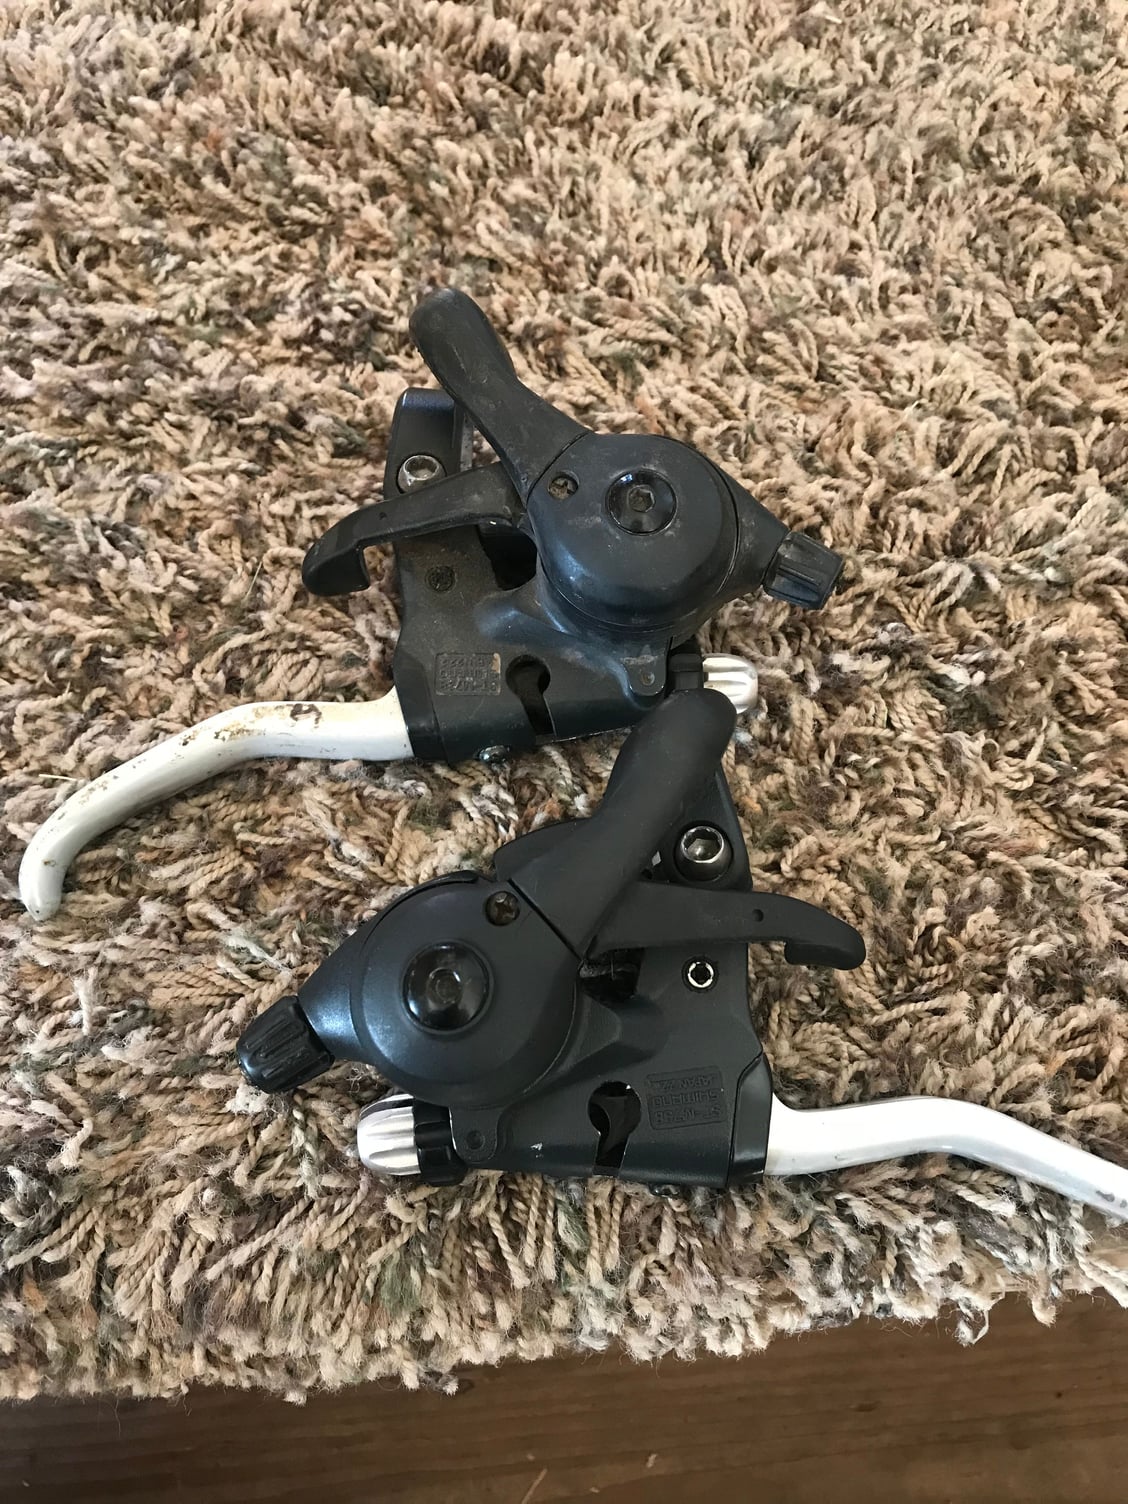
The bike is a bit of a bitsa, with only 2 components dating to 1991: the FD (FD-M732) and crankset (FC-M730 in 180mm length!). The rest are from 1994/1995 time frame; all XT from before 1996 when Shimano unleashed V brakes on an unsuspecting cycling public. The RD is an RD-M750, so about 1998 or so. This is all good news as I’d been wanting to build a nice cantilever braked bike but didn’t have any nice canti’s available. Also I don’t feel constrained to building a period correct restoration job; I have the parts to do so but time and improvements in technology have combined to take the shine off the old stalwart M732/M735 XT.
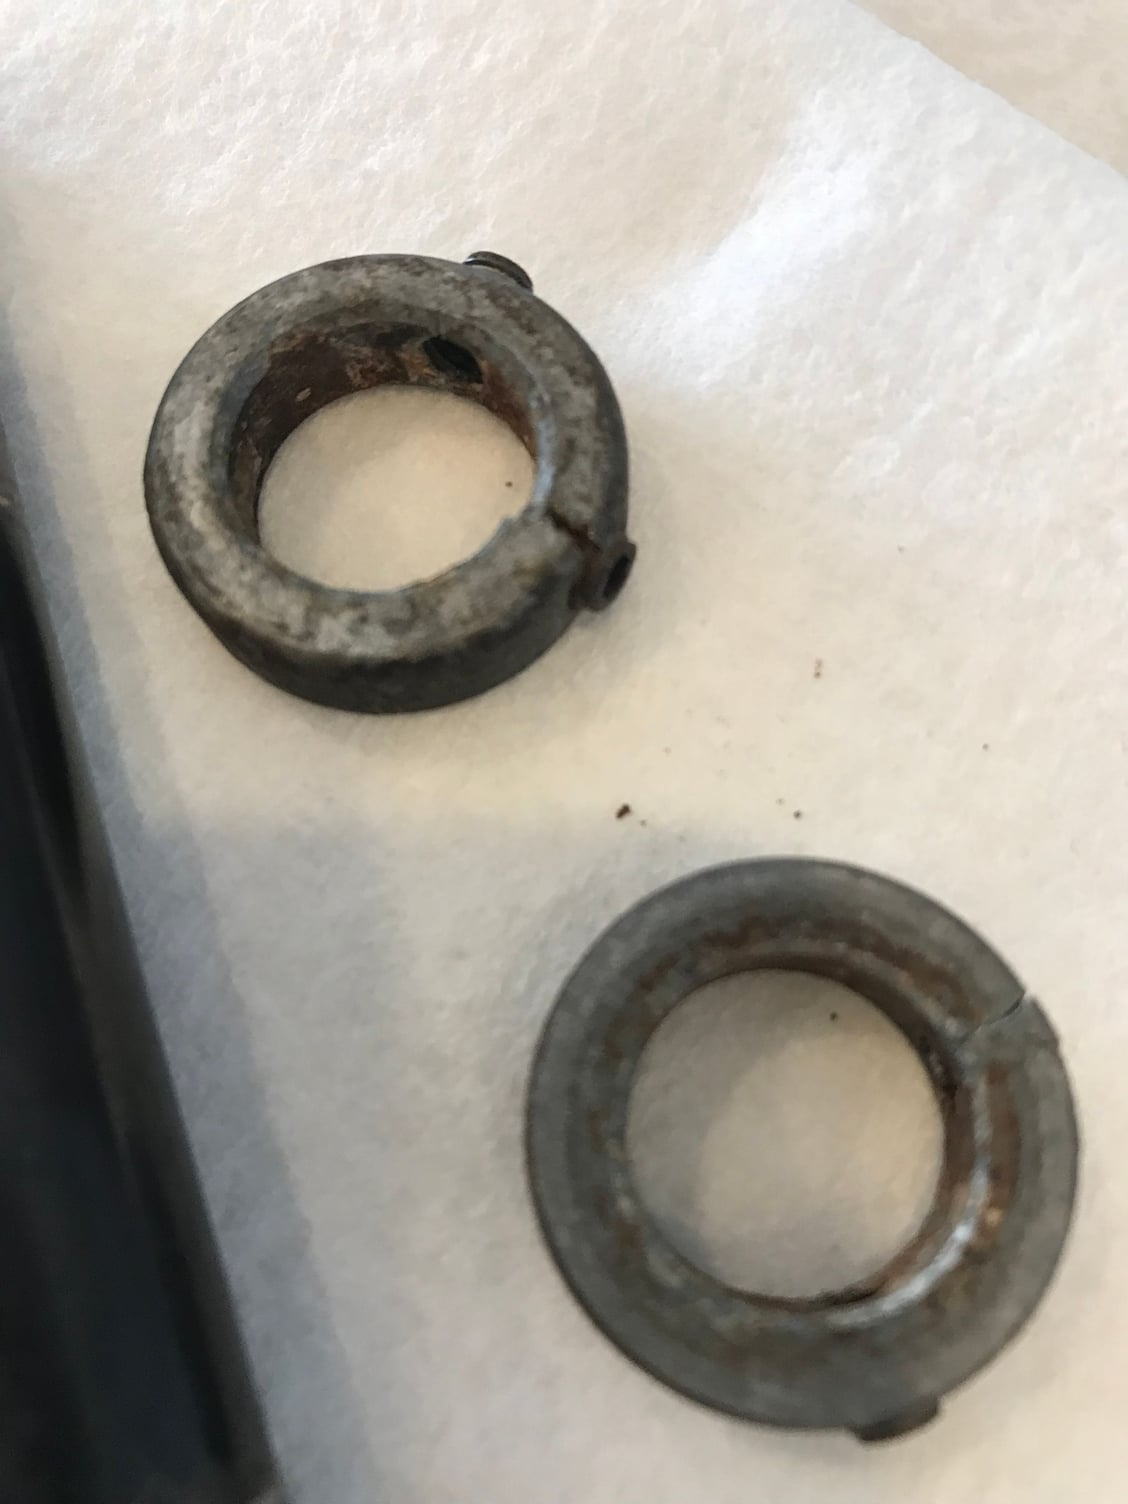
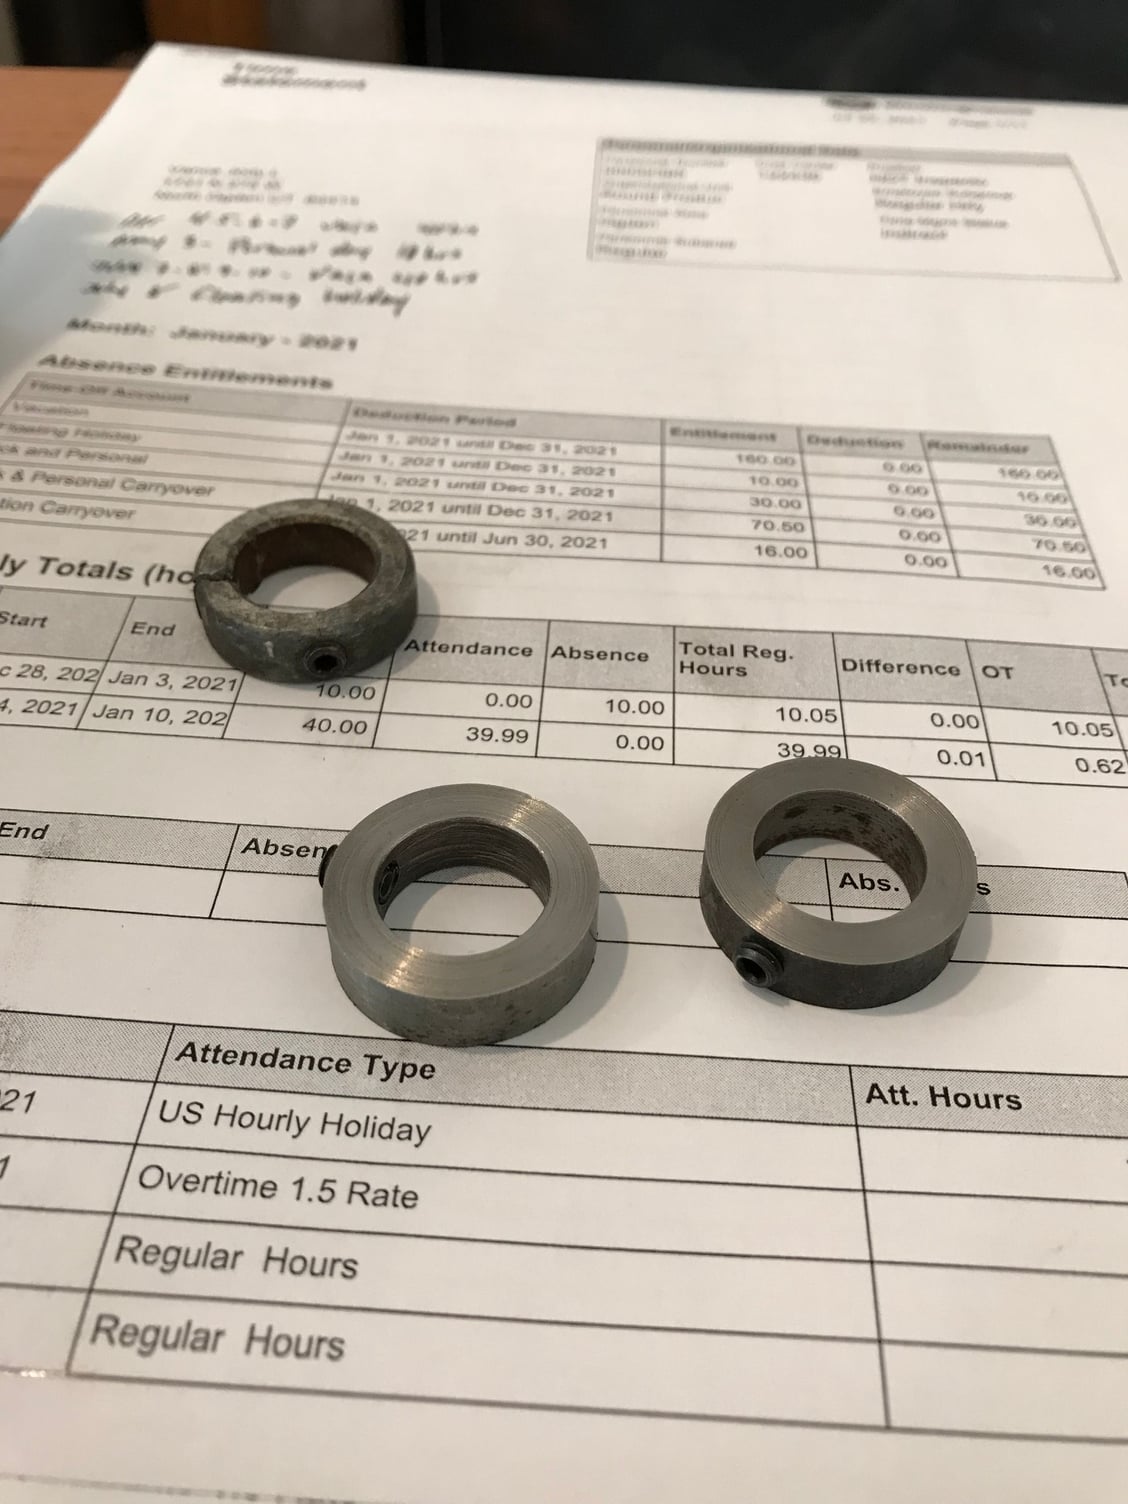
So let’s dig into this pig and see just how bad it really is. Of course it’ll need the full monty with a paint job but let’s start small. The biggest concern I had was the unique press fit BB, but it came apart without too much complaint; unfortunately the retaining collars are both destroyed :
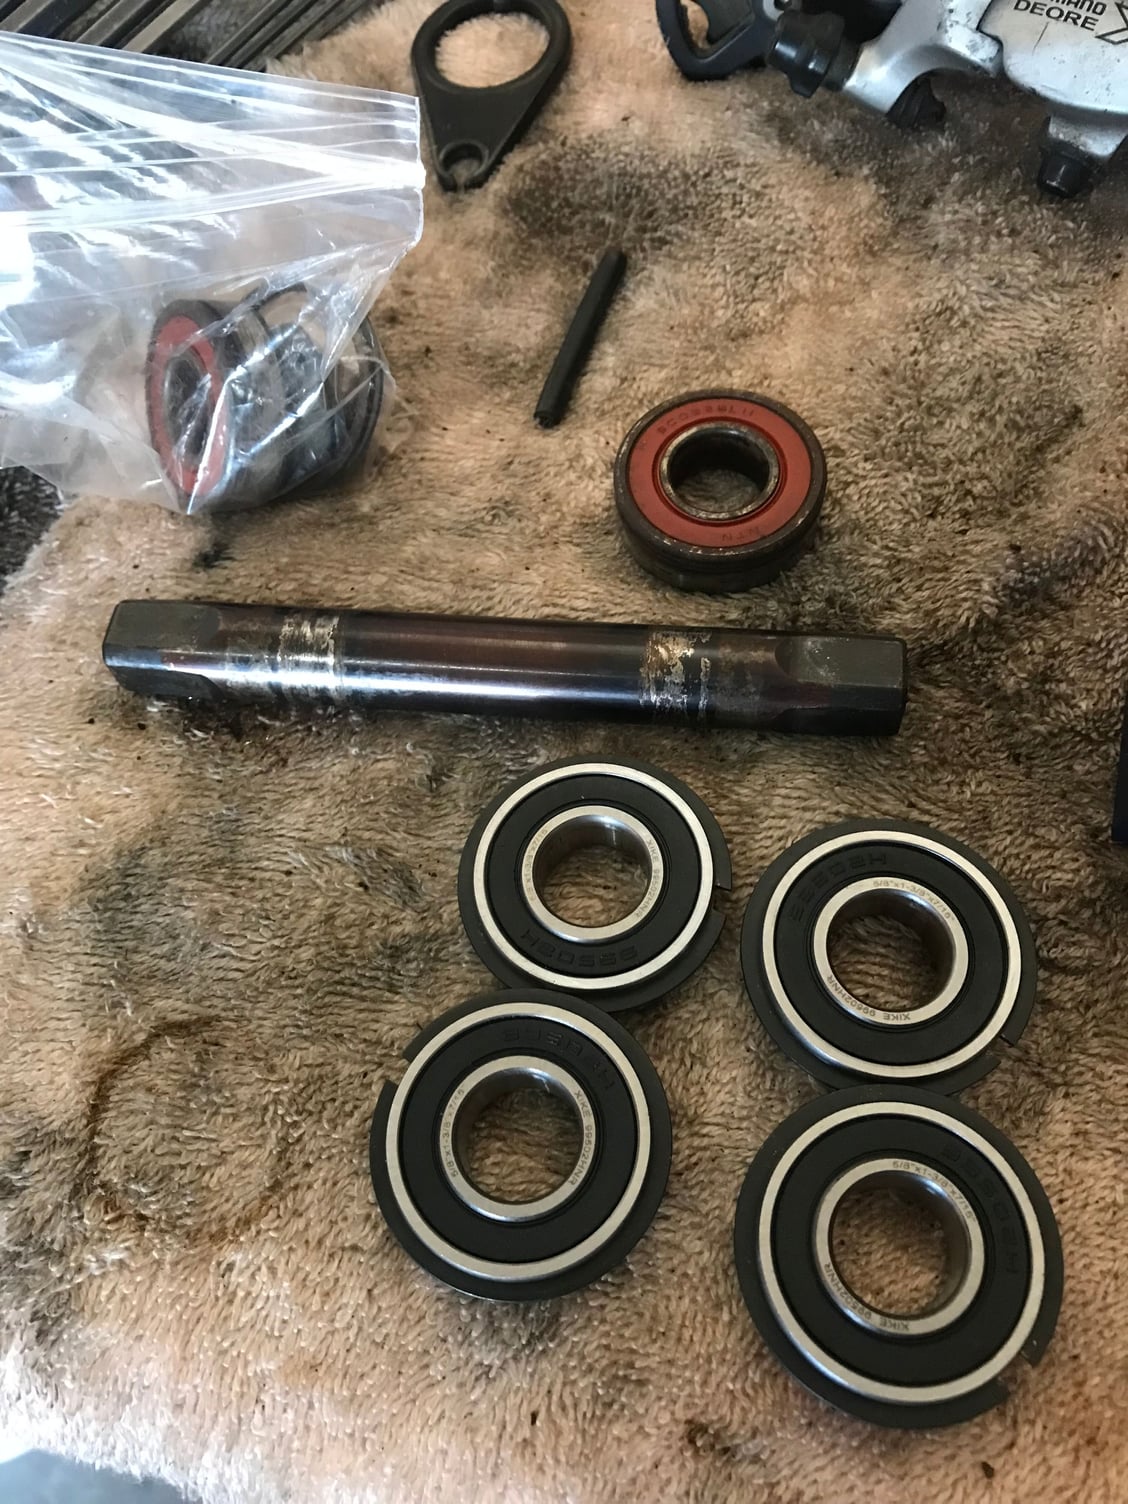
BB spindle looks to be in pretty good nick:
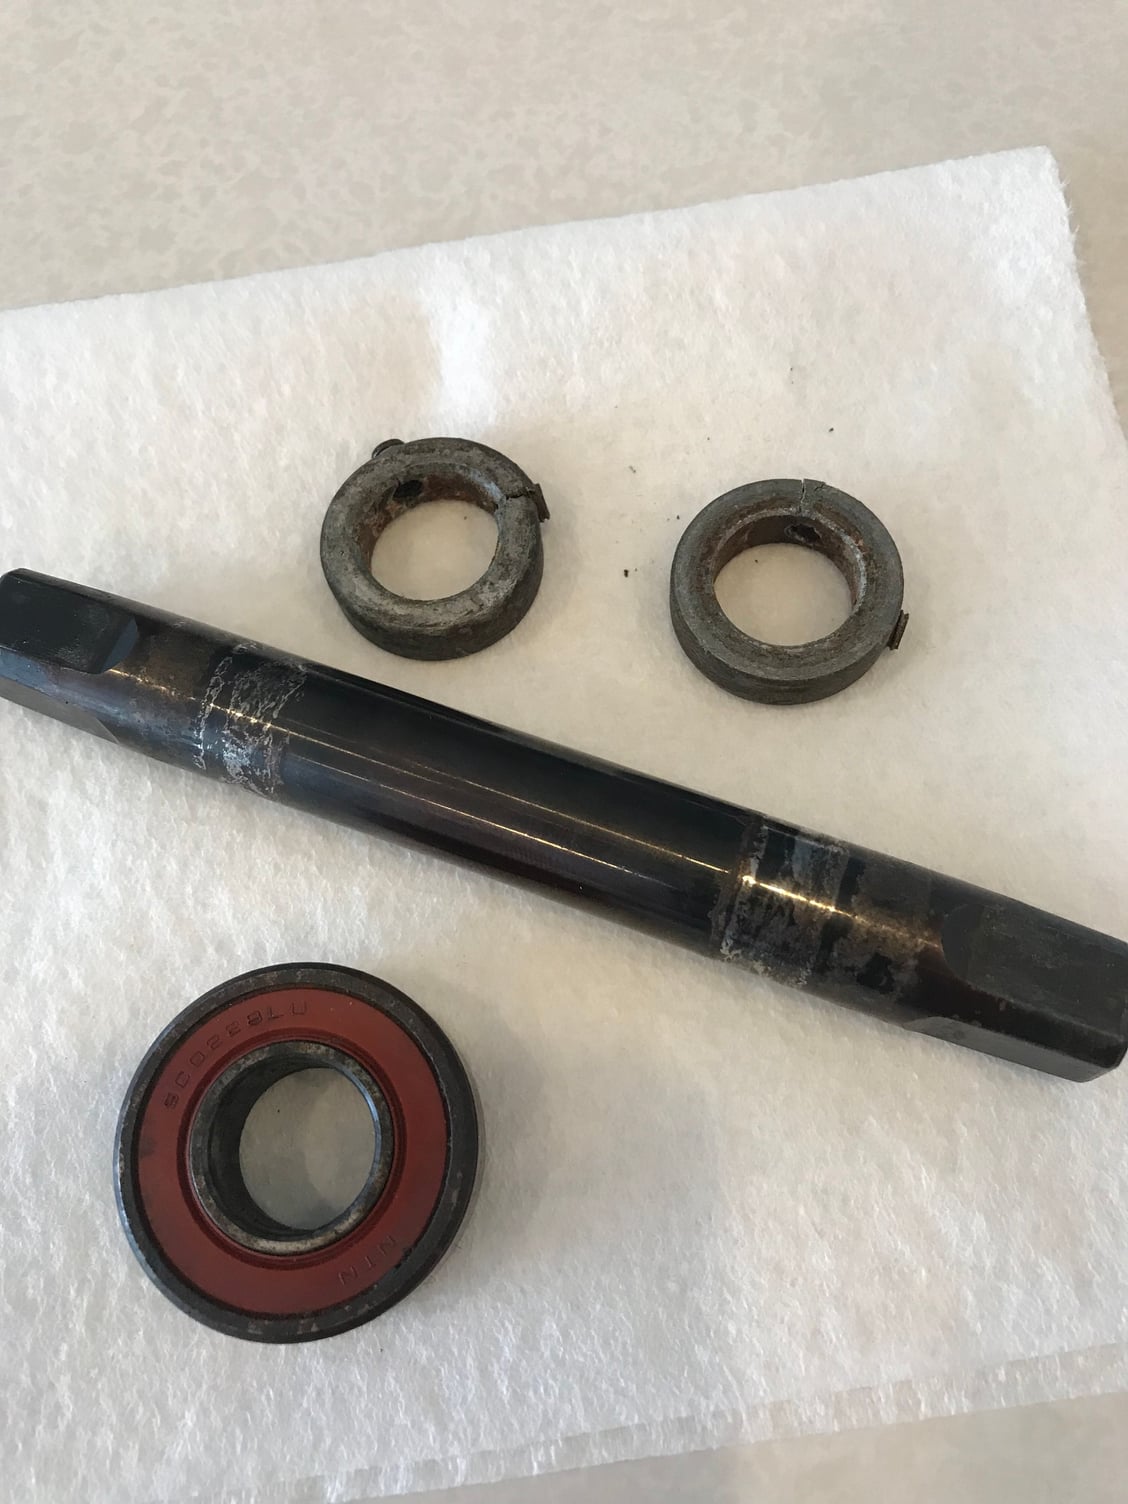
Bearings are still smooth but in the interest of being thorough I think I’ll try to source some new ones. The part number on the rubber seal is SC0228LU, while the part number etched on the body is SC0228N. I suspect the LU designates a body with a groove cut in. The BB is interesting in that it is designed to allow for an adjustable chain line. The bearings are pressed into the BB shell and held in position with a circlip that fits in the groove of the bearing and presses against the outer edge of the BB shell. The spindle just slips into the bearing, and the side to side adjustment is controlled by the locking collars. Very simple and effective, but I can see how it could be a pain to set the chain line.
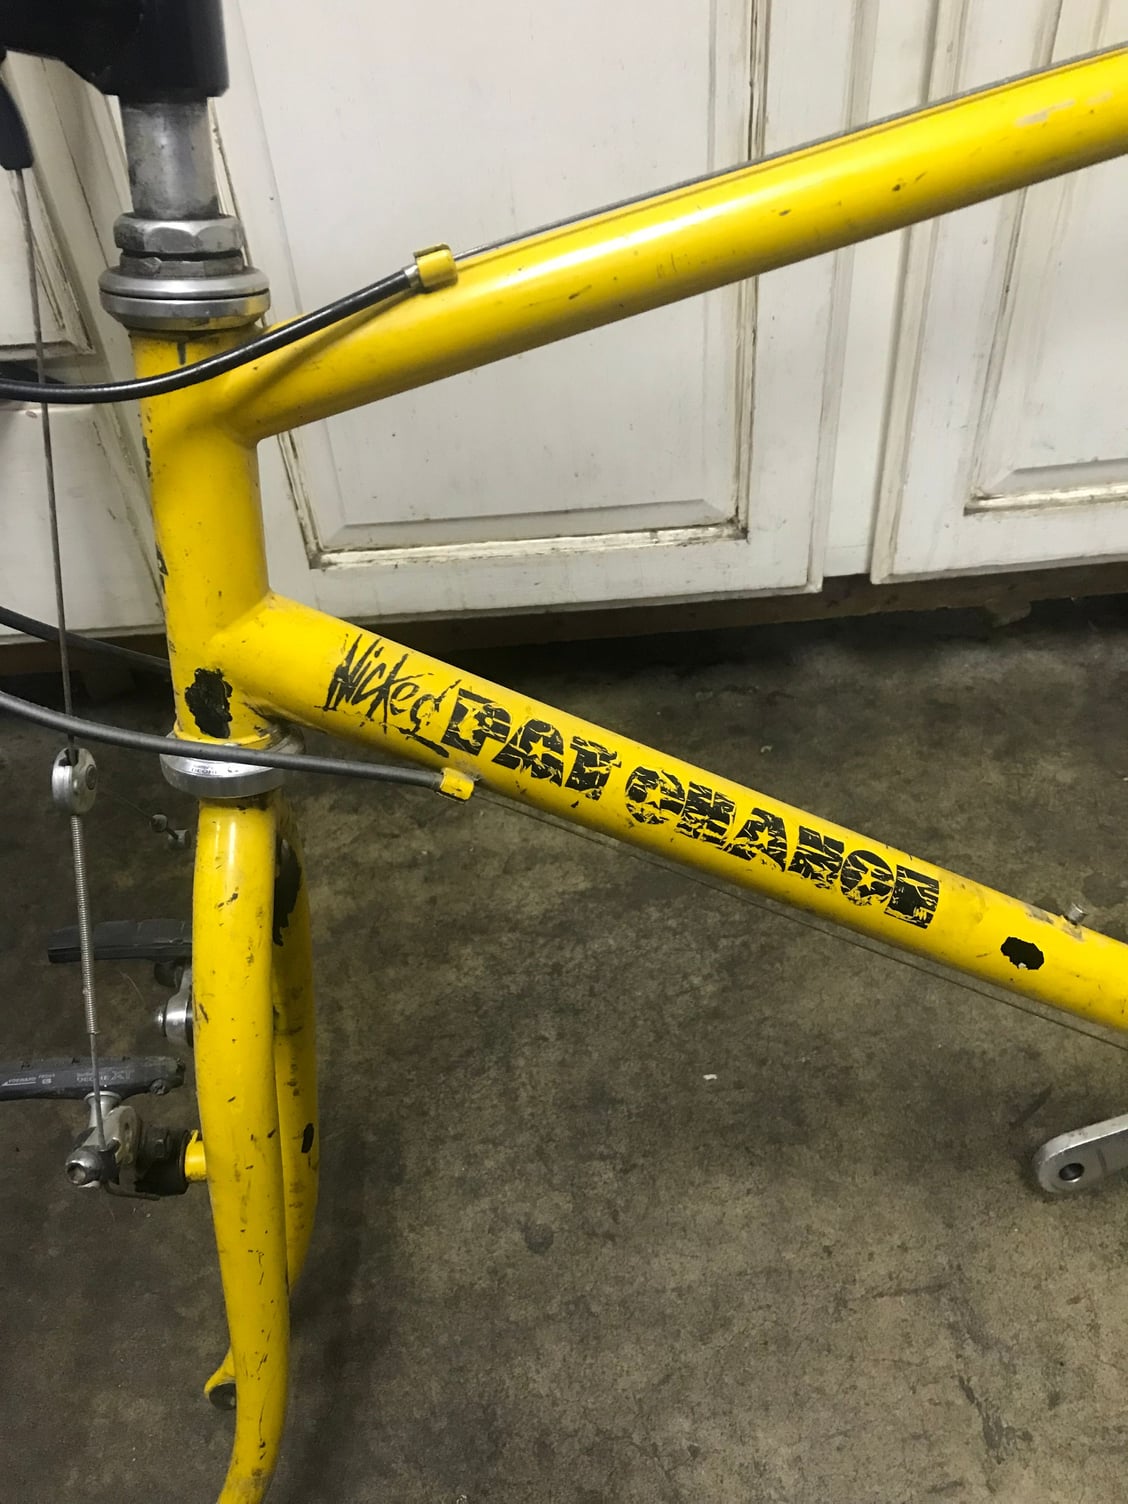
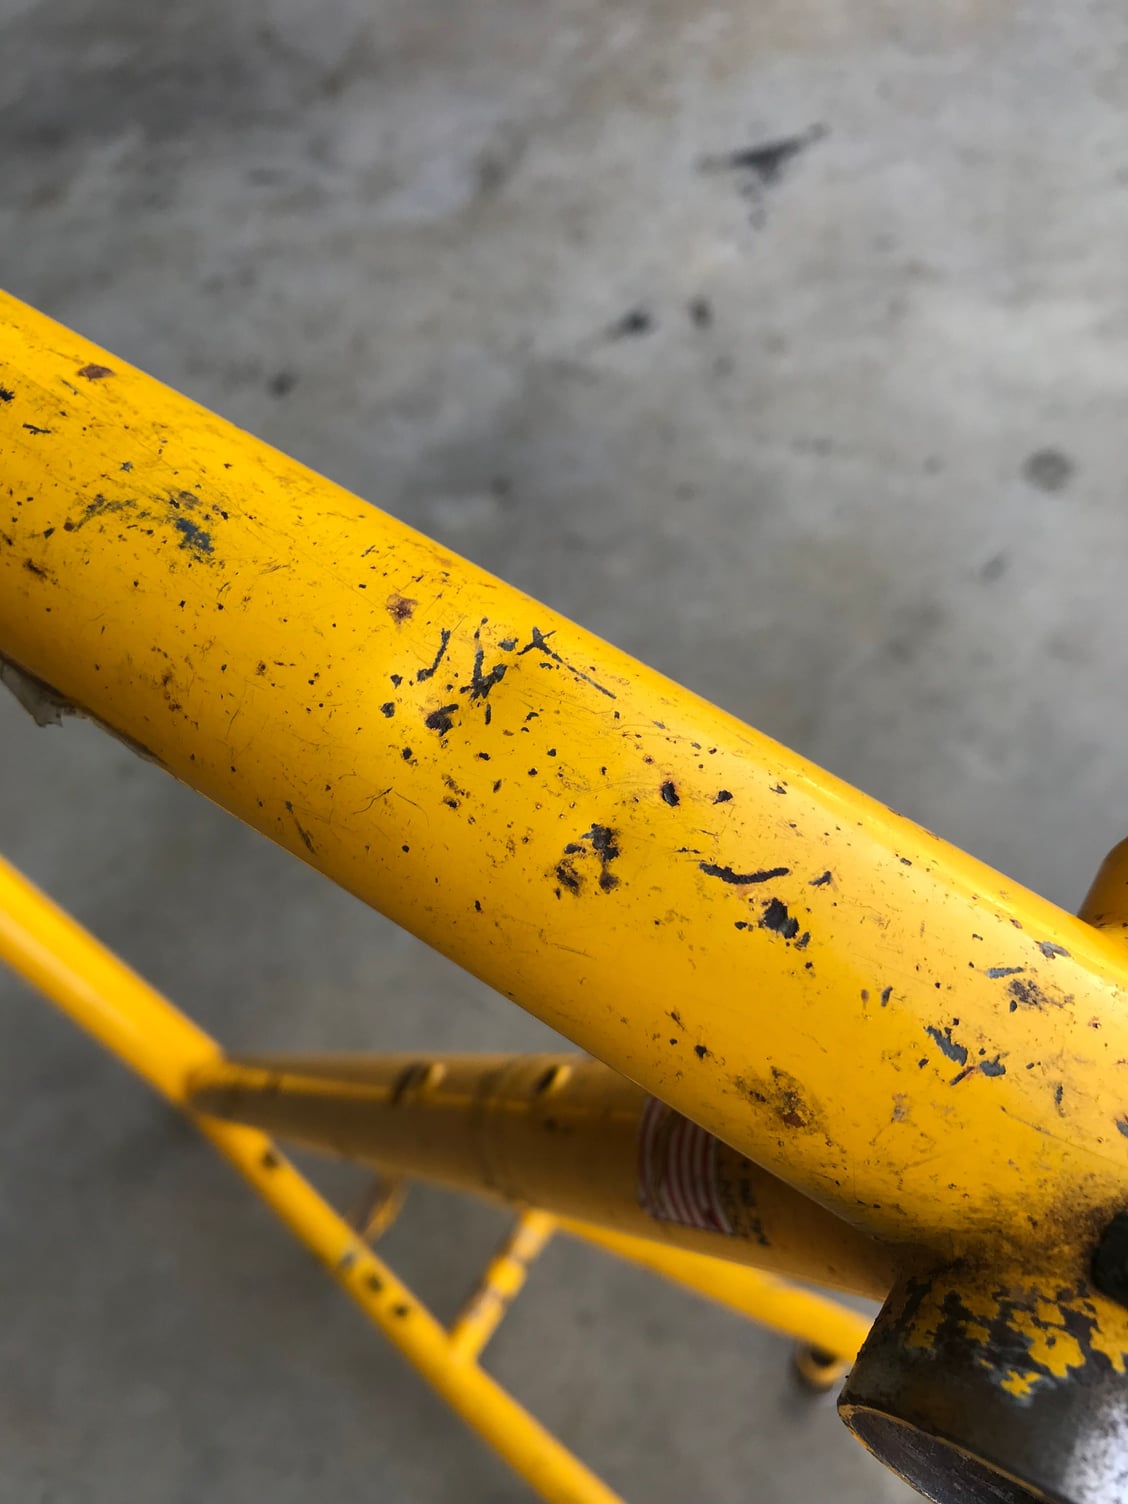
There were (are) patches of black scattered around the frame and fork, and at first I thought it might have been repainted at some point. Turns out some previous owner covered up places where the original paint had worn through to bare steel. The most concerning of these areas is on the drive side chainstay where there appears to be some evidence of a nasty chainsuck event:

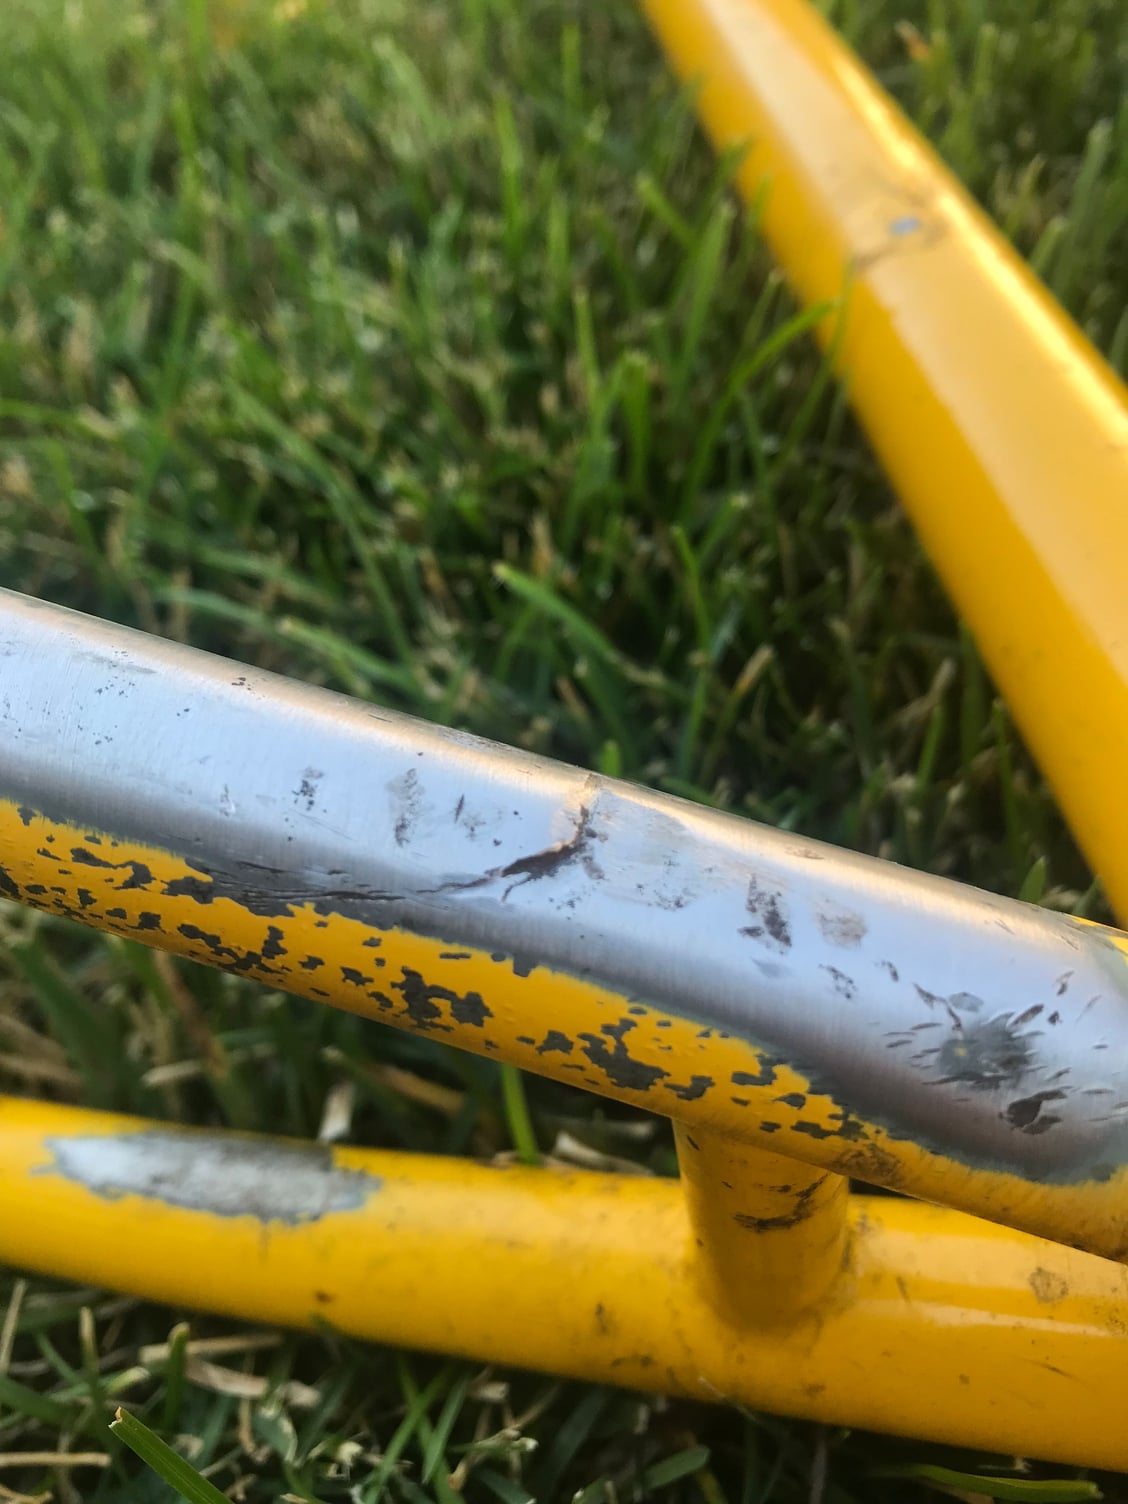
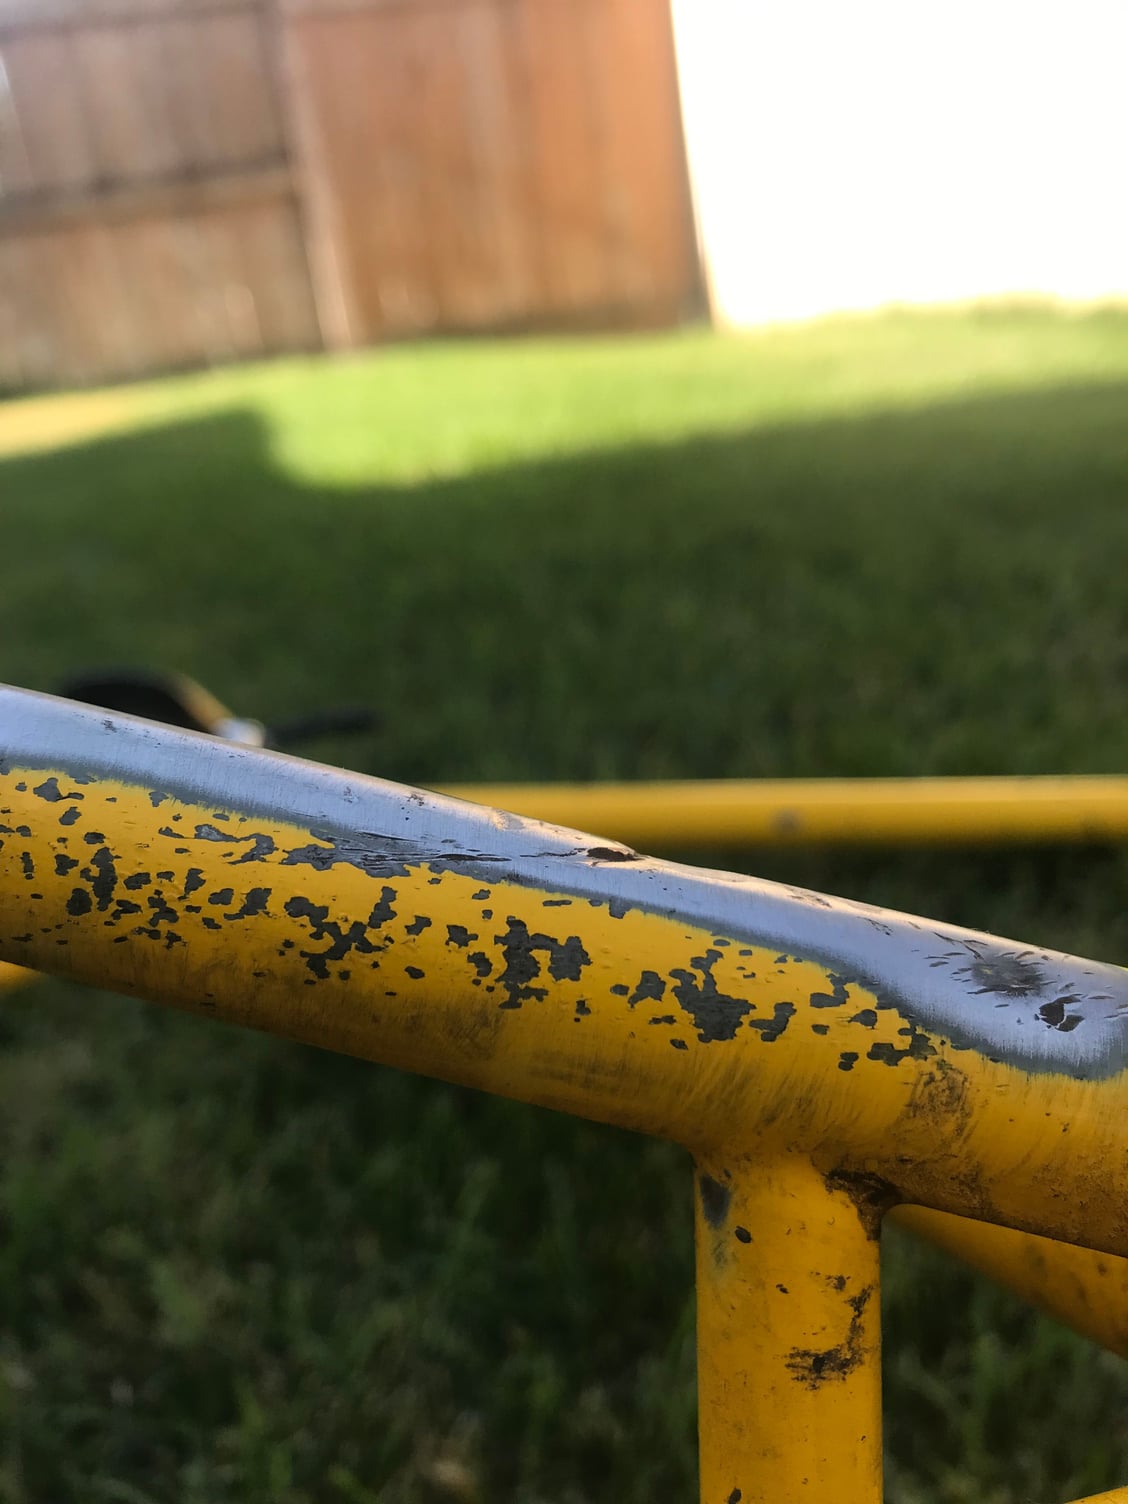
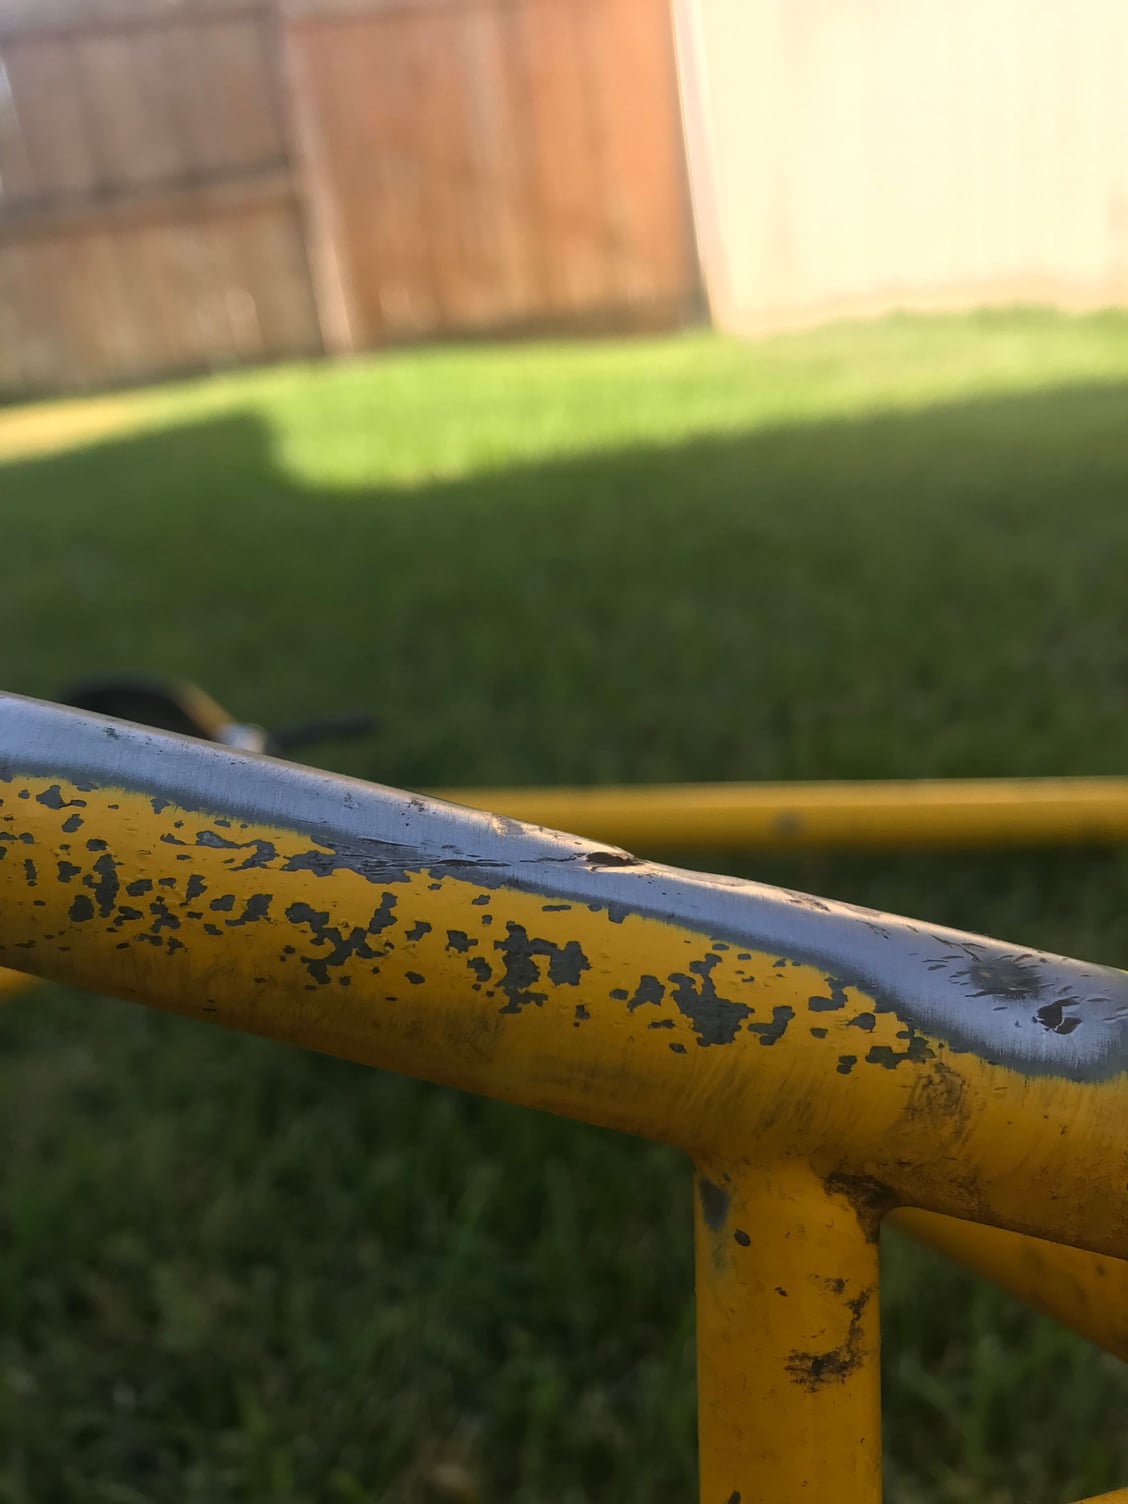
And that’s where I stopped. It looks bad but I don’t think it went through; I fully intend to get it repaired, just need to source someone local. I think while I’m having this repaired I might want to do a few other thing as well- add a 3rd bottle mount on the bottom of the down tube and add some rack braze-ons to the seatstays. I think I’ll make it an urban assault vehicle, and in that capacity it needs a clean rack mounting option.
Thoughts? Feedback welcomed!
So my SN is 359W11, making my bike frame #359, Wicked, 1991, 21” . A 1991 Wicked - made in Somerville, MA, before the move to Serotta. My measurement of the seat tube CTT comes out at 21”, so I think I can reliably say it’s all true.
Hard to see but it is definitely 359W11
The bike is a bit of a bitsa, with only 2 components dating to 1991: the FD (FD-M732) and crankset (FC-M730 in 180mm length!). The rest are from 1994/1995 time frame; all XT from before 1996 when Shimano unleashed V brakes on an unsuspecting cycling public. The RD is an RD-M750, so about 1998 or so. This is all good news as I’d been wanting to build a nice cantilever braked bike but didn’t have any nice canti’s available. Also I don’t feel constrained to building a period correct restoration job; I have the parts to do so but time and improvements in technology have combined to take the shine off the old stalwart M732/M735 XT.
So let’s dig into this pig and see just how bad it really is. Of course it’ll need the full monty with a paint job but let’s start small. The biggest concern I had was the unique press fit BB, but it came apart without too much complaint; unfortunately the retaining collars are both destroyed :
BB spindle looks to be in pretty good nick:
Bearings are still smooth but in the interest of being thorough I think I’ll try to source some new ones. The part number on the rubber seal is SC0228LU, while the part number etched on the body is SC0228N. I suspect the LU designates a body with a groove cut in. The BB is interesting in that it is designed to allow for an adjustable chain line. The bearings are pressed into the BB shell and held in position with a circlip that fits in the groove of the bearing and presses against the outer edge of the BB shell. The spindle just slips into the bearing, and the side to side adjustment is controlled by the locking collars. Very simple and effective, but I can see how it could be a pain to set the chain line.
There were (are) patches of black scattered around the frame and fork, and at first I thought it might have been repainted at some point. Turns out some previous owner covered up places where the original paint had worn through to bare steel. The most concerning of these areas is on the drive side chainstay where there appears to be some evidence of a nasty chainsuck event:
And that’s where I stopped. It looks bad but I don’t think it went through; I fully intend to get it repaired, just need to source someone local. I think while I’m having this repaired I might want to do a few other thing as well- add a 3rd bottle mount on the bottom of the down tube and add some rack braze-ons to the seatstays. I think I’ll make it an urban assault vehicle, and in that capacity it needs a clean rack mounting option.
Thoughts? Feedback welcomed!
07-17-21, 06:45 PM
#8
Senior Member
Join Date: Dec 2007
Location: NWNJ
Posts: 3,704
Bikes: Road bike is a Carbon Bianchi C2C & Grandis (1980's), Gary Fisher Mt Bike, Trek Tandem & Mongoose SS MTB circa 1992.
Mentioned: 9 Post(s)
Tagged: 0 Thread(s)
Quoted: 722 Post(s)
Liked 353 Times
in
226 Posts
So I couldn’t wait to get into it but a little research beforehand was in order. Off to the internet I went in search of enlightenment. Fortunately, there are a few people here and there who know a thing or two about these crappy old bikes. From the fatcogs.com website I found this helpful in decoding my serial number:
So my SN is 359W11, making my bike frame #359, Wicked, 1991, 21” . A 1991 Wicked - made in Somerville, MA, before the move to Serotta. My measurement of the seat tube CTT comes out at 21”, so I think I can reliably say it’s all true.
Hard to see but it is definitely 359W11
The bike is a bit of a bitsa, with only 2 components dating to 1991: the FD (FD-M732) and crankset (FC-M730 in 180mm length!). The rest are from 1994/1995 time frame; all XT from before 1996 when Shimano unleashed V brakes on an unsuspecting cycling public. The RD is an RD-M750, so about 1998 or so. This is all good news as I’d been wanting to build a nice cantilever braked bike but didn’t have any nice canti’s available. Also I don’t feel constrained to building a period correct restoration job; I have the parts to do so but time and improvements in technology have combined to take the shine off the old stalwart M732/M735 XT.
So let’s dig into this pig and see just how bad it really is. Of course it’ll need the full monty with a paint job but let’s start small. The biggest concern I had was the unique press fit BB, but it came apart without too much complaint; unfortunately the retaining collars are both destroyed :
BB spindle looks to be in pretty good nick:
Bearings are still smooth but in the interest of being thorough I think I’ll try to source some new ones. The part number on the rubber seal is SC0228LU, while the part number etched on the body is SC0228N. I suspect the LU designates a body with a groove cut in. The BB is interesting in that it is designed to allow for an adjustable chain line. The bearings are pressed into the BB shell and held in position with a circlip that fits in the groove of the bearing and presses against the outer edge of the BB shell. The spindle just slips into the bearing, and the side to side adjustment is controlled by the locking collars. Very simple and effective, but I can see how it could be a pain to set the chain line.
There were (are) patches of black scattered around the frame and fork, and at first I thought it might have been repainted at some point. Turns out some previous owner covered up places where the original paint had worn through to bare steel. The most concerning of these areas is on the drive side chainstay where there appears to be some evidence of a nasty chainsuck event:
And that’s where I stopped. It looks bad but I don’t think it went through; I fully intend to get it repaired, just need to source someone local. I think while I’m having this repaired I might want to do a few other thing as well- add a 3rd bottle mount on the bottom of the down tube and add some rack braze-ons to the seatstays. I think I’ll make it an urban assault vehicle, and in that capacity it needs a clean rack mounting option.
Thoughts? Feedback welcomed!
thus something wicked has indeed arrived.
so good luck keep posted.
07-17-21, 06:53 PM
#9
Old fart

Join Date: Nov 2004
Location: Appleton WI
Posts: 24,786
Bikes: Several, mostly not name brands.
Mentioned: 153 Post(s)
Tagged: 0 Thread(s)
Quoted: 3588 Post(s)
Liked 3,400 Times
in
1,934 Posts
So I was at my bike collective yesterday yapping with my guy JP about old bikes and asked if he might have anything interesting in the back room. He said “I might have something you’d be interested in” and directed my gaze to this ugly, beat up old school bus yellow MTB.
If you're going to repaint it, I'd take the opportunity to add a second set of eyelets onto the dropouts, so they don't have to share duty between the rack and the mudguard.
But maybe that's just me.
Likes For JohnDThompson:
07-17-21, 06:53 PM
#10
Senior Member
Thread Starter
Nah that’s not a showstopper. Just inconvenient. It’s going to be a sweet ride one day
Likes For Smokinapankake:
07-17-21, 06:55 PM
#11
Senior Member
Thread Starter
Agreed. I’m considering also adding down tube gear lever bosses as well. Just, ya know, in case…
Likes For Smokinapankake:
07-17-21, 07:18 PM
#12
Full Member
07-17-21, 07:25 PM
#13
Senior Member
Join Date: Jul 2014
Location: New Zealand
Posts: 1,035
Bikes: 1963? Anquetil , 1973 PX10,1979 PX10,1984 PX10, VITUS 979 PX10DU,1970S ALAN,1985 PSV10,1980s PY10FC,1978 bERTIN,ALAN carbon
Mentioned: 10 Post(s)
Tagged: 0 Thread(s)
Quoted: 283 Post(s)
Liked 636 Times
in
283 Posts
BB spindle looks to be in pretty good nick:
Bearings are still smooth but in the interest of being thorough I think I’ll try to source some new ones. The part number on the rubber seal is SC0228LU, while the part number etched on the body is SC0228N. I suspect the LU designates a body with a groove cut in. The BB is interesting in that it is designed to allow for an adjustable chain line. The bearings are pressed into the BB shell and held in position with a circlip that fits in the groove of the bearing and presses against the outer edge of the BB shell. The spindle just slips into the bearing, and the side to side adjustment is controlled by the locking collars. Very simple and effective, but I can see how it could be a pain to set the chain line.
s? Feedback welcomed![/QUOTE]
For what its worth the LU in the part number refers to the seal . Full contact double lipped in this instance . LU one side only , LLU Both sides .
The "N" on the body refers to the circlip groove in outer ring .
In theory correct part number should be SCO228LLUNR .The "R" is for the clip in the groove if needed
(too many years working in the bearing industry )
Also the lock collars look to be reasonably standard shaft collar which will be available through an engineering supply company.
Sometimes only available with one grubscrew but nothing a drill and tap wont fix !
HAve fun !
Likes For 1simplexnut:
07-17-21, 07:47 PM
#14
Phyllo-buster
Join Date: Jan 2010
Location: Nova Scotia
Posts: 8,847
Bikes: roadsters, club bikes, fixed and classic
Mentioned: 133 Post(s)
Tagged: 0 Thread(s)
Quoted: 2298 Post(s)
Liked 2,054 Times
in
1,254 Posts
edit...well, maybe Bladerunner
Last edited by clubman; 07-17-21 at 08:00 PM.
07-17-21, 08:02 PM
#15

Senior Member
Join Date: Jun 2006
Posts: 20,305
Mentioned: 130 Post(s)
Tagged: 0 Thread(s)
Quoted: 3464 Post(s)
Liked 2,829 Times
in
1,995 Posts
How my Mom got me interested in reading.
totally messed me up for “see Spot run” in first grade. As a 5 year old reading about a carousel that the rider got older going forward and younger in reverse was fascinating. want to buy a lightening rod?
Likes For repechage:
07-18-21, 04:50 AM
#16
Senior Member

Join Date: Oct 2013
Location: Connecticut
Posts: 3,448
Bikes: are fun!
Mentioned: 66 Post(s)
Tagged: 0 Thread(s)
Quoted: 466 Post(s)
Liked 864 Times
in
273 Posts
Nice grab. Too bad about the chainstay, but good on ya for turning it into an opportunity. Curious to see how it all goes.
07-18-21, 06:30 AM
#17
Senior Member
Thread Starter
BB spindle looks to be in pretty good nick:
Bearings are still smooth but in the interest of being thorough I think I’ll try to source some new ones. The part number on the rubber seal is SC0228LU, while the part number etched on the body is SC0228N. I suspect the LU designates a body with a groove cut in. The BB is interesting in that it is designed to allow for an adjustable chain line. The bearings are pressed into the BB shell and held in position with a circlip that fits in the groove of the bearing and presses against the outer edge of the BB shell. The spindle just slips into the bearing, and the side to side adjustment is controlled by the locking collars. Very simple and effective, but I can see how it could be a pain to set the chain line.
s? Feedback welcomed!
The "N" on the body refers to the circlip groove in outer ring .
In theory correct part number should be SCO228LLUNR .The "R" is for the clip in the groove if needed
(too many years working in the bearing industry )
Also the lock collars look to be reasonably standard shaft collar which will be available through an engineering supply company.
Sometimes only available with one grubscrew but nothing a drill and tap wont fix !
HAve fun ![/QUOTE]
Thank you! This is exactly the kind of information I was hoping to find here! I figured both the bearings and the locking collars were pretty standard off the shelf items, but was having trouble finding a grooved bearing.
As far as the chainstay goes, I’m sure there are people local who can fix it. We’ve got a technical college just down the street that teaches welding and certifies students to aerospace levels so if anything I’m sure the instructors there can help me out.
07-18-21, 06:44 AM
#18
Senior Member
Thread Starter
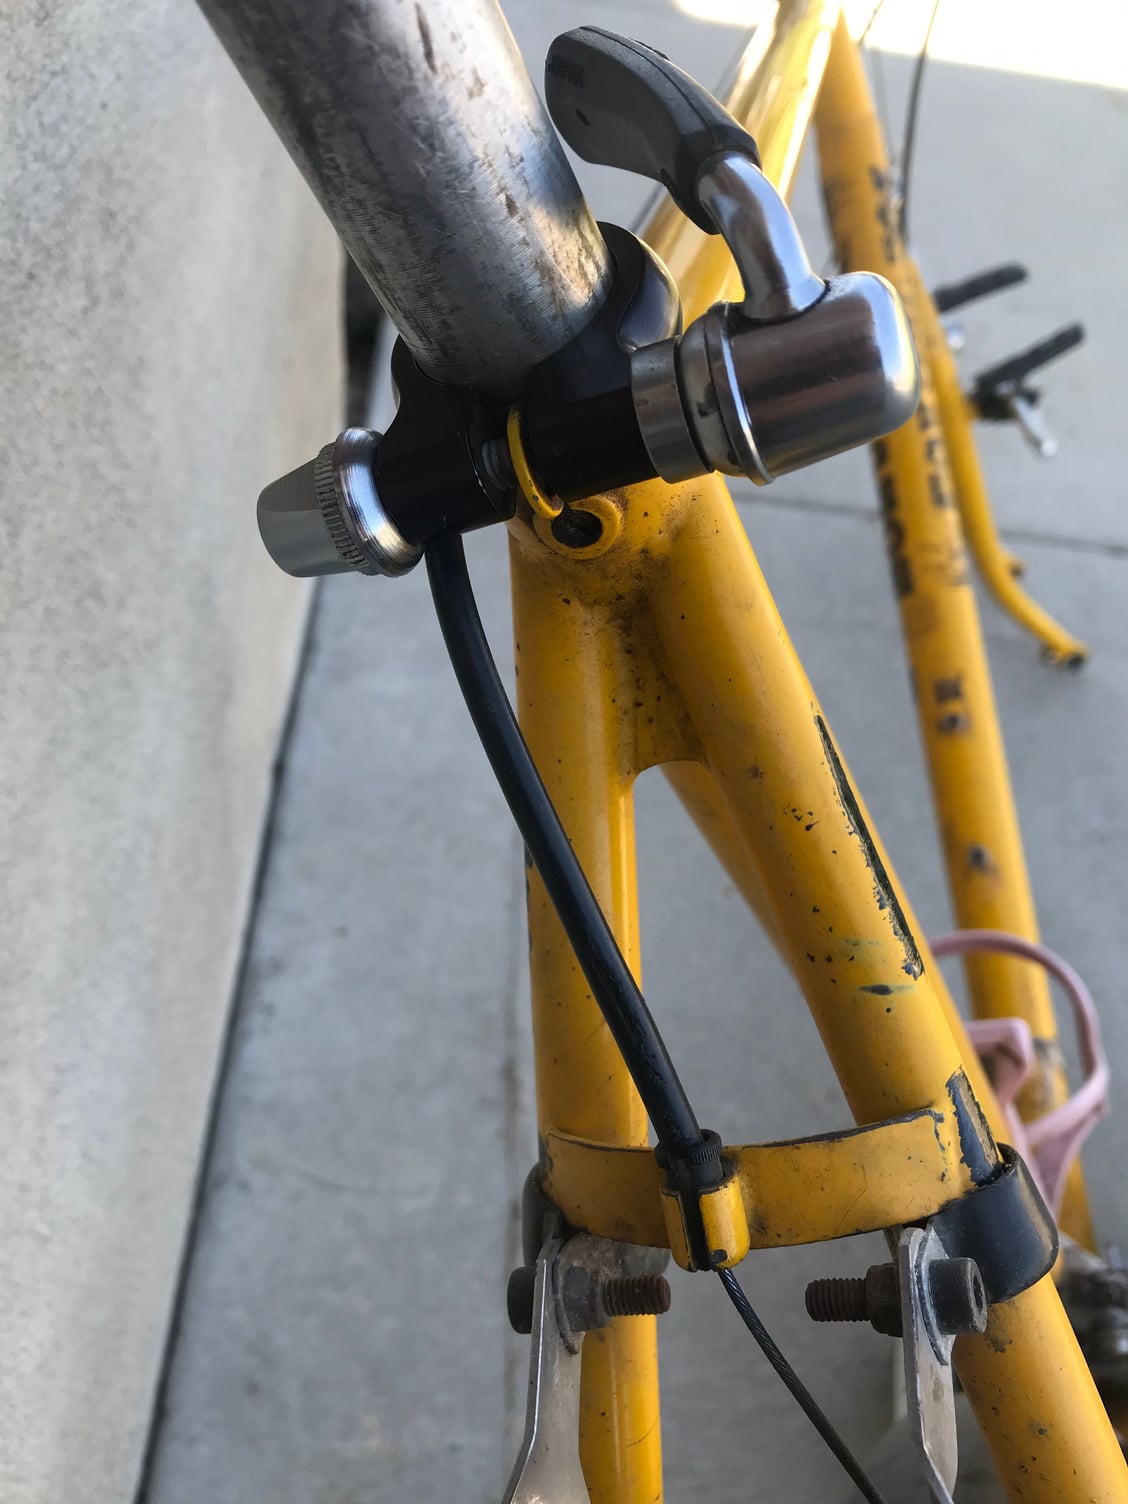
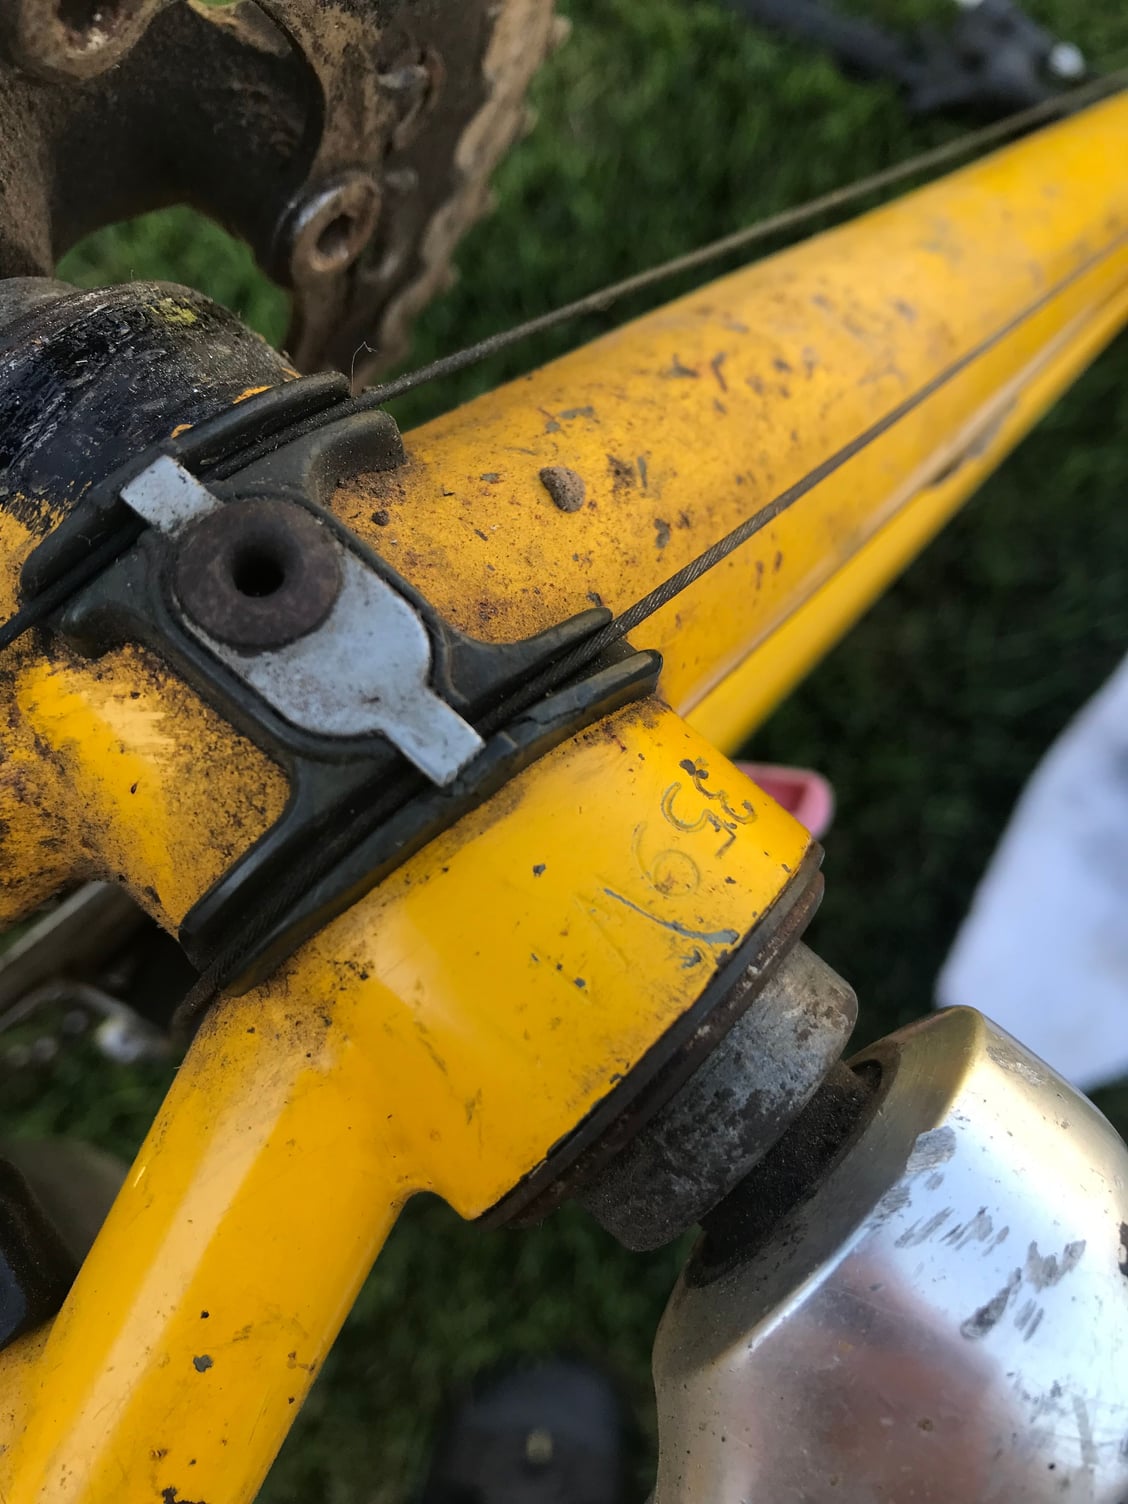
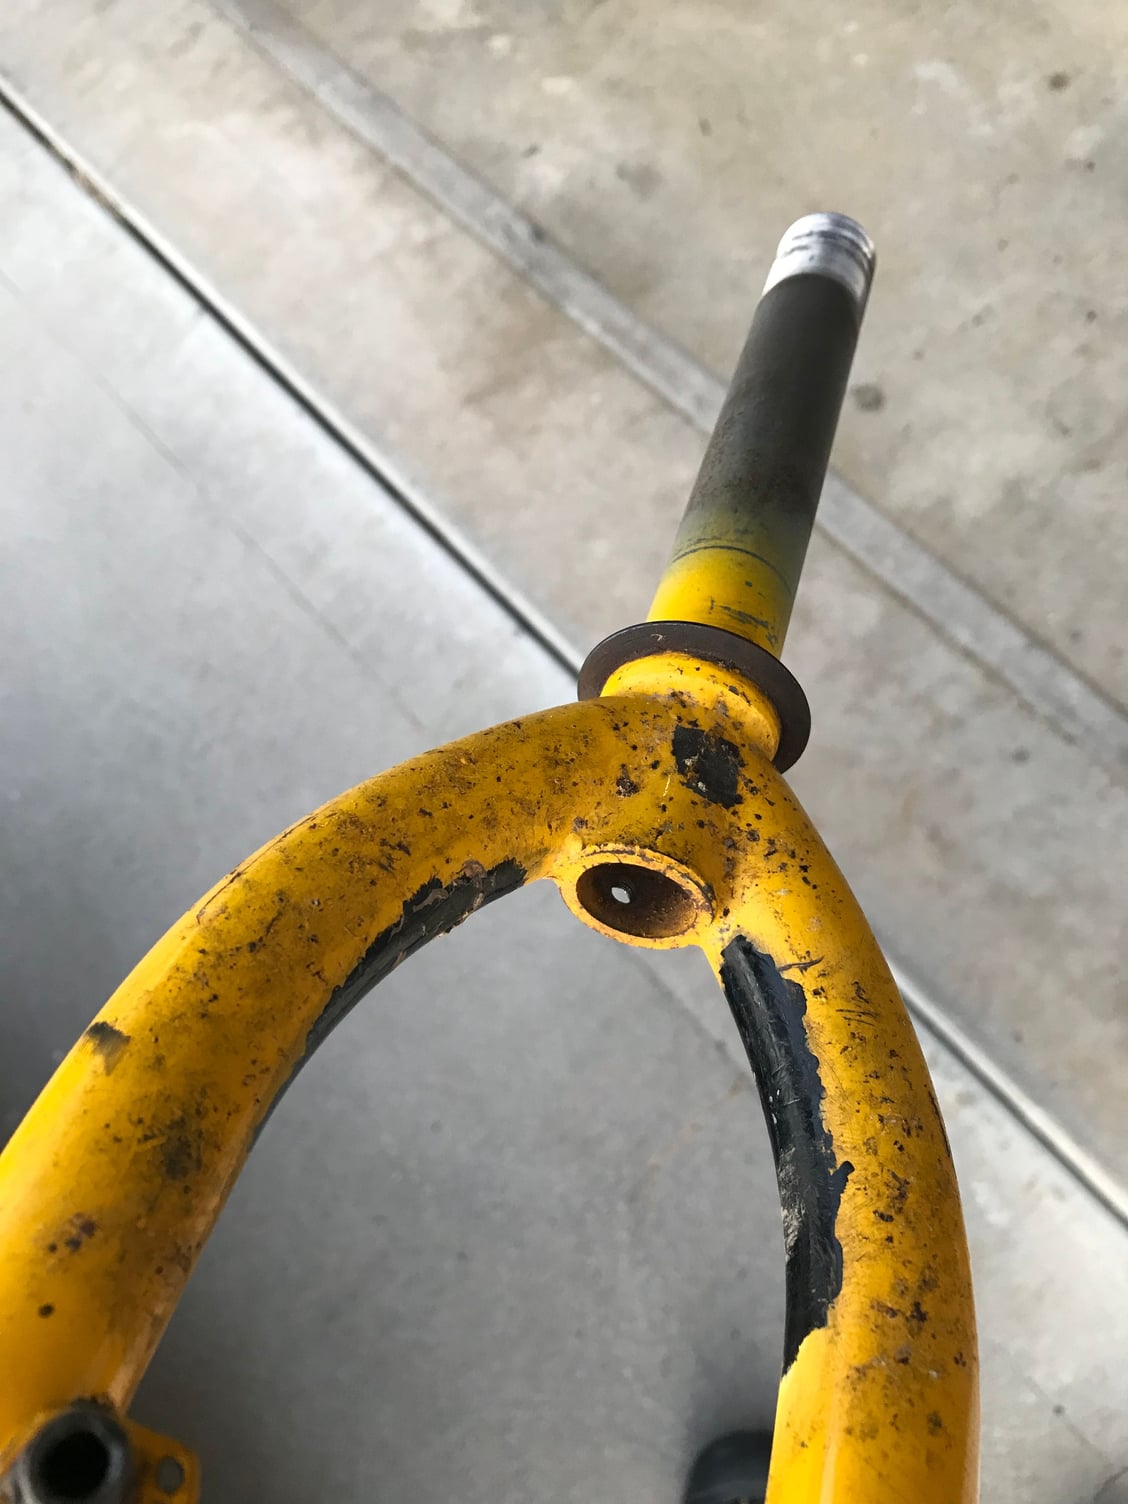
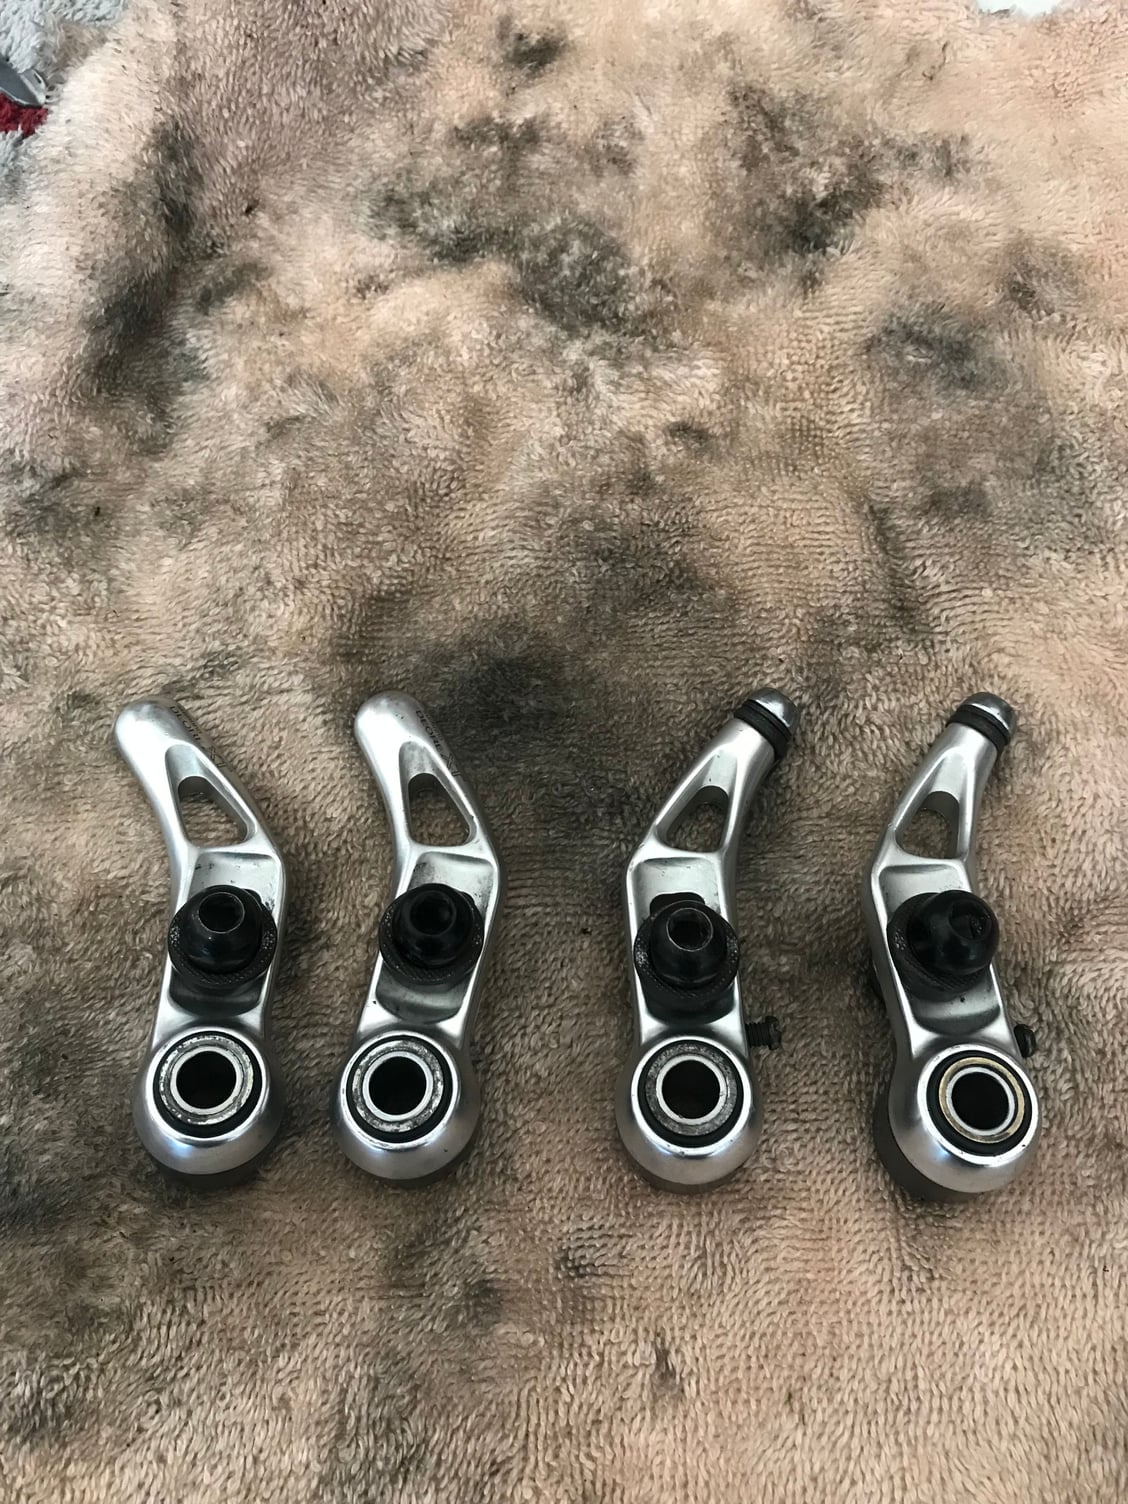
So moving forward, (both literally and figuratively), the fork looks okay except for a little damage to the threads:
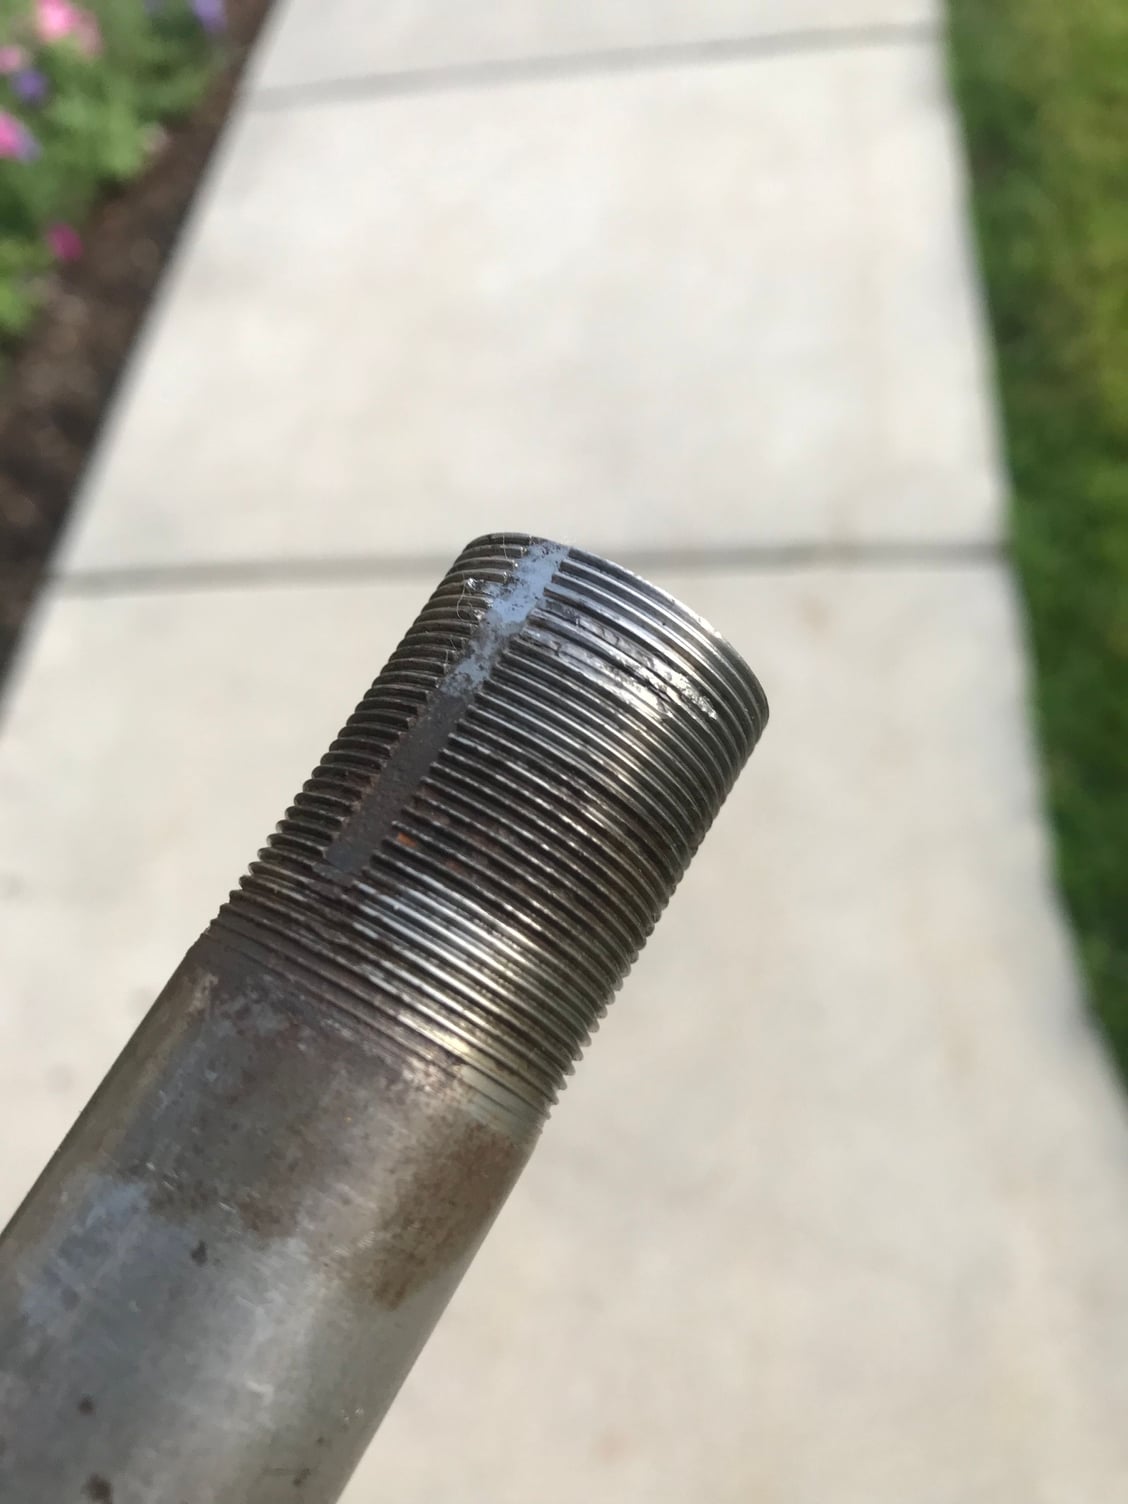
This comes from the tang on the washer between the locknut and the adjustable cup. When the locknut gets tightened, sometimes the washer spins as well. The tang slips out of the groove, and if not caught, proceeds to tear up the threads. I usually file off that tang to prevent this from happening. Or use aluminum washers. Makes adjusting the headset a little more finicky, but worth the effort. So - what to do about it? Not much to do but run a triangular jewelers file through the threads, I guess. Ultimately, I’d like to source a nice Tange Switchblade fork:
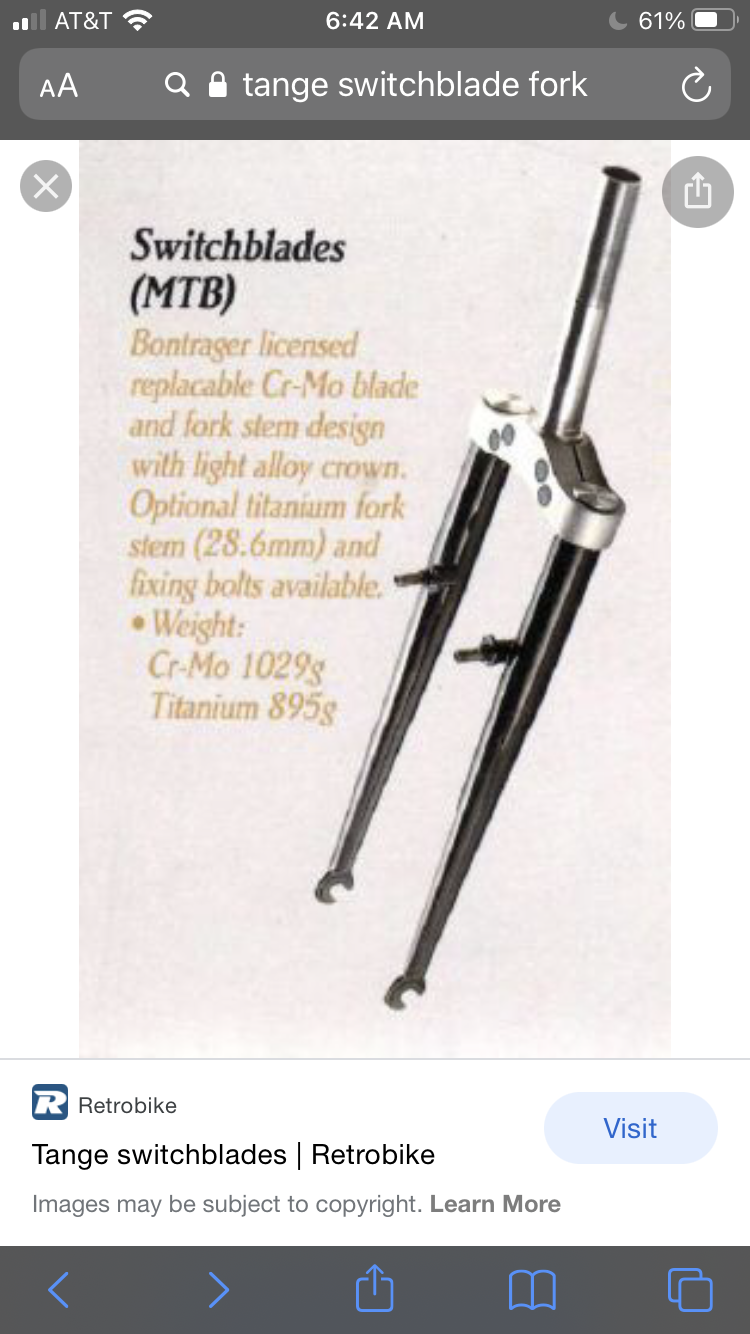
I’ve actually got a NOS switchblade crown and 1” steer tube, just need to source (or fabricate) some legs:
This comes from the tang on the washer between the locknut and the adjustable cup. When the locknut gets tightened, sometimes the washer spins as well. The tang slips out of the groove, and if not caught, proceeds to tear up the threads. I usually file off that tang to prevent this from happening. Or use aluminum washers. Makes adjusting the headset a little more finicky, but worth the effort. So - what to do about it? Not much to do but run a triangular jewelers file through the threads, I guess. Ultimately, I’d like to source a nice Tange Switchblade fork:
I’ve actually got a NOS switchblade crown and 1” steer tube, just need to source (or fabricate) some legs:
07-18-21, 06:52 AM
#19
Senior Member
Thread Starter

Don’t know what happened there…
Anyway, if someone’s got a pair of legs without a crown, or even a full fork, PM me please. For now I’ll just stick with the original fork.
I really like that the original crown has a threaded hole on the back:
Seems so much cleaner than a through hole although it probably drives the cost of manufacture up a bit. Part of what makes it a Fat…
Stay tuned!
07-18-21, 11:31 AM
#20
Senior Member
Thread Starter
It’s amazing what a lick of lemon furniture polish will do, isn’t it, Gromit? To paraphrase Wallace & Gromit….
Dirty on top; clean on bottom
Dirty on top; clean on bottom
07-18-21, 05:13 PM
#21
Senior Member
Thread Starter
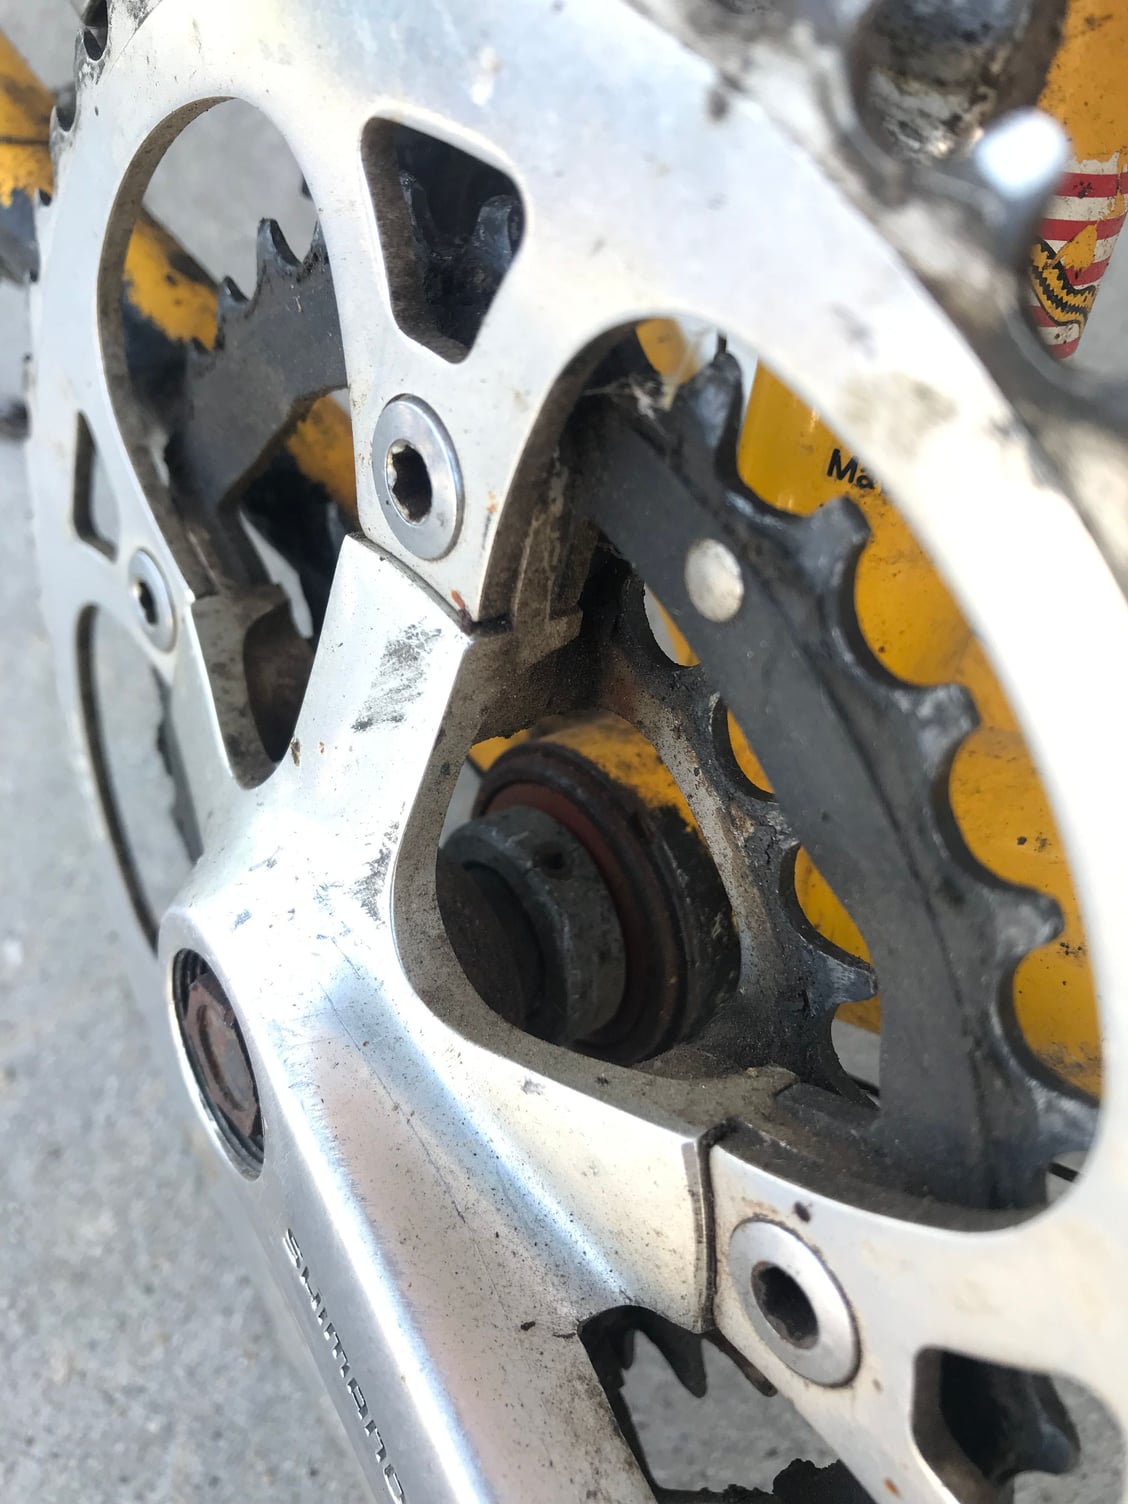
More cleaning done - I’m amazed at how grimy this pig really is. Cranks before and after:
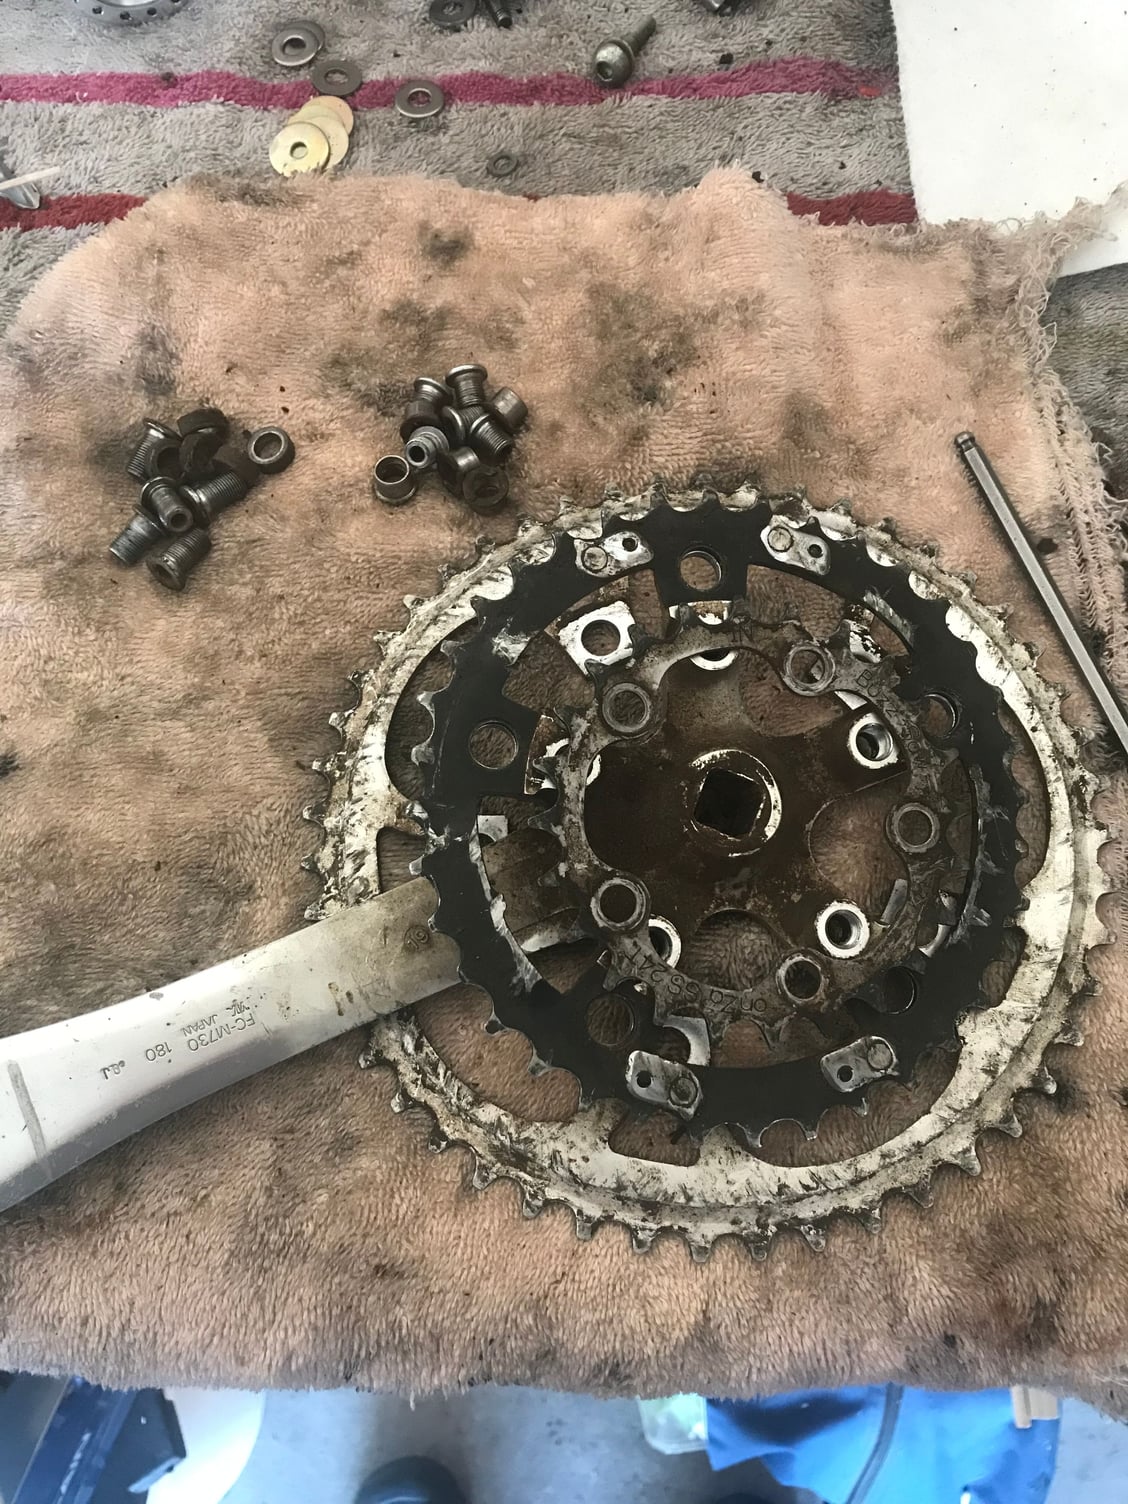
Before
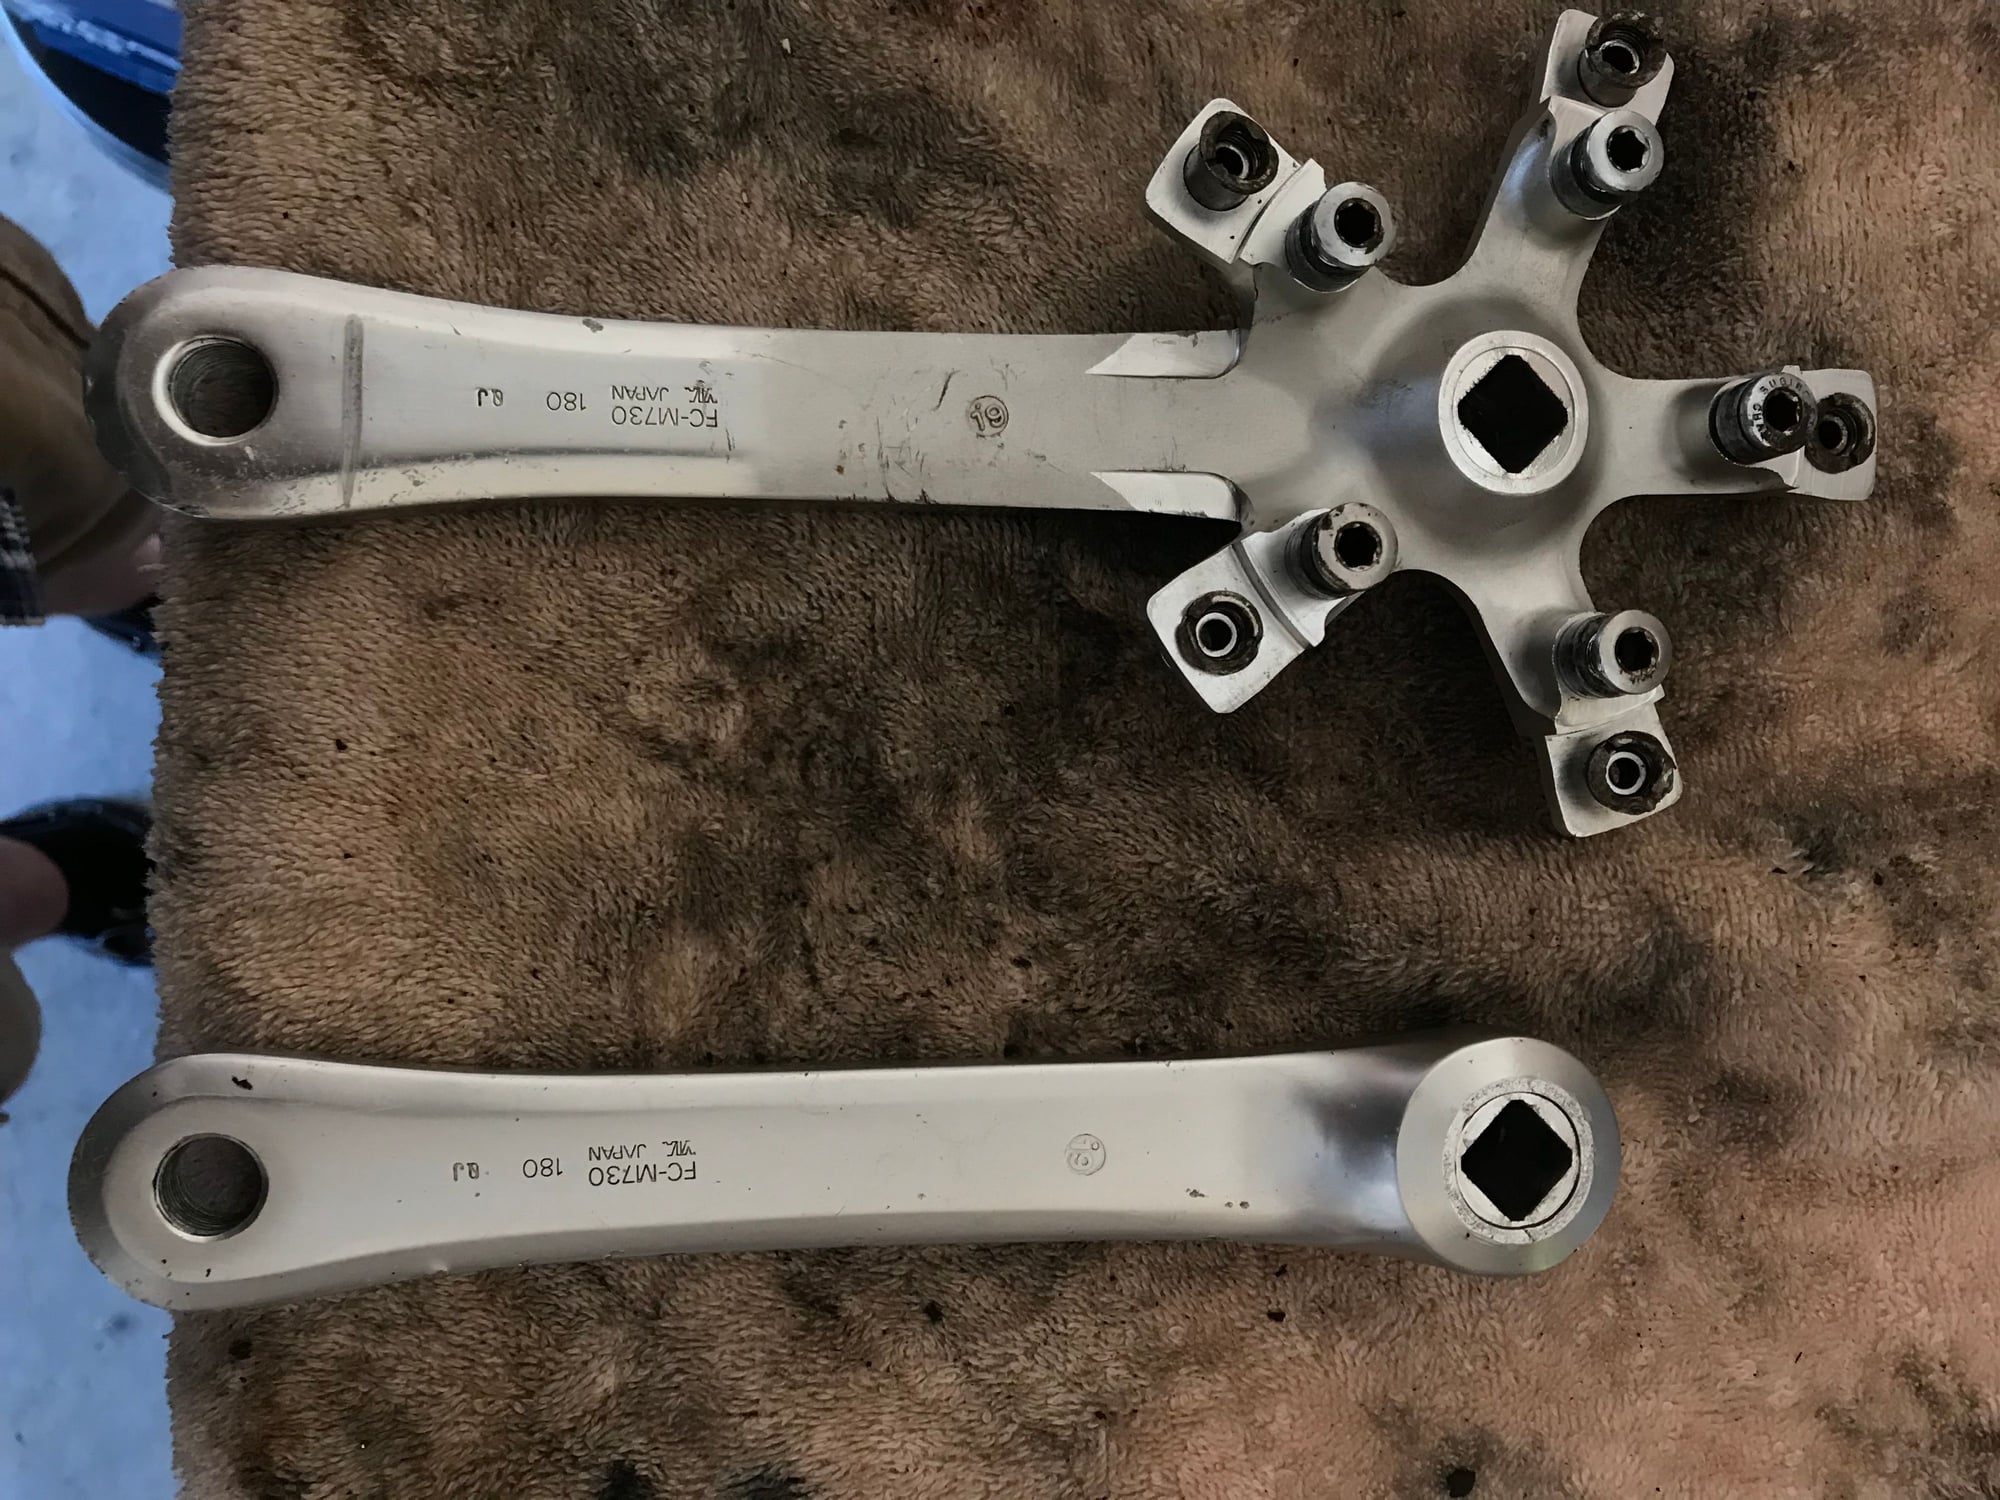
After
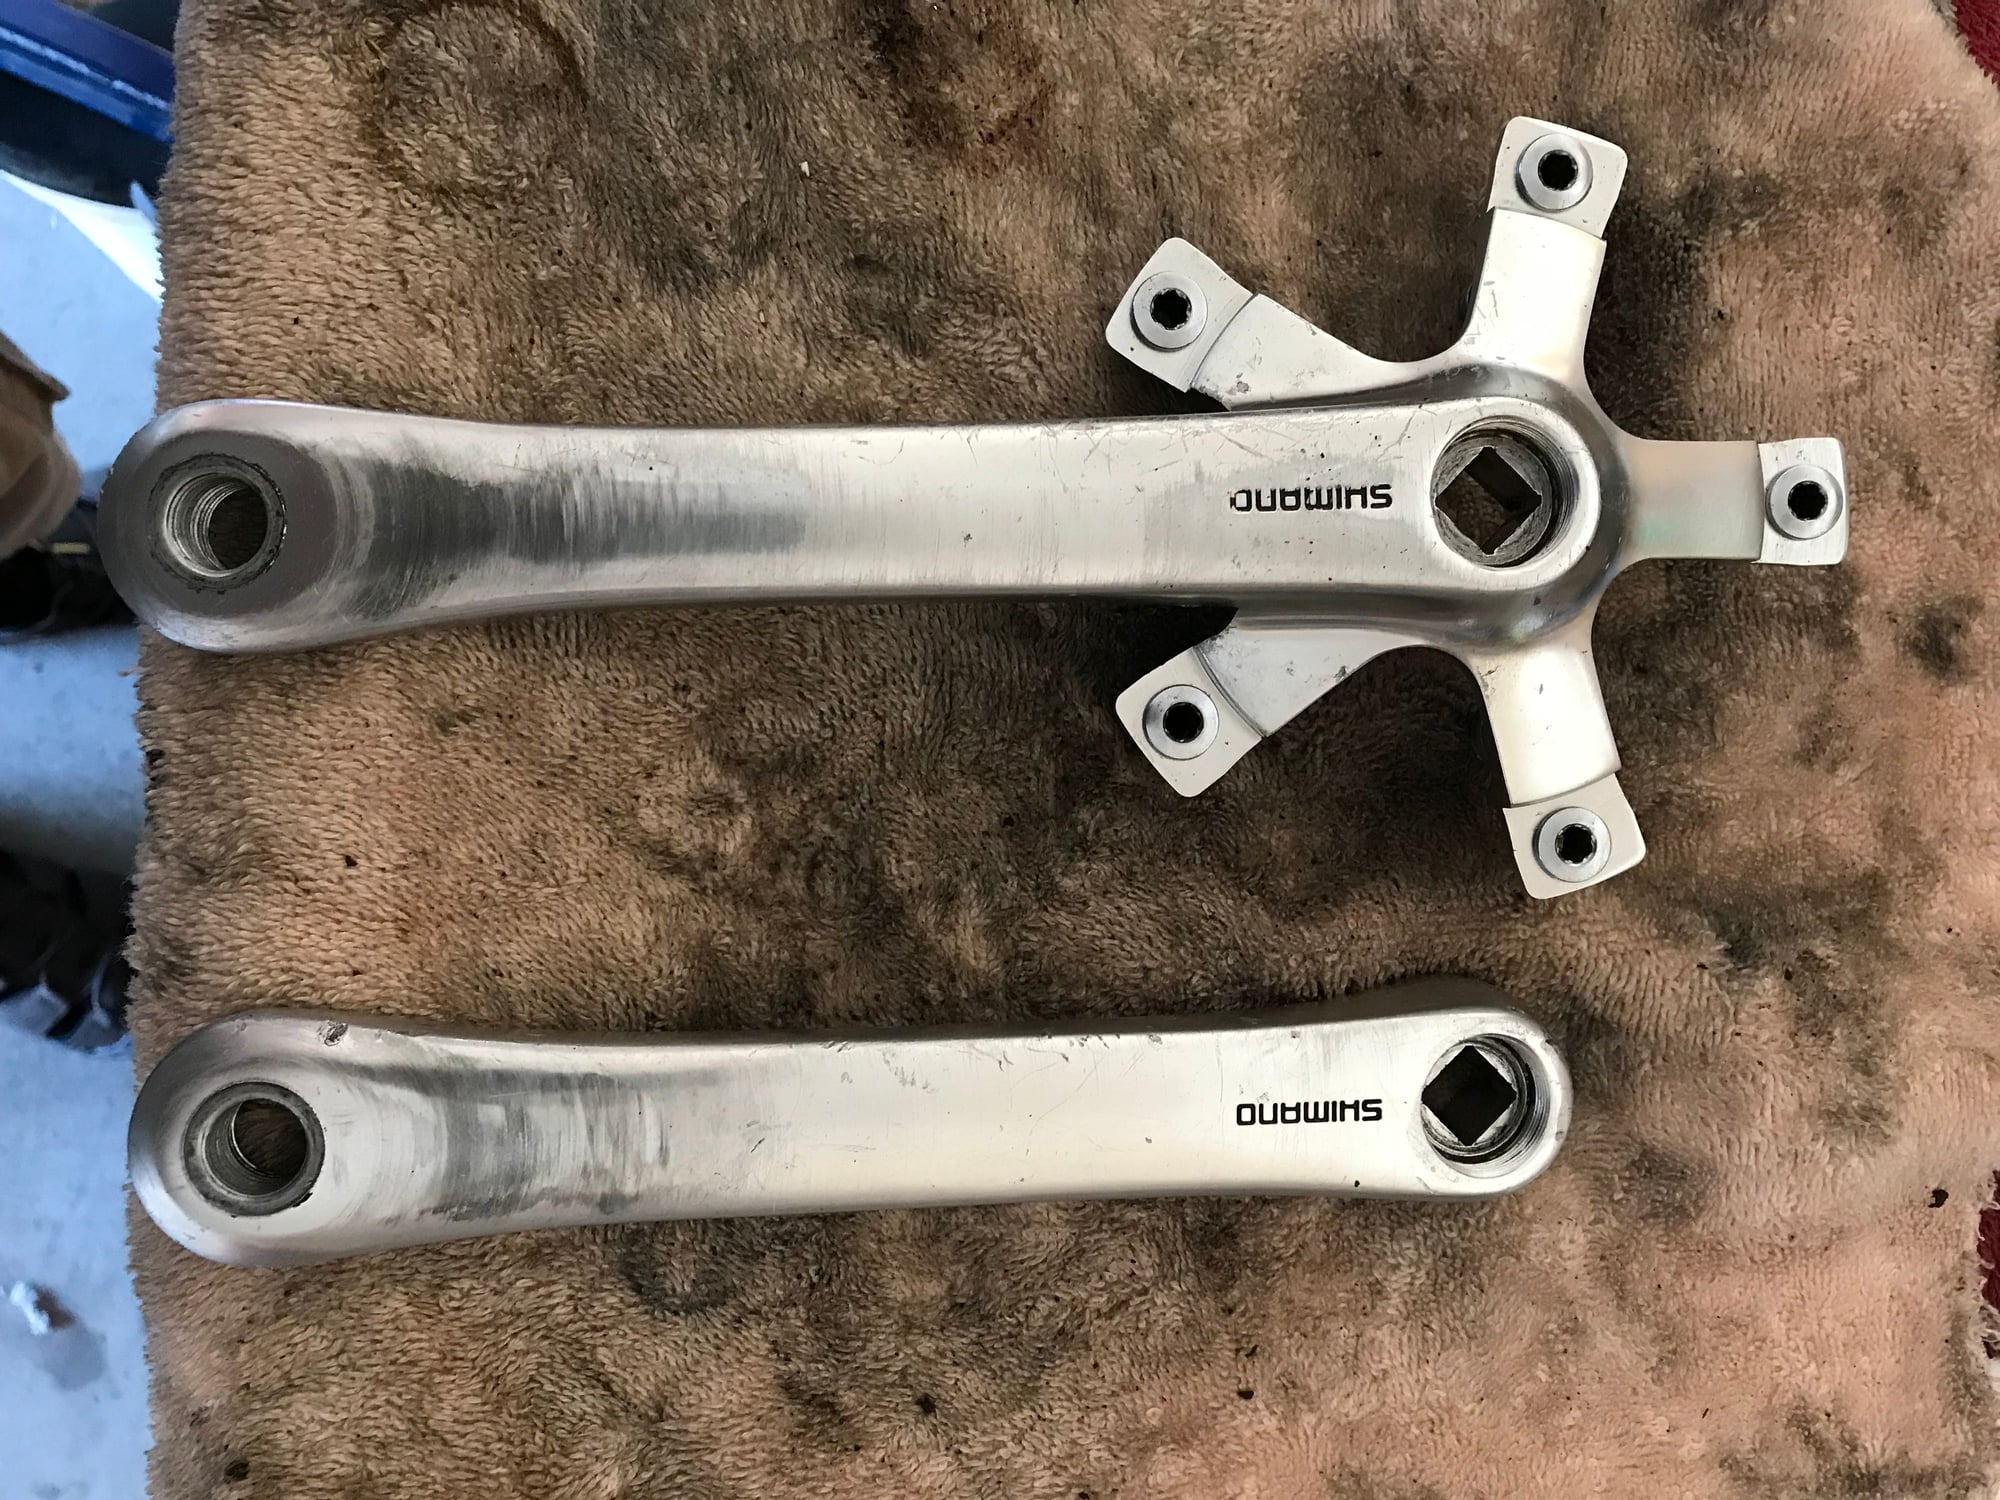
After
On the other hand, I always like a drivetrain covered in dried up oil and dirty grime. It acts to protect the goods beneath, and usually comes off pretty easily. I cut my bike mechanic teeth in a small shop in Colorado Springs called Pedal Revolution, and I learned there that lemon furniture polish is the best thing for cleaning bikes because it doesn’t affect decals and lithography inks. So I’ve always used it and it’s always delivered for me.
So there are nicks and dings and scrapes on all the parts I’ve cleaned so far. For about a New York minute I was tempted to try and polish them all out. But then you lose the patina, and character, of the whole. Oftentimes on my bikes I’ll see a ding or a gouge or a scrape and am reminded of the ride I was on when it happened. The frame is just too ugly to live with so it’ll get repainted but the parts will carry their scars with pride.
Patina or character is different from serious damage, and my biggest concern turned out to be a false alarm. I took a dremel with a grinding stone to the chainstay gouge just to see how bad it was. Turns out it doesn’t go through the tube, which downgrades the emergency to just an annoyance:
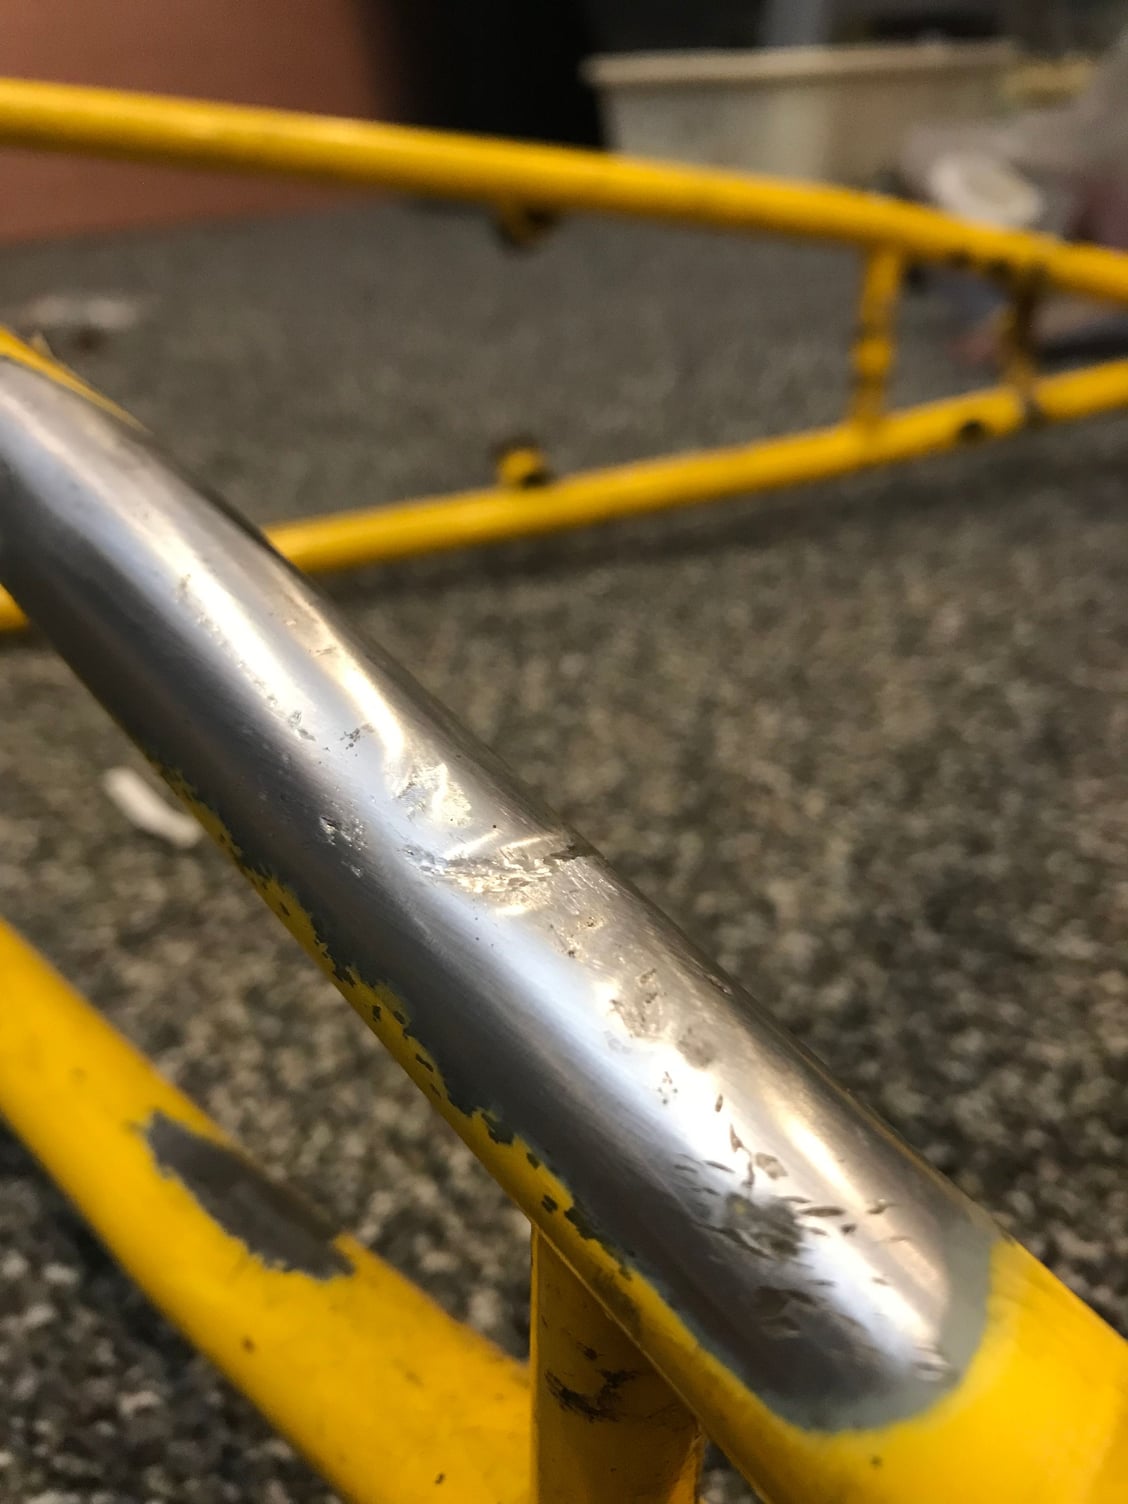
I think I’ll just have it brazed to fill the dents and be on my merry way.
Speaking of dents, I did find a minor one on the bottom of the down tube:
That’s the patina I’m talking about!
So my plan of action going forward will be to get this pig brazed, build it up, and ride it for a while. Just to, y‘know, get acquainted with it. Do some commuting, around towning, jump a few curbs, and run down a few potholes. Maybe even take some fire road rides (oh wait, that’s called gravel grinding now) just to feel out that “east coast feel” the magazines used to rave about.
Before
After
After
On the other hand, I always like a drivetrain covered in dried up oil and dirty grime. It acts to protect the goods beneath, and usually comes off pretty easily. I cut my bike mechanic teeth in a small shop in Colorado Springs called Pedal Revolution, and I learned there that lemon furniture polish is the best thing for cleaning bikes because it doesn’t affect decals and lithography inks. So I’ve always used it and it’s always delivered for me.
So there are nicks and dings and scrapes on all the parts I’ve cleaned so far. For about a New York minute I was tempted to try and polish them all out. But then you lose the patina, and character, of the whole. Oftentimes on my bikes I’ll see a ding or a gouge or a scrape and am reminded of the ride I was on when it happened. The frame is just too ugly to live with so it’ll get repainted but the parts will carry their scars with pride.
Patina or character is different from serious damage, and my biggest concern turned out to be a false alarm. I took a dremel with a grinding stone to the chainstay gouge just to see how bad it was. Turns out it doesn’t go through the tube, which downgrades the emergency to just an annoyance:
I think I’ll just have it brazed to fill the dents and be on my merry way.
Speaking of dents, I did find a minor one on the bottom of the down tube:
That’s the patina I’m talking about!
So my plan of action going forward will be to get this pig brazed, build it up, and ride it for a while. Just to, y‘know, get acquainted with it. Do some commuting, around towning, jump a few curbs, and run down a few potholes. Maybe even take some fire road rides (oh wait, that’s called gravel grinding now) just to feel out that “east coast feel” the magazines used to rave about.
07-21-21, 07:46 PM
#22
Senior Member
Thread Starter
New bottom bracket bearings came in the mail today - $10 for a pack of 4 from Amazon:
Came with the retaining clips, but I suspect I could have gotten away with a flanged bearing as well. 5/8” bore x 1-3/8” OD x 7/16” thickness, just like the originals. They were listed as kart bearings. Now to get some locking collars…
Meanwhile the frame is off to the maintenance shop at work, patiently waiting it’s turn under the hands of our resident ex-air force welder for some brass filler work. Should have it back in hand next week…I’m waiting much less patiently!
 07-25-21, 09:23 AM
#25
Senior Member
Thread Starter
Some new chainrings from the bike collective:
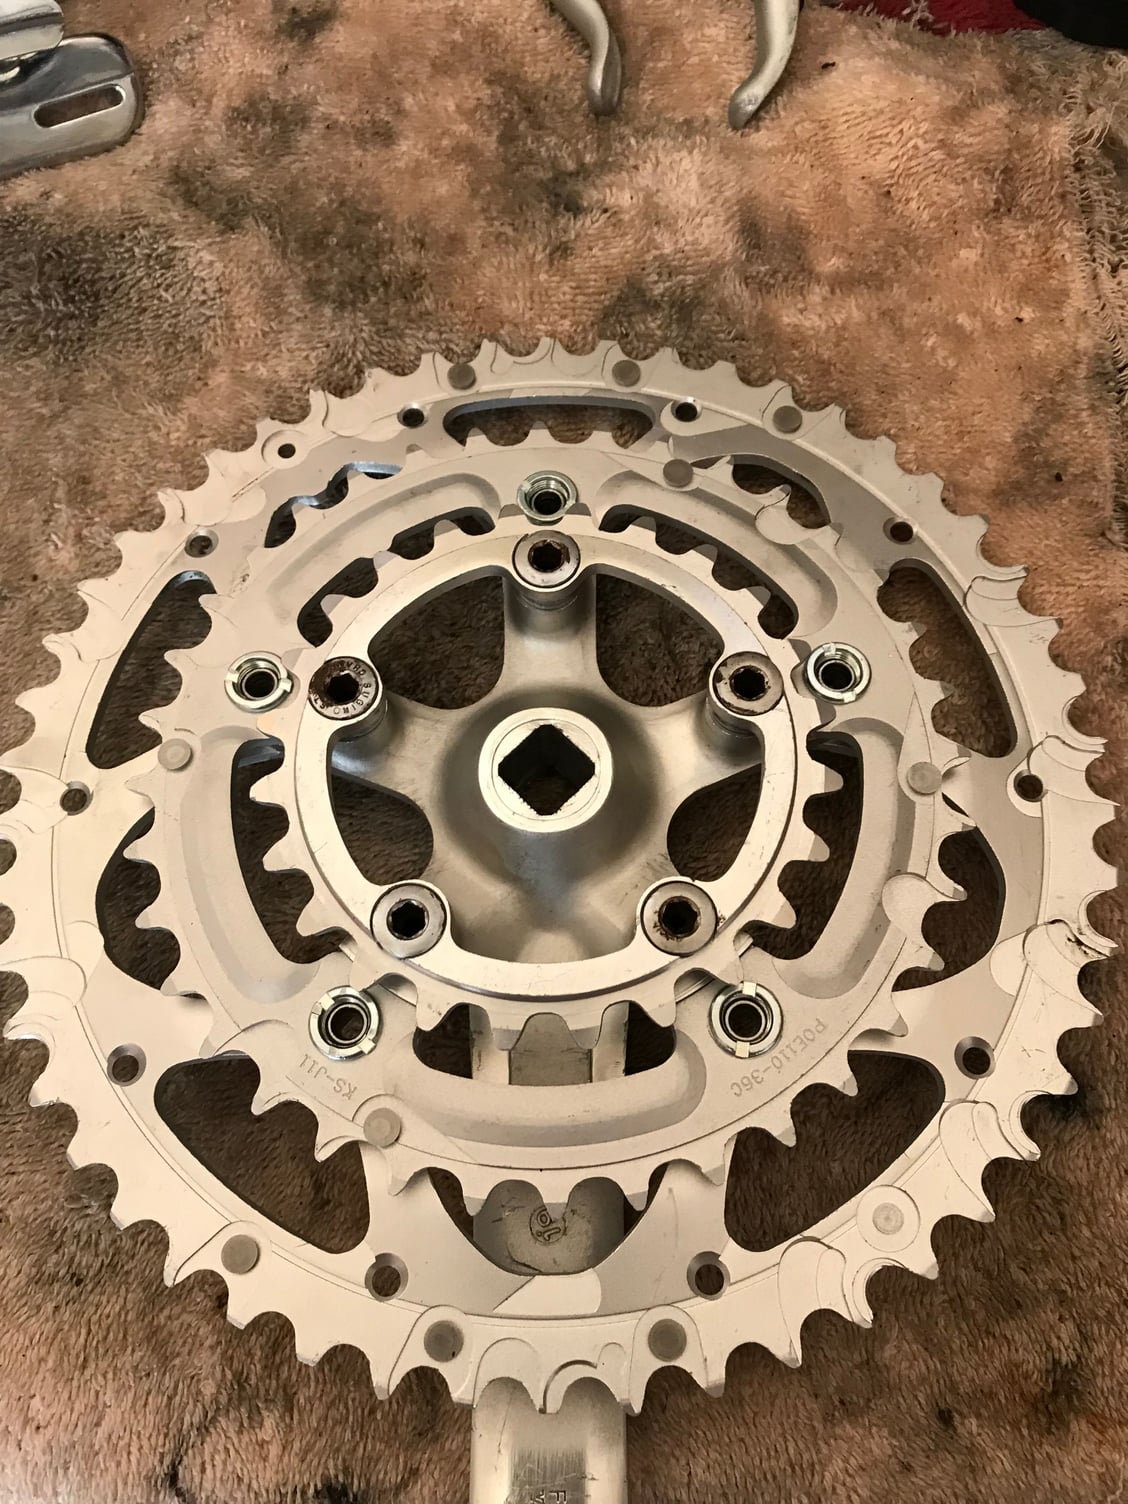

I know the pin that catches the chain is misaligned; these came off a Sugino crankset that has the chainring bolt hidden behind the crank arm. But a set of new rings for a measly $10 was too good to pass up!
24-36-50 is a little tall but I’ve run 24-36-48 without an issue on other bikes so we’ll see how this goes…