


Witness Marks Spoke Holes
 04-27-21, 07:48 PM
#1
Junior Member
Thread Starter
Witness Marks Spoke Holes
Apologies if this seems like a silly post.
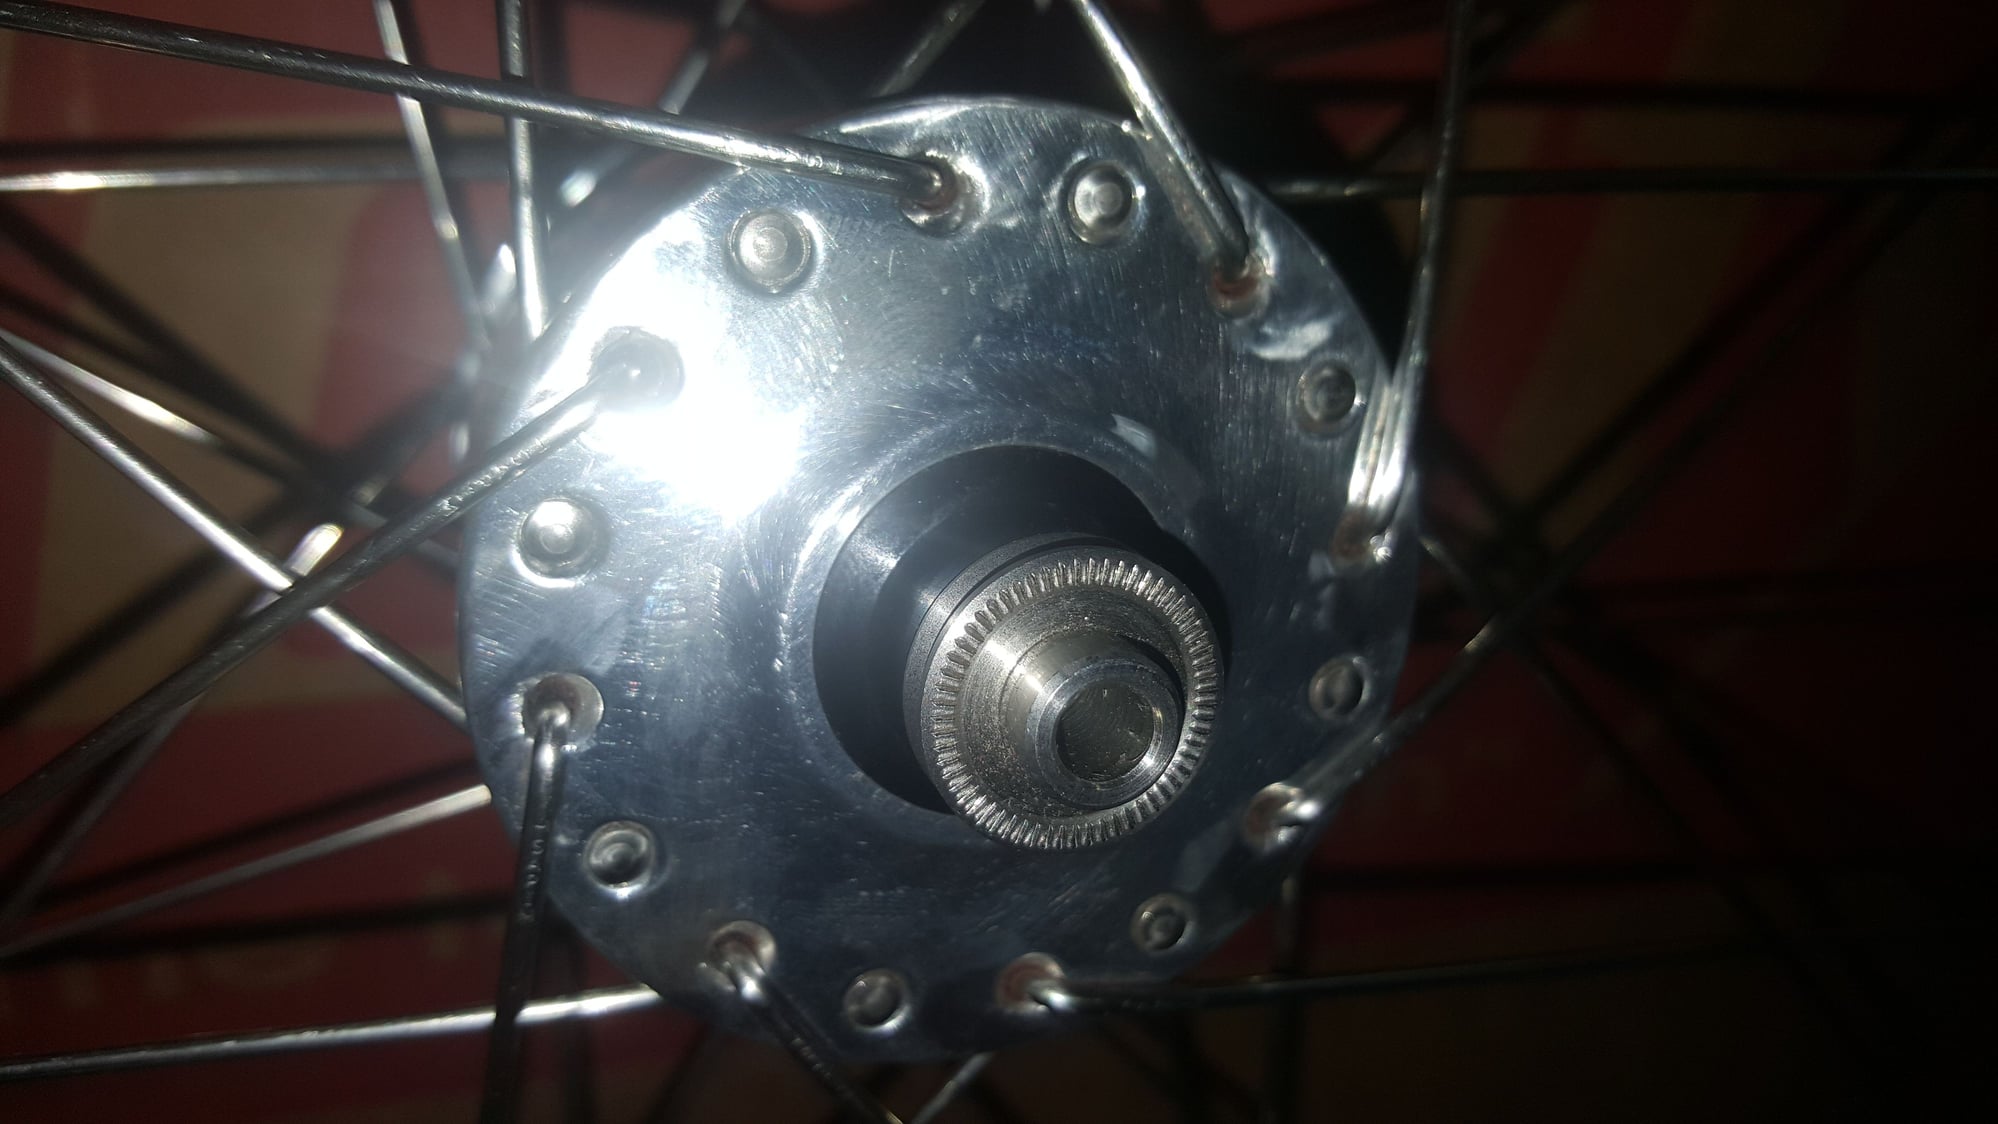
I had this hub laced before and it had some deep witness marks that were showing on this build. To my chagrin, I'm hung up on aesthetics . . . badly. I thought it would've been a good idea to dremel those scars, but it seems that was a big 'oof'. Guess I don't have that great an imagination. How would you go about polishing this so it dosen't become worse? Or would anyone want commission work?
Edit: Realized I cant attach photos.
Last edited by Ebedeley; 04-27-21 at 07:59 PM.
 04-27-21, 08:04 PM
#2

Senior Member
Join Date: Feb 2012
Location: Rochester, NY
Posts: 18,089
Bikes: Stewart S&S coupled sport tourer, Stewart Sunday light, Stewart Commuting, Stewart Touring, Co Motion Tandem, Stewart 3-Spd, Stewart Track, Fuji Finest, Mongoose Tomac ATB, GT Bravado ATB, JCP Folder, Stewart 650B ATB
Mentioned: 0 Post(s)
Tagged: 0 Thread(s)
Quoted: 4206 Post(s)
Liked 3,870 Times
in
2,314 Posts
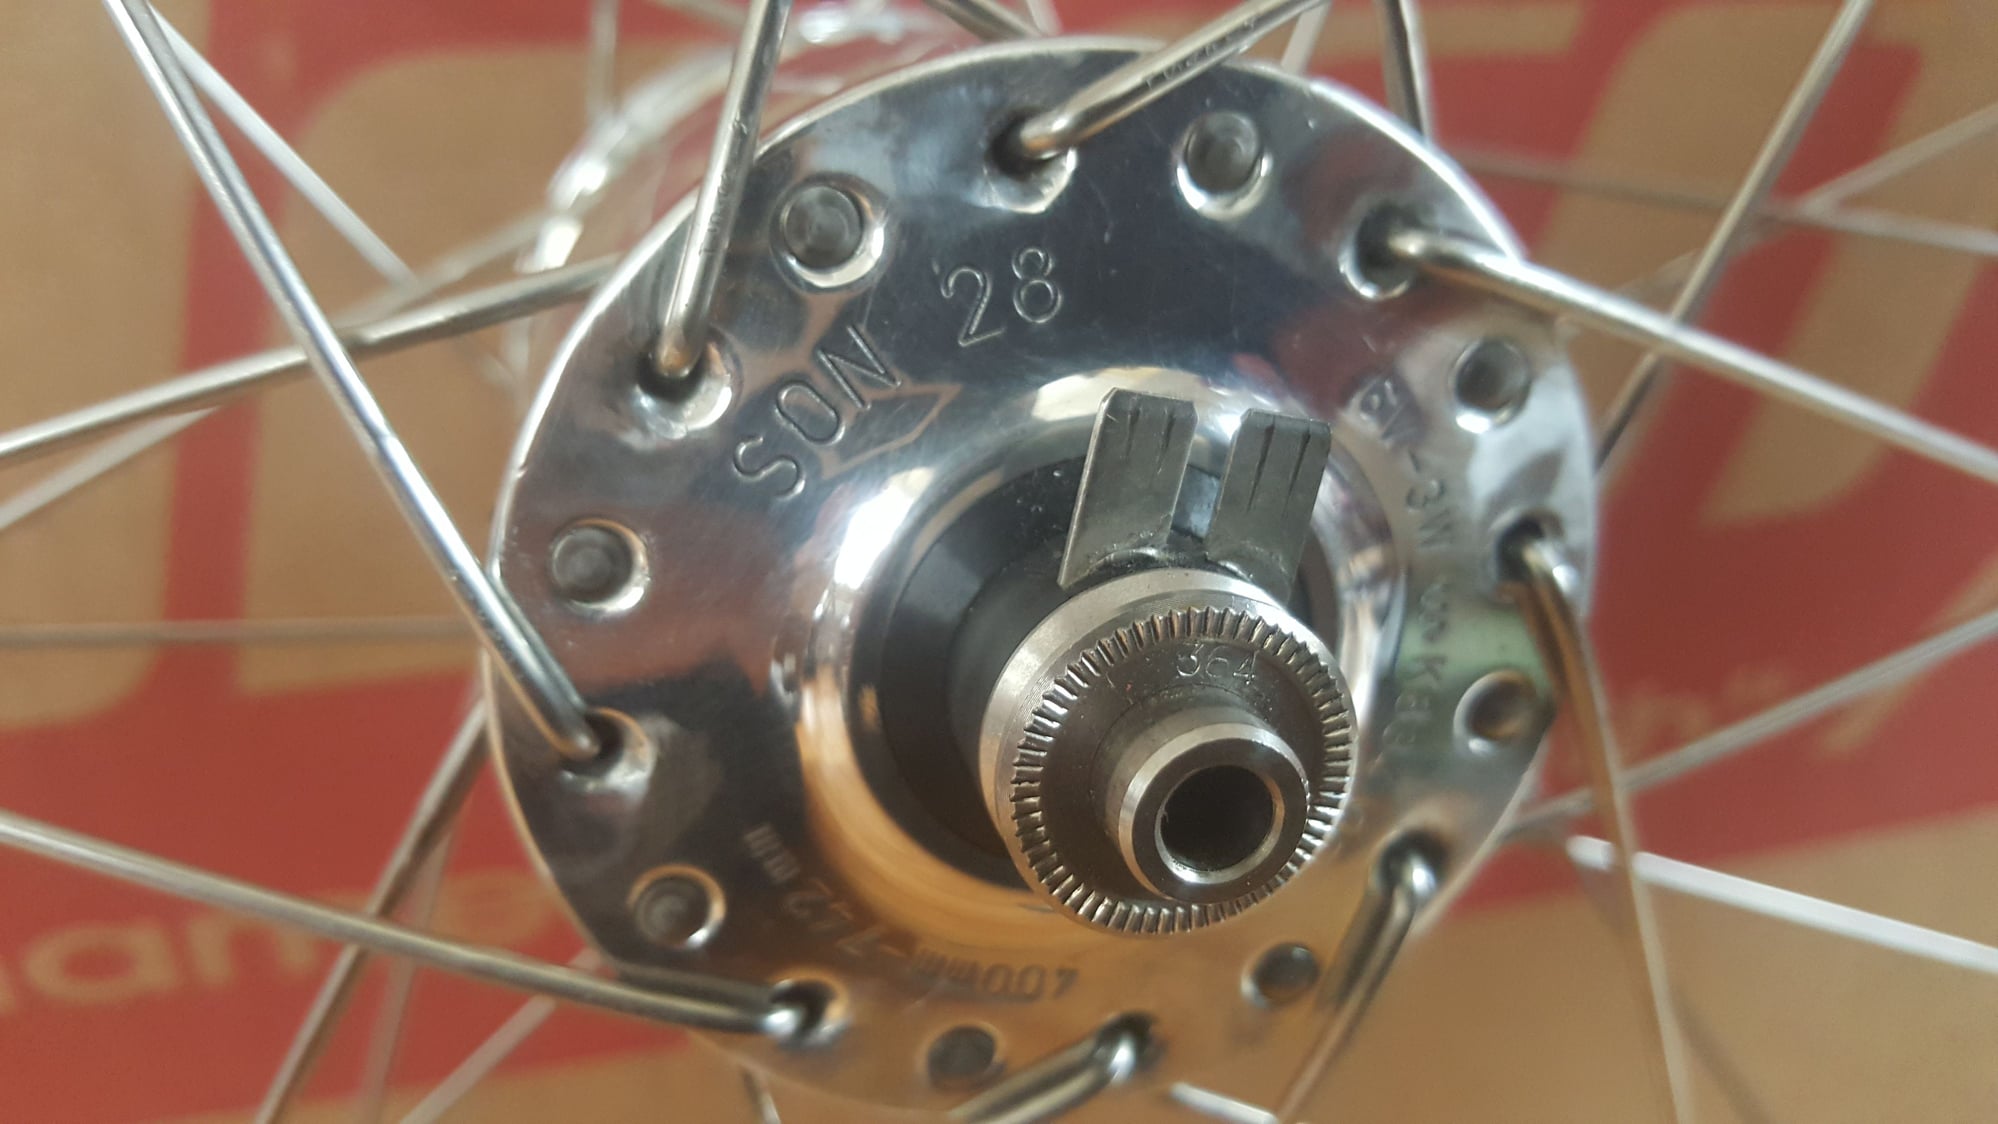
The usual is to match the spoke bedding marks on the flange with the new lacing, pattern and spoke radiating directions. This both hides the old flange wear somewhat and decreases the flange from getting even more "stressed out". We can't see how much spoke wear the flange had of how much material removal you've done (or I think you've done, the post was a bit les then specific in this regard). in another post you can include photos. they would help us understand your situation far better.
As to polishing- that will be dependent of what was done and how much. Polishing doesn't really remove much material beyond the lowest feature. polishing done well will reduce surface stress risers but also reduce ultimate strength. Andy
As to polishing- that will be dependent of what was done and how much. Polishing doesn't really remove much material beyond the lowest feature. polishing done well will reduce surface stress risers but also reduce ultimate strength. Andy
__________________
AndrewRStewart
AndrewRStewart
04-27-21, 08:15 PM
#3
Senior Member
Join Date: Feb 2012
Location: Rochester, NY
Posts: 18,089
Bikes: Stewart S&S coupled sport tourer, Stewart Sunday light, Stewart Commuting, Stewart Touring, Co Motion Tandem, Stewart 3-Spd, Stewart Track, Fuji Finest, Mongoose Tomac ATB, GT Bravado ATB, JCP Folder, Stewart 650B ATB
Mentioned: 0 Post(s)
Tagged: 0 Thread(s)
Quoted: 4206 Post(s)
Liked 3,870 Times
in
2,314 Posts
The admin frowns of filler posts that add nothing to the story but try to end run around the goal of a discussion with each post contributing. Andy
__________________
AndrewRStewart
AndrewRStewart
04-27-21, 08:20 PM
#4
Junior Member
Thread Starter
The system says I can't attach a photo unless I have 10 posts. I am new as of today, and have been inactive for a few years, so a bit thrown off why my post 'counter' was reset. I do wish to attach a photo of my hub. Apologies for spamming this way.
04-27-21, 08:23 PM
#5
Junior Member
Thread Starter
Finally I can visually show you what I have done. Sorry about the earlier post, a crummy workaround to that limitation.
I had Dremeled the witness marks that were deeply gouged, but I imagined it to have turned out differently.

I had Dremeled the witness marks that were deeply gouged, but I imagined it to have turned out differently.
04-27-21, 09:19 PM
#6
Senior Member
Join Date: Feb 2012
Location: Rochester, NY
Posts: 18,089
Bikes: Stewart S&S coupled sport tourer, Stewart Sunday light, Stewart Commuting, Stewart Touring, Co Motion Tandem, Stewart 3-Spd, Stewart Track, Fuji Finest, Mongoose Tomac ATB, GT Bravado ATB, JCP Folder, Stewart 650B ATB
Mentioned: 0 Post(s)
Tagged: 0 Thread(s)
Quoted: 4206 Post(s)
Liked 3,870 Times
in
2,314 Posts
I can see why you want to save that hub. Mu suggestion is to keep the spoke tension on the lower end of acceptable range to limit future stress. Ride it and monitor it periodically. Andy
__________________
AndrewRStewart
AndrewRStewart
Likes For Andrew R Stewart:
04-28-21, 05:11 AM
#7
Senior Member
Join Date: Oct 2013
Location: Mich
Posts: 7,391
Bikes: RSO E-tire dropper fixie brifter
Mentioned: 0 Post(s)
Tagged: 0 Thread(s)
Quoted: 6 Post(s)
Liked 2,972 Times
in
1,918 Posts
using your dremel with a cotton attachment drum & a medium grit rubbing compound, work the surface carefully at a low RPM speed. Once the surface is "uniform" looking, wipe up as much of the compound & apply finishing polish to the surface while using the low RPM dremel speed. After you've achieved the aesthetically pleasing surface finish, clean up the surface from both products previously applied & apply detailing wax by hand. After working in the wax, wipe away the remnant wax to leave behind the final surface finish achieved. Might take a while to do, so a lot a solid block of time dedicated to the task at hand.
__________________
-Oh Hey!
-Oh Hey!
Likes For Troul:
04-28-21, 09:06 AM
#8
Junior Member
Thread Starter
using your dremel with a cotton attachment drum & a medium grit rubbing compound, work the surface carefully at a low RPM speed. Once the surface is "uniform" looking, wipe up as much of the compound & apply finishing polish to the surface while using the low RPM dremel speed. After you've achieved the aesthetically pleasing surface finish, clean up the surface from both products previously applied & apply detailing wax by hand. After working in the wax, wipe away the remnant wax to leave behind the final surface finish achieved. Might take a while to do, so a lot a solid block of time dedicated to the task at hand.
04-28-21, 01:45 PM
#9
Junior Member
Thread Starter
Re: Troul
Not the final results, although I'm glad how it turned out. Spent about 3hrs today polishing with medium grit. Gonna have to go to the store and get Flitz polish to finish the next step and buff the remaining streaks, but so far the results are much better than before -- and it works for anyone who might find this. Thanks for your input.
Not the final results, although I'm glad how it turned out. Spent about 3hrs today polishing with medium grit. Gonna have to go to the store and get Flitz polish to finish the next step and buff the remaining streaks, but so far the results are much better than before -- and it works for anyone who might find this. Thanks for your input.
Likes For Ebedeley:
04-28-21, 01:49 PM
#10
Senior Member
Join Date: Oct 2013
Location: Mich
Posts: 7,391
Bikes: RSO E-tire dropper fixie brifter
Mentioned: 0 Post(s)
Tagged: 0 Thread(s)
Quoted: 6 Post(s)
Liked 2,972 Times
in
1,918 Posts
Hardest part is dedicating the time to do it.
__________________
-Oh Hey!
-Oh Hey!
04-28-21, 02:05 PM
#11
Senior Member
Join Date: Jul 2013
Location: Nor-Cal
Posts: 3,767
Bikes: lots
Mentioned: 7 Post(s)
Tagged: 0 Thread(s)
Quoted: 1958 Post(s)
Liked 2,932 Times
in
1,489 Posts
Nice work OP!
