


How to make reproduction Vittoria hoods
 12-09-15, 06:28 PM
#1
Senior Member
Thread Starter

Join Date: Jun 2006
Location: NW Burbs, Chicago
Posts: 12,055
Mentioned: 201 Post(s)
Tagged: 0 Thread(s)
Quoted: 3015 Post(s)
Liked 3,804 Times
in
1,408 Posts
How to make reproduction Vittoria hoods
With all of the reproduction hoods on the market, I saw a gap, no Vittorria hoods. Probably because there are about eight people in the world who would want them.
Well I am one of the elite eight. :-p
And this stuff is easy for me, I like doing the process, so I borrowed some original Vittoria hoods from a friend to act as a pattern. The great part of this is that no damage occurs to the original part. And obviously, you can do this with any hood or other parts.
Please note you are seeing the first part off of the mold, which tends to be the worst. Also, I made no attempt to "improve" the original hood and its ugly parting line. Future parts off of the mold can be modified to be "pretty" and serve as a pattern for a new mold.
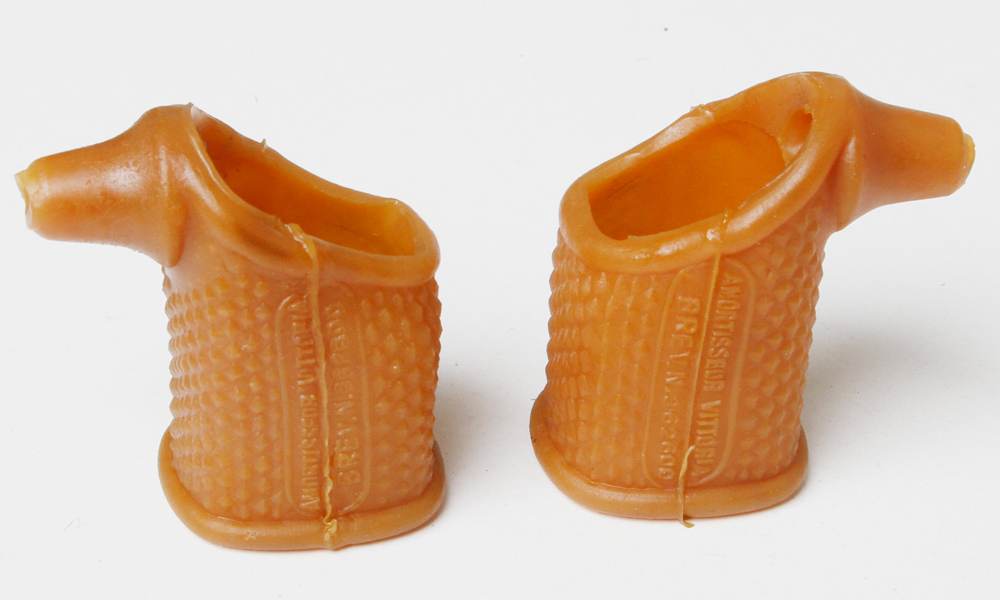
Vittoria hood, also known as a pattern
 Hood 001 by iabisdb, on Flickr
 Hood 002 by iabisdb, on Flickr
The Vittoria hood has the great advantage over other brands as its main core shape is a cylinder. I used a 1" diameter PE pipe with the ends eventually filled with Sculpey clay. Sculpey does not react with the silicone mold material whereas an oil-base clay will cause an adverse reaction. The cable routing core is a stainless rod which will also act as the sprue pattern.
 Hood 003 by iabisdb, on Flickr
 Hood 004 by iabisdb, on Flickr
A simple container made with 0.75" MDF and wood screws. A counter-sunk hole at the bottom receives the stainless rod for the pattern placement in the mold.
 Hood 005 by iabisdb, on Flickr
 Hood 006 by iabisdb, on Flickr
Silicone rubber and catalyst from Freeman supply. About a 35 Shore A.
 Hood 007 by iabisdb, on Flickr
Pattern release from Freeman Supply. Basically an aerosol navel jelly. Using a silicone pattern release with a silicone mold will cause an adverse reaction.
 Hood 008 by iabisdb, on Flickr
The vacuum pump on the left is the most expensive part of the process. I recommend a good one, goes fast. The vacuum chamber is just a metal pot, rubber sealing gasket, plexi lid so you can see in and an air hose nipple. Obviously air tight.
 Hood 009 by iabisdb, on Flickr
Mixing silicone rubber and catalyst. 10:1 ratio by weight.
 Hood 010 by iabisdb, on Flickr
Well I am one of the elite eight. :-p
And this stuff is easy for me, I like doing the process, so I borrowed some original Vittoria hoods from a friend to act as a pattern. The great part of this is that no damage occurs to the original part. And obviously, you can do this with any hood or other parts.
Please note you are seeing the first part off of the mold, which tends to be the worst. Also, I made no attempt to "improve" the original hood and its ugly parting line. Future parts off of the mold can be modified to be "pretty" and serve as a pattern for a new mold.
Vittoria hood, also known as a pattern
Hood 001 by iabisdb, on FlickrHood 002 by iabisdb, on FlickrThe Vittoria hood has the great advantage over other brands as its main core shape is a cylinder. I used a 1" diameter PE pipe with the ends eventually filled with Sculpey clay. Sculpey does not react with the silicone mold material whereas an oil-base clay will cause an adverse reaction. The cable routing core is a stainless rod which will also act as the sprue pattern.
Hood 003 by iabisdb, on FlickrHood 004 by iabisdb, on FlickrA simple container made with 0.75" MDF and wood screws. A counter-sunk hole at the bottom receives the stainless rod for the pattern placement in the mold.
Hood 005 by iabisdb, on FlickrHood 006 by iabisdb, on FlickrSilicone rubber and catalyst from Freeman supply. About a 35 Shore A.
Hood 007 by iabisdb, on FlickrPattern release from Freeman Supply. Basically an aerosol navel jelly. Using a silicone pattern release with a silicone mold will cause an adverse reaction.
Hood 008 by iabisdb, on FlickrThe vacuum pump on the left is the most expensive part of the process. I recommend a good one, goes fast. The vacuum chamber is just a metal pot, rubber sealing gasket, plexi lid so you can see in and an air hose nipple. Obviously air tight.
Hood 009 by iabisdb, on FlickrMixing silicone rubber and catalyst. 10:1 ratio by weight.
Hood 010 by iabisdb, on Flickr
 12-09-15, 06:31 PM
#2
Senior Member

Join Date: Nov 2014
Location: Eugene, Oregon, USA
Posts: 27,547
Mentioned: 217 Post(s)
Tagged: 0 Thread(s)
Quoted: 18378 Post(s)
Liked 4,512 Times
in
3,354 Posts
Wow, that looks like an ambitious project. I can't wait to see the finished product.
If it turns out... perhaps throw some up on E-Bay.
If it turns out... perhaps throw some up on E-Bay.
12-09-15, 06:33 PM
#3
Senior Member
Thread Starter
Join Date: Jun 2006
Location: NW Burbs, Chicago
Posts: 12,055
Mentioned: 201 Post(s)
Tagged: 0 Thread(s)
Quoted: 3015 Post(s)
Liked 3,804 Times
in
1,408 Posts
Mixed silicone. Note volume as when degassing, the volume will double.
 Hood 011 by iabisdb, on Flickr
Degassing the silicone in the vacuum chamber eliminates tiny bubbles in the silicone which will ruin the mold. Note the doubled volume.
 Hood 012 by iabisdb, on Flickr
The pattern was sprayed with the pattern release. Silicone was poured to the hood's original parting line.
 Hood 013 by iabisdb, on Flickr
 Hood 014 by iabisdb, on Flickr
After spraying again with pattern release, the second half of the mold is poured.
 Hood 015 by iabisdb, on Flickr
Removing both parts of the mold and the pattern from the container.
 Hood 016 by iabisdb, on Flickr
Separating the two sides of the mold. Please note the alignment notches.
 Hood 017 by iabisdb, on Flickr
Both halves of the mold with the pattern removed.
 Hood 018 by iabisdb, on Flickr
Both halves of the mold with the core in place.
 Hood 019 by iabisdb, on Flickr
An illustration of the injection method. The urethane used gels quickly and I don't want it to setup while I am taking a picture.
 Hood 020 by iabisdb, on Flickr
Hood 011 by iabisdb, on FlickrDegassing the silicone in the vacuum chamber eliminates tiny bubbles in the silicone which will ruin the mold. Note the doubled volume.
Hood 012 by iabisdb, on Flickr The pattern was sprayed with the pattern release. Silicone was poured to the hood's original parting line.
Hood 013 by iabisdb, on FlickrHood 014 by iabisdb, on FlickrAfter spraying again with pattern release, the second half of the mold is poured.
Hood 015 by iabisdb, on FlickrRemoving both parts of the mold and the pattern from the container.
Hood 016 by iabisdb, on FlickrSeparating the two sides of the mold. Please note the alignment notches.
Hood 017 by iabisdb, on FlickrBoth halves of the mold with the pattern removed.
Hood 018 by iabisdb, on FlickrBoth halves of the mold with the core in place.
Hood 019 by iabisdb, on FlickrAn illustration of the injection method. The urethane used gels quickly and I don't want it to setup while I am taking a picture.
Hood 020 by iabisdb, on Flickr
12-09-15, 06:36 PM
#4
Senior Member
Thread Starter
Join Date: Jun 2006
Location: NW Burbs, Chicago
Posts: 12,055
Mentioned: 201 Post(s)
Tagged: 0 Thread(s)
Quoted: 3015 Post(s)
Liked 3,804 Times
in
1,408 Posts
After injection. Please note the cavity on the left is a tapered vent hole to release air during injection. At the part level, the vent hole diameter is 0.060" to minimize cuts needed to remove the vent material. Also not the rubber bands to clamp the mold together. I used and recommend a 35 Shore A 2-part urethane for this application. It can be purchased at Freeman Supply or any other mold-supply company.
 Hood 021 by iabisdb, on Flickr
Removal of the bottom part of the mold. Please note for this part the urethane was not degassed as shown by the micro bubbles. I also only had blue colorant on hand at the time of molding. I used and recommend a 35 Shore A 2-part urethane for this application. It can be purchased at Freeman Supply or any other mold-supply company.
 Hood 022 by iabisdb, on Flickr
Both halves of mold removed with the part remaining on the core. Sprue and vent material uncut. Please note for this part the urethane was not degassed as shown by the micro bubbles. I also only had blue colorant on hand at the time of molding. I used and recommend a 35 Shore A 2-part urethane for this application. It can be purchased at Freeman Supply or any other mold-supply company.
 Hood 023 by iabisdb, on Flickr
Original and new together. Please note for this part the urethane was not degassed as shown by the micro bubbles. I also only had blue colorant on hand at the time of molding. I used and recommend a 35 Shore A 2-part urethane for this application. It can be purchased at Freeman Supply or any other mold-supply company.
 Hood 024 by iabisdb, on Flickr
 Hood 025 by iabisdb, on Flickr
Hood 021 by iabisdb, on FlickrRemoval of the bottom part of the mold. Please note for this part the urethane was not degassed as shown by the micro bubbles. I also only had blue colorant on hand at the time of molding. I used and recommend a 35 Shore A 2-part urethane for this application. It can be purchased at Freeman Supply or any other mold-supply company.
Hood 022 by iabisdb, on FlickrBoth halves of mold removed with the part remaining on the core. Sprue and vent material uncut. Please note for this part the urethane was not degassed as shown by the micro bubbles. I also only had blue colorant on hand at the time of molding. I used and recommend a 35 Shore A 2-part urethane for this application. It can be purchased at Freeman Supply or any other mold-supply company.
Hood 023 by iabisdb, on FlickrOriginal and new together. Please note for this part the urethane was not degassed as shown by the micro bubbles. I also only had blue colorant on hand at the time of molding. I used and recommend a 35 Shore A 2-part urethane for this application. It can be purchased at Freeman Supply or any other mold-supply company.
Hood 024 by iabisdb, on FlickrHood 025 by iabisdb, on Flickr
Likes For iab:
12-09-15, 07:04 PM
#5

Senior Member

Join Date: Apr 2005
Location: Wherever
Posts: 16,748
Mentioned: 92 Post(s)
Tagged: 0 Thread(s)
Quoted: 556 Post(s)
Likes: 0
Liked 132 Times
in
78 Posts
Oh wow! Absolutely super, Iab. This is the most interesting thing I've seen in months. Here or anywhere else.
Very cool. Great job.
Very cool. Great job.
12-09-15, 07:07 PM
#7
Still learning

Amazing Iab. So how many hours of time to produce the molds and then how much time to produce the hoods?
 12-09-15, 07:20 PM
#10
Senior Member
Thread Starter
Join Date: Jun 2006
Location: NW Burbs, Chicago
Posts: 12,055
Mentioned: 201 Post(s)
Tagged: 0 Thread(s)
Quoted: 3015 Post(s)
Liked 3,804 Times
in
1,408 Posts
My time to make the mold is 8 hours. My time to make a single hood is maybe 15 minutes. It obviously would be faster if I made more molds. But I'm lazy. And silicone is not cheap. And if make 2 sets that should last me a decade or two.
Demolding is 16 hours, both for the mold and a single hood. You can actually do it less than that though. I can get 2 hoods a day if I wanted. But I don't.
For selling. Sure, why not. But I am the worst retailer in the world. The customer can wait when I am good and ready. And if they change their mind, I don't care at all.
12-09-15, 07:20 PM
#11

multimodal commuter

Join Date: Nov 2006
Location: NJ, NYC, LI
Posts: 19,808
Bikes: 1940s Fothergill, 1959 Allegro Special, 1963? Claud Butler Olympic Sprint, Lambert 'Clubman', 1974 Fuji "the Ace", 1976 Holdsworth 650b conversion rando bike, 1983 Trek 720 tourer, 1984 Counterpoint Opus II, 1993 Basso Gap, 2010 Downtube 8h, and...
Mentioned: 584 Post(s)
Tagged: 0 Thread(s)
Quoted: 1908 Post(s)
Liked 574 Times
in
339 Posts
Very cool!
So, there's no shrinkage? The reproduction matches the original in size?
I suppose to make a more complicated shape, like a Campagnolo hood, you would need a three piece mold... start by casting a mold from the inside of an original... hmm. Very cool.

So, there's no shrinkage? The reproduction matches the original in size?
I suppose to make a more complicated shape, like a Campagnolo hood, you would need a three piece mold... start by casting a mold from the inside of an original... hmm. Very cool.
__________________
www.rhmsaddles.com.
www.rhmsaddles.com.
12-09-15, 07:28 PM
#12
Senior Member
Thread Starter
Join Date: Jun 2006
Location: NW Burbs, Chicago
Posts: 12,055
Mentioned: 201 Post(s)
Tagged: 0 Thread(s)
Quoted: 3015 Post(s)
Liked 3,804 Times
in
1,408 Posts
No shrinkage. The hoods are never in a pool.
A Campy hood would be still two parts. The core would need to be more complex.
A Campy hood would be still two parts. The core would need to be more complex.
12-09-15, 07:42 PM
#13
is just a real cool dude

Join Date: Aug 2010
Location: The Thumb, MI
Posts: 3,165
Mentioned: 12 Post(s)
Tagged: 0 Thread(s)
Quoted: 32 Post(s)
Likes: 0
Liked 34 Times
in
14 Posts
Ummm wow that was pretty dang impressive! Hilary Stone also sells repop Vittoria hoods but for $50. I'm surprised no one hasn't done gum hoods for Ergopower shifter to go along with the silver Athena group.
Last edited by Henry III; 12-09-15 at 11:22 PM.
12-09-15, 08:02 PM
#14
Banned
Join Date: Aug 2013
Posts: 6,480
Mentioned: 93 Post(s)
Tagged: 0 Thread(s)
Quoted: 1361 Post(s)
Likes: 0
Liked 424 Times
in
283 Posts
~ Blue Ribbon award ~
No need for them but they're so cool! Thanks for the outstanding demonstration and education.
BTW: If anyone is considering a low cost alternative to a vacuum pump, look into an inline vacuum generator + on/off valve that uses a conventional air compressor. The tiny vac. gen is basically a venturi with exhaust port. Handy for small projects like the above or veneer glue downs on wood (along with with bag), etc..
12-09-15, 08:30 PM
#15
Bike Butcher of Portland

Join Date: Jul 2014
Location: Portland, OR
Posts: 11,639
Bikes: It's complicated.
Mentioned: 1299 Post(s)
Tagged: 0 Thread(s)
Quoted: 4682 Post(s)
Liked 5,802 Times
in
2,286 Posts
Damn cool! Now I've gotta find a project to apply this to...
__________________
If someone tells you that you have enough bicycles and you don't need any more, stop talking to them. You don't need that kind of negativity in your life.
If someone tells you that you have enough bicycles and you don't need any more, stop talking to them. You don't need that kind of negativity in your life.
12-09-15, 08:30 PM
#16
Senior Member
Very Impressive.
__________________
My bikes: 1970`s Roberts - 1981 Miyata 912 - 1980`s Ocshner (Chrome) - 1987 Schwinn Circuit - 1987 Schwinn Prologue - 1992 Schwinn Crosspoint - 1999 Schwinn Circuit - 2014 Cannondale Super Six EVO
My bikes: 1970`s Roberts - 1981 Miyata 912 - 1980`s Ocshner (Chrome) - 1987 Schwinn Circuit - 1987 Schwinn Prologue - 1992 Schwinn Crosspoint - 1999 Schwinn Circuit - 2014 Cannondale Super Six EVO
12-09-15, 09:02 PM
#17
Senior Member
Join Date: Jul 2013
Location: New Bedford, Mass
Posts: 110
Bikes: 1972 Motobecane Le Champion, 1976 Motobecane Grand Record
Mentioned: 4 Post(s)
Tagged: 0 Thread(s)
Quoted: 24 Post(s)
Likes: 0
Liked 4 Times
in
3 Posts
Killer work! I resin and rubber cast by trade myself and I never thought of making hoods! Im gonna do it to the Mafac ones I need since I need a few sets of half hoods.
12-09-15, 09:51 PM
#18
Senior Member

Join Date: Sep 2011
Location: Baltimore MD
Posts: 3,333
Bikes: '72 Motobecane Grand Record, '72 Gitane tandem, '72 Raleigh Super Course, '73 Raleigh Gran Sport, '73 Colnago Super, '76 Fiorelli Coppi, '78 Raleigh SBDU Team Pro, '78 Trek 930, '81 Holdsworth Special 650B, '86 Masi GC, ’94 Bridgestone RB-T
Mentioned: 67 Post(s)
Tagged: 0 Thread(s)
Quoted: 787 Post(s)
Liked 521 Times
in
282 Posts
Very impressive. Glad to see folks tackling repro unobtanium hoods. Campy NR/SR from Italy, Mafac half-hoods from Rustines in France, and now these. Well done. I hope somebody takes on Shimano 600 EX 6209 hoods.
__________________
The man who dies with the most toys�is dead. - Rootboy
The man who dies with the most toys�is dead. - Rootboy
12-09-15, 11:41 PM
#19
Senior Member
Join Date: Aug 2009
Location: Berkeley, CA
Posts: 7,247
Bikes: '72 Cilo Pacer, '72 Gitane Gran Tourisme, '72 Peugeot PX10, '73 Speedwell Ti, '74 Peugeot UE-8, '75 Peugeot PR-10L, '80 Colnago Super, '85 De Rosa Pro, '86 Look Equipe 753, '86 Look KG86, '89 Parkpre Team, '90 Parkpre Team MTB, '90 Merlin
Mentioned: 87 Post(s)
Tagged: 0 Thread(s)
Quoted: 835 Post(s)
Liked 2,135 Times
in
558 Posts
Dia-Compe replacement hoods are available at Velo-Orange in a variety of colors. Less than $20 and work fine. Sure, maybe a little loose, but who cares except the period-correct police. Just kidding!  Awesome and impressive work! I never knew I wanted Vittoria brakes.
Awesome and impressive work! I never knew I wanted Vittoria brakes.
12-09-15, 11:51 PM
#20
Senior Member
Join Date: Aug 2013
Location: San Francisco
Posts: 833
Bikes: '68 Raleigh Suberbe, '92 (German) Centurion Equipe, '85 Schwinn Peloton, 1983ish Zunow Road Racer project, '69 Squanch Super Tourer, 1980 Bianchi Super Corsa, '82 Austro-Daimler Vent Noir, '89 Miyata 914 project, 1982ish Bianchi Rallye
Mentioned: 25 Post(s)
Tagged: 0 Thread(s)
Quoted: 294 Post(s)
Liked 9 Times
in
9 Posts
Dia-Compe RGC Aeros next! Nobody makes them.
12-09-15, 11:51 PM
#21
Senior Member
Join Date: Nov 2014
Location: Eugene, Oregon, USA
Posts: 27,547
Mentioned: 217 Post(s)
Tagged: 0 Thread(s)
Quoted: 18378 Post(s)
Liked 4,512 Times
in
3,354 Posts
Hmmm,
Apparently not completely impossible to source.
Hilary Stone Spare Parts Brakes
Repro, Only �32
Apparently not completely impossible to source.
Hilary Stone Spare Parts Brakes
Repro, Only �32
12-10-15, 12:46 AM
#23
Junior Member
Join Date: Oct 2015
Location: between the ocean and the bay
Posts: 9
Mentioned: 0 Post(s)
Tagged: 0 Thread(s)
Quoted: 0 Post(s)
Likes: 0
Liked 0 Times
in
0 Posts
Great work!
How necessary do you think the vacuum chamber is? I've made a ton of polyurethane rubber molds for concrete work without one and with good results, but I can see the detail in that hood might be hard to get otherwise.
I really love seeing people remake stuff that's NLA. As 3D printing plastics and metals continues to improve and go down in cost, NLA won't be so much of an issue in the future, and that's pretty cool. Thanks for sharing your process.
12-10-15, 12:51 AM
#24
Senior Member
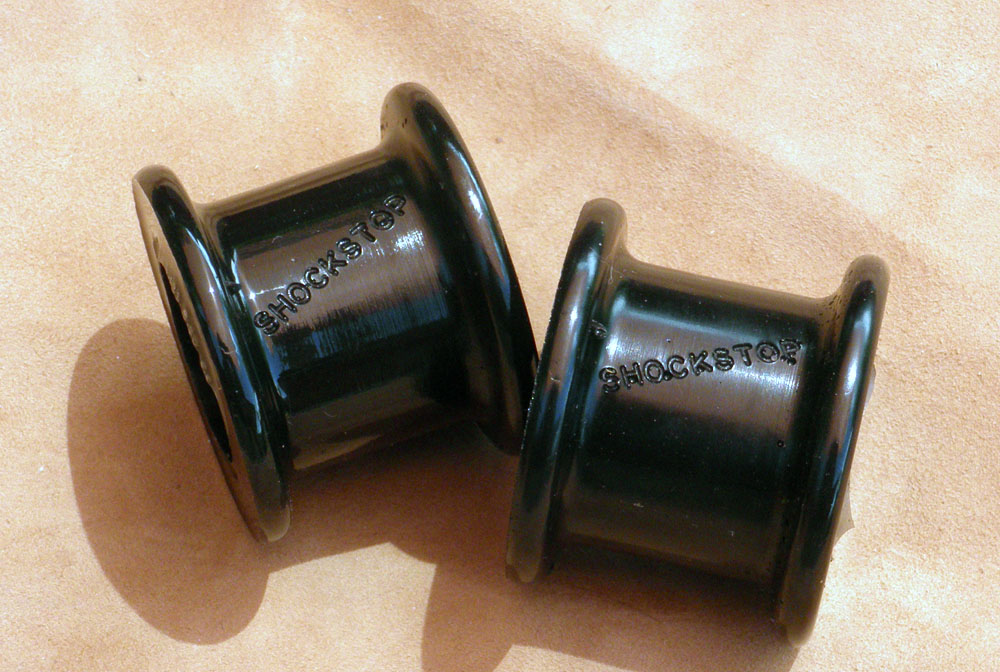
as well as 'rubber' cable bands
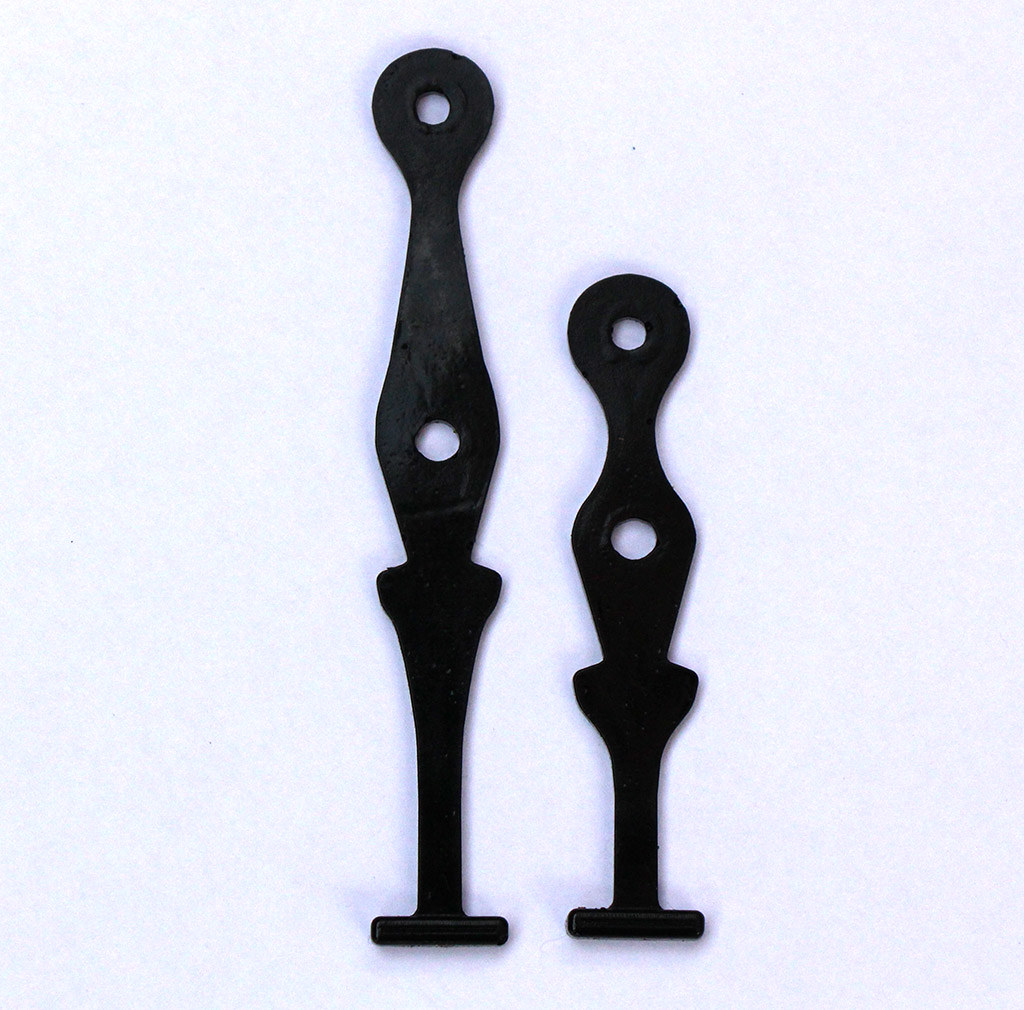
David, an excellent photo essay. Hopefully it will inspire others to add to the otherwise difficult to source items.
Last edited by Big Block; 11-18-17 at 04:45 AM.
12-10-15, 05:28 AM
#25
Banned.
Join Date: Dec 2007
Posts: 27,199
Mentioned: 34 Post(s)
Tagged: 1 Thread(s)
Quoted: 378 Post(s)
Liked 1,410 Times
in
910 Posts
Well, we've seen bikes built around cranksets, shifters, wheelsets, calipers, and now, hoods......
Any excuse, any excuse.
Chicago 'hoods. I've heard of them.
Any excuse, any excuse.
Chicago 'hoods. I've heard of them.
Last edited by RobbieTunes; 12-10-15 at 06:27 AM.