


Anyone know about Burley tandem BBs?
 07-13-23, 06:27 PM
#1

blahblahblah chrome moly
Thread Starter

Join Date: Apr 2009
Location: Seattle
Posts: 1,994
Mentioned: 92 Post(s)
Tagged: 0 Thread(s)
Quoted: 1181 Post(s)
Liked 2,576 Times
in
1,076 Posts
Anyone know about Burley tandem BBs?
I got this Burley Duet for free, whole bike, pretty good deal, right? Well maybe not, the frame is rust-perforated at the bottom of the cap'n seat tube where it joins the bottom bracket. That's OK, I'm a framebuilder and I can fix that, but what will I have when I'm done? The front BB is too small to take any modern eccentric insert, and I hate the method of securing the insert, using grub screws that burrow into the soft aluminum of the insert. That's OK, I can replace the whole F. BB shell. Yes, really:
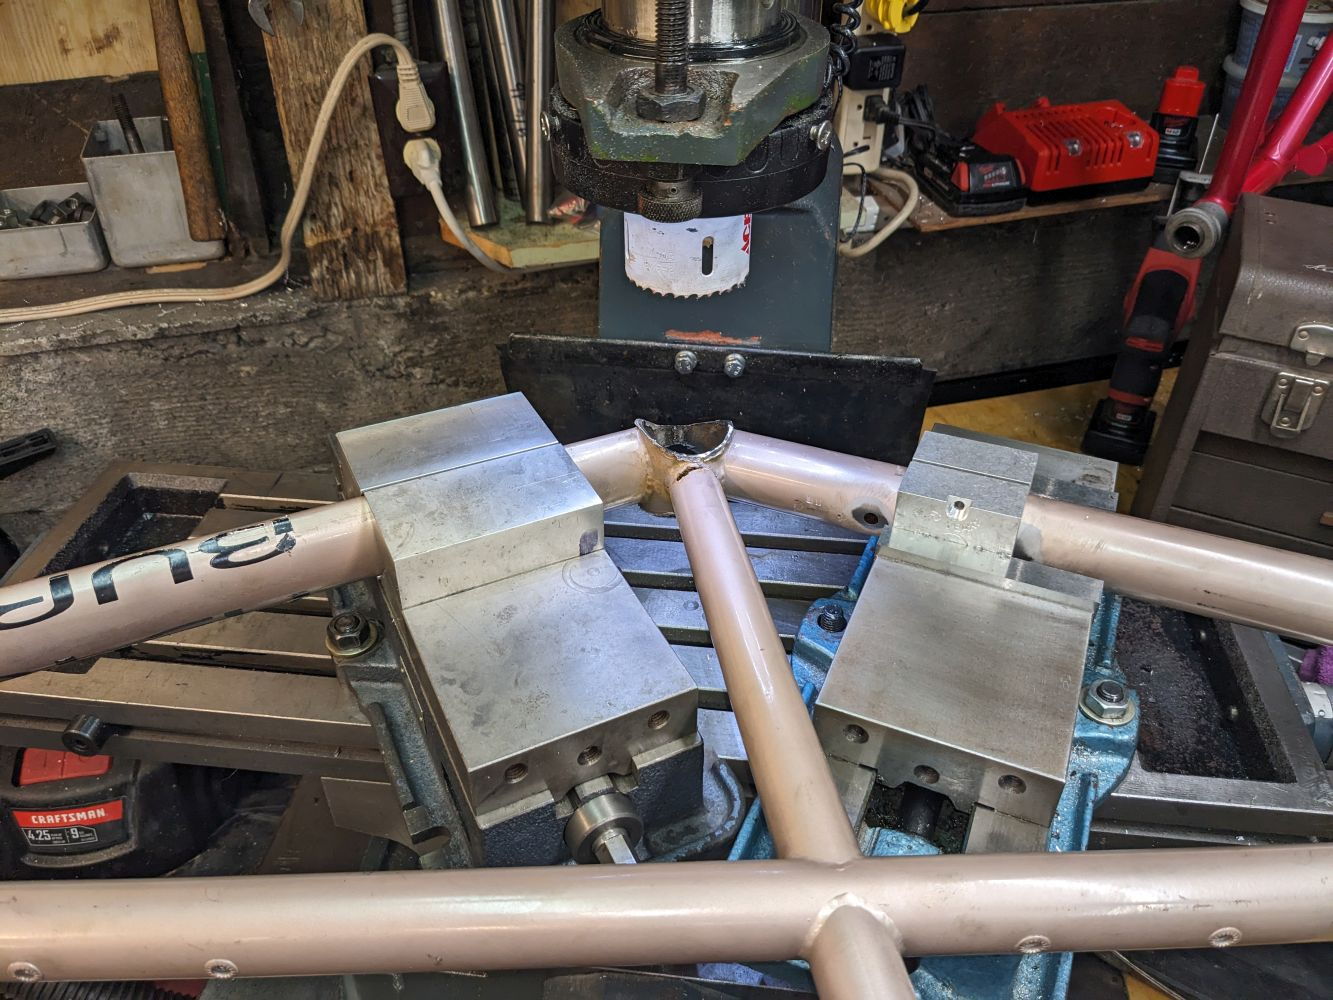
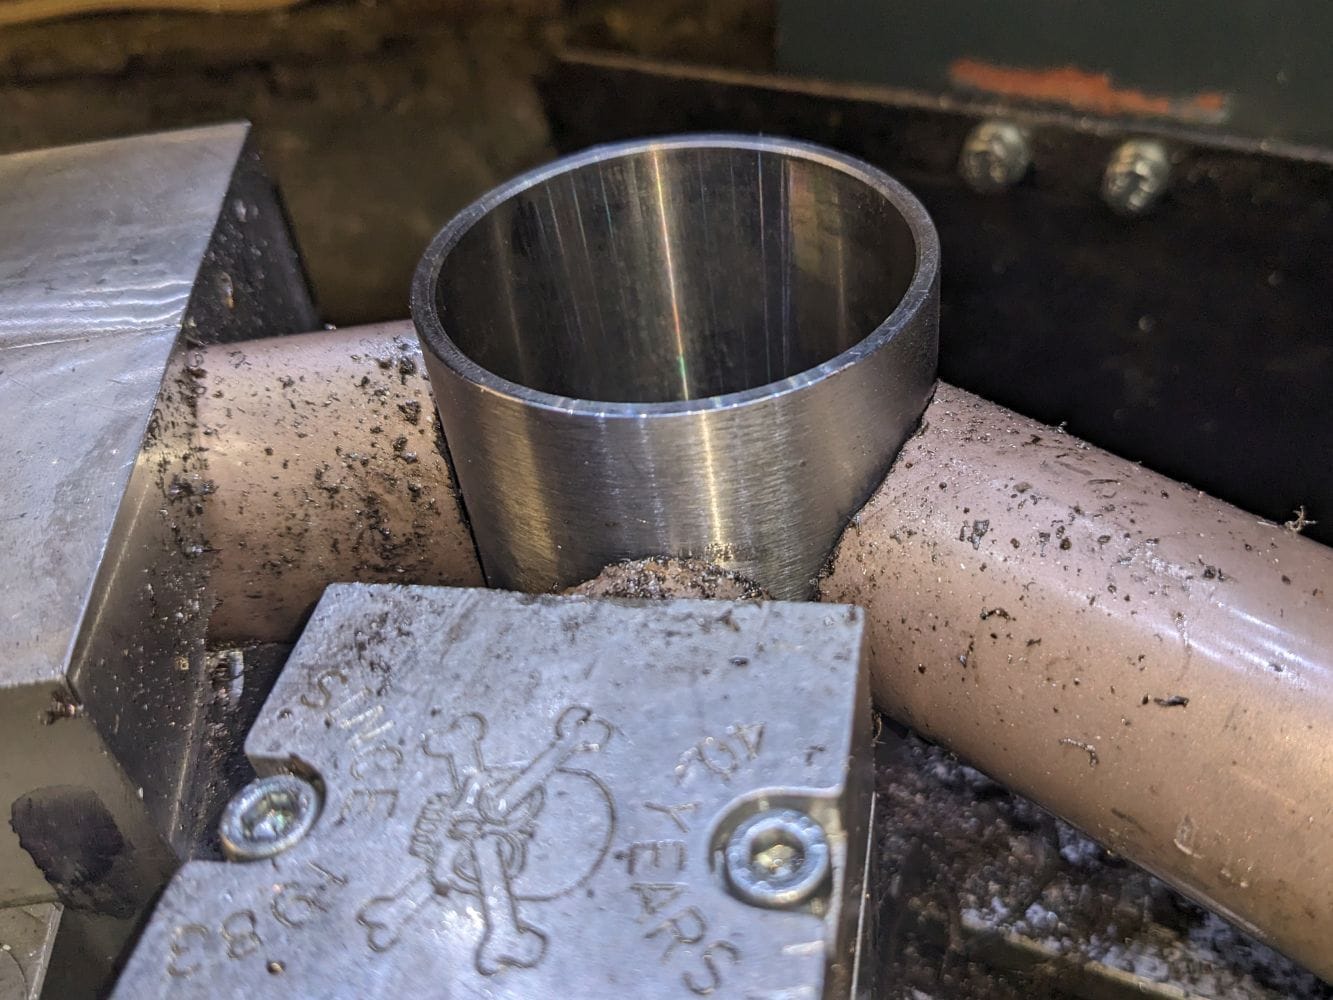
Ever mitered 3 tubes with one cut? This is sort of a mock-up, I don't have the correct holesaw yet (it's ordered), but I do have the new shell, which is large enough for a Bushnell eccentric insert. You can see in the pic, I cut away much of the old shell with an angle-grinder, to reduce how much steel needs to be turned into chips. I'll clamp a tube block on the seat tube and put a machinist jack under it for a little more constraint. The seat tube where it's rust-perforated will get a sleeve, "bi-lam" style.
Then there's the rear BB, and my question to you all: It's a crazy 82.5 mm wide and appears to have pressed-in (or glued in?) bearings. Has anyone ever had one of those BBs out, to see what dimensions/features the shell has inside? Some pressed-in BBs can be tapped to normal English thread. I have confirmed that I can cut the width of the shell down to 68 mm without nicking into the chainstay welds, so the width isn't the problem.

I know I should measure it but there's a chamfer and a lot of grime and I'm lazy.
If it's too large for English, maybe I can tap it to Italian. Have you seen those cool inserts that are threaded Italian on the outside and English on the inside, to allow English cups in an Italian frame?
It's otherwise a very smartly designed frame, with stout oversized tubing, and I have some young neighbors who ride and who say they would really like a tandem, so I'm inclined to fix this one up for them. Unfortunately the rear crankset I have for it, came in the box of parts supplied, is an Ultegra that uses their proprietary multi-spline interface with the spindle (Octa-link?). That never could have been mounted on this Burley, with it's pressed-in square-taper spindle, so I guess there was a mix-up with the parts box, original cranks replaced with this Ultegra. Which is a really nice crank, but I'll need a threaded BB shell.
I'm tempted to press this spindle and bearings out and just see what's in there, but I thought I'd ask here first in case there's someone who's been down this road already. Tips, tricks, pitfalls to avoid?
Thanks!
Mark B
Ever mitered 3 tubes with one cut? This is sort of a mock-up, I don't have the correct holesaw yet (it's ordered), but I do have the new shell, which is large enough for a Bushnell eccentric insert. You can see in the pic, I cut away much of the old shell with an angle-grinder, to reduce how much steel needs to be turned into chips. I'll clamp a tube block on the seat tube and put a machinist jack under it for a little more constraint. The seat tube where it's rust-perforated will get a sleeve, "bi-lam" style.
Then there's the rear BB, and my question to you all: It's a crazy 82.5 mm wide and appears to have pressed-in (or glued in?) bearings. Has anyone ever had one of those BBs out, to see what dimensions/features the shell has inside? Some pressed-in BBs can be tapped to normal English thread. I have confirmed that I can cut the width of the shell down to 68 mm without nicking into the chainstay welds, so the width isn't the problem.
I know I should measure it but there's a chamfer and a lot of grime and I'm lazy.
If it's too large for English, maybe I can tap it to Italian. Have you seen those cool inserts that are threaded Italian on the outside and English on the inside, to allow English cups in an Italian frame?
It's otherwise a very smartly designed frame, with stout oversized tubing, and I have some young neighbors who ride and who say they would really like a tandem, so I'm inclined to fix this one up for them. Unfortunately the rear crankset I have for it, came in the box of parts supplied, is an Ultegra that uses their proprietary multi-spline interface with the spindle (Octa-link?). That never could have been mounted on this Burley, with it's pressed-in square-taper spindle, so I guess there was a mix-up with the parts box, original cranks replaced with this Ultegra. Which is a really nice crank, but I'll need a threaded BB shell.
I'm tempted to press this spindle and bearings out and just see what's in there, but I thought I'd ask here first in case there's someone who's been down this road already. Tips, tricks, pitfalls to avoid?
Thanks!
Mark B
 07-13-23, 07:20 PM
#2
Senior Member
Join Date: Feb 2012
Location: Rochester, NY
Posts: 18,096
Bikes: Stewart S&S coupled sport tourer, Stewart Sunday light, Stewart Commuting, Stewart Touring, Co Motion Tandem, Stewart 3-Spd, Stewart Track, Fuji Finest, Mongoose Tomac ATB, GT Bravado ATB, JCP Folder, Stewart 650B ATB
Mentioned: 0 Post(s)
Tagged: 0 Thread(s)
Quoted: 4210 Post(s)
Liked 3,875 Times
in
2,315 Posts
Mark- I have serviced a few Burley tandem BB's back in the 1990s. I only replaced the bearings, not the captain's complete shell (although i do share your dislike for the grub screw design I never had a problem with them on either customer bikes or my own one). The bearings simple pressed out, the size number was found on the sealing rings and sourced before doing the mechanical work. I recorder the bearing fit in the shell (from the face to the bearing) and from the axle end to the bearing to duplicate the chainline. I used Locktight (609 IIRC) and located one bearing on the axle and the other in the shell. After they had cured I then pressed the bearing/axle into the shell/bearing, again with Locktight so that the remaining dimensions were the same as OEM.
But you likely already know this method Andy
Andy
PS- I should still have a tandem crank arm set, both ft and rears, that I got as a back up but never needed. They would be Dimension "brand" (QBP sourced) and are melt forged using tapered square interface. I would move them along to you if it helps.
But you likely already know this method
AndyPS- I should still have a tandem crank arm set, both ft and rears, that I got as a back up but never needed. They would be Dimension "brand" (QBP sourced) and are melt forged using tapered square interface. I would move them along to you if it helps.
__________________
AndrewRStewart
AndrewRStewart
Last edited by Andrew R Stewart; 07-13-23 at 07:25 PM.
 07-13-23, 07:22 PM
#3


Randomhead
Join Date: Aug 2008
Location: Happy Valley, Pennsylvania
Posts: 24,399
Mentioned: 0 Post(s)
Tagged: 0 Thread(s)
Quoted: 4 Post(s)
Liked 3,699 Times
in
2,519 Posts
I have seen some pictures Bilenky posted of putting an eccentric in a single bike. Since they had to cut the chain stays, I believe their setup was somewhat more hinky than yours.
07-14-23, 03:59 AM
#4
blahblahblah chrome moly
Thread Starter
Join Date: Apr 2009
Location: Seattle
Posts: 1,994
Mentioned: 92 Post(s)
Tagged: 0 Thread(s)
Quoted: 1181 Post(s)
Liked 2,576 Times
in
1,076 Posts
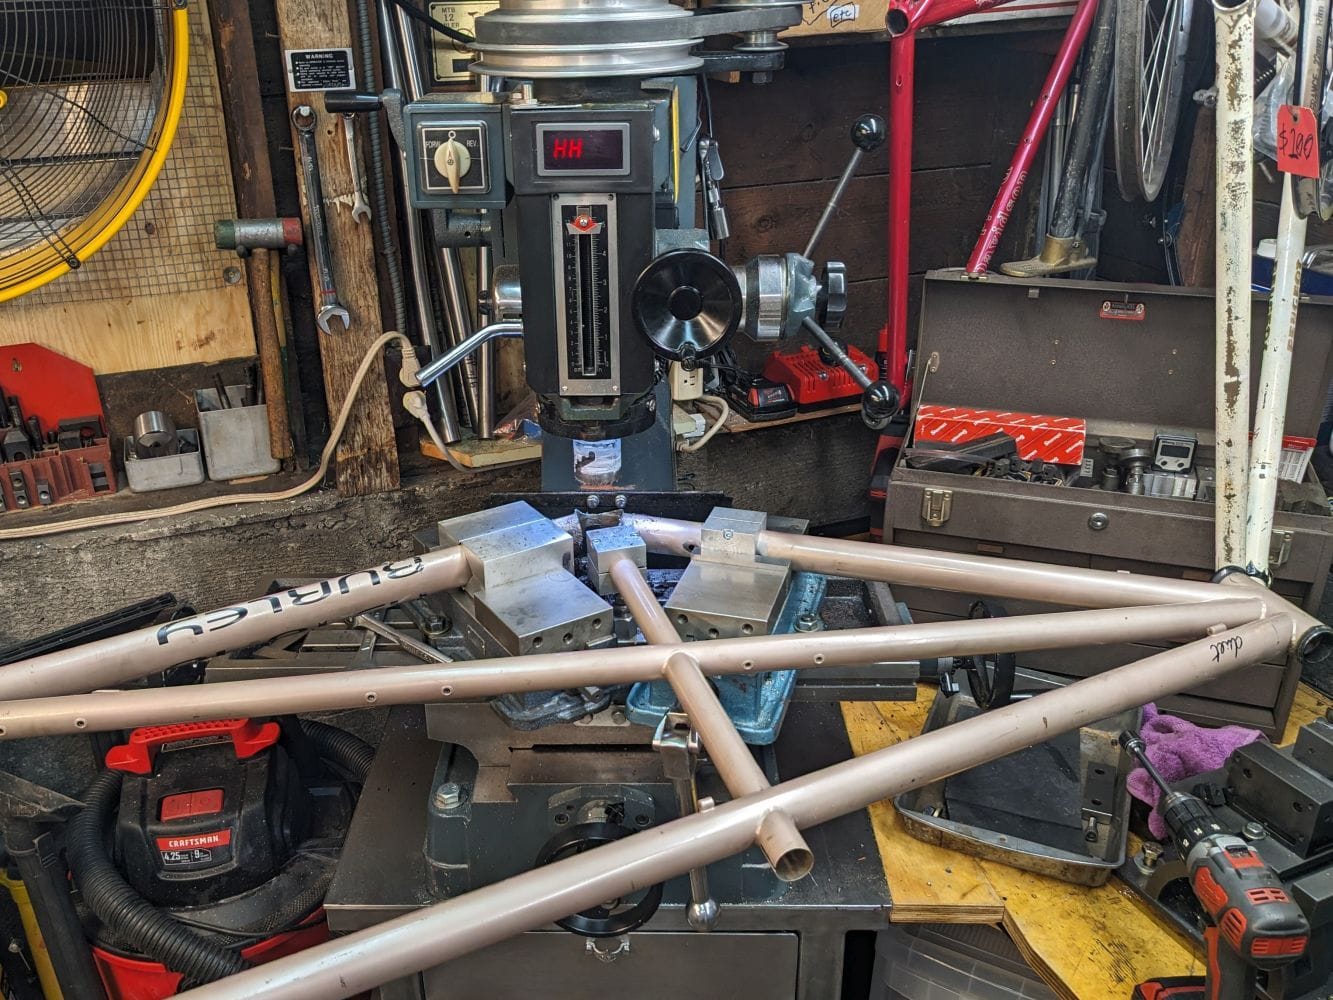
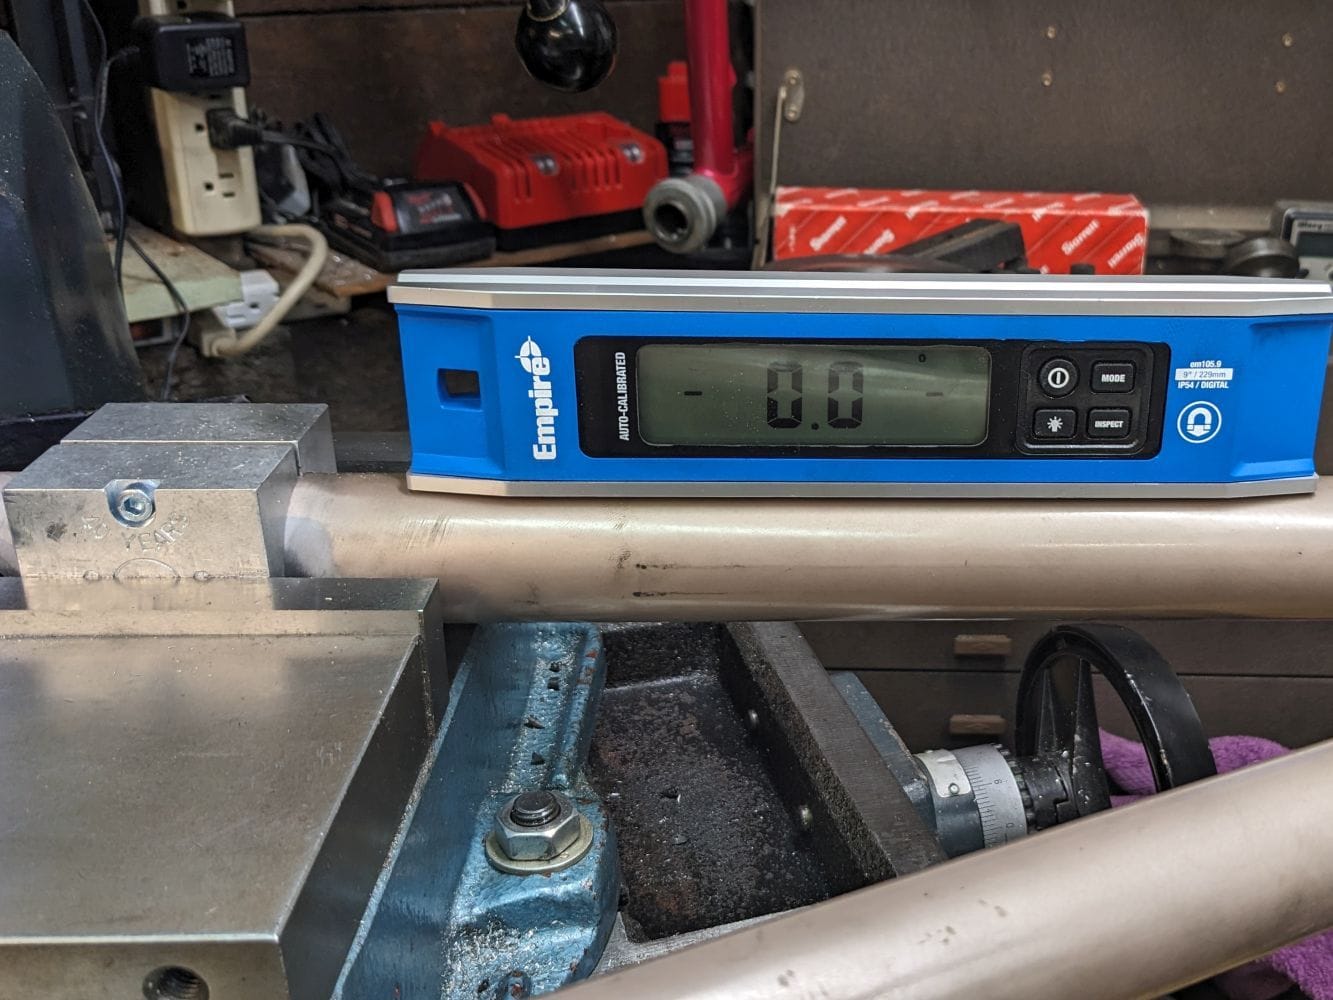
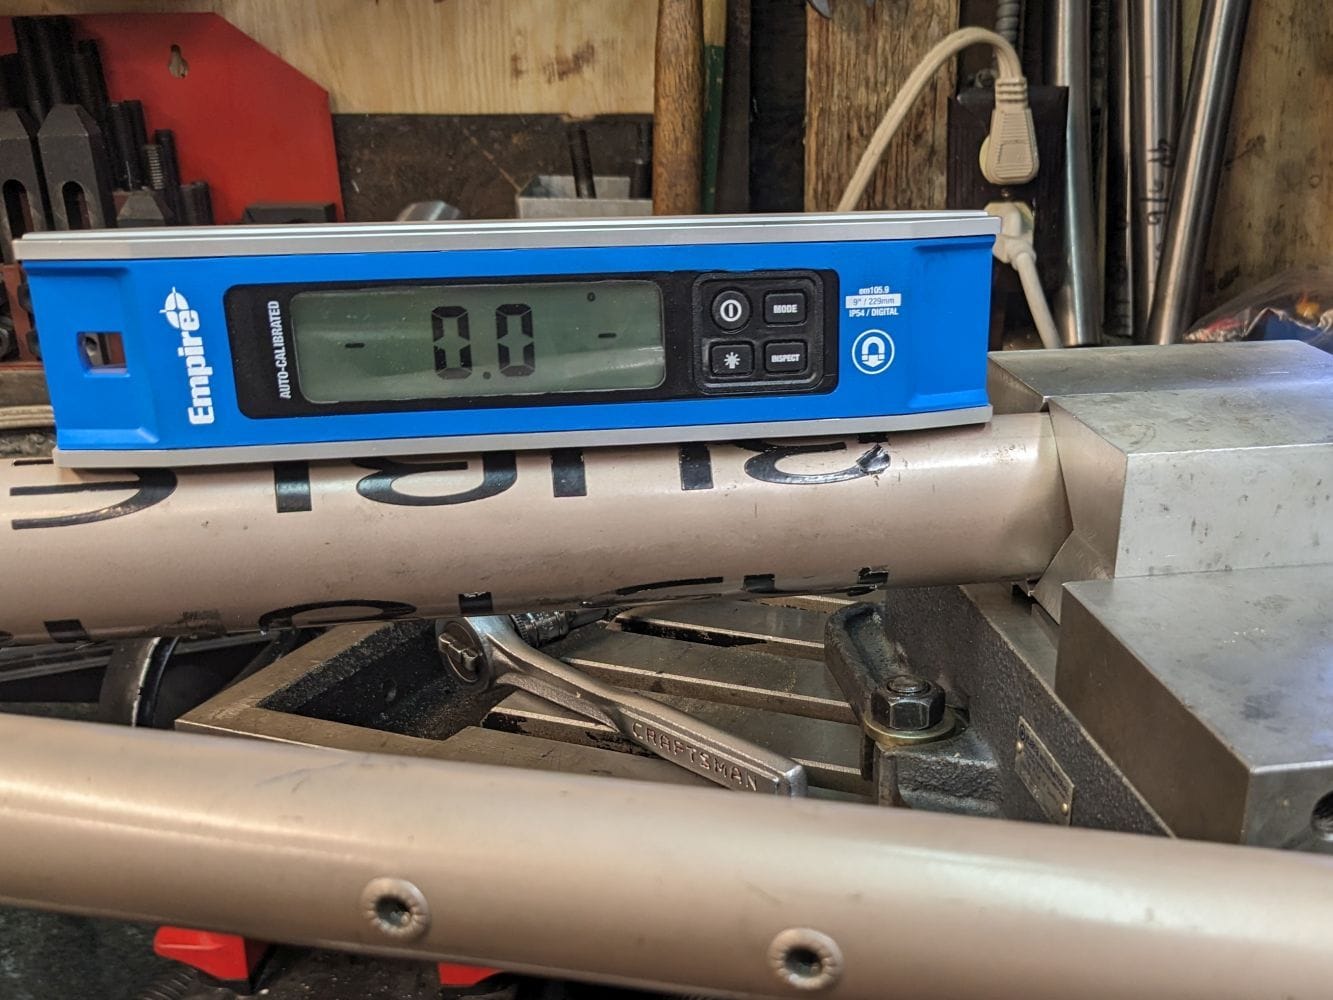
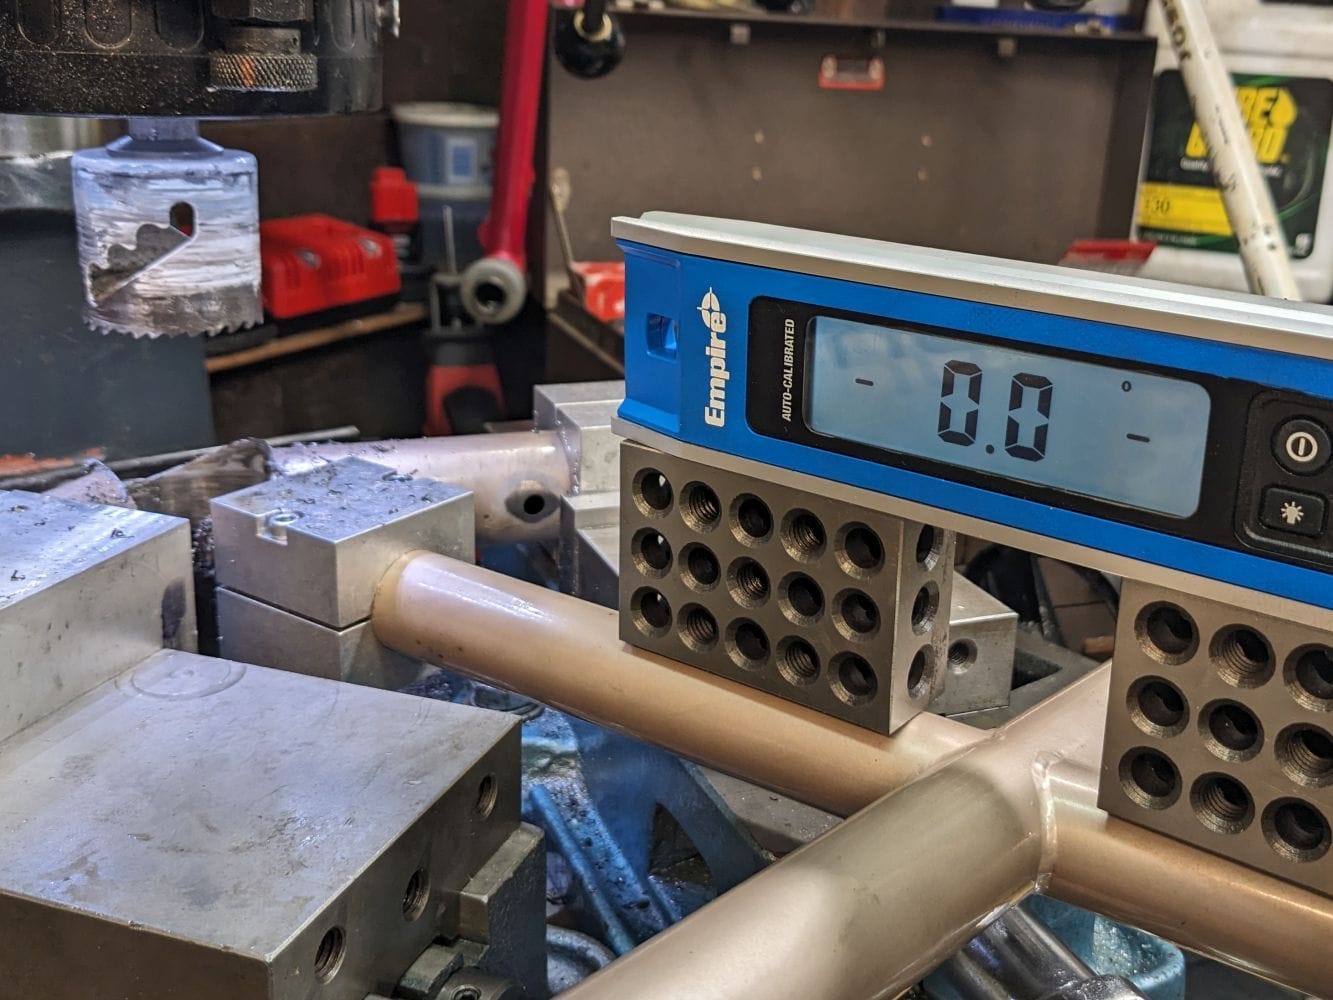
For setting the angles of those vises, I let them float on the mill table until after I clamped down on the tubes, so the vises just floated to the needed angle. Then I bolted the vises down to the table. I think the most time-consuming bit so far was ahving to remove the DT H2O bosses, and the pump peg that was on the keel tube.
Here's the result after the initial cut, and some pics of checking the frame was "flat" to the mill before cutting. I believe having the digital level say it's within a tenth of a degree is good enough for jazz.
TGIF,
Mark B
07-14-23, 04:05 AM
#5
blahblahblah chrome moly
Thread Starter
Join Date: Apr 2009
Location: Seattle
Posts: 1,994
Mentioned: 92 Post(s)
Tagged: 0 Thread(s)
Quoted: 1181 Post(s)
Liked 2,576 Times
in
1,076 Posts
I'm going to leave the rear BB alone and put a nice White Industries square-taper crank on there. Since I'm replacing the front shell with a bigger one, and I have a spare Bushnell insert I got at a swap meet, I can install the nice Ultegra pair in the front. It won't match, but it'll get 'em down the road.
This is not the first time Andrew has offered to send me stuff, he's a good guy to know!
Mark B
07-14-23, 09:10 AM
#6
Senior Member
Join Date: Feb 2012
Location: Rochester, NY
Posts: 18,096
Bikes: Stewart S&S coupled sport tourer, Stewart Sunday light, Stewart Commuting, Stewart Touring, Co Motion Tandem, Stewart 3-Spd, Stewart Track, Fuji Finest, Mongoose Tomac ATB, GT Bravado ATB, JCP Folder, Stewart 650B ATB
Mentioned: 0 Post(s)
Tagged: 0 Thread(s)
Quoted: 4210 Post(s)
Liked 3,875 Times
in
2,315 Posts
Mark- Thanks for the props. Your set up is what I've seen before, more or less, for various bike's milling needs. I still marvel at doing this myself but expect I would become comfy if I did it a few times. In my house the machining would have to happen in one day. Or the wife will complain about the garage being too cluttered
Each or the three tandems I have had saw some frame working by me, two with repaints done by the factories. The Burley Duet (first gen with the Friday like bent tubes) had those same (fill in your personal word of disgust) RivNut bottle bosses. Especially sad on a steel thin wall where the Rivnut doesn't have much metal to grip and that metal is often harder than the Rivnut. Glad to see at least one pair will be replaced. Andy
Each or the three tandems I have had saw some frame working by me, two with repaints done by the factories. The Burley Duet (first gen with the Friday like bent tubes) had those same (fill in your personal word of disgust) RivNut bottle bosses. Especially sad on a steel thin wall where the Rivnut doesn't have much metal to grip and that metal is often harder than the Rivnut. Glad to see at least one pair will be replaced. Andy
__________________
AndrewRStewart
AndrewRStewart
07-14-23, 04:10 PM
#7
blahblahblah chrome moly
Thread Starter
Join Date: Apr 2009
Location: Seattle
Posts: 1,994
Mentioned: 92 Post(s)
Tagged: 0 Thread(s)
Quoted: 1181 Post(s)
Liked 2,576 Times
in
1,076 Posts
Mark- Thanks for the props. Your set up is what I've seen before, more or less, for various bike's milling needs. I still marvel at doing this myself but expect I would become comfy if I did it a few times. In my house the machining would have to happen in one day. Or the wife will complain about the garage being too cluttered
Each or the three tandems I have had saw some frame working by me, two with repaints done by the factories. The Burley Duet (first gen with the Friday like bent tubes) had those same (fill in your personal word of disgust) RivNut bottle bosses. Especially sad on a steel thin wall where the Rivnut doesn't have much metal to grip and that metal is often harder than the Rivnut. Glad to see at least one pair will be replaced. Andy
Each or the three tandems I have had saw some frame working by me, two with repaints done by the factories. The Burley Duet (first gen with the Friday like bent tubes) had those same (fill in your personal word of disgust) RivNut bottle bosses. Especially sad on a steel thin wall where the Rivnut doesn't have much metal to grip and that metal is often harder than the Rivnut. Glad to see at least one pair will be replaced. Andy
Likes For bulgie:
07-22-23, 06:28 PM
#8
blahblahblah chrome moly
Thread Starter
Join Date: Apr 2009
Location: Seattle
Posts: 1,994
Mentioned: 92 Post(s)
Tagged: 0 Thread(s)
Quoted: 1181 Post(s)
Liked 2,576 Times
in
1,076 Posts
Tandem F. BB replacement
The 2-5/16" (59 mm) hole saw I ordered just arrived, and I ran downstairs and made the cut. Came out great, should be pretty much self-jigging when I tack the shell to the 3 tubes.
I was talking to another FB who shall remain nameless, who admitted he's had some small number of frames where the tubes cracked at the BB welds. That was when he was using Reynolds's first attempt at double-butted titanium. I agree, I used one set of those tubes and I was not impressed, stuff seemed weak, way too easy to cold-set on the alignment table. I assume Reynolds sells better Ti tubes nowadays so this isn't a comment on their current product.
But anyway the point of this story is, to fix frames where, say, the seat tube cracked, he'd mount it in the vertical mill and make a plunge cut through DT, ST and C-stays, and weld in a T47 shell. Voil�, all the HAZ and fatigued metal from the original welds, now gone. Probably easier than replacing a seat tube, since you don't mess with the TT and seatstays. Brilliant.
Mark B
07-22-23, 09:33 PM
#9
Disco Infiltrator

Join Date: May 2013
Location: Folsom CA
Posts: 13,446
Bikes: Stormchaser, Paramount, Tilt, Samba tandem
Mentioned: 72 Post(s)
Tagged: 0 Thread(s)
Quoted: 3126 Post(s)
Liked 2,105 Times
in
1,369 Posts
82.5mm shell is nearly the same as 83mm downhill shell and might fit a Zee crankset if it were threaded English. The Zee crank is set up for 1x10 but it's a pretty standard 104mm bcd crank with the inner ring holes undrilled
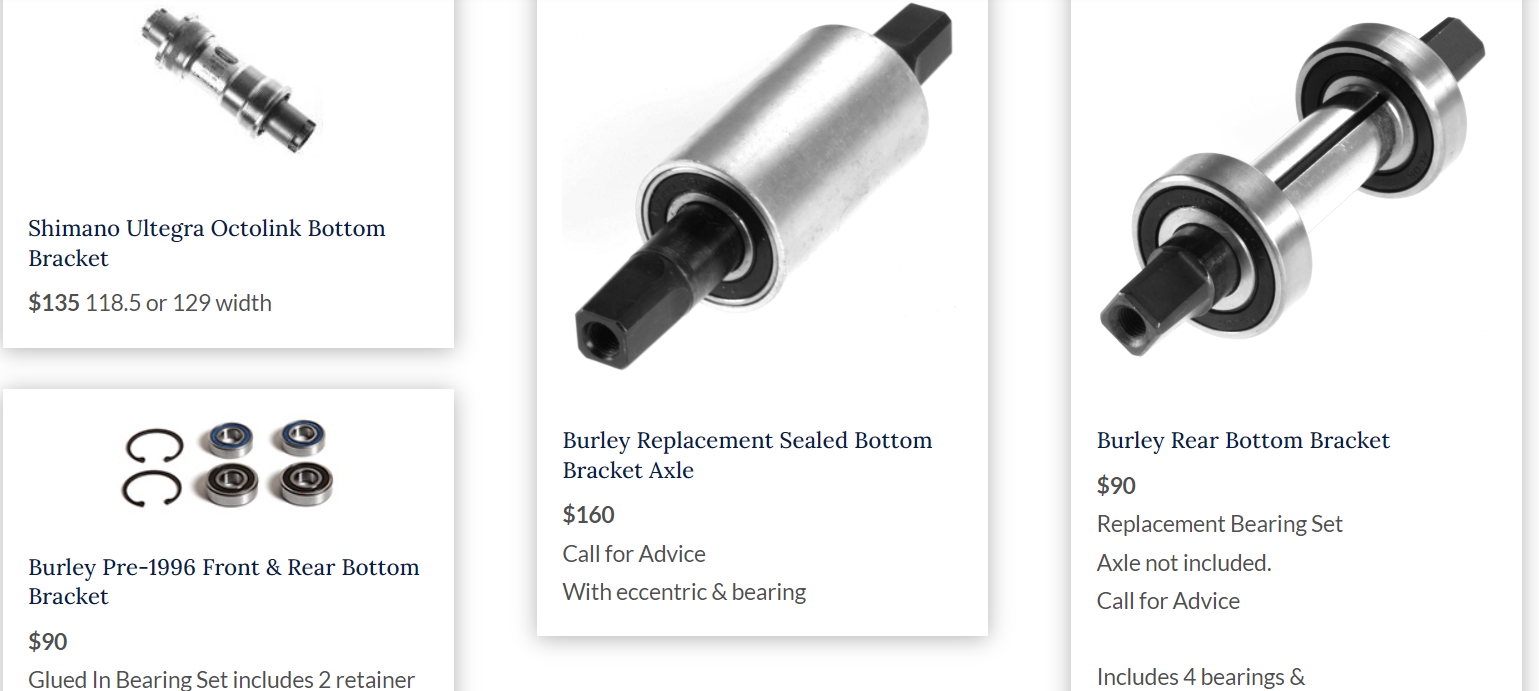
On the other hand my Burley has what seems to be a 68mm shell (can't find my little scale to measure better right now) and instead of being recessed like yours the cartridge protrudes out the sides. Nevertheless I think it's the same cartridge. Tandems East has a listing for a Burley bottom bracket cartridge but little details. Screenshot below. Pretty sure this is what's in my Burley though right now it's built up and I can't measure spindle length for you
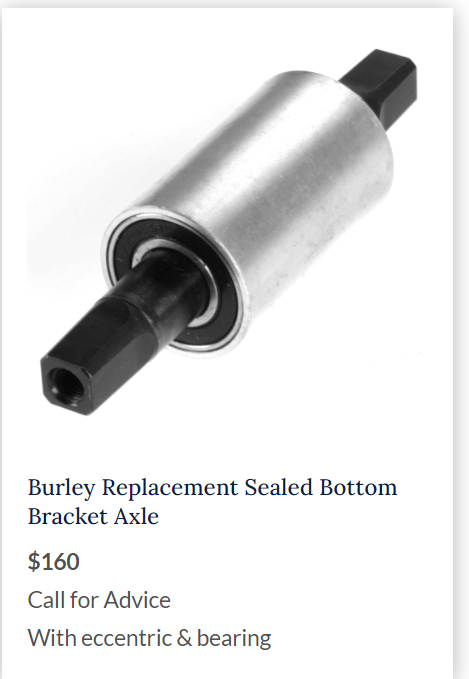
On the other hand my Burley has what seems to be a 68mm shell (can't find my little scale to measure better right now) and instead of being recessed like yours the cartridge protrudes out the sides. Nevertheless I think it's the same cartridge. Tandems East has a listing for a Burley bottom bracket cartridge but little details. Screenshot below. Pretty sure this is what's in my Burley though right now it's built up and I can't measure spindle length for you
__________________
Genesis 49:16-17
Genesis 49:16-17
07-22-23, 09:34 PM
#10
Disco Infiltrator
Join Date: May 2013
Location: Folsom CA
Posts: 13,446
Bikes: Stormchaser, Paramount, Tilt, Samba tandem
Mentioned: 72 Post(s)
Tagged: 0 Thread(s)
Quoted: 3126 Post(s)
Liked 2,105 Times
in
1,369 Posts
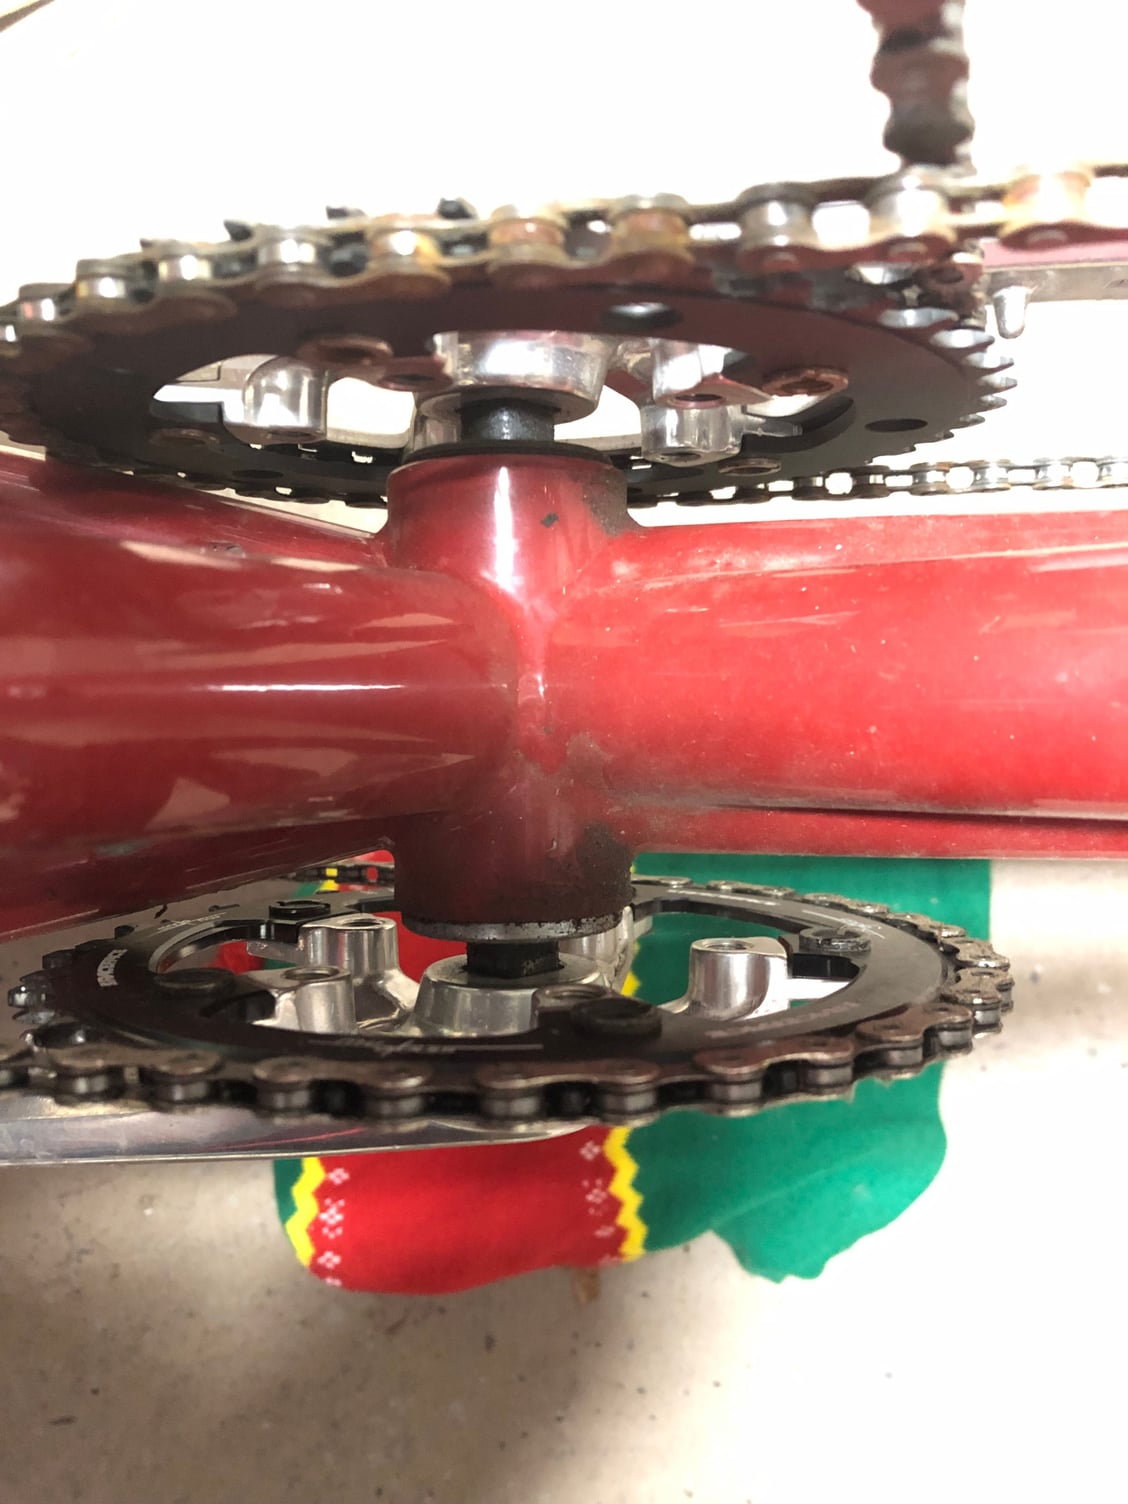
In situ
__________________
Genesis 49:16-17
Genesis 49:16-17
07-23-23, 01:23 PM
#11
blahblahblah chrome moly
Thread Starter
Join Date: Apr 2009
Location: Seattle
Posts: 1,994
Mentioned: 92 Post(s)
Tagged: 0 Thread(s)
Quoted: 1181 Post(s)
Liked 2,576 Times
in
1,076 Posts
Once I cleaned some gunk I saw the circlip groove on each end. The circlips are not installed, but one of them was in the bottom of the parts box. (Previous owner apparently started to disassemble, and maybe got stopped by not knowing what to do next.) I popped the one circlip in, fits perfectly, so I ordered a new one for the other side from McMaster, which just arrived. I'm going to just leave this BB installed, since it feels smooth. The bearings being so big, should mean it is super robust (knock wood). In addition to the circlips, I also see green loctite (annoying!), so this BB will be difficult to remove, will require heat for sure. I'm not going to try, not enough potential upside to outweigh the risk. I'm not repainting the frame, excpet for some rattle-can for the repaired area.
In other news, I made some "heat sinks" to put in the front shell to keep it round while brazing. I put "heat sinks" in scare-quotes because I specifically designed them to not sink much heat. They're only to keep the shell round, while minimizing the heat they soak up. I like being able to point the flame at the inner face of the shell, and these allow torch access to the inside. They're just two 1/4" thick washers for 1" bolt, with a machined OD that's a light press fit in the shell, with the >1" hole in each washer for torch access. They will cool the shell some, at that 1/4" wide strip on each side where they contact the shell, but they won't cause a cold joint there, I'll still get the brass to flow and make an inside fillet. I know this from long experience, since this style of heat sink is just like the ones I made and used at a couple of my previous employers. I've brazed plenty of tandem eccentric BBs both with and without the thick washers, and the washers do reduce the amount of reaming, boring or grinding needed to take out the distortion. With the washers and good heat control, distortion should be negligible.
I also like to relieve the shell a bit, boring the ID for most of the width, leaving a full-thickness band maybe 15 mm wide on each end, with the shell thinner in between. This is obviously not necessary, since most frames don't get that treatment and they still work fine. But it makes the post brazing distortion easier to remove, since you can ignore the middle of the shell. Only those 15 mm wide bands need to be bored. Other reasons to relieve the shell include light weight (kidding!) and looks... also kidding since you can't see it with the eccentric installed. OK I'll admit it, I just think it's a cool feature, and it doesn't take more than 5-10 minutes to do the relief on the lathe. Just for my own enjoyment, since the next owner will never notice this or care. It's my hobby, so it doesn't have to make economic sense.
Mark B
07-23-23, 04:24 PM
#12
Disco Infiltrator
Join Date: May 2013
Location: Folsom CA
Posts: 13,446
Bikes: Stormchaser, Paramount, Tilt, Samba tandem
Mentioned: 72 Post(s)
Tagged: 0 Thread(s)
Quoted: 3126 Post(s)
Liked 2,105 Times
in
1,369 Posts
Well, here is a wider screenshot showing the other ones they have on offer. There is more going on than I first noticed and sorry if it was a bum steer, did not mean to do that. Mine is from the early 2000's (9 speed Deore / Sora mix, and V brakes)
__________________
Genesis 49:16-17
Genesis 49:16-17
Last edited by Darth Lefty; 07-23-23 at 04:32 PM.
Likes For Darth Lefty:
