


Overspreading a steel frame? Rear wheel not inline anymore...
 12-01-20, 06:01 AM
#1
Full Member
Thread Starter
Join Date: Mar 2017
Location: Arnhem NL
Posts: 230
Bikes: Might as well, now that I am here...
Mentioned: 3 Post(s)
Tagged: 0 Thread(s)
Quoted: 79 Post(s)
Liked 78 Times
in
66 Posts
Overspreading a steel frame? Rear wheel not inline anymore...
Hi all,
I have a steel Benotto 800 from 1978 or there about. I spread the frame to 130 mm but I think I should have been a tad more careful.
I might have overspread on the right (ND) side. The rear wheel is not in line anymore witht he rest of the frame.
I've tried to push it back but it's still not okay.
Spreading and such have been done with a long piece of wood, I think I've applied pressure/force with care.
The chainline is quite nice, if seen from the 42 tooth ring. The big ring (52) isnt in line. Sad.
It bothers me quite a bit. So, basically, how often can you do this with care to a frame? Should I be worried about breaking stuff on the frame?
It's a Benotto "from over here", it was sold a long time ago here in Arnhem so it's not a Mexican made frame or anything.
It rides quite nice so I really like to have it fixed. If I do I have several builds I'll try with this one. I might even do an Eroica on it...
On one hand I do like the bike/frame. It being sold once over here is part of the attraction, on the other hand I didnt pay that much for it.
Worth another try? Leave it well alone? More advise?
Cheers,
Jan

 12-01-20, 06:46 AM
#3

Senior Member
Join Date: Dec 2005
Posts: 17,160
Mentioned: 481 Post(s)
Tagged: 0 Thread(s)
Quoted: 3811 Post(s)
Liked 6,717 Times
in
2,614 Posts
Sheldon Brown shows a method to check alignment with a length of string:
https://www.sheldonbrown.com/frame-spacing.html
https://www.sheldonbrown.com/frame-spacing.html
12-01-20, 06:47 AM
#4
Drip, Drip.
Join Date: Oct 2020
Location: Southern Ontario
Posts: 1,575
Bikes: Trek Verve E bike, Felt Doctrine 4 XC, Opus Horizon Apex 1
Mentioned: 8 Post(s)
Tagged: 0 Thread(s)
Quoted: 1034 Post(s)
Liked 193 Times
in
163 Posts
It could be the rim itself. You'd have to check on a properly calibrated truing stand.
I wouldn't worry much about the rigidity of the frame being compromised. But I think it would be wise not to try to bend the framw again.
I wouldn't worry much about the rigidity of the frame being compromised. But I think it would be wise not to try to bend the framw again.
12-01-20, 06:58 AM
#5
Senior Member

Join Date: May 2008
Location: Fredericksburg, Va
Posts: 9,579
Bikes: '65 Frejus TDF, '73 Bottecchia Giro d'Italia, '83 Colnago Superissimo, '84 Trek 610, '84 Trek 760, '88 Pinarello Veneto, '88 De Rosa Pro, '89 Pinarello Montello, '94 Burley Duet, 97 Specialized RockHopper, 2010 Langster, Tern Link D8
Mentioned: 73 Post(s)
Tagged: 0 Thread(s)
Quoted: 1609 Post(s)
Liked 2,216 Times
in
1,103 Posts
@Millstone - How much too far is it from the center of the frame?
You said you used a piece of wood. Be sure to clamp around the chain and stay bridges! If the amount of deviation is small, couple of mm, bend it back. Yes you will induce cold-work hardening but it is too late for that anyway. Or take it to a frame builder and have him align everything on the bike, including the RD mount.
Chain line is assessed by determining the distance from the center of the frame to the center of the sprocket cluster and the center between the small and large chain ring.
__________________
Bikes don't stand alone. They are two tired.
Bikes don't stand alone. They are two tired.
12-01-20, 07:07 AM
#6
framebuilder
I'm a professional frame builder/painter that has aligned thousands of steel frames over the many years of my career in Niles, Michigan. I have special tools to do it right and so does my colleague Martin Gerritsen in Kiel Windeweer (a very cute and small village in the north of the Netherlands). He goes by M-gineering online. Give him a call to make an appointment and he will bend it back to where it should be. I don't believe most amateurs/hobbyists can get this right with crude methods.
Likes For Doug Fattic:
12-01-20, 08:54 AM
#7
aka Tom Reingold

Join Date: Jan 2009
Location: New York, NY, and High Falls, NY, USA
Posts: 40,509
Bikes: 1962 Rudge Sports, 1971 Raleigh Super Course, 1971 Raleigh Pro Track, 1974 Raleigh International, 1975 Viscount Fixie, 1982 McLean, 1996 Lemond (Ti), 2002 Burley Zydeco tandem
Mentioned: 511 Post(s)
Tagged: 0 Thread(s)
Quoted: 7353 Post(s)
Liked 2,481 Times
in
1,440 Posts
I used the threaded rod method to spread a frame recently. The same thing went wrong for me. So I corrected it with the Sheldon Brown method that @nlerner cites, and all is good now.
__________________
Tom Reingold, tom@noglider.com
New York City and High Falls, NY
Blogs: The Experienced Cyclist; noglider's ride blog
�When man invented the bicycle he reached the peak of his attainments.� � Elizabeth West, US author
Please email me rather than PM'ing me. Thanks.
Tom Reingold, tom@noglider.com
New York City and High Falls, NY
Blogs: The Experienced Cyclist; noglider's ride blog
�When man invented the bicycle he reached the peak of his attainments.� � Elizabeth West, US author
Please email me rather than PM'ing me. Thanks.
12-01-20, 08:55 AM
#8
Senior Member
Join Date: Sep 2017
Location: Eastern Shore, MD
Posts: 2,107
Bikes: Road ready: 1993 Koga Miyata City Liner Touring Hybrid, 1989 Centurion Sport DLX, "I Blame GP" Bridgestone CB-1. Projects: Yea, I got a problem....
Mentioned: 24 Post(s)
Tagged: 0 Thread(s)
Quoted: 753 Post(s)
Liked 737 Times
in
422 Posts
I'm a hamfisted rude mechanic that has invested a bunch of time and into decent 126mm spaced wheelsets...... It sounds like you haven't figured out how to get any sort of confirmation of alignment. There are a bunch of different ways to check this including strings, measuring off of straight edges and useing a mounted wheel. The trick with all of these methods is defining a center with mirrored measurements. So if your your wheel is out of true or dished incorrectly you can mark a spot on the rim and flip it in the drop outs to get a consistent point to measure from. You are not going to damage your frame getting a set of measurements. Continuing to mess with it with out having a way to check final alignment is just adding potential metal fatigue. Once you get the spacing where you want it, the dropouts need to be adjusted to parallel. Taking it to a framebuilder is the right answer. I will mention in passing that when asked a local bike shop about respacing a frame, they said that they wouldn't, but if I brought in a bike that was out of alignment and happened to be close to 130mm, they would work with that. Of course if the chainstay bridge pops off later or a drop out cracks its outside of their liability.
Last edited by bark_eater; 12-01-20 at 08:58 AM.
12-01-20, 10:19 AM
#9
Senior Member

Join Date: Aug 2009
Posts: 2,397
Mentioned: 14 Post(s)
Tagged: 0 Thread(s)
Quoted: 1563 Post(s)
Liked 1,737 Times
in
976 Posts
This is yet another reminder to not tweak your frame on the garage floor. Leave that sht alone. I will never buy a frame that has been tweaked by some yahoo on his garage floor with a 2x4. It�s time to stop this madness now.
126mm / 7 speed is totally fine. You can get modern HG cassettes for it or HG style freewheels.
Even a 120mm spacing is fine- you can get a Suntour ultra6 freewheel and still be able to use 7 speed STI brifters.
126mm / 7 speed is totally fine. You can get modern HG cassettes for it or HG style freewheels.
Even a 120mm spacing is fine- you can get a Suntour ultra6 freewheel and still be able to use 7 speed STI brifters.
Likes For icemilkcoffee:
12-01-20, 10:28 AM
#10
Senior Member
Join Date: Aug 2010
Location: Utah
Posts: 8,684
Bikes: Paletti,Pinarello Monviso,Duell Vienna,Giordana XL Super,Lemond Maillot Juane.& custom,PDG Paramount,Fuji Opus III,Davidson Impulse,Pashley Guv'nor,Evans,Fishlips,Y-Foil,Softride, Tetra Pro, CAAD8 Optimo,
Mentioned: 156 Post(s)
Tagged: 0 Thread(s)
Quoted: 2326 Post(s)
Liked 5,012 Times
in
1,783 Posts
This is yet another reminder to not tweak your frame on the garage floor. Leave that sht alone. I will never buy a frame that has been tweaked by some yahoo on his garage floor with a 2x4. It�s time to stop this madness now.
126mm / 7 speed is totally fine. You can get modern HG cassettes for it or HG style freewheels.
Even a 120mm spacing is fine- you can get a Suntour ultra6 freewheel and still be able to use 7 speed STI brifters.
126mm / 7 speed is totally fine. You can get modern HG cassettes for it or HG style freewheels.
Even a 120mm spacing is fine- you can get a Suntour ultra6 freewheel and still be able to use 7 speed STI brifters.
__________________
Steel is real...and comfy.
Steel is real...and comfy.
12-01-20, 10:59 AM
#11
Friendship is Magic

Join Date: Nov 2010
Location: Sacramento, CA
Posts: 22,985
Bikes: old ones
Mentioned: 304 Post(s)
Tagged: 0 Thread(s)
Quoted: 26427 Post(s)
Liked 10,384 Times
in
7,212 Posts
.
...I once posted a whole series of pictures of what works for me over here.
At this point, I'm inclined to say take it to someone experienced.
You don't get an infinite number of bending sets without some frame compromise.
It's fine to do it when the frame is obviously out of alignment, but as someone already mentioned, fatigue is an issue.
An uncontrolled spread like you describe often goes awry because the two sides of the rear triangle are often configured so that they bend at different rates.
12-01-20, 11:49 AM
#13
Senior Member
Join Date: Aug 2010
Location: Utah
Posts: 8,684
Bikes: Paletti,Pinarello Monviso,Duell Vienna,Giordana XL Super,Lemond Maillot Juane.& custom,PDG Paramount,Fuji Opus III,Davidson Impulse,Pashley Guv'nor,Evans,Fishlips,Y-Foil,Softride, Tetra Pro, CAAD8 Optimo,
Mentioned: 156 Post(s)
Tagged: 0 Thread(s)
Quoted: 2326 Post(s)
Liked 5,012 Times
in
1,783 Posts
12-01-20, 01:00 PM
#14
Senior Member

Join Date: Jan 2008
Location: Beaverton, OR
Posts: 14,744
Bikes: Yes
Mentioned: 525 Post(s)
Tagged: 0 Thread(s)
Quoted: 3230 Post(s)
Liked 3,870 Times
in
1,439 Posts
Park makes a tool to check the frame alignment if you don't like the string method. It seems I can't even post a link to Park's page for this tool because Bike Forums doesn't like the acronym for the Frame Alignment Gauge. You can make a DIY version of the tool with a couple of piece of wood and some screws if you are confident that the wood isn't warped. RJ the Bike Guy has instructions here:
I like the Park tool for spreading the dropouts because it lets you choose where pressure is applied to avoid problems with the chainstay bridge. It's not cheap, but it will be useful in the event of zombie apocalypse or other melee combat.
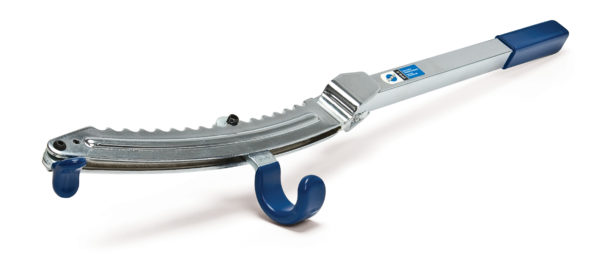
https://www.parktool.com/product/fra...ightener-ffs-2
You should also check the dropout alignment to make sure they're parallel after you spread them. RJ has a video for a DIY version of that tool too.
Finally, if you're using indexed shifting, you'll need to check the alignment of the derailleur hanger. That's another pricy tool, or you can use another wheel (the axle happens to thread into the derailleur hanger).
If you like buying tools, there's your Christmas/Hanukah/Kwanza/Festivus list. Otherwise, there's the reason to take it to a shop.
As for how many times you can do this, you will notice the metal getting stiffer as you move it back and forth. When it breaks, you will have established that the number of times you can do it is one less than you did. It's probably a high number though. I'll leave it to the mechanical engineers to provide a more reliable answer.
I like the Park tool for spreading the dropouts because it lets you choose where pressure is applied to avoid problems with the chainstay bridge. It's not cheap, but it will be useful in the event of zombie apocalypse or other melee combat.
https://www.parktool.com/product/fra...ightener-ffs-2
You should also check the dropout alignment to make sure they're parallel after you spread them. RJ has a video for a DIY version of that tool too.
Finally, if you're using indexed shifting, you'll need to check the alignment of the derailleur hanger. That's another pricy tool, or you can use another wheel (the axle happens to thread into the derailleur hanger).
If you like buying tools, there's your Christmas/Hanukah/Kwanza/Festivus list. Otherwise, there's the reason to take it to a shop.
As for how many times you can do this, you will notice the metal getting stiffer as you move it back and forth. When it breaks, you will have established that the number of times you can do it is one less than you did. It's probably a high number though. I'll leave it to the mechanical engineers to provide a more reliable answer.
__________________
My Bikes
My Bikes
12-01-20, 01:17 PM
#15
Friendship is Magic
Join Date: Nov 2010
Location: Sacramento, CA
Posts: 22,985
Bikes: old ones
Mentioned: 304 Post(s)
Tagged: 0 Thread(s)
Quoted: 26427 Post(s)
Liked 10,384 Times
in
7,212 Posts
12-01-20, 01:32 PM
#16
Senior Member
Join Date: Aug 2010
Location: Utah
Posts: 8,684
Bikes: Paletti,Pinarello Monviso,Duell Vienna,Giordana XL Super,Lemond Maillot Juane.& custom,PDG Paramount,Fuji Opus III,Davidson Impulse,Pashley Guv'nor,Evans,Fishlips,Y-Foil,Softride, Tetra Pro, CAAD8 Optimo,
Mentioned: 156 Post(s)
Tagged: 0 Thread(s)
Quoted: 2326 Post(s)
Liked 5,012 Times
in
1,783 Posts
...the only ones I've found in the past couple of years are Sunrace. The one I bought was surprisingly well constructed and works well (it's made to the Shimano standards for indexing.) I'm not 100% certain if these are just old stock lying around on Amazon, or if they still manufacture them. Try a Google search for Sunrace 12-24 cassette and see what comes up.
__________________
Steel is real...and comfy.
Steel is real...and comfy.
12-01-20, 01:56 PM
#17
se�or miembro

Join Date: Dec 2018
Location: Pac NW
Posts: 6,629
Bikes: '70s - '80s Campagnolo
Mentioned: 92 Post(s)
Tagged: 0 Thread(s)
Quoted: 3891 Post(s)
Liked 6,491 Times
in
3,213 Posts
I've done it a couple times with excellent results. One, using a 2x4, and another, using a threaded bolt. I just used a string from the dropouts around the head tube to check alignment. Sheldon can show you how.
It's not rocket science. Nearly anyone can do it. If the alignment is a little off, you can easily fix it. It just takes patience. No reason for any handwringing. Steel is real.
And make sure your wheel is correctly dished!
It's not rocket science. Nearly anyone can do it. If the alignment is a little off, you can easily fix it. It just takes patience. No reason for any handwringing. Steel is real.
And make sure your wheel is correctly dished!
12-01-20, 02:25 PM
#18
Full Member
Thread Starter
Join Date: Mar 2017
Location: Arnhem NL
Posts: 230
Bikes: Might as well, now that I am here...
Mentioned: 3 Post(s)
Tagged: 0 Thread(s)
Quoted: 79 Post(s)
Liked 78 Times
in
66 Posts
Thanks all.
Wheel is correctly dished btw. And (I should have mentioned that), I did check with strings. it's a tad off.
Going to M-gineering (Doug: thanks for the suggestion, I've spoken to him a few times over email) is out of the question, it's too far away (200 kms?).
Going to a 'local' framebuilder it is then. If there are any...
I've spread a bike before btw, it went very well. that was a Peugeot. Somehow I've managed to get it wrong this time.
The Peugeot I did with a threaded nut, maybe I should have sticked with that.
Again, thanks!
And 5-6-7 speed is enough, but sometimes it's nice to have a decent new wheel that fits. I do like "old" bikes but I cant see myself building my own wheels. I have too many hobbies/distractions already.
Wheel is correctly dished btw. And (I should have mentioned that), I did check with strings. it's a tad off.
Going to M-gineering (Doug: thanks for the suggestion, I've spoken to him a few times over email) is out of the question, it's too far away (200 kms?).
Going to a 'local' framebuilder it is then. If there are any...
I've spread a bike before btw, it went very well.
that was a Peugeot. Somehow I've managed to get it wrong this time. The Peugeot I did with a threaded nut, maybe I should have sticked with that.
Again, thanks!
And 5-6-7 speed is enough, but sometimes it's nice to have a decent new wheel that fits. I do like "old" bikes but I cant see myself building my own wheels. I have too many hobbies/distractions already.
12-01-20, 03:26 PM
#19
Passista
Join Date: Jul 2005
Posts: 7,601
Bikes: 1998 Pinarello Asolo, 1992 KHS Monta�a pro, 1980 Raleigh DL-1, IGH Hybrid, IGH Utility
Mentioned: 5 Post(s)
Tagged: 0 Thread(s)
Quoted: 869 Post(s)
Liked 721 Times
in
396 Posts
Dave Moulton's Blog - Dave Moulton's Bike Blog - Straightening bent seatstays
12-01-20, 05:37 PM
#20
Ride, Wrench, Swap, Race

Join Date: Jan 2010
Location: Northern California
Posts: 9,194
Bikes: Cheltenham-Pedersen racer, Boulder F/S Paris-Roubaix, Varsity racer, '52 Christophe, '62 Continental, '92 Merckx, '75 Limongi, '76 Presto, '72 Gitane SC, '71 Schwinn SS, etc.
Mentioned: 132 Post(s)
Tagged: 0 Thread(s)
Quoted: 1565 Post(s)
Liked 1,296 Times
in
866 Posts
This kind of work, both the measuring part and the bending part, are easy when one has real familiarity with bending steel tubing.
Unlike bending a metal rod, tubing tends to buckle, resulting in a decreasing force required to bend further, possibly out of control and out of range.
On the other hand, steel has memory, so the force to bend it back a SMALL amount like 1-2mm tends to be much lower than the force required to bend it in the direction that it has ended up in. This can be dramatic in that I've used my thumb to push a driveside chainstay back that 1mm.
In addition to the ease of making a small bending correction in the reverse direction, the result is a "stress-relieved" tube which now resists bending better than the "easier" direction before the small correction. This is thus actually ideal when such reverse-corrections are small!
I learned how to straighten frames and forks on the side of the road decades ago, using my feet on the dropout and using my hands on the handlebar and seatpost for balance and for control of force application and keeping the steering direction from flopping around. When too much force is required for a very-controlled bending, I place a piece of wood under the dropout I am flexing/bending to act as a positive stop to prevent a buckling scenario.
Finally, I use the over-locknut axle width to measure my progress on one side at a time, visually sighting the 1, 2 or 3mm(?) gap between locknut and dropout. I will later correct the dropout alignment as needed using a big Crescent wrench together with a double-nutted axle to point toward the opposite dropout's axle resting spot. Good enough.
Don't get me started on roadside work [freewheel repair (nail and rock), chainring straightening or wheel repair], but it all works the same in theory and all are quite do-able, to good standards relative to typical used production bikes.
Last edited by dddd; 12-01-20 at 08:16 PM. Reason: fixed the corrections/directions wording, swear it was the computer that mis-spelled.
Likes For dddd:
12-01-20, 06:41 PM
#21
framebuilder
I'll write in more detail the steps involved in properly aligning a steel frame that has come in for reconditioning. Of course a pro is expected to achieve a higher standard of excellence. The front triangle has to be aligned 1st so it can be the reference to align the back triangle. I never assume a frame is anywhere near correct because usually they aren't. It is important that a seat tube be 90� to the bottom bracket threads. If it isn't, the seat tube will go straight vertical to the ground when the bike is being ridden and the threads of the BB will be at an angle that will eventually tilt the pedals. This crookedness can introduce a damaging stress into the rider's knees.
A common way to check seat tube alignment is to use the face of the BB as a reference. To insure the face is 90� to the threads, it has to be faced with a special tool. It is common that the threads might need to be taped 1st so the facing tool will work properly. Most frame builders have some kind of BB holding post attached to an alignment surface plate. Mine is cast iron (and I have an cast aluminum one too). A surface gage is used to find any alignment discrepancies while it is held on the table. If the steel tubing isn't heat treated, the tubes can be bent into alignment. Now the frame is prepared to check the rear triangle.
Framebuilders like myself have a step tool to find if the dropouts are equal distant from the frame's centerline while it is on the alignment table. An alternative tool is to use some kind of straight edge with a movable point on one end. The Park version has already been mentioned. Again for this method to be accurate, the front triangle has to be true. Once the stays are bent so the dropouts are in the right place, dropout alignment tools are used to bend the dropouts so their faces are perfectly parallel to each other as well as to the plane of the frame. Next a rear derailleur alignment tool is screwed into the dropout hanger. With the help of a true and properly dished rear wheel, this tool can be used to bend the hanger so the derailleur's jockey wheels are in plane with the rear wheel.
Fork alignment requires some kind of fork fixture to check that the dropouts are equal distant from the steerer's centerline. I'll skip further explanation on fork alignment as it is a bit of a process and not the point of this discussion.
A pro needs to hold closer than half a mm of tolerance. It is impossible to know how far out of alignment makes a difference. I've asked many of my customers if they can tell a difference before and after alignment and same say they can tell and others can't. Where that point is, is not important to me. I set a high standard of accuracy and hope others do too. I've seen many poorly aligned frames in my career and know that the expectation that any frame is close is not true. This process because of the tools and knowledge required does not lend itself well for an amateur home mechanic to be able to do a good job. That doesn't mean it is impossible but just that a typical or average person is unlikely to do so.
Likes For Doug Fattic:
12-01-20, 08:19 PM
#22
Senior Member

Join Date: Jul 2017
Location: Queens, NY for now...
Posts: 1,515
Bikes: 82 Lotus Unique, 86 Lotus Legend, 88 Basso Loto, 88 Basso PR, 89 Basso PR, 96 Bianchi CDI, 2013 Deda Aegis, 2019 Basso Diamante SV
Mentioned: 46 Post(s)
Tagged: 0 Thread(s)
Quoted: 943 Post(s)
Liked 172 Times
in
113 Posts
Doug out here making me wish I lived in Niles, Michigan, so I could pop into his shop with a few frames! Good stuff...
Likes For robertorolfo:
Likes For beicster:
12-01-20, 08:48 PM
#24
Senior Member
Join Date: Aug 2013
Posts: 2,321
Mentioned: 35 Post(s)
Tagged: 0 Thread(s)
Quoted: 767 Post(s)
Liked 1,898 Times
in
889 Posts
Not rocket science. Entirely possible to have purchased a decades old steel bike frame that has been spread to 126, and then back to 120 by "some yahoo with a 2x4," and never know it because it rides straight and measures out correctly.
No detraction meant toward the pros at all. Good work is good work.
No detraction meant toward the pros at all. Good work is good work.
Likes For BFisher:
12-01-20, 09:30 PM
#25
se�or miembro
Join Date: Dec 2018
Location: Pac NW
Posts: 6,629
Bikes: '70s - '80s Campagnolo
Mentioned: 92 Post(s)
Tagged: 0 Thread(s)
Quoted: 3891 Post(s)
Liked 6,491 Times
in
3,213 Posts
