


Help Sourcing Shifter Parts for an Old Cannondale
 07-21-23, 08:28 AM
#1
Senior Member
Thread Starter
Help Sourcing Shifter Parts for an Old Cannondale
Apparently the shifter bosses (studs?) are bolted right through the downtube on my ST 600 from the early 90's. The issue is that one of them stripped its threads causing both of them to come loose while riding yesterday. Are these easy to find? I tried Ebay but maybe I didn't know what to call them.
I could also, maybe, drill out the side that stripped, get a longer bolt and then put a nut on that side to hold the whole assembly together?
I could also, maybe, drill out the side that stripped, get a longer bolt and then put a nut on that side to hold the whole assembly together?
 07-21-23, 08:41 AM
#2
Senior Member
Thread Starter
Now I'm finding a few on ebay. "Boss" was the magic word--which only came to me while writing the post.
Still, if anyone has any advice about this I'd be glad to hear it. Thanks!
Still, if anyone has any advice about this I'd be glad to hear it. Thanks!
07-21-23, 10:18 AM
#3
Thread derailleur
Join Date: Mar 2004
Location: Glendora, CA
Posts: 645
Bikes: Merlin Extralight '94 & Cannondale Supersix '15
Mentioned: 0 Post(s)
Tagged: 0 Thread(s)
Quoted: 367 Post(s)
Liked 462 Times
in
264 Posts
I never knew this terrible design ever existed. One learns something every day.
Glad you found a - hopefully - economical solution.
Seems that sourcing some clamp-on shifters would work.
Or you could step into the 21st century and install brake lever shifters.
Glad you found a - hopefully - economical solution.
Seems that sourcing some clamp-on shifters would work.
Or you could step into the 21st century and install brake lever shifters.
Likes For roadcrankr:
07-21-23, 12:53 PM
#4
Senior Member
Thread Starter
For the record, the bike has bar-end shifters, so the bosses only exist to hold on the cable end thingies with adjustment barrels.
I'm going to try to find a long M5 bolt, thanks.
I'm going to try to find a long M5 bolt, thanks.
Likes For Headpost:
07-21-23, 01:15 PM
#5

Pedal to the medal
Interested to see how to solve this. I have the same issue, I bought an C'dale with no bosses, so I need to source a whole set.
07-21-23, 01:23 PM
#6
Dirty Heathen
Join Date: Oct 2015
Location: MC-778, 6250 fsw
Posts: 2,182
Bikes: 1997 Cannondale, 1976 Bridgestone, 1998 SoftRide, 1989 Klein, 1989 Black Lightning #0033
Mentioned: 19 Post(s)
Tagged: 0 Thread(s)
Quoted: 889 Post(s)
Liked 906 Times
in
534 Posts
Nova Cycles (frame building supplies) had a kit, but it doesn't look like they're in business anymore.
Improve_Part (sic) has a version in his eBay store, in CNC titanium") nice stuff, and he's a big supporter of the Vintage Cannondale community.
nice stuff, and he's a big supporter of the Vintage Cannondale community.
For cable stops, instead of DT shifters, you could remove the stud and drill out the bosses to clear an M5 or 10-32 machine screw as a through -bolt, holding the whole assembly together from the outside
Improve_Part (sic) has a version in his eBay store, in CNC titanium
nice stuff, and he's a big supporter of the Vintage Cannondale community. For cable stops, instead of DT shifters, you could remove the stud and drill out the bosses to clear an M5 or 10-32 machine screw as a through -bolt, holding the whole assembly together from the outside
07-21-23, 01:49 PM
#7
Team Beer
Join Date: Apr 2004
Location: Sacramento CA
Posts: 6,339
Bikes: Too Many
Mentioned: 3 Post(s)
Tagged: 0 Thread(s)
Quoted: 114 Post(s)
Liked 159 Times
in
104 Posts
Nova Cycles (frame building supplies) had a kit, but it doesn't look like they're in business anymore.
Improve_Part (sic) has a version in his eBay store, in CNC titanium nice stuff, and he's a big supporter of the Vintage Cannondale community.
For cable stops, instead of DT shifters, you could remove the stud and drill out the bosses to clear an M5 or 10-32 machine screw as a through -bolt, holding the whole assembly together from the outside
Improve_Part (sic) has a version in his eBay store, in CNC titanium
nice stuff, and he's a big supporter of the Vintage Cannondale community.For cable stops, instead of DT shifters, you could remove the stud and drill out the bosses to clear an M5 or 10-32 machine screw as a through -bolt, holding the whole assembly together from the outside
__________________
I'm not one for fawning over bicycles, but I do believe that our bikes communicate with us, and what this bike is saying is, "You're an idiot." BikeSnobNYC
I'm not one for fawning over bicycles, but I do believe that our bikes communicate with us, and what this bike is saying is, "You're an idiot." BikeSnobNYC
07-21-23, 02:25 PM
#8
Master Parts Rearranger

Join Date: Mar 2015
Location: Portlandia's Kuiper Belt, OR
Posts: 4,403
Bikes: 1982 Trek 720 - 1985 Trek 620 - 1984 Trek 620 - 1980 Trek 510 - Other luminaries past and present
Mentioned: 221 Post(s)
Tagged: 0 Thread(s)
Quoted: 1556 Post(s)
Liked 2,024 Times
in
989 Posts
I bought a kit from Nova for a 1990 ST400 I had a little bit ago. Really appreciated its availability and it worked well. Bummed that they aren't open anymore.
07-21-23, 02:56 PM
#9
Senior Member
Thread Starter
There are a couple on ebay that look like they would work. I'm going to try a cheaper route by finding a long M5 bolt and drilling out the stripped part. Not sure if it will need a nut on one side or not.
07-22-23, 10:27 AM
#10

feros ferio

Join Date: Jul 2000
Location: www.ci.encinitas.ca.us
Posts: 21,800
Bikes: 1959 Capo Modell Campagnolo; 1960 Capo Sieger (2); 1962 Carlton Franco Suisse; 1970 Peugeot UO-8; 1982 Bianchi Campione d'Italia; 1988 Schwinn Project KOM-10;
Mentioned: 44 Post(s)
Tagged: 0 Thread(s)
Quoted: 1393 Post(s)
Liked 1,329 Times
in
837 Posts
How about just a clamp-on cable stop?
When I converted the UO-8 frame to stem shifters (for my wife) and eventually barcons (for me), I chiseled off the single shift lever boss and covered the scar with a clamp on cable stop, which has served us well for almost 50 years.
My UO-8 with barcon cables routed between the rack and the cylindrical Bellwether front bag.
__________________
"Far and away the best prize that life offers is the chance to work hard at work worth doing." --Theodore Roosevelt
Capo: 1959 Modell Campagnolo, S/N 40324; 1960 Sieger (2), S/N 42624, 42597
Carlton: 1962 Franco Suisse, S/N K7911
Peugeot: 1970 UO-8, S/N 0010468
Bianchi: 1982 Campione d'Italia, S/N 1.M9914
Schwinn: 1988 Project KOM-10, S/N F804069
Likes For brian3069:
 07-22-23, 02:54 PM
#13
Senior Member

Join Date: Jan 2015
Location: Los Angeles
Posts: 4,707
Bikes: 82 Medici, 2011 Richard Sachs, 2011 Milwaukee Road
Mentioned: 55 Post(s)
Tagged: 0 Thread(s)
Quoted: 1952 Post(s)
Liked 2,013 Times
in
1,112 Posts
A local shop owned by a Master Mechanic told me he has epoxied many shifter bosses to Cannondale's.
__________________
I don't do: disks, tubeless, e-shifting, or bead head nymphs.
I don't do: disks, tubeless, e-shifting, or bead head nymphs.
Likes For Classtime:
07-22-23, 03:01 PM
#14
Senior Member
Join Date: Oct 2022
Posts: 1,378
Bikes: a couple
Mentioned: 15 Post(s)
Tagged: 0 Thread(s)
Quoted: 563 Post(s)
Liked 863 Times
in
456 Posts
Apparently the shifter bosses (studs?) are bolted right through the downtube on my ST 600 from the early 90's. The issue is that one of them stripped its threads causing both of them to come loose while riding yesterday. Are these easy to find? I tried Ebay but maybe I didn't know what to call them.
I could also, maybe, drill out the side that stripped, get a longer bolt and then put a nut on that side to hold the whole assembly together?
I could also, maybe, drill out the side that stripped, get a longer bolt and then put a nut on that side to hold the whole assembly together?
If one boss is stripped, can you still use the other side to install the piece if you jb welded the one bad side stationary to the stud (not the frame) and left the undamaged side to install/adjust?
Making that center stud wouldn't be any type of difficult. (allthread cut to size)
Last edited by Schweinhund; 07-22-23 at 03:06 PM.
07-22-23, 08:16 PM
#15
Senior Member
Thread Starter
Thanks for all the help and attention.
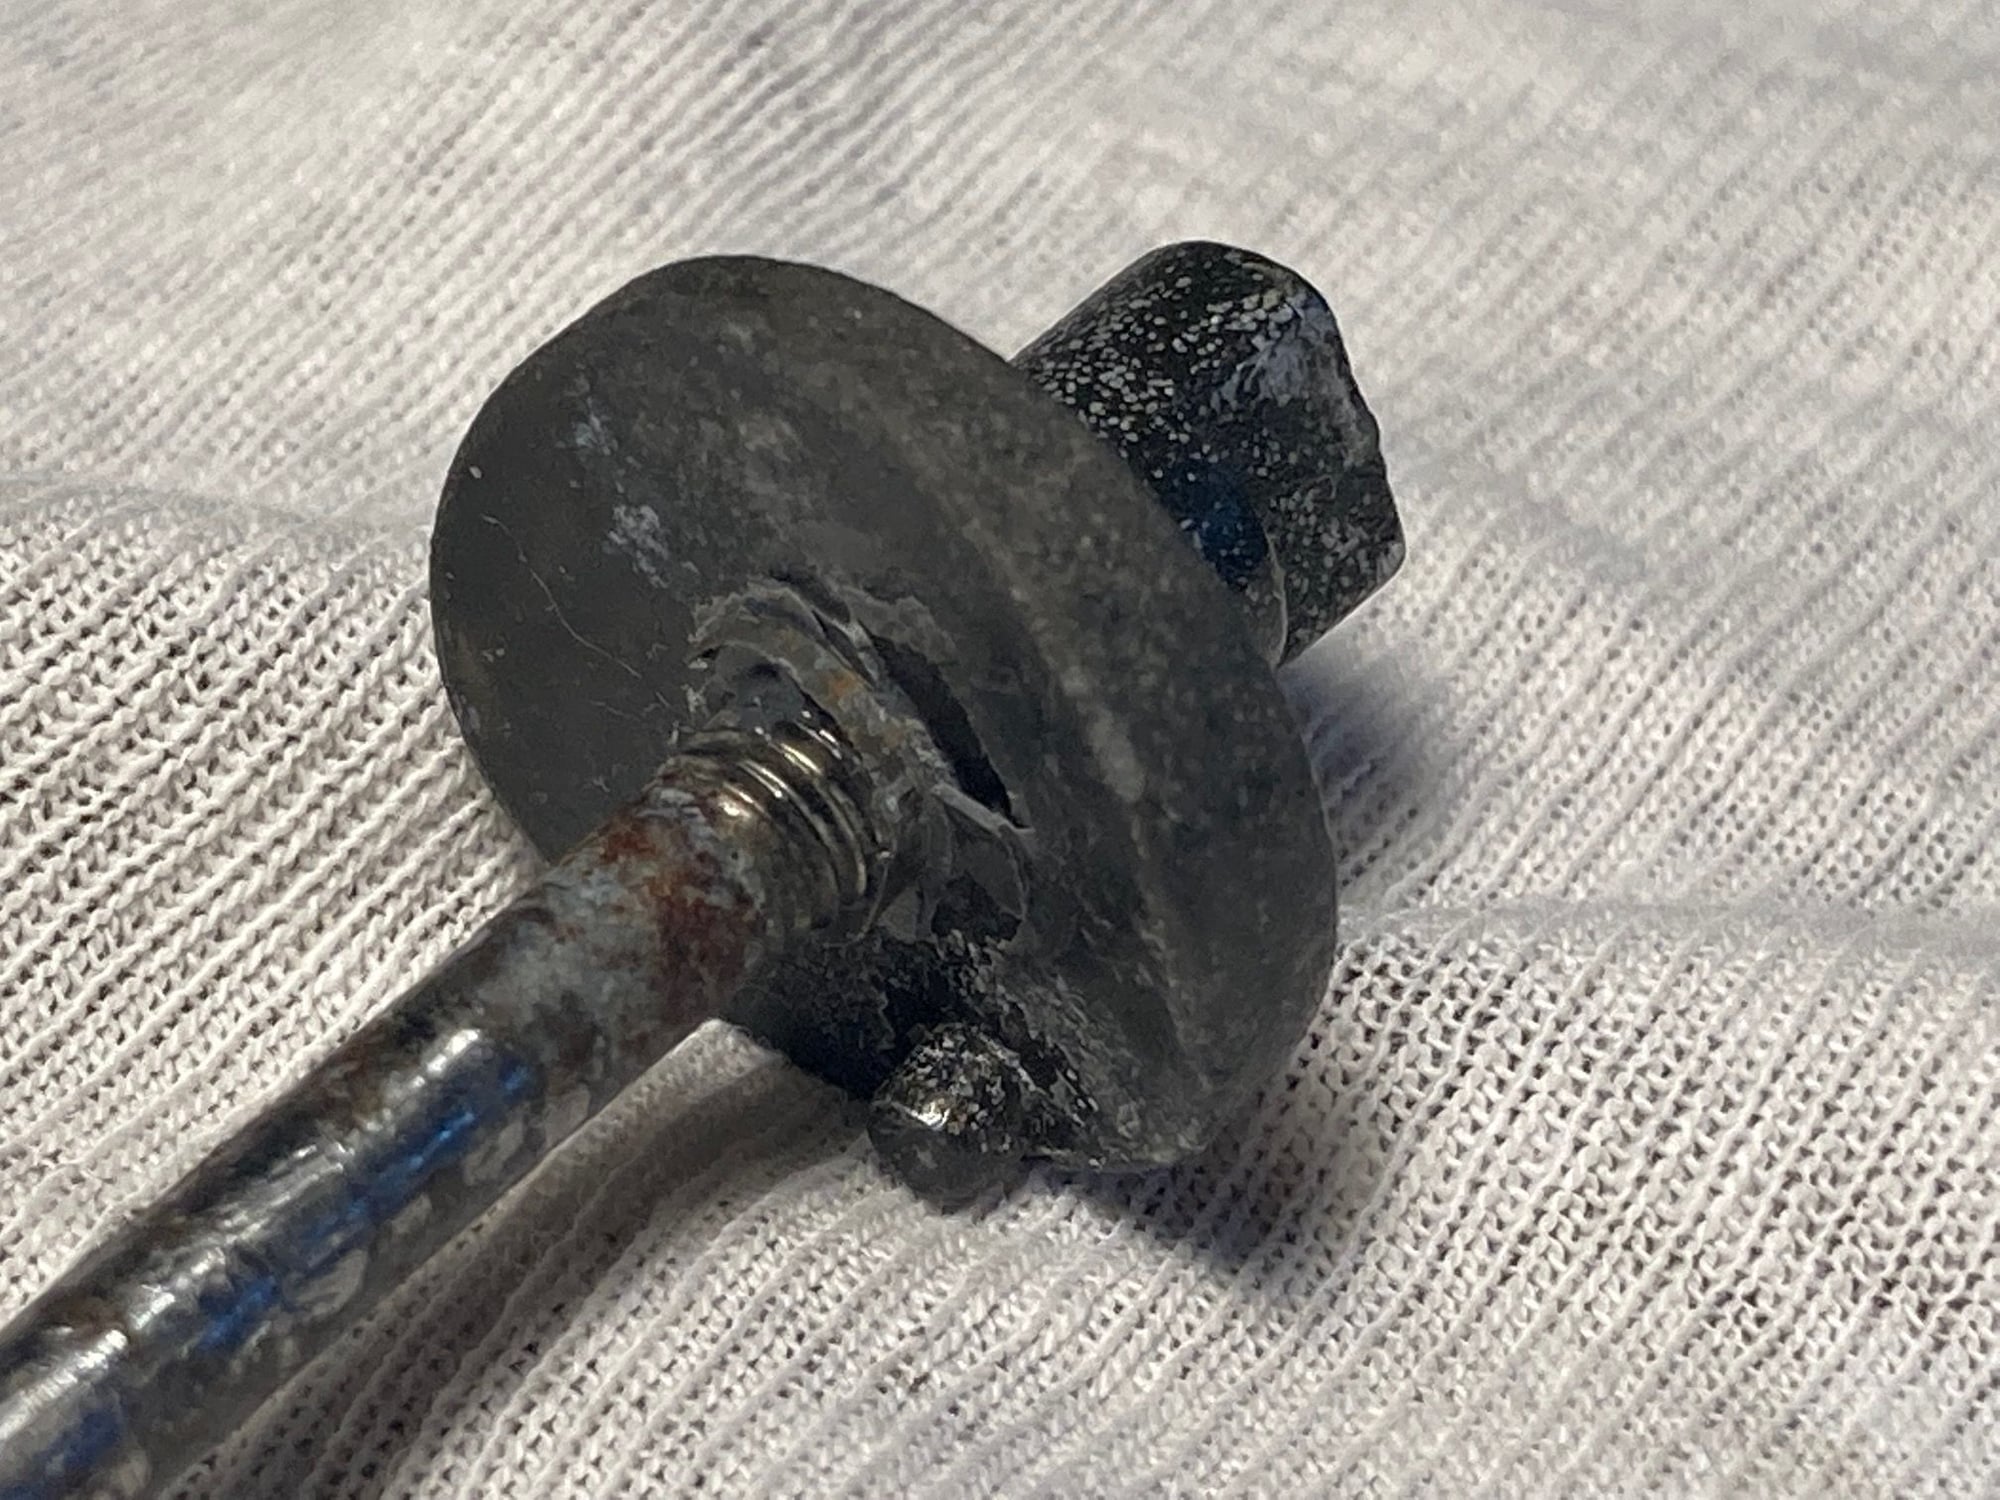
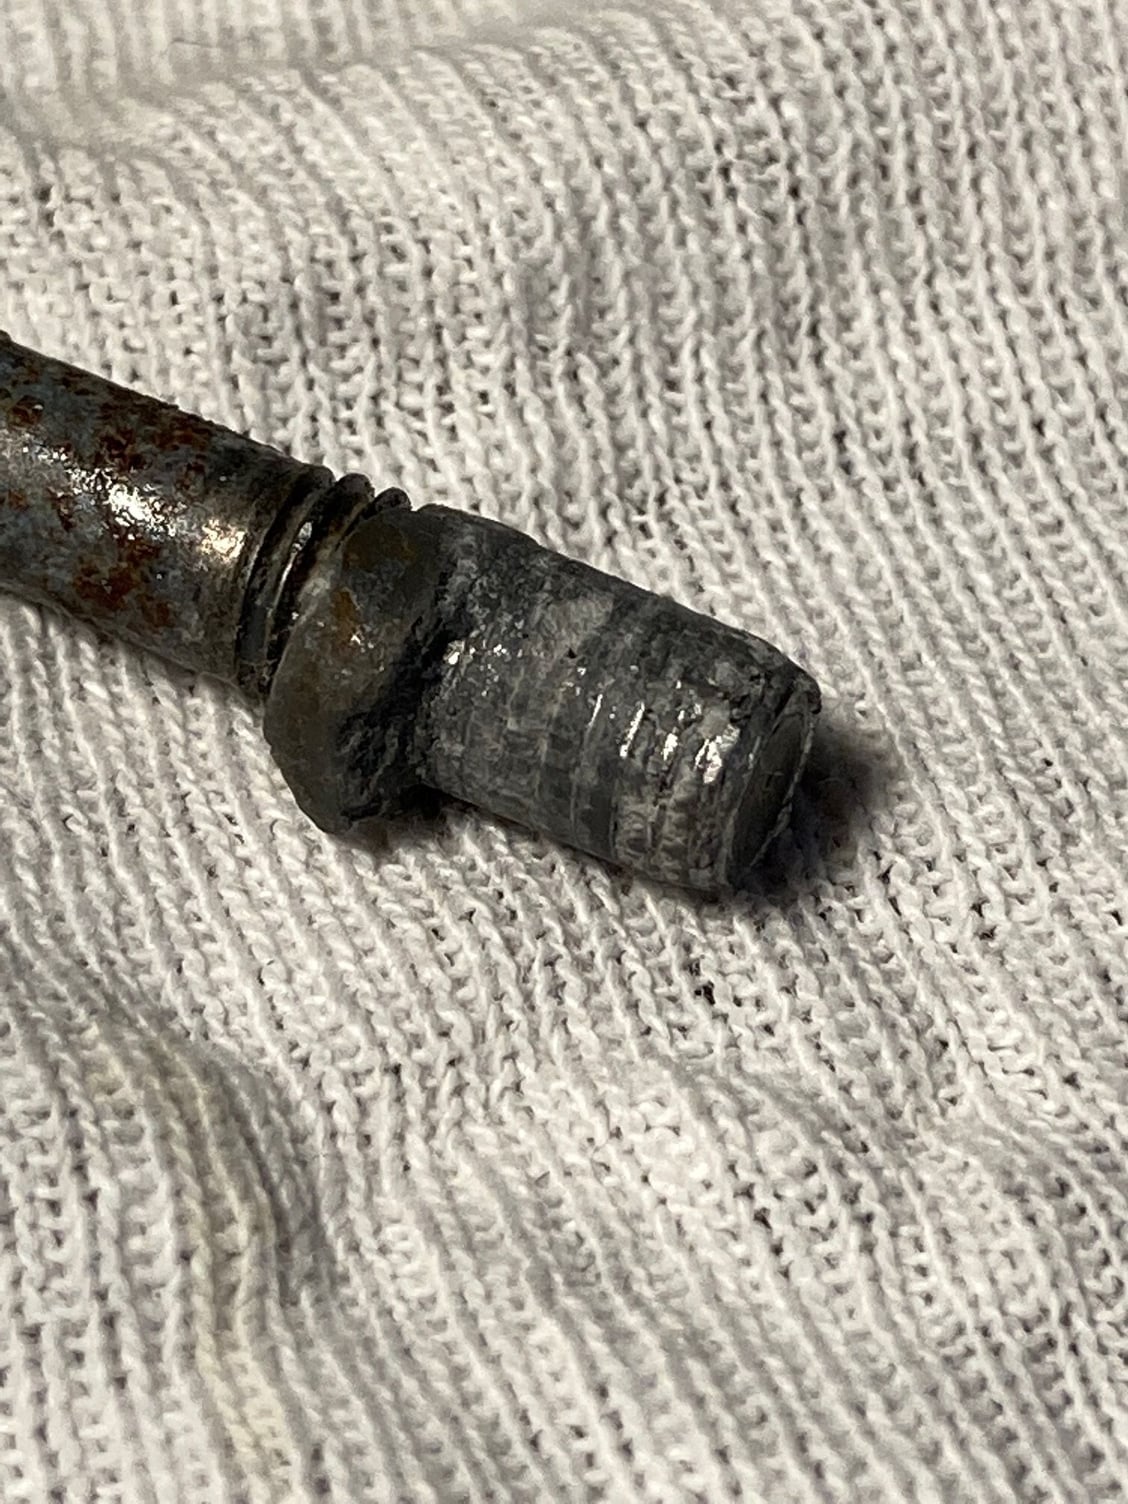
Just to be clearer about what happened, the boss on one side stripped and broke. It's hard to see in the pictures, but the one on the right is missing the lip (flange?) that went partway into the down tube's hole along with the threaded rod. That's not very clear, but here is a close-up of the piece that broke off.
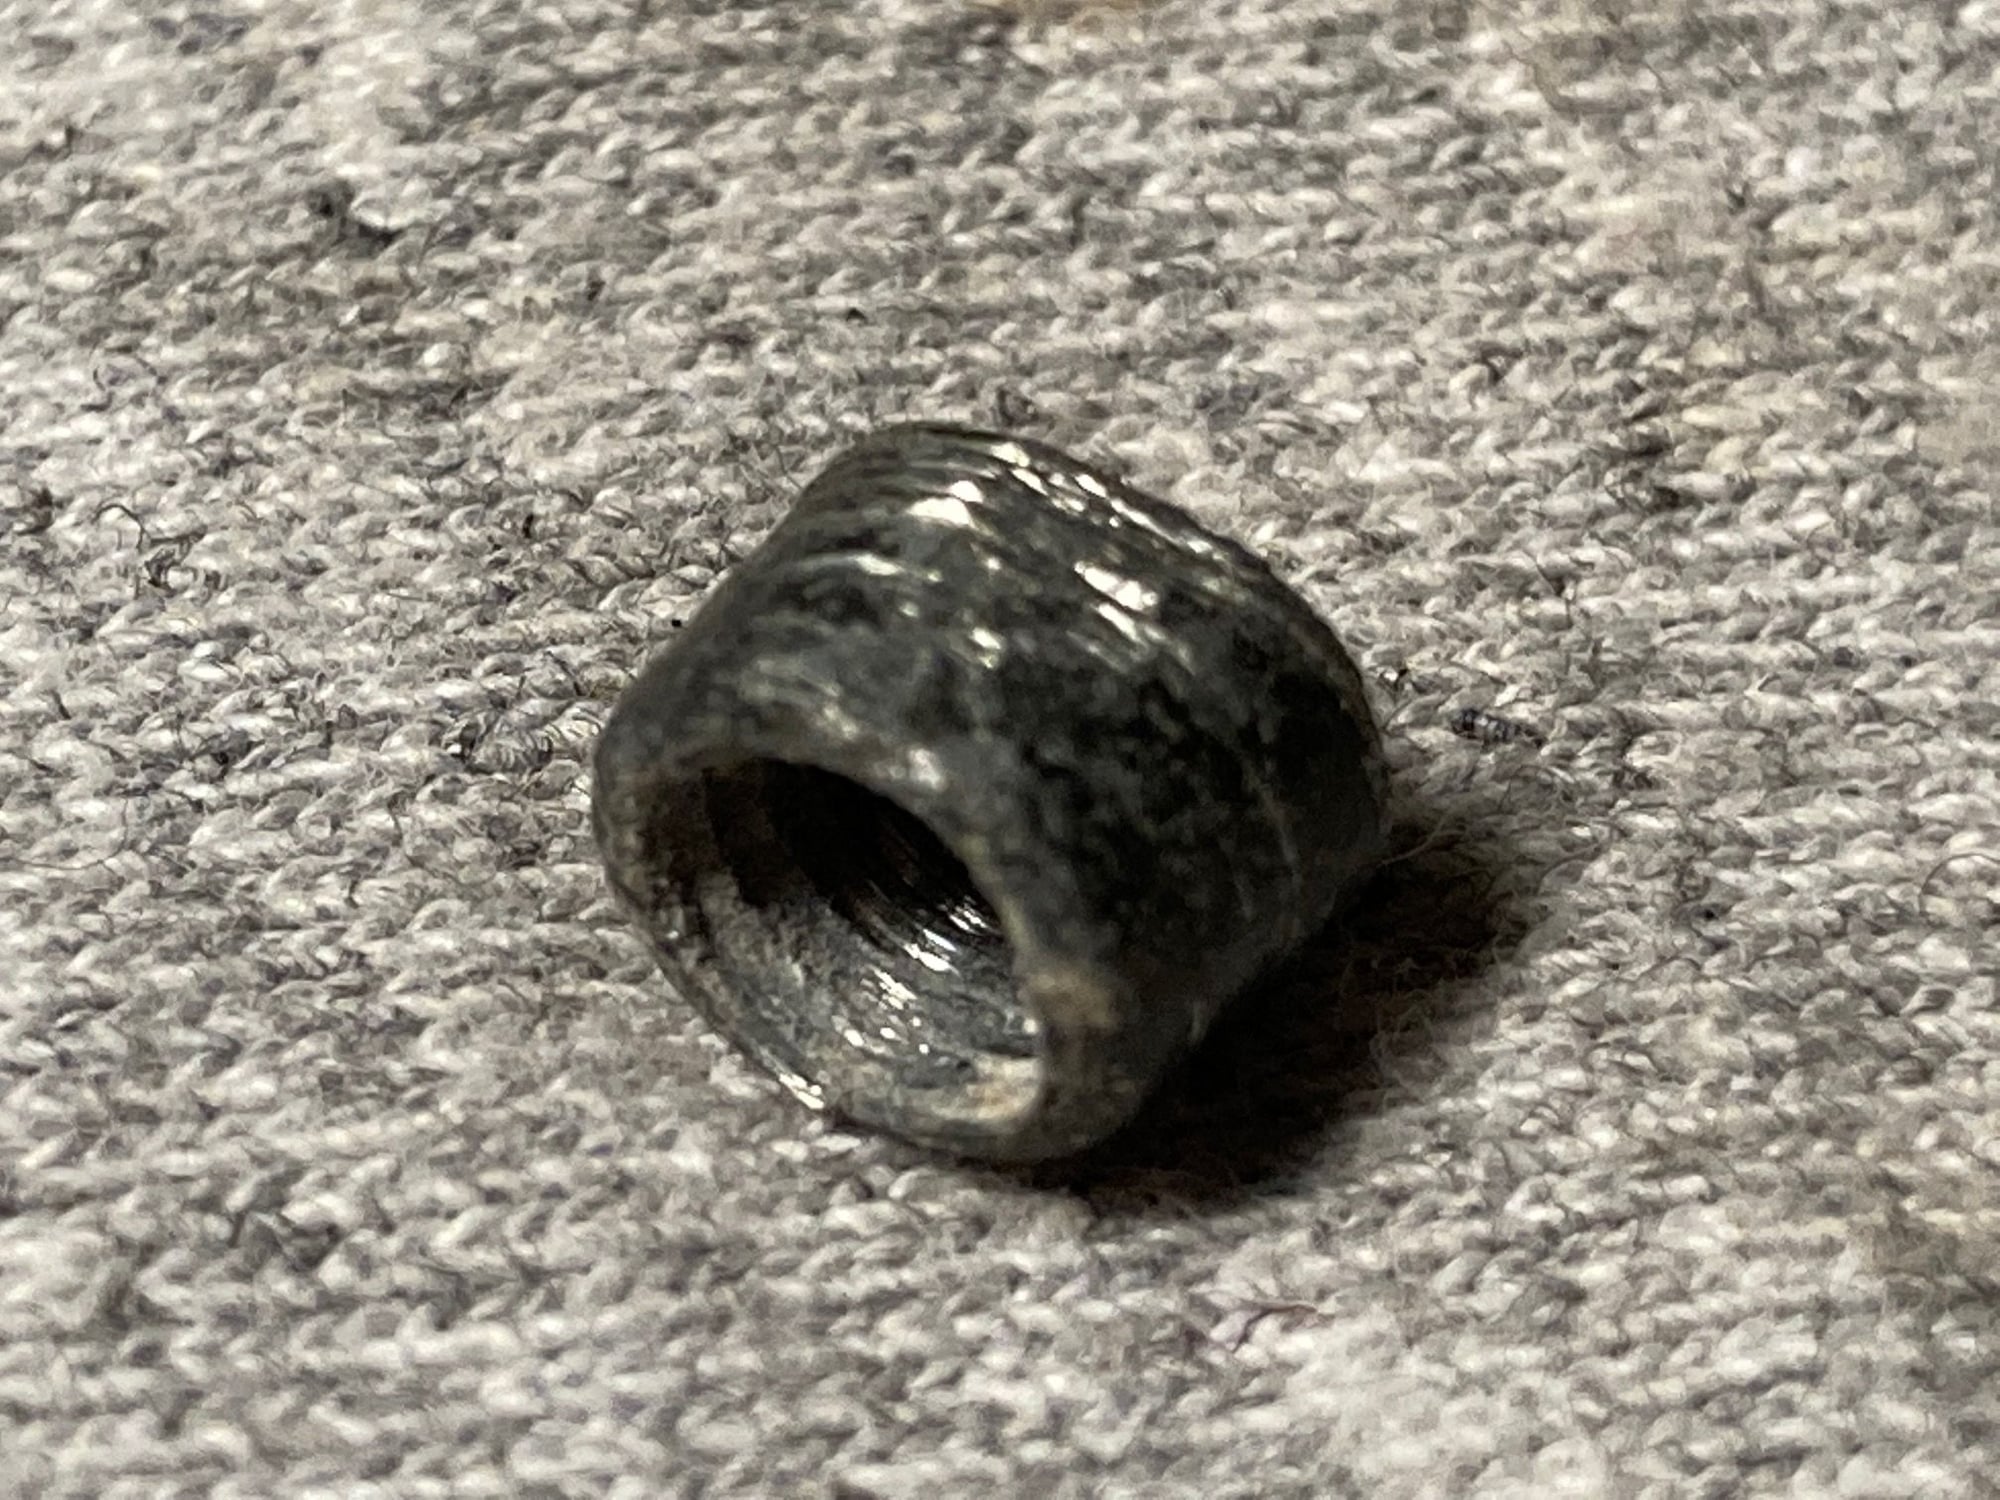
So that boss is both stripped and missing some of the metal that's supposed to hold it onto the threaded rod--which doesn't seem to be stripped, although it's plainly not in good shape. Some kind of epoxy or JB Weld would probably still work even with the compromised boss, but I'd feel better drilling it out and then bolting the whole thing together somehow. It's no fun when that thing pops off your bike and you're stuck with one--high--gear..Luckily I was close to home!
I'd also rather not jury rig some kind of clamp just because it would look so wrong on a Cannondale. That would also definitely solve the problem though.
Thanks again.
Just to be clearer about what happened, the boss on one side stripped and broke. It's hard to see in the pictures, but the one on the right is missing the lip (flange?) that went partway into the down tube's hole along with the threaded rod. That's not very clear, but here is a close-up of the piece that broke off.
So that boss is both stripped and missing some of the metal that's supposed to hold it onto the threaded rod--which doesn't seem to be stripped, although it's plainly not in good shape. Some kind of epoxy or JB Weld would probably still work even with the compromised boss, but I'd feel better drilling it out and then bolting the whole thing together somehow. It's no fun when that thing pops off your bike and you're stuck with one--high--gear..Luckily I was close to home!
I'd also rather not jury rig some kind of clamp just because it would look so wrong on a Cannondale. That would also definitely solve the problem though.
Thanks again.
Likes For Headpost:
07-22-23, 08:34 PM
#16
Senior Member
Thread Starter
I'm not clear, is the center stud stripped on one side or is the boss itself stripped?
If one boss is stripped, can you still use the other side to install the piece if you jb welded the one bad side stationary to the stud (not the frame) and left the undamaged side to install/adjust?
Making that center stud wouldn't be any type of difficult. (allthread cut to size)
If one boss is stripped, can you still use the other side to install the piece if you jb welded the one bad side stationary to the stud (not the frame) and left the undamaged side to install/adjust?
Making that center stud wouldn't be any type of difficult. (allthread cut to size)
My thanks again.
Last edited by Headpost; 07-22-23 at 08:50 PM.
07-23-23, 07:42 AM
#17
Senior Member
Join Date: Oct 2022
Posts: 1,378
Bikes: a couple
Mentioned: 15 Post(s)
Tagged: 0 Thread(s)
Quoted: 563 Post(s)
Liked 863 Times
in
456 Posts
Only one side is stripped so I could use the other side to install the piece, as you--and others--suggest. Right now I'm hoping to basically do the same thing with a bolt that also holds on the cable stop on the damaged side, though. That bolt will also have to be cut down to size. As i said, I just don't trust any kind of glue to do the job. Maybe I'm being silly.
My thanks again.
My thanks again.
If I understand what you'd like to do, I don't believe it's going to work out well.
Glue isn't what it used to be, technology advances
Last edited by Schweinhund; 07-23-23 at 07:48 AM.
07-25-23, 04:49 PM
#18
Senior Member
Thread Starter
Okay, I tried to JB Weld it, and I'd hoped, and thought, that this would be a happy post to end this thread, but it failed almost immediately after installing. This is not an I-told-you-so post, though. I'm sure i did things wrong.
The glued parts:
The remains of the the JB weld on the rod:
Possible problems:
Did I not give it long enough to dry--24hrs?
Although I cleaned off the rod as well as I could, I made no attempt to clean the inside of the hole in the boss.beforehand.
I was sparing with the stuff because I didn't want this to be a "permanent" installation, but if I had put the JB Weld all over everything, including the sides of the frame, that would have obviously been a completely different situation. In that case, though, if something went wrong with one of the bosses, I don't know how you'd fix it--I guess you'd just chip it off and glue another one on?
I didn't tighten down the bosses very much on the frame, but I didn't realize that, when you put on the cable stops, they also push against the side of the frame while pulling on the rod--and I really tightened these down, as I tend to do. This was probably the problem, and why it broke in the first place, possibly. If I glue it again I will just tighten these on lightly, maybe with some thread lock on them.
My thanks again for everyone's advice.
Last edited by Headpost; 07-25-23 at 04:59 PM.
07-25-23, 09:07 PM
#19
aka: Dr. Cannondale
Join Date: Jul 2009
Posts: 7,735
Mentioned: 234 Post(s)
Tagged: 0 Thread(s)
Quoted: 2155 Post(s)
Liked 3,406 Times
in
1,206 Posts
I’ll check in the morning to see if I have one of these.
Yes, if the bolts for the stops were too long and you tightened them against the end of the thru-bolt, that’s what caused the thru bolt to strip.
Yes, if the bolts for the stops were too long and you tightened them against the end of the thru-bolt, that’s what caused the thru bolt to strip.
__________________
Hard at work in the Secret Underground Laboratory...
Hard at work in the Secret Underground Laboratory...
07-30-23, 10:21 PM
#20
Senior Member
Thread Starter
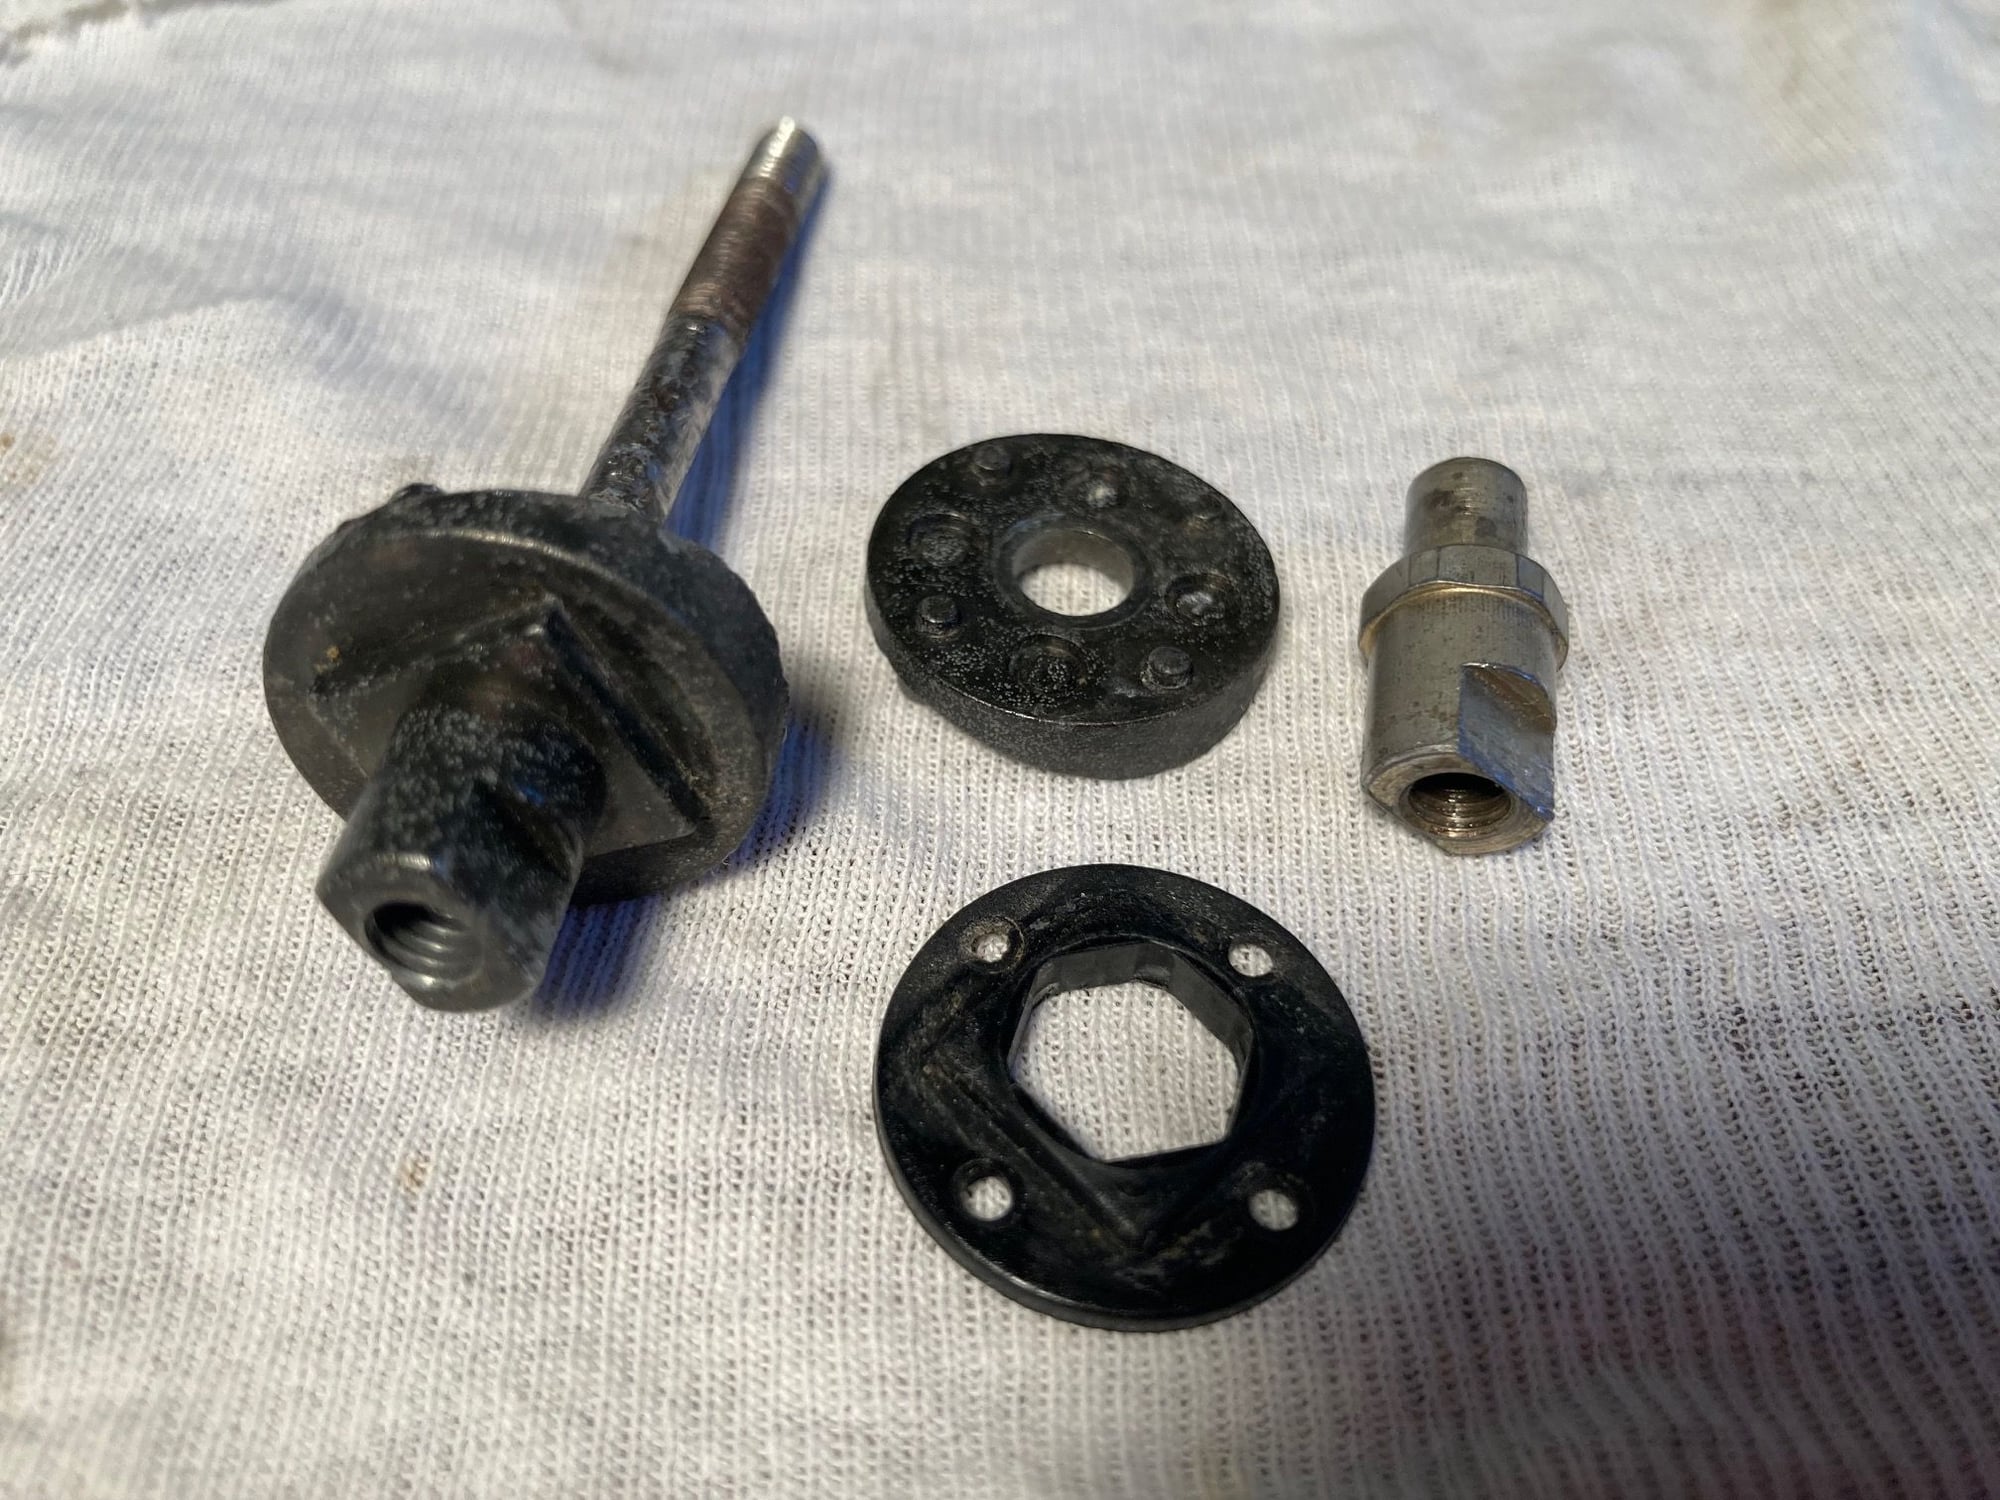
One of the bosses is one-piece, and it's no problem tightening the cable-stop against this one. The other boss is made up of three pieces, though, and when you tighten the cable stop bolt on this side the "washer" pieces slide and push against the side of the down tube. Maybe these aren't the right pieces or something is broken?
I reglued the thru bolt to the broken boss and reinstalled it without tightening the bolt on the dangerous side so much this time, and it's holding. I don't trust it, though, so when (if?) the long M5 bolt I ordered from China through Ebay arrives I will probably still try to bolt the entire assembly together.
07-31-23, 06:18 AM
#21
aka: Dr. Cannondale
Join Date: Jul 2009
Posts: 7,735
Mentioned: 234 Post(s)
Tagged: 0 Thread(s)
Quoted: 2155 Post(s)
Liked 3,406 Times
in
1,206 Posts
Those are the correct pieces. The disc shaped metal piece goes against the downtube. The brass colored piece threads on to the thru-bolt where it comes thru the disc. The plastic piece slides on after the brass piece is tightened and is held on by both the fitting into the brass piece hex and the small pips on the disc. You have to play with things a little to get the shiftier mount lined up properly. Check to see if the thread on the brass piece are bunged up- you might want to re-tap that before installing the new thru-bolt.
__________________
Hard at work in the Secret Underground Laboratory...
Hard at work in the Secret Underground Laboratory...
07-31-23, 12:55 PM
#22
Ride, Wrench, Swap, Race

Join Date: Jan 2010
Location: Northern California
Posts: 9,194
Bikes: Cheltenham-Pedersen racer, Boulder F/S Paris-Roubaix, Varsity racer, '52 Christophe, '62 Continental, '92 Merckx, '75 Limongi, '76 Presto, '72 Gitane SC, '71 Schwinn SS, etc.
Mentioned: 132 Post(s)
Tagged: 0 Thread(s)
Quoted: 1565 Post(s)
Liked 1,296 Times
in
866 Posts
I find that JB Weld is still somewhat soft after only 24 hours.
07-31-23, 07:15 PM
#23
Senior Member
Thread Starter
Thanks and thanks!
--The threads on the unbroken/brass side seem fine.
--So maybe I didn't let it dry long enough before, and this time it will hold . . .
--The threads on the unbroken/brass side seem fine.
--So maybe I didn't let it dry long enough before, and this time it will hold . . .
03-18-24, 07:01 PM
#24
Senior Member
Thread Starter
Please forgive me for updating this old thread, however a few days ago the shifter boss assembly broke again. I think there just wasn't enough bolt-end going into the broken shifter boss for the JB-Weld to grab onto. If I'd also glued the bosses to the frame, as many people advised, that probably would have held, but, as I think I said, I didn't want to do that...
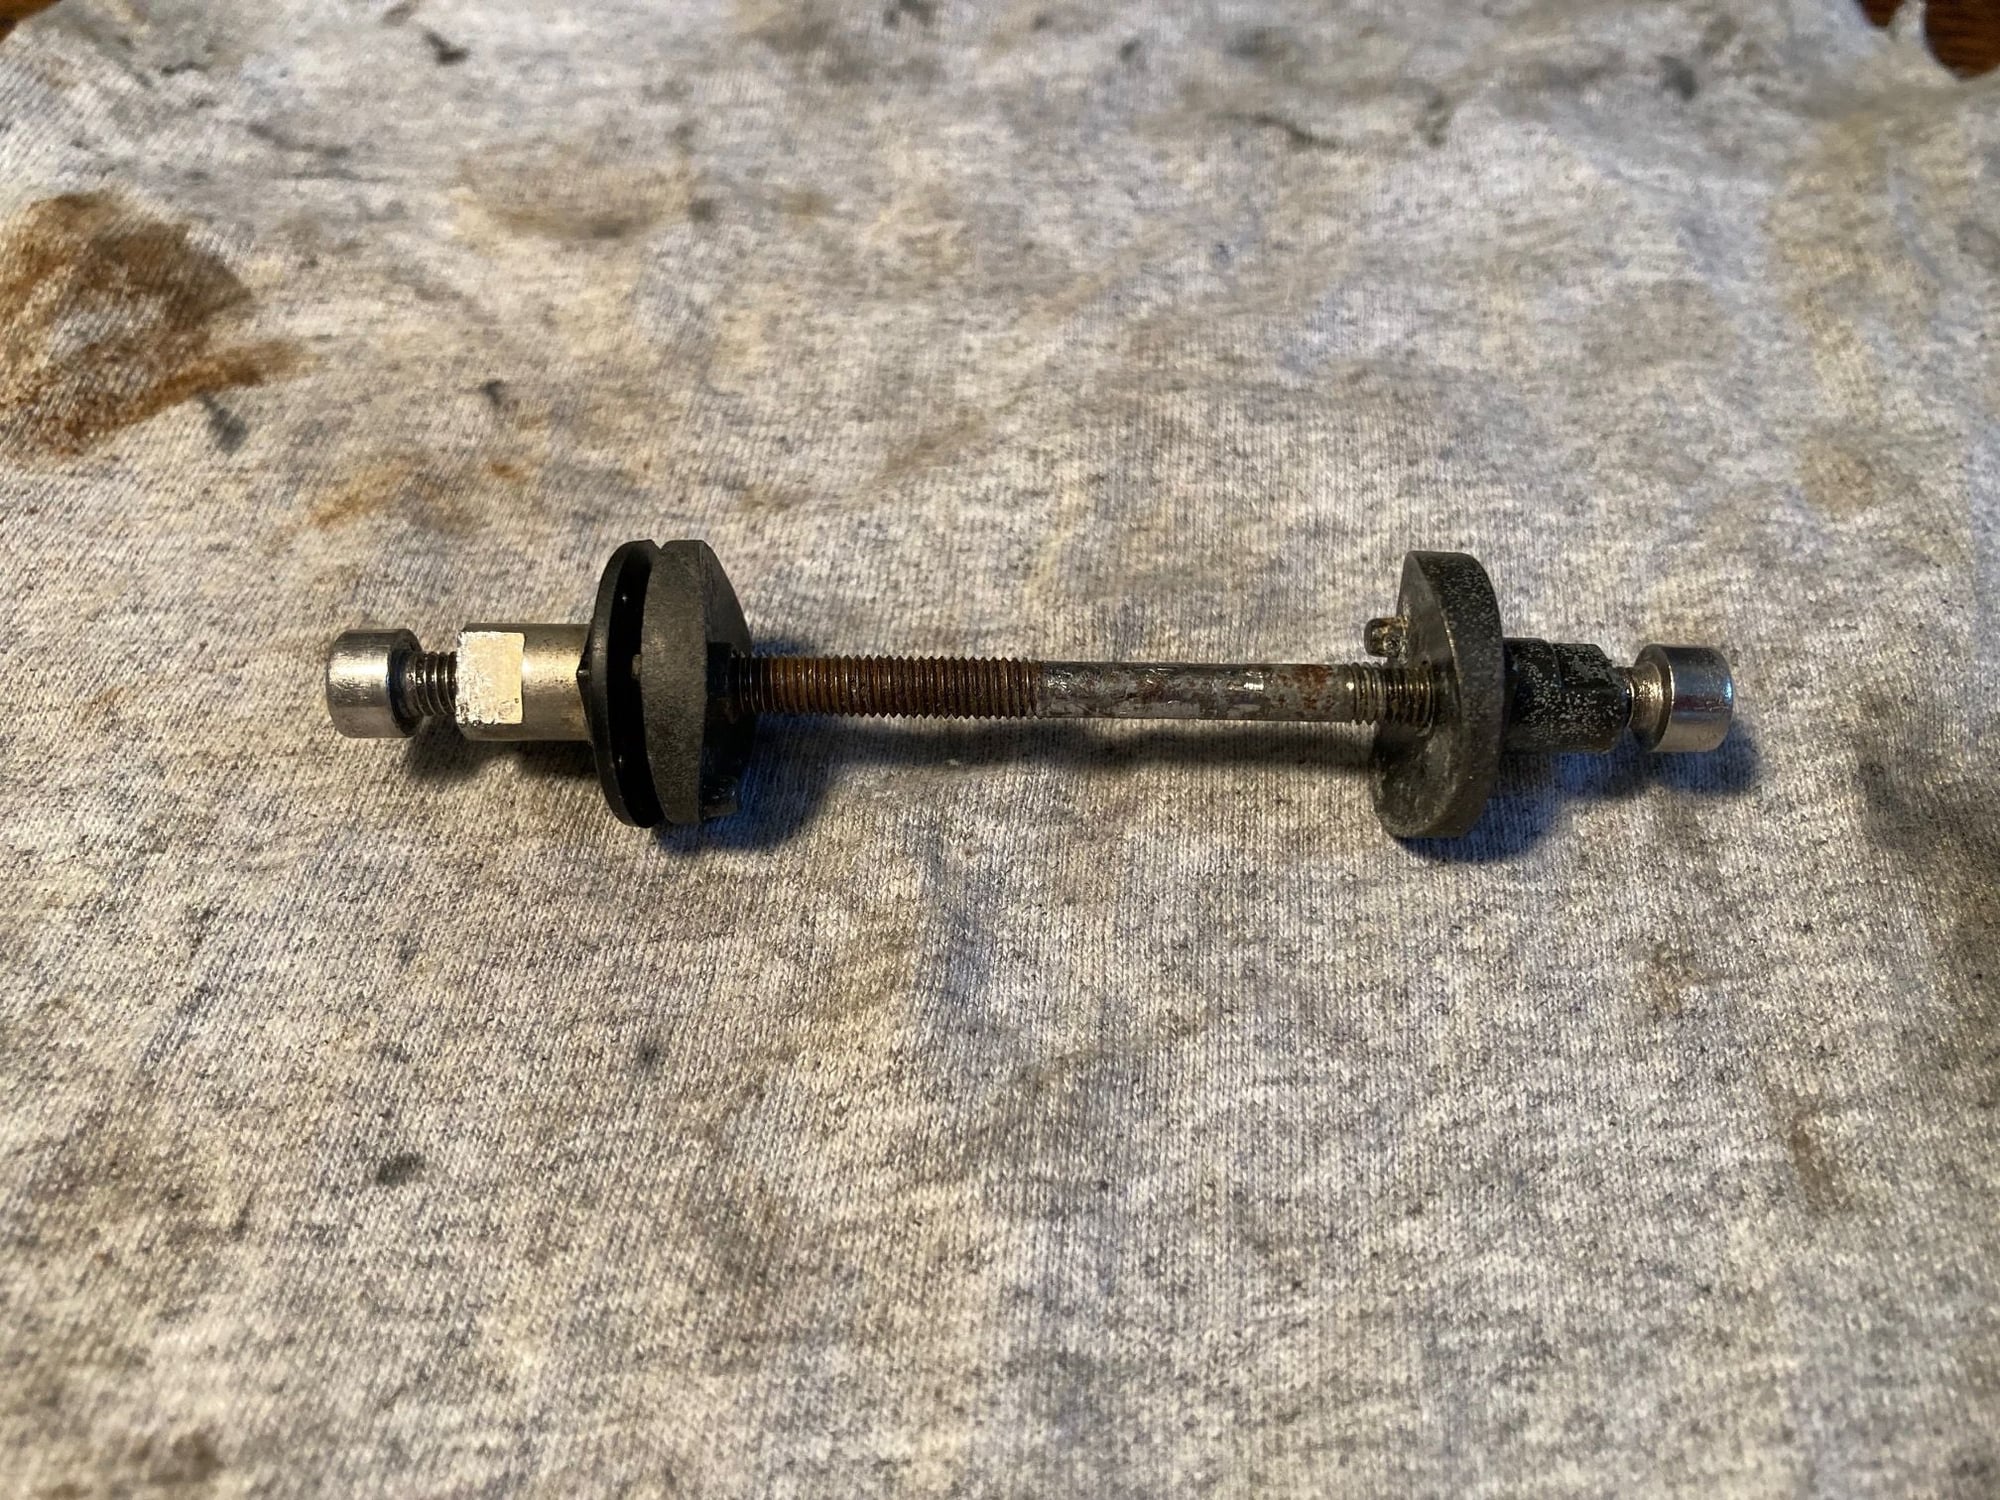
So anyway, I decided to go with my original idea after all of bolting right through to the other side, and I think it ended up being a very effective fix for this.
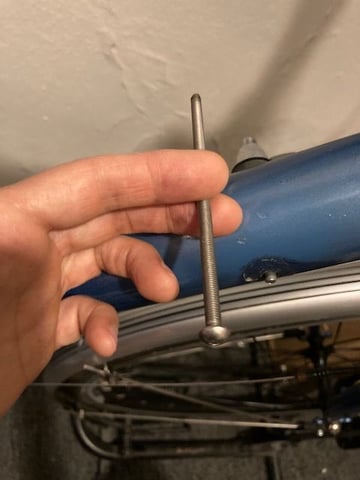
I ordered this long, stainless M5 bolt.
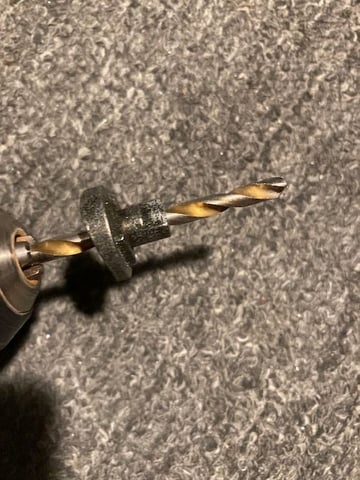
This was the only piece that had to be drilled out--the already-broken boss. I made the hole just big enough so that the threads of the bolt didn't engage.
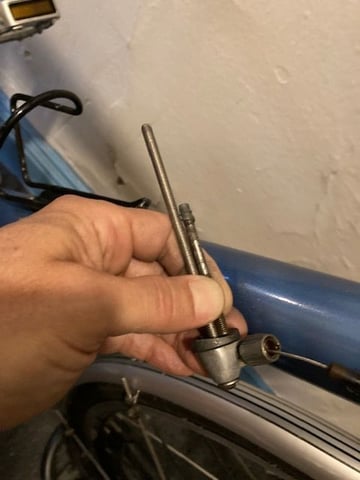
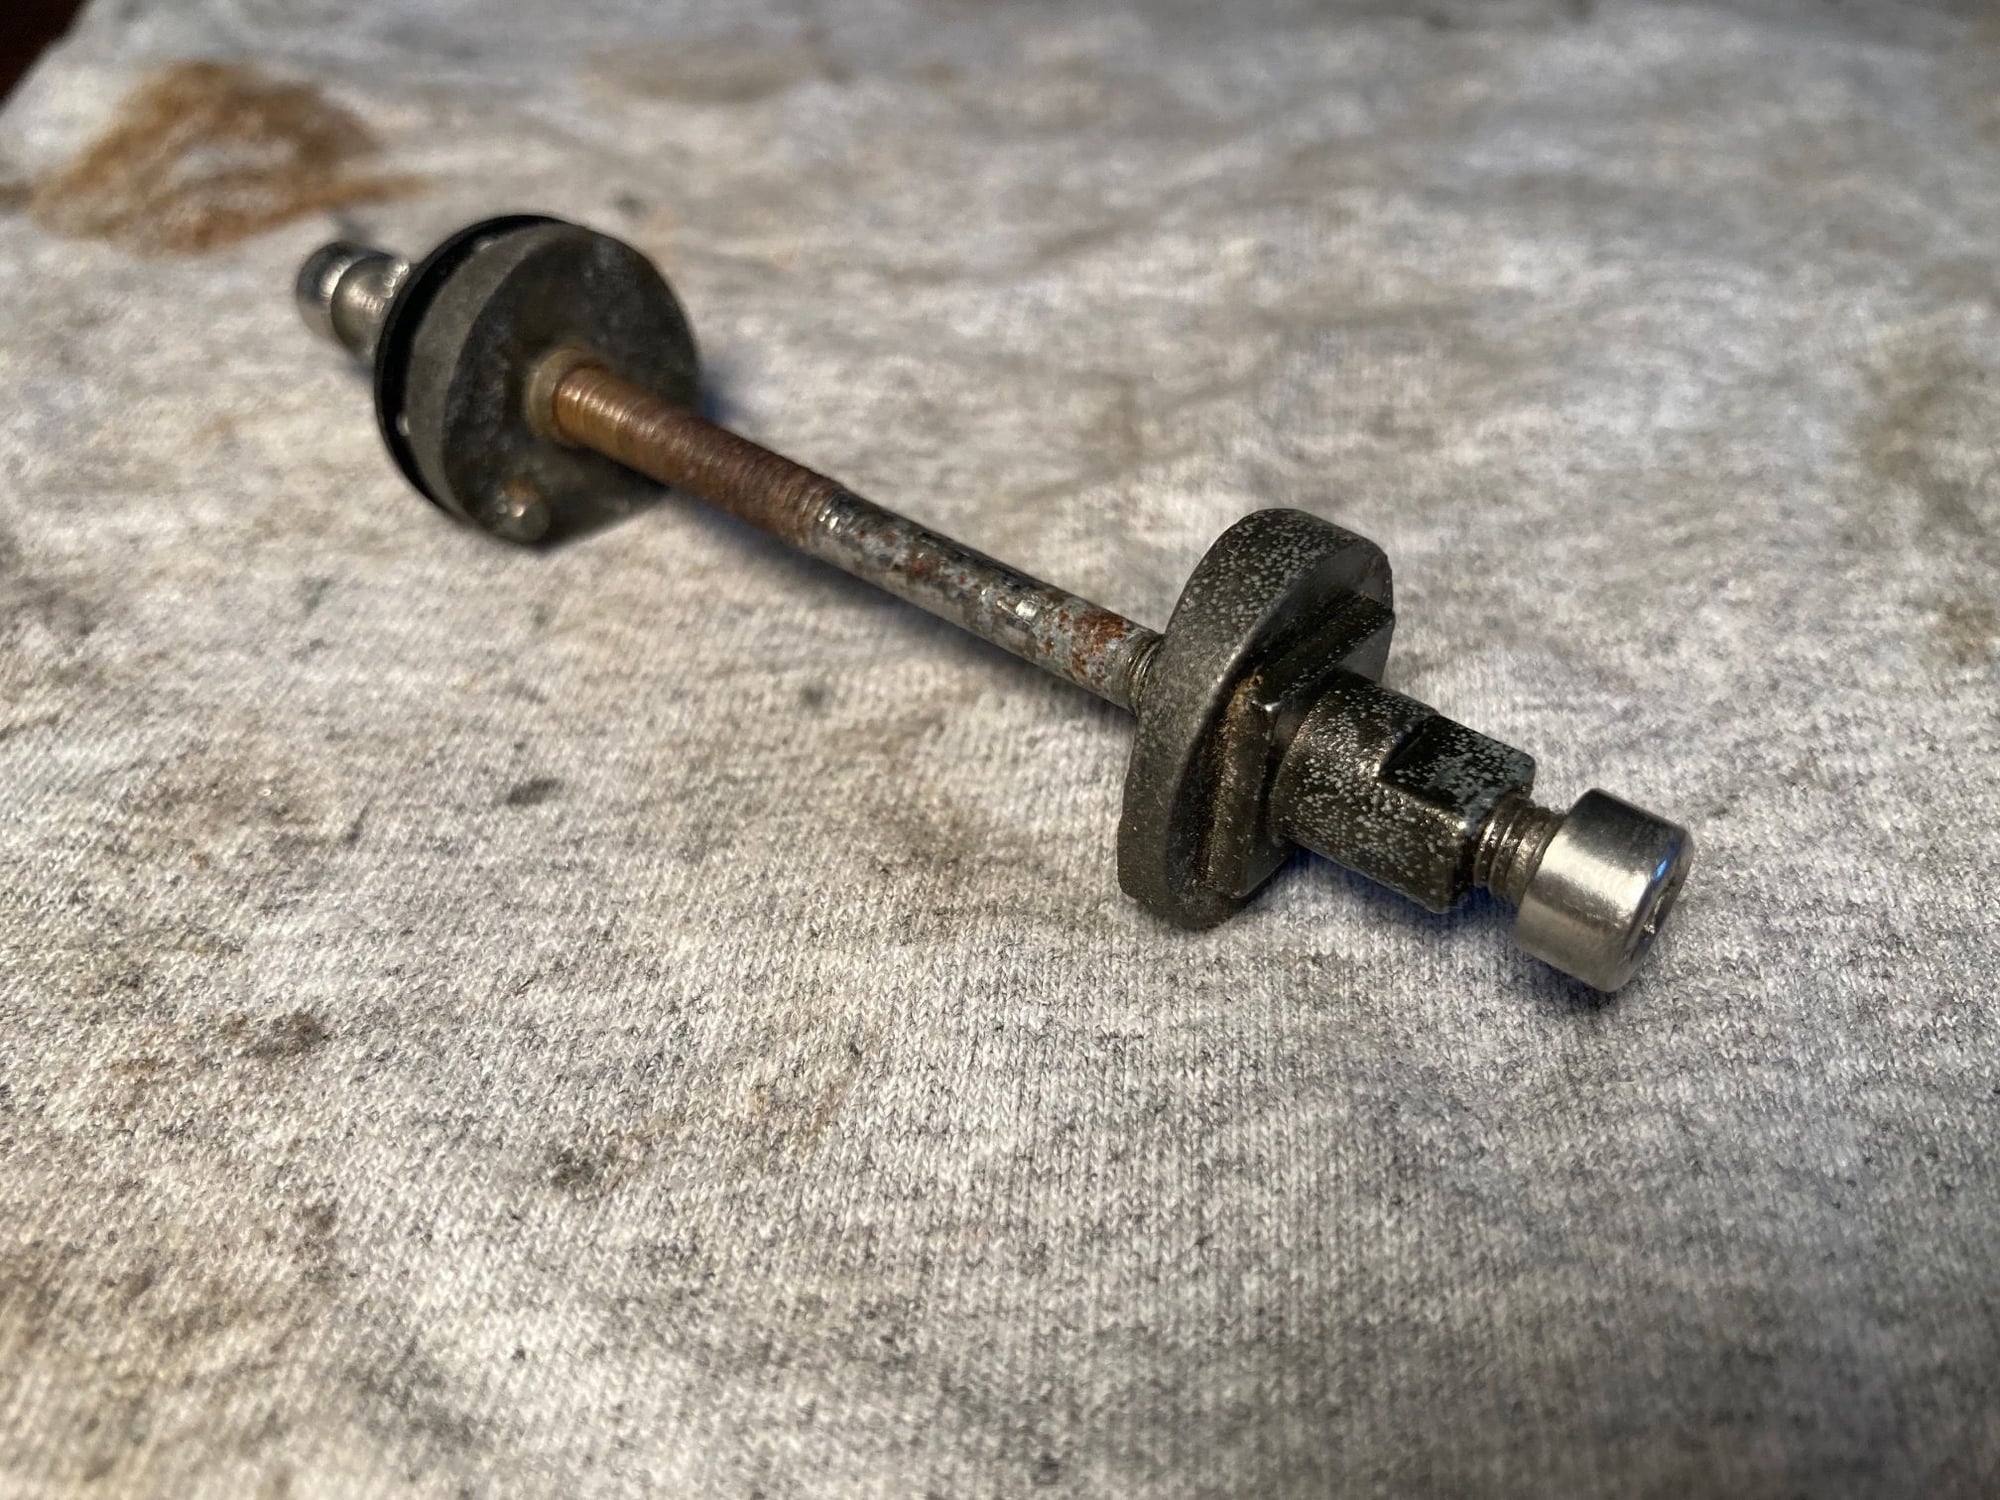
This is the old bolt held up against the new assembly for sizing purposes.
This is the new bolt cut down to the correct size. (I actually made it too long the first time and had to cut it again.)
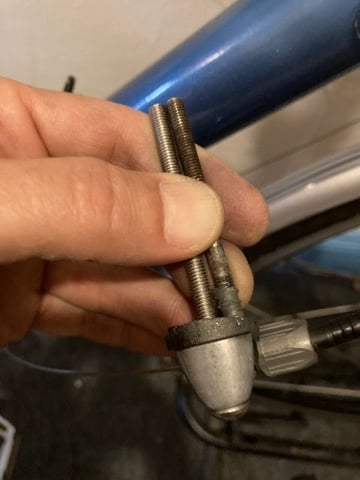
The bolt needs to be long enough so that it grabs plenty of threading of the boss on the other side but short enough so that it doesn't interfere with the other bolt coming from the opposite direction.
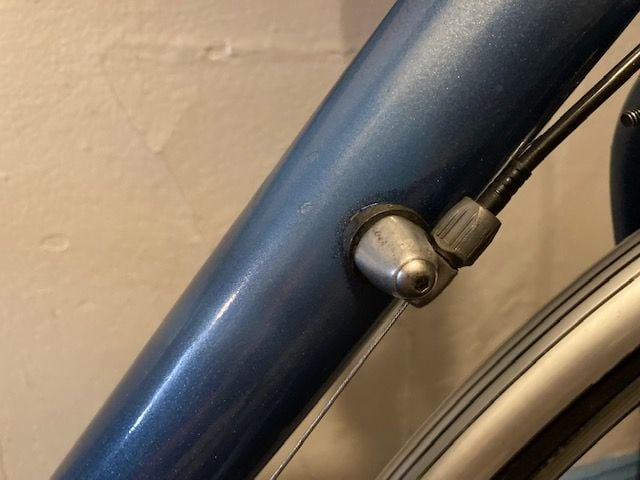
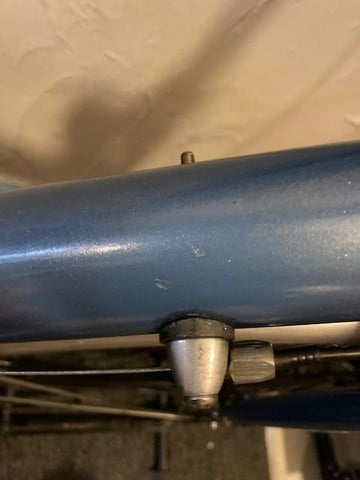
Here it is installed. The other side is there, I promise.
The only thing a little bit strange now is that the heads of the two bolts don't match, but that could obviously be fixed if I cared enough to do it.
If the boss on the other side also breaks, I will just drill that one out too, buy another long bolt, and this time use a nut on the other side.
So anyway, I decided to go with my original idea after all of bolting right through to the other side, and I think it ended up being a very effective fix for this.
I ordered this long, stainless M5 bolt.
This was the only piece that had to be drilled out--the already-broken boss. I made the hole just big enough so that the threads of the bolt didn't engage.
This is the old bolt held up against the new assembly for sizing purposes.
This is the new bolt cut down to the correct size. (I actually made it too long the first time and had to cut it again.)
The bolt needs to be long enough so that it grabs plenty of threading of the boss on the other side but short enough so that it doesn't interfere with the other bolt coming from the opposite direction.
Here it is installed. The other side is there, I promise.
The only thing a little bit strange now is that the heads of the two bolts don't match, but that could obviously be fixed if I cared enough to do it.
If the boss on the other side also breaks, I will just drill that one out too, buy another long bolt, and this time use a nut on the other side.
Likes For Headpost: