


Uniglide lockring removal without tool?
 07-13-17, 10:57 PM
#1
Senior Member
Thread Starter

Uniglide lockring removal without tool?
I don't have the correct removal tool so before I place an order, does anyone have tips on removing it without chewing it up too much? This is for my clunker build so I am hoping to be able to use the wheelset. The freewheel is just really crunchy when I spin it so I wanted to remove it, spray it down, and lube it. Thank ya.
For reference:
https://i.imgur.com/roQuit4.jpg
For reference:
https://i.imgur.com/roQuit4.jpg
 07-13-17, 11:13 PM
#2

Stop reading my posts!

chain-whips, 2 of them, are all you need. If you don't have then borrow 2 for a half hour, max. You won't have to use them to re-install afterward.
EDIT, sorry but did not see the pic when Iadvised you , it IS a freewheel and not a UG cassette, so the chainwhips will do nothing (unless you want to take sprockets off the FW body). You need the FW tool to remove it, as others have said... then you can soak it in a can or solvent (try 50-50 acetone and ATF) then drain-dry and re-lube with liquid lube.
EDIT, sorry but did not see the pic when Iadvised you , it IS a freewheel and not a UG cassette, so the chainwhips will do nothing (unless you want to take sprockets off the FW body). You need the FW tool to remove it, as others have said... then you can soak it in a can or solvent (try 50-50 acetone and ATF) then drain-dry and re-lube with liquid lube.
Last edited by unworthy1; 07-15-17 at 12:53 AM.
07-13-17, 11:22 PM
#3
Senior Member
Maybe two big ass pipe wrenches. Or, one big ass pipe wrench and a big ass set of chanellocks. Really. The easiest way to get one off is this: Get an old sacrificial chain. (put on some work gloves) Wrap chain around big cog. Turn wheel upside down & clamp chain down in a big f#$%^n vise. Now, hit that small cog wit a big ass pipe wrench. Or, a chain whip tool if you got one. You'll figure it out sooner or later. Be good. Have fun.
07-14-17, 02:42 AM
#4
Senior Member
"Lockring" usually refers to the part that holds a cassette onto the freehub body.
UG freehubs AFAIK don't have lockrings. They use the smallest sprocket to thread onto the FH body and hold the rest of the stack in Place.
If yours is crunchy, removing the cassette won't do squat. That's not where the action is.
So don't go looking for cassette whips to borrow.
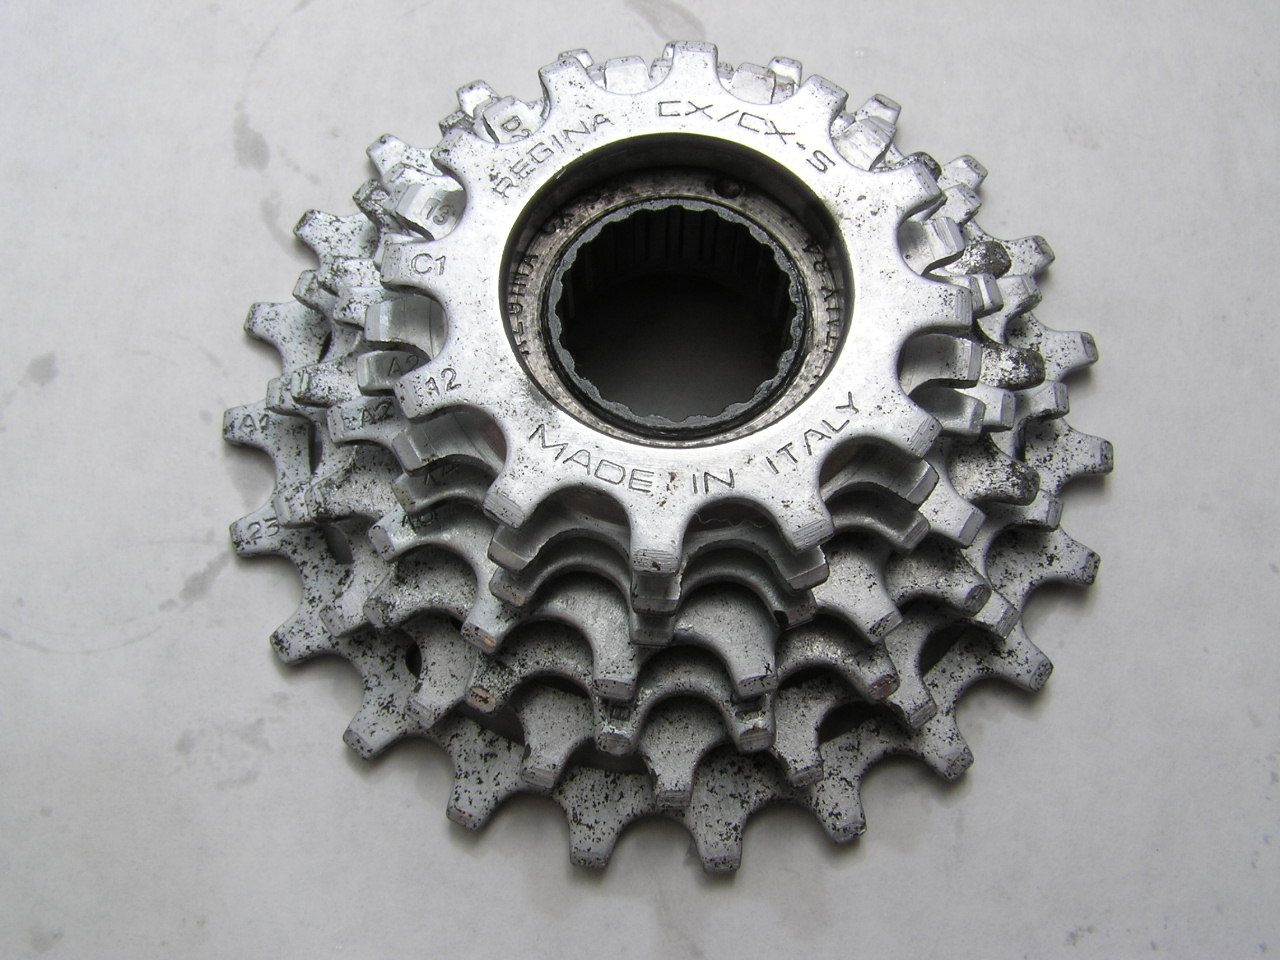
The splined center cavity of yours look like on a freewheel. But freewheels generally do have a lockring holding the sprockets in Place.
So I assume the part you want to remove is the ring with the lettering on.
The correct tool would be a pin wrench. Something like this.117.B | Facom 100mm Pin Wrench 245 mm Chrome | Facom
If you have some metal stock, it's not that hard to make a crude one.
Success is largely dependent on how stuck things are.
Don't get your hope up.
Some have managed removal with a drift punch.
It's cheap enough to try.
Can't advise on thread direction.
Freewheels generally aren't very well sealed on the inside.
If it was me, I'd put the Wheel flat, then shoot WD-40 at/through the gap between stationary and moving parts until it begins to run off Clean.
Then add some runny oil and call it a day.
UG freehubs AFAIK don't have lockrings. They use the smallest sprocket to thread onto the FH body and hold the rest of the stack in Place.
If yours is crunchy, removing the cassette won't do squat. That's not where the action is.
So don't go looking for cassette whips to borrow.
The splined center cavity of yours look like on a freewheel. But freewheels generally do have a lockring holding the sprockets in Place.
So I assume the part you want to remove is the ring with the lettering on.
The correct tool would be a pin wrench. Something like this.117.B | Facom 100mm Pin Wrench 245 mm Chrome | Facom
If you have some metal stock, it's not that hard to make a crude one.
Success is largely dependent on how stuck things are.
Don't get your hope up.
Some have managed removal with a drift punch.
It's cheap enough to try.
Can't advise on thread direction.
Freewheels generally aren't very well sealed on the inside.
If it was me, I'd put the Wheel flat, then shoot WD-40 at/through the gap between stationary and moving parts until it begins to run off Clean.
Then add some runny oil and call it a day.
07-14-17, 05:28 AM
#5

Senior Member

Join Date: Jan 2012
Location: Ithaca, NY
Posts: 4,852
Bikes: Click on the #YOLO
Likes: 0
Liked 13 Times
in
13 Posts
Sheldon Brown has a method I can't quite wrap my head around in his heroic repairs section:
https://www.sheldonbrown.com/heroic-repairs.html
https://www.sheldonbrown.com/heroic-repairs.html
Originally Posted by Sheldon brown's site
Removing sprockets without a tool.
With a freewheel or older cassette, the outer one, sometimes more, sprockets are threaded on. Chain whips are usually not necessary to remove them, except on the oldest freewheels which have sprockets that remove to the inside.
Place the chain on the smallest front sprocket, and remove the chain from the rear derailer. A SRAM chain with a PowerLink can easily be disconnected. With another chain, you may have to remove the lower (tension) pulley of the rear derailer to extract the chain.
With the right pedal behind top position (around 10 o'clock), wrap the lower of chain around the bottom of the outermost outer sprocket and the upper run around an inner sprocket. The closer the two sprockets are in size the better this works. Get as much slack out of the chain as you can. If you haven't disconnected the chain, shape it into a figure-8 behind the sprockets.
Now step down on the right pedal, backpedaling. Because the outer sprocket is smaller, it will turn faster and unscrew. You may have to reposition the chain once or twice before the sprocket is completely loose.
Repeat as necessary to remove additional sprockets until you reach a splined sprocket and can lift the rest of the sprockets off. Be sure to keep all sprockets and spacers in order for replacement.
__________________

Shimano : Click :: Campy : Snap :: SRAM : Bang
Shimano : Click :: Campy : Snap :: SRAM : Bang
07-14-17, 05:54 AM
#6
Senior Member

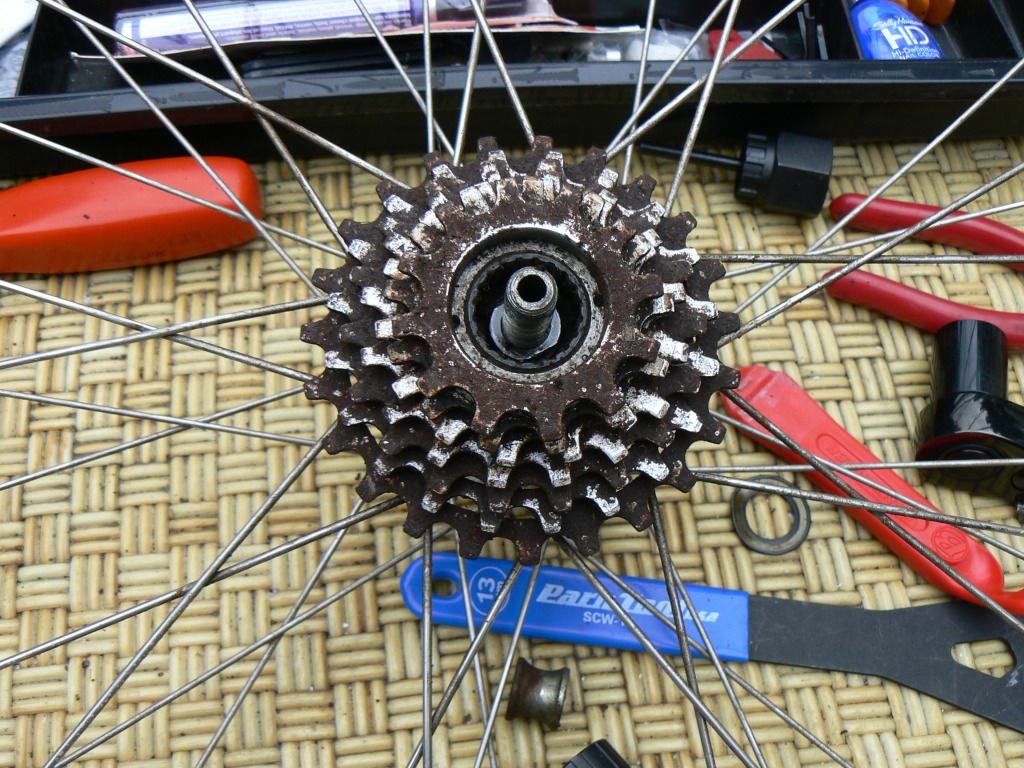
Photo looks more like a freewheel than a freehub.
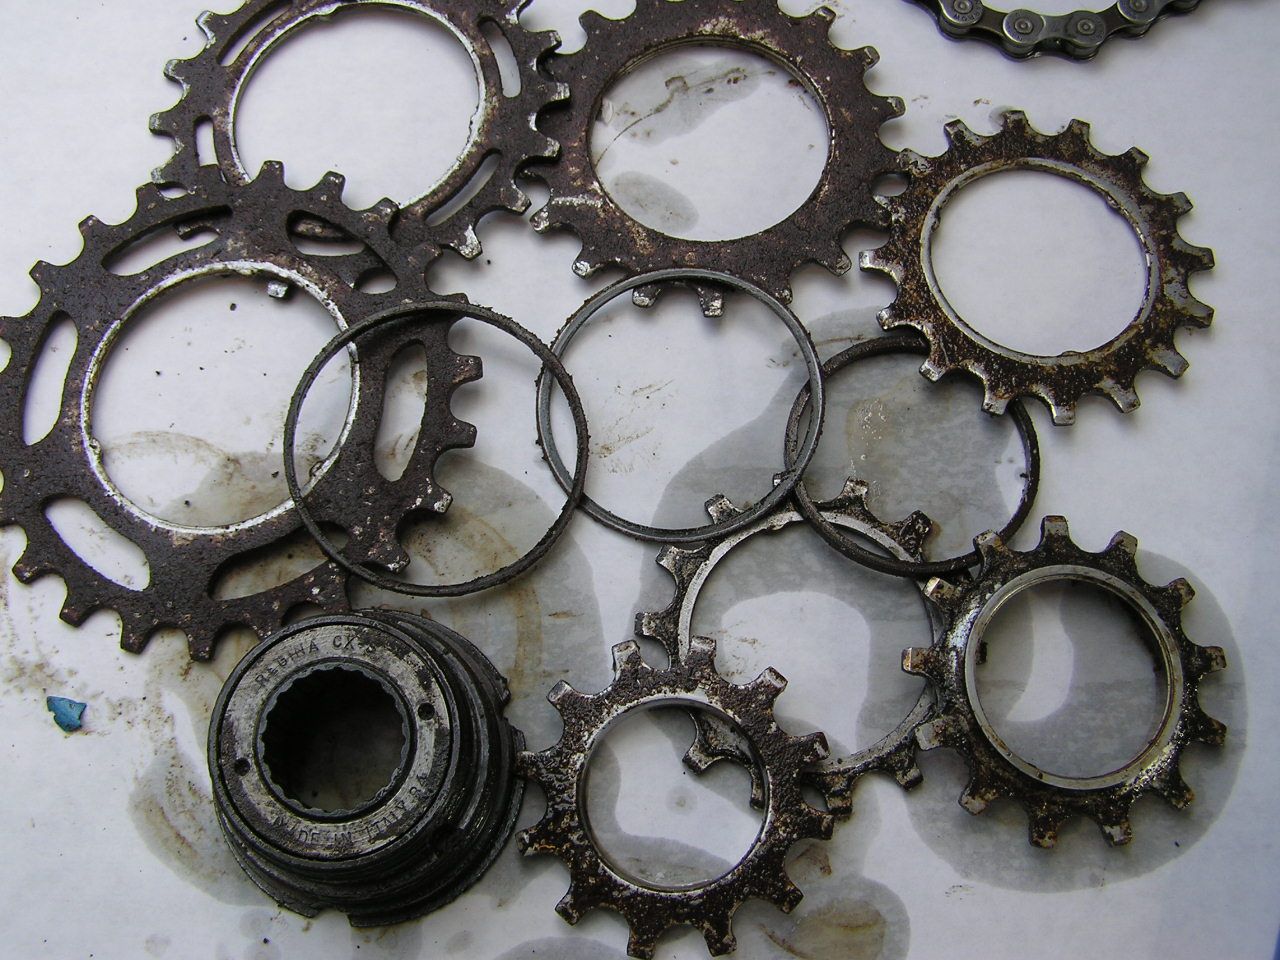
I'd suggest you try flushing it with a light oil and solvent first, rather than taking it apart. That will usually work. Disassembly invloves getting a gazillion little balls and little pawls + springs all over the place, if you aren't careful.
Maybe consider a new one. The cheap ones on amazon aren't bad for a clunker, and if you get a new chain, you could have skipping problems with the worn freewheel.
07-14-17, 07:06 AM
#7

Senior Member
^ ditto. If that photo is of the item in question, it's a freewheel.
07-14-17, 07:16 AM
#8
Senior Member

It's a freewheel. Park Tool sells the splined tool that goes inside there. They're around $6 where I live.
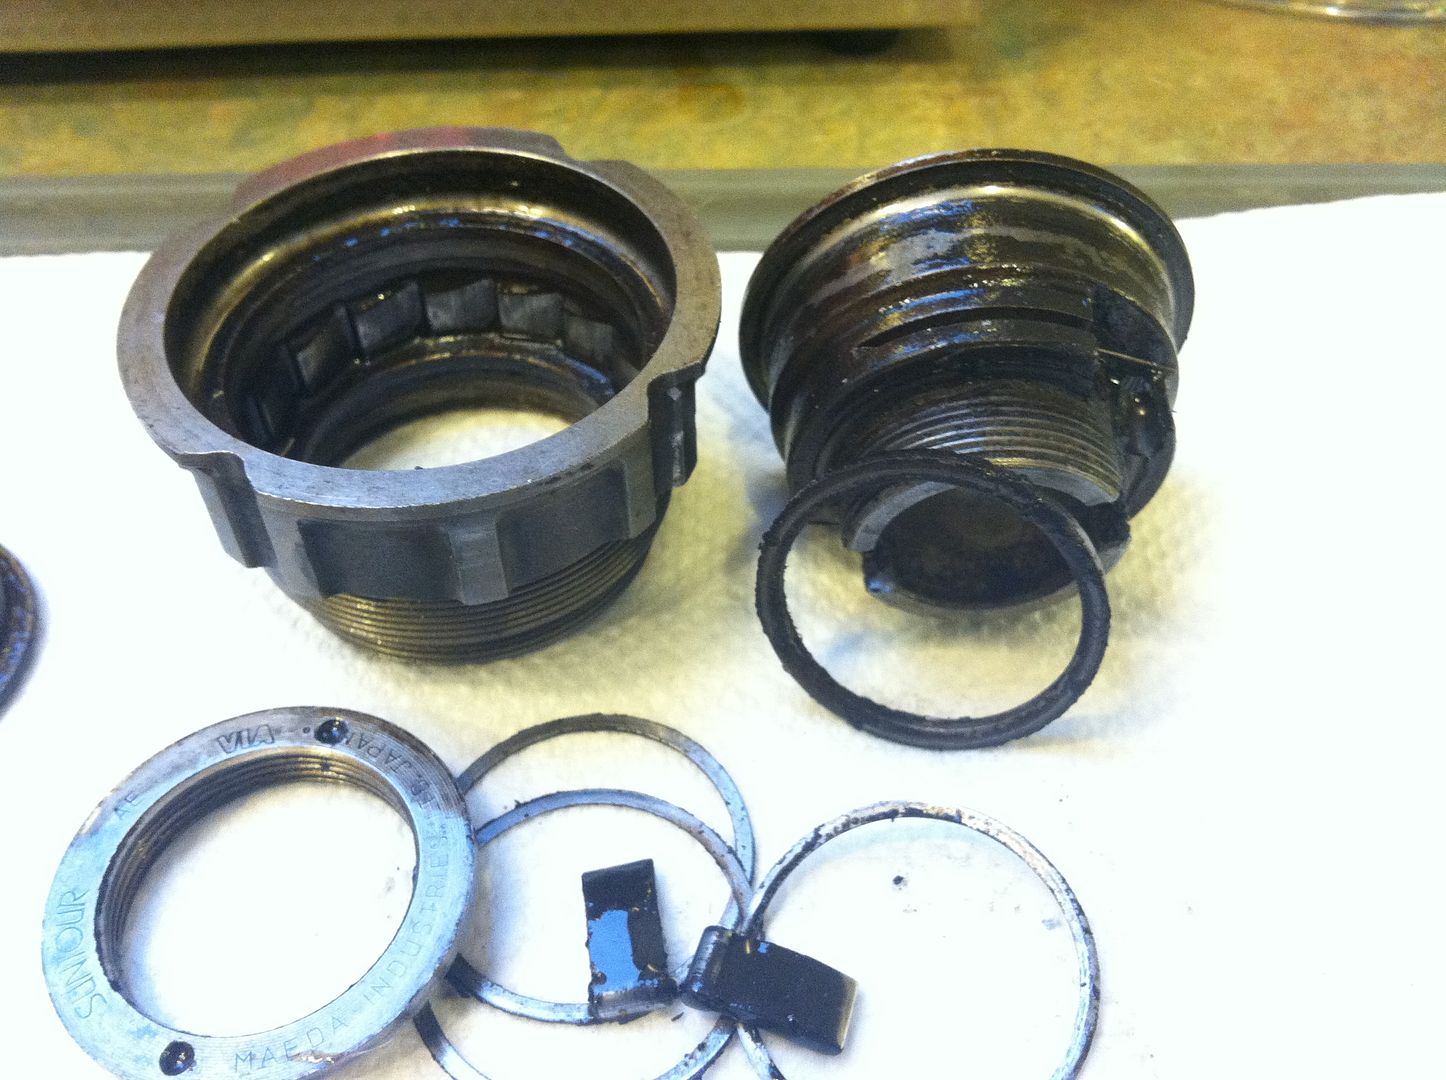
Unless you wish to dismantle the freewheel, do not get a pin spanner to unscrew the top race where the two little divots are. I just happen to like to disassemble freewheels and have done it many, many times. I wait to get the freewheel off the hub first. Although I have disassembled, de-greased, put new ball bearings, top & bottom, while the freewheel was still attatched.
It is not for the impatient. It helps to have small fingers and a steady hand.
07-14-17, 12:00 PM
#9
Old fart

Join Date: Nov 2004
Location: Appleton WI
Posts: 25,043
Bikes: Several, mostly not name brands.
Liked 3,675 Times
in
2,077 Posts
Agreed. The Park FR-1, Bicycle Research CT-6, or Shimano TL-FW30 will remove it from the hub. The Park and Bicycle Research versions are usually under US$10, the Shimano a bit more.
 07-14-17, 12:11 PM
#10
Senior Member
Thread Starter
Yeah, the FR-1 is what I need and was planning to order. I checked a nearby REI and Performance Bike and neither had it, so I'd have to order one or go further into town to an LBS. I have the FR-5 tool but didn't realize this was a different design until I tried fitting it on last night.
I also have a chain whip so I'm going to give that a try today. Thanks all for the tips!
I also have a chain whip so I'm going to give that a try today. Thanks all for the tips!
07-14-17, 01:06 PM
#11
Senior Member
Yeah, the FR-1 is what I need and was planning to order. I checked a nearby REI and Performance Bike and neither had it, so I'd have to order one or go further into town to an LBS. I have the FR-5 tool but didn't realize this was a different design until I tried fitting it on last night.
I also have a chain whip so I'm going to give that a try today. Thanks all for the tips!
I also have a chain whip so I'm going to give that a try today. Thanks all for the tips!
Chain whips will remove the sprockets from the core, but will not expose the innards.
07-14-17, 02:16 PM
#12
Senior Member

Join Date: Feb 2012
Location: Williamsburg, VA Sebastian, FL
Posts: 1,370
Bikes: 1987 Centurion Ironman Master, 1992 Koga Miyata Exerciser, 1992 Schwinn Crosscut
Likes: 0
Liked 186 Times
in
94 Posts
I know it's frowned upon, but I've cut a portion out of the top of a milk jug, put in about an inch of gasoline, followed by the freewheel, then swirled it around for a few days, once in a while taking it out and spinning it. After that, and several days of spinning and drying, I work in some Tenacious Oil. The result is a very smooth, and very quiet, freewheel.
(PS: I also collect and take the dirty gas to a oil change place for proper disposal...)
(PS: I also collect and take the dirty gas to a oil change place for proper disposal...)
Last edited by 67tony; 07-14-17 at 02:20 PM.
07-14-17, 09:41 PM
#13

[QUOTE=67tony;19719337]... After that, and several days of spinning and drying, I work in some Tenacious Oil. The result is a very smooth, and very quiet, freewheel...
+1 on the Phil's Tenacious!
+1 on the Phil's Tenacious!
07-15-17, 06:18 AM
#14
Freewheel Medic

Join Date: Oct 2005
Location: An Island on the Coast of GA!
Posts: 13,019
Bikes: Snazzy* Schwinns, Classy Cannondales & a Super Pro Aero Lotus (* Ed.)
Liked 2,341 Times
in
1,036 Posts
Or remove it, and properly service it. It's the only mechanical part on a vintage bicycle (the rest are simple axles with or without bearings).
"Drip--- spin--- drip" is only a temporary solution and doesn't effectively remove contaminants such as dust, grit, rust, the dried out original grease, or bad ball bearings. Also, the oil does not last as long as a proper grease nor does it protect the internals from future contamination.
Would you "Drip--- spin--- drip" on your BB, your headset or your wheel axles? Of course not!
__________________
Bob
Enjoying the GA coast all year long!
Thanks for visiting my website: www.freewheelspa.com
Bob
Enjoying the GA coast all year long!
Thanks for visiting my website: www.freewheelspa.com
07-15-17, 07:24 AM
#15
Old fart
Join Date: Nov 2004
Location: Appleton WI
Posts: 25,043
Bikes: Several, mostly not name brands.
Liked 3,675 Times
in
2,077 Posts
I know it's frowned upon, but I've cut a portion out of the top of a milk jug, put in about an inch of gasoline, followed by the freewheel, then swirled it around for a few days, once in a while taking it out and spinning it. After that, and several days of spinning and drying, I work in some Tenacious Oil. The result is a very smooth, and very quiet, freewheel.
(PS: I also collect and take the dirty gas to a oil change place for proper disposal...)
(PS: I also collect and take the dirty gas to a oil change place for proper disposal...)
07-15-17, 07:26 AM
#16
Old fart
Join Date: Nov 2004
Location: Appleton WI
Posts: 25,043
Bikes: Several, mostly not name brands.
Liked 3,675 Times
in
2,077 Posts


