


Bike Photos - how the heck do they do that?
 11-02-20, 06:44 PM
#1
Senior Member
Thread Starter
Join Date: Sep 2012
Location: SoCal
Posts: 1,186
Bikes: 2016 Surly Cross Check, 2019 Kona Rove ST
Liked 313 Times
in
211 Posts
Bike Photos - how the heck do they do that?
I follow sites like Radavist, Bikepacking, etc and follow many small builders on Instagram. Someone please enlighten me - how do they take those photos of bikes that appear to be just standing there, without anything propping it up? No stick, no rock, whatever. It's not photoshop in the cases I'm talking about, you can tell it wasn't retouched--these are mostly Instagram posts just done out on the trail etc. What's the trick?
 11-02-20, 06:49 PM
#2
Senior Member
Usually a small dowel near the BB or rear axle. If the angle is right, it looks like a spoke.
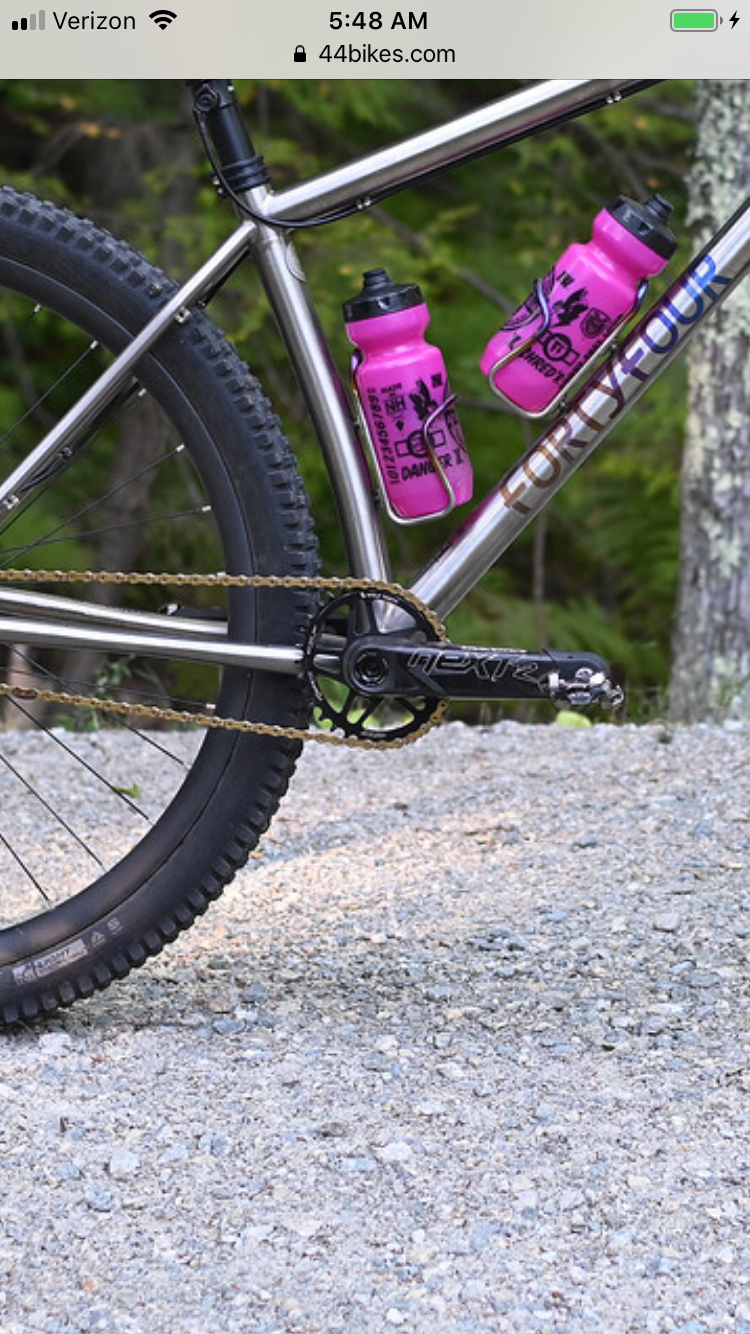
I know of one builder who uses the camoflauged shaft of a carbon arrow. If the background is blurred in a high-quality photo, it is even easier to photoshop out. https://www.44bikes.com/my-marauder-ti-ss/
I know of one builder who uses the camoflauged shaft of a carbon arrow. If the background is blurred in a high-quality photo, it is even easier to photoshop out. https://www.44bikes.com/my-marauder-ti-ss/
Last edited by aggiegrads; 11-02-20 at 06:52 PM.
Likes For aggiegrads:
11-02-20, 07:01 PM
#3
-------
I follow sites like Radavist, Bikepacking, etc and follow many small builders on Instagram. Someone please enlighten me - how do they take those photos of bikes that appear to be just standing there, without anything propping it up? No stick, no rock, whatever. It's not photoshop in the cases I'm talking about, you can tell it wasn't retouched--these are mostly Instagram posts just done out on the trail etc. What's the trick?
Likes For Mojo31:
11-02-20, 07:03 PM
#4
Senior Member
Thread Starter
Join Date: Sep 2012
Location: SoCal
Posts: 1,186
Bikes: 2016 Surly Cross Check, 2019 Kona Rove ST
Liked 313 Times
in
211 Posts
I think it's like aggiegrads says in these cases, they're just doing a very careful placement of a small "propper upper" of some kind. Gotta up my photo game! (but I'm not gonna take the time to photoshop my stuff!)
11-02-20, 07:30 PM
#5
Example?
11-02-20, 08:03 PM
#6
Senior Member
11-03-20, 04:59 AM
#7
jj
I thought I saw either a clear acrylic/gorilla glass/Pyrex/borosilicate rod or a single less-amazing photoshop, but now I�m not sure. The photo after this one looks like a sorta A-frame that might�ve been a clear material or, also, less amazingly �shopped, but I had to zoom way in and still couldn�t really see it.
maybe just email the person and ask?
[edit] looking at it again, maybe it�s a slightly trapezoidal clear plate with a small cradle to �hold� the bb shell?
Last edited by hsuBM; 11-03-20 at 05:02 AM.
Likes For hsuBM:
11-03-20, 07:34 AM
#9
Senior Member
44bikes has a thread on garagejournal.com that discusses his bike photography a couple of times. Here is a short discussion on page 84 of the thread.
https://www.garagejournal.com/forum/...112578&page=84
do not click on this link unless you have lots of time. You will get sucked into the rabbit hole. I read from the first post in the thread to the end over the course of several weeks..
https://www.garagejournal.com/forum/...112578&page=84
do not click on this link unless you have lots of time. You will get sucked into the rabbit hole. I read from the first post in the thread to the end over the course of several weeks..
Likes For aggiegrads:
11-03-20, 08:10 AM
#10
Senior Member
I follow sites like Radavist, Bikepacking, etc and follow many small builders on Instagram. Someone please enlighten me - how do they take those photos of bikes that appear to be just standing there, without anything propping it up? No stick, no rock, whatever. It's not photoshop in the cases I'm talking about, you can tell it wasn't retouched--these are mostly Instagram posts just done out on the trail etc. What's the trick?
 11-03-20, 10:15 AM
#11
Senior Member
Thread Starter
Join Date: Sep 2012
Location: SoCal
Posts: 1,186
Bikes: 2016 Surly Cross Check, 2019 Kona Rove ST
Liked 313 Times
in
211 Posts
44bikes has a thread on garagejournal.com that discusses his bike photography a couple of times. Here is a short discussion on page 84 of the thread.
https://www.garagejournal.com/forum/...112578&page=84
do not click on this link unless you have lots of time. You will get sucked into the rabbit hole. I read from the first post in the thread to the end over the course of several weeks..
https://www.garagejournal.com/forum/...112578&page=84
do not click on this link unless you have lots of time. You will get sucked into the rabbit hole. I read from the first post in the thread to the end over the course of several weeks..
11-03-20, 10:28 AM
#12
-------
I thought I saw either a clear acrylic/gorilla glass/Pyrex/borosilicate rod or a single less-amazing photoshop, but now I�m not sure. The photo after this one looks like a sorta A-frame that might�ve been a clear material or, also, less amazingly �shopped, but I had to zoom way in and still couldn�t really see it.
maybe just email the person and ask?
[edit] looking at it again, maybe it�s a slightly trapezoidal clear plate with a small cradle to �hold� the bb shell?
It's all smoke and mirrors. Bikes don't stand up all by themselves.
Likes For Mojo31:
11-03-20, 10:35 AM
#13
Senior Member

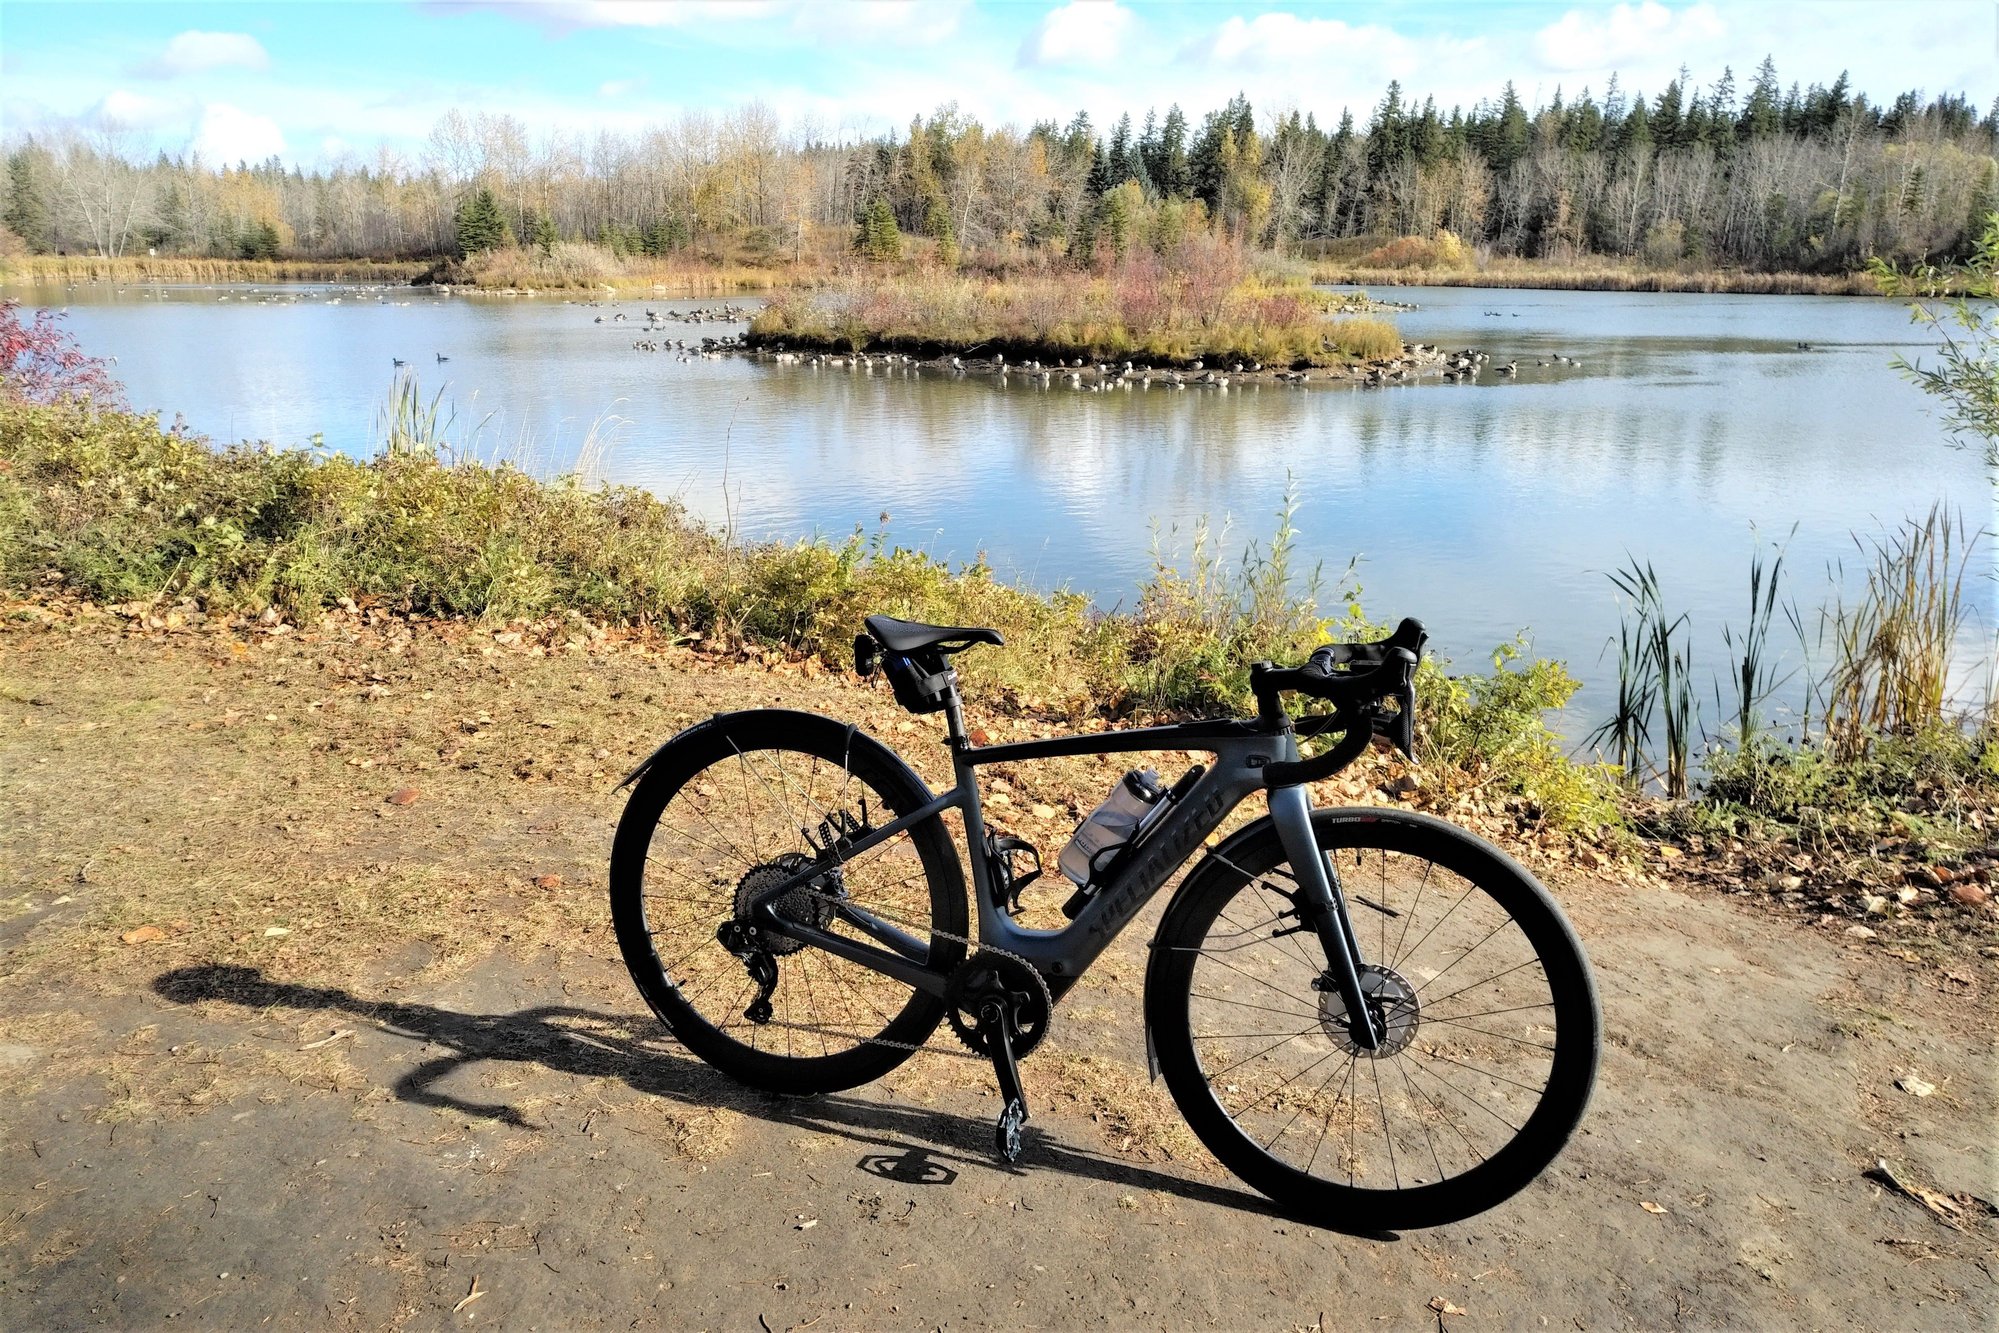
I use a Click Stand. If the shot is taken at the right angle and the stand is placed in the appropriate position, it appears that the bike is standing on its own.
Last edited by Batstar; 11-03-20 at 10:50 AM.
Likes For Batstar:
11-03-20, 12:03 PM
#14
Senior Member
Thread Starter
Join Date: Sep 2012
Location: SoCal
Posts: 1,186
Bikes: 2016 Surly Cross Check, 2019 Kona Rove ST
Liked 313 Times
in
211 Posts
If you look at the background through the chainring, you can see that the green stuff is not in quite the same focus as the green stuff outside of the chainring. That tells me that there was some shoppin goin on. If the rod was propping up the BB, then shoppin out the rod through the gravel is easy and likely would never be found.
It's all smoke and mirrors. Bikes don't stand up all by themselves.
It's all smoke and mirrors. Bikes don't stand up all by themselves.
11-03-20, 01:42 PM
#15
Bike ≠ Car ≠ Ped.

OP, I think you're underestimating how much editing can be done on a smartphone.
It's not hard to just set the camera somewhere, hold the bike and take one pic with a timer, then take another pic of an empty scene (you and your bike both out of frame), then stitch them together and erase yourself.
It's not like anyone's in a rush when they stop in the middle of nowhere, so what's an extra five minutes?
Adding a hypothetical example by borrowing Batstar's pic:
Last edited by BarracksSi; 11-03-20 at 01:52 PM.
11-03-20, 02:18 PM
#16
Senior Member
Thread Starter
Join Date: Sep 2012
Location: SoCal
Posts: 1,186
Bikes: 2016 Surly Cross Check, 2019 Kona Rove ST
Liked 313 Times
in
211 Posts
OP, I think you're underestimating how much editing can be done on a smartphone.
It's not hard to just set the camera somewhere, hold the bike and take one pic with a timer, then take another pic of an empty scene (you and your bike both out of frame), then stitch them together and erase yourself.
It's not like anyone's in a rush when they stop in the middle of nowhere, so what's an extra five minutes?
Adding a hypothetical example by borrowing Batstar's pic:
 I have not explored what retouching I can do with iOS apps at all. Still, what you describe above sounds pretty tricky to get a clean result! Think I'll still just look for a nice stick...
Likes For pbass:
11-03-20, 02:35 PM
#17
Bike ≠ Car ≠ Ped.
That may be true! I used to be a hardcore photoshop guy for my job, retouched everything from food to fashion...but that's 2 careers ago I have not explored what retouching I can do with iOS apps at all. Still, what you describe above sounds pretty tricky to get a clean result! Think I'll still just look for a nice stick...
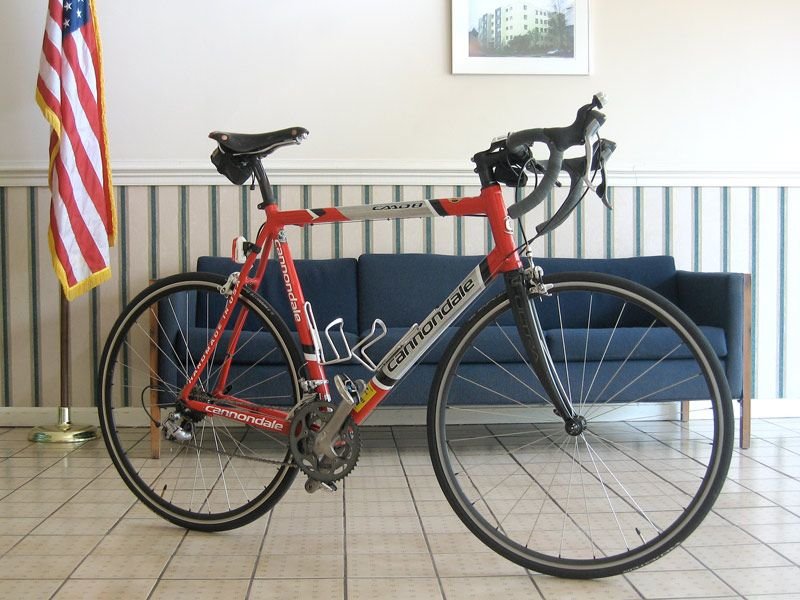
I have not explored what retouching I can do with iOS apps at all. Still, what you describe above sounds pretty tricky to get a clean result! Think I'll still just look for a nice stick...Dug up this pic that I made years ago back when my CAAD8 was my main bike. The advantage was that I could set the camera on the table for the pics. I was standing behind it and holding onto the saddle almost exactly like how I drew the stick figure onto the other photo.
Likes For BarracksSi:
11-03-20, 02:40 PM
#18
Senior Member
Thread Starter
Join Date: Sep 2012
Location: SoCal
Posts: 1,186
Bikes: 2016 Surly Cross Check, 2019 Kona Rove ST
Liked 313 Times
in
211 Posts
Yeah, the stick is probably easier after all. You won't even need to hang the phone onto anything.
Dug up this pic that I made years ago back when my CAAD8 was my main bike. The advantage was that I could set the camera on the table for the pics. I was standing behind it and holding onto the saddle almost exactly like how I drew the stick figure onto the other photo.
Dug up this pic that I made years ago back when my CAAD8 was my main bike. The advantage was that I could set the camera on the table for the pics. I was standing behind it and holding onto the saddle almost exactly like how I drew the stick figure onto the other photo.
Likes For pbass:
11-03-20, 02:44 PM
#19
Senior Member
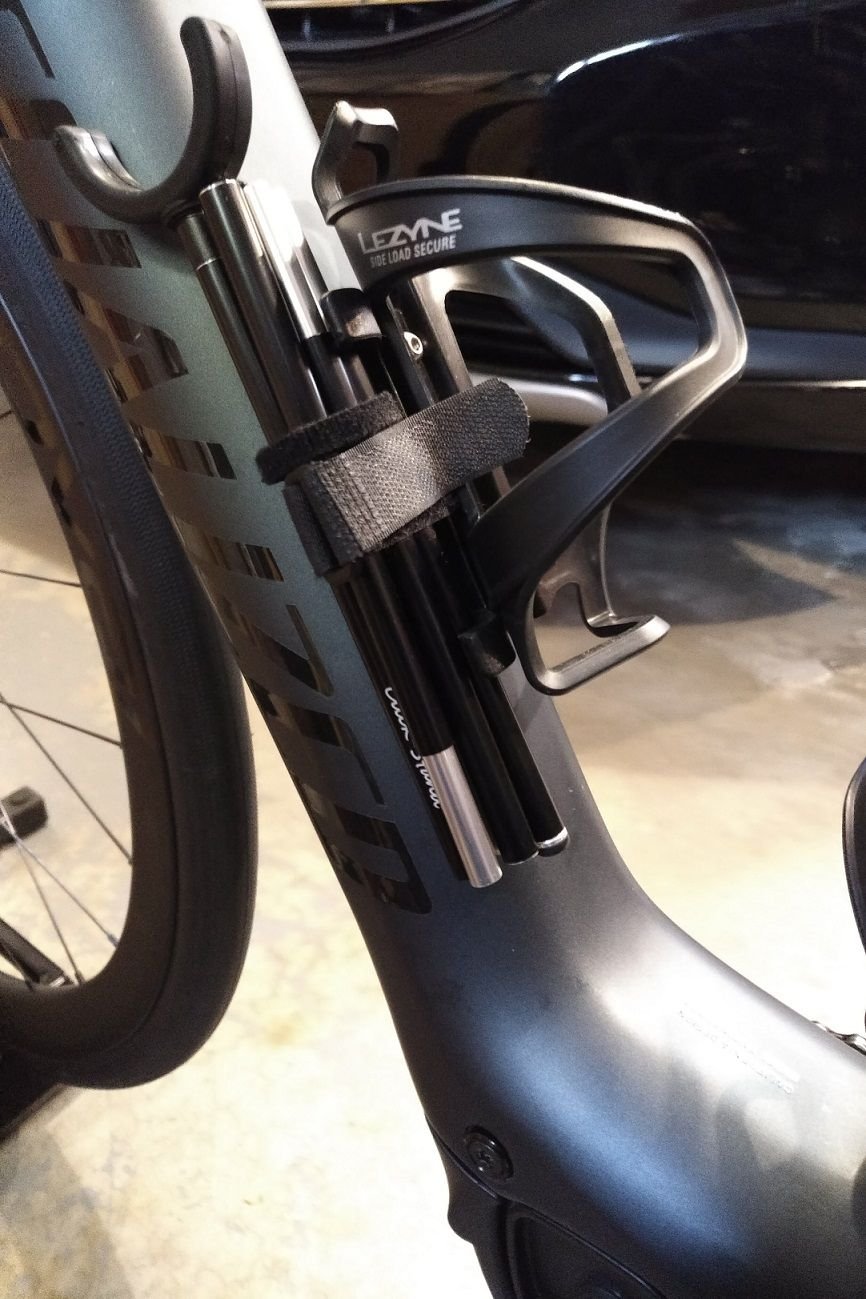
Effective shadowing of the stickman. Couldn�t have done it better myself! 
Here�s a closer shot of the area where the stand is hidden behind the frame/crank.
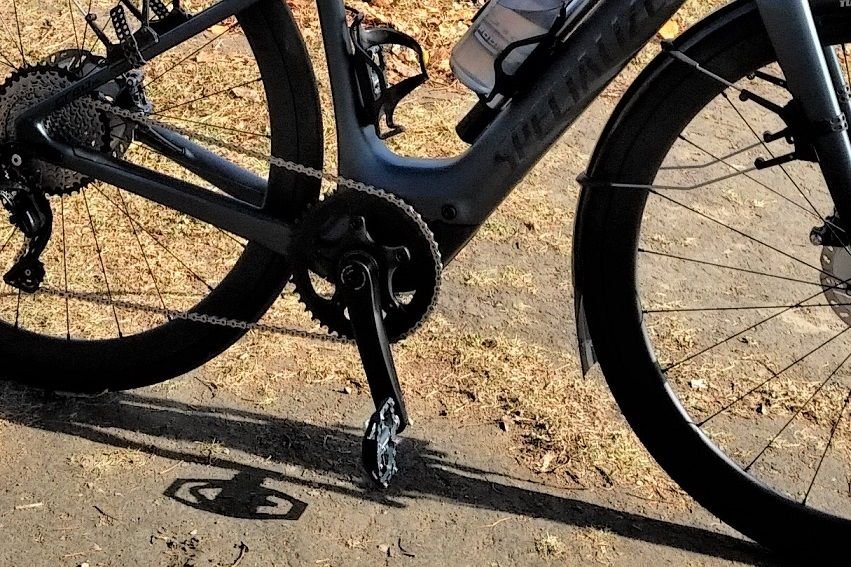
Here�s a closer shot of the area where the stand is hidden behind the frame/crank.
11-03-20, 03:07 PM
#20
Senior Member
Some of the above photos are missing some other critical steps, aside from slammed stems and perfectly level saddles:
If you can't creatively hide a stick propping up the bike on the non-drive side, you can just have a friend hold your bike, then pull their hand away as you blast a few shots. They just need to catch it before it falls. (Or learn how to use the rubber stamp tool in PS and simply brush them out, which is also not difficult.)
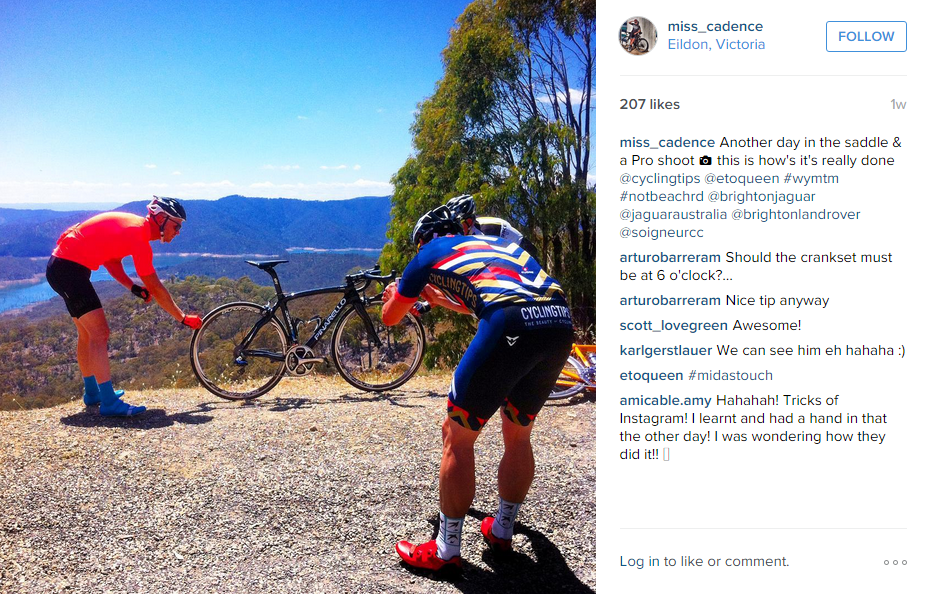
Cyclingtips had an article about this very topic a few years ago:
https://cyclingtips.com/2015/11/how-...-of-your-bike/
The setup:
The result:
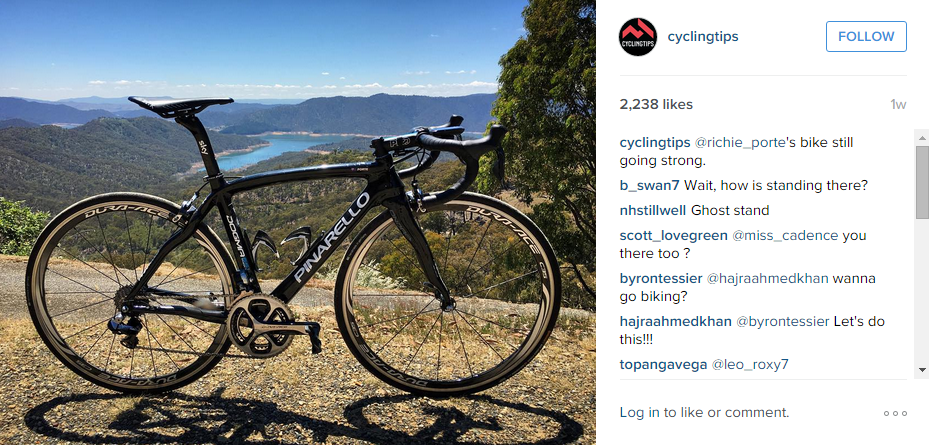
- The cranks should be aligned with the chain stays
- Drive-side photos only with the chain in big ring/small cog
- Valve stems should be aligned with tire logos - no caps on valve stems
- Wheels should be positioned so the valves are either exactly at 6 o'clock, or hidden behind the fork/chain stays/seat stays
- QR skewers should also be hidden
- All bags and bottles should be removed, unless they are a part of "the look"
If you can't creatively hide a stick propping up the bike on the non-drive side, you can just have a friend hold your bike, then pull their hand away as you blast a few shots. They just need to catch it before it falls. (Or learn how to use the rubber stamp tool in PS and simply brush them out, which is also not difficult.)
Cyclingtips had an article about this very topic a few years ago:
https://cyclingtips.com/2015/11/how-...-of-your-bike/
The setup:
The result:
Last edited by msu2001la; 11-03-20 at 03:11 PM.
Likes For msu2001la:
