


Mavic Madness
 12-17-20, 06:46 PM
#1
Junior Member
Thread Starter
Mavic Madness
The pawls on my rear hub sometimes lock up. I want to rebuild the freehub and am stuck with a proprietary nut on the cassette side. This is a Mavic Crossland hub. The axle is a two-piece threaded axle which comes apart nicely with two 5mm hex keys. What remains on top of the cassette is a nut that takes a special socket which I cannot find in any of the Mavic service bulletins. Pitching it out to the team to see if any of you have a homebrew trick up your sleeve.
here�s a drawing showing what I�m talking about.
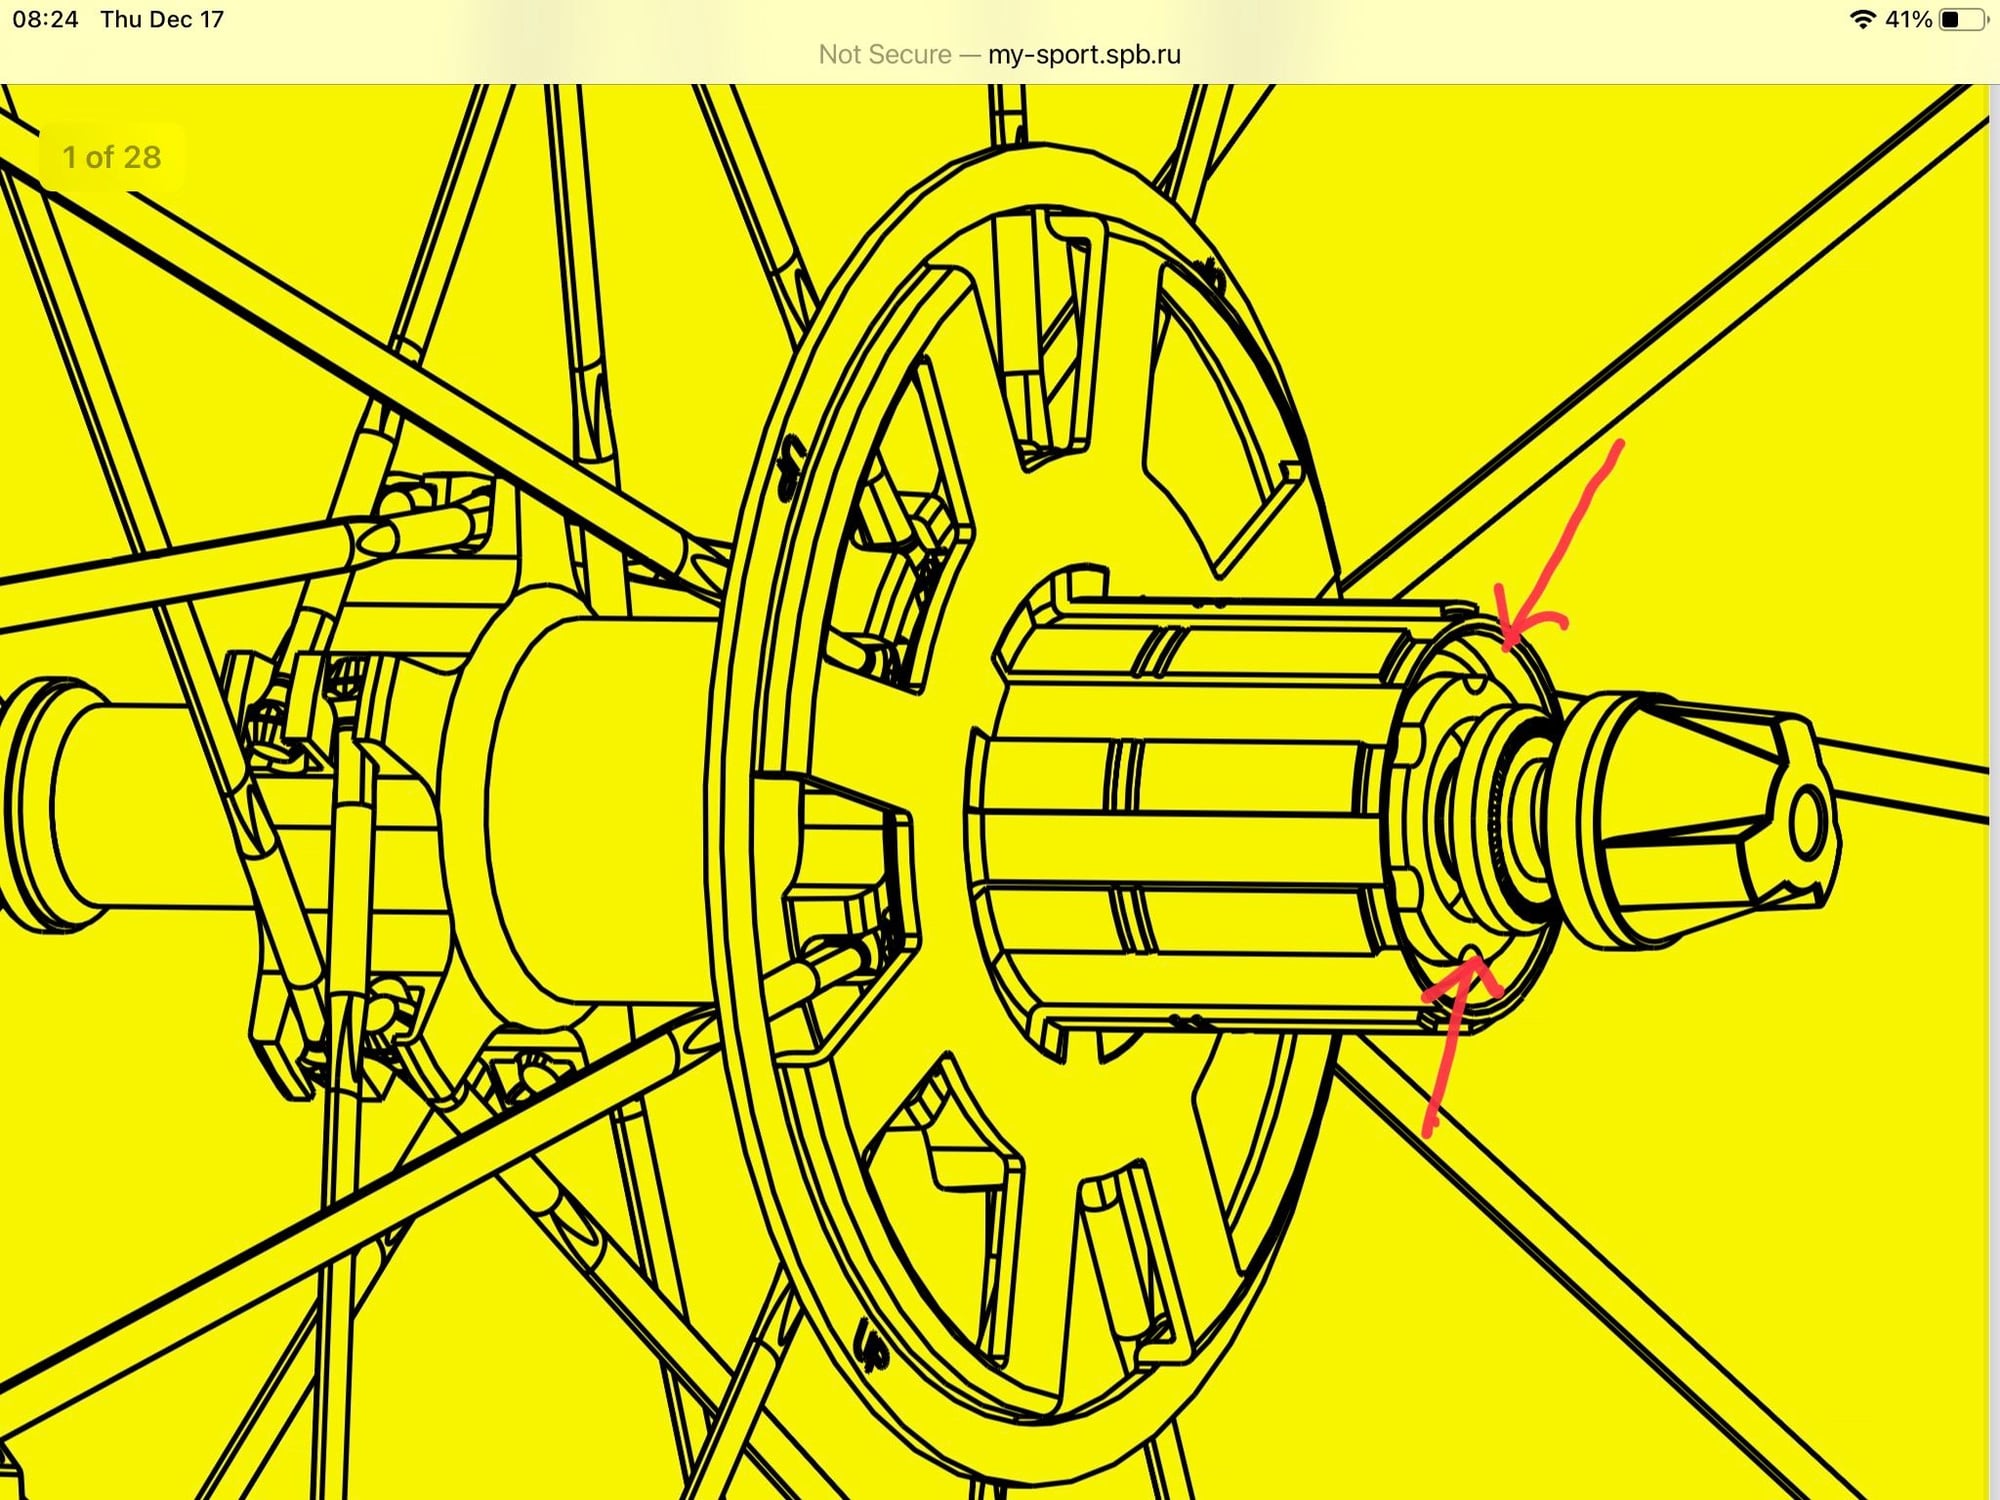
here�s a drawing showing what I�m talking about.
 12-17-20, 09:49 PM
#2
Senior Member
It needs the little black plastic Mavic pin spanner that is normally used to adjust bearings on the NDS, or you can just use a normal pin spanner, I think the red one works. Mavic sucks.
12-18-20, 06:04 AM
#3
Junior Member
Thread Starter
 12-18-20, 08:53 AM
#5
Newbie
Join Date: Mar 2020
Location: Mid Atlantic, Nawf Cackalaky, Rawlywood
Posts: 68
Bikes: 3 road steelys, 3 alu, 1 mtb, 1cx
Likes: 0
Liked 22 Times
in
15 Posts
Although I have not worked on this particular crossland hub, the ksyrium
hub that I have worked with allowed the freehub to be easily removed
when the NDS adjuster cap was completely unscrewed using the plastic
hub adjuster pintool as CX Wrench suggested. Worth a try.
hub that I have worked with allowed the freehub to be easily removed
when the NDS adjuster cap was completely unscrewed using the plastic
hub adjuster pintool as CX Wrench suggested. Worth a try.
12-18-20, 10:26 AM
#6
Junior Member
Thread Starter
Some are suggesting using a plastic tool with molded plastic pins and to clarify I want to show you the plastic pins are designed to work on the opposite side, which turns very easily:
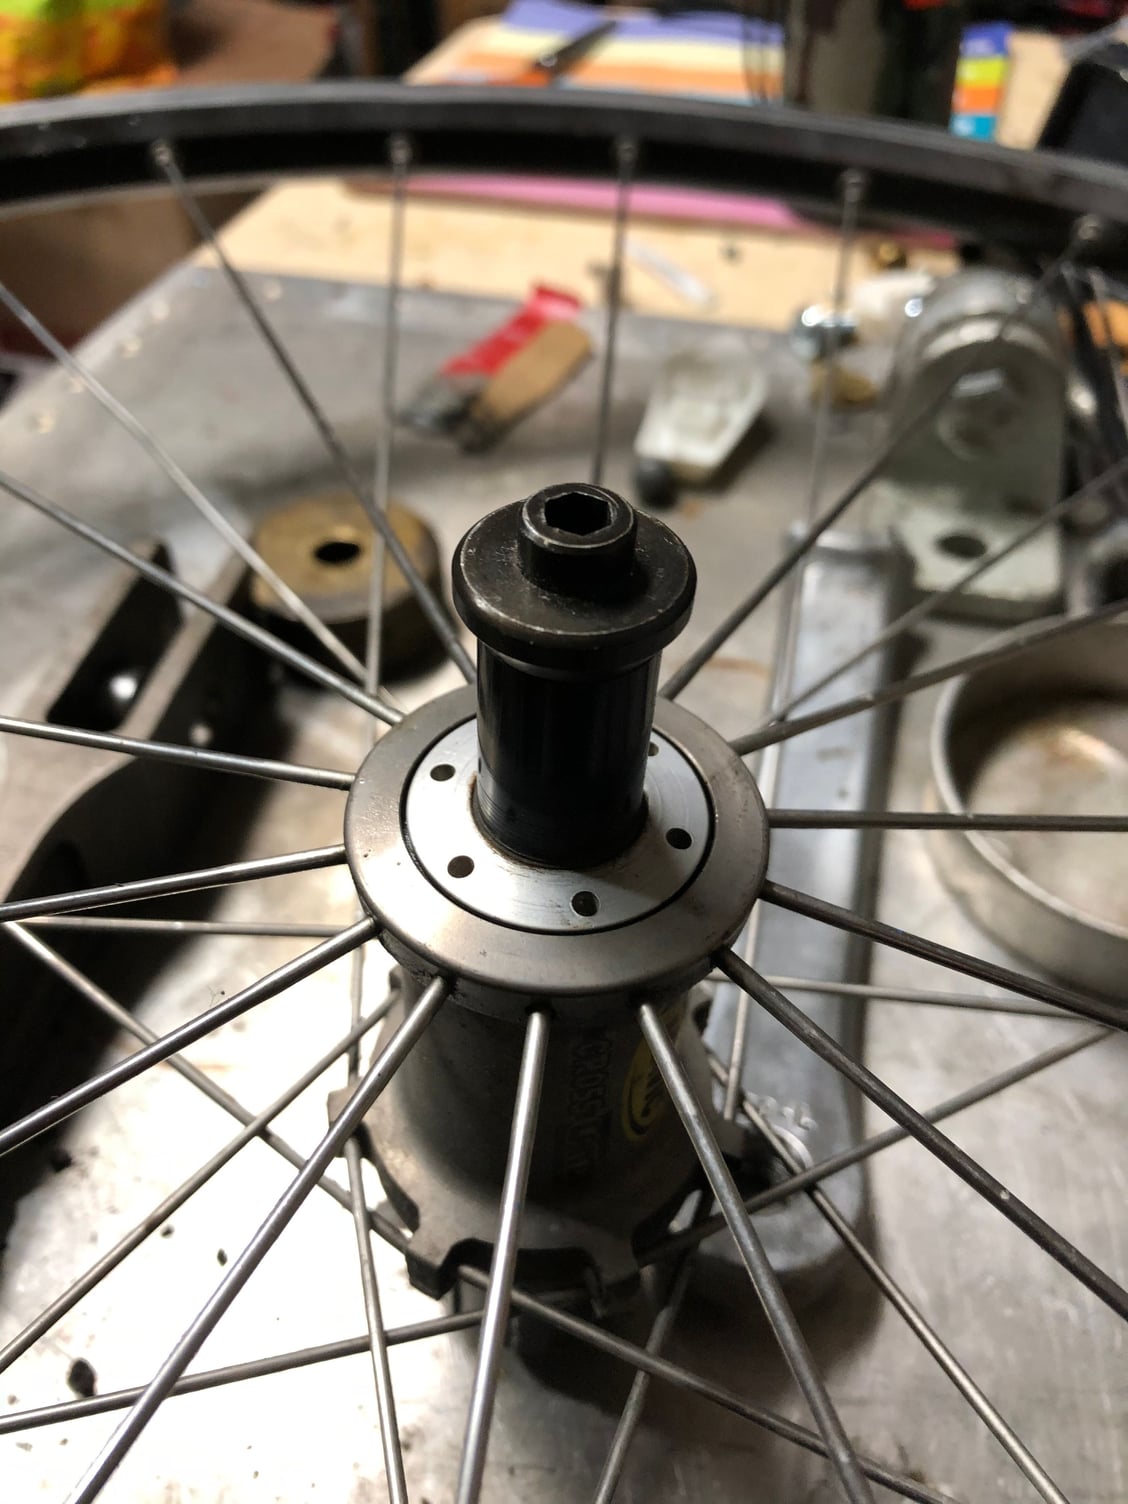
The freehub side is far too tight and rubust to use plastic anything on. I’ve already tried narrow jawed visegrips on it.
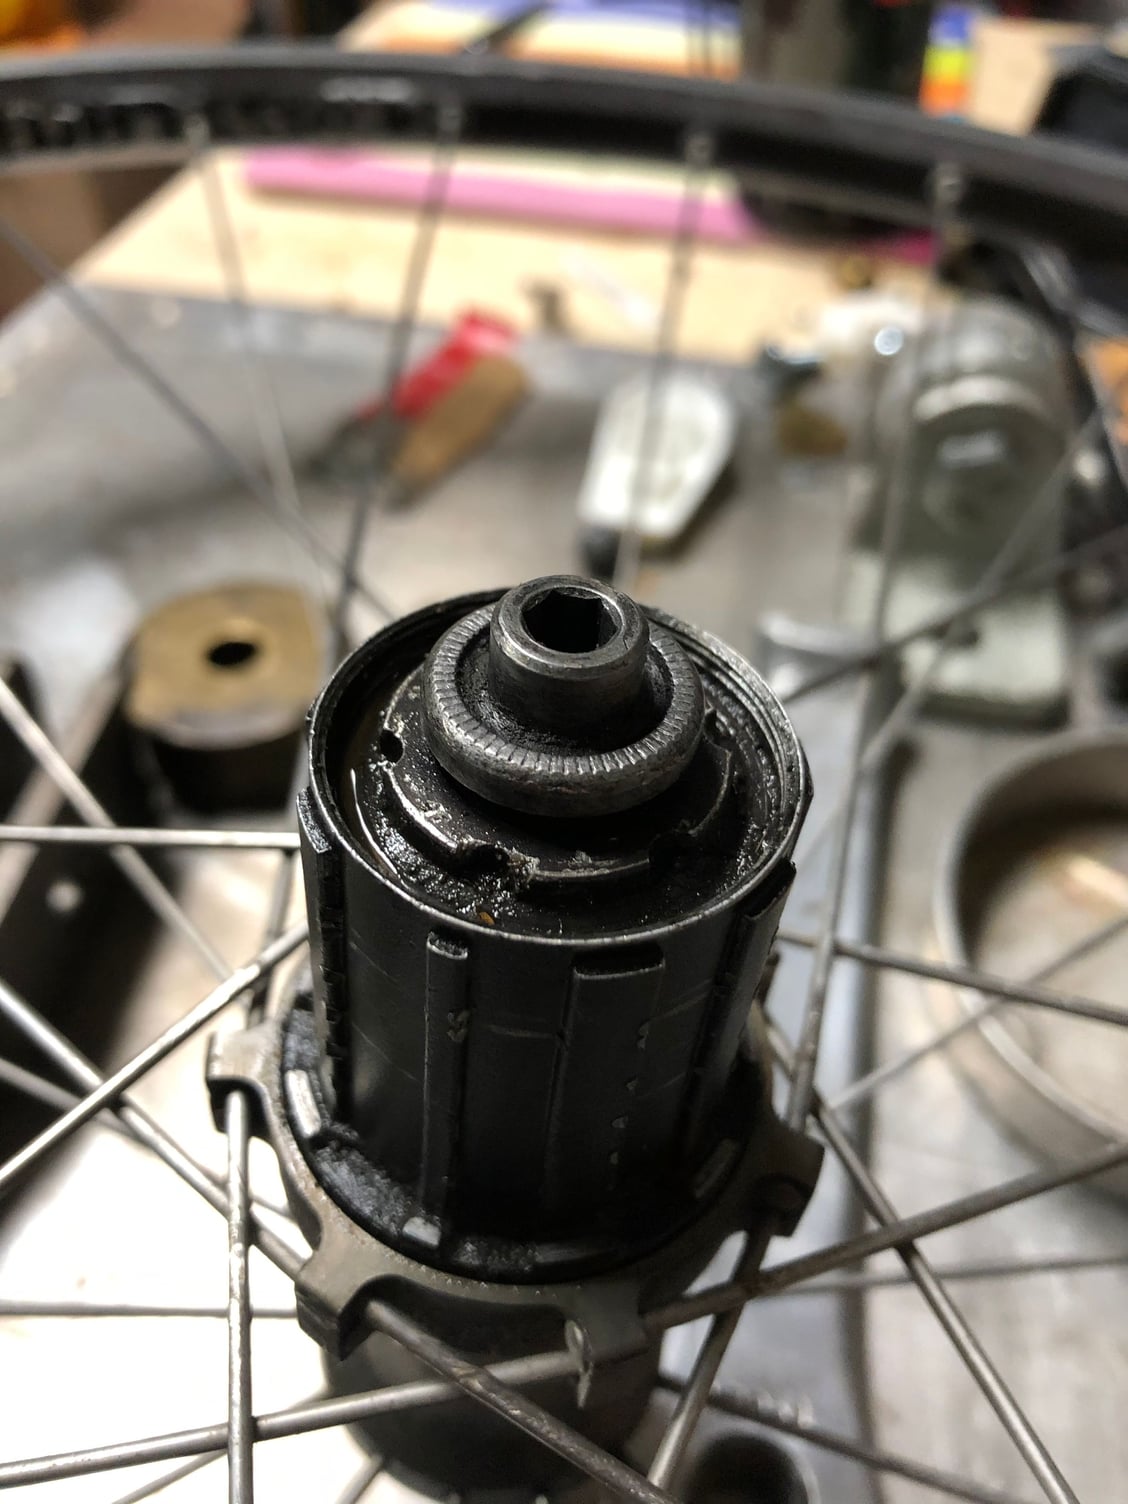
I may end up filing a socket to fit these notches. But right now I’m gonna go ride a bike!
The freehub side is far too tight and rubust to use plastic anything on. I’ve already tried narrow jawed visegrips on it.
I may end up filing a socket to fit these notches. But right now I’m gonna go ride a bike!
12-18-20, 10:48 AM
#7
Senior Member

Join Date: Jul 2018
Location: USA
Posts: 2,190
Bikes: Ti, Mn Cr Ni Mo Nb, Al, C
Liked 528 Times
in
350 Posts
What is that made out of. I know on my Mavic wheels there is a plastic/derlin cover that looks like it takes a special tool to remove, but in fact comes pulls right out using angled long nose needle pliers.
Edit: I posted the same time the pictures above were posted and didn't see it. It's definitely not what I was talking about above.
Edit: I posted the same time the pictures above were posted and didn't see it. It's definitely not what I was talking about above.
12-18-20, 01:10 PM
#8
Junior Member
Thread Starter
The end cap we�re looking at here is made of steel. I checked the wheel serial number on the Mavic site but it returns nothing so I assume it is an early type no longer in the catalog.
12-18-20, 01:36 PM
#9
Newbie
Join Date: Mar 2020
Location: Mid Atlantic, Nawf Cackalaky, Rawlywood
Posts: 68
Bikes: 3 road steelys, 3 alu, 1 mtb, 1cx
Likes: 0
Liked 22 Times
in
15 Posts
Yes this what I am suggesting. Use your 5mm hex to unscrew the axle ends and
then use the mavic pin tool on the Non Drive Side,NDS, adjuster cap to completely
unscrew and remove the adjuster cap. Then your freehub side should be able to be removed.
12-18-20, 01:47 PM
#10
Junior Member
Thread Starter
I guess I wasn�t clear enough. The photos you see show it put back together�my way of preventing parts loss until I figure out a tool. I began my story with 1) the axle out 2) the ND bearing cap out with the left side axle and 3) the right side axle half also comes out, no sweat. What remains is this specially shaped steel nut which is torqued in place. That plastic pin tool isn�t designed for the steel nut on the DS.
12-18-20, 02:59 PM
#11
Newbie
Join Date: Mar 2020
Location: Mid Atlantic, Nawf Cackalaky, Rawlywood
Posts: 68
Bikes: 3 road steelys, 3 alu, 1 mtb, 1cx
Likes: 0
Liked 22 Times
in
15 Posts
This may be worth checking out. After you remove the Non Drive Side axle end, insert
a 6mm allen key into the open end of the non drive side. This may give
the anchor for unscrewing the drive side axle and removing the freehub.
I have not worked on the crossland, but an older ksyrium allowed you to
remove the freehub by unscrewing the drive side axle against the drive side
axle nut. I may be wrong but I don,t think you need to remove the notched drive side cap. This
is such an old mavic hub that it is difficult to find info on it.
Technical Manual : login (mavic.com)
login is mavic-com, and password is dealer
12-18-20, 03:52 PM
#12

Old fart

Join Date: Nov 2004
Location: Appleton WI
Posts: 25,048
Bikes: Several, mostly not name brands.
Liked 3,683 Times
in
2,079 Posts
I wonder if they'll migrate it to a supported standard, e.g. HTML5?
12-21-20, 01:34 PM
#13
Newbie
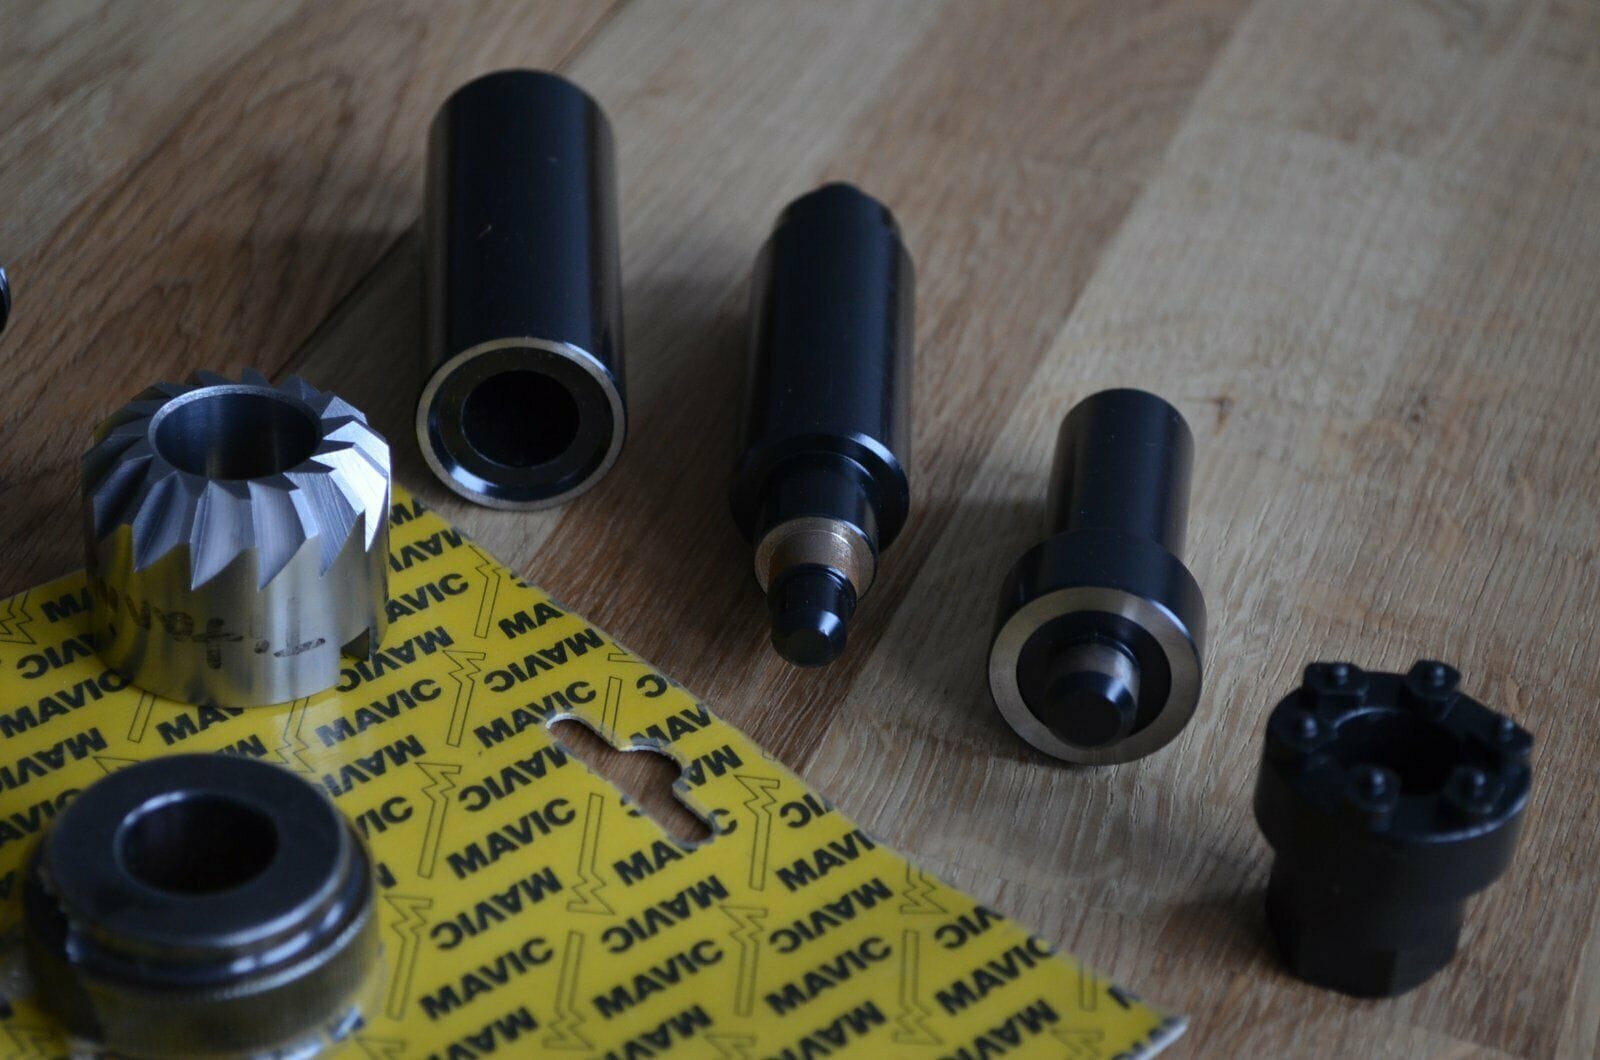
What you are in need of is the tool at the rightmost in this picture.
https://www.ebay-kleinanzeigen.de/s-...34685-230-4715
I had to deal with the same type of lockring on a 2nd gen. Cosmic. Personally I would never pay that much money for a tool I will use once. Also, given that that design dates back to the late 90s, there is a good chance the nut underwent galvanic welding with the freehub's outer bearing race. At least this is what I think happened to mine.
The way I see it your best chances are finding a store that has been a Mavic service centre for long enough to maybe still have that tool laying around, or, do what I did and drill it to destruction (it doesn't really do much).
Last edited by Igor_M; 12-21-20 at 01:49 PM.
Likes For Igor_M:
12-21-20, 11:04 PM
#14
Junior Member
Thread Starter
What you are in need of is the tool at the rightmost in this picture.
https://www.ebay-kleinanzeigen.de/s-...34685-230-4715
I had to deal with the same type of lockring on a 2nd gen. Cosmic. Personally I would never pay that much money for a tool I will use once. Also, given that that design dates back to the late 90s, there is a good chance the nut underwent galvanic welding with the freehub's outer bearing race. At least this is what I think happened to mine.
The way I see it your best chances are finding a store that has been a Mavic service centre for long enough to maybe still have that tool laying around, or, do what I did and drill it to destruction (it doesn't really do much).
https://www.ebay-kleinanzeigen.de/s-...34685-230-4715
I had to deal with the same type of lockring on a 2nd gen. Cosmic. Personally I would never pay that much money for a tool I will use once. Also, given that that design dates back to the late 90s, there is a good chance the nut underwent galvanic welding with the freehub's outer bearing race. At least this is what I think happened to mine.
The way I see it your best chances are finding a store that has been a Mavic service centre for long enough to maybe still have that tool laying around, or, do what I did and drill it to destruction (it doesn't really do much).
