


Removing French BB fixed cup
 06-26-21, 01:41 PM
#51
Senior Member
Thread Starter
The stein tool is great and well worth owning. The problem is the spanner. I've had good luck with a 15 inch crescent which will set you back considerably less than a $100 (post 32). The back up is the Sheldon Brown tool described above (post 5).
By the way, I have a 70s era Mercier 300 in the build queue. It came to me with a VO bottom bracket and a stronglight 99 crank. The two worked well together.
By the way, I have a 70s era Mercier 300 in the build queue. It came to me with a VO bottom bracket and a stronglight 99 crank. The two worked well together.

Likes For TullySteve:
06-26-21, 01:46 PM
#52

Senior Member
^^^^ Suppose you'd want to plug the tubes and stays as well.....
06-26-21, 02:01 PM
#53
Senior Member
Thread Starter
06-26-21, 02:11 PM
#54
Senior Member
Join Date: Oct 2015
Location: PDX
Posts: 13,509
Bikes: Merz x 5 + Specialized Merz Allez x 2, Strawberry/Newlands/DiNucci/Ti x3, Gordon, Fuso/Moulton x2, Bornstein, Paisley,1958-74 Paramounts x3, 3rensho, 74 Moto TC, 73-78 Raleigh Pro's x5, Marinoni x2, 1960 Cinelli SC, 1980 Bianchi SC, PX-10 X 2
Liked 6,823 Times
in
3,897 Posts
06-26-21, 02:51 PM
#55
I tried the Sheldon Brown "tool" method and couldn't get it to budge, the nut side of the tool turned regardless of the torque I put on the sandwich. I did not find the finer pitched bolt that he spec'd in my local Ace, so I was limited in tightening to a course-threaded bolt. Call to my LBS (I do want to do most of this DIY, but I also want to move on here) resulted in an interesting recommendation: He had me plug the spindle hole with a cork (from inside the BB), lay the bike down with the fixed cup down, and fill the fixed cup & BB above with heated Canola oil and leave it overnight. So that's the current status. He is a seasoned vet and was a certified TDF mechanic & lived in France for several years, so I trust him. He said even if I end up bringing it to them tomorrow, this will help immensely.
EDIT: I may have misled you all into thinking TMWKE would use the dog clutch on anything - not so; I remember the first time hearing about the method as he was explaining to a customer that the cup was so stuck that this was the only way forward and it would mean buying a new bit.
Last edited by oneclick; 06-26-21 at 03:14 PM.
06-26-21, 02:59 PM
#56

Disraeli Gears

Eeewww! Okay for a throwaway cup, but for a vintage Stronglight, = x666x.
Likes For Charles Wahl:
06-26-21, 03:03 PM
#57
Senior Member
Join Date: Oct 2015
Location: PDX
Posts: 13,509
Bikes: Merz x 5 + Specialized Merz Allez x 2, Strawberry/Newlands/DiNucci/Ti x3, Gordon, Fuso/Moulton x2, Bornstein, Paisley,1958-74 Paramounts x3, 3rensho, 74 Moto TC, 73-78 Raleigh Pro's x5, Marinoni x2, 1960 Cinelli SC, 1980 Bianchi SC, PX-10 X 2
Liked 6,823 Times
in
3,897 Posts
The ManWhoKnewEverything at the LBS in my youth used the bolt-through-the-cup method, but he used a thing he called a "dog-clutch" to grab the cup from the inside. It was a cylinder with a hole through it, one end flat and the other had ramped teeth, angled as on a milling cutter. It *always* grabbed, and the cup was *never* usable afterwards.
 06-26-21, 10:39 PM
#58
Senior Member

Join Date: Jan 2008
Location: Beaverton, OR
Posts: 14,964
Bikes: Yes
Liked 4,301 Times
in
1,584 Posts
This is what I meant by taking a photo to determine the thread direction. Andy_K , I presume we're looking at a left-hand (French or Italian) threaded fixed cup, since it appears to unscrew clockwise from the exterior?
The one in my picture is ISO (�righty loosey�). It was on a Japanese-built Gitane.
__________________
My Bikes
My Bikes
06-27-21, 09:18 AM
#59
Disraeli Gears
Whoops!, I apologize for associating "left-hand" and "(French or Italian)" in my previous post and the quote above. Being sorta "schizodextrous", I've had a left-right confusion since childhood. Gaffe fixed in my offending post above.
06-27-21, 10:23 AM
#60
Passista
Join Date: Jul 2005
Posts: 7,797
Bikes: 1998 Pinarello Asolo, 1992 KHS Monta�a pro, 1980 Raleigh DL-1, IGH Hybrid, IGH Utility
Liked 829 Times
in
461 Posts
My son is left handed and also has this problem. If you say him "Turn right (or left) now, quick" he often mistakes sides. Doesn't happen if he has a moment to think, though.
06-27-21, 11:22 AM
#61
Bike Butcher of Portland

Join Date: Jul 2014
Location: Portland, OR
Posts: 11,806
Bikes: It's complicated.
Liked 6,174 Times
in
2,402 Posts
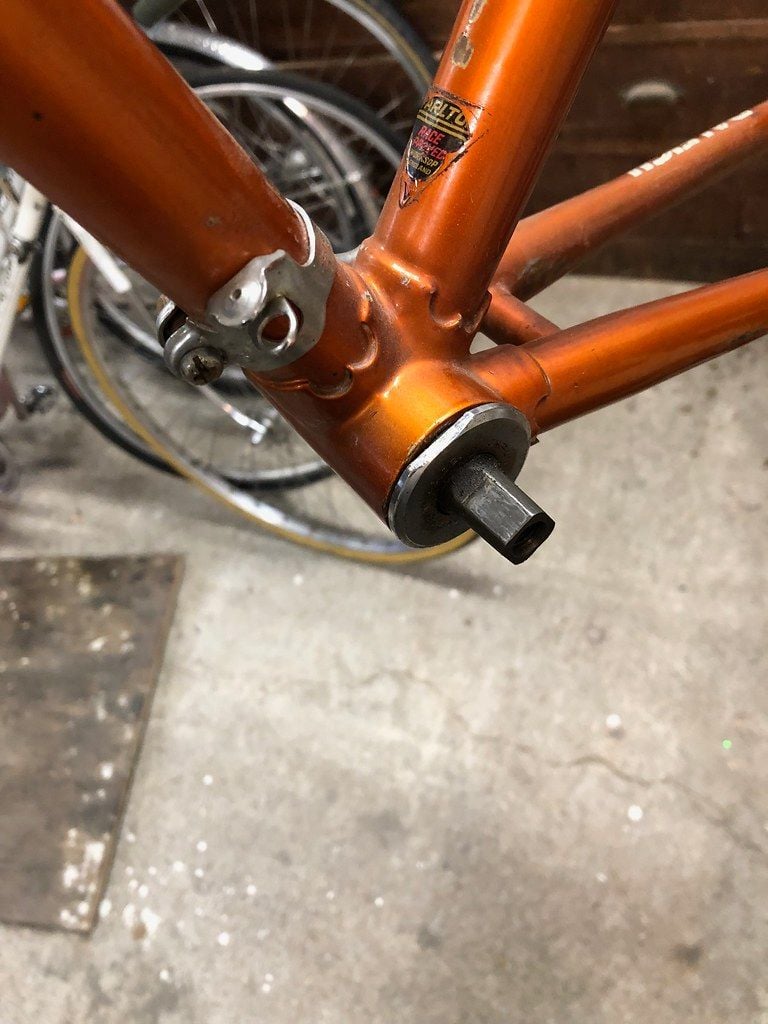
I bought a Raleigh International a few years back that had cross threaded cups (how does that happen???) Fixed cup was on the non-drive side! I clamped it on my vise and used the frame to torque it out.
The adjustable cup tools were no match, for this, so I removed the lock ring and filed flats on opposite sides so I could use the vise method.
After running a tap through both sides, I could put in a new English BB with no problem. I haven't built that frame up, if/when I do I'll probably just use that BB and watch to see if it loosens. My backup plan if it loosens is to use some of the proper locktite. Failing that, my backup-backup plan is to ream it out and retap as Italian. Third choice would be to silver braze over the threads and retap, but this frame has one of those beautiful copper colored paint jobs that's in good shape. Maybe at that point it becomes a wall hanger?
I don't think I've ever seen a bike that swapped the fixed and adjustable cup sides like that. They were labelled with english threading. I have no idea how someone forced them in, unless it was done at the factory with power tools and jigs. I'm also amazed that I could retap it and still have useable threads. It seemed like a magic trick.
edit: forgot that pix or it didn't happen:
__________________
If someone tells you that you have enough bicycles and you don't need any more, stop talking to them. You don't need that kind of negativity in your life.
If someone tells you that you have enough bicycles and you don't need any more, stop talking to them. You don't need that kind of negativity in your life.
Last edited by gugie; 06-27-21 at 05:56 PM.
06-27-21, 05:07 PM
#62
Death fork? Naaaah!!

In the last extremity I have used a pipe wrench.
I do not recommend it (unless it has become personal...), but it can be done.
Top
I do not recommend it (unless it has become personal...), but it can be done.
Top
__________________
You know it's going to be a good day when the stem and seatpost come right out.
(looking for a picture and not seeing it? Thank the Photobucket fiasco.PM me and I'll link it up.)
You know it's going to be a good day when the stem and seatpost come right out.
(looking for a picture and not seeing it? Thank the Photobucket fiasco.PM me and I'll link it up.)
06-28-21, 07:34 AM
#63
Senior Member
Thread Starter
Well we got it out in good reusable shape! Combination of the Sheldon Brown tool, overnight soaking in canola, and my LBS used a version of your method to clamp a regular large adjustable wrench to work in concert with the Brown tool and it cracked free. Threads on cup and shell look good, races are clean, on to the next step.
06-28-21, 07:58 AM
#64
Senior Member
Join Date: Oct 2015
Location: PDX
Posts: 13,509
Bikes: Merz x 5 + Specialized Merz Allez x 2, Strawberry/Newlands/DiNucci/Ti x3, Gordon, Fuso/Moulton x2, Bornstein, Paisley,1958-74 Paramounts x3, 3rensho, 74 Moto TC, 73-78 Raleigh Pro's x5, Marinoni x2, 1960 Cinelli SC, 1980 Bianchi SC, PX-10 X 2
Liked 6,823 Times
in
3,897 Posts
Well we got it out in good reusable shape! Combination of the Sheldon Brown tool, overnight soaking in canola, and my LBS used a version of your method to clamp a regular large adjustable wrench to work in concert with the Brown tool and it cracked free. Threads on cup and shell look good, races are clean, on to the next step.
 Great news!
You need to buy them a six pack, as you probably know, I would not entrust this to any LBS mainly due to not letting something like this get away from me and many shops don't have a good handle on this sort of thing anymore and, most would not hesitate to butcher it and slap a cartridge in it and say "oh, we don't worry about it, a cartridge is better anyway." BS imo.

Glad it worked out.
06-28-21, 01:59 PM
#65
For stuck fix cups I got the best results with loads of lubrication (sometimes I had to used Molybdene based lubricants) and a vice. Might be a good idea to have someone help you, applying pressure to the BB shell so it will stay flat on the vice's claw. It is worth trying both directions, I was surprised to learn that a Peugeot PY10 I recently serviced had a Swiss BB and I extra-tightened the cup by trying to unscrew it.
06-28-21, 04:33 PM
#66
Senior Member
Join Date: Oct 2015
Location: PDX
Posts: 13,509
Bikes: Merz x 5 + Specialized Merz Allez x 2, Strawberry/Newlands/DiNucci/Ti x3, Gordon, Fuso/Moulton x2, Bornstein, Paisley,1958-74 Paramounts x3, 3rensho, 74 Moto TC, 73-78 Raleigh Pro's x5, Marinoni x2, 1960 Cinelli SC, 1980 Bianchi SC, PX-10 X 2
Liked 6,823 Times
in
3,897 Posts
For stuck fix cups I got the best results with loads of lubrication (sometimes I had to used Molybdene based lubricants) and a vice. Might be a good idea to have someone help you, applying pressure to the BB shell so it will stay flat on the vice's claw. It is worth trying both directions, I was surprised to learn that a Peugeot PY10 I recently serviced had a Swiss BB and I extra-tightened the cup by trying to unscrew it.
I never use the vise method, have seen several nice frames damaged when the frame slips out of the vise, my clamp and cheater setup has never failed or damaged anything, it like the vice, takes practice and patience for a good result.
This is a regular topic here and many different opinions always come up with many here including myself insisting theirs is the best, easiest, fastest, etc.
At the end of the day the method that works best for you is the best method for you to use.
But when someone that has not been there asks for help it seems that many think that someone will be able to do it like they do.
And they may be able to but if not and slipping wrenches and vises are part of the problem then the result may be worse than simple failure when it ends up making the problem worse.
06-28-21, 07:40 PM
#67
Senior Member

Join Date: Nov 2010
Location: Sacramento, CA
Posts: 22,995
Bikes: old ones
Liked 10,458 Times
in
7,255 Posts
It's not used more because people are trying t o save the paint. But even at lower heats, it often will free up a stuck cup.
Likes For 3alarmer:
06-28-21, 10:20 PM
#68
blahblahblah chrome moly

They're exactly like a Helicoil, except they're not coils, and not Helicoil brand. And the right-side one is RH threaded inside and LH threaded outside.
As Albert Einstein almost certainly did not say, "The only difference is that there is no cat."
Mark B
06-28-21, 10:54 PM
#69
Bike Butcher of Portland
Join Date: Jul 2014
Location: Portland, OR
Posts: 11,806
Bikes: It's complicated.
Liked 6,174 Times
in
2,402 Posts
Gugie, have you seen those BB thread repair rings that are threaded Ital on the outside and Eng. on the inside? So after you get it tapped Ital, you can still use Eng/ISO cups. Ceeway carries the repair rings. (Go here and scroll down to the bottom.) I have a set, amazing to behold, probably not easy to make. The rings could be fixed with red Loctite to become effectively a permanent part of the frame, and no one need ever know what you did... Maybe ethics demands disclosure in the event of a sale later, but honestly I believe this repair would be good as new � better than new on some frames that had cr�p threads to begin with.
They're exactly like a Helicoil, except they're not coils, and not Helicoil brand. And the right-side one is RH threaded inside and LH threaded outside.
As Albert Einstein almost certainly did not say, "The only difference is that there is no cat."
Mark B
They're exactly like a Helicoil, except they're not coils, and not Helicoil brand. And the right-side one is RH threaded inside and LH threaded outside.
As Albert Einstein almost certainly did not say, "The only difference is that there is no cat."
Mark B
I'm vaguely remembering having someone else told me about these eons ago! BITD I remember one of the LBS's I worked at that reminded me to "put a note in the BB" if I ever retapped to a larger size, so a future owner would know what was going on!
Thanks for the reminder, Ceeway tends to have odds and ends that no one else carries - but Peter's been around longer than our stateside vendors. I might have to look through his 1990's designed website and see what else I can order from him!
Have you retapped English to Italian before? Does one ream a bit to remove threads first, or can you "force feed" an Italian tap on the adjustable side, then use that to center the tap on the fixed side?
__________________
If someone tells you that you have enough bicycles and you don't need any more, stop talking to them. You don't need that kind of negativity in your life.
If someone tells you that you have enough bicycles and you don't need any more, stop talking to them. You don't need that kind of negativity in your life.
06-29-21, 04:50 AM
#70
blahblahblah chrome moly
I have Campy taps, and also a fixed-size reamer for Ital that fits on the Campy tap holder, so the reaming is forced to be concentric (coaxial?) with the thread on the other side. Then, after one side is reamed and tapped, you can put the reamer in the other side of the frame, with the Ital tap now in the good new Ital thread. (FYI for those who don't know, Campy and other good BB taps pilot into each other to ensure the threads are on the same axis. Campy's pilot is the most precise of any taps I've used.)
I don't know who made that reamer; it came to me with my Campy toolkit, which was jam-packed with extras like taps and facer-pilots in all 3 popular (at the time) national standards. (Alas, no Swiss, though I do have a Hozan Swiss tap.) The reamer doesn't look like it's a Campy tool but it was clearly made to fit the Campy tap holder, with a very precise fit. The reaming goes fairly easily, but then the tapping is more work than you're used to if all you've done before is chase already-existing threads. You're removing substantial metal chips, even after reaming. Which is why I can't imagine tapping without reaming first.
I've also seen the "reaming" done with a boring head on a vertical milling machine. (Of course then it's not reaming, it's boring.) It's a very finicky setup on the mill though, probably too time-consuming ($$) for anything but a very expensive frame. It was a custom Ti frame that I saw it done on.
I recently tapped only one side to Ital on a French bike, and the owner asked me to stop there, leave the other side French, against my advice. That'll be a surprise to some mechanic down the road! At least they both are RH thread on the right side, so there's not much risk of turning the fixed cup the wrong way, trying to loosen it.
Mark B.
06-29-21, 05:06 AM
#71
I have tapped English (and French) to Ital, but only by reaming first. Some damaged threads have significant metal loss or a flared/oversized shell, and then maybe you can just force the Ital tap in, but it makes me squeamish to even think about it. Seems like it'd be tough on the tap, tough on the frame.
06-29-21, 07:16 AM
#72
Disraeli Gears

Last edited by Charles Wahl; 06-29-21 at 11:58 AM.
06-29-21, 07:35 AM
#73
Old fart

Join Date: Nov 2004
Location: Appleton WI
Posts: 25,052
Bikes: Several, mostly not name brands.
Liked 3,684 Times
in
2,080 Posts
It's best to ream first; forcing an Italian thread tap would be difficult. Bicycle Research used to offer a reamer/tap set for this purpose. I've used it several times with good success.
06-29-21, 08:58 AM
#74
Bike Butcher of Portland
Join Date: Jul 2014
Location: Portland, OR
Posts: 11,806
Bikes: It's complicated.
Liked 6,174 Times
in
2,402 Posts
With respect: how does this even work? There's only about 1.25 mm difference in the thread (cup) diameter in theory, and Sutherland's says only 1 mm (34.8 vs 35.8), plus the two threads can't "nest" on the drive side because they're in opposite directions. Is this one of those ShelBroCo April Fool's products? I drew this up in CAD, using 1/24" as the thread pitch, and 60 degree (yeah, English is 55 degree or so), and when offsetting the "English" by half a mm, I get overlap between the two thread profiles:
__________________
If someone tells you that you have enough bicycles and you don't need any more, stop talking to them. You don't need that kind of negativity in your life.
If someone tells you that you have enough bicycles and you don't need any more, stop talking to them. You don't need that kind of negativity in your life.
06-29-21, 10:54 AM
#75
Senior Member

Join Date: May 2008
Location: Fredericksburg, Va
Posts: 9,711
Bikes: '65 Frejus TDF, '73 Bottecchia Giro d'Italia, '83 Colnago Superissimo, '84 Trek 610, '84 Trek 760, '88 Pinarello Veneto, '88 De Rosa Pro, '89 Pinarello Montello, '94 Burley Duet, 97 Specialized RockHopper, 2010 Langster, Tern Link D8
Liked 2,327 Times
in
1,162 Posts
Great info on this thread even though we have discussed stuck fixed cups before.
I have a 72 Le Champion that was rendered inoperable by a car back in 2009. It had the same Stronglight BB. Getting the fixed cup out was an exercise of experimentation. Did most of the suggestions above.
The one that worked for me was to leave the Sheldon assembly on the fixed cup to absorb the heat and used a flame to heat the assembly up. I did not burn or brown the paint at all with the result of it coming off reasonably easily comparted the the amount of torque applied on pervious attempts. At the time I was hoping there would be an opportunity for repair. NOT!
__________________
Bikes don't stand alone. They are two tired.
Bikes don't stand alone. They are two tired.