


Your Most Recent Cycling-related Repair
 01-21-23, 01:24 AM
#201
Senior Member
Thread Starter

Join Date: Nov 2007
Location: Yamaguchi City, Japan
Posts: 1,091
Bikes: Trek Madone 5.2 SL 2007, Look KG386, R022 Re-framed Azzurri Primo, Felt Z5, Trek F7.3 FX
Mentioned: 36 Post(s)
Tagged: 0 Thread(s)
Quoted: 404 Post(s)
Liked 85 Times
in
73 Posts
You are clearly the cold weather expert! It is going to go down to -6 Celsius next Wednesday but that is rare and the first time in years. I will walk to work and jog in the snow for exercise. I got some "innov8" shoes with "talons" on the sole for this purpose, on the left in this photo below.
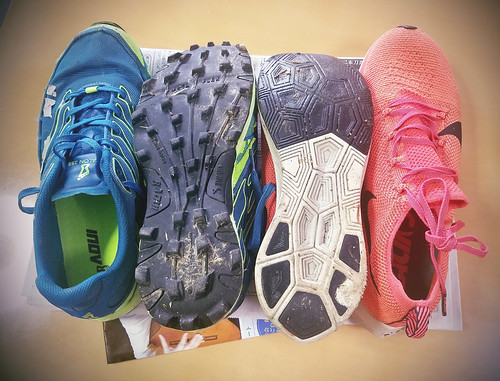
Running Shoes: For Mountain and Road by Timothy Takemoto, on Flickr
I have only used chemical warmers in my cycling shoes once.
I do recommend neoprene covers though. I found that if I just covered the toes of my shoes it made a big difference
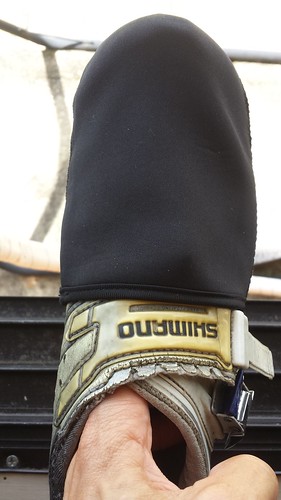
Chinese Shoe Toe Covers by Timothy Takemoto, on Flickr
Now I only use bottle covers.
Running Shoes: For Mountain and Road by Timothy Takemoto, on Flickr
I have only used chemical warmers in my cycling shoes once.
I do recommend neoprene covers though. I found that if I just covered the toes of my shoes it made a big difference
Chinese Shoe Toe Covers by Timothy Takemoto, on Flickr
Now I only use bottle covers.
Last edited by timtak; 01-21-23 at 05:55 AM.

 06-15-23, 02:33 AM
#203
Senior Member
Thread Starter
Join Date: Nov 2007
Location: Yamaguchi City, Japan
Posts: 1,091
Bikes: Trek Madone 5.2 SL 2007, Look KG386, R022 Re-framed Azzurri Primo, Felt Z5, Trek F7.3 FX
Mentioned: 36 Post(s)
Tagged: 0 Thread(s)
Quoted: 404 Post(s)
Liked 85 Times
in
73 Posts
I got some more Shimano Road Bike shoes of the SH-R133 variety. They don't have super high friction catstongue material in the heel, and they may have a little more stack height than the R200s (which are heat customisable but I never have) but other than that they have the same super stiff sole with a bit of heel cup.
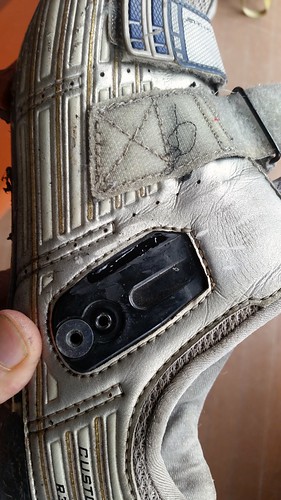
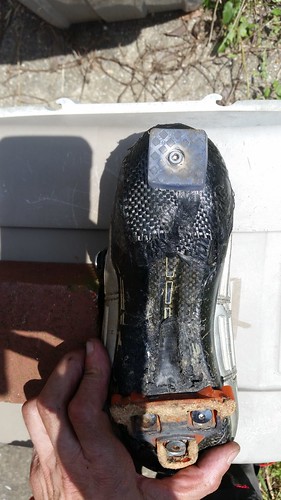
But the heel pads wore out in a couple of weeks. No wonder I have been patching heel carbon earlier in the thread. Fortunately I managed to Sidify them with a T-nut/claw nut and add a clear rubber table leg pad before the carbon is damaged.
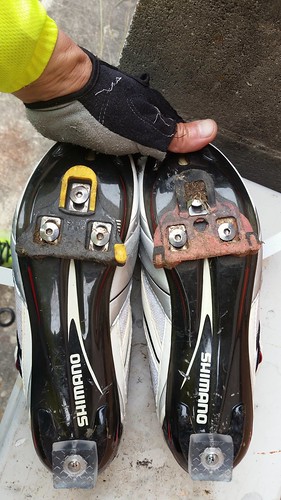
Quick Sidification by Timothy Takemoto, on Flickr

Close up of pad
They may not look cool, but they are fine to walk on and make Shimano shoes last forever.
Procedure
Drill 5mm hole *from outside* through removed Shimano rivet hole taking care to drill straight and not touch material. A drill bit in a screwdriver handle will cut through quick enough.
De-bur the inside with a screwdriver or similar (do not wiggle an electric drill around from the outside nor electric drill from the inside out, and risk catching the material in the drill bit!)
Bash the M4 t-nut/claw nut into the insole using a steel bar and hammer (do not attempt to just screw up the pad because that may screw the T-nut's claws round and round cutting a ring into the insole)
Screw on the table leg pad using 12mm M4 plus bolt or similar.
M4 (for heel pad) claw nut are about 1USD (148 yen) for 10 here
https://www.aliexpress.com/item/1005001633066995.html
Boltt/screw 12mm M4 20 pieces for about 2USD for 20 (they wear with the pads)
https://www.aliexpress.com/item/4000195813438.html
Table leg pads here. round or square, clear or black is a matter of preference but they should have a metal washer inside them. I did not get mine from this llisting but I think that they are simlar to 16 at 3USD for 10
https://www.aliexpress.com/item/1005003604849406.html
Cleat bolts need an M5 claw nut but for the heel pad M4 is fine.
Looking at the latest S-Phyre Shimano RC300 etc shoes...is it really true that the heel pad is still non replaceable?
But the heel pads wore out in a couple of weeks. No wonder I have been patching heel carbon earlier in the thread. Fortunately I managed to Sidify them with a T-nut/claw nut and add a clear rubber table leg pad before the carbon is damaged.
Quick Sidification by Timothy Takemoto, on Flickr
Close up of pad
They may not look cool, but they are fine to walk on and make Shimano shoes last forever.
Procedure
Drill 5mm hole *from outside* through removed Shimano rivet hole taking care to drill straight and not touch material. A drill bit in a screwdriver handle will cut through quick enough.
De-bur the inside with a screwdriver or similar (do not wiggle an electric drill around from the outside nor electric drill from the inside out, and risk catching the material in the drill bit!)
Bash the M4 t-nut/claw nut into the insole using a steel bar and hammer (do not attempt to just screw up the pad because that may screw the T-nut's claws round and round cutting a ring into the insole)
Screw on the table leg pad using 12mm M4 plus bolt or similar.
M4 (for heel pad) claw nut are about 1USD (148 yen) for 10 here
https://www.aliexpress.com/item/1005001633066995.html
Boltt/screw 12mm M4 20 pieces for about 2USD for 20 (they wear with the pads)
https://www.aliexpress.com/item/4000195813438.html
Table leg pads here. round or square, clear or black is a matter of preference but they should have a metal washer inside them. I did not get mine from this llisting but I think that they are simlar to 16 at 3USD for 10
https://www.aliexpress.com/item/1005003604849406.html
Cleat bolts need an M5 claw nut but for the heel pad M4 is fine.
Looking at the latest S-Phyre Shimano RC300 etc shoes...is it really true that the heel pad is still non replaceable?
Last edited by timtak; 06-15-23 at 03:15 AM. Reason: pads added
Likes For timtak:
06-15-23, 10:28 AM
#204
Super-duper Genius

Join Date: Aug 2016
Location: Muskrat Springs, Utah
Posts: 1,713
Mentioned: 20 Post(s)
Tagged: 0 Thread(s)
Quoted: 768 Post(s)
Liked 984 Times
in
508 Posts
I was on my road bike a few weeks ago. I shifted to my largest cog for an approaching steep hill. Somehow, my derailler was out of adjustment, and it over shifted, letting the chain go off the top and get jammed between the cassette and hub. Fortunately I was going quite slow at the time, so it was not a very dramatic incident. I pulled the chain free and set it back on a cog, and then carefully continued back home. Inspection revealed no damage to the chain or cassette, but seven damaged spokes. (28 spoke wheel, and every one of the drive side trailing spokes got bent a little, plus severely marred/gouged).
I ordered new spokes and replaced them, then re-trued the wheel. Seems A-OK now, but I've not had a chance to take it for a test ride. Oh, yeah... I've also readjusted the derailler.
I ordered new spokes and replaced them, then re-trued the wheel. Seems A-OK now, but I've not had a chance to take it for a test ride. Oh, yeah... I've also readjusted the derailler.
Last edited by Broctoon; 06-15-23 at 10:46 AM.
06-24-23, 12:51 AM
#205
Senior Member
Thread Starter
Join Date: Nov 2007
Location: Yamaguchi City, Japan
Posts: 1,091
Bikes: Trek Madone 5.2 SL 2007, Look KG386, R022 Re-framed Azzurri Primo, Felt Z5, Trek F7.3 FX
Mentioned: 36 Post(s)
Tagged: 0 Thread(s)
Quoted: 404 Post(s)
Liked 85 Times
in
73 Posts
I wish I were better at mending spokes/wheels.
I sewed a leatherette patch onto the right thigh of my cycling shorts.
I think that somewhere on these forums there is an image from John Cobb's site showing a saddle superimposed with a femur arguing that one should rest one thigh on ones saddle. I though the suggestion crazy at the time.
But now that i am into pedalling by catapulting myself forward using the upward movement of my femur resting on my saddle to push my pedals down, I find that putting the fulcrum of my saddle on the middle of my femur, so that i am using quads and glutes equally, to be the fastest position. I feel a bit like an oil pump jack. This is Eddy but I have my saddle similarly positioned.
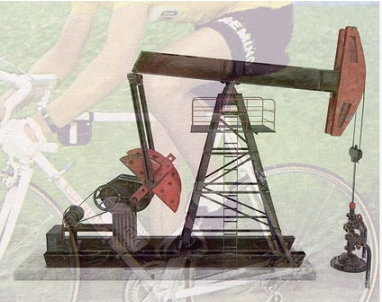
Eddy Merckx superimposted with a pump jack (the pump is a view of
a 3D model by dragosburian. If you would like me to remove this
image please let me know)
I can't put both thighs on my saddle, except when i start off, in the "I want to pee position" as shown below.
How to pedal a road bike by Timothy Takemoto, on Flickr
So I rest my right thigh on the side of my saddle. The only drawback of this is that my shorts wear out very quickly. I read somewhere, and I think perhaps saw, that cyclists used to use shammy leather patches to prolong the life of their shorts. I think I may even have seen one with a an off-centre patch. Here are my shorts with leatherette patch on my right thigh where the shorts had a hole. The leatherette is non optimal because it is sweaty, but it sticks to my seat and this seems to help.

Right Thigh Pad by Timothy Takemoto, on Flickr
I sewed a leatherette patch onto the right thigh of my cycling shorts.
I think that somewhere on these forums there is an image from John Cobb's site showing a saddle superimposed with a femur arguing that one should rest one thigh on ones saddle. I though the suggestion crazy at the time.
But now that i am into pedalling by catapulting myself forward using the upward movement of my femur resting on my saddle to push my pedals down, I find that putting the fulcrum of my saddle on the middle of my femur, so that i am using quads and glutes equally, to be the fastest position. I feel a bit like an oil pump jack. This is Eddy but I have my saddle similarly positioned.
Eddy Merckx superimposted with a pump jack (the pump is a view of
a 3D model by dragosburian. If you would like me to remove this
image please let me know)
I can't put both thighs on my saddle, except when i start off, in the "I want to pee position" as shown below.
How to pedal a road bike by Timothy Takemoto, on Flickr
So I rest my right thigh on the side of my saddle. The only drawback of this is that my shorts wear out very quickly. I read somewhere, and I think perhaps saw, that cyclists used to use shammy leather patches to prolong the life of their shorts. I think I may even have seen one with a an off-centre patch. Here are my shorts with leatherette patch on my right thigh where the shorts had a hole. The leatherette is non optimal because it is sweaty, but it sticks to my seat and this seems to help.
Right Thigh Pad by Timothy Takemoto, on Flickr
Last edited by timtak; 06-24-23 at 01:18 AM.
07-07-23, 12:38 AM
#206
Senior Member
Thread Starter
Join Date: Nov 2007
Location: Yamaguchi City, Japan
Posts: 1,091
Bikes: Trek Madone 5.2 SL 2007, Look KG386, R022 Re-framed Azzurri Primo, Felt Z5, Trek F7.3 FX
Mentioned: 36 Post(s)
Tagged: 0 Thread(s)
Quoted: 404 Post(s)
Liked 85 Times
in
73 Posts
I thought I'd try stronger buckles on the new shoes I purchased above, but before doing so, I tried them on my R300 (the next rank up), which are a bit to small for me. I ground sown the race next to the Shimano buckle and filled it with black goo.
Race Removed and Filled by Timothy Takemoto, on Flickr]
And added a roller skate buckle from China
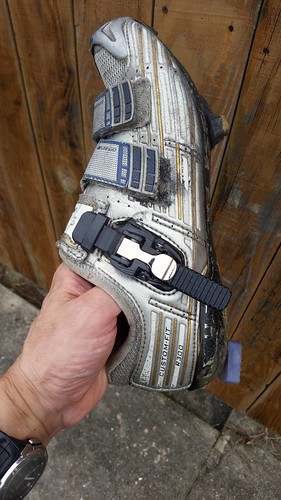 Stronger Roller Skate Buckle by Timothy Takemoto, on Flickr
This worked so well that I found myself wearing the "too small" Shimano R300 ancient top-of the range shoes because the buckle pushed my heel so hard into the back of the shoe that my toes have room.
I had not used the tight R300s much before. They did not have Sidi like replaceable heels and had been repaired with shoe goo only. So the pad that I added got pulled off

Carbon Reheel and ReSidification by Timothy Takemoto, on Flickr
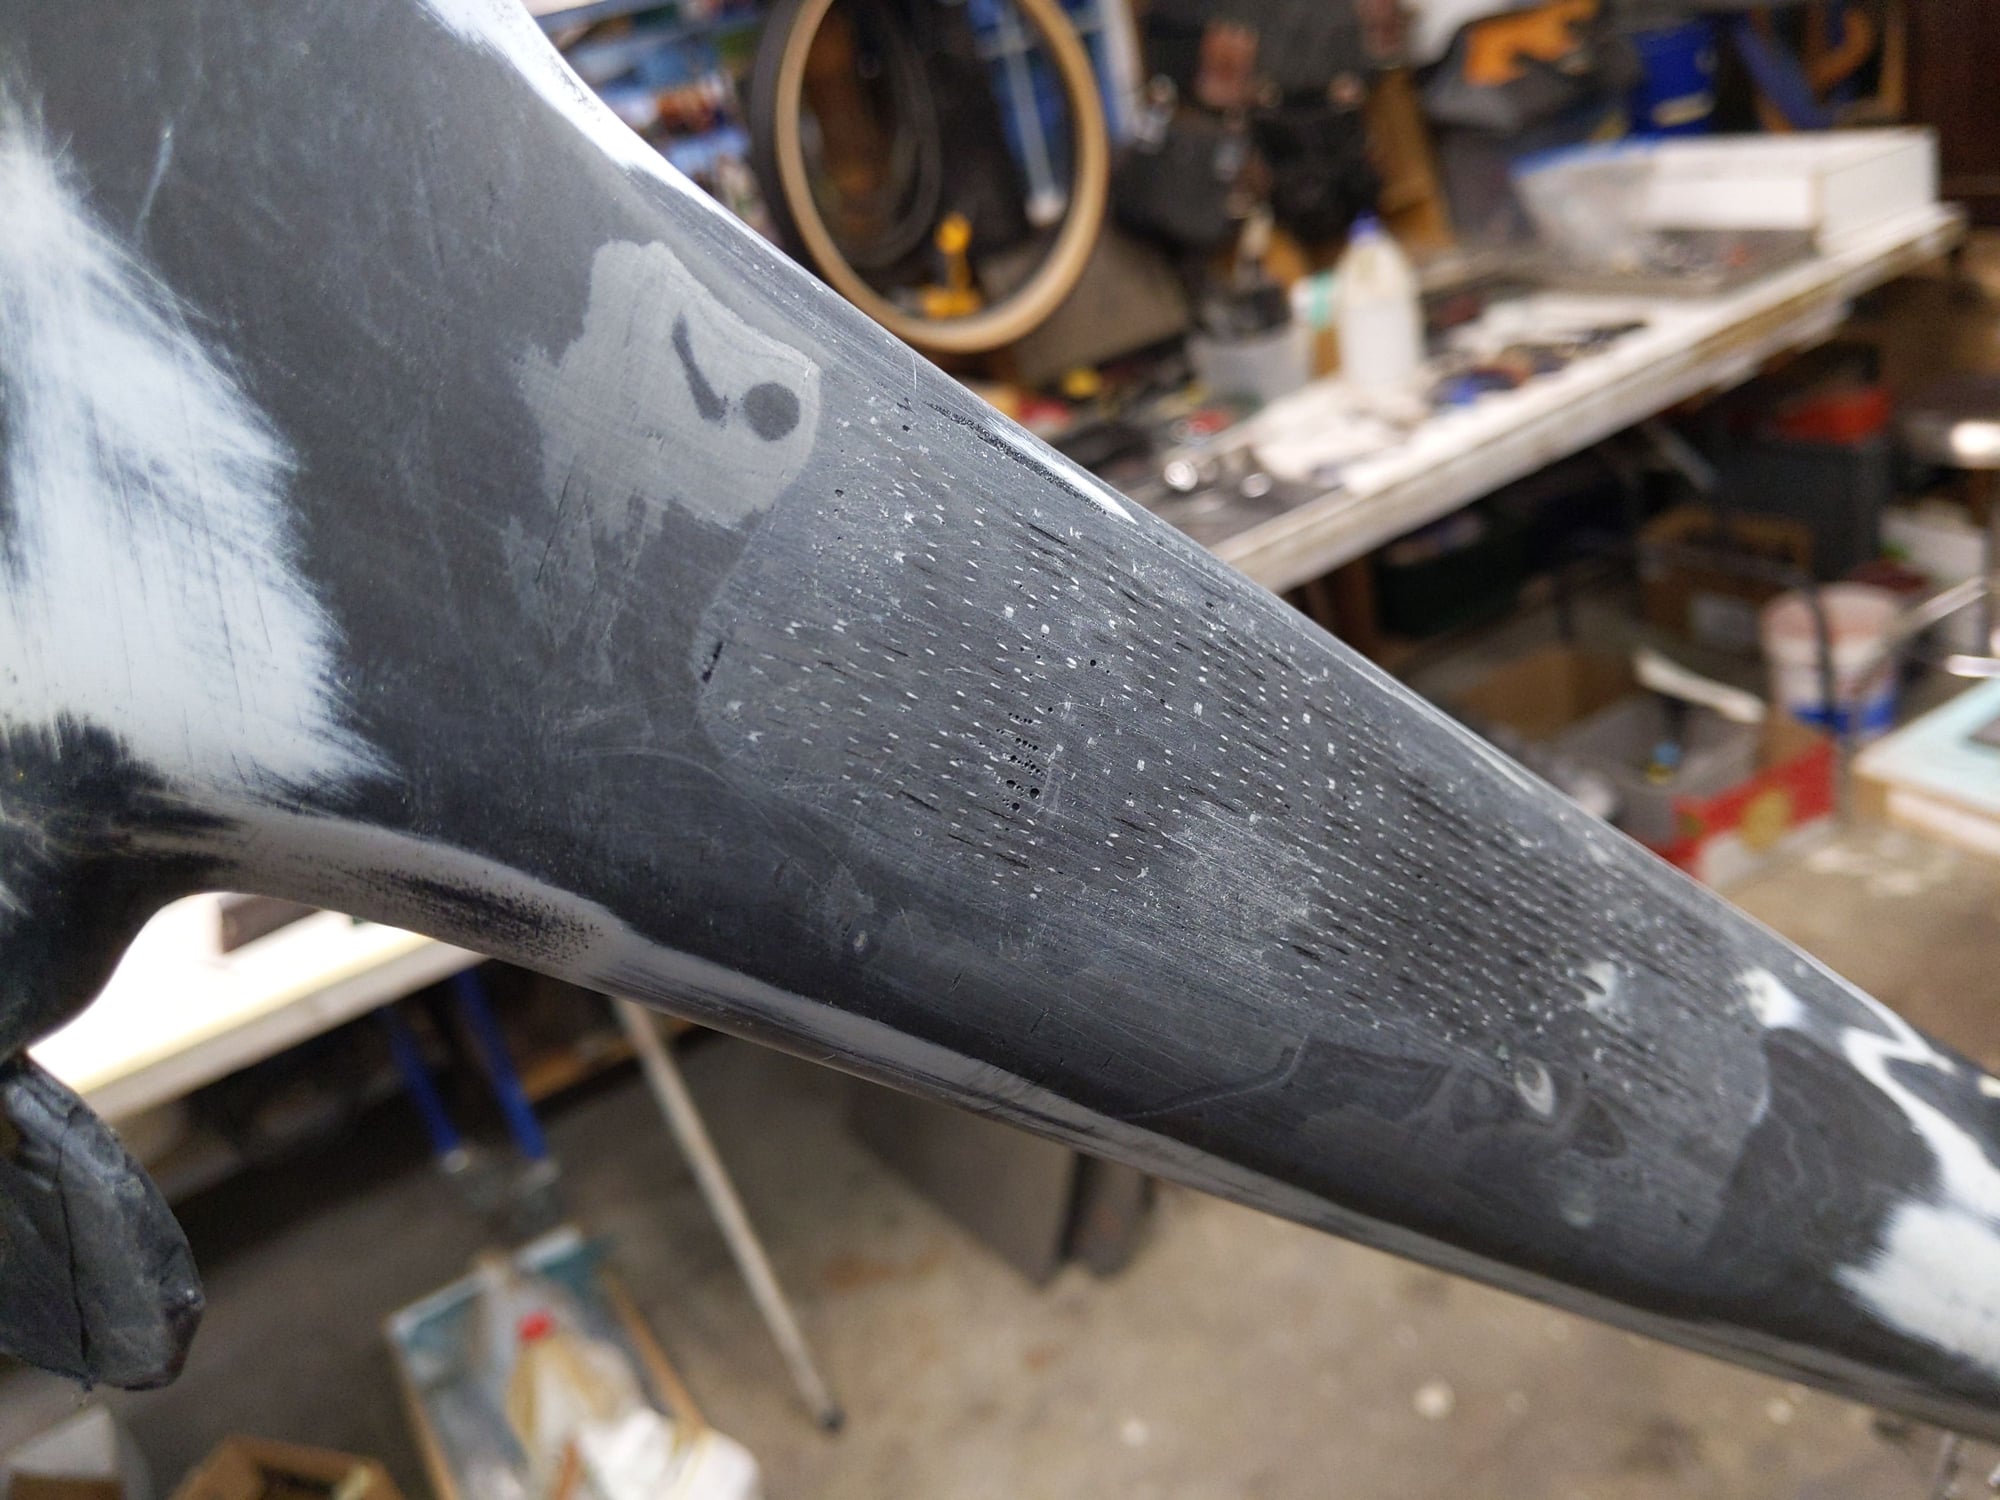
So I removed the goo to reveal that there was hardly any carbon left on the heel (Shimano is a bit evil!)

Carbon Reheel and ReSidification by Timothy Takemoto, on Flickr
So I used some carbon sheet and epoxy resin to mend the heel
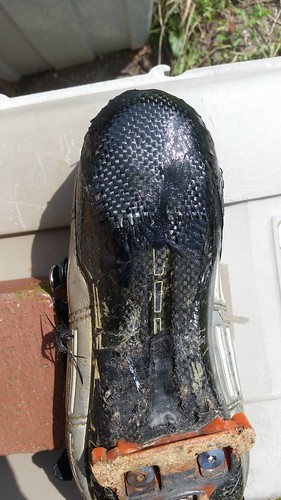
Carbon Reheel and ReSidification by Timothy Takemoto, on Flickr
I added 4 layers of carbon fibre sheet with Wessex Resins West Systems 105 Resin that I bought from a company called Carbonology which no longer seems to sell the carbon fibre mending sets. In fact I am not sure that Carbonology (the English company) still exists.
Wessex Resins does exist but they did not reply to my email asking where else I could purchase a small (100ml and 50ml) amount of resin and hardener. The heel is now very strong.
Aha. One can purchase the Wessex resin here
https://www.tradeinn.com/waveinn/ja/...00g/139575352/
And this alternative on amazon Japan
www.amazon.co.jp/dp/B0090WAMIE
Now they are rock hard, and I added a Sid type replaceable heel pad which is in fact a table leg pad
Carbon Reheel and ReSidification by Timothy Takemoto, on Flickr
Carbon sheet repairs are fun. But the epoxy can be carcinogenic, so please take care.
Race Removed and Filled by Timothy Takemoto, on Flickr]
And added a roller skate buckle from China
Stronger Roller Skate Buckle by Timothy Takemoto, on FlickrThis worked so well that I found myself wearing the "too small" Shimano R300 ancient top-of the range shoes because the buckle pushed my heel so hard into the back of the shoe that my toes have room.
I had not used the tight R300s much before. They did not have Sidi like replaceable heels and had been repaired with shoe goo only. So the pad that I added got pulled off
Carbon Reheel and ReSidification by Timothy Takemoto, on Flickr
So I removed the goo to reveal that there was hardly any carbon left on the heel (Shimano is a bit evil!)
Carbon Reheel and ReSidification by Timothy Takemoto, on Flickr
So I used some carbon sheet and epoxy resin to mend the heel
Carbon Reheel and ReSidification by Timothy Takemoto, on Flickr
I added 4 layers of carbon fibre sheet with Wessex Resins West Systems 105 Resin that I bought from a company called Carbonology which no longer seems to sell the carbon fibre mending sets. In fact I am not sure that Carbonology (the English company) still exists.
Wessex Resins does exist but they did not reply to my email asking where else I could purchase a small (100ml and 50ml) amount of resin and hardener. The heel is now very strong.
Aha. One can purchase the Wessex resin here
https://www.tradeinn.com/waveinn/ja/...00g/139575352/
And this alternative on amazon Japan
www.amazon.co.jp/dp/B0090WAMIE
Now they are rock hard, and I added a Sid type replaceable heel pad which is in fact a table leg pad
Carbon Reheel and ReSidification by Timothy Takemoto, on Flickr
Carbon sheet repairs are fun. But the epoxy can be carcinogenic, so please take care.
Last edited by timtak; 07-07-23 at 05:28 PM.
Likes For timtak:
08-02-23, 05:23 AM
#207


Senior Member

Join Date: Jul 2006
Location: Jacksonville, FL
Posts: 6,887
Bikes: Trek Domane SLR 7 AXS, Trek CheckPoint SL7 AXS, Trek Emonda ALR AXS, Trek FX 5 Sport
Mentioned: 2 Post(s)
Tagged: 0 Thread(s)
Quoted: 768 Post(s)
Liked 1,745 Times
in
1,016 Posts
Found that the initial bedding of the brakes was not done correctly on my bike and after several months of tinkering trying to get it corrected, I'd had enough and just replaced the rotors and pads. Bedded them properly and all is now correct in my bicycle world.
08-02-23, 07:15 AM
#208
Senior Member
Join Date: Jan 2023
Location: Eastern Shore MD
Posts: 884
Bikes: Lemond Zurich/Trek ALR/Giant TCX/Sette CX1
Mentioned: 1 Post(s)
Tagged: 0 Thread(s)
Quoted: 570 Post(s)
Liked 773 Times
in
404 Posts
Messed with my disc brakes for the first time in over 8k miles. One was starting to squeak and they were losing power.
Lightly sanded the pads and rotors, rebedded them in - working like brand new again.
Lightly sanded the pads and rotors, rebedded them in - working like brand new again.
08-04-23, 12:24 PM
#209
Senior Member
Join Date: Oct 2013
Location: Mich
Posts: 7,395
Bikes: RSO E-tire dropper fixie brifter
Mentioned: 0 Post(s)
Tagged: 0 Thread(s)
Quoted: 6 Post(s)
Liked 2,979 Times
in
1,920 Posts
No necessarily a breakage, but had to do a factory reset on the bicycle computer. I suspect it may be tied to the recent update applied; it went haywire pretty much after it rebooted.
#tech
#tech
__________________
-Oh Hey!
-Oh Hey!
12-31-23, 12:19 AM
#210
Senior Member
Thread Starter
Join Date: Nov 2007
Location: Yamaguchi City, Japan
Posts: 1,091
Bikes: Trek Madone 5.2 SL 2007, Look KG386, R022 Re-framed Azzurri Primo, Felt Z5, Trek F7.3 FX
Mentioned: 36 Post(s)
Tagged: 0 Thread(s)
Quoted: 404 Post(s)
Liked 85 Times
in
73 Posts
I changed my rear cassette (rather than attempt to replace the cogs that were worn - about three of them were jumping). Maybe one day soon AI will be able to tell us which cogs need replacing. I am still finding it really difficult to tell when to replace cassette (cogs). Skipping can also be caused by mal adjustment of deraileur, chain wear, a bent hanger, a broken rear triangle, and worn rear wheel bearings (all of which my bike has to a degree). I was getting scared that the paint chipping of my rear triangle was in fact a carbon break.
New Cassette by Timothy Takemoto, on Flickr
I did not notice the fact that the cheap 100g heavier Tiagra 10s cassette CS-HG500-10 pictured above does NOT need the 1mm spacer required for most 10 speed cassettes (other than this and CS-4600/6600 apparently). I wondered why I could hardly get the retaining nut on! Fortunately I read an Amazon review which explained the situation before I stripped the thread on my hub. I will now take it apart and remove the spacer. I guess it will not last as long as an Ultegra but at only 100g more and only about 30%% of the price ($23 vs 70 usd), I think I will buy another. I am not sure Ultegra cassettes start at about 25USD second hand.
I also found a guy on ****** who uses a dremel to deepen worn cassette cogs and I would like to try that one day because cassettes cost about halfl the price of a cheap bike.
I bought myself an aluminium cross bike by Cannodale for snowy days for 110 usd and slammed it, and moved the seat back as far as it would go. I have a 5mm headset spacer on order. At the moment the parking cone is above the bars as you can see.
 Cannondale Quick 4 by Timothy Takemoto, on Flickr
I also moved the tip of my saddle a little bit -- about 2 degrees -- to the left, as recommended by John Cobb (now only found in one post on these forums by @Campag4life I think) when John Cobb used to instruct people on how to do old school road bike cycling, so as to facilitate resting my right femur on my saddle.Here below is the image that Campag4Life posted here

Cycling has changed completely for me over the past two years since moving to the wobble femur on saddle style of cycling. My femur becomes part of the gearing allowing me in a sense to change gear by changing the point at which my femur is supported on the saddle. I'll post that image again.

rocking femur on saddle
I also bought some more fluorescent yoga pant that I convert to cycling pants that are really cheap right now. I prefer the ones without the black line but at 4USD I won't complain.
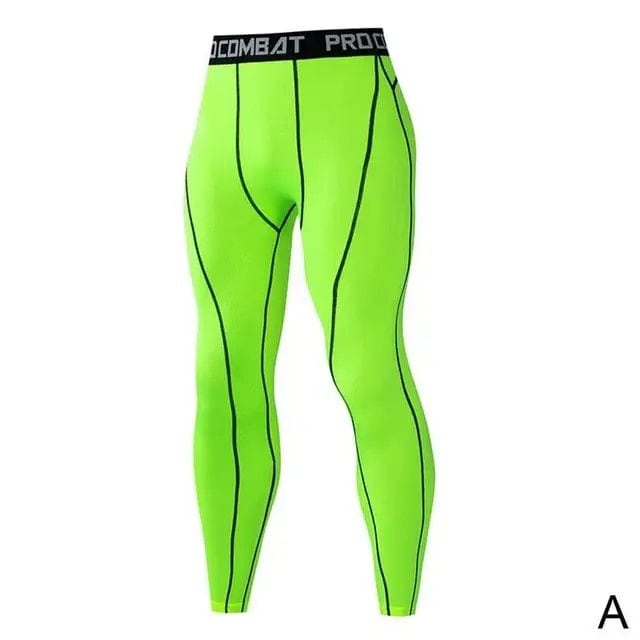
Why are there no cycling pants in this colour?
New Cassette by Timothy Takemoto, on Flickr
I did not notice the fact that the cheap 100g heavier Tiagra 10s cassette CS-HG500-10 pictured above does NOT need the 1mm spacer required for most 10 speed cassettes (other than this and CS-4600/6600 apparently). I wondered why I could hardly get the retaining nut on! Fortunately I read an Amazon review which explained the situation before I stripped the thread on my hub. I will now take it apart and remove the spacer. I guess it will not last as long as an Ultegra but at only 100g more and only about 30%% of the price ($23 vs 70 usd), I think I will buy another. I am not sure Ultegra cassettes start at about 25USD second hand.
I also found a guy on ****** who uses a dremel to deepen worn cassette cogs and I would like to try that one day because cassettes cost about halfl the price of a cheap bike.
I bought myself an aluminium cross bike by Cannodale for snowy days for 110 usd and slammed it, and moved the seat back as far as it would go. I have a 5mm headset spacer on order. At the moment the parking cone is above the bars as you can see.
Cannondale Quick 4 by Timothy Takemoto, on FlickrI also moved the tip of my saddle a little bit -- about 2 degrees -- to the left, as recommended by John Cobb (now only found in one post on these forums by @Campag4life I think) when John Cobb used to instruct people on how to do old school road bike cycling, so as to facilitate resting my right femur on my saddle.Here below is the image that Campag4Life posted here
Cycling has changed completely for me over the past two years since moving to the wobble femur on saddle style of cycling. My femur becomes part of the gearing allowing me in a sense to change gear by changing the point at which my femur is supported on the saddle. I'll post that image again.
rocking femur on saddle
I also bought some more fluorescent yoga pant that I convert to cycling pants that are really cheap right now. I prefer the ones without the black line but at 4USD I won't complain.
Why are there no cycling pants in this colour?
Last edited by timtak; 12-31-23 at 07:03 PM. Reason: I need to remove the spacer from behind my Tiagra 10s cassette
12-31-23, 08:44 AM
#211

well hello there

Join Date: May 2005
Location: Point Loma, CA
Posts: 15,430
Bikes: Bill Holland (Road-Ti), Fuji Roubaix Pro (back-up), Bike Friday (folder), Co-Motion (tandem) & Trek 750 (hybrid)
Mentioned: 6 Post(s)
Tagged: 0 Thread(s)
Quoted: 503 Post(s)
Liked 336 Times
in
206 Posts
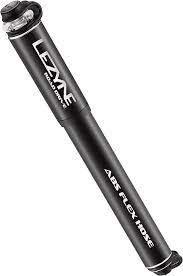
Lezyne Road Drive to replace my topeak micro rocket that failed the last couple times I used it and i didn't want to try any repair or replacement of parts.
__________________
.
.
Two wheels good. Four wheels bad.
.
.
Two wheels good. Four wheels bad.
01-03-24, 01:21 PM
#212
Senior Member

My last bicycle-related repair was a "fixed itself"! On two consecutive rides in the last week, I had a puncture in first the rear tire and then in the front tire the next day. And glory be both self-repaired after blowing sealant all over both me and the bike. But I did not need to stop and reinflate, I rode home just fine! Glory Be! I did need to clean off the bike and my shoes and tights though.
 02-15-24, 02:46 AM
#215
Senior Member
Thread Starter
Join Date: Nov 2007
Location: Yamaguchi City, Japan
Posts: 1,091
Bikes: Trek Madone 5.2 SL 2007, Look KG386, R022 Re-framed Azzurri Primo, Felt Z5, Trek F7.3 FX
Mentioned: 36 Post(s)
Tagged: 0 Thread(s)
Quoted: 404 Post(s)
Liked 85 Times
in
73 Posts
I love Paul Jensen's carbon frame repair.
I found and stopped a creak.
While they rarely creak themselves (a bike mechanic once told me), carbon bicycle frames have a tendency to amplify creaks when the mechanics of the bike rub against each other or against the carbon frame. Common causes of creak are
Skewer to dropout looseness caused by dirty dropouts -- this is probably the most common cause
Loose chainring bolts (this can be critical -- keep your chainring bolts tight!)
Loose seatpost
Loose anything else
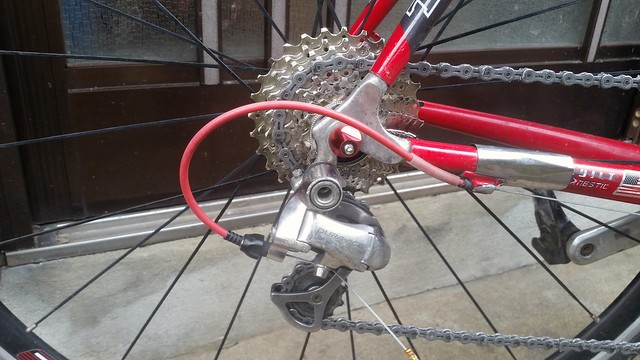
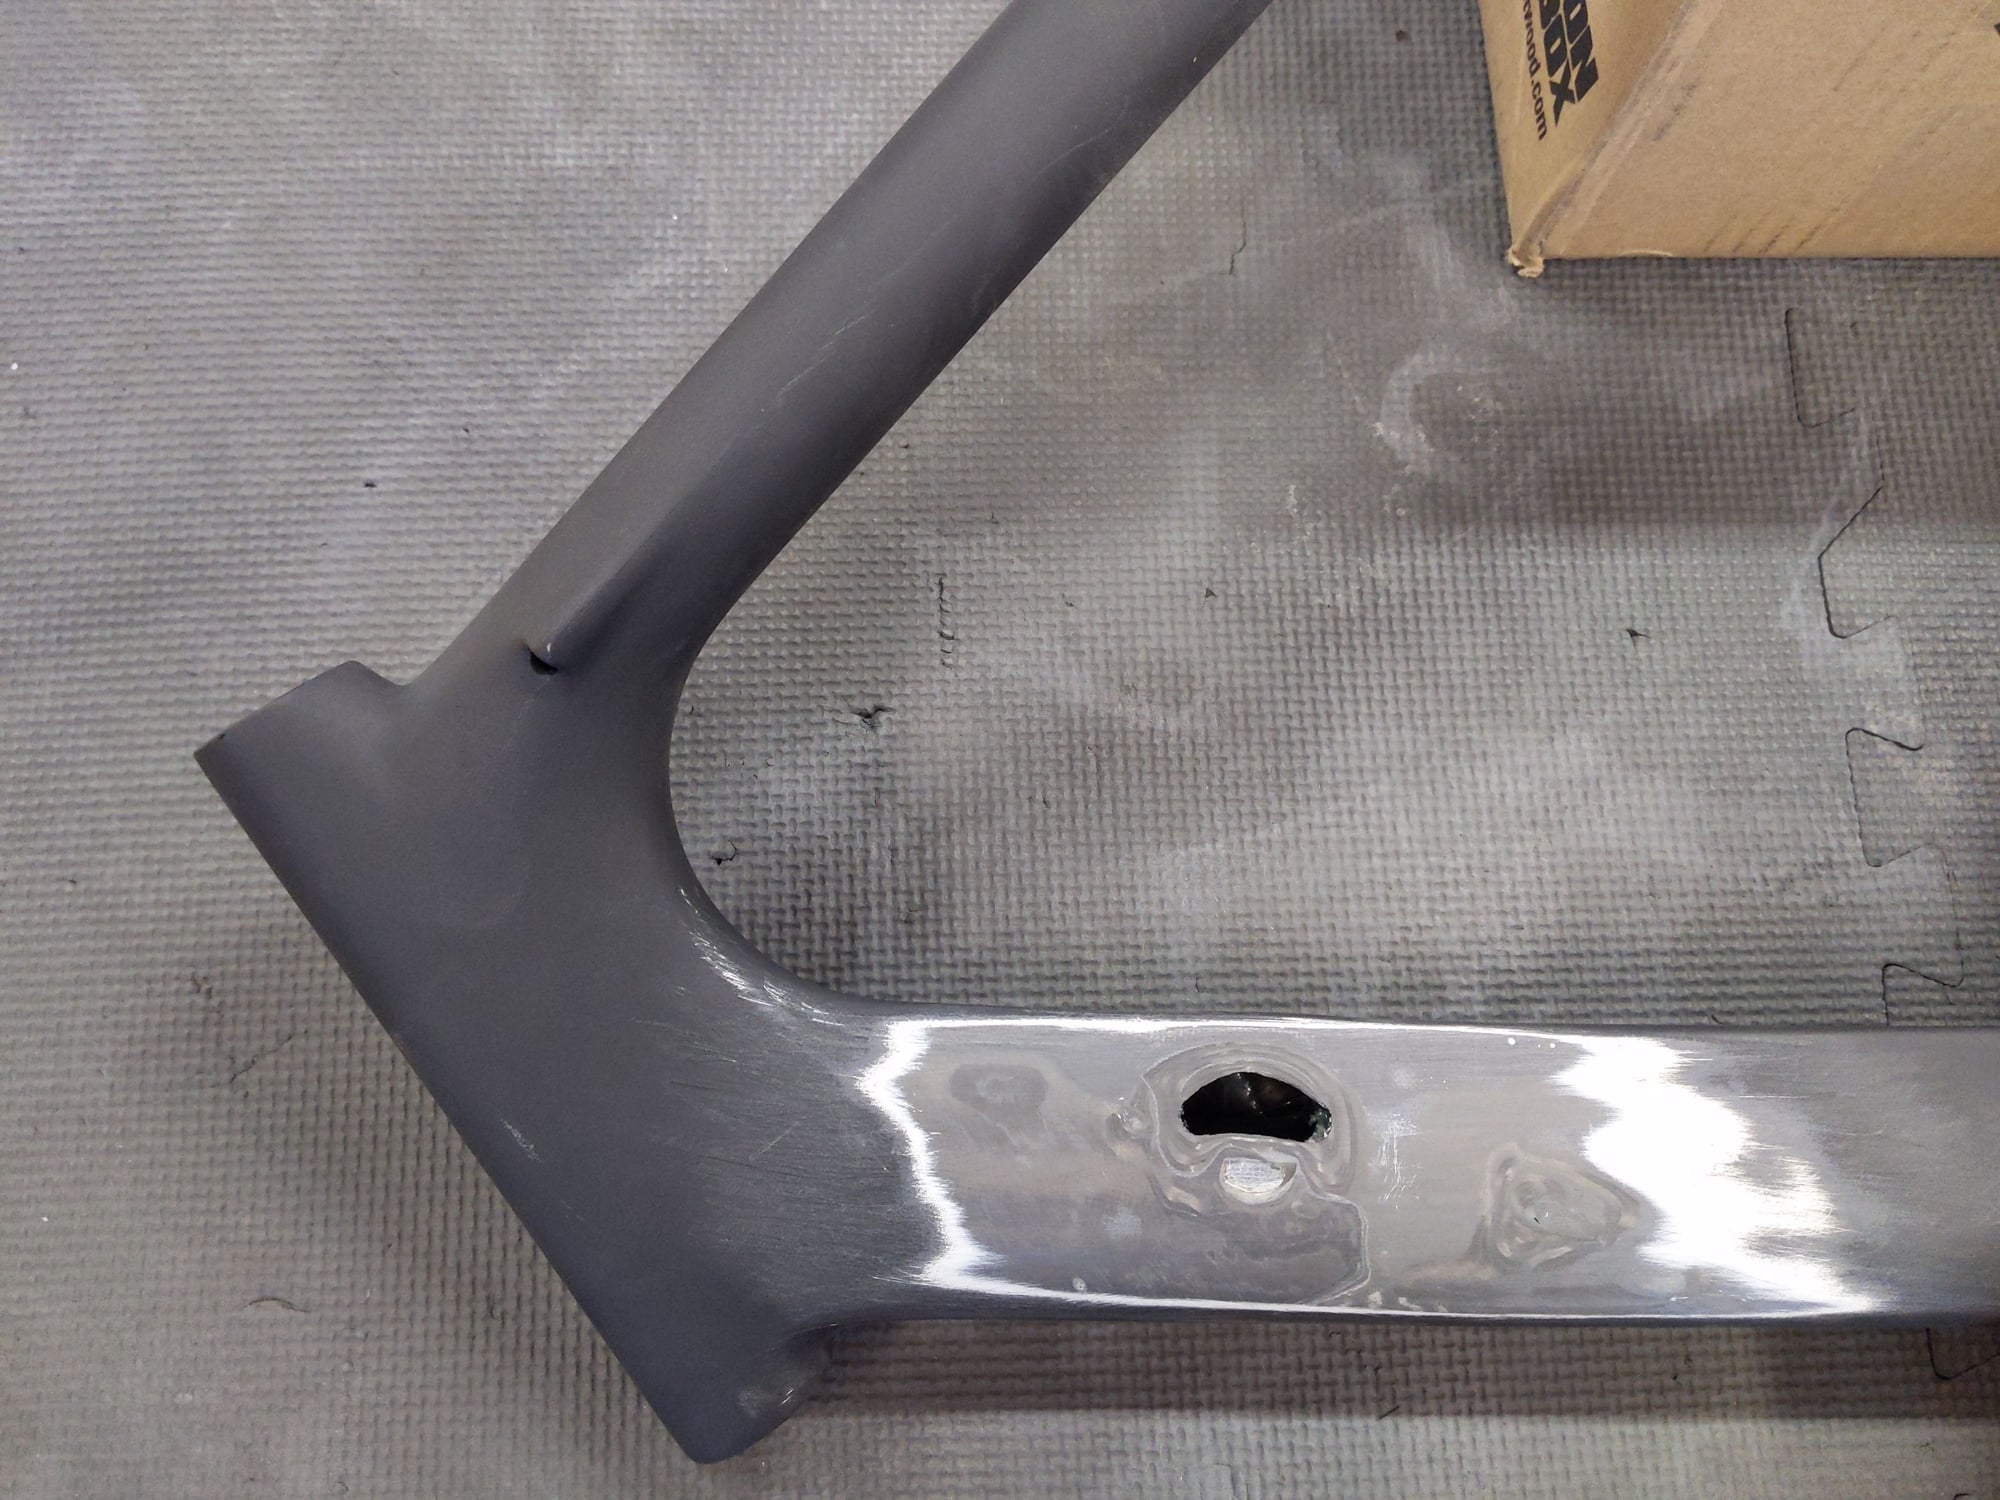
To the above I found that if the front d�railleur wire comes out of the black plastic race and instead just rubs on the bottom of the bottom bracket, this will cause the wire to cut a line in the bottom bracket eventually and cause a pretty noisy creak in the meantime. I put the wire back in its race and the creak stopped.

This was causing the Creaking by Timothy Takemoto, on Flickr
The problem is that the creak will often sound like it is coming from where ones ears are pointed, usually the front area of the bike because the frame as a whole will act as a sounds box and creak all over. I ditched a bike with a small crack in the downtube for that reason. I think that the downtube and bike were in fact fine to ride for many years more.
I found and stopped a creak.
While they rarely creak themselves (a bike mechanic once told me), carbon bicycle frames have a tendency to amplify creaks when the mechanics of the bike rub against each other or against the carbon frame. Common causes of creak are
Skewer to dropout looseness caused by dirty dropouts -- this is probably the most common cause
Loose chainring bolts (this can be critical -- keep your chainring bolts tight!)
Loose seatpost
Loose anything else
To the above I found that if the front d�railleur wire comes out of the black plastic race and instead just rubs on the bottom of the bottom bracket, this will cause the wire to cut a line in the bottom bracket eventually and cause a pretty noisy creak in the meantime. I put the wire back in its race and the creak stopped.
This was causing the Creaking by Timothy Takemoto, on Flickr
The problem is that the creak will often sound like it is coming from where ones ears are pointed, usually the front area of the bike because the frame as a whole will act as a sounds box and creak all over. I ditched a bike with a small crack in the downtube for that reason. I think that the downtube and bike were in fact fine to ride for many years more.
03-05-24, 11:48 AM
#216
Senior Member
Join Date: Oct 2013
Location: Mich
Posts: 7,395
Bikes: RSO E-tire dropper fixie brifter
Mentioned: 0 Post(s)
Tagged: 0 Thread(s)
Quoted: 6 Post(s)
Liked 2,979 Times
in
1,920 Posts
had a piston in the caliper develop a weeping leak. Hope+ it is able to be serviced.
__________________
-Oh Hey!
-Oh Hey!
03-05-24, 12:05 PM
#217
I don't know.

Join Date: May 2003
Location: South Meriden, CT
Posts: 2,015
Bikes: '90 B'stone RB-1, '92 B'stone RB-2, '89 SuperGo Access Comp, '03 Access 69er, '23 Trek 520, '14 Ritchey Road Logic, '09 Kestrel Evoke, '08 Windsor Tourist, '17 Surly Wednesday, '89 Centurion Accordo, '15 CruX, '17 Ridley X-Night, '89 Marinoni
Mentioned: 2 Post(s)
Tagged: 0 Thread(s)
Quoted: 317 Post(s)
Liked 853 Times
in
446 Posts
sorry no repair pictures, but the ole 2008 Windsor Tourist broke a rear spoke on a recent ride (factory wheels with thousands of miles). Replaced spoke and wheel was practically true just from initial tightening. Two minutes in the truing stand and it was perfect. Gotta love that. Also, deep cleaned chain (soaked in kerosene twice) and cleaned cassette.
I bought the bike new from Bikes Direct, and I gotta say, it's been so good, so dependable.
old picture of bike:

I bought the bike new from Bikes Direct, and I gotta say, it's been so good, so dependable.
old picture of bike:
03-09-24, 02:32 PM
#218
Senior Member
Join Date: Jul 2006
Location: Jacksonville, FL
Posts: 6,887
Bikes: Trek Domane SLR 7 AXS, Trek CheckPoint SL7 AXS, Trek Emonda ALR AXS, Trek FX 5 Sport
Mentioned: 2 Post(s)
Tagged: 0 Thread(s)
Quoted: 768 Post(s)
Liked 1,745 Times
in
1,016 Posts
Which bike?
03-09-24, 02:34 PM
#219
Senior Member
Join Date: Oct 2013
Location: Mich
Posts: 7,395
Bikes: RSO E-tire dropper fixie brifter
Mentioned: 0 Post(s)
Tagged: 0 Thread(s)
Quoted: 6 Post(s)
Liked 2,979 Times
in
1,920 Posts
Likes For Troul:
03-09-24, 05:03 PM
#220
Senior Member
Join Date: Jul 2006
Location: Jacksonville, FL
Posts: 6,887
Bikes: Trek Domane SLR 7 AXS, Trek CheckPoint SL7 AXS, Trek Emonda ALR AXS, Trek FX 5 Sport
Mentioned: 2 Post(s)
Tagged: 0 Thread(s)
Quoted: 768 Post(s)
Liked 1,745 Times
in
1,016 Posts
Likes For jaxgtr:
03-10-24, 02:50 AM
#221
Senior Member
Join Date: Apr 2019
Location: UK
Posts: 1,404
Mentioned: 3 Post(s)
Tagged: 0 Thread(s)
Quoted: 682 Post(s)
Liked 453 Times
in
338 Posts
From this
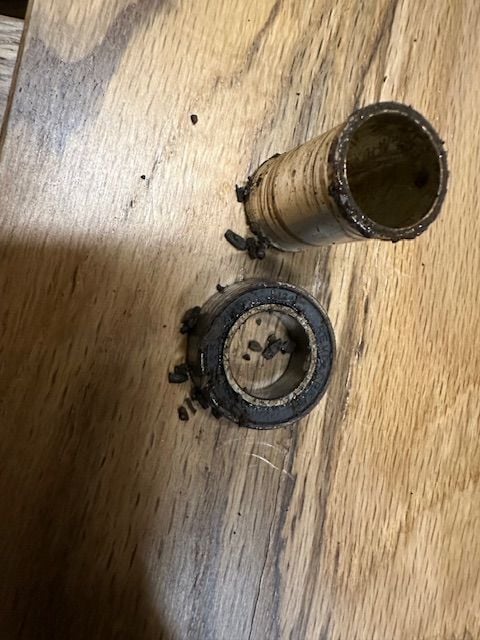
to this

only cost double what a new freehub would have been. But now I have a really nice shiny bearing press and a not very good blind bearing removal tool I didn�t need.
to this
only cost double what a new freehub would have been. But now I have a really nice shiny bearing press and a not very good blind bearing removal tool I didn�t need.
03-15-24, 06:56 PM
#222
Senior Member
Join Date: Jul 2006
Location: Jacksonville, FL
Posts: 6,887
Bikes: Trek Domane SLR 7 AXS, Trek CheckPoint SL7 AXS, Trek Emonda ALR AXS, Trek FX 5 Sport
Mentioned: 2 Post(s)
Tagged: 0 Thread(s)
Quoted: 768 Post(s)
Liked 1,745 Times
in
1,016 Posts
03-15-24, 09:43 PM
#223
Senior Member
Had a mishap the other day, seat ended up 5 degrees off from straight, loosened seat clamp wedge, fixed and retightened. Couple days later realized that when I re-tightened, the crummy little weak washer under the bolt taco'd/bored itself right through the top portion of the clamp ruining it so I couldn't even trust that it was torqued properly despite my torque wrench clicking, it basically stripped out; the diameter of the washer was barely bigger than the hole to begin with and it was a really crummy washer.
Luckily found a new NOS clamp, this time went to Home Depot and got three stainless washers which unfortunately are also barely bigger than the bolt hole but are also unfortunately the biggest they can be and actually fit in the recess for the bolt (aka the recess in the top part of the clamp where the bolt goes is BARELY bigger than the actual hole for the bolt so you can only put one size washer in there and it will fill the entire recess diameter while also yet barely spanning the bolt hole). Installed and added carbon paste, we'll see if it holds, someone on Youtube said they had no issues after installing two stainless washers. Can't really tell if the bottom washer started to bore through the top part of the clamp or not (torqued to 4.5 Nm).

I better track down another clamp as a spare.
Luckily found a new NOS clamp, this time went to Home Depot and got three stainless washers which unfortunately are also barely bigger than the bolt hole but are also unfortunately the biggest they can be and actually fit in the recess for the bolt (aka the recess in the top part of the clamp where the bolt goes is BARELY bigger than the actual hole for the bolt so you can only put one size washer in there and it will fill the entire recess diameter while also yet barely spanning the bolt hole). Installed and added carbon paste, we'll see if it holds, someone on Youtube said they had no issues after installing two stainless washers. Can't really tell if the bottom washer started to bore through the top part of the clamp or not (torqued to 4.5 Nm).
I better track down another clamp as a spare.

Thread
Thread Starter
Forum
Replies
Last Post
shnibop
Classic and Vintage Sales
5
03-11-20 09:10 AM
northbend
Classic & Vintage
37
06-13-19 09:46 AM
