


building my first single speed, any pointers?
 08-18-09, 07:36 PM
#1
S'toon trail rider!
Thread Starter
Join Date: Jul 2009
Location: Saskatoon, SK
Posts: 451
Bikes: 2011 Norco Mountaineer(XC/Trails), 2011 Jamis Commuter1(commuter)
Mentioned: 0 Post(s)
Tagged: 0 Thread(s)
Quoted: 12 Post(s)
Likes: 0
Liked 0 Times
in
0 Posts
building my first vintage single speed, any pointers?
so since i broke my collar bone and my cycling is done for a few months, i figured id BUILD anew bike.
heres the direction i figured id go (feel free to step in anywhere)
look for a decent shape old 10 speed (preferably a raleigh, trek, norco, bianchi, any other brands to look for?)
i wanna make it single speed so i figure ill paint it (since all the components are comin off eh, unless is this a no-no depending what i find?)
all i really need to do off the bat is remove the derailleurs and shorten the chain to the gear (front and back) i like most (for now) correct, until i get "more into it"?
i wanna look for double butted right? (i believe this is what that means right?)
anything else i should look into for now? still gotta go thrift store hopping so dont kill me yet
Last edited by MisterK; 08-18-09 at 07:44 PM.
 08-18-09, 07:55 PM
#2
Senior Member
Join Date: Nov 2005
Posts: 5,768
Bikes: Cinelli, Paramount, Raleigh, Carlton, Zeus, Gemniani, Frejus, Legnano, Pinarello, Falcon
Mentioned: 0 Post(s)
Tagged: 0 Thread(s)
Quoted: 12 Post(s)
Likes: 0
Liked 8 Times
in
8 Posts
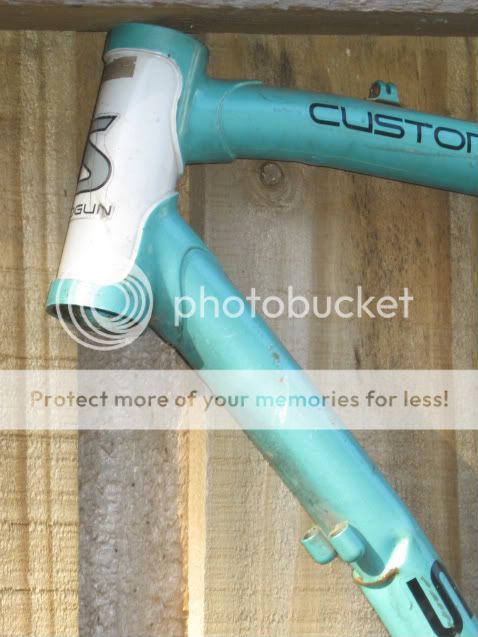
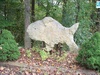
Ah, that frame looks bent.
But, given that, I recently build up a single speed, freewheel.
You'll need a narrower bottom bracket.
You'll need to toss the outer ring and use the inner with narrower chainring bolts for a single chainring.
You'll need a single speed freewheel or a fixed cog and a bottom bracket lockring.
Yeah, you'll need a chain breaker to shorter the chain.
Brakes would be nice.
Or you could just do it "ghetto" by shorting the chain to the freewheel cog of your choice.
08-18-09, 08:02 PM
#3
S'toon trail rider!
Thread Starter
Join Date: Jul 2009
Location: Saskatoon, SK
Posts: 451
Bikes: 2011 Norco Mountaineer(XC/Trails), 2011 Jamis Commuter1(commuter)
Mentioned: 0 Post(s)
Tagged: 0 Thread(s)
Quoted: 12 Post(s)
Likes: 0
Liked 0 Times
in
0 Posts
not my frame, just for reference,
are you saying i should use the middle front cog? (if three front cogs)
im fine with "ghettoing" it until i can hammer down the rough edges and finish it properly.
if i ghetto it, should i still single brake it?
one plan is to def use bullhorn handlebars(upon finishing details, cuz i prolly wont find a bike with said bars), not a huge fan of drops....
Last edited by MisterK; 08-18-09 at 08:33 PM.
08-18-09, 09:33 PM
#4
Paste Taster
Join Date: May 2006
Location: Sacramento, CA
Posts: 4,392
Bikes: , Jury Bike, Moto Outcast 29, Spicer standard track frame and spicer custom steel sprint frame.
Mentioned: 0 Post(s)
Tagged: 0 Thread(s)
Quoted: 0 Post(s)
Likes: 0
Liked 0 Times
in
0 Posts
please refer to sheldonbrown.com and read his many article on building single speed bikes
btw you might be in the wrong sub forum really
btw you might be in the wrong sub forum really
08-18-09, 10:51 PM
#5
S'toon trail rider!
Thread Starter
Join Date: Jul 2009
Location: Saskatoon, SK
Posts: 451
Bikes: 2011 Norco Mountaineer(XC/Trails), 2011 Jamis Commuter1(commuter)
Mentioned: 0 Post(s)
Tagged: 0 Thread(s)
Quoted: 12 Post(s)
Likes: 0
Liked 0 Times
in
0 Posts

 )
)didnt know wither to put this in SS/FG or here cuz yes im building a single speed, but i also plan on using a vintage bike for the build....was abit torn.
08-18-09, 11:03 PM
#6
Steel is real, baby!
The bent frame pictured is not necessarily "double butted".
What you have there is a "lugged" frame (bent badly, of course). The tubing is brazed (like soldering, but with a brass alloy instead of tin/lead solder) into the lugs that form the frame.
Butted tubing refers to the inside diameter of the tubing itself. "Double butted" tubing will be thicker at the ends of the tubes, where the meet up with the lugs (for example) and thinner in the center section. This allows for very light weight, yet still strong.
But to answer your question, "yes", you will want a double butted frame. You'll probably want it to be a lugged frame also, as they are prettier than non-lugged (in MY opinion... someone will undoubtedly chime in to the contrary)
EDIT #1: Whatever frame you find, DON'T cut anything off! At least allow it to be converted back to a multi-geared bike.
EDIT #2: Try to find one that is your size, and make it look like a proper bike. Too often, I see guys running around on frames that are WAY too big for them, and they've got the saddle slammed all the way down to the top tube.
Last edited by frpax; 08-18-09 at 11:07 PM.
08-18-09, 11:11 PM
#7
S'toon trail rider!
Thread Starter
Join Date: Jul 2009
Location: Saskatoon, SK
Posts: 451
Bikes: 2011 Norco Mountaineer(XC/Trails), 2011 Jamis Commuter1(commuter)
Mentioned: 0 Post(s)
Tagged: 0 Thread(s)
Quoted: 12 Post(s)
Likes: 0
Liked 0 Times
in
0 Posts
by "dont cut anything off" do you mean dont cut off, say, the bracket to bolt a derailleur to?
i mean i wouldnt hack anything apart anyways, just the basic taking off wires, components etc.
i do have a quick 2nd question. that front tube the fork and stem connect thru, should i look for a shorter one? a nice long one? or does it not matter? like i said i dont plan on major overhaul asap, but if i want fancy forks etc, i still wanna have options.
08-18-09, 11:20 PM
#8
Steel is real, baby!
The "front tube the fork and stem connect thru" is called a head tube. Length will depend on the size of frame that you get. Frame sizes are measured along the seat tube, from the center of the bottom bracket, to the center of the top tube where it meets up with the seat tube. Measure in centimeters. Some people & frame makers measure to the TOP of the top tube. There is only a centimeter or so difference, so it's not lofe or death.
08-18-09, 11:31 PM
#9
S'toon trail rider!
Thread Starter
Join Date: Jul 2009
Location: Saskatoon, SK
Posts: 451
Bikes: 2011 Norco Mountaineer(XC/Trails), 2011 Jamis Commuter1(commuter)
Mentioned: 0 Post(s)
Tagged: 0 Thread(s)
Quoted: 12 Post(s)
Likes: 0
Liked 0 Times
in
0 Posts
or is smaller better than too big in this case.
also the verticle dropout thing has me scratchin my brain....do i want a verticle dropout or horizontal? does it matter....that sheldonbrown site doesnt really give me an answer i can understand...
08-19-09, 12:17 AM
#10
Paste Taster
Join Date: May 2006
Location: Sacramento, CA
Posts: 4,392
Bikes: , Jury Bike, Moto Outcast 29, Spicer standard track frame and spicer custom steel sprint frame.
Mentioned: 0 Post(s)
Tagged: 0 Thread(s)
Quoted: 0 Post(s)
Likes: 0
Liked 0 Times
in
0 Posts
it is generally cheaper to buy a single speed than to try and build one from just a frame
if you happen upon an inexpensive road bike you wish to convert simply remove the derrailleurs shifter inner rings and multi speed fw then thread a bb lockring onto the hub to space the ss fw out enough for a suitable chainline thread on a fw of your choice and go for it
btw save all the factory parts should you choose to reinstate the bike as a geared bike after all we have all had those instances where we regret throwing out groups
mine was a stock nishiki internation where I trashed the whole suntour arx group
arx wasn't the best but I still feel like a idiot for it
08-19-09, 12:26 AM
#11
Steel is real, baby!
would it look just as wierd if i found a smaller frame and had a foot of seat post sticking out?
or is smaller better than too big in this case.
also the verticle dropout thing has me scratchin my brain....do i want a verticle dropout or horizontal? does it matter....that sheldonbrown site doesnt really give me an answer i can understand...
or is smaller better than too big in this case.
also the verticle dropout thing has me scratchin my brain....do i want a verticle dropout or horizontal? does it matter....that sheldonbrown site doesnt really give me an answer i can understand...
My optimum frame size is a 54cm, but 53cm or 55cm are acceptable for me. 56cm starts getting too big, and 52cm might be doable only if it has a longer top tube, like 54 or 55cm, but is generally too small and would require a stupid long stem.
Don't worry about dropouts. Either will work fine.
08-19-09, 03:52 AM
#12

Senior Member
Join Date: Apr 2007
Location: Thunder Bay, Ontario, Canada - burrrrr!
Posts: 11,677
Bikes: 1958 Rabeneick 120D, 1968 Legnano Gran Premio, 196? Torpado Professional, 2000 Marinoni Piuma
Mentioned: 210 Post(s)
Tagged: 0 Thread(s)
Quoted: 1372 Post(s)
Likes: 0
Liked 1,755 Times
in
941 Posts
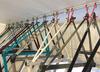
My "ten speeds"...
I have written a long feature article on building up your own Single Speed, be it a Poor Boy or a nicely finished creation from the heart. I invite you to email me and I will send you to the page for the article.
08-19-09, 05:20 AM
#13


Senior Member

Join Date: Aug 2003
Location: Tampa, Florida
Posts: 13,954
Mentioned: 40 Post(s)
Tagged: 0 Thread(s)
Quoted: 413 Post(s)
Likes: 0
Liked 109 Times
in
78 Posts
This thread feels so Fixie/SS.
Parts needed are: BMX freewheel 16t ($13), BMX chainring bolts ($8), rear axle spacers (maybe).
Tools needed are: 5mm allen wrench for chainring bolts, tool for removing/installing chains, cone wrenchs, open end wrenches, freewheels tools.
1. Its always cheaper to start with a complete bike. Always.
2. Find a bike that fits you with 700c wheels and a double crankset up front with removeable chainrings.
3. Remove the F&R derailleurs, shift levers and cables and existing freewheel.
4. Remove outer chainring, install BMX chainring bolts. Measure chainline.
5. Remove 6mm of spacer from gear side of rear wheel, lightly install BMX freewheel. You now have a 120mm spaced rear wheel. Center axle.
6. Squeeze rear frame spacing down to 120mm, install rear wheel.
7. Measure rear chainline. If its different than the front move spacers around to achieve proper chainline.
8. Re-dish rear wheel.
There are other ways of doing it but this is the least expensive way if your dealing with a scew-on freewheel. Its possible to convert leaving the frame spaced at 126mm but you'll need a very narrow BB to get the proper chainline, shifing spacers around only gets you so far. Starting with a cassette hub'd bike is the easiest and least expensive, aside from the cost of tools your looking at $8 for BMX chainring bolts.
Last edited by miamijim; 08-19-09 at 05:26 AM.
08-19-09, 06:17 AM
#14
Tinkerer
Join Date: Feb 2009
Location: Tulsa, OK
Posts: 152
Mentioned: 1 Post(s)
Tagged: 0 Thread(s)
Quoted: 2 Post(s)
Likes: 0
Liked 3 Times
in
2 Posts
The absolute cheapest route is to buy a used bike, put it in a gear you like and Don't Shift!!! -- Instant single speed! No sweat, no mess!
08-19-09, 06:53 AM
#15
Trout!
Join Date: May 2007
Location: St. Paul, MN
Posts: 261
Bikes: Fuji Absolute of unknown age, Framed Gravier
Mentioned: 1 Post(s)
Tagged: 0 Thread(s)
Quoted: 1 Post(s)
Likes: 0
Liked 0 Times
in
0 Posts
another option is you can remove all of the cogs on a 5-speed freewheel and thread on one of the 2 outer cogs, that should give you a good chainline without re-dishing. seems to work best with suntour freewheels. another positive is you can use the existing crank and chain, seems to be the cheapest and a pretty elegant solution. to remove the cogs you need a chain whip.
08-19-09, 07:39 AM
#16
Steel is real, baby!
As several have said, it is much cheaper to buy one, than to make one. But, I think (and this is an assumption, I know) that the OP's purpose is to build one; to have the pride in making his own, even though it will cost more. He'll learn about bikes at a mechanical level, and he'll learn something about himself in the process.
I'm the same with several of the Stratocaster guitars I have built & owned over the years. Yes, they cost me more than just going and buying them, but I have the pride in craftsmanship. Building one to sound the way I want it to, etc.
So don't try to fix the young man! He ain't broken!!!
I'm the same with several of the Stratocaster guitars I have built & owned over the years. Yes, they cost me more than just going and buying them, but I have the pride in craftsmanship. Building one to sound the way I want it to, etc.
So don't try to fix the young man! He ain't broken!!!
08-19-09, 08:30 AM
#18
Bianchi Goddess

Join Date: Apr 2009
Location: Shady Pines Retirement Fort Wayne, In
Posts: 27,884
Bikes: Too many to list here check my signature.
Mentioned: 194 Post(s)
Tagged: 2 Thread(s)
Quoted: 2942 Post(s)
Liked 2,947 Times
in
1,503 Posts
*giggle* I always though DB was short for double butted not double bent *giggle* unless you are a fellow Alouminum hater don't discount cannondale. the cable giudes and shifter bosses are easily removed. then you can fill them a bit while painting. then use a derailuer for chain tension.
__________________
�One morning you wake up, the girl is gone, the bikes are gone, all that's left behind is a pair of old tires and a tube of tubular glue, all squeezed out"
Sugar "Kane" Kowalczyk
�One morning you wake up, the girl is gone, the bikes are gone, all that's left behind is a pair of old tires and a tube of tubular glue, all squeezed out"
Sugar "Kane" Kowalczyk
08-19-09, 08:34 AM
#19
Thrifty Bill
Join Date: Jan 2008
Location: Mountains of Western NC
Posts: 23,526
Bikes: 86 Katakura Silk, 87 Prologue X2, 88 Cimarron LE, 1975 Sekai 4000 Professional, 73 Paramount, plus more
Mentioned: 96 Post(s)
Tagged: 0 Thread(s)
Quoted: 1236 Post(s)
Liked 965 Times
in
629 Posts
+1 Listen to Miamijim, that is great advice.
+1 Don't be a DREW.
+100 Start with a complete bike. Building up a frame is very costly, unless you happen to have a workshop full of take-off parts (like many of us do).
If you want to go super cheap, start with a good brand rigid frame mountain bike. They are the bargain of the vintage market.
+1 Don't be a DREW.
+100 Start with a complete bike. Building up a frame is very costly, unless you happen to have a workshop full of take-off parts (like many of us do).
If you want to go super cheap, start with a good brand rigid frame mountain bike. They are the bargain of the vintage market.
08-19-09, 10:04 AM
#20
Paste Taster
Join Date: May 2006
Location: Sacramento, CA
Posts: 4,392
Bikes: , Jury Bike, Moto Outcast 29, Spicer standard track frame and spicer custom steel sprint frame.
Mentioned: 0 Post(s)
Tagged: 0 Thread(s)
Quoted: 0 Post(s)
Likes: 0
Liked 0 Times
in
0 Posts
This thread feels so Fixie/SS.
Parts needed are: BMX freewheel 16t ($13), BMX chainring bolts ($8), Bottom Bracket Lockring (maybe).
Tools needed are: 5mm allen wrench for chainring bolts, tool for removing/installing chains, open end wrenches, freewheels tools.
1. Its always cheaper to start with a complete bike. Always.
2. Find a bike that fits you with 700c wheels and a double crankset up front with removeable chainrings.
3. Remove the F&R derailleurs, shift levers and cables and existing freewheel.
4. Remove Inner Chainrings, install BMX chainring bolts. Measure chainline.
5. Add Bottom Bracket Lockring to Hub
6. Add Single Speed Freewheel to hub
7. Measure rear chainline. If its different than the front Use a 1/8" Chain.
8. acceptable chainline without derrailling can be +/- 2mm
There are other ways of doing it but this is the least expensive way if your dealing with a scew-on freewheel. Its possible to convert leaving the frame spaced at 126mm but you'll need a very narrow BB to get the proper chainline, shifing spacers around only gets you so far. Starting with a cassette hub'd bike is the easiest and least expensive, aside from the cost of tools your looking at $8 for BMX chainring bolts.
both methods work fine either way
it would be easiest to just use a cassette hub in most cases but freewheels work too
08-19-09, 10:49 AM
#21
formerly turdsandwich
Join Date: Mar 2008
Location: Charlotte, NC
Posts: 425
Bikes: 1993 Specialized Allez Pro, 1984 Trek 520, 198? Ross Mt St Helens, 1980 Raleigh Super Gran Prix, 197? Raleigh Gran Prix SS City Banger, 2012 Lynskey ProCross Disc
Mentioned: 0 Post(s)
Tagged: 0 Thread(s)
Quoted: 0 Post(s)
Likes: 0
Liked 1 Time
in
1 Post
another option is you can remove all of the cogs on a 5-speed freewheel and thread on one of the 2 outer cogs, that should give you a good chainline without re-dishing. seems to work best with suntour freewheels. another positive is you can use the existing crank and chain, seems to be the cheapest and a pretty elegant solution. to remove the cogs you need a chain whip.
Can you explain this method for me a little better. I think I'll do this with my next SS project. I just completed a cassette hub conversion.
How do you remove the cogs from the freewheel?
Does this method prevent you from having to redish?
08-19-09, 10:59 AM
#22
.
Join Date: Aug 2005
Location: Rocket City, No'ala
Posts: 12,764
Bikes: 2014 Trek Domane 5.2, 1985 Pinarello Treviso, 1990 Gardin Shred, 2006 Bianchi San Jose
Mentioned: 3 Post(s)
Tagged: 0 Thread(s)
Quoted: 62 Post(s)
Likes: 0
Liked 29 Times
in
14 Posts
so since i broke my collar bone and my cycling is done for a few months, i figured id BUILD anew bike.
heres the direction i figured id go (feel free to step in anywhere)
look for a decent shape old 10 speed (preferably a raleigh, trek, norco, bianchi, any other brands to look for?)
i wanna make it single speed so i figure ill paint it (since all the components are comin off eh, unless is this a no-no depending what i find?)
all i really need to do off the bat is remove the derailleurs and shorten the chain to the gear (front and back) i like most (for now) correct, until i get "more into it"?
i wanna look for double butted right? (i believe this is what that means right?)
anything else i should look into for now? still gotta go thrift store hopping so dont kill me yet
heres the direction i figured id go (feel free to step in anywhere)
look for a decent shape old 10 speed (preferably a raleigh, trek, norco, bianchi, any other brands to look for?)
i wanna make it single speed so i figure ill paint it (since all the components are comin off eh, unless is this a no-no depending what i find?)
all i really need to do off the bat is remove the derailleurs and shorten the chain to the gear (front and back) i like most (for now) correct, until i get "more into it"?
i wanna look for double butted right? (i believe this is what that means right?)
anything else i should look into for now? still gotta go thrift store hopping so dont kill me yet
Read these links: https://sheldonbrown.com/singlespeed.html
https://software.bareknucklebrigade.com/
https://sheldonbrown.com/fixed/index.html
https://sheldonbrown.com/deakins/how-...onversion.html this one to get you started on the cheap.
08-19-09, 11:02 AM
#23
.
Join Date: Aug 2005
Location: Rocket City, No'ala
Posts: 12,764
Bikes: 2014 Trek Domane 5.2, 1985 Pinarello Treviso, 1990 Gardin Shred, 2006 Bianchi San Jose
Mentioned: 3 Post(s)
Tagged: 0 Thread(s)
Quoted: 62 Post(s)
Likes: 0
Liked 29 Times
in
14 Posts
You might have to redish but that's an easy enough job for the LBS if you don't build your own wheels. They simply loosen the spokes, recenter the hub, and tighten the spokes.
You need a special tool to remove the freewheel and it depends upon your freewheel. LBS can do this in a jiffy.
08-19-09, 11:09 AM
#25
Senior Member
Join Date: Aug 2003
Location: Tampa, Florida
Posts: 13,954
Mentioned: 40 Post(s)
Tagged: 0 Thread(s)
Quoted: 413 Post(s)
Likes: 0
Liked 109 Times
in
78 Posts
Removing cogs: With 2 chain wips. 1 to hold the freewheel in the forward direc tion and 1 to loosen the outer cogs by turning them counterclockwise.
Freewheel cogs are held together in any number of ways the most common style you'll find has the first 4 or 5 cogs sliding onto splines with the outer 1 or 2 cogs screwing on to hold everything together.
To be honest with you if have a cassette wheel available your better off using it rather than using a complete freewheel and removing a few cogs.