


Regreasing cottered crank bottom bracket without removal
 11-08-10, 01:55 PM
#1

rain dog
Thread Starter
Join Date: Oct 2009
Location: Northern PA
Posts: 772
Mentioned: 4 Post(s)
Tagged: 0 Thread(s)
Quoted: 16 Post(s)
Likes: 0
Liked 8 Times
in
6 Posts
Regreasing cottered crank bottom bracket without removal
This is probably high up there in lazy maneuvers so I'm expecting a lot of no's, but has anyone ever greased a bottom bracket on a bike with a cottered crank without removing the crank arms?
I don't even know if this is physically possible, depending on clearance between the crank arm and the bottom bracket shell. I'm just asking because I got a free high-ten azuki off craigslist and both bottom bracket cups have notches that fit the 3 slot end of my park lockring tool. They're loose enough that I'm able to easily adjust both while the crank arms are still on. The bottom bracket could probably use some grease but I really don't want to futz with the cotters if at all possible.
This is probably just karma for scoffing at the price of the $50 cotter press tool a week or two ago, but that tool still costs $50 more than what I paid for this bike and I don't plan on adding any more cottered crank bikes to the stable.

 11-08-10, 02:11 PM
#3

multimodal commuter

Join Date: Nov 2006
Location: NJ, NYC, LI
Posts: 19,808
Bikes: 1940s Fothergill, 1959 Allegro Special, 1963? Claud Butler Olympic Sprint, Lambert 'Clubman', 1974 Fuji "the Ace", 1976 Holdsworth 650b conversion rando bike, 1983 Trek 720 tourer, 1984 Counterpoint Opus II, 1993 Basso Gap, 2010 Downtube 8h, and...
Mentioned: 584 Post(s)
Tagged: 0 Thread(s)
Quoted: 1908 Post(s)
Liked 574 Times
in
339 Posts
There are other ways of getting a cotter pin out, you know. Not with a hammer, of course. I have a small vise that I got at a yard sale for a couple bucks; I think it came on a drill press or something once. That, together with a socket, always works for me. Sometimes I tighten the screw up until it won't go anymore, and the thing still won't budge; then one good tap with the hammer is all it takes.
If you really don't want to do any of that... oh, fine. Why not just get some fairly runny grease and dump a lot of it down the seat post? Of course you won't know whether it actually gets all the way down there unless you pack the whole seat tube with grease... In fact, I think I read about that in the "bonehead moves" thread!
If you really don't want to do any of that... oh, fine. Why not just get some fairly runny grease and dump a lot of it down the seat post? Of course you won't know whether it actually gets all the way down there unless you pack the whole seat tube with grease... In fact, I think I read about that in the "bonehead moves" thread!
11-08-10, 02:17 PM
#4
PanGalacticGargleBlaster

Join Date: Apr 2009
Location: Smugglers Notch, Vermont
Posts: 7,531
Bikes: Upright and Recumbent....too many to list, mostly Vintage.
Mentioned: 0 Post(s)
Tagged: 0 Thread(s)
Quoted: 19 Post(s)
Likes: 0
Liked 6 Times
in
5 Posts
I'm a caveman. I just use a hammer and a piece of pipe on the opposite side of the cotter to help relieve the force of the hammer strike.
__________________
--Don't Panic.
--Don't Panic.
11-08-10, 02:55 PM
#5
Senior Member

I haven't done it but if you can get the grease in there go for it. I'd say the possibility depends on how deep the BB cups are and you won't know that until you give it a go. You could spray some brake cleaner, etc in there to clean things up first but that stuff is pretty toxic so be careful. You could also try shooting grease into the gap between the spindle and cups with a giant syringe.
11-08-10, 03:01 PM
#6
Senior Member

Join Date: Aug 2006
Location: Knoxville, TN
Posts: 1,977
Bikes: Schwinn Paramount P15, Fisher Montare, Proteus, Rivendell Quickbeam
Mentioned: 1 Post(s)
Tagged: 0 Thread(s)
Quoted: 12 Post(s)
Likes: 0
Liked 4 Times
in
4 Posts
Oil into seat tube if it is an older Raleigh Sports that took oil anyway.
Likes For mparker326:
 11-08-10, 03:31 PM
#8
Senior Member

+1. however, if there's a bunch of scaly, rusty, flaky stuff down in the BB shell, it's going to mix with the oil. but i have heard from others that this is a viable way of getting some lube down there. some people claim oil is better for bearings than grease, anyway.
11-08-10, 03:32 PM
#9
Extraordinary Magnitude

Join Date: Aug 2009
Location: Waukesha WI
Posts: 13,649
Bikes: 1978 Trek TX700; 1978/79 Trek 736; 1984 Specialized Stumpjumper Sport; 1984 Schwinn Voyageur SP; 1985 Trek 620; 1985 Trek 720; 1986 Trek 400 Elance; 1987 Schwinn High Sierra; 1990 Miyata 1000LT
Mentioned: 84 Post(s)
Tagged: 0 Thread(s)
Quoted: 2608 Post(s)
Liked 1,703 Times
in
937 Posts
Hammer is bad.
I used a C Clamp and a 15 or 16mm socket.
Undo the nut/cover on the cotter
Place the socket over the other end of the cotter.
Place the "spinny" portion of the C-Clamp on the socket
Placed the "fixed" side of the C-Clamp on the nut side.
Tighten the clamp until the cotter pops out into the socket cup.
If you place the "fixed" end of the clamp on the socket, it tends to fall off and the socket slips out.
I also let some Tri Flow soak in overnight.
Don't use a hammer. I wrecked the pants leg protector thingy on my chainrings when I missed.
__________________
*Recipient of the 2006 Time Magazine "Person Of The Year" Award*
Commence to jigglin� huh?!?!
"But hey, always love to hear from opinionated amateurs." -says some guy to Mr. Marshall.
Commence to jigglin� huh?!?!
"But hey, always love to hear from opinionated amateurs." -says some guy to Mr. Marshall.
11-08-10, 03:52 PM
#10
Senior Member

Join Date: Apr 2009
Location: Detroit
Posts: 10,303
Mentioned: 6 Post(s)
Tagged: 0 Thread(s)
Quoted: 17 Post(s)
Likes: 0
Liked 42 Times
in
33 Posts
Regardless of how you do it, you'll need to completely remove the old contaminated grease, have clean dry cups for the new lube, and replace the balls. If you don't, I really think you would do better to leave things undisturbed, rather than get to stirring that witches brew of scale and rust and silica.
__________________
- Auchen
- Auchen
11-08-10, 06:41 PM
#11
Thrifty Bill

Join Date: Jan 2008
Location: Mountains of Western NC
Posts: 23,526
Bikes: 86 Katakura Silk, 87 Prologue X2, 88 Cimarron LE, 1975 Sekai 4000 Professional, 73 Paramount, plus more
Mentioned: 96 Post(s)
Tagged: 0 Thread(s)
Quoted: 1236 Post(s)
Liked 964 Times
in
628 Posts
Regardless of how you do it, you'll need to completely remove the old contaminated grease, have clean dry cups for the new lube, and replace the balls. If you don't, I really think you would do better to leave things undisturbed, rather than get to stirring that witches brew of scale and rust and silica.
Likes For wrk101:
11-08-10, 07:17 PM
#13
people's champ

Join Date: Oct 2010
Location: joisey
Posts: 1,517
Mentioned: 0 Post(s)
Tagged: 0 Thread(s)
Quoted: 1 Post(s)
Likes: 0
Liked 3 Times
in
2 Posts
dude you dont want to clean and relube the BB that is clear - the bike was free this is also clear - so just ride the darn thing and enjoy it
Likes For marley mission:
11-08-10, 08:33 PM
#14
Rustbelt Rider

Join Date: Oct 2008
Location: Canton, OH
Posts: 9,104
Bikes: 1990 Trek 1420 - 1978 Raleigh Professional - 1973 Schwinn Collegiate - 1974 Schwinn Suburban
Mentioned: 20 Post(s)
Tagged: 0 Thread(s)
Quoted: 261 Post(s)
Liked 372 Times
in
177 Posts
RHM, I can't wait to try your socket and c-clamp technique! I have a Hercules to test that on. It sounds promising.
To the OP, I bet you could find a local bike shop to remove those cotter pins for a very small fee. Remember to buy new ones and not re-use the old.
To the OP, I bet you could find a local bike shop to remove those cotter pins for a very small fee. Remember to buy new ones and not re-use the old.
__________________
|^^^^^^^^^^^^^^| ||
|......GO.BROWNS........| ||'|";, ___.
|_..._..._______===|=||_|__|..., ] -
"(@)'(@)"""''"**|(@)(@)*****''(@)
|^^^^^^^^^^^^^^| ||
|......GO.BROWNS........| ||'|";, ___.
|_..._..._______===|=||_|__|..., ] -
"(@)'(@)"""''"**|(@)(@)*****''(@)
11-08-10, 09:13 PM
#15
Senior Member
Join Date: Aug 2010
Posts: 241
Bikes: Peugeot, Bianchi, Raleigh, Free Spirit, Nishiki, Gitane, and others...
Mentioned: 0 Post(s)
Tagged: 0 Thread(s)
Quoted: 1 Post(s)
Likes: 0
Liked 1 Time
in
1 Post
About greasing with partial disassembling - See these pictures:
https://dl.dropbox.com/u/4370787/Gre_0704.JPG
https://dl.dropbox.com/u/4370787/Gre_0705.JPG
https://dl.dropbox.com/u/4370787/Gre_0706.JPG
You should know, just in case you don't, that Alemite makes an attachment for their grease guns that has a very small orifice for grease application in tight spots. Here is a picture I just took of mine in action. Squeezing the handle quickly shoots a thin high-pressure stream of grease about four feet (in the USA) or 1.3 metres (in Canada). I have found this invaluable for putting grease quickly into tight places that have been flushed out with thin oil or kerosene & blown clear with compressed air.
You should also be aware that Keystone (and others) makes an adhesive lubricant known in the industry as "open gear grease" that comes in aerosol cans and can be squirted as a foam (!) into very close quarters. They all have good adhesion and the lithium-based types are water resistant. Better than oil in places where grease is required but difficult to get it into.
I have a good collection of specialty tools and dry and wet lubricants designed for use in machining and maintenance procedures. The grease fitting that squirts grease is especially useful because it allows precise placement of the lubricant.
11-09-10, 11:36 AM
#16
multimodal commuter
Join Date: Nov 2006
Location: NJ, NYC, LI
Posts: 19,808
Bikes: 1940s Fothergill, 1959 Allegro Special, 1963? Claud Butler Olympic Sprint, Lambert 'Clubman', 1974 Fuji "the Ace", 1976 Holdsworth 650b conversion rando bike, 1983 Trek 720 tourer, 1984 Counterpoint Opus II, 1993 Basso Gap, 2010 Downtube 8h, and...
Mentioned: 584 Post(s)
Tagged: 0 Thread(s)
Quoted: 1908 Post(s)
Liked 574 Times
in
339 Posts
No, that was The Golden Boy, who suggested a C-clamp. C-clamp technique is trickier; I use a small vise! The thing about the C-clamp is that you want the jaws open about 2" and a 2" C-clamp is way too flimsy. 6" C clamp may be beefy enough to do the job, but then you have 4" of thread sticking out the adjustable end, and this makes the whole thing a little floppy; as a result the force can get a bit oblique, which will bend the cotter. If you use a C-clamp, better make yourself a large spacer, like a thick chunk of oak with a hole in it, instead of a socket. You can do it, but a vise is foolproof.
11-09-10, 12:19 PM
#17
Senior Member

Join Date: Apr 2007
Location: Thunder Bay, Ontario, Canada - burrrrr!
Posts: 11,674
Bikes: 1958 Rabeneick 120D, 1968 Legnano Gran Premio, 196? Torpado Professional, 2000 Marinoni Piuma
Mentioned: 210 Post(s)
Tagged: 0 Thread(s)
Quoted: 1372 Post(s)
Likes: 0
Liked 1,752 Times
in
939 Posts
Here's my home made cotter pin puller/press and it works just grrrreat!
Anyone with a welding machine and access to these simple components, can make up one of these little tools.
Slip the too onto the appropriate end of the cotter pin, snug up the bolt and give a little tap on the end to set the taper. Tighten and tap again. Just tap, you do not have to hit hard.
Things might not free up immediately and a wee bit of WD40 might prove useful.
Anyway, hope this is a help.
CotterPin_Press_4_Comment_1..jpg CotterPin_Press_3..jpg
11-09-10, 12:21 PM
#18
multimodal commuter
Join Date: Nov 2006
Location: NJ, NYC, LI
Posts: 19,808
Bikes: 1940s Fothergill, 1959 Allegro Special, 1963? Claud Butler Olympic Sprint, Lambert 'Clubman', 1974 Fuji "the Ace", 1976 Holdsworth 650b conversion rando bike, 1983 Trek 720 tourer, 1984 Counterpoint Opus II, 1993 Basso Gap, 2010 Downtube 8h, and...
Mentioned: 584 Post(s)
Tagged: 0 Thread(s)
Quoted: 1908 Post(s)
Liked 574 Times
in
339 Posts
^I was hoping randyjawa would show us that thing again. I want one. Brilliant!
11-09-10, 12:43 PM
#19
Senior Member
Join Date: Jul 2009
Posts: 11,128
Bikes: 1986 Alan Record Carbonio, 1985 Vitus Plus Carbone 7, 1984 Peugeot PSV, 1972 Line Seeker, 1986(est.) Medici Aerodynamic (Project), 1985(est.) Peugeot PY10FC
Mentioned: 22 Post(s)
Tagged: 0 Thread(s)
Quoted: 150 Post(s)
Likes: 0
Liked 34 Times
in
27 Posts
Hmmm.. lazy way to clean/grease the BB beraings and races??
I would think that you could just pour copious amounts of mineral spirits through the seat tube and down into the BB shell (remember to spin the BB axle when you are pouring in the mineral spirits and have a bucket to catch the mess). You should be able to flush out a good amount of any old grease and dirt that have accumulated in the BB shell and bearings draining out through the BB drain hole(s) and the seams between the BB axle and cups doing so. Make sure you have the seat stays tipped up so the gunk does not end up in them. After you think you've got most of the dirt and gunk out, you can seal the seam between the BB axle and the cup opening with maybe modeling clay and leave a small gap to jam the tip of a grease tube against or into it. Push enough grease into the seam and it should easily work it's way towards the bearings and races when you spin the axle while pushing in the grease. Repeat on the other side and you are done.
Of course I only recommend doing this if for some reason there is just no parctical way you could open up/dismantle your BB to properly service it....or if you are just really really lazy cyclist......")

Chombi
I would think that you could just pour copious amounts of mineral spirits through the seat tube and down into the BB shell (remember to spin the BB axle when you are pouring in the mineral spirits and have a bucket to catch the mess). You should be able to flush out a good amount of any old grease and dirt that have accumulated in the BB shell and bearings draining out through the BB drain hole(s) and the seams between the BB axle and cups doing so. Make sure you have the seat stays tipped up so the gunk does not end up in them. After you think you've got most of the dirt and gunk out, you can seal the seam between the BB axle and the cup opening with maybe modeling clay and leave a small gap to jam the tip of a grease tube against or into it. Push enough grease into the seam and it should easily work it's way towards the bearings and races when you spin the axle while pushing in the grease. Repeat on the other side and you are done.
Of course I only recommend doing this if for some reason there is just no parctical way you could open up/dismantle your BB to properly service it....or if you are just really really lazy cyclist......
Chombi
11-09-10, 04:04 PM
#20
Rustbelt Rider
Join Date: Oct 2008
Location: Canton, OH
Posts: 9,104
Bikes: 1990 Trek 1420 - 1978 Raleigh Professional - 1973 Schwinn Collegiate - 1974 Schwinn Suburban
Mentioned: 20 Post(s)
Tagged: 0 Thread(s)
Quoted: 261 Post(s)
Liked 372 Times
in
177 Posts
No, that was The Golden Boy, who suggested a C-clamp. C-clamp technique is trickier; I use a small vise! The thing about the C-clamp is that you want the jaws open about 2" and a 2" C-clamp is way too flimsy. 6" C clamp may be beefy enough to do the job, but then you have 4" of thread sticking out the adjustable end, and this makes the whole thing a little floppy; as a result the force can get a bit oblique, which will bend the cotter. If you use a C-clamp, better make yourself a large spacer, like a thick chunk of oak with a hole in it, instead of a socket. You can do it, but a vise is foolproof.
__________________
|^^^^^^^^^^^^^^| ||
|......GO.BROWNS........| ||'|";, ___.
|_..._..._______===|=||_|__|..., ] -
"(@)'(@)"""''"**|(@)(@)*****''(@)
|^^^^^^^^^^^^^^| ||
|......GO.BROWNS........| ||'|";, ___.
|_..._..._______===|=||_|__|..., ] -
"(@)'(@)"""''"**|(@)(@)*****''(@)
09-04-22, 03:23 AM
#22
verktyg

Join Date: Jul 2006
Location: SF Bay Area
Posts: 4,030
Bikes: Current favorites: 1988 Peugeot Birraritz, 1984 Gitane Super Corsa, 1980s DeRosa, 1981 Bianchi Campione Del Mondo, 1992 Paramount OS, 1988 Colnago Technos, 1985 RalieghUSA SBDU Team Pro
Mentioned: 207 Post(s)
Tagged: 0 Thread(s)
Quoted: 1036 Post(s)
Liked 1,238 Times
in
654 Posts
Zombie Thread

Replying to old zombie threads is frowned upon by many C&V members - 3 reasons:
1. Folks have to wade through a slew of old posts to get to the current message...
2. Many of the links in old threads are broken... In this case it's a 12 year old post...
3. Old responses are frequently irrelevant because of changes in technology...
Frequently it's better to start a new thread and you'l get responses from current members...
verktyg Grumpy Old Man

__________________
Don't believe everything you think! History is written by those who weren't there....
Chas. ;-)
Don't believe everything you think! History is written by those who weren't there....
Chas. ;-)
09-04-22, 09:45 AM
#23
Ride, Wrench, Swap, Race

Join Date: Jan 2010
Location: Northern California
Posts: 9,194
Bikes: Cheltenham-Pedersen racer, Boulder F/S Paris-Roubaix, Varsity racer, '52 Christophe, '62 Continental, '92 Merckx, '75 Limongi, '76 Presto, '72 Gitane SC, '71 Schwinn SS, etc.
Mentioned: 132 Post(s)
Tagged: 0 Thread(s)
Quoted: 1565 Post(s)
Liked 1,296 Times
in
866 Posts
For anyone who lands here in this old thread, it's super-simple to lay the bike on it's side and dribble in a few fat drops of oil, one side then the other.
I've done this many times on many different bikes. Unless you'll be riding high mileage, the hardened bearing surfaces will hold up fine to a bit of grit in my experience, and the old grease usually softens up enough to let any "glued" bearing cages move freely as they must.
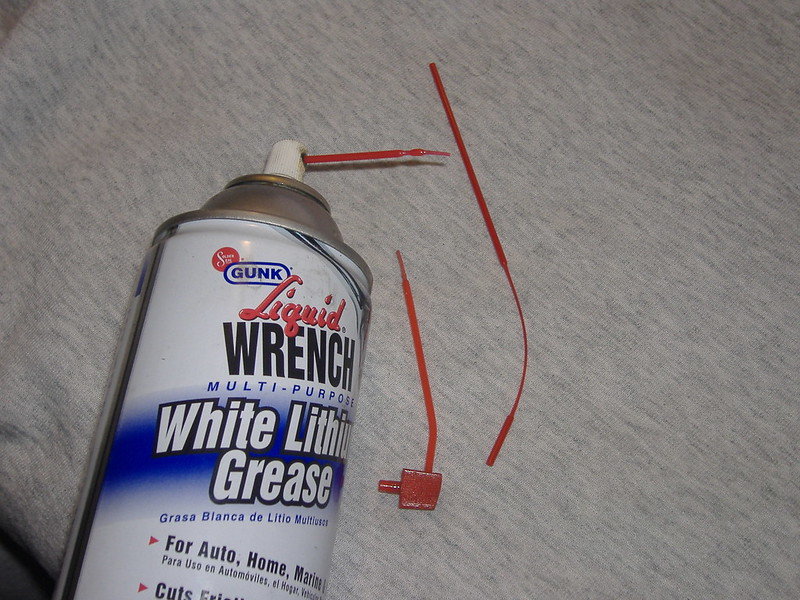
I sometimes use a stretched-thin applicator tube on my can of aerosol lithium grease for this purpose, the grease should last longer than oil.
Note that the bearings may sound somewhat noisy for a day or two until the carrier solvent evaporates!
Press or no press, cotters seem to usually get damaged during removal.
Finding suitably-hardened replacement cotters today is not easy, so install the nut loosely to protect the cotter threads, and use a propane torch on the crankarm for a couple of minutes if it's taking too much force to press them out!(!)
I've done this many times on many different bikes. Unless you'll be riding high mileage, the hardened bearing surfaces will hold up fine to a bit of grit in my experience, and the old grease usually softens up enough to let any "glued" bearing cages move freely as they must.
I sometimes use a stretched-thin applicator tube on my can of aerosol lithium grease for this purpose, the grease should last longer than oil.
Note that the bearings may sound somewhat noisy for a day or two until the carrier solvent evaporates!
Press or no press, cotters seem to usually get damaged during removal.
Finding suitably-hardened replacement cotters today is not easy, so install the nut loosely to protect the cotter threads, and use a propane torch on the crankarm for a couple of minutes if it's taking too much force to press them out!(!)
Last edited by dddd; 09-04-22 at 09:49 AM.
Likes For dddd:
09-04-22, 09:48 AM
#24
Senior Member

Join Date: Aug 2015
Posts: 3,306
Mentioned: 39 Post(s)
Tagged: 0 Thread(s)
Quoted: 1143 Post(s)
Liked 1,753 Times
in
966 Posts
Hammer is bad.
I used a C Clamp and a 15 or 16mm socket.
Undo the nut/cover on the cotter
Place the socket over the other end of the cotter.
Place the "spinny" portion of the C-Clamp on the socket
Placed the "fixed" side of the C-Clamp on the nut side.
Tighten the clamp until the cotter pops out into the socket cup.
If you place the "fixed" end of the clamp on the socket, it tends to fall off and the socket slips out.
I also let some Tri Flow soak in overnight.
Don't use a hammer. I wrecked the pants leg protector thingy on my chainrings when I missed.
I used a C Clamp and a 15 or 16mm socket.
Undo the nut/cover on the cotter
Place the socket over the other end of the cotter.
Place the "spinny" portion of the C-Clamp on the socket
Placed the "fixed" side of the C-Clamp on the nut side.
Tighten the clamp until the cotter pops out into the socket cup.
If you place the "fixed" end of the clamp on the socket, it tends to fall off and the socket slips out.
I also let some Tri Flow soak in overnight.
Don't use a hammer. I wrecked the pants leg protector thingy on my chainrings when I missed.
09-04-22, 10:38 AM
#25
Extraordinary Magnitude
Join Date: Aug 2009
Location: Waukesha WI
Posts: 13,649
Bikes: 1978 Trek TX700; 1978/79 Trek 736; 1984 Specialized Stumpjumper Sport; 1984 Schwinn Voyageur SP; 1985 Trek 620; 1985 Trek 720; 1986 Trek 400 Elance; 1987 Schwinn High Sierra; 1990 Miyata 1000LT
Mentioned: 84 Post(s)
Tagged: 0 Thread(s)
Quoted: 2608 Post(s)
Liked 1,703 Times
in
937 Posts
I think what I was really trying to convey was that the hammer method is worse than the 'c-clamp/socket' method which, by extension is nowhere as good as the purpose designed tool.
Yeah, I did bad things to that poor bike with that hammer...
__________________
*Recipient of the 2006 Time Magazine "Person Of The Year" Award*
Commence to jigglin� huh?!?!
"But hey, always love to hear from opinionated amateurs." -says some guy to Mr. Marshall.
Commence to jigglin� huh?!?!
"But hey, always love to hear from opinionated amateurs." -says some guy to Mr. Marshall.