Building another second rear wheel
 02-01-22, 01:28 PM
#1
Senior Member
Thread Starter
Join Date: Jul 2015
Posts: 586
Mentioned: 7 Post(s)
Tagged: 0 Thread(s)
Quoted: 120 Post(s)
Likes: 0
Liked 0 Times
in
0 Posts
Building another second rear wheel
https://www.bikeforums.net/bicycle-m...l#post22395165
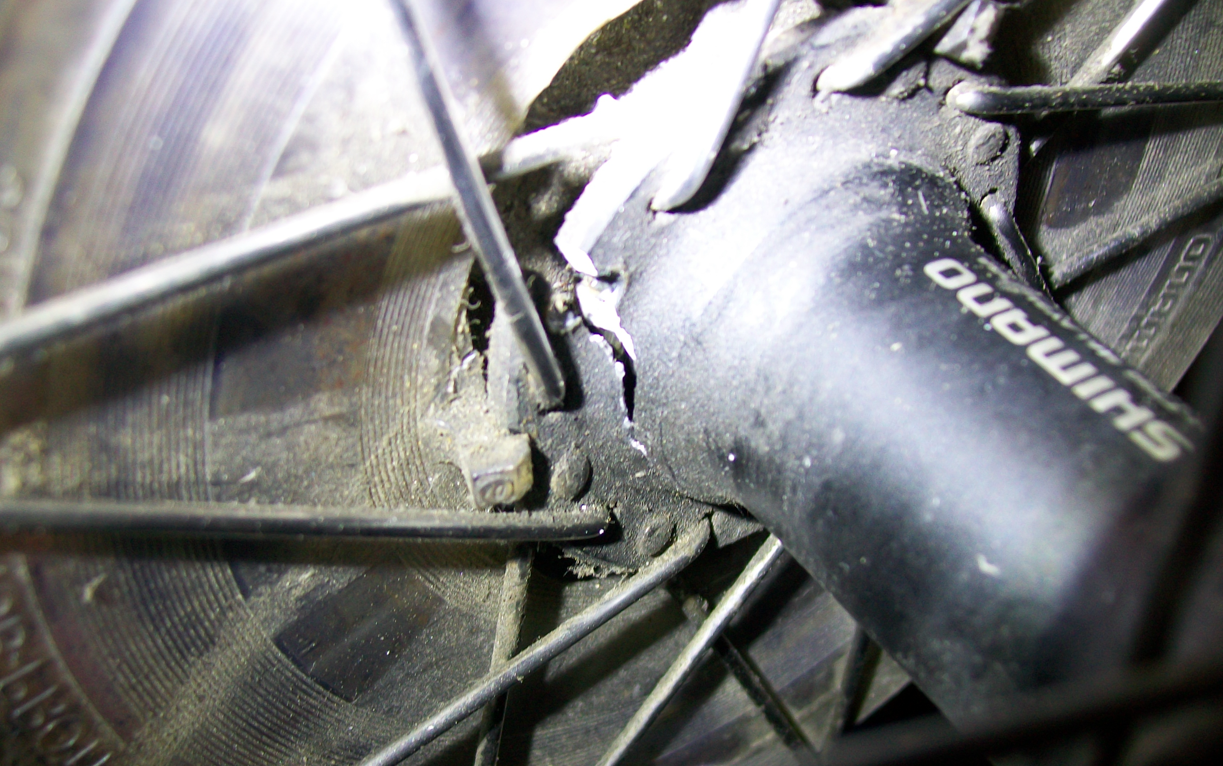
That black hub was a Shimano Deore XL FH-T780. That's discontinued, but I found a Shimano FH-T610 Deore Rear Hub that was on my 2016 rear hub speccing. It looks similar. I got that in, measured it, and calculated spoke lengths of 289 and 290. The current spokes are 290 and 292mm I think. So I'm going to try reusing those.
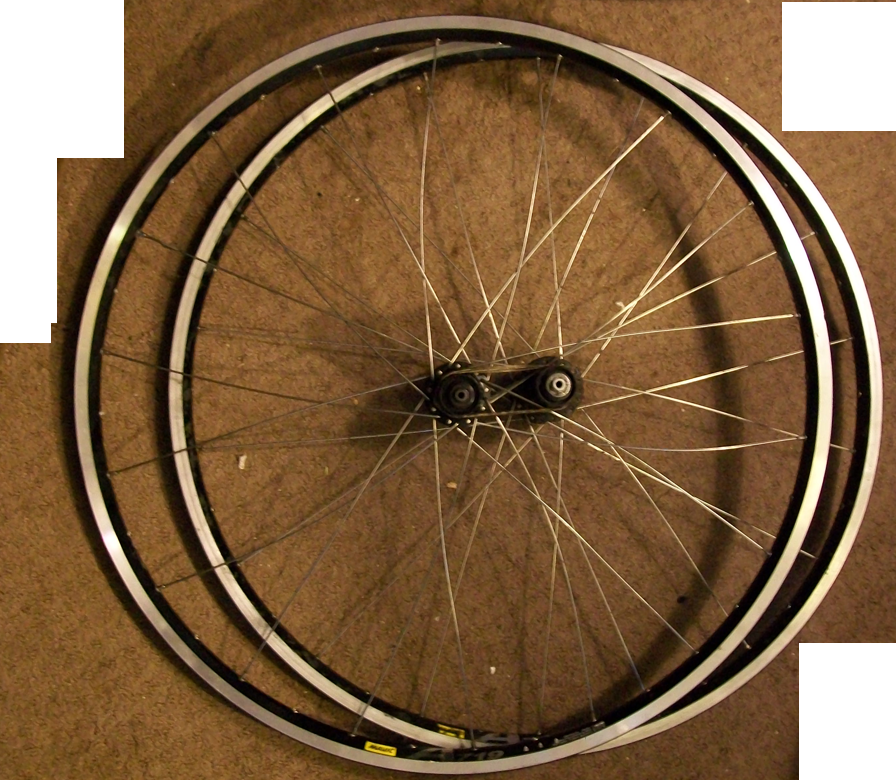
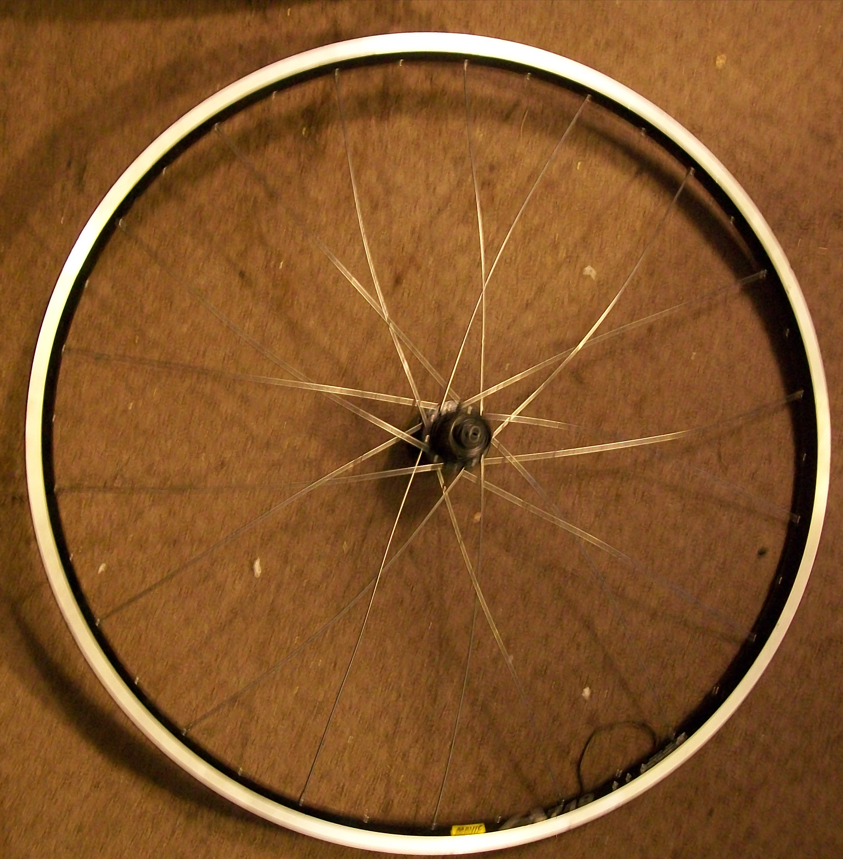
I also finally ordered my new FRONT wheel spokes, a different project. But that front wheel has a new Mavic A719 rim, just like the two rear wheels.
Over the weekend, I loosened up the nipples on the black, broken hub wheel. Using used spokes isn't great probably but that's two years or use on them/3,000 miles. Plus, all new spokes are about $50 with shipping. I know that from ordering the new front wheel spokes.
I'm going to use my front wheel rim for the refurbed rear wheel. I'm going to take the new rear wheel hub and then pull each spoke out from the busted hub wheel individually. I'm going to transfer each spoke onto the new hub/rim set up, so each spoke will stay in the same place in the new set up. And then hopefully I won't have to think about how spokes weave together. I'll just keep them all in the same position. I was thinking potentially even though they're used spokes, if they're in the same position on the new rear wheel, that might match some wear pattern, as opposed to having them where ever on the new wheel and having them bent or wear in a little differently and stress them in a different place. I should have some spare spokes from the 2016 wheel builds too. If this doesn't work, I'll just buy all new spokes and redo the spokes from scratch.
That black hub was a Shimano Deore XL FH-T780. That's discontinued, but I found a Shimano FH-T610 Deore Rear Hub that was on my 2016 rear hub speccing. It looks similar. I got that in, measured it, and calculated spoke lengths of 289 and 290. The current spokes are 290 and 292mm I think. So I'm going to try reusing those.
I also finally ordered my new FRONT wheel spokes, a different project. But that front wheel has a new Mavic A719 rim, just like the two rear wheels.
Over the weekend, I loosened up the nipples on the black, broken hub wheel. Using used spokes isn't great probably but that's two years or use on them/3,000 miles. Plus, all new spokes are about $50 with shipping. I know that from ordering the new front wheel spokes.
I'm going to use my front wheel rim for the refurbed rear wheel. I'm going to take the new rear wheel hub and then pull each spoke out from the busted hub wheel individually. I'm going to transfer each spoke onto the new hub/rim set up, so each spoke will stay in the same place in the new set up. And then hopefully I won't have to think about how spokes weave together. I'll just keep them all in the same position. I was thinking potentially even though they're used spokes, if they're in the same position on the new rear wheel, that might match some wear pattern, as opposed to having them where ever on the new wheel and having them bent or wear in a little differently and stress them in a different place. I should have some spare spokes from the 2016 wheel builds too. If this doesn't work, I'll just buy all new spokes and redo the spokes from scratch.
 02-01-22, 01:53 PM
#2
Constant tinkerer
I recommend these instructions: https://www.sheldonbrown.com/wheelbuild.html
This is how I learned to build wheels and it hasn't let me down yet. It is probably easier to start with fresh, new parts. But you can certainly re-use spokes and rims if they're in good shape. I would recommend buying new brass nipples though, because they're cheap and because you're likely to round a few off or encounter ones that have gotten stuck in place.
The only tool that is absolutely necessary for building a straight, reliable wheel is a good spoke wrench. A cheap, poorly-fitting one will round off nipples before they are adequately tight. The other tools (truing stand, tensiometer, dish stick, etc.) might be nice to have, but I don't have them.
Likes For FastJake:
02-02-22, 03:36 PM
#3
Senior Member
Based on Shimano's published specs of each of the hub mentioned, the spoke lengths that would work are very similar. Probably within 1mm difference between the old and new hub. So unless you're 'close to the limit' of acceptable length now, the replacement hub should be fine. Unfortunately, Shimano has reduced the offerings of hubs for non-road rim brake wheels, no upper tier models.
When I reuse spokes on a totally disassembled wheel, I mark the spokes to reassemble in similar position (head in/out), but don't worry about rotational position. Use 2 color Sharpies, one on each side, marking somewhere on the middle of the spoke and a matching color dot on the exposed spoke head for the head out spokes. Sort these into 4 bundles and relace as indicated.
I usually replace the nipples also, they're quite cheap.
02-04-22, 02:58 PM
#5
The dropped

Join Date: Oct 2018
Location: Columbus, OH
Posts: 2,144
Bikes: Pake C'Mute Touring/Commuter Build, 1989 Kona Cinder Cone, 1995 Trek 5200, 1973 Raleigh Super Course FG, 1960/61 Montgomery Ward Hawthorne "thrift" 3 speed, by Hercules (sold) : 1966 Schwinn Deluxe Racer (sold)
Mentioned: 10 Post(s)
Tagged: 0 Thread(s)
Quoted: 1739 Post(s)
Liked 1,014 Times
in
696 Posts
02-04-22, 03:37 PM
#6
Senior Member
Join Date: Jul 2013
Location: Nor-Cal
Posts: 3,767
Bikes: lots
Mentioned: 7 Post(s)
Tagged: 0 Thread(s)
Quoted: 1958 Post(s)
Liked 2,932 Times
in
1,489 Posts
I recommend these instructions: https://www.sheldonbrown.com/wheelbuild.html
This is how I learned to build wheels and it hasn't let me down yet. It is probably easier to start with fresh, new parts. But you can certainly re-use spokes and rims if they're in good shape. I would recommend buying new brass nipples though, because they're cheap and because you're likely to round a few off or encounter ones that have gotten stuck in place.
The only tool that is absolutely necessary for building a straight, reliable wheel is a good spoke wrench. A cheap, poorly-fitting one will round off nipples before they are adequately tight. The other tools (truing stand, tensiometer, dish stick, etc.) might be nice to have, but I don't have them.
This is how I learned to build wheels and it hasn't let me down yet. It is probably easier to start with fresh, new parts. But you can certainly re-use spokes and rims if they're in good shape. I would recommend buying new brass nipples though, because they're cheap and because you're likely to round a few off or encounter ones that have gotten stuck in place.
The only tool that is absolutely necessary for building a straight, reliable wheel is a good spoke wrench. A cheap, poorly-fitting one will round off nipples before they are adequately tight. The other tools (truing stand, tensiometer, dish stick, etc.) might be nice to have, but I don't have them.
02-04-22, 03:40 PM
#7
Constant tinkerer
02-04-22, 09:29 PM
#8
Senior Member
Join Date: Jul 2013
Location: Nor-Cal
Posts: 3,767
Bikes: lots
Mentioned: 7 Post(s)
Tagged: 0 Thread(s)
Quoted: 1958 Post(s)
Liked 2,932 Times
in
1,489 Posts
02-06-22, 01:01 AM
#9
Senior Member
Join Date: Jun 2002
Location: Montreal, Quebec
Posts: 6,052
Mentioned: 16 Post(s)
Tagged: 0 Thread(s)
Quoted: 1885 Post(s)
Liked 1,759 Times
in
1,021 Posts
Sheldon was a very pragmatic bike mechanic. I hadn't heard that term either, but I wouldn't say that he was weird
02-06-22, 09:46 AM
#10
Senior Member
Join Date: Oct 2017
Location: Chapel Hill NC
Posts: 1,683
Bikes: 2000 Litespeed Vortex Chorus 10, 1995 DeBernardi Cromor S/S
Mentioned: 4 Post(s)
Tagged: 0 Thread(s)
Quoted: 645 Post(s)
Liked 797 Times
in
446 Posts
With respect, CX, Sheldon likely forgot more about bikes and cycling than you learned in your 25 years 🙄
02-06-22, 10:08 AM
#11
Senior Member
Join Date: Jul 2013
Location: Nor-Cal
Posts: 3,767
Bikes: lots
Mentioned: 7 Post(s)
Tagged: 0 Thread(s)
Quoted: 1958 Post(s)
Liked 2,932 Times
in
1,489 Posts
Where did I say he wasn't a hugely knowledgeable person?
02-06-22, 03:25 PM
#12
Senior Member
Join Date: Oct 2017
Location: Chapel Hill NC
Posts: 1,683
Bikes: 2000 Litespeed Vortex Chorus 10, 1995 DeBernardi Cromor S/S
Mentioned: 4 Post(s)
Tagged: 0 Thread(s)
Quoted: 645 Post(s)
Liked 797 Times
in
446 Posts
You didn't, and no-one said you did. I'm just a little taken aback that, when presented with a bit of Sheldon Brown bike trivia of which you were unaware, your response wasn't "Today I learned something new" but "Well, I've been in the business for 25 years, and I've never heard of this". I suppose my initial response should have been clearer - more along the lines of "So what? I imagine there's a bazillion items of cycling trivia that Sheldon Brown knew that you don't".
02-06-22, 04:12 PM
#13
Senior Member
Join Date: Jul 2013
Location: Nor-Cal
Posts: 3,767
Bikes: lots
Mentioned: 7 Post(s)
Tagged: 0 Thread(s)
Quoted: 1958 Post(s)
Liked 2,932 Times
in
1,489 Posts
You didn't, and no-one said you did. I'm just a little taken aback that, when presented with a bit of Sheldon Brown bike trivia of which you were unaware, your response wasn't "Today I learned something new" but "Well, I've been in the business for 25 years, and I've never heard of this". I suppose my initial response should have been clearer - more along the lines of "So what? I imagine there's a bazillion items of cycling trivia that Sheldon Brown knew that you don't".
02-06-22, 05:30 PM
#14
Constant tinkerer

If you are having trouble figuring out how to use Google, might I suggest the obvious solution of adding "bicycle" to the search.
02-06-22, 08:13 PM
#15
Senior Member
Join Date: Jul 2013
Location: Nor-Cal
Posts: 3,767
Bikes: lots
Mentioned: 7 Post(s)
Tagged: 0 Thread(s)
Quoted: 1958 Post(s)
Liked 2,932 Times
in
1,489 Posts
Oooooooooh you really got me there. No doubting where I stand in your book.
02-20-22, 05:44 PM
#16
Senior Member
Thread Starter
Join Date: Jul 2015
Posts: 586
Mentioned: 7 Post(s)
Tagged: 0 Thread(s)
Quoted: 120 Post(s)
Likes: 0
Liked 0 Times
in
0 Posts
So far, so good. I got the spokes off the cassette, drive side all transferred to the new wheel (new hub and what would have been my second/new front wheel rim).
Lined the inner tube hole up first. I also positioned the brand new in line with the hole. Then I picked a spoke to start with. That was a little confusing from the start. I decided to just reuse the same nipples, at least for now. This would be the time to change them though. I'm not sure how many mistakes I still made. Maybe ten. Even at the end I discovered the very first spoke I put I last week I put on in the wrong direction on the hub. After getting a few pairs of spokes on it was obvious what the pattern was. Spoke dropped in from the top, on the left of the hub holes, and then six holes over (including the starting hole), that's where the crossing spoke goes, coming up from the bottom in the new hub though. That's where I would screw up. And that crossing spoke would go (over one barely I think) over the shorter one and under the longer one, two rim holes down from the last spoke in the rim.
I guess what I considered the "right" spoke (vs. left spoke I removed first) is over the spoke that it barely covers, and then over, and then under the "long" spoke. And then the next rim hole down.
I nipple driver tool was definitely useful for removing and adding spokes. This Mavic rim has an eyelet, so I don't think there was any chance of dropping a nipple into the rim. I was concerned about that at the beginning.
So half are on now. I also found it useful to rubber band the two hubs together to keep them in place. Even with that, they still managed to drift away from having the spokes lined up on both while I was working.
I think the other side will go faster. That's going to be more obvious where those go. It's probably the same amount of work there as it was after I started. So hopefully I will have all the spokes loosely in place with a new hub and new rim.
The old hub will still be useful. I have the hub tool to open it for regreasing the ball bearings. I've got an old 32-spoke rear wheel hub and this cracked hub now I can practice on. For regreasing a hub I'm concerned about not closing it up right and having water get in.
For some reason too, when I started, I was thinking the drive and non-drive spokes interlaced, but they don't. Each side is completely separate from the other.
02-23-22, 05:33 PM
#17
Senior Member
Thread Starter
Join Date: Jul 2015
Posts: 586
Mentioned: 7 Post(s)
Tagged: 0 Thread(s)
Quoted: 120 Post(s)
Likes: 0
Liked 0 Times
in
0 Posts
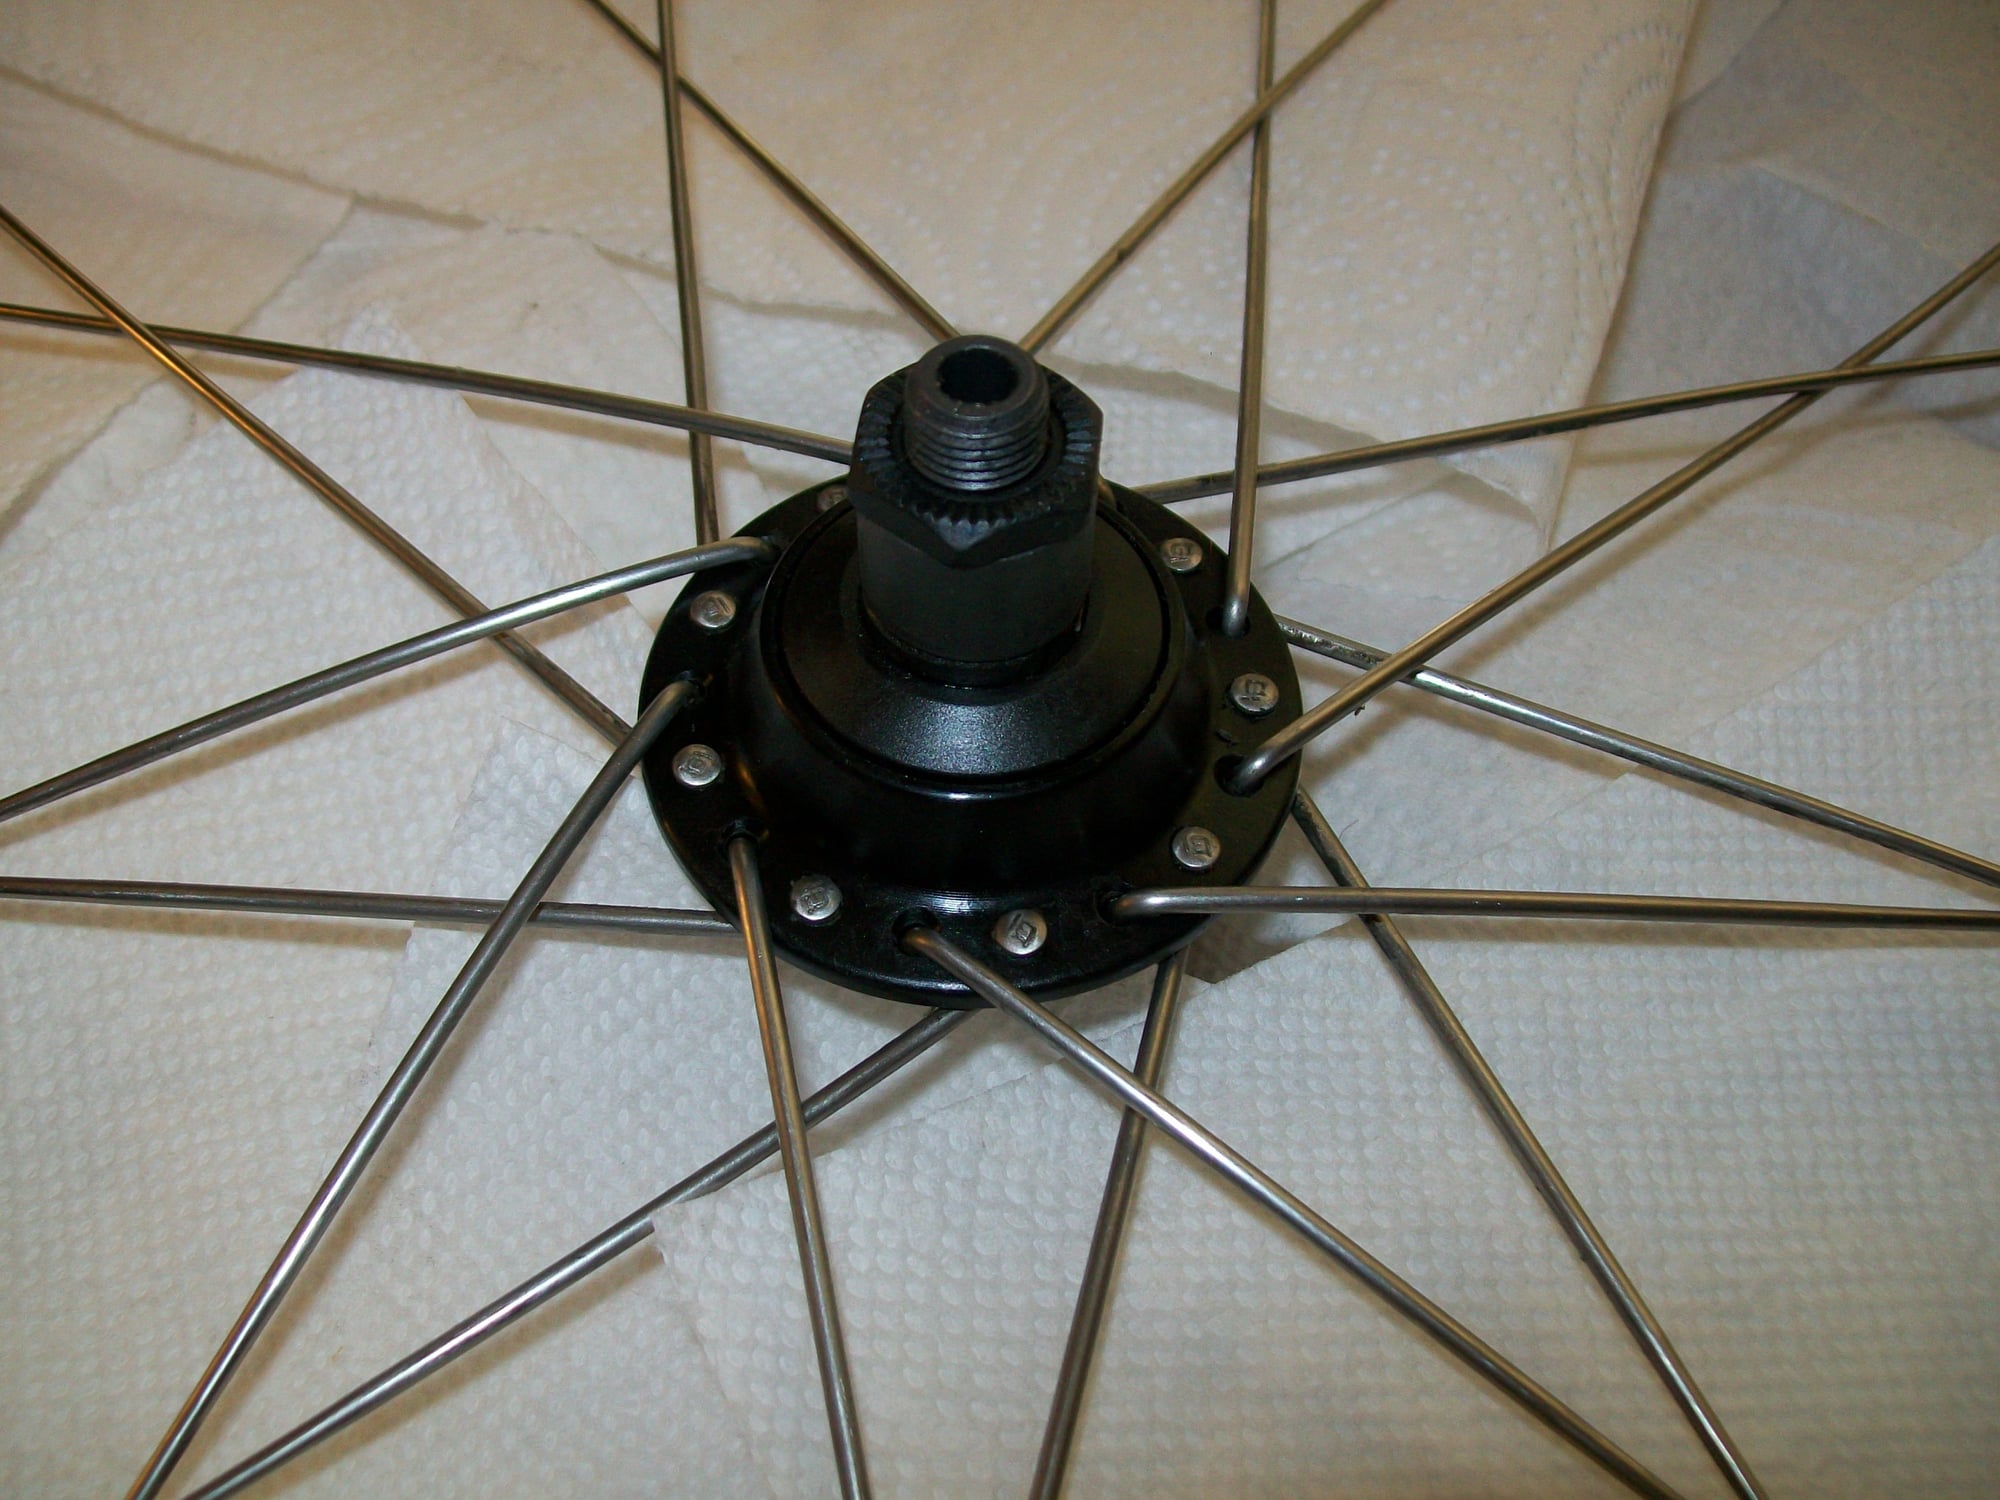
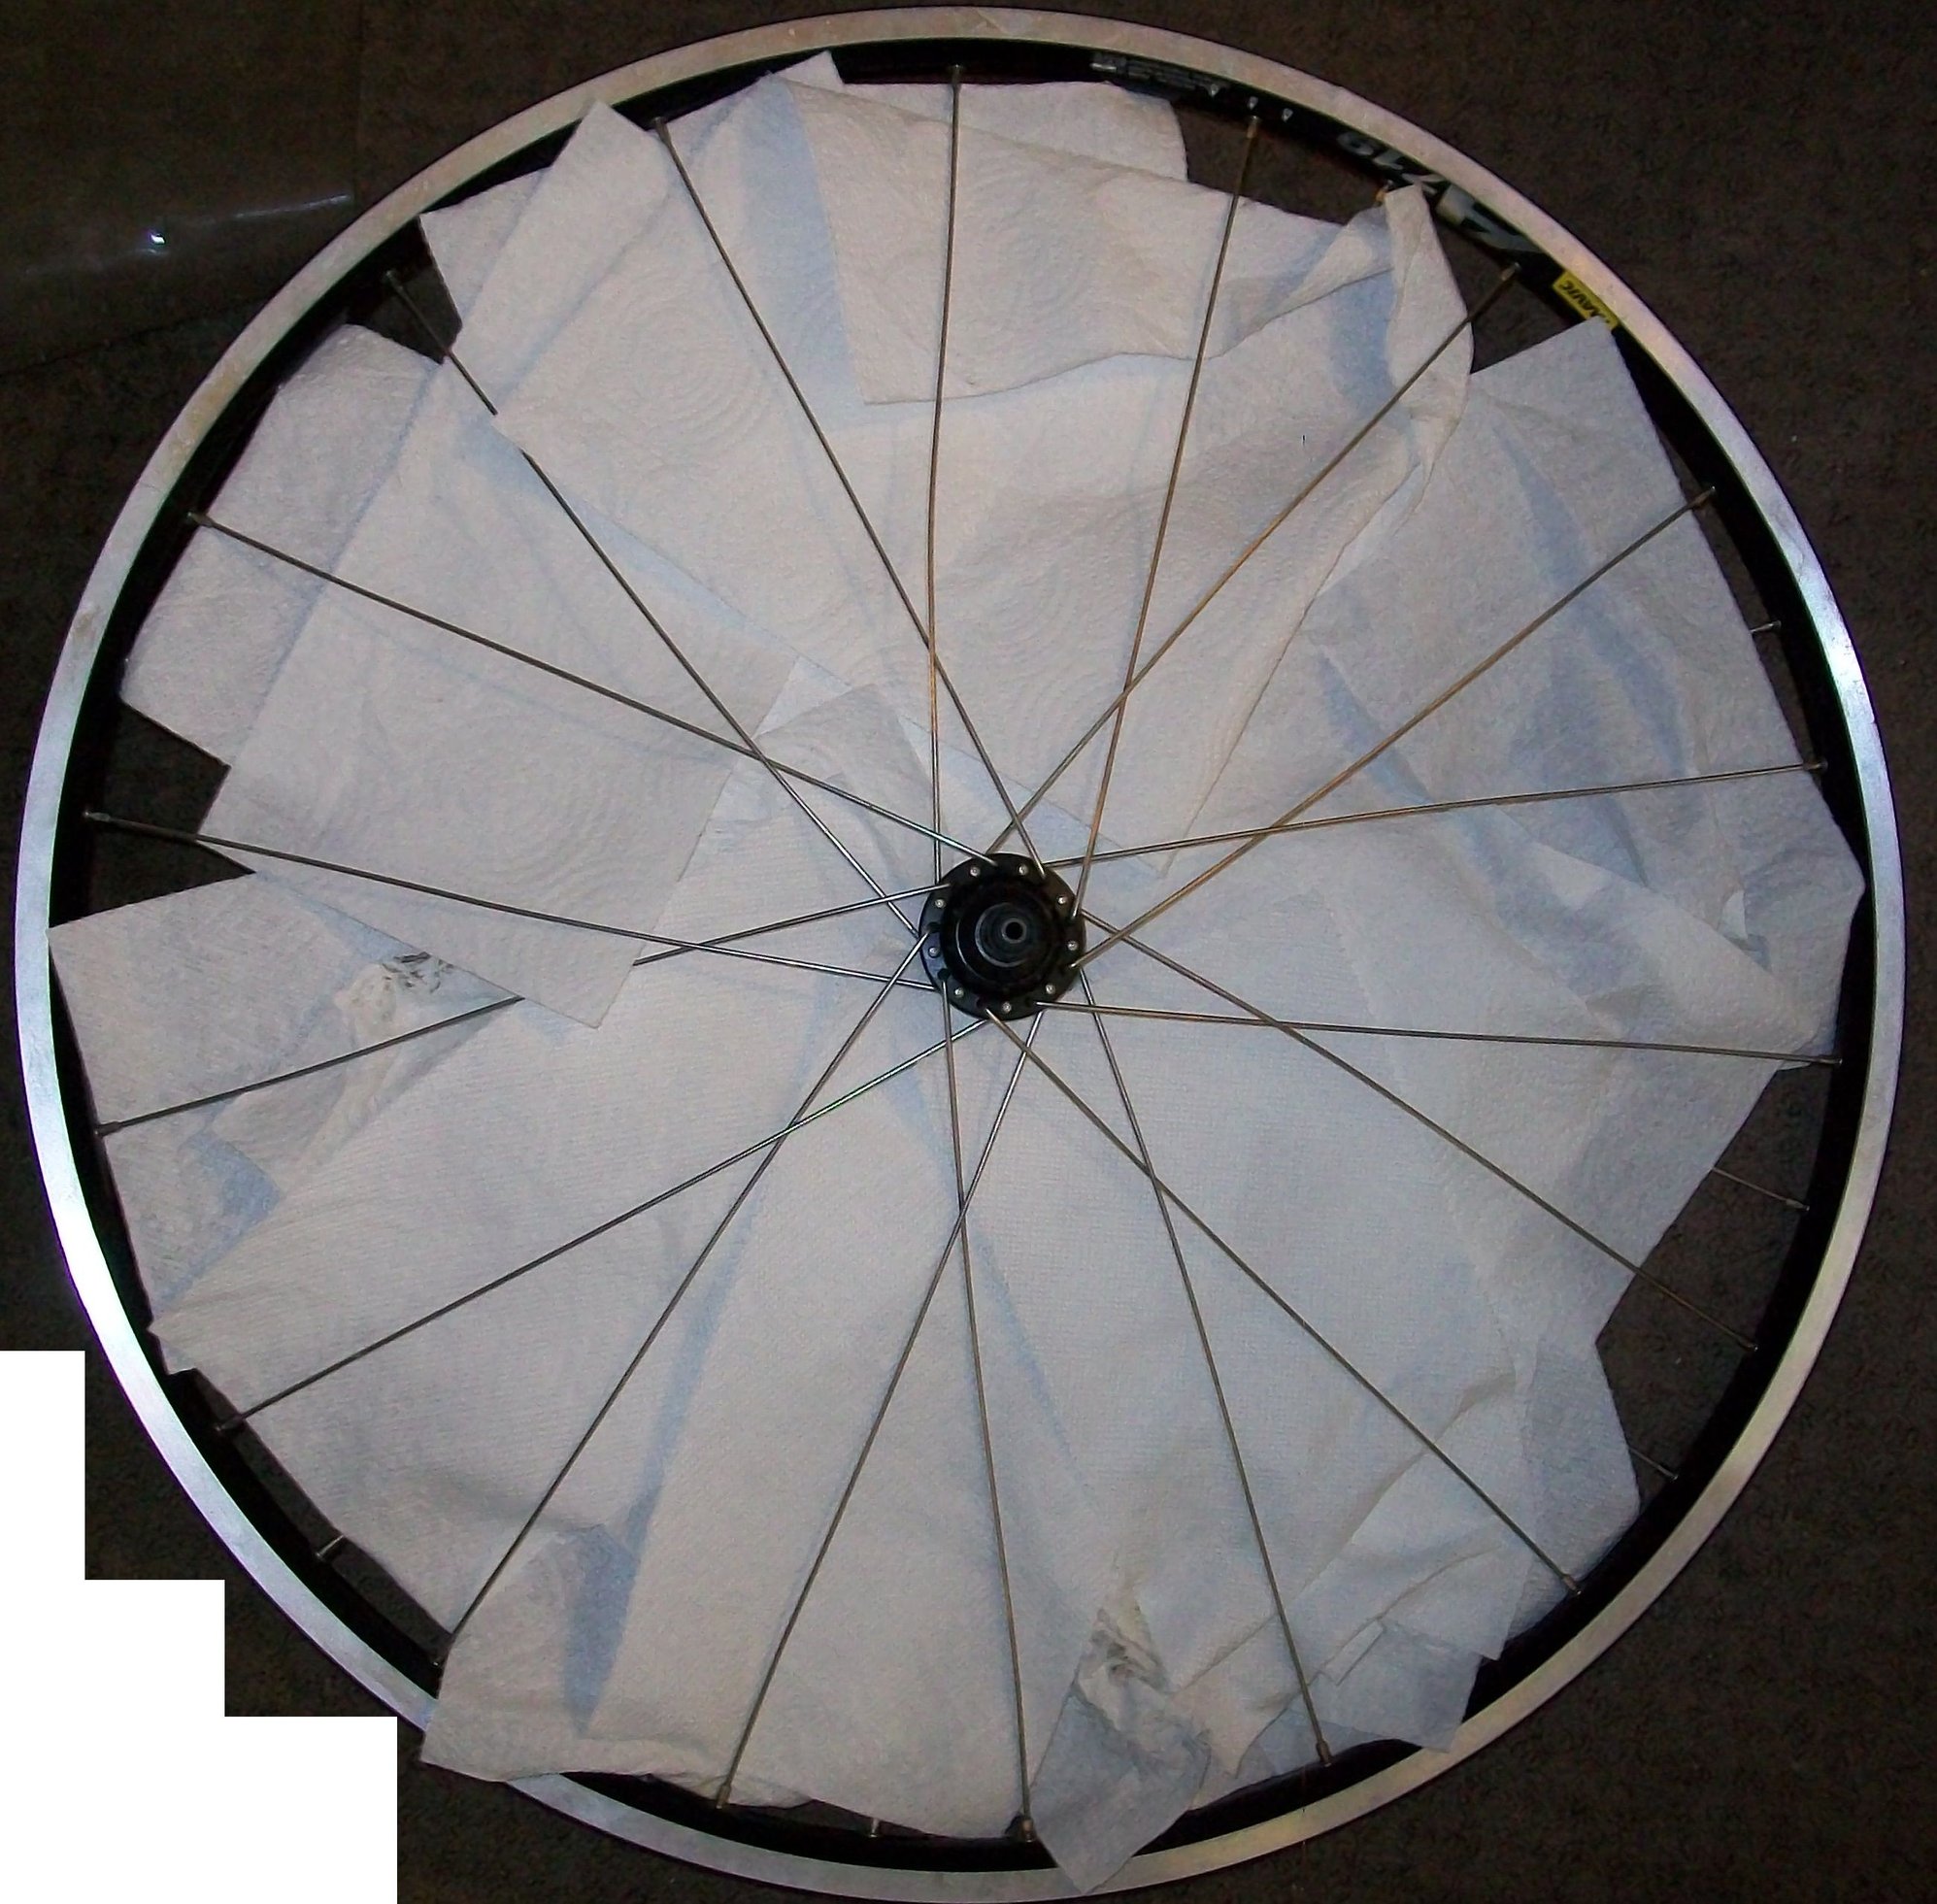
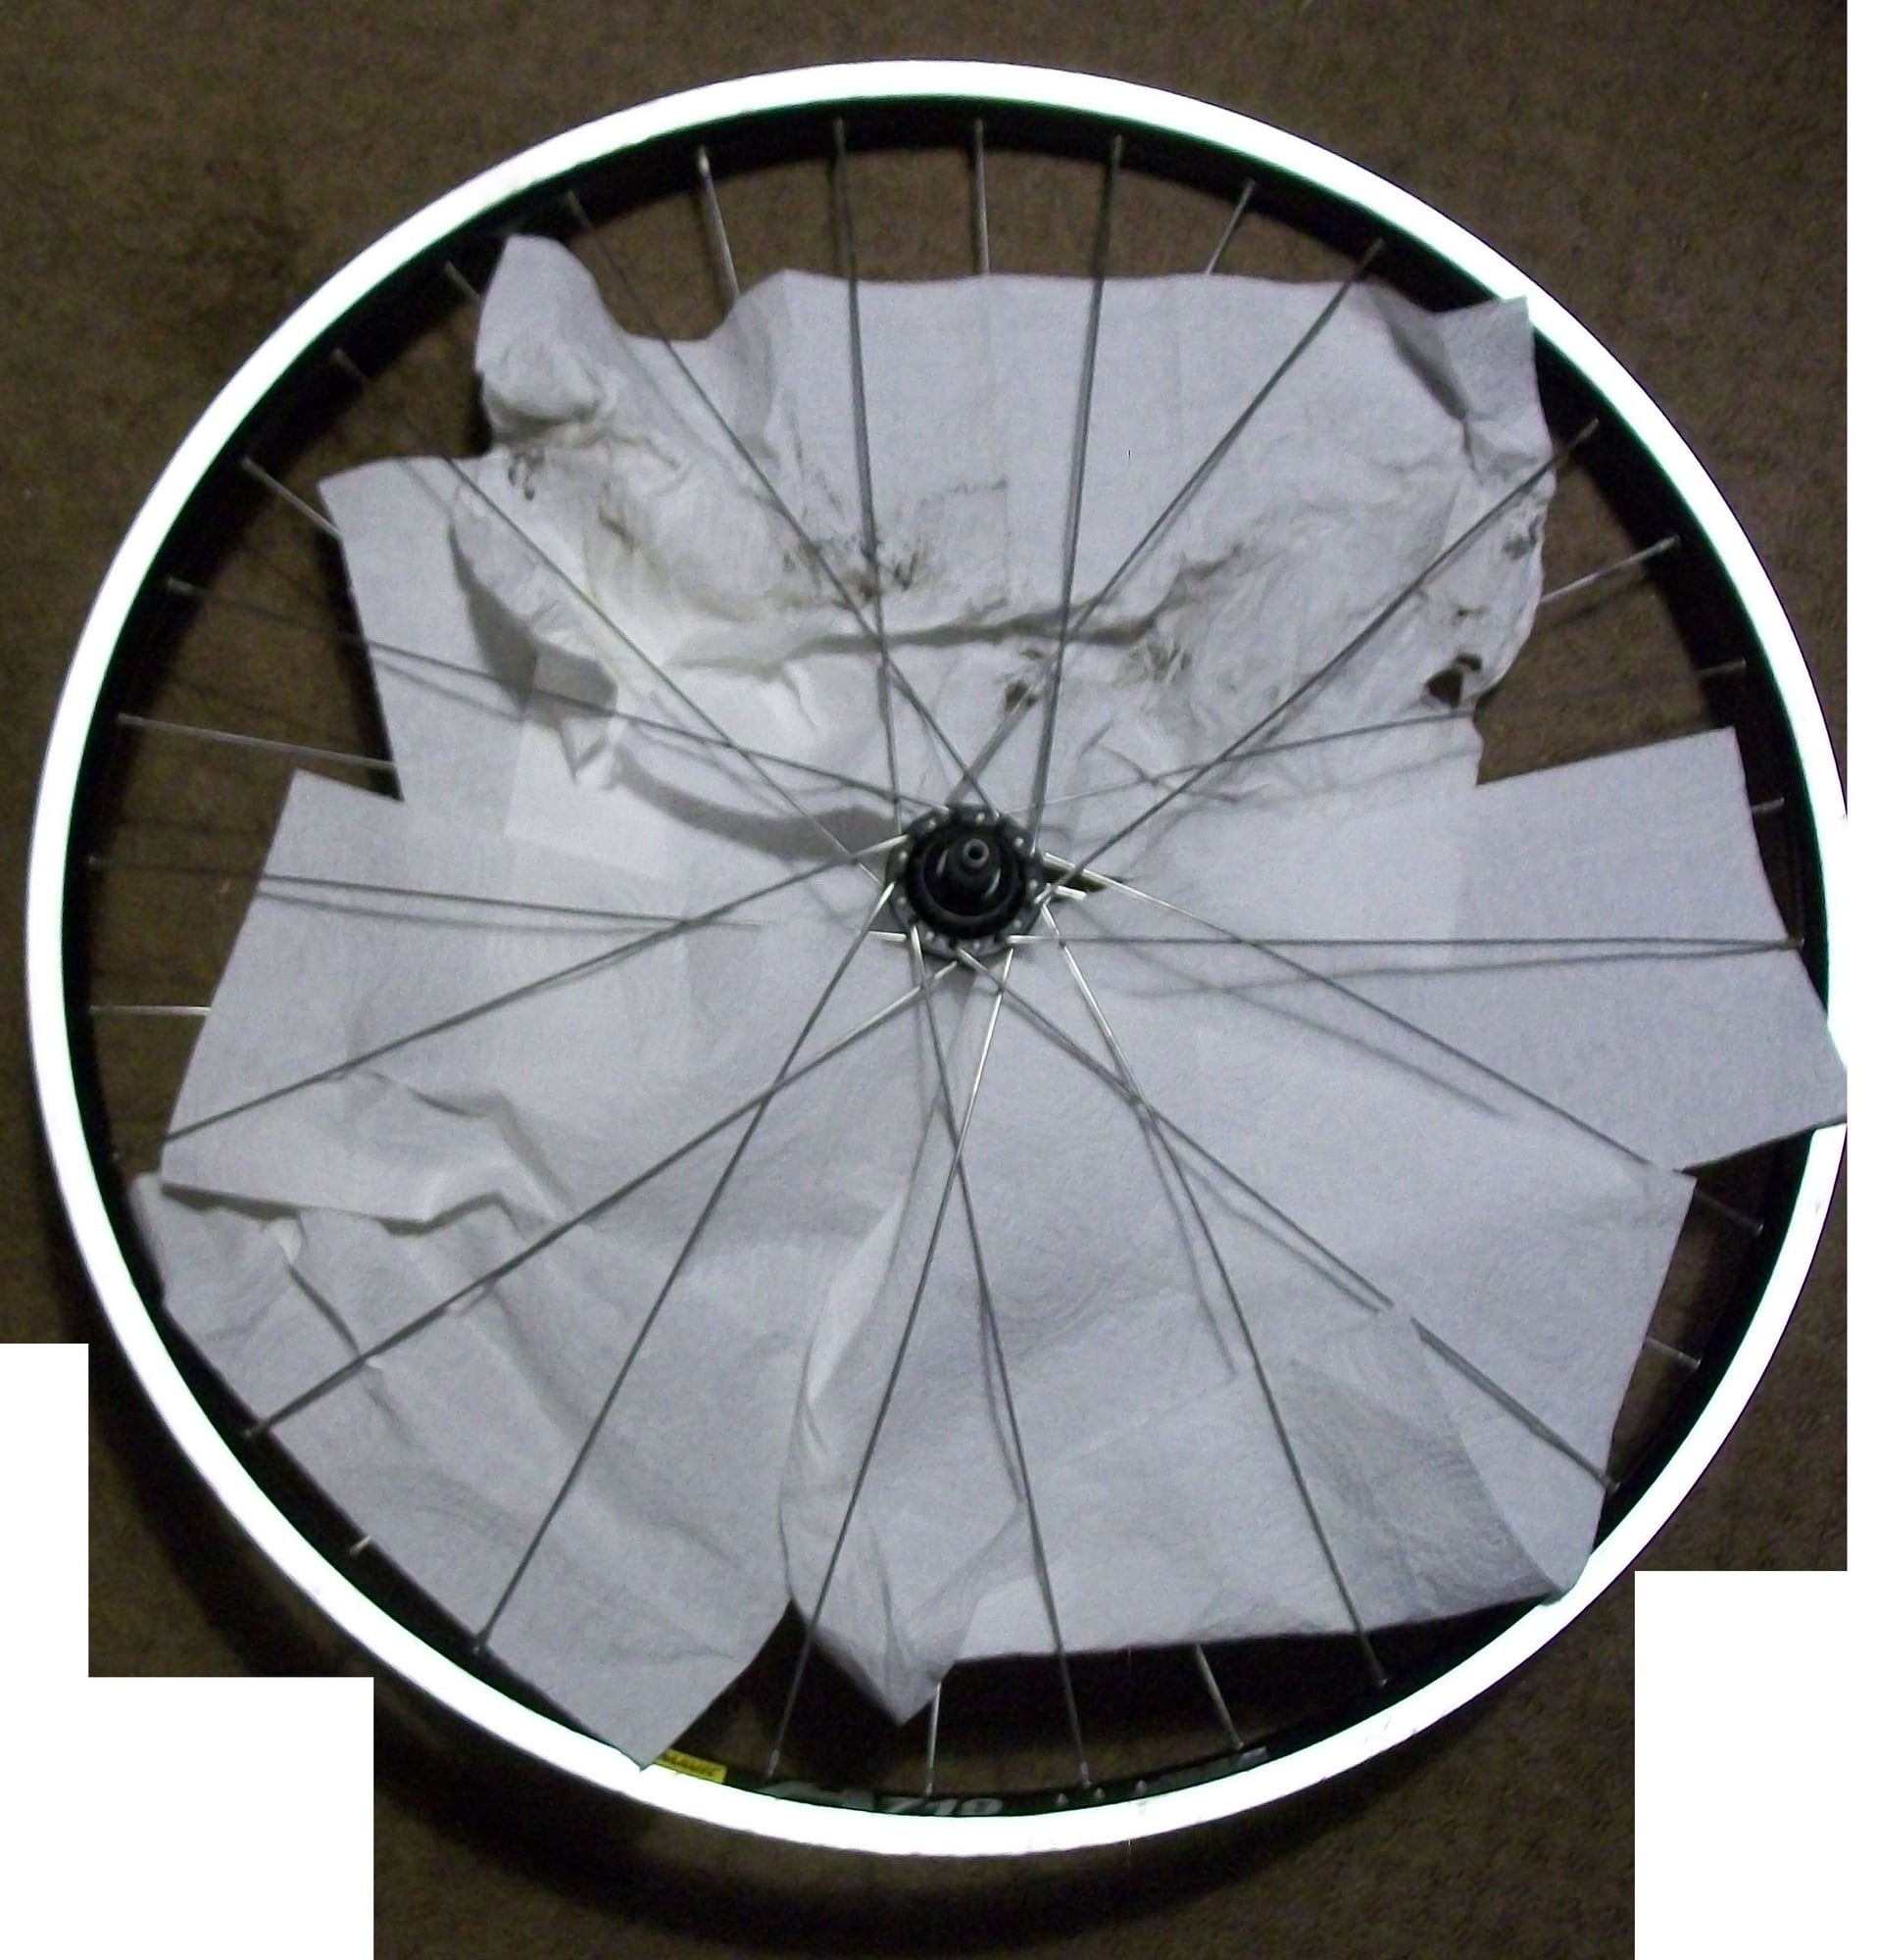
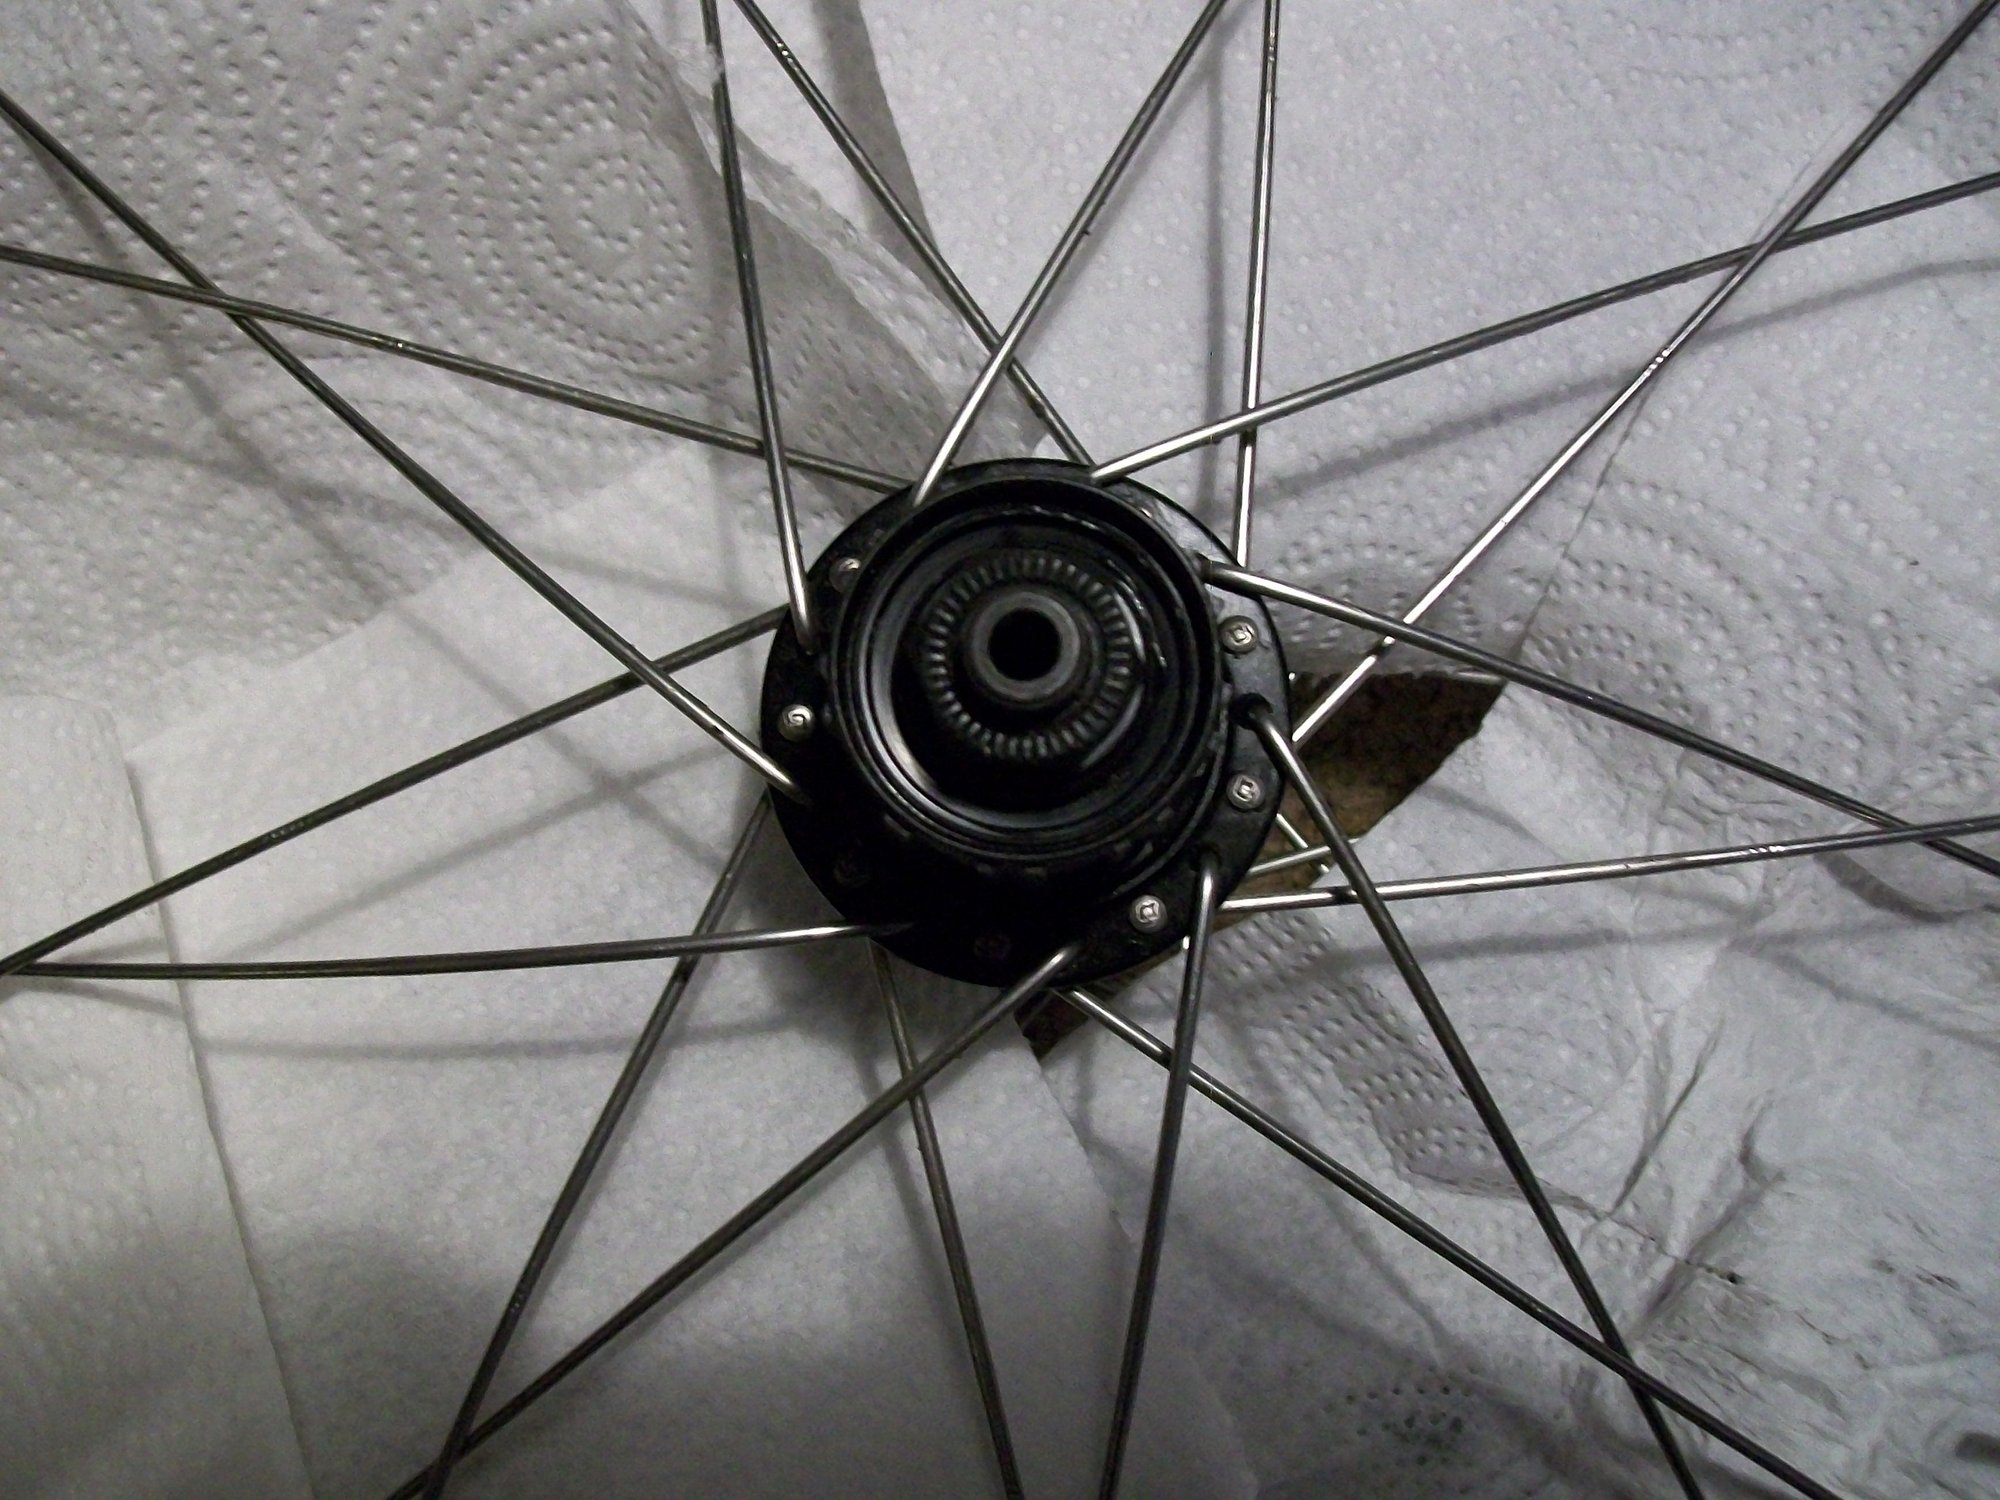
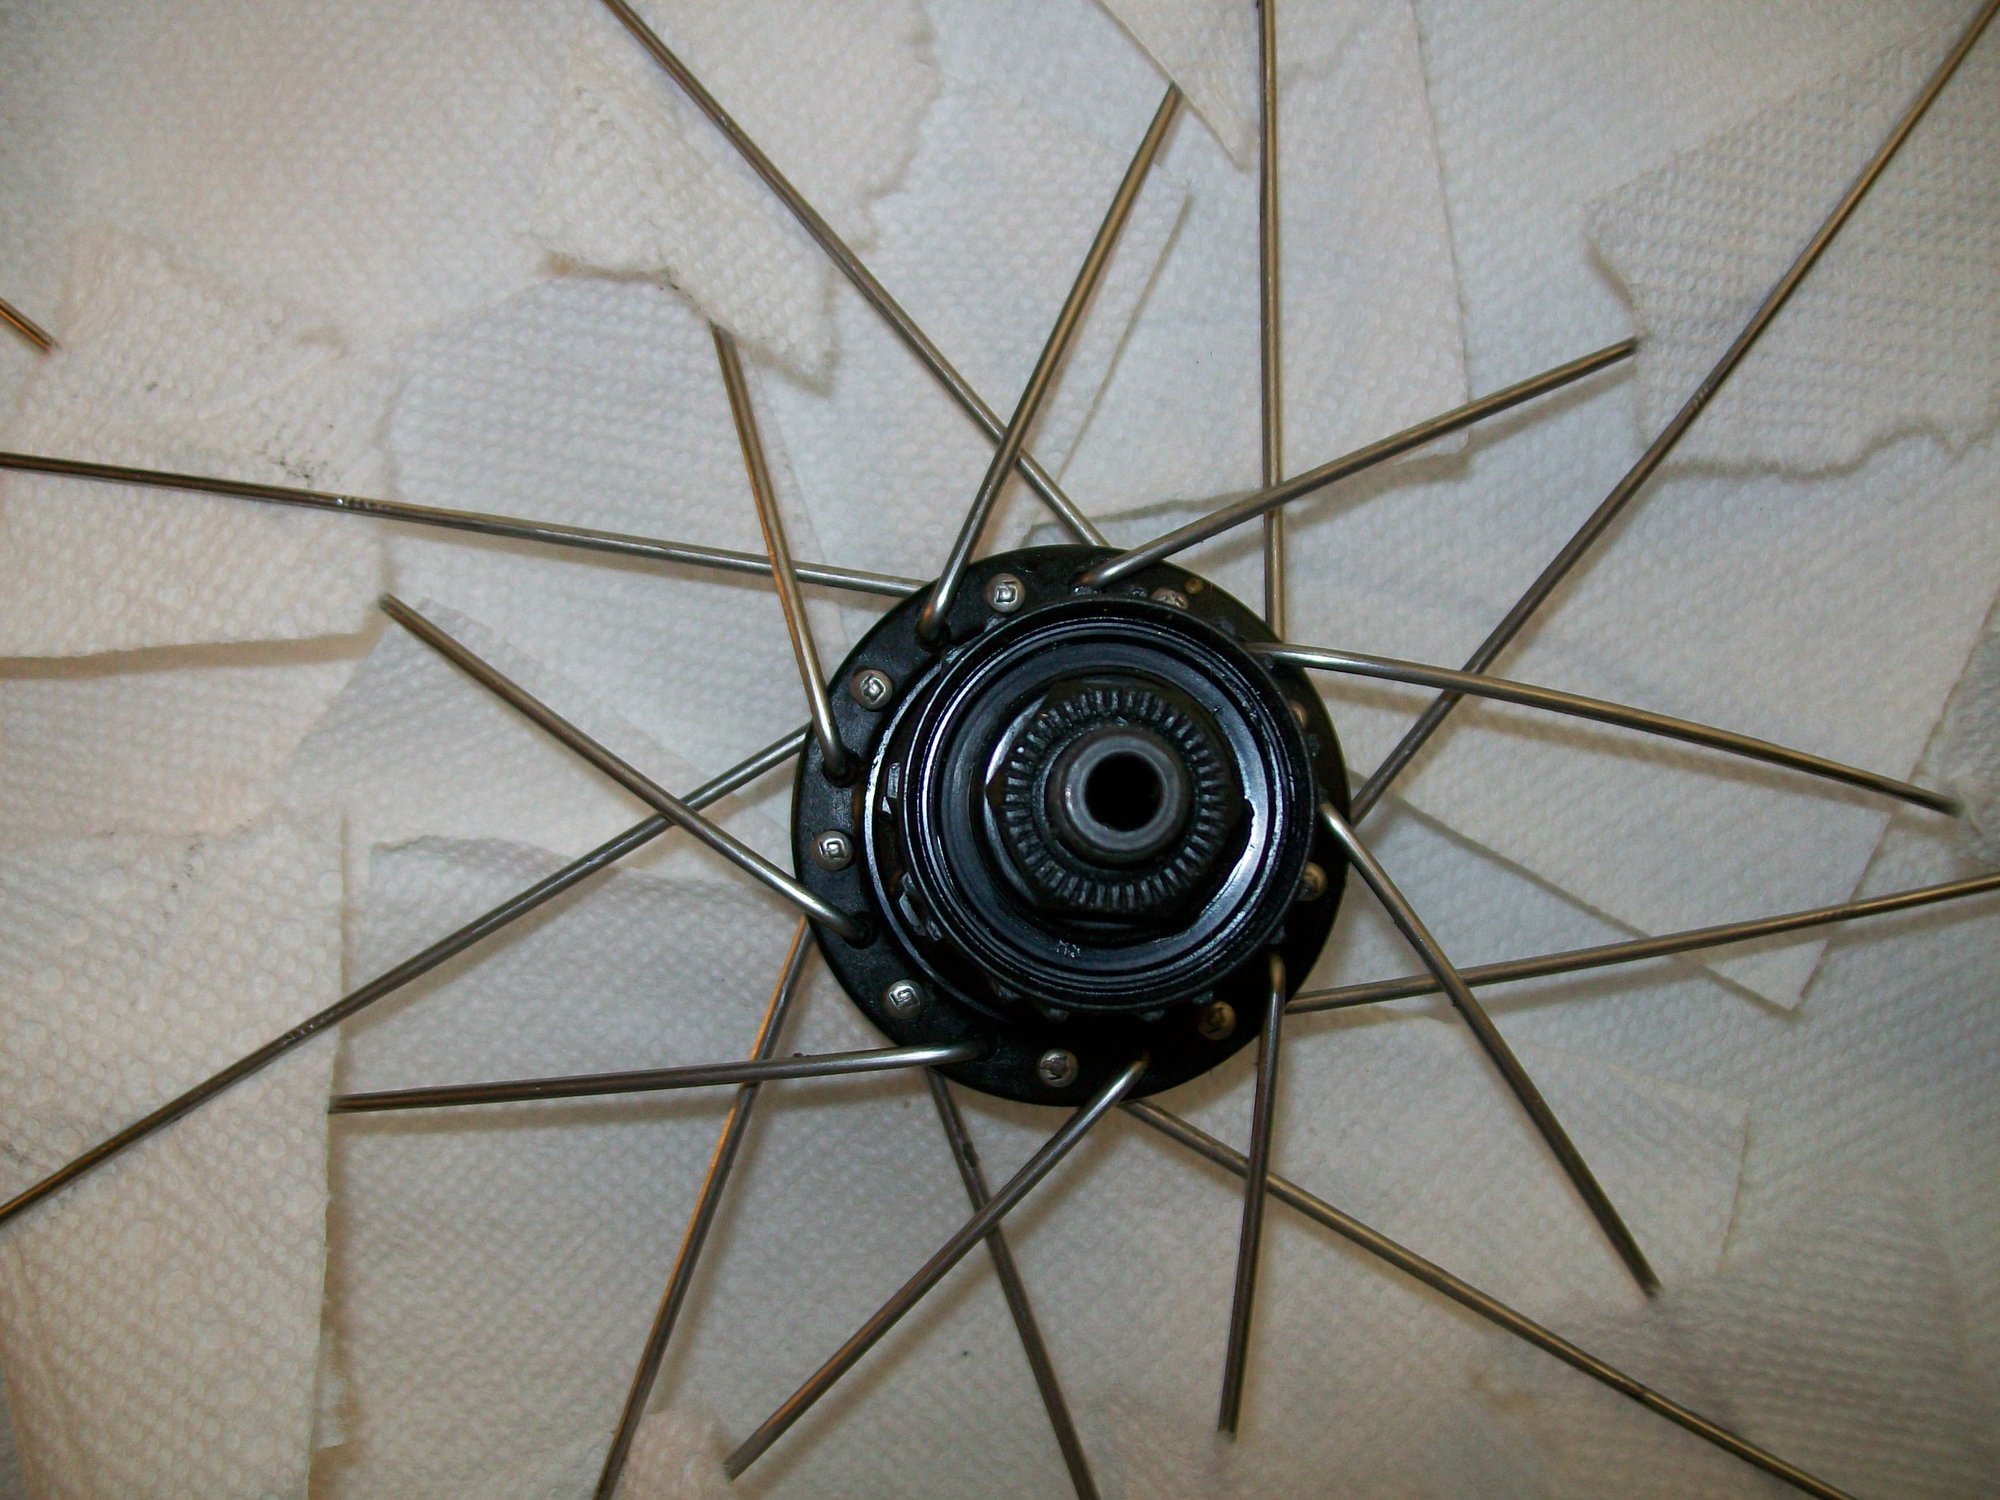
Can someone give me a second opinion (or more) about my spoke lacing here please? This is the new rim (original meant for the second front wheel but that gets a used rim now), new hub, and reused spokes and nipples. I think I got the lacing right. I still made a lot of mistakes along the way. I just popped off a spoke on the "left" of the hub, transferred that to the new set up. Then I popped off the paired spoke on the "right" side of the hub and put that on. The mistakes were toward the beginning for starting the pattern. Or just dumb mistakes or not putting the spoke in from the top or bottom in the hub and noticing the pattern broke then. Or I would mix up lacing it over and under in the middle of the wheel. It's easy enough to check to make sure the pattern is consistent all the way around though.
I think I got the pairs on each side lined up with the inner tube hole so it's more || there. I remembered that.
My next step is smashing the J end of the spokes on the hub up against the hub more to smooth that out. I dished it a little today but realized I was forgetting that. And I didn't put the dork disk or cassette back on, but that's minor at this point. I need to make sure the spokes are laced.
I was thinking for my future second front wheel build, I might do the same thing and work in pairs going around instead of following the Sheldon Brown method with spokes every four holes or whatever it is. Going in pairs let me focus my attention on just those two spokes, one at a time. That's what I was starting to think while I was working with them, but it's easier to think of a plan like that vs. doing it. Working in pairs worked because I had the reference wheel. For a new second front wheel, I would still have my in-use rear wheel as a reference.though.
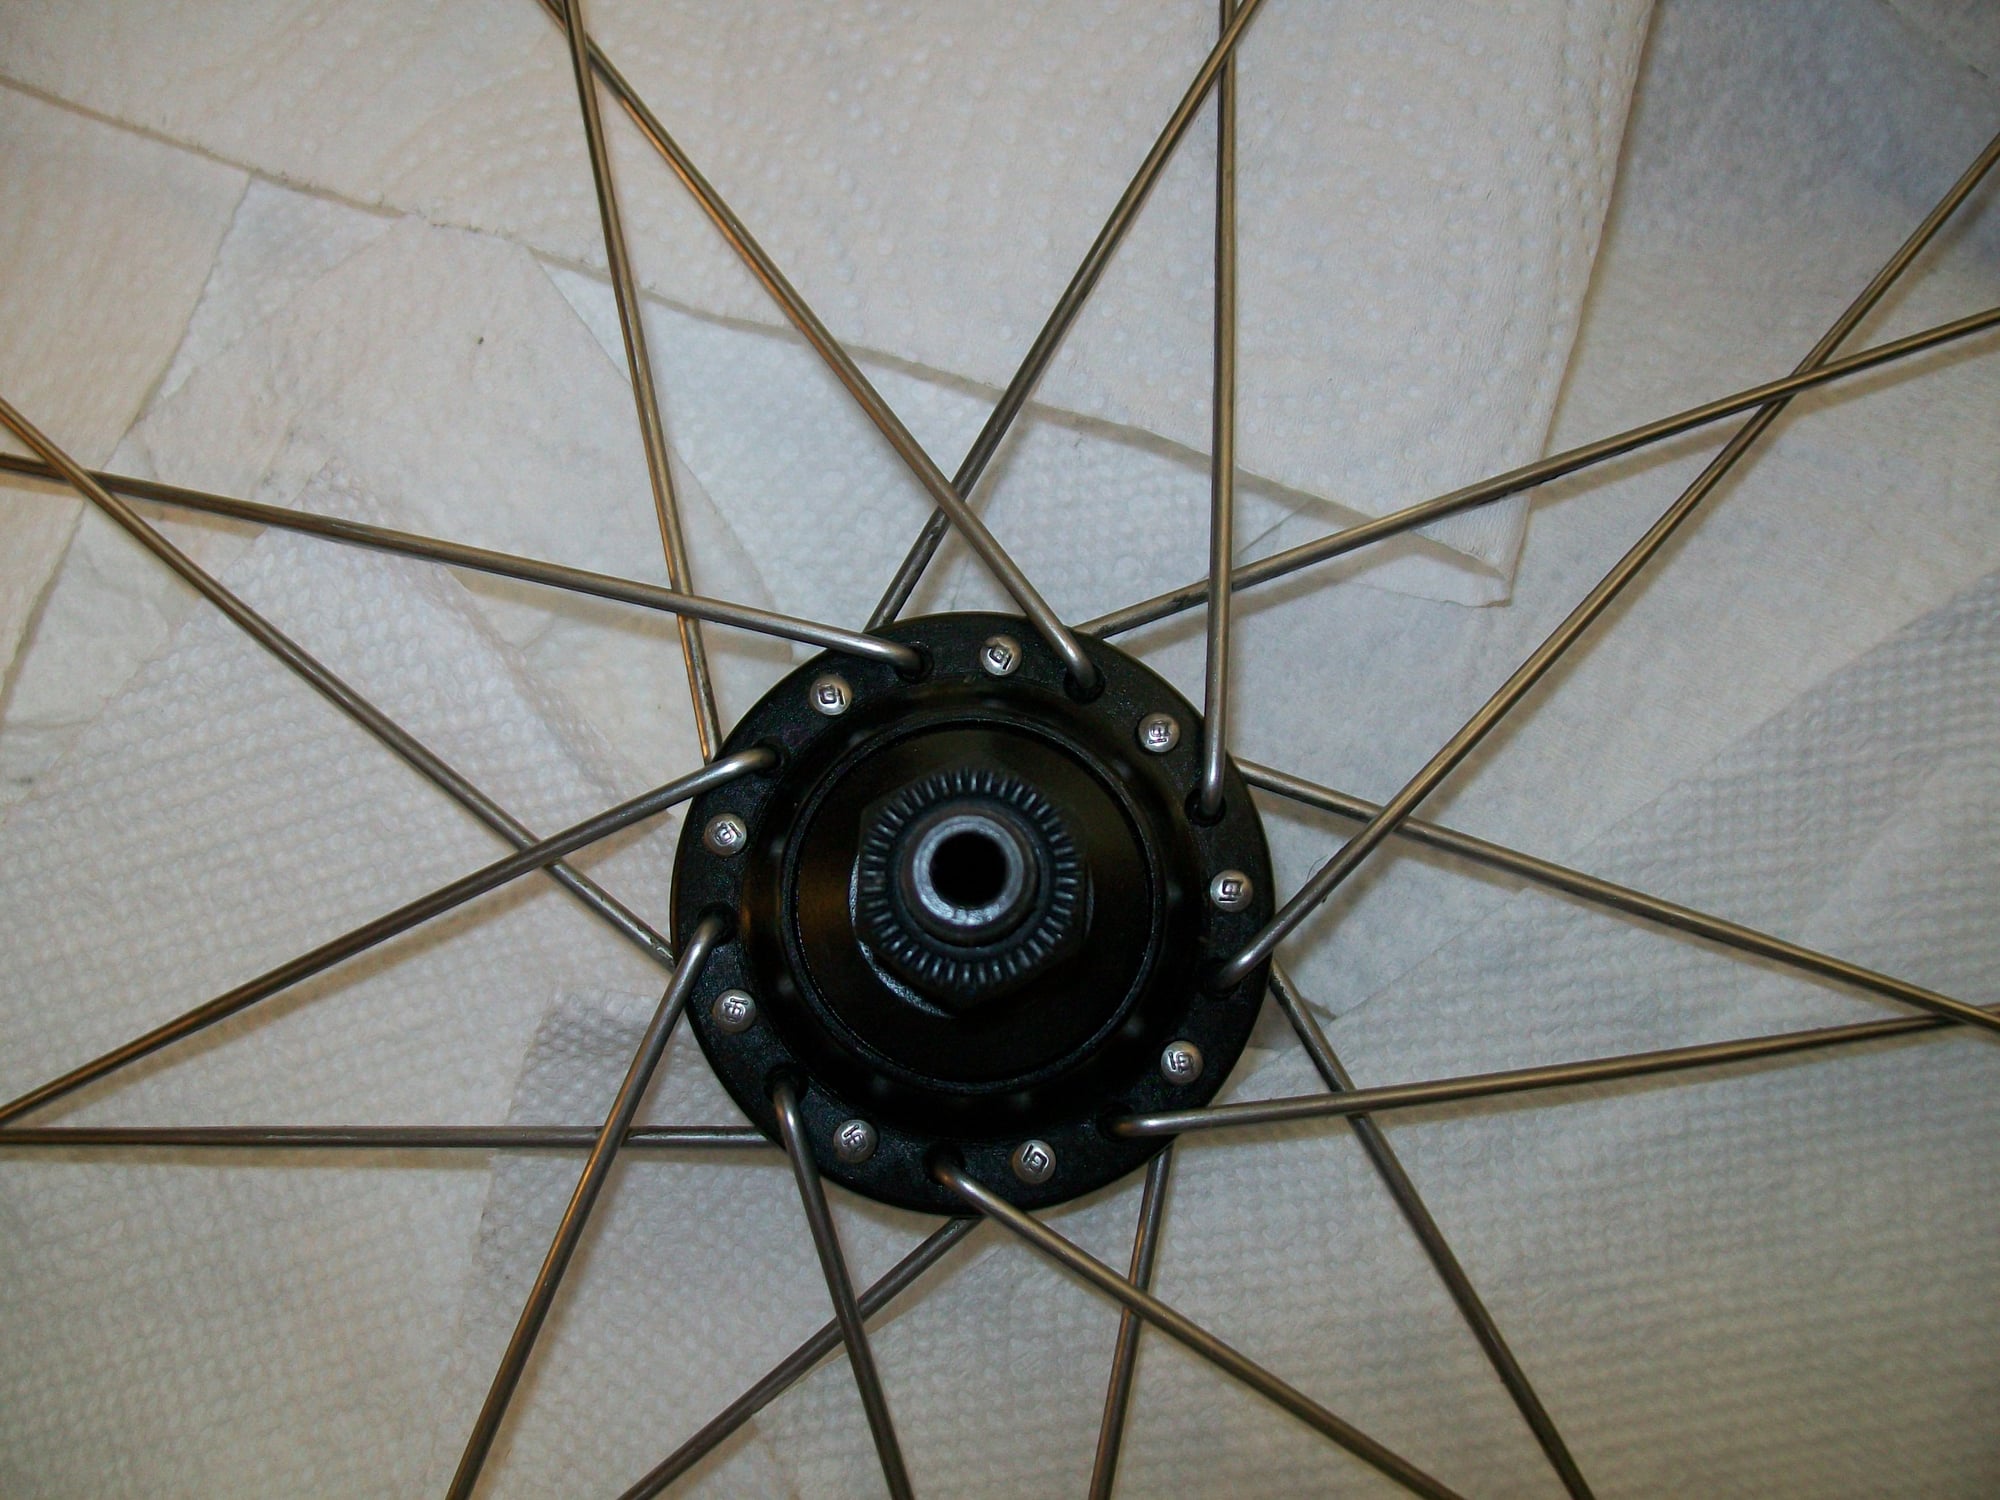
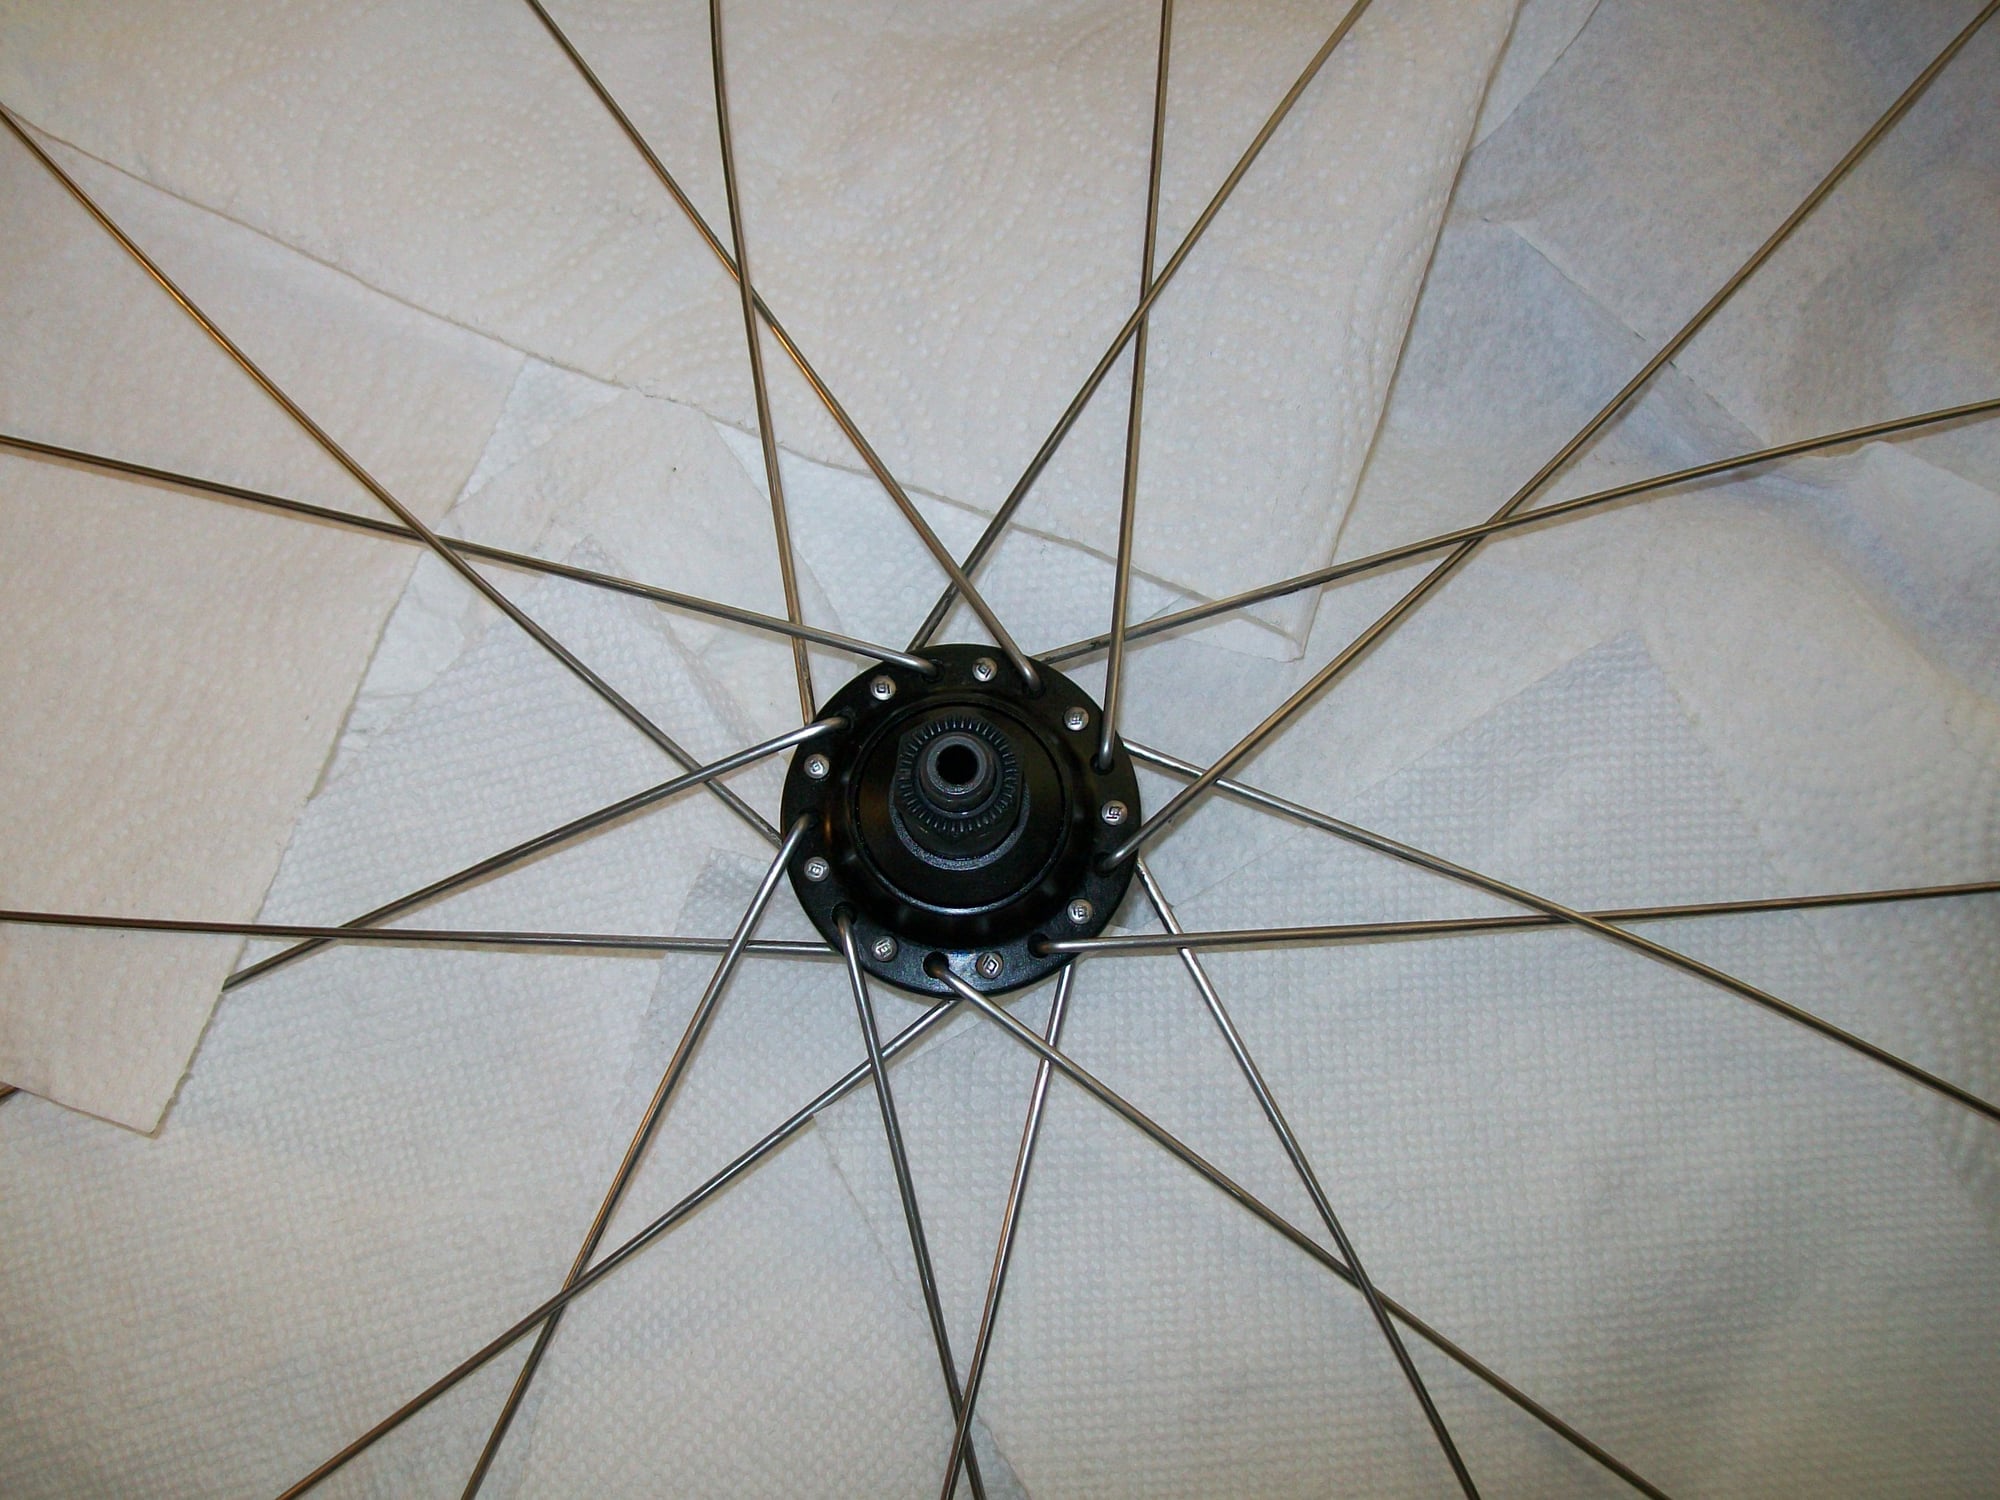
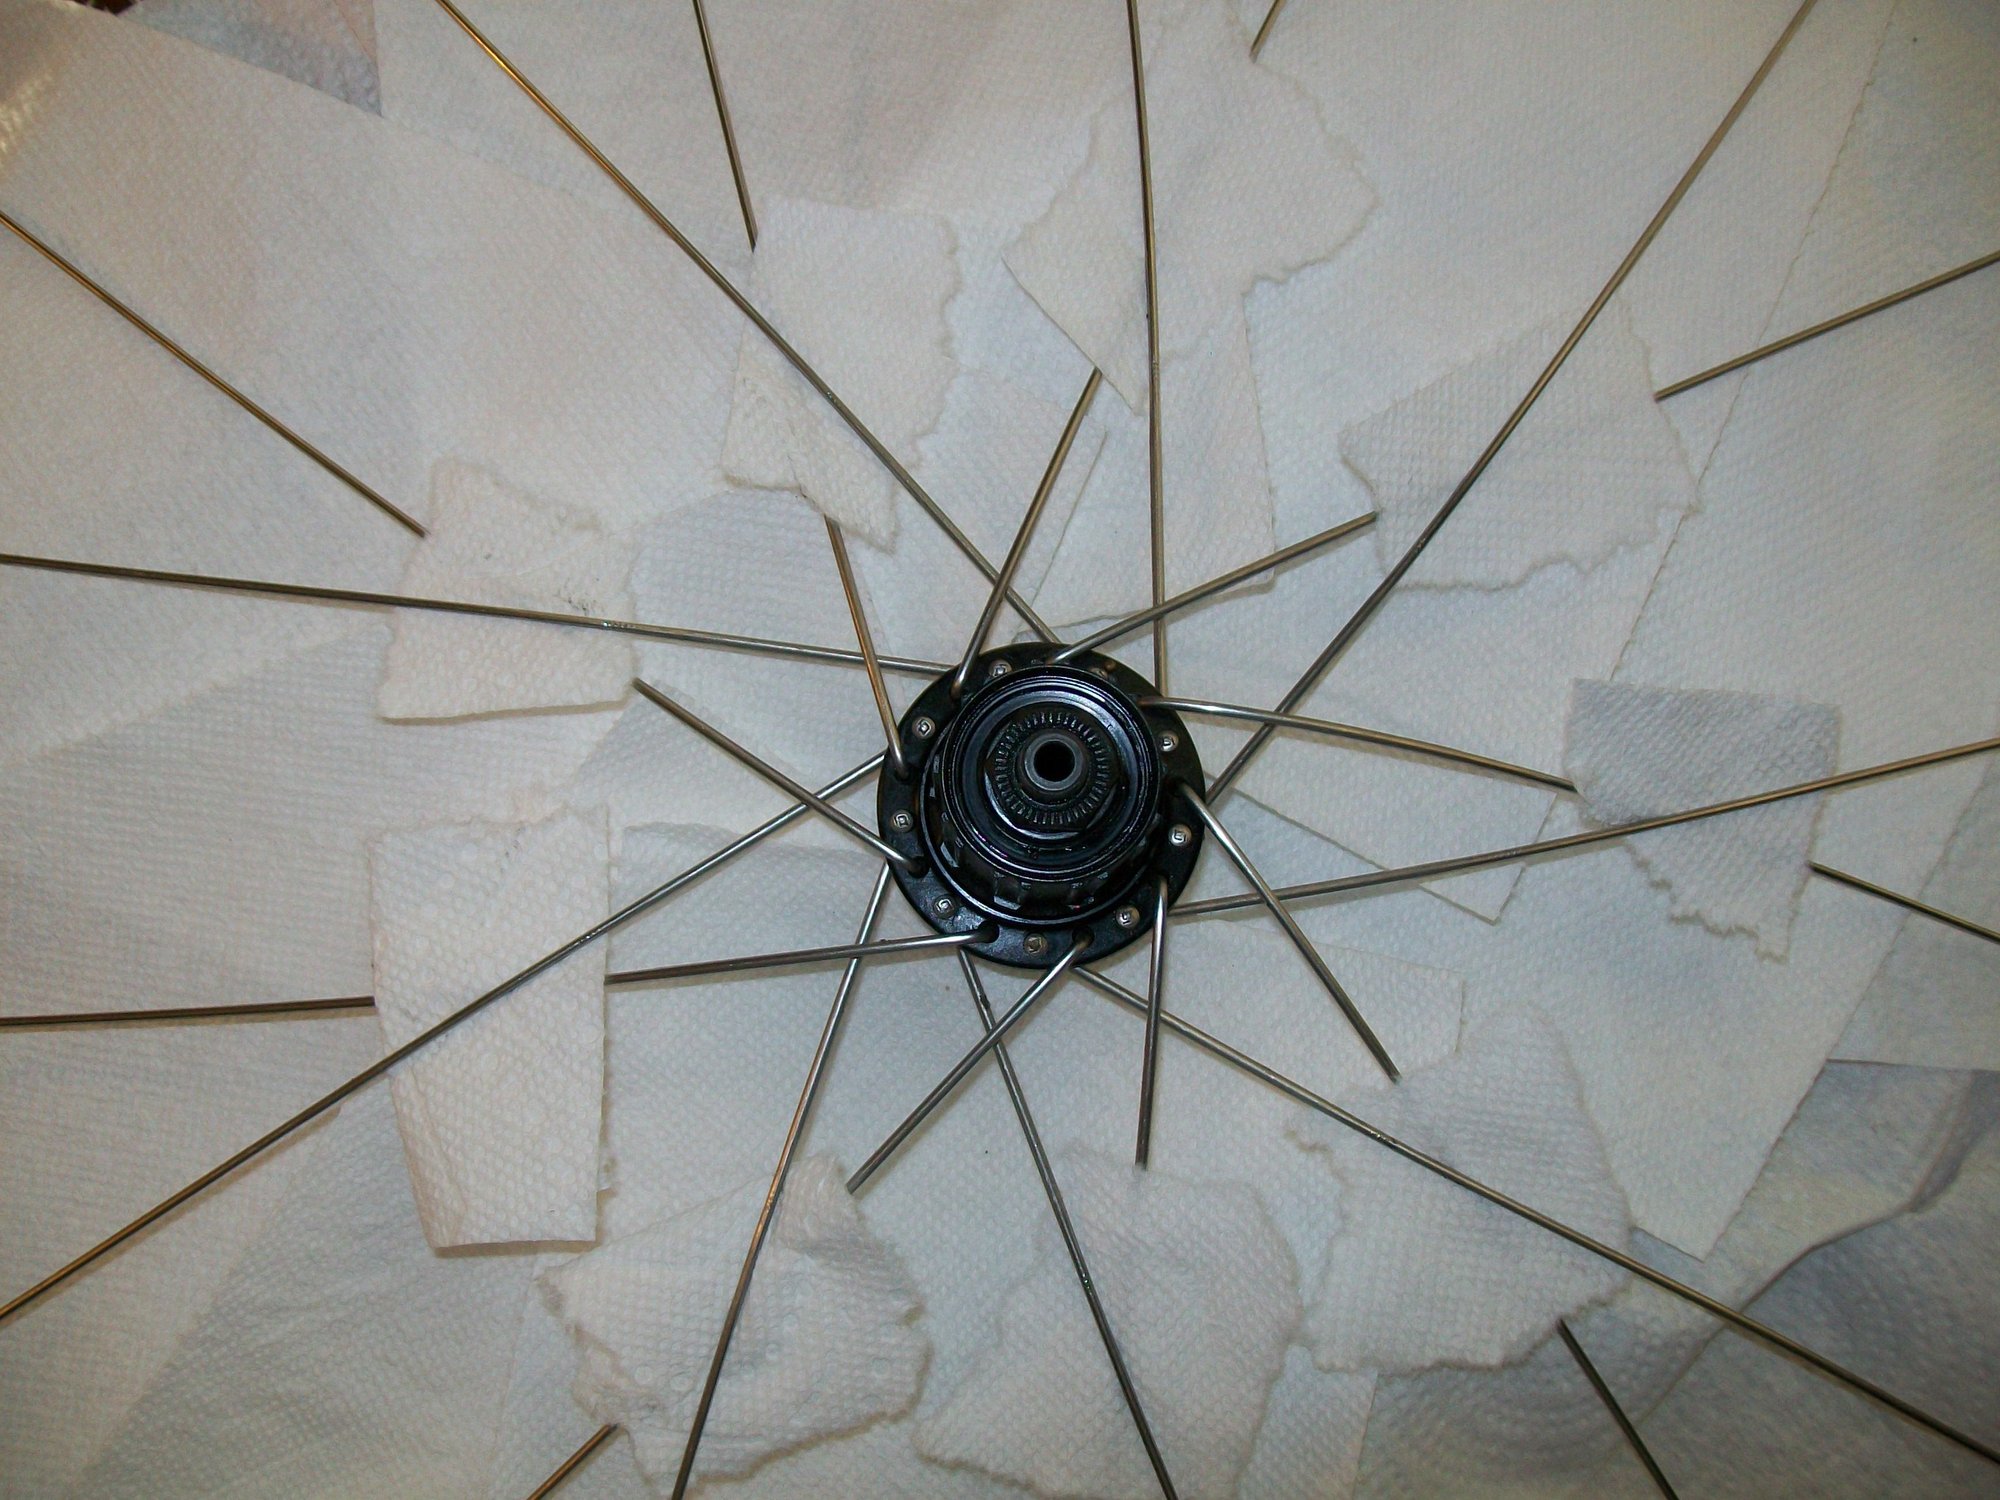
Here are the pics though. I put paper towels in to make it easier to distinguish each side of the wheel. It's still tough to pick out spokes crossing though I think. The pattern is consistent around the wheel though, so if spokes cross in one point in these pics, they cross the same way in another similar-pattern spot in the pics.
I remember there was something about the drive/cassette side and the spokes for the chain not getting pulled in by the spokes. Someone in 2016 here said I got that right on those two rear wheels, so this must also have it. It's where if the chain comes loose, the spokes would push the chain away instead of sucking it in.


I think I got the pairs on each side lined up with the inner tube hole so it's more || there. I remembered that.
My next step is smashing the J end of the spokes on the hub up against the hub more to smooth that out. I dished it a little today but realized I was forgetting that. And I didn't put the dork disk or cassette back on, but that's minor at this point. I need to make sure the spokes are laced.
I was thinking for my future second front wheel build, I might do the same thing and work in pairs going around instead of following the Sheldon Brown method with spokes every four holes or whatever it is. Going in pairs let me focus my attention on just those two spokes, one at a time. That's what I was starting to think while I was working with them, but it's easier to think of a plan like that vs. doing it. Working in pairs worked because I had the reference wheel. For a new second front wheel, I would still have my in-use rear wheel as a reference.though.
Here are the pics though. I put paper towels in to make it easier to distinguish each side of the wheel. It's still tough to pick out spokes crossing though I think. The pattern is consistent around the wheel though, so if spokes cross in one point in these pics, they cross the same way in another similar-pattern spot in the pics.
I remember there was something about the drive/cassette side and the spokes for the chain not getting pulled in by the spokes. Someone in 2016 here said I got that right on those two rear wheels, so this must also have it. It's where if the chain comes loose, the spokes would push the chain away instead of sucking it in.
02-24-22, 01:52 PM
#18
The dropped
Join Date: Oct 2018
Location: Columbus, OH
Posts: 2,144
Bikes: Pake C'Mute Touring/Commuter Build, 1989 Kona Cinder Cone, 1995 Trek 5200, 1973 Raleigh Super Course FG, 1960/61 Montgomery Ward Hawthorne "thrift" 3 speed, by Hercules (sold) : 1966 Schwinn Deluxe Racer (sold)
Mentioned: 10 Post(s)
Tagged: 0 Thread(s)
Quoted: 1739 Post(s)
Liked 1,014 Times
in
696 Posts
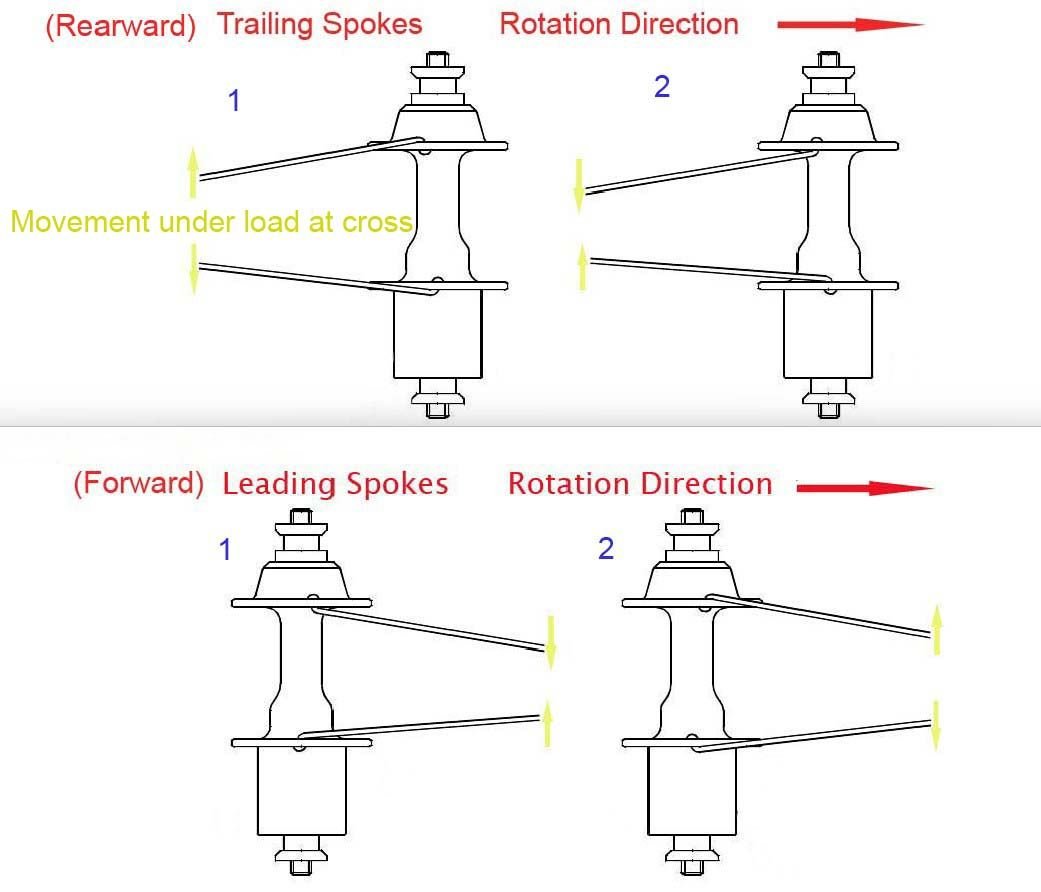
From what I can see, you laced the DS spokes the opposite of how the NDS is laced. Your NDS has trailing spokes elbows out, which is good for 'rejecting' the chain from getting stuck on the DS. However, your leading spokes are elbows out on the DS which is the opposite of what I recall being suggested. You could probably just unlace the DS and swap the elbow orientation to correct it, or just start from scratch.
02-25-22, 04:43 PM
#19
Senior Member
The spoking looks fine, assuming that you are trying to lace as Sheldon shows. Pulling (trailing) spokes head-out (elbow-in) on both sides. This means last cross of the pulling spokes is outside of pushing (leading) spokes, which pull inwards under drive tension.
This is one of the standard lacing patterns and widely use. Won't debate this and the other patterns commonly used, on this thread. For a 3x, normal spoke count rim brake wheel, this pattern is widely accepted.
About the issue of chain-drops, won't express an opinion either. Both spoke orientation (head in or head out) has its + & -.
If you follow Sheldon's direction, lacing is quite simple, easier than trying to do the lacing in pairs. His method leaves the head-in spokes for last and makes the inter-lacing easier.
02-26-22, 11:41 AM
#20
Senior Member
Thread Starter
Join Date: Jul 2015
Posts: 586
Mentioned: 7 Post(s)
Tagged: 0 Thread(s)
Quoted: 120 Post(s)
Likes: 0
Liked 0 Times
in
0 Posts
Looking at this again. I've got pics from my 2016 wheel builds on here. And then the wheel I just made to compare against the 2016 wheel that still exists, except it's on the bike. I may have screwed up in 2016, and then I just copied that mistake.
I was noticing that while I was working. For describing it, it almost needs to be over described so it's clear or twice-described.
Last post on the 2016 rear wheel build threat, of the busted hub. That would be the rear wheel, looking into the hub/inside the wheel, with the chain disk there, so that's the drive side. Those would be the pulling spokes... With the wheel rotating, counter clockwise in this pic... Inside the hub though, under-under-over.
Last edited by bikerbobbbb; 02-26-22 at 11:46 AM.
02-26-22, 11:51 AM
#21
Senior Member
Thread Starter
Join Date: Jul 2015
Posts: 586
Mentioned: 7 Post(s)
Tagged: 0 Thread(s)
Quoted: 120 Post(s)
Likes: 0
Liked 0 Times
in
0 Posts
Nice. Something good to compare with. I did a better job getting spoke pics before. I was rushing the other day though.
https://www.bikeforums.net/19459154-post141.html
DS side.... So that rotates clockwise in this pic.... Trailing/pulling spoke is under-under-over, so it's over on the middle-of-the-spoke-crossing part.
https://www.bikeforums.net/19459158-post142.html
NDS side... Rotates counter clockwise in this pic... Spokes again are under-under-over.
So I'd be looking for the trailing/pulling spokes I guess... and then the under-under-over vs. over-over-under pattern...
The goal is trailing/pulling spokes to be under-under-over, right?
I need better, clearer pics of my current wheel rebuild. So much for rushing. Spokes don't take good pics.... Not without a lot of paper towels and paper between the spoke crossings mid-spoke to make that crossing clear.
Last edited by bikerbobbbb; 02-26-22 at 11:57 AM.
02-26-22, 12:08 PM
#22
Senior Member
Thread Starter
Join Date: Jul 2015
Posts: 586
Mentioned: 7 Post(s)
Tagged: 0 Thread(s)
Quoted: 120 Post(s)
Likes: 0
Liked 0 Times
in
0 Posts
Good. I just checked. And I did noticed the spokes seemed opposite on the wheel when I was working on it before, but I figured that's how it was, and I just wanted to copy what the other wheel was. I should have taken pics of that in detail before starting.
It looks like both DS and NDS sides have trailing/pulling spokes that are under-under-over, so the trailing/pulling spoke is over in the md-spoke cross point.
It looks like both DS and NDS sides have trailing/pulling spokes that are under-under-over, so the trailing/pulling spoke is over in the md-spoke cross point.
02-26-22, 03:45 PM
#23
Senior Member
Good. I just checked. And I did noticed the spokes seemed opposite on the wheel when I was working on it before, but I figured that's how it was, and I just wanted to copy what the other wheel was. I should have taken pics of that in detail before starting.
It looks like both DS and NDS sides have trailing/pulling spokes that are under-under-over, so the trailing/pulling spoke is over in the md-spoke cross point.
It looks like both DS and NDS sides have trailing/pulling spokes that are under-under-over, so the trailing/pulling spoke is over in the md-spoke cross point.
 02-26-22, 04:53 PM
#24
Senior Member
Thread Starter
Join Date: Jul 2015
Posts: 586
Mentioned: 7 Post(s)
Tagged: 0 Thread(s)
Quoted: 120 Post(s)
Likes: 0
Liked 0 Times
in
0 Posts
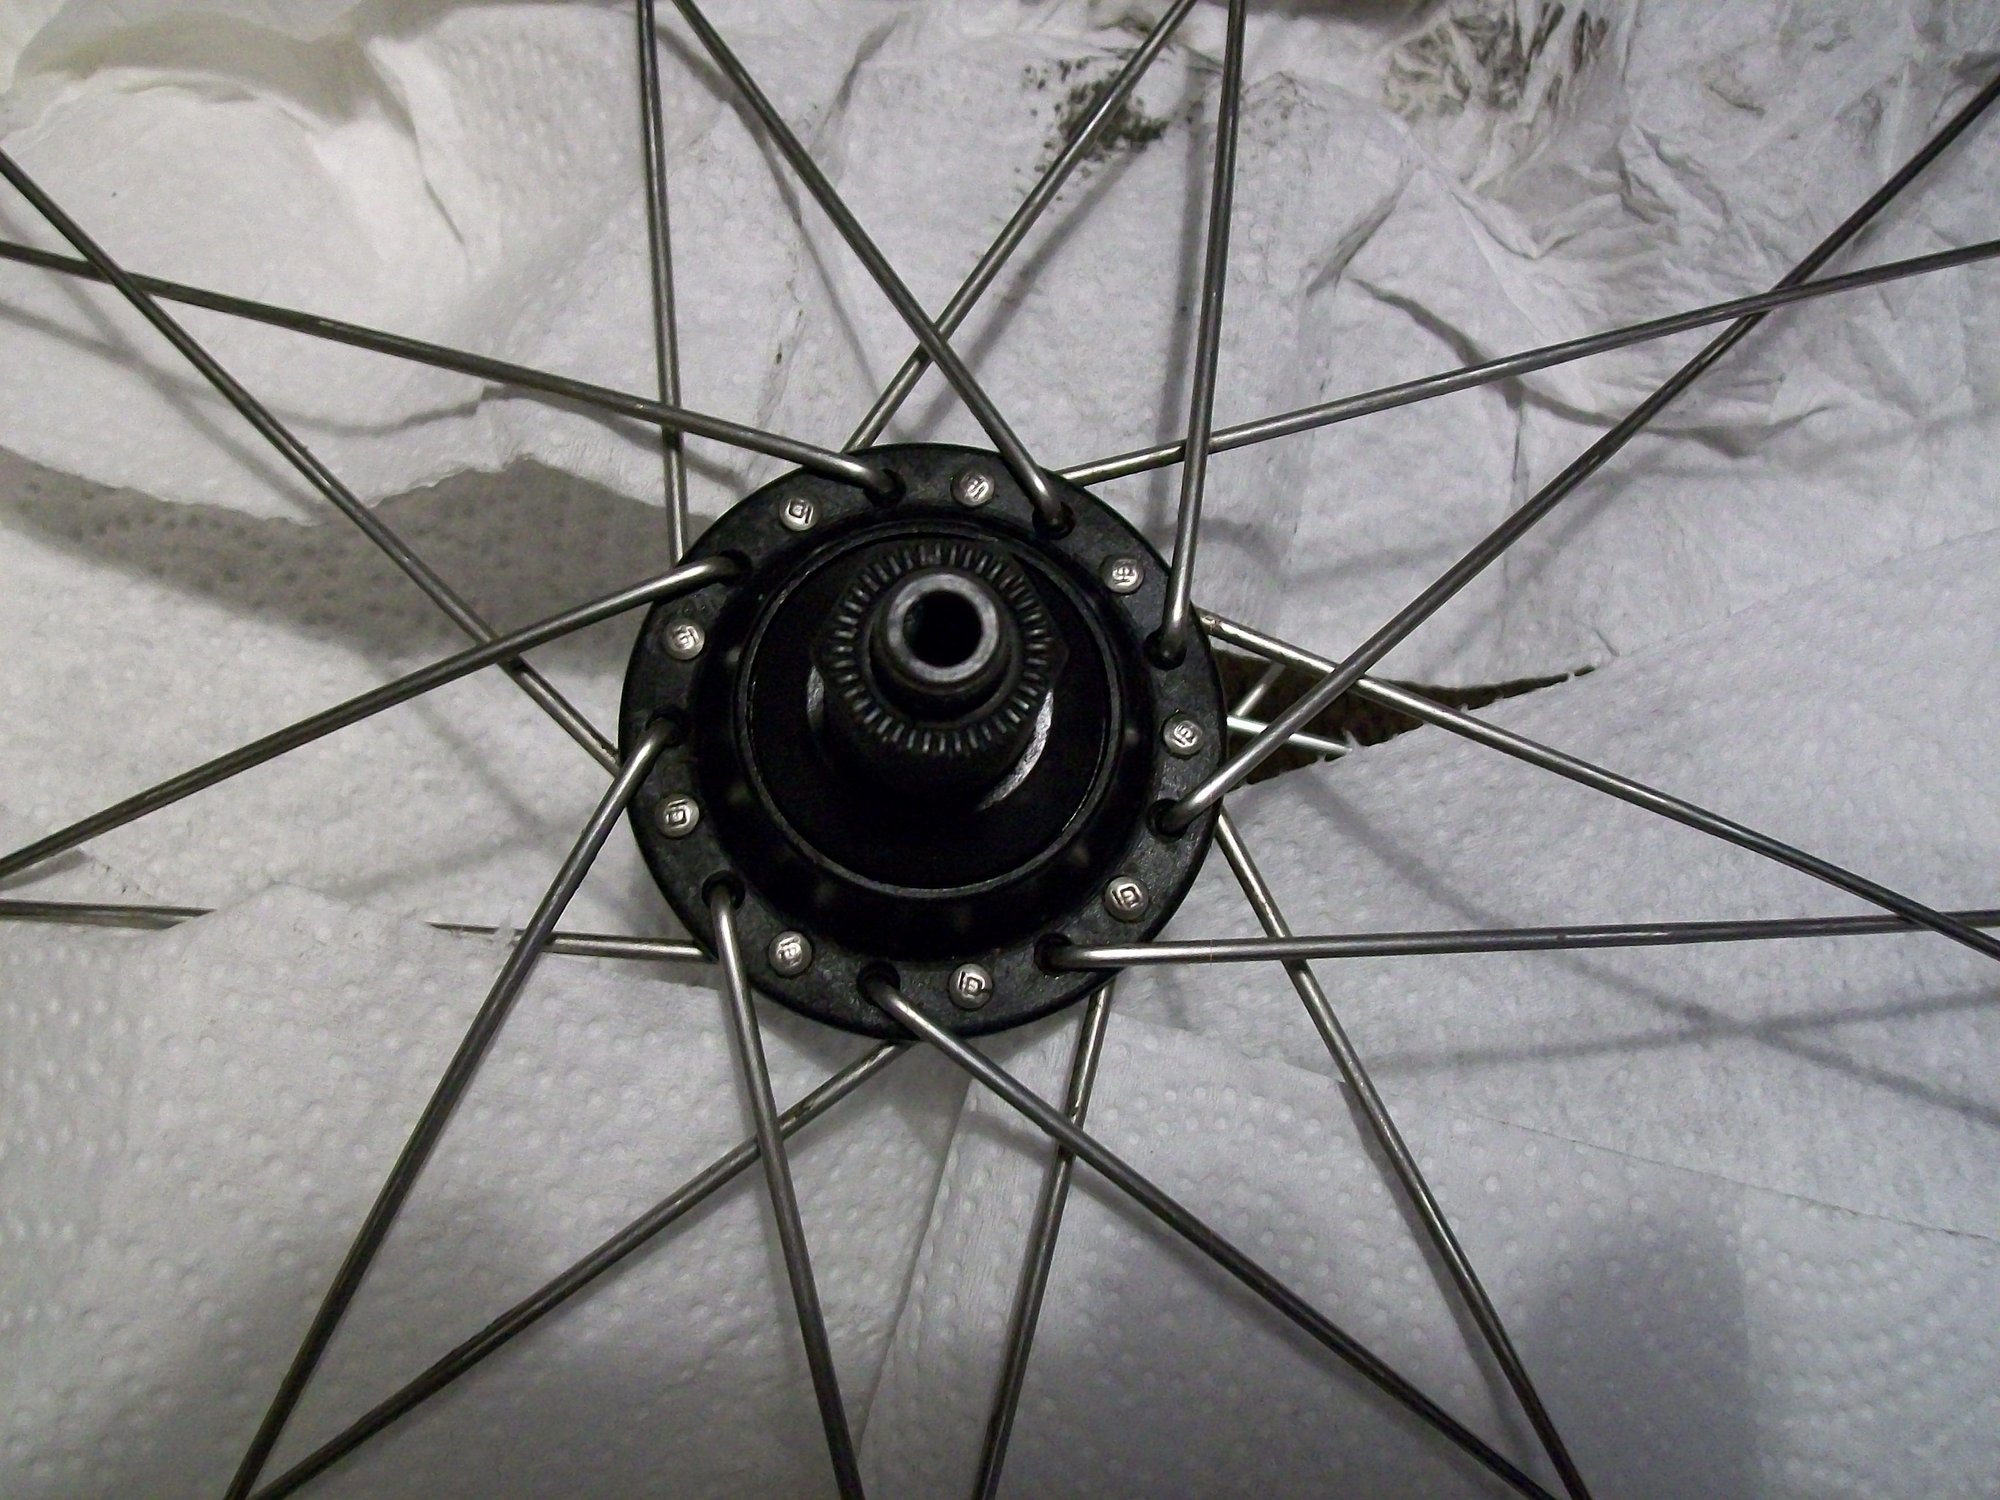
Drive side pics. Lessons learned. Dirty paper towels make it more difficult to see. And more paper towels last week would have made this easier, although that it probably at least an extra 15 minutes, plus wasted paper towels.
It should be under-under-over for trailing/pulling spokes on each side.


It should be under-under-over for trailing/pulling spokes on each side.
02-26-22, 04:55 PM
#25
Senior Member
Thread Starter
Join Date: Jul 2015
Posts: 586
Mentioned: 7 Post(s)
Tagged: 0 Thread(s)
Quoted: 120 Post(s)
Likes: 0
Liked 0 Times
in
0 Posts
And non drive side. F... I forgot to put little paper towels in. You can still see on the paper towels I missed for putting under the spokes on the left on the wider shot that... I'll just go redo it...